Using Virtual Attendance Tracking for Virtual Sessions
PheedLoop offers built-in session attendance tracking directly into the Virtual Portal. When enabled, the Virtual Portal will assign CE credits based on how long the attendees have been in the session for. If an attendee leaves the session or loses connection to the stream, the Virtual Portal will still track their time and not start from zero.
- From the Event Dashboard, navigate to Sessions > Sessions
- Select the Session you wish to edit
- Scroll down to Virtual Settings
- Toggle on the Enable Virtual Attendance Tracking checkbox
- Under the Minimum Attendance Percentage for Attendance CE Credits field, enter the minimum percentage the attendee needs to be in the session to earn their credits
- Percentages are based on the total length of the session. For example, if you enter 10 under this field and the session lasts for an hour, the attendee will need to view at least 6 minutes (10% of 1 hour) to receive the CE credit.
- Under the Attendance CE Credit Value field, enter the number of CE credits to be awarded after the attendee has attended the session
Select Save Changes

How Virtual Session Attendance Tracking Works
The goal of this feature is to accurately measure how long an attendee remains actively engaged in a virtual session while it is live. As part of the overall feature goals, the system works to achieve the following objectives:
-
Precisely capture the total duration an attendee remains actively engaged in a session.
-
Automatically award the Attendance CE Credit Value to attendees who meet the session’s defined Minimum Attendance Percentage for Attendance CE Credits.
When Tracking Happens
Tracking only occurs when the session is live and the Virtual Session Attendance Tracking is enabled for the session. The attendee must be identified (logged in) and actively viewing the session tab. If the browser tab is in the background or not visible, tracking pauses. Tracking stops when the session ends or expires.
How Time is Recorded
How Credit Allocation is Determined
After the session ends, an automated task reviews all tracked time against the official session start/end window. This process also runs when a session is ended early. The system calculates the percentage of valid viewing time.
If that percentage meets or exceeds the session’s minimum threshold, the attendee earns the configured credit value. The result is stored as a CE credit history record for the attendee and session. In that sense, the Virtual Session Attendance Tracking system is not a “check-in” flag; it’s a credit entry based on time watched.
Practical Implications and Limitations
Attendees should be mindful of their browsing behavior while a session is active. Switching to another tab or app, or minimizing the window, typically stops tracking because the session is no longer visible. Pop-up blockers or strict browser settings generally do not affect tracking. However, tracking will not occur if the attendee isn’t identified (for example, no username) or if event-level or session-level tracking is disabled.
Creating a Session Check-In Report for Virtual Events
For Virtual Events making use of Virtual Attendance Tracking, use the Session Attendance Time Tracking report to gather your session's attendance data.
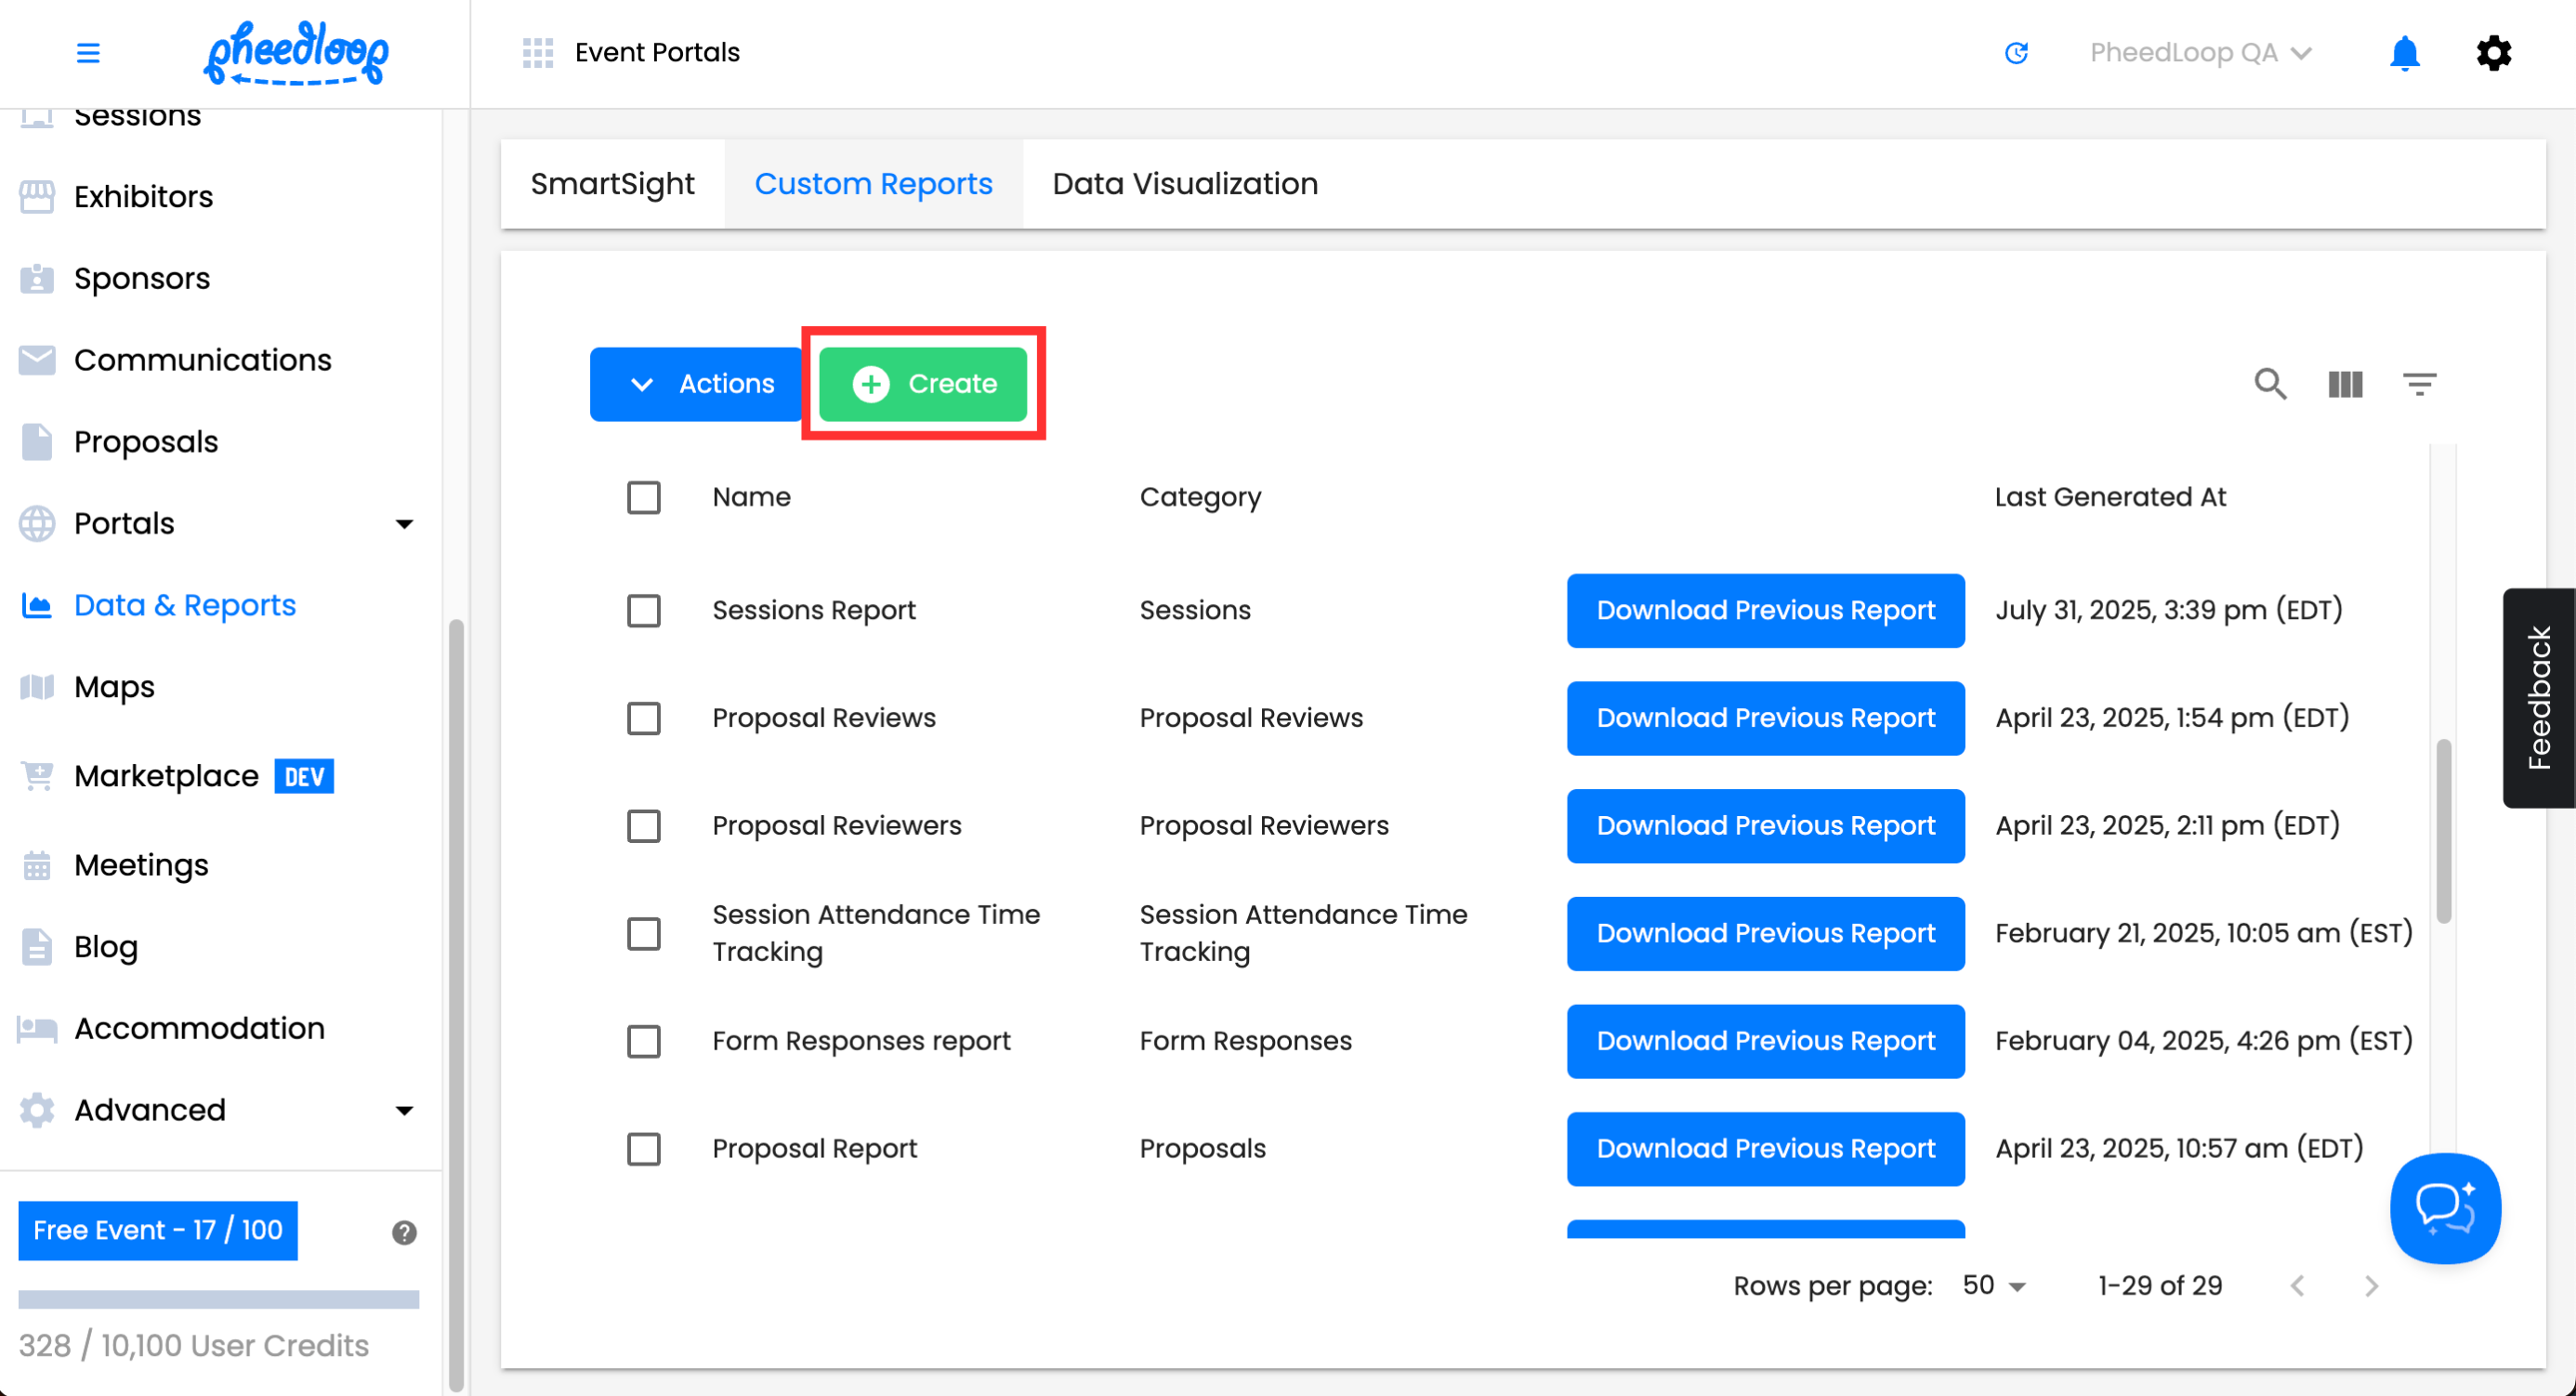
- From the Event Dashboard, navigate to Data & Reports > Custom Reports
Above the custom reports table, select Create
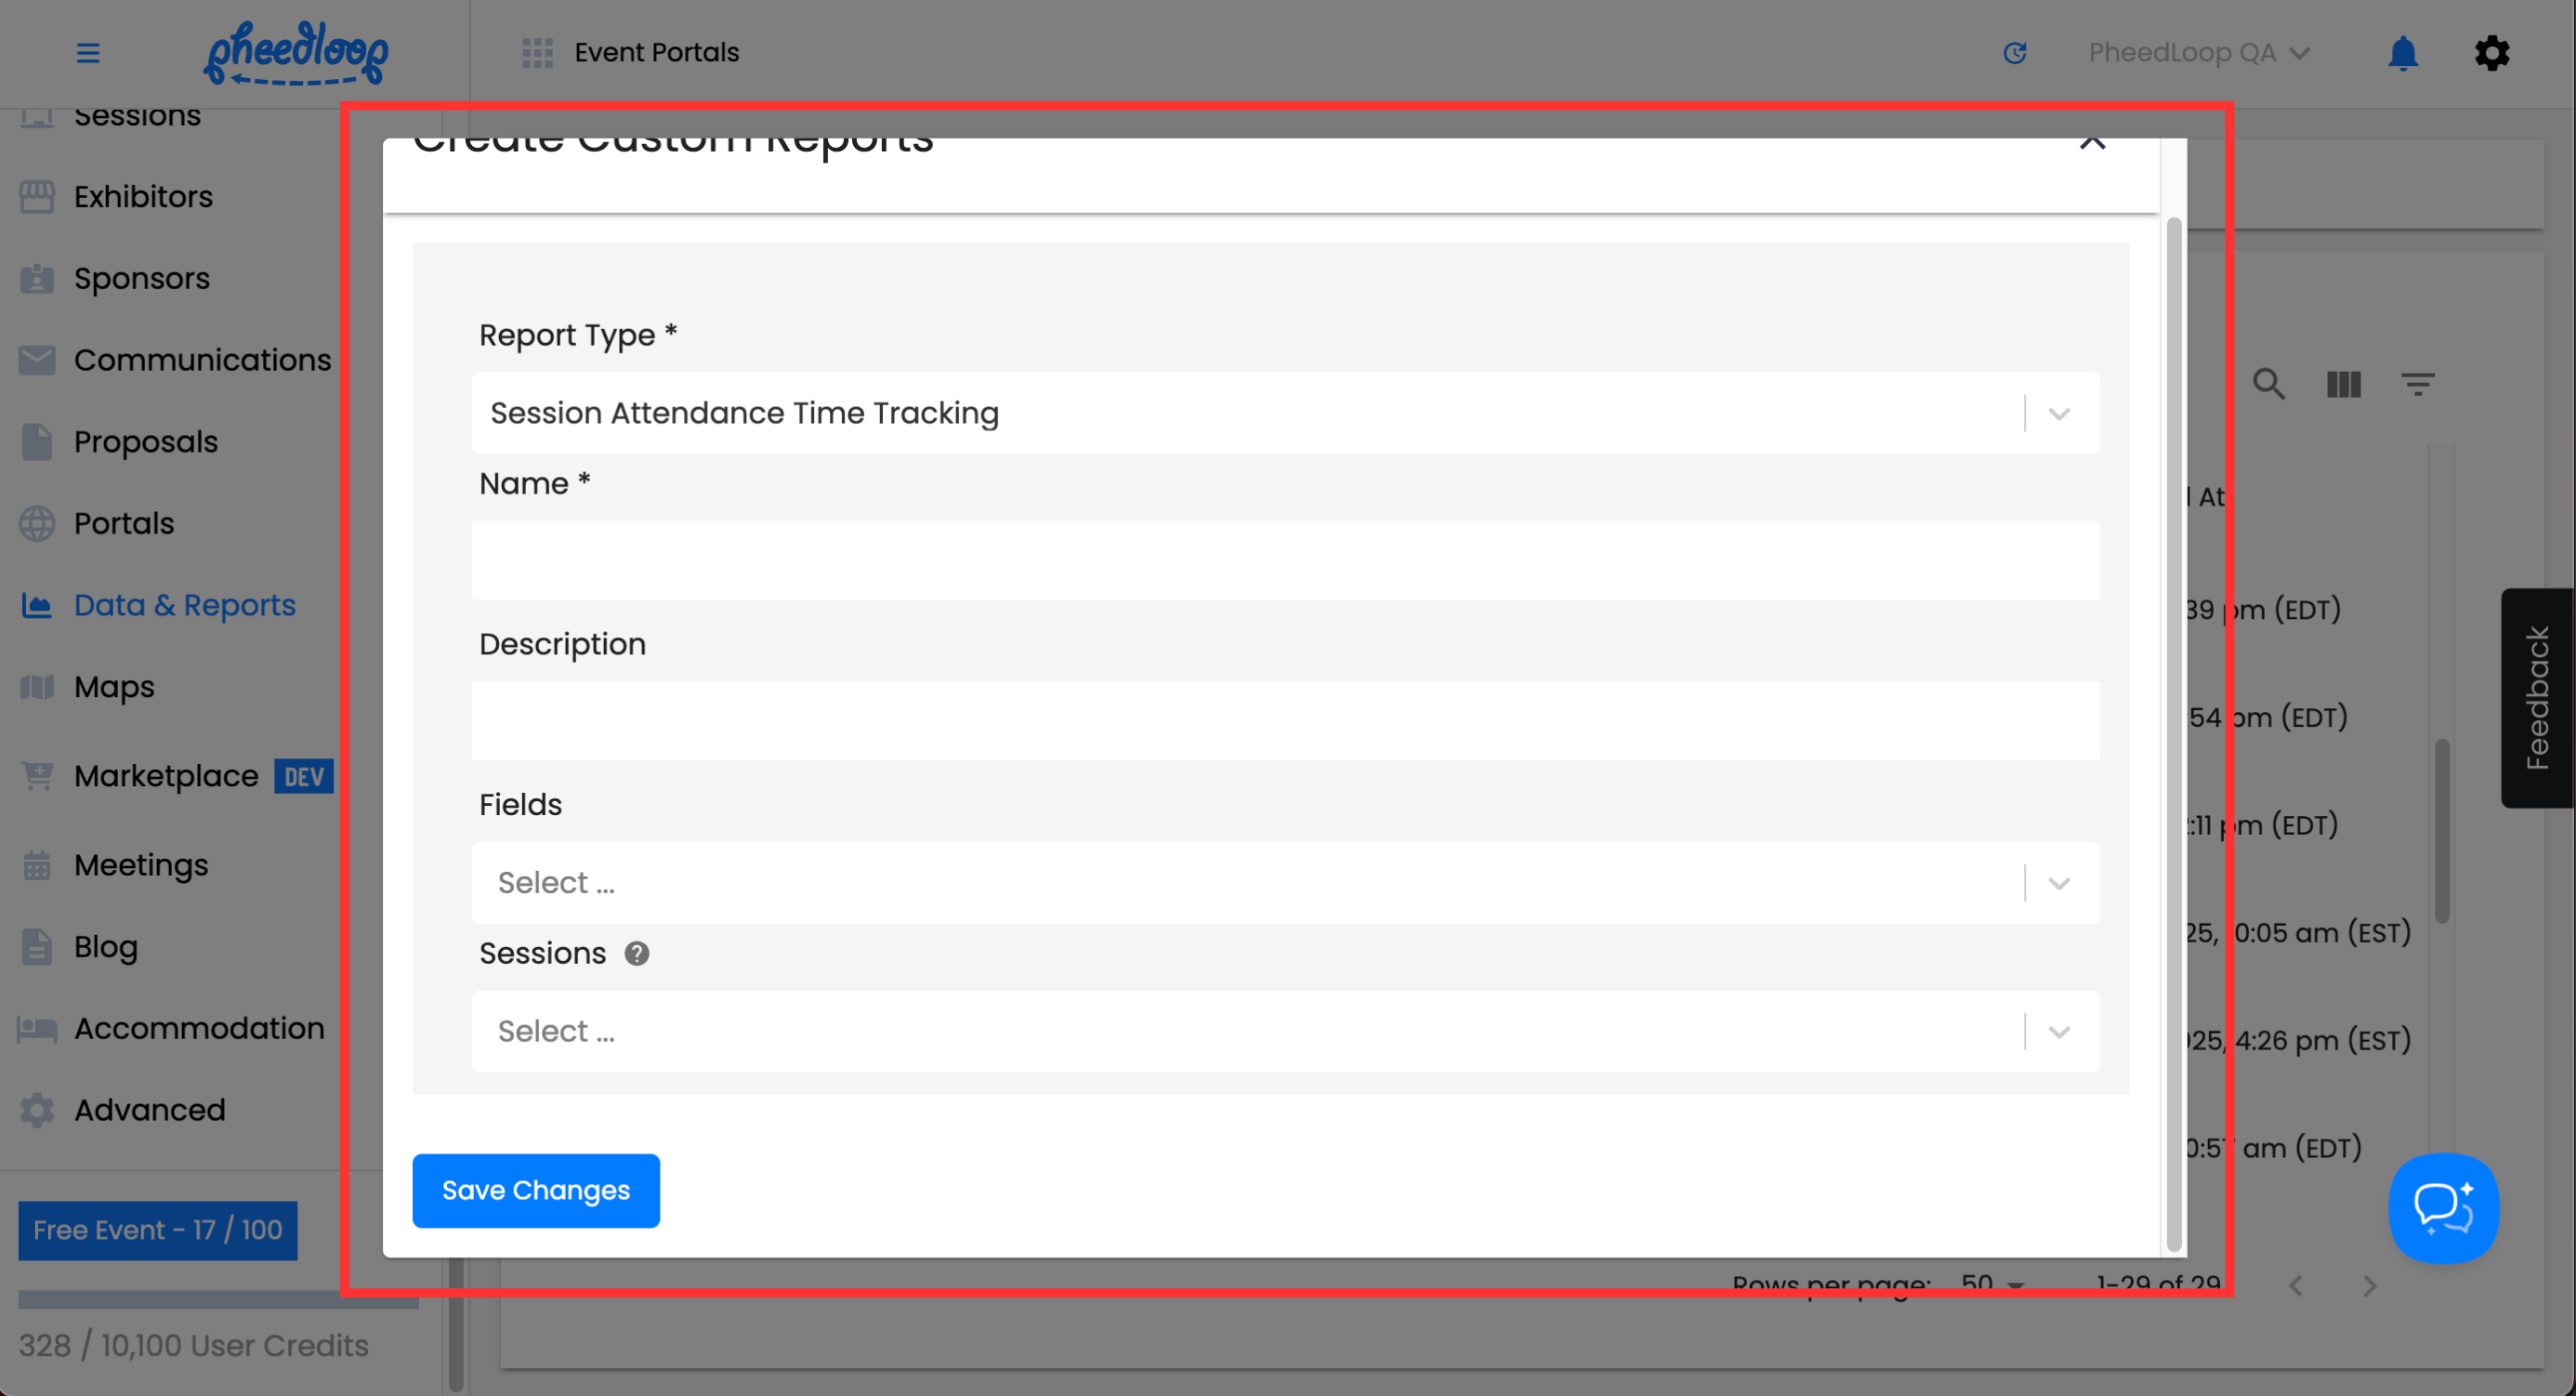
- Under Report Type, select Session Attendance Time Tracking
- Enter a name and description for your report under the Name and Description fields
- Under Fields, select the following as required

| Session Title | The title of the session. |
|---|---|
| First Name | The first name of the Attendee. |
| Last Name | The last name of the Attendee. |
| The email of the attendee. | |
| Credits | This field will display the continuing education credits the attendee earned for the session. |
| Time Duration | This is the duration of time the attendee was in the session for. |
- Under Sessions, select the individual session would like to get the data from
- If you leave this blank and choose sessions as a field, the report will take data from every session in your event.
Select Save Changes

Exporting the Session Attendance Time Tracking Report as a CSV file
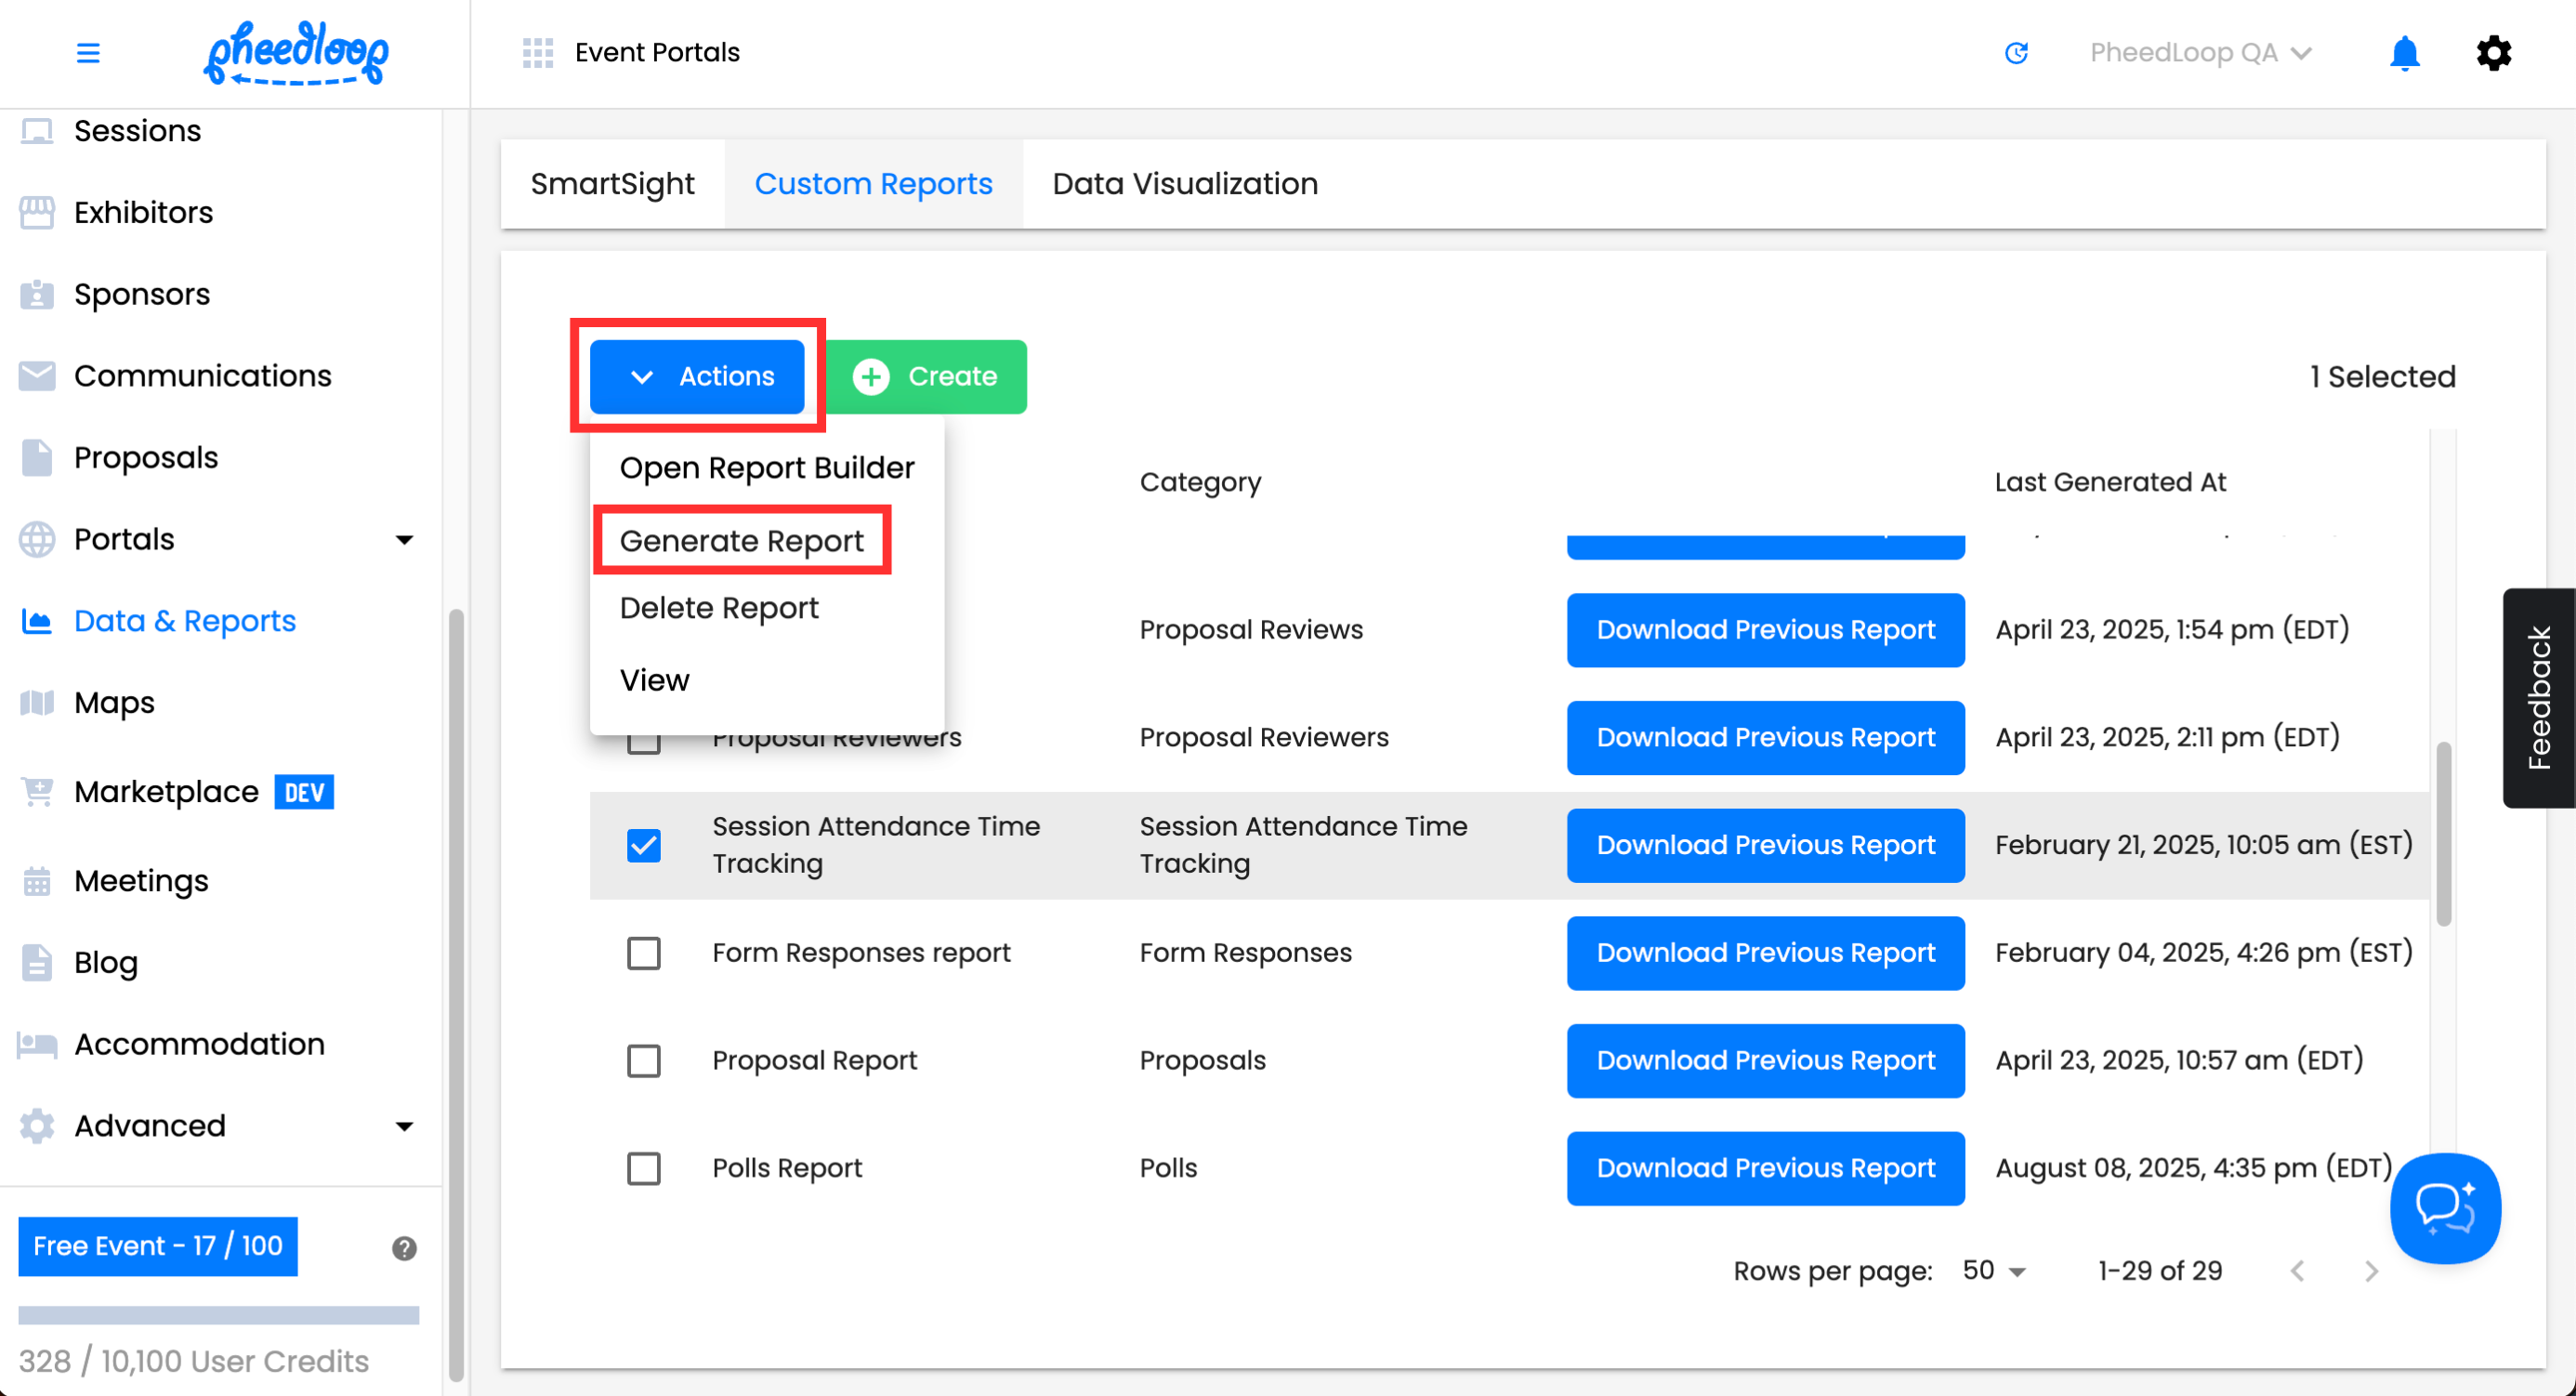
- From the Event Dashboard, navigate to Data & Reports > Custom Reports
- Select the custom report related to Session Attendance Time Tracking from the list
Above the custom report table, select Actions > Generate Report
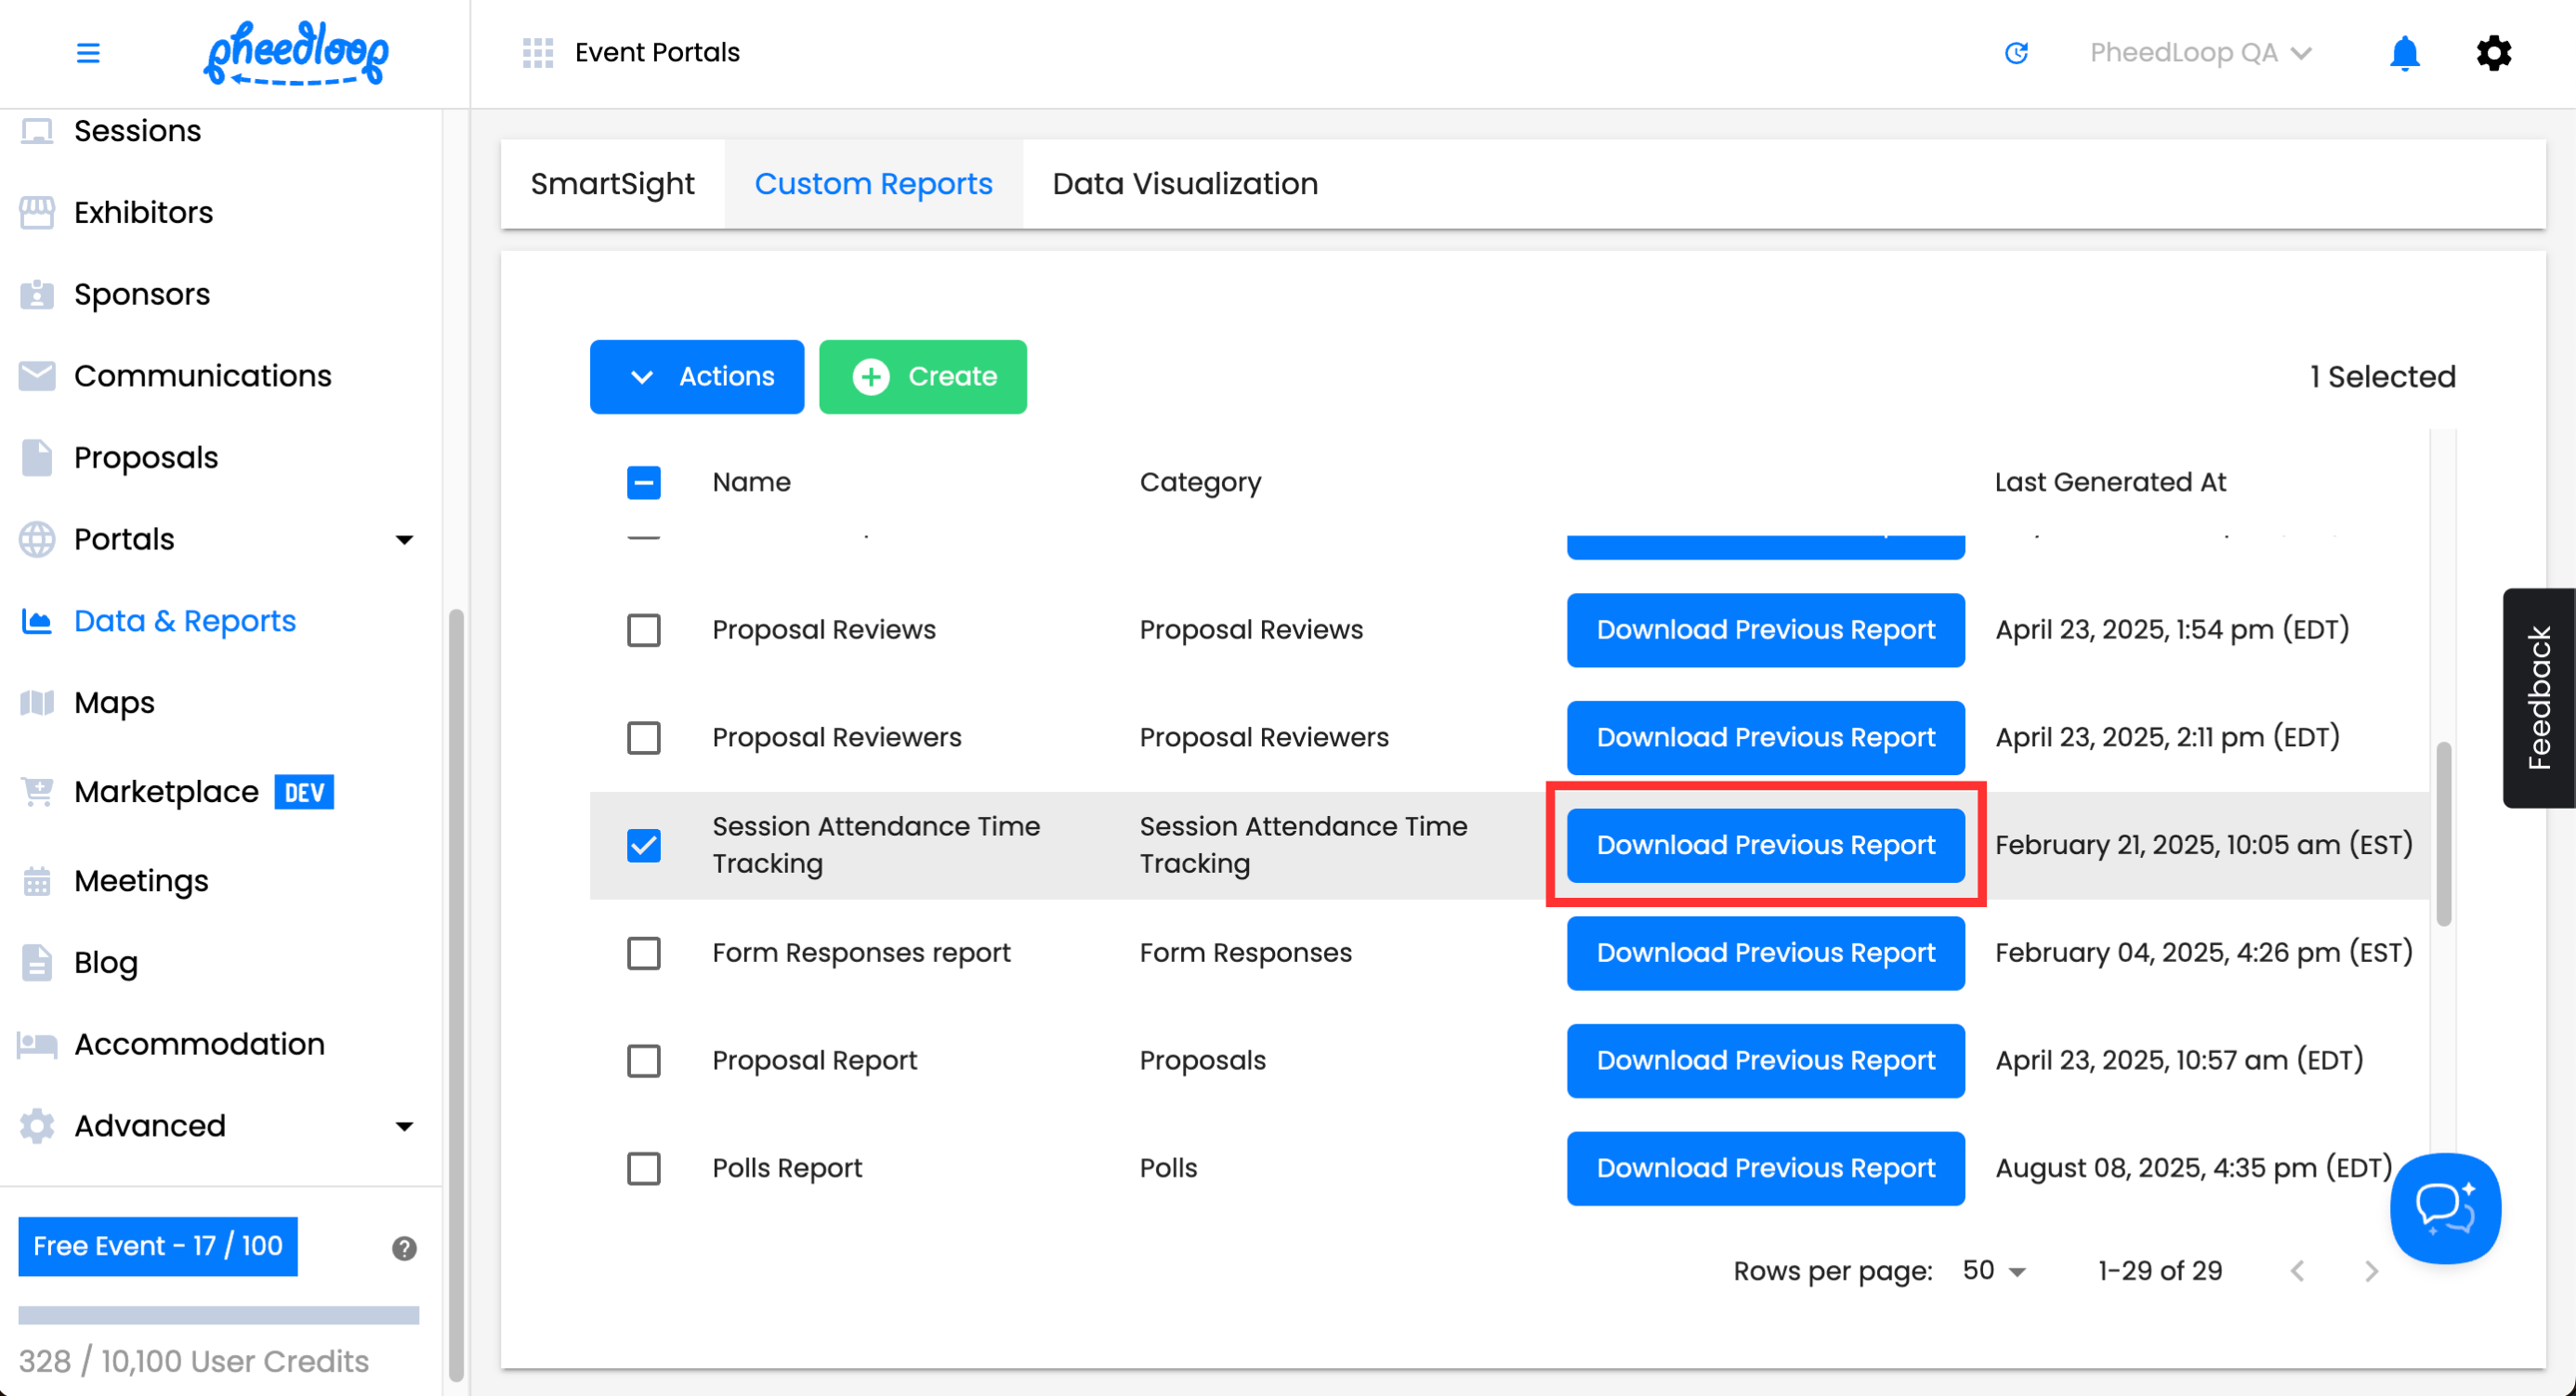
Select Download Previous Report


Another method to track session attendance is through Check-In Surveys. Check-In Surveys allow you to gather input from your sessions as well as serve as proof of attendance.