Creating Invite Lists for Registration
Many Event Planners have a list of prospective attendees they wish to invite, which can be done in the Event Dashboard. This feature allows you to create a list of invitations for multiple guests, which you can send out manually at a later time. The best part, user credits won’t be applied until after the guest completes their registration.
Creating Invite Lists
It is recommended that you create your invite lists first before listing your guests. An invite list is required for creating your invites.
- From the Event Dashboard, navigate to Invitations > Invite Lists
-
Above the Invite Lists table, select Create

- Under the Title field, enter the name for your invite list
- Under the Registration Category field, select the category you wish for guests to be redirected to when they click on the call to action button in their email
-
Leave this field blank to take them to the category selection step.
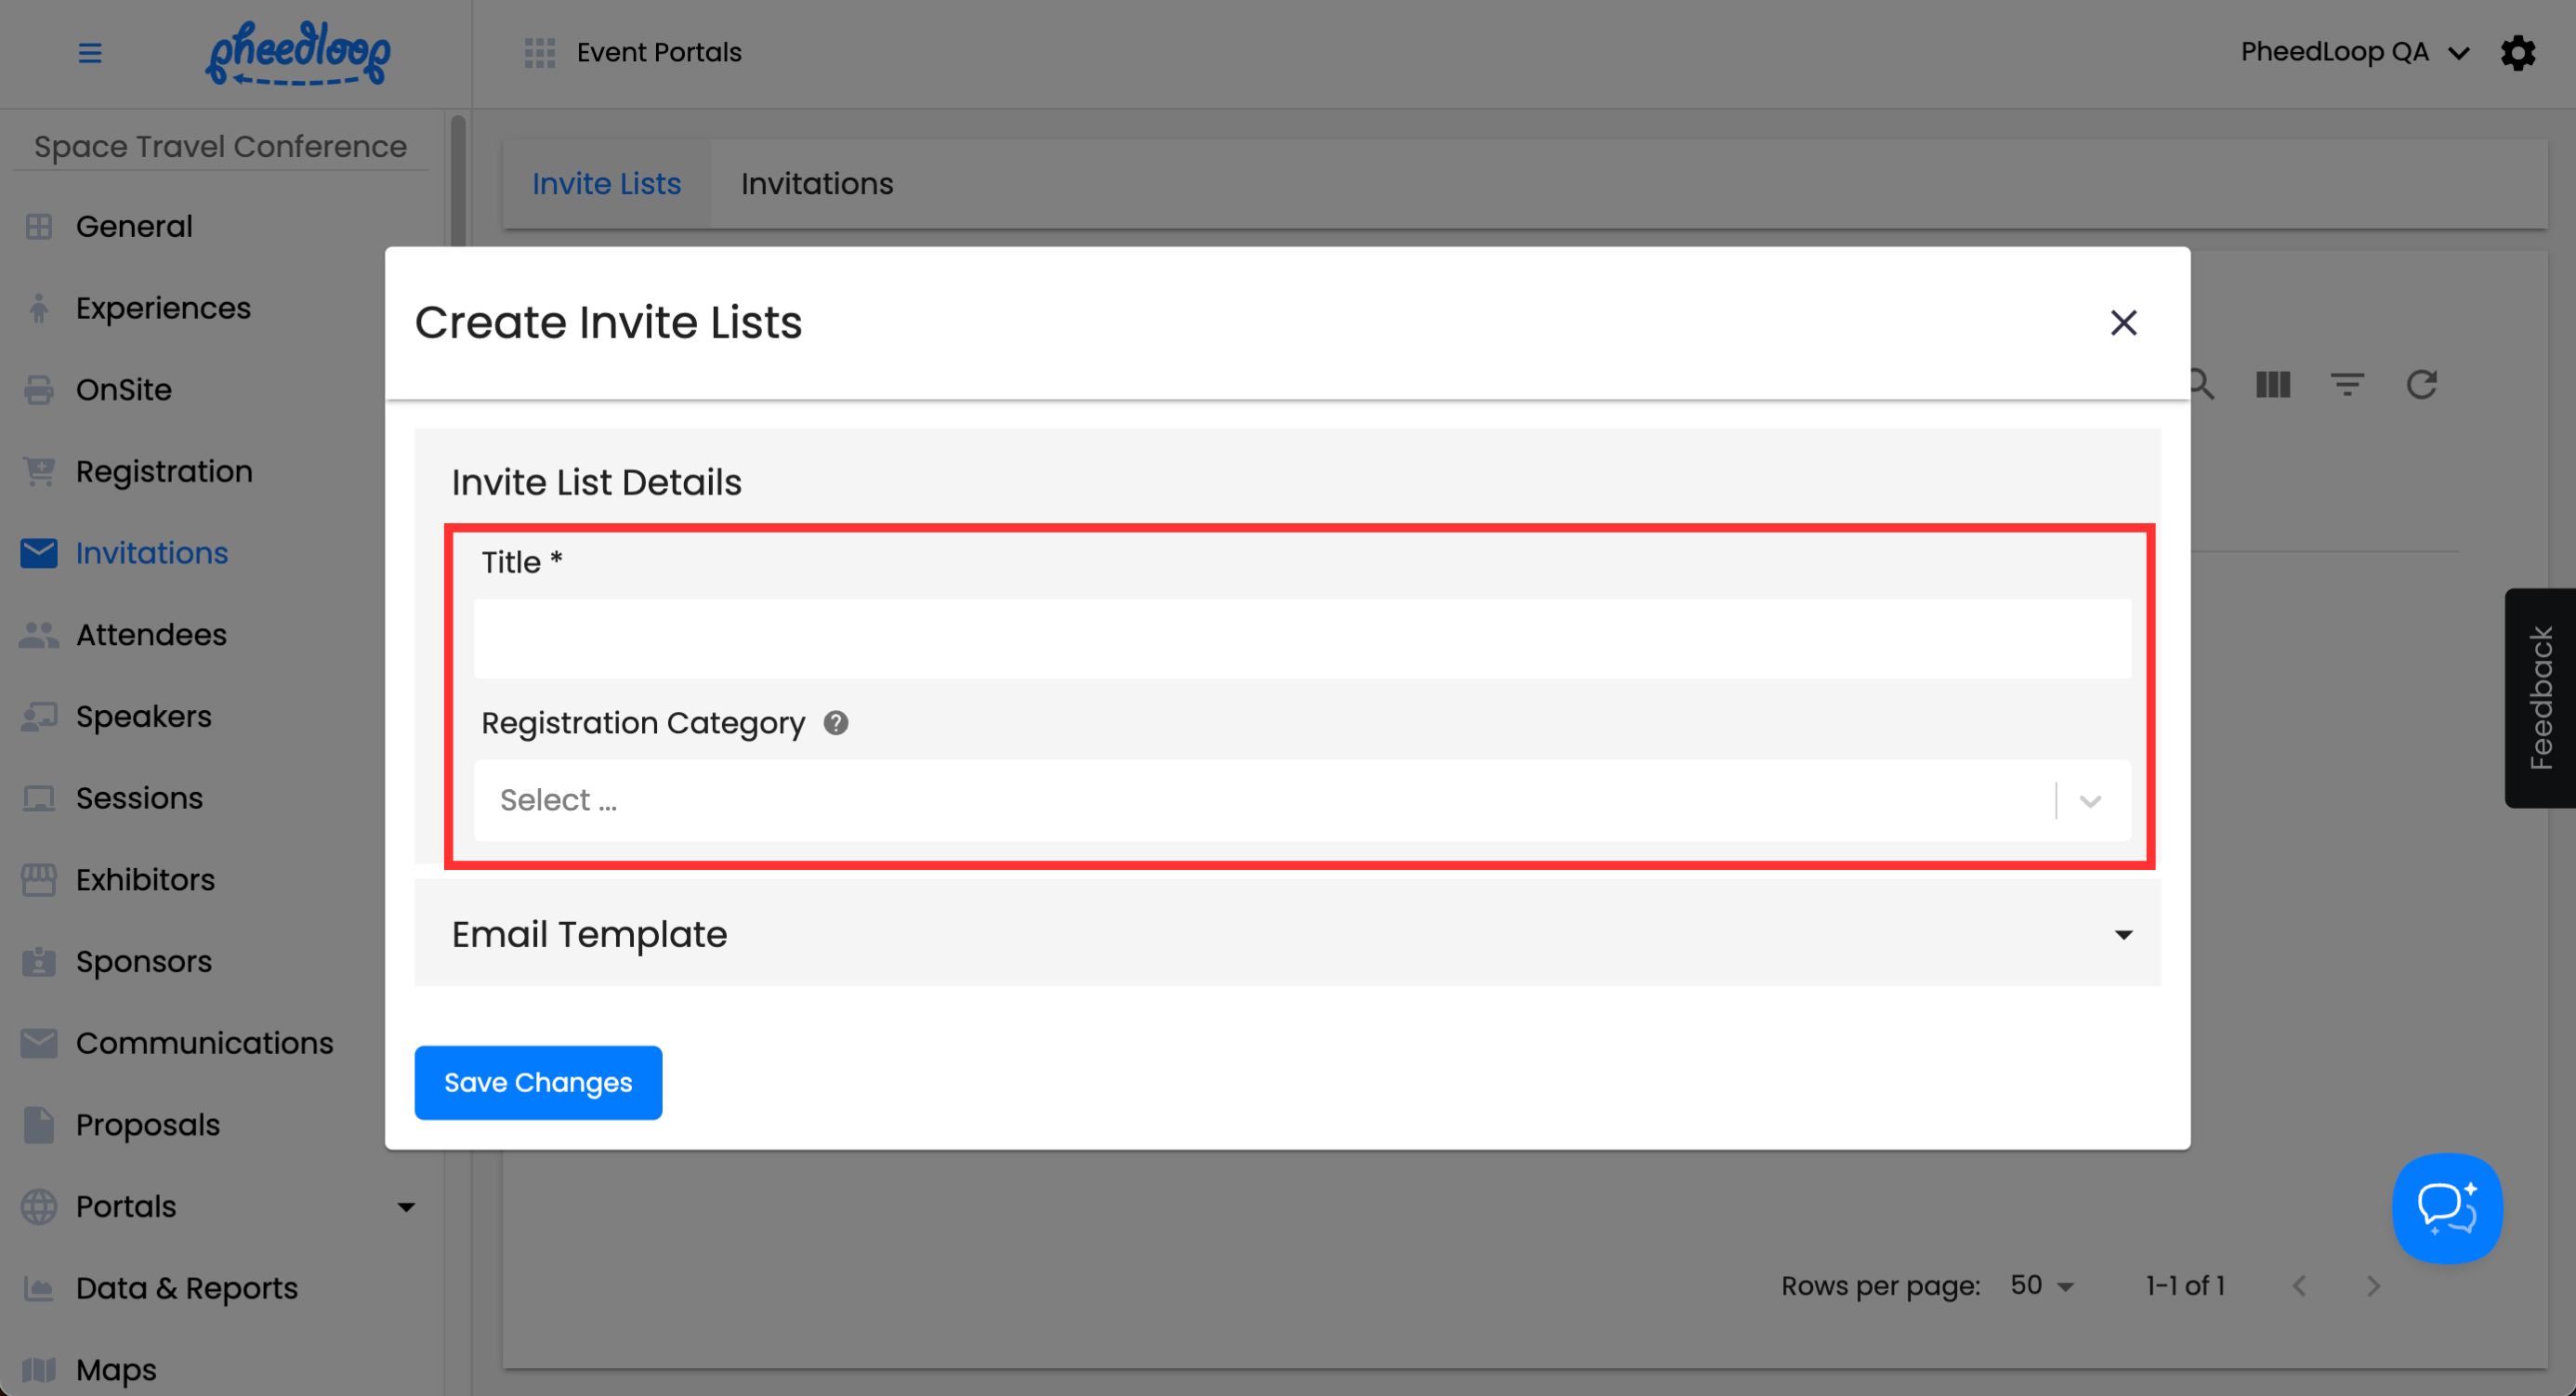
-
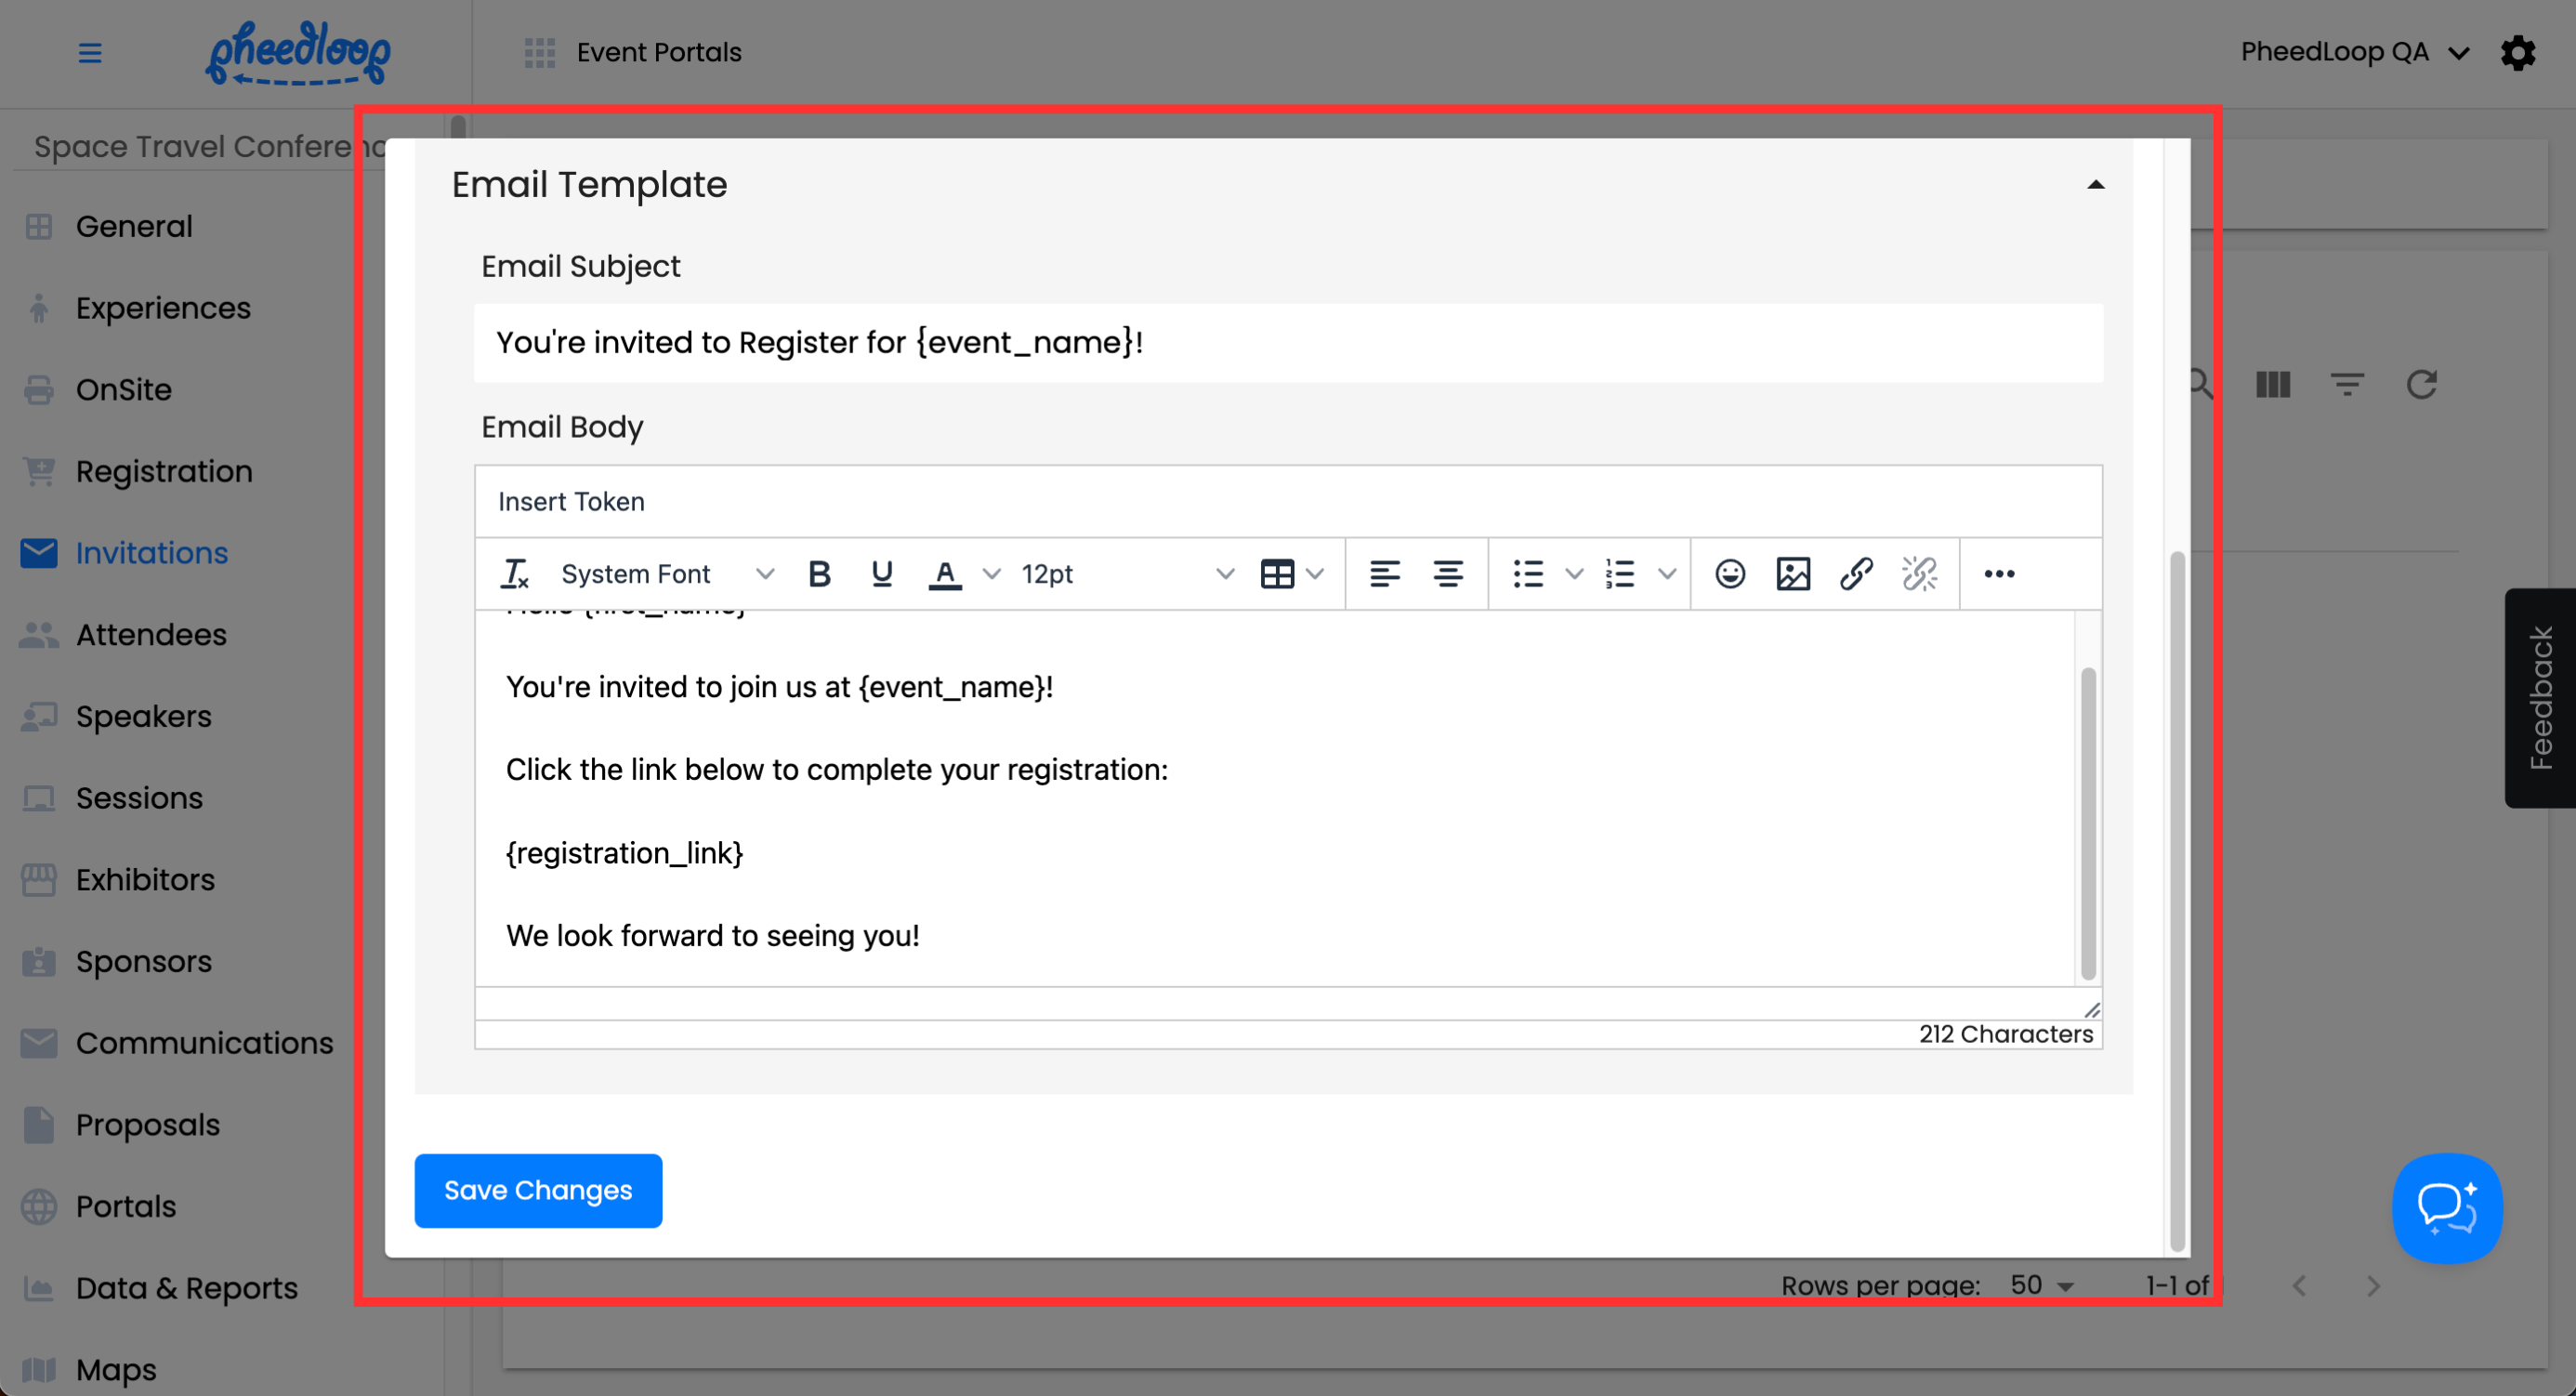
- Under the Email Subject field, enter the title for your email
- Under the Email Body field, enter the contents of your email
-
Select Save Changes


Creating Invites
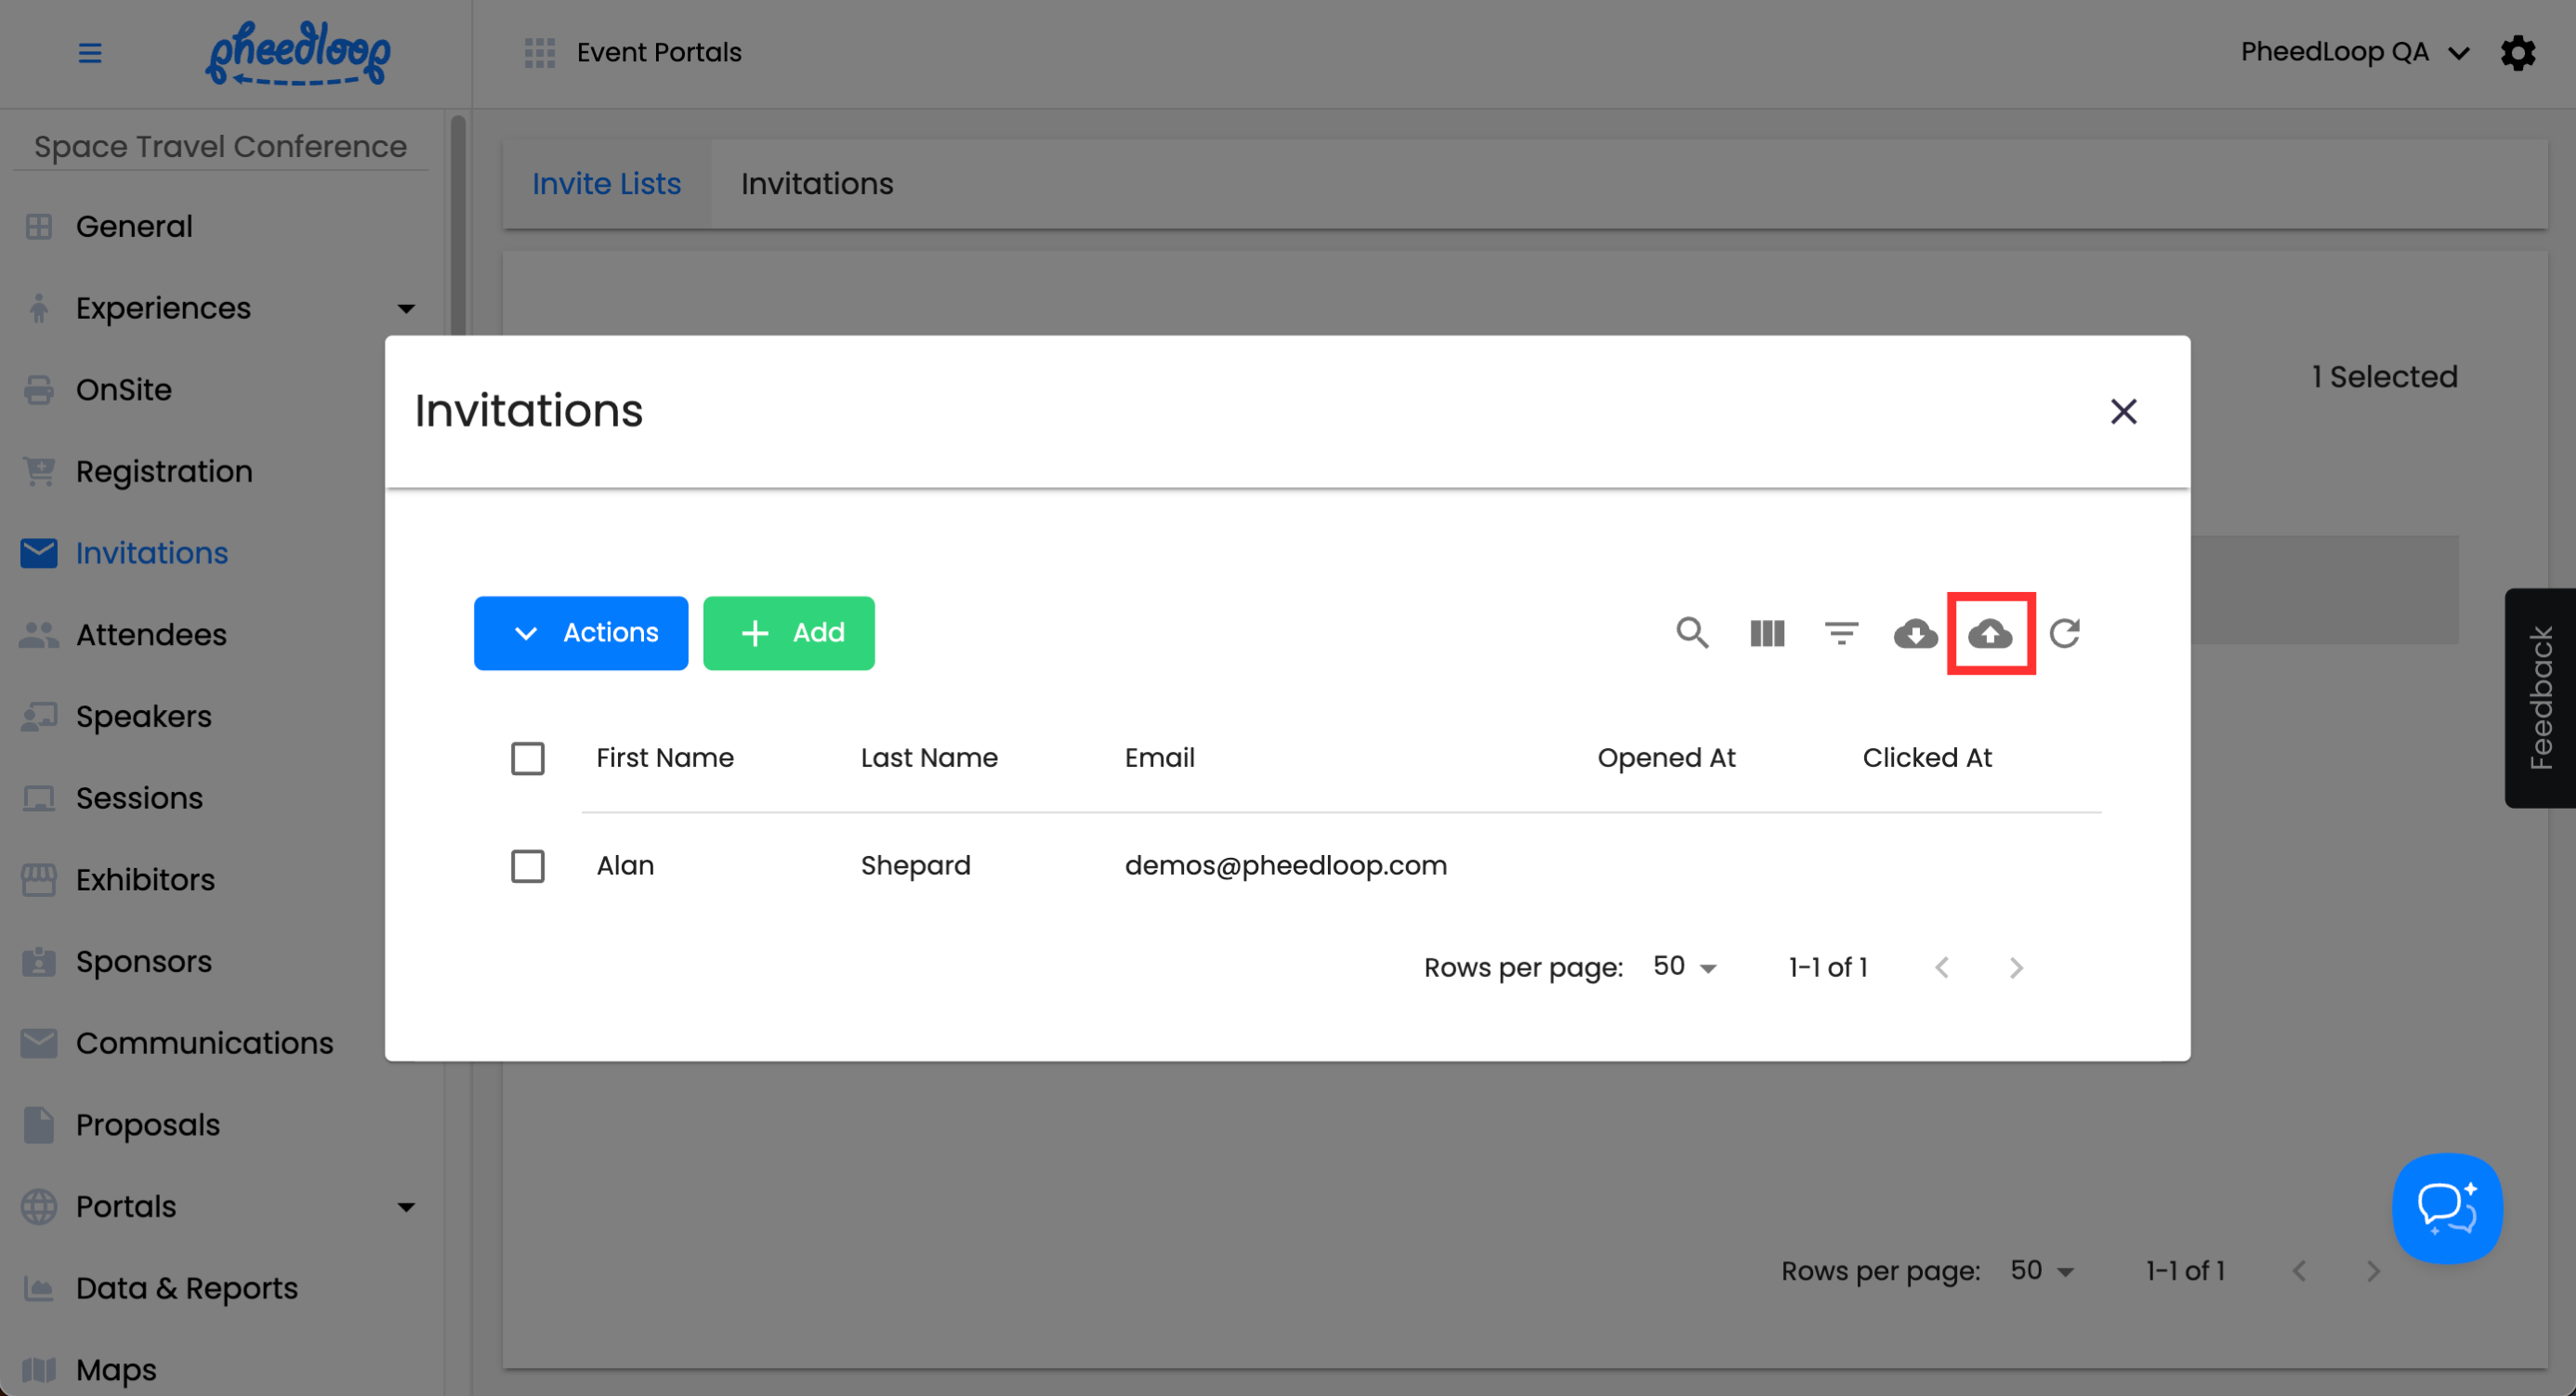
The Invites tab will list all your invitees and indicate whether they have opened the email and clicked on the call-to-action button. This can be found under the Opened At column and Clicked At column, respectively. Please note that an invite list must be assigned to an invitee before they can be added to the Event Dashboard. If an invitee belongs to multiple invite lists, a duplicate entry will be created for each list they are included in.

- From the Event Dashboard, navigate to Invitations > Invitations
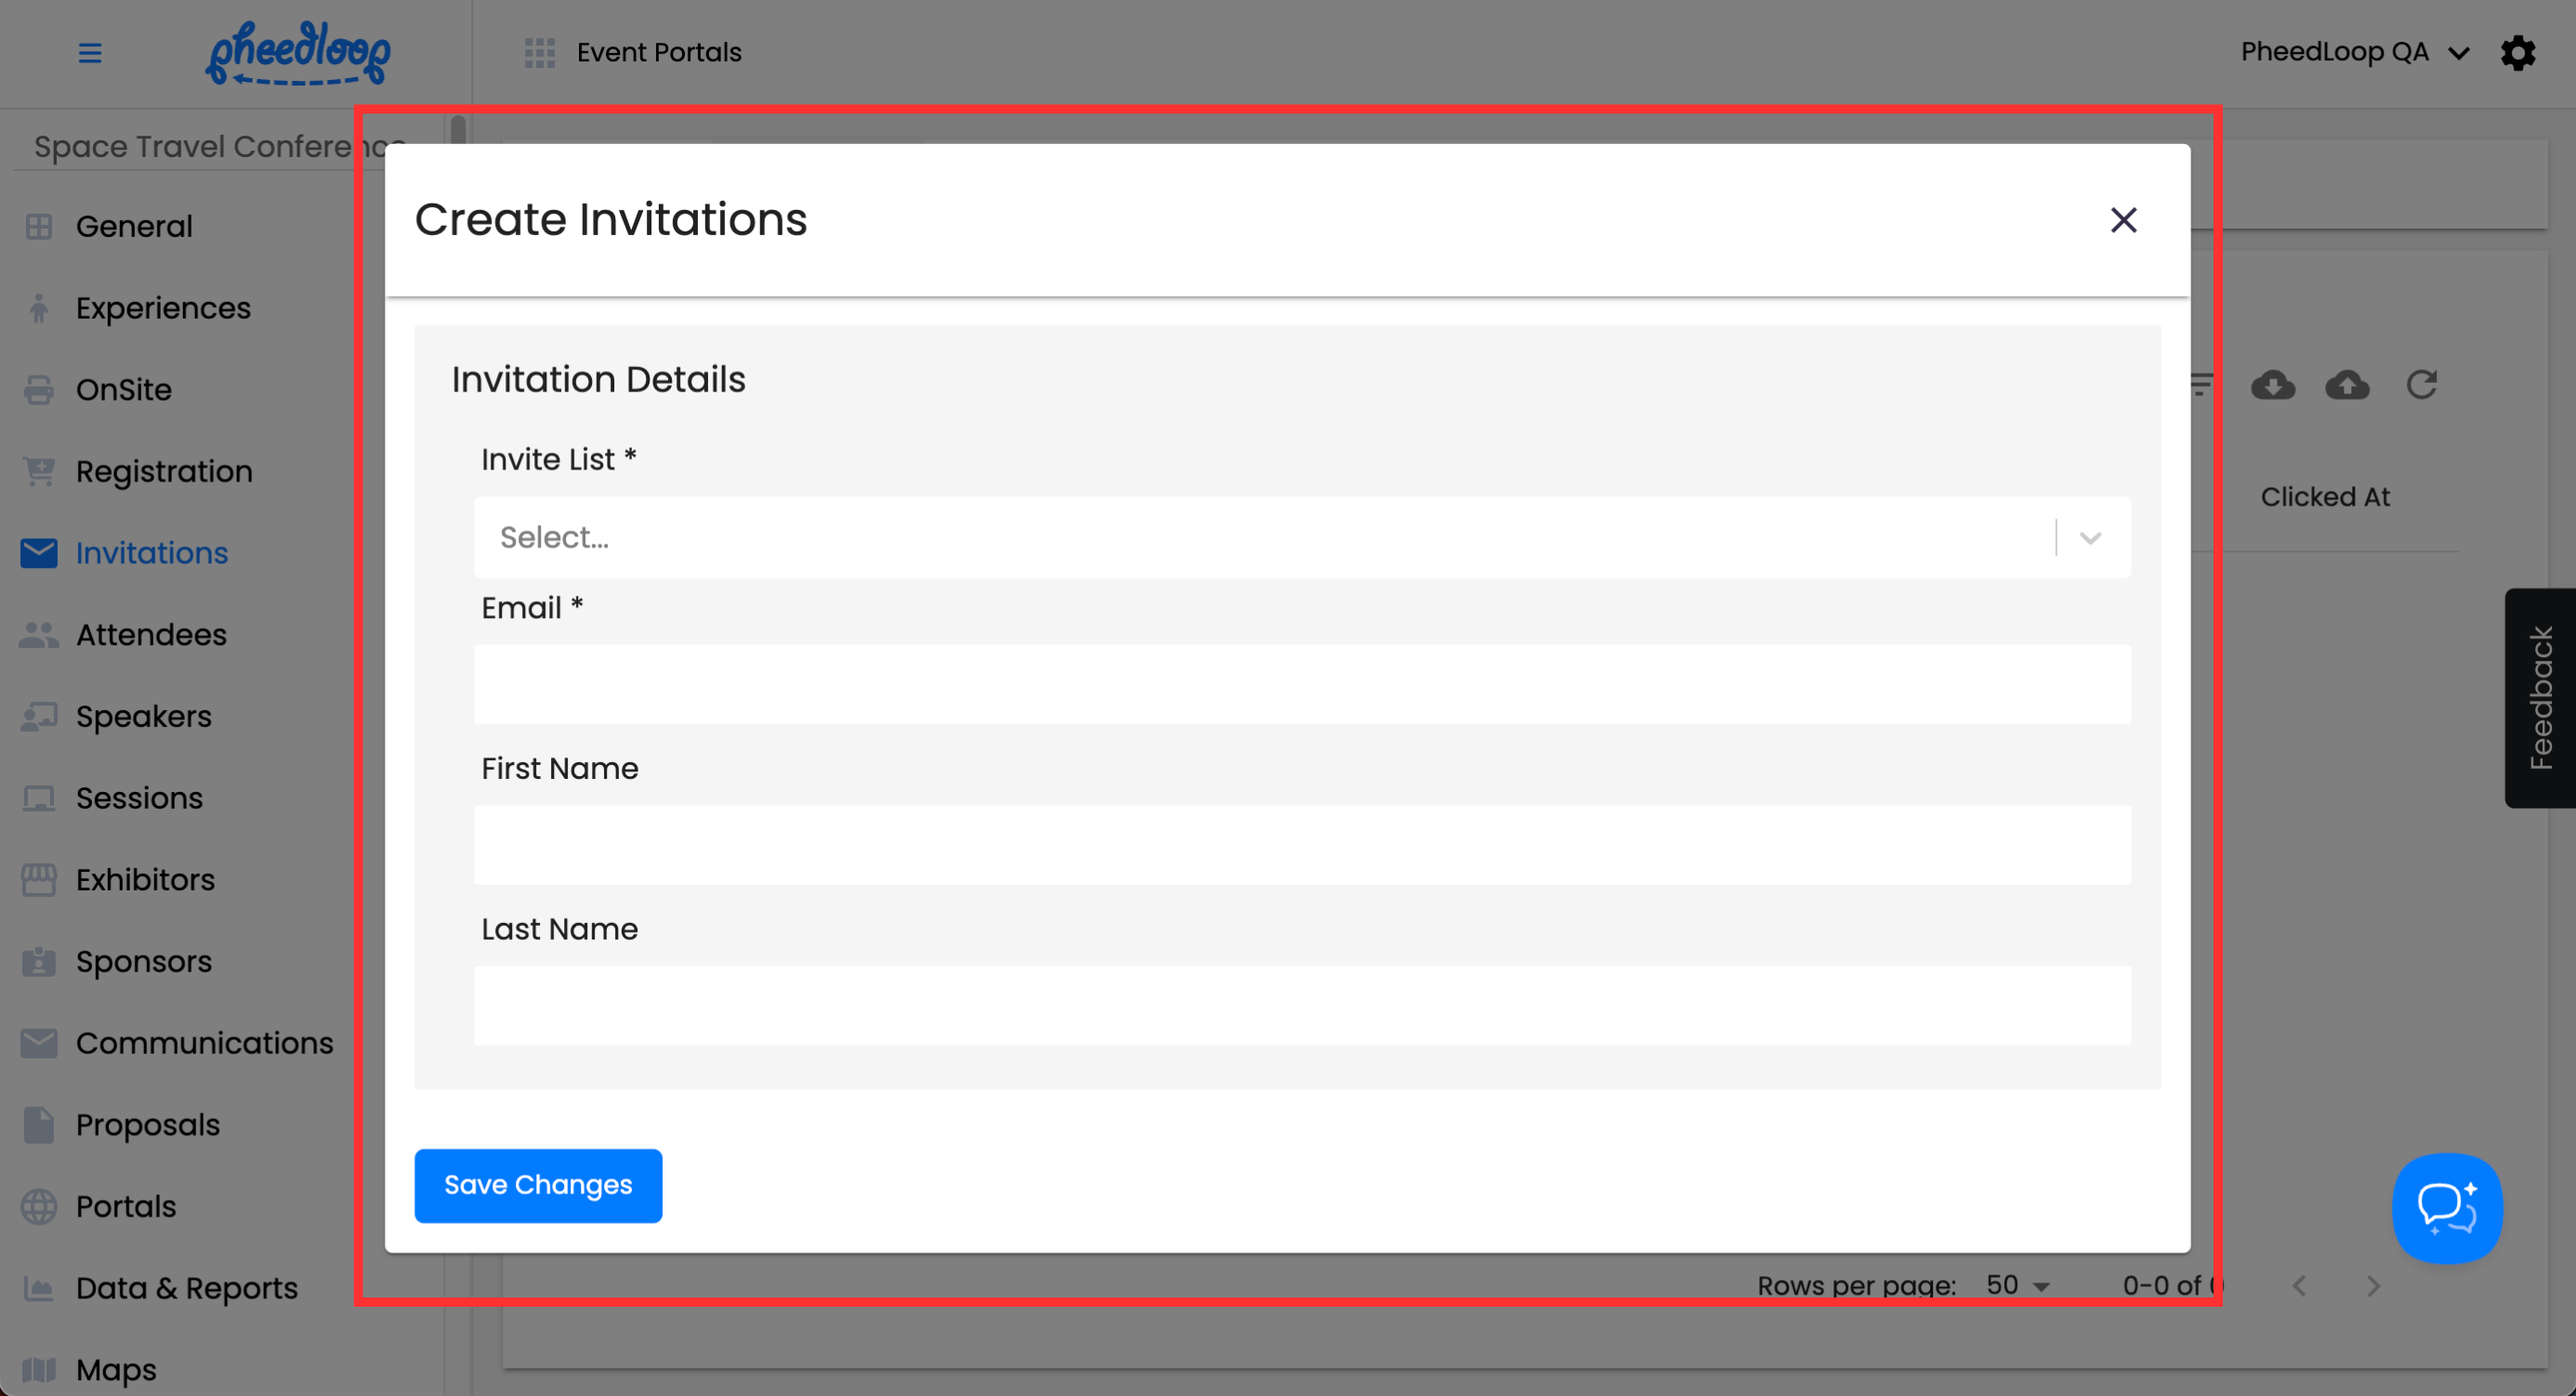
- Above the Invites table, select Create
- Under the Email field, enter the email for your invitee
- Under the First Name field, enter the first name of your invitee
- Under the Last Name field, enter the last name for your invitee
- Under the Invite List field, select the Invite List you wish to assign the invitee to
-
Select Save Changes

Bulk Uploading Invites
Multiple invitees can be added simultaneously with our bulk upload feature.
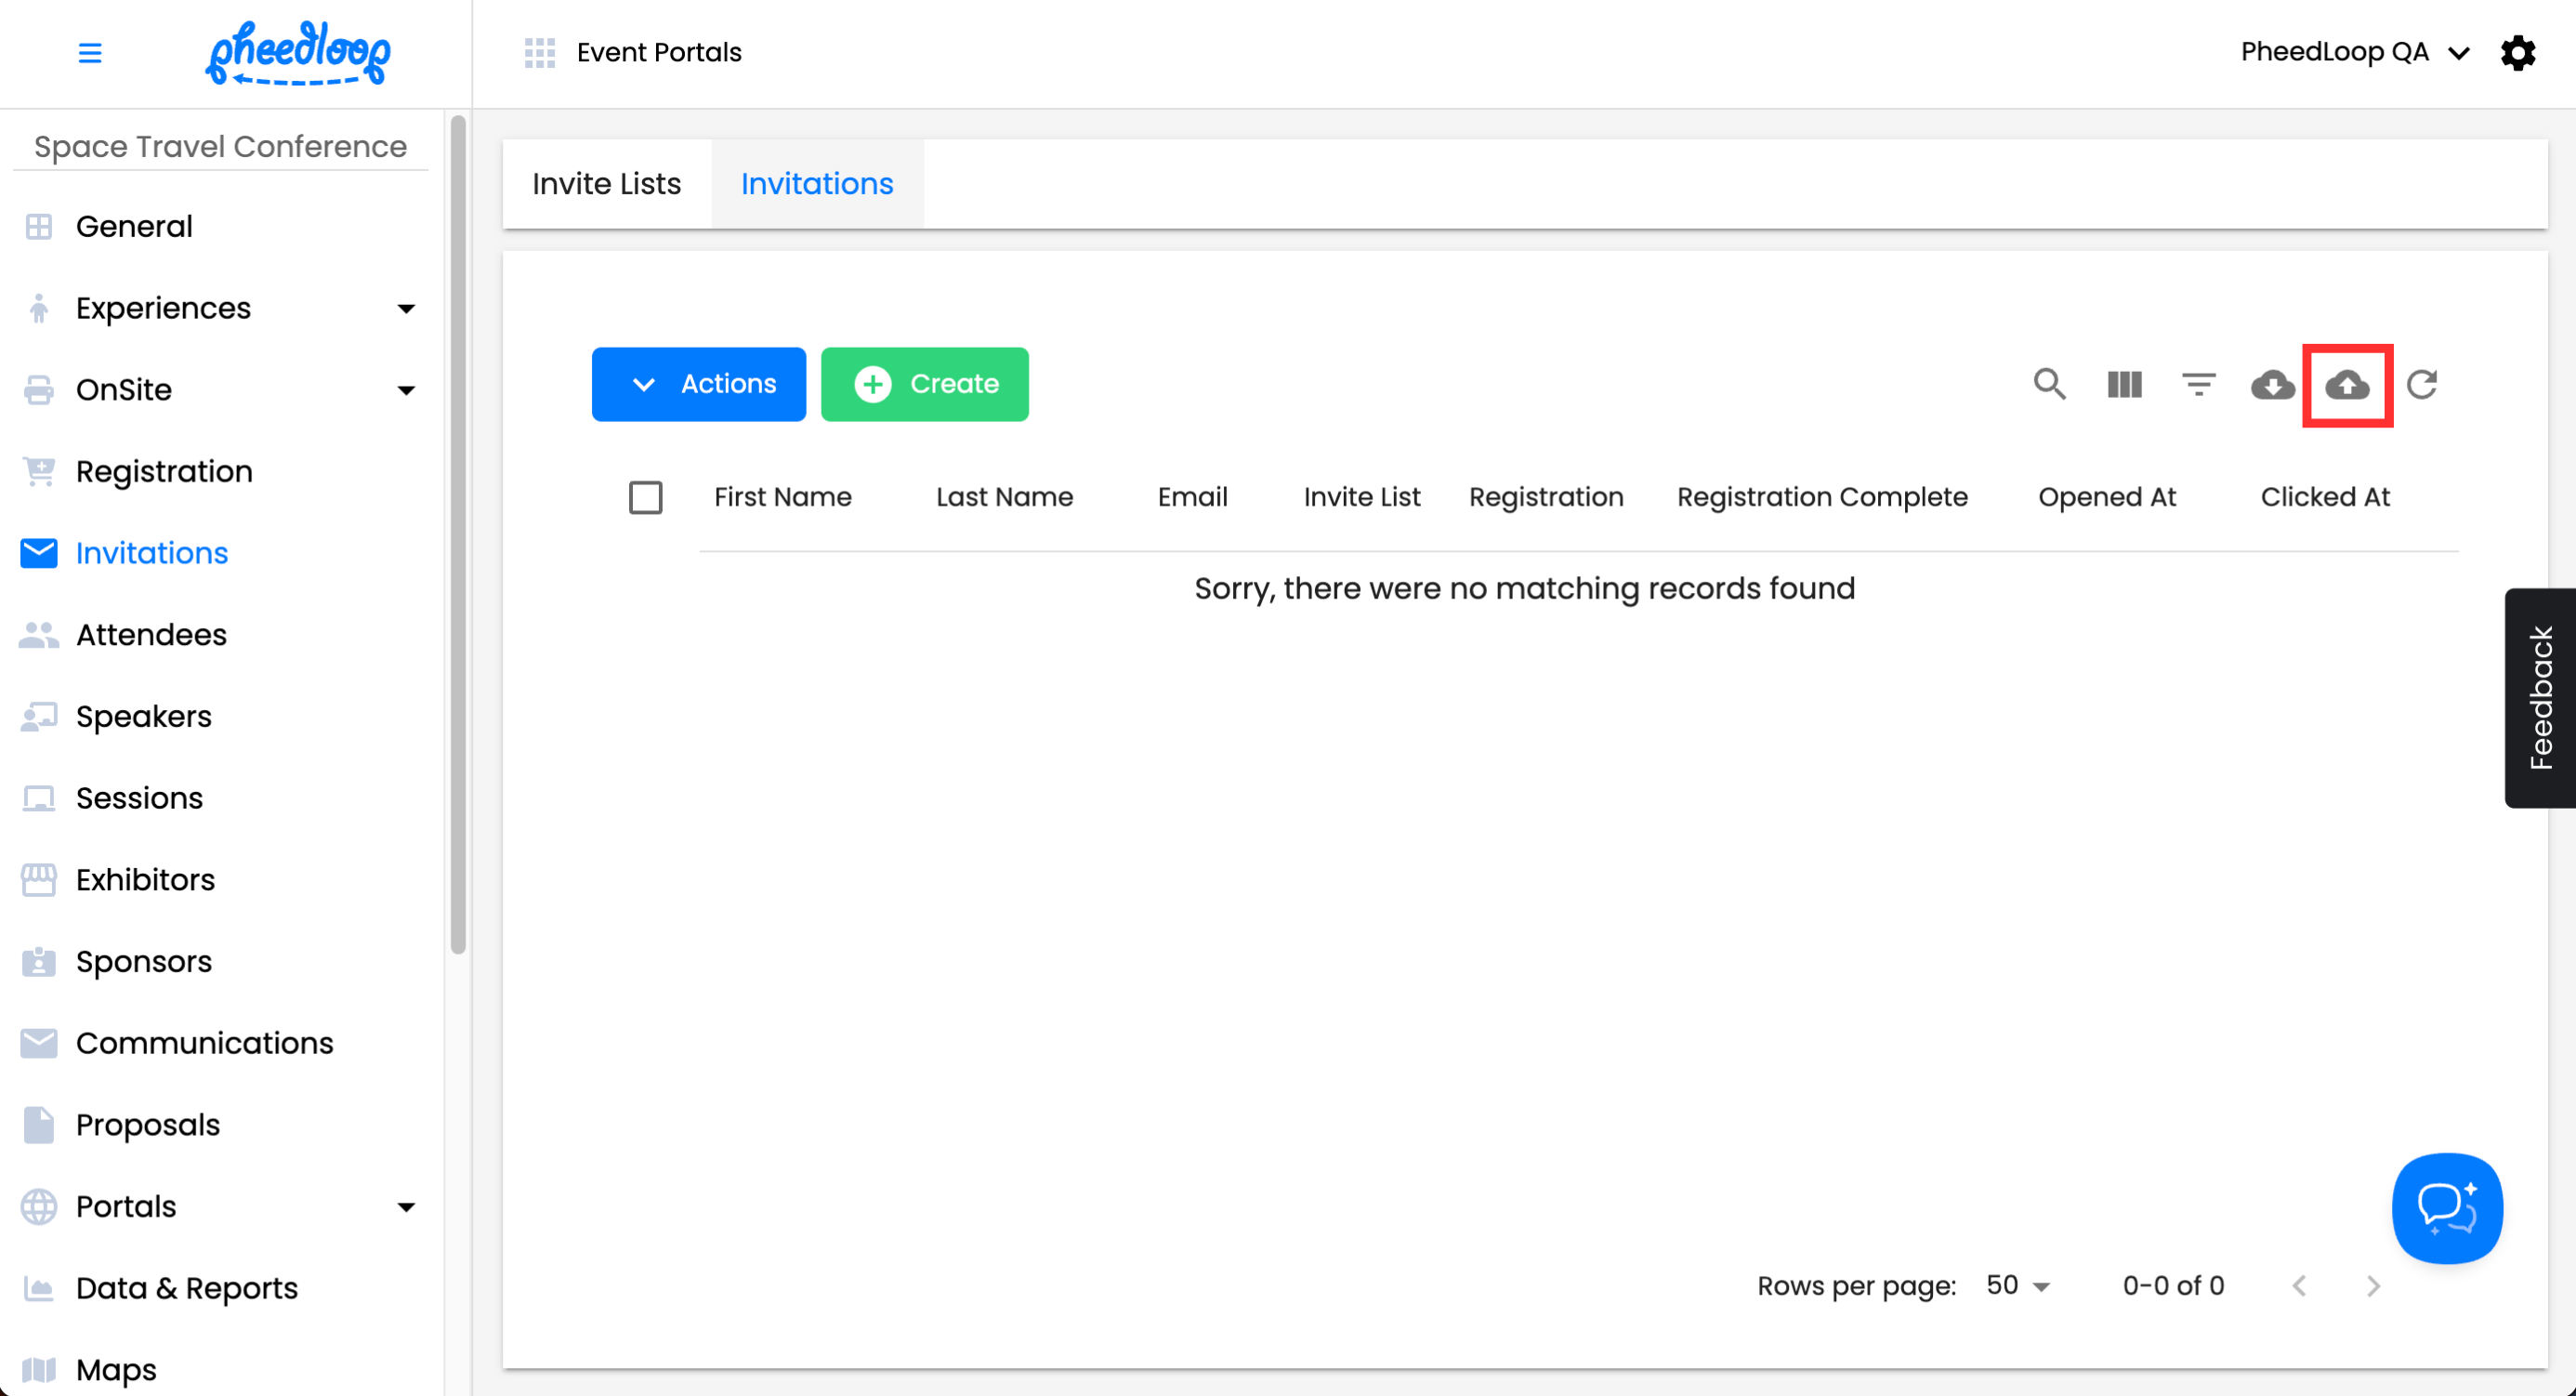
- From the Event Dashboard, navigate to Invitations > Invitations
-
Above the Invites table, select the upload button
-
In the new window, select Download Template
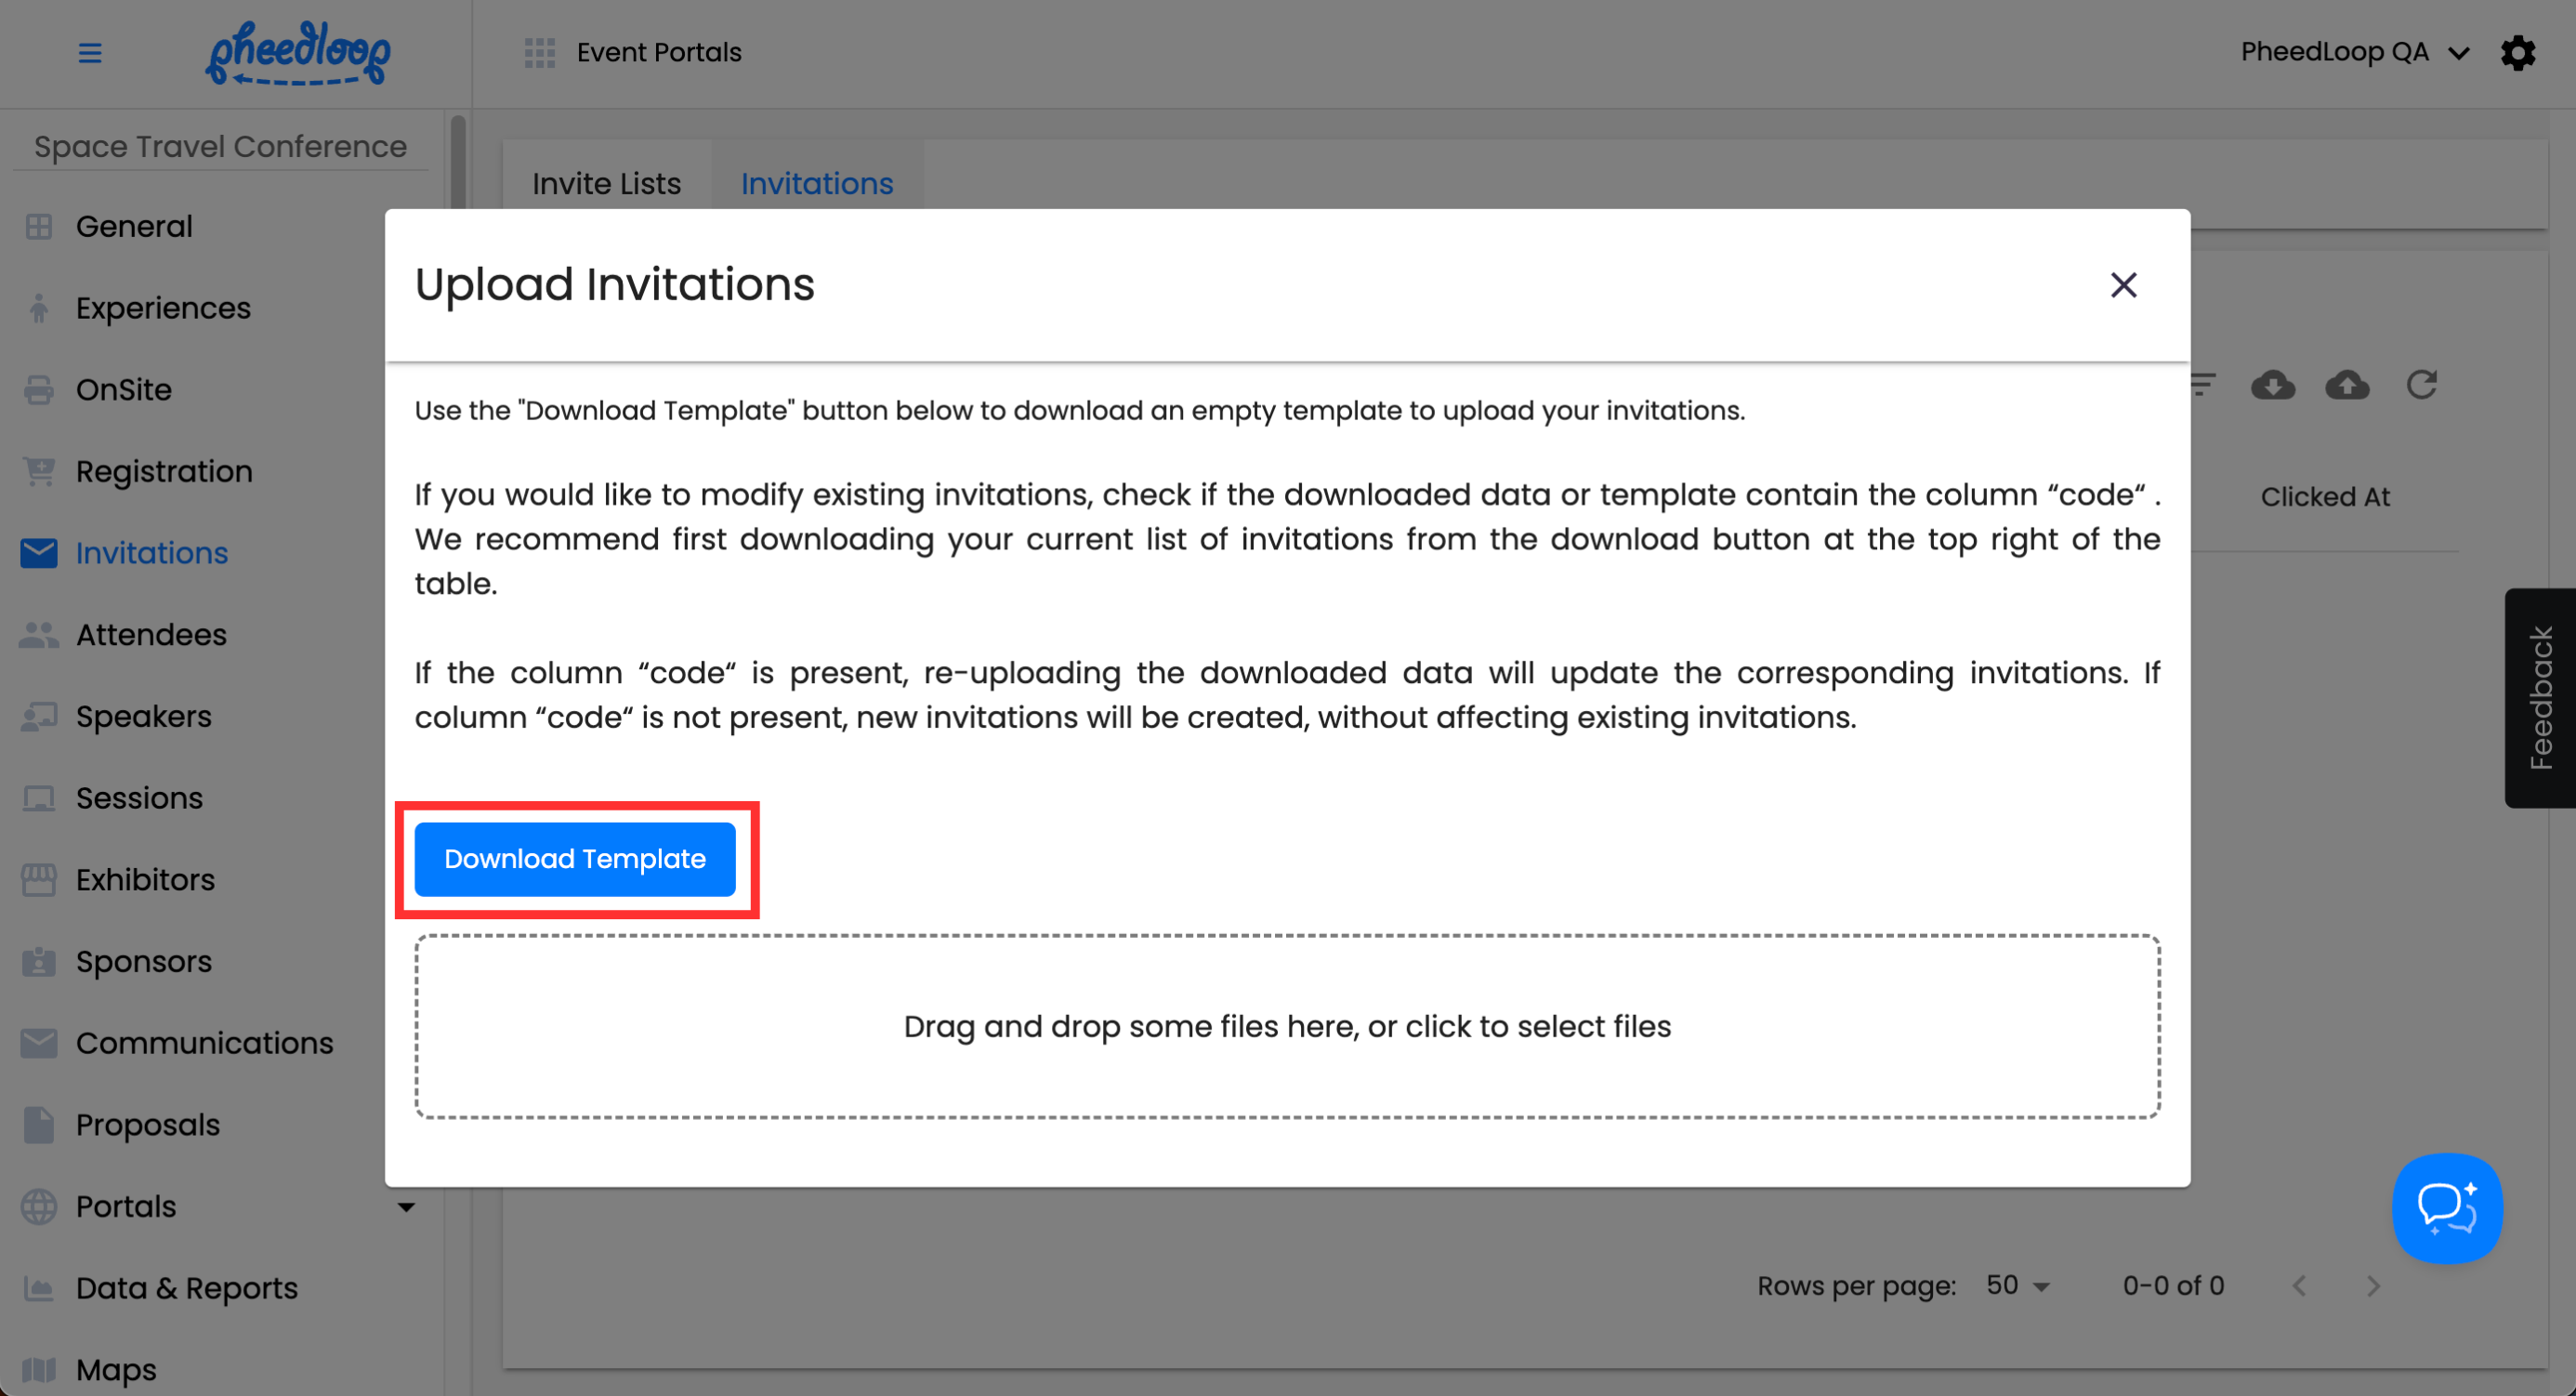


The Invites template will now be downloaded onto your device.
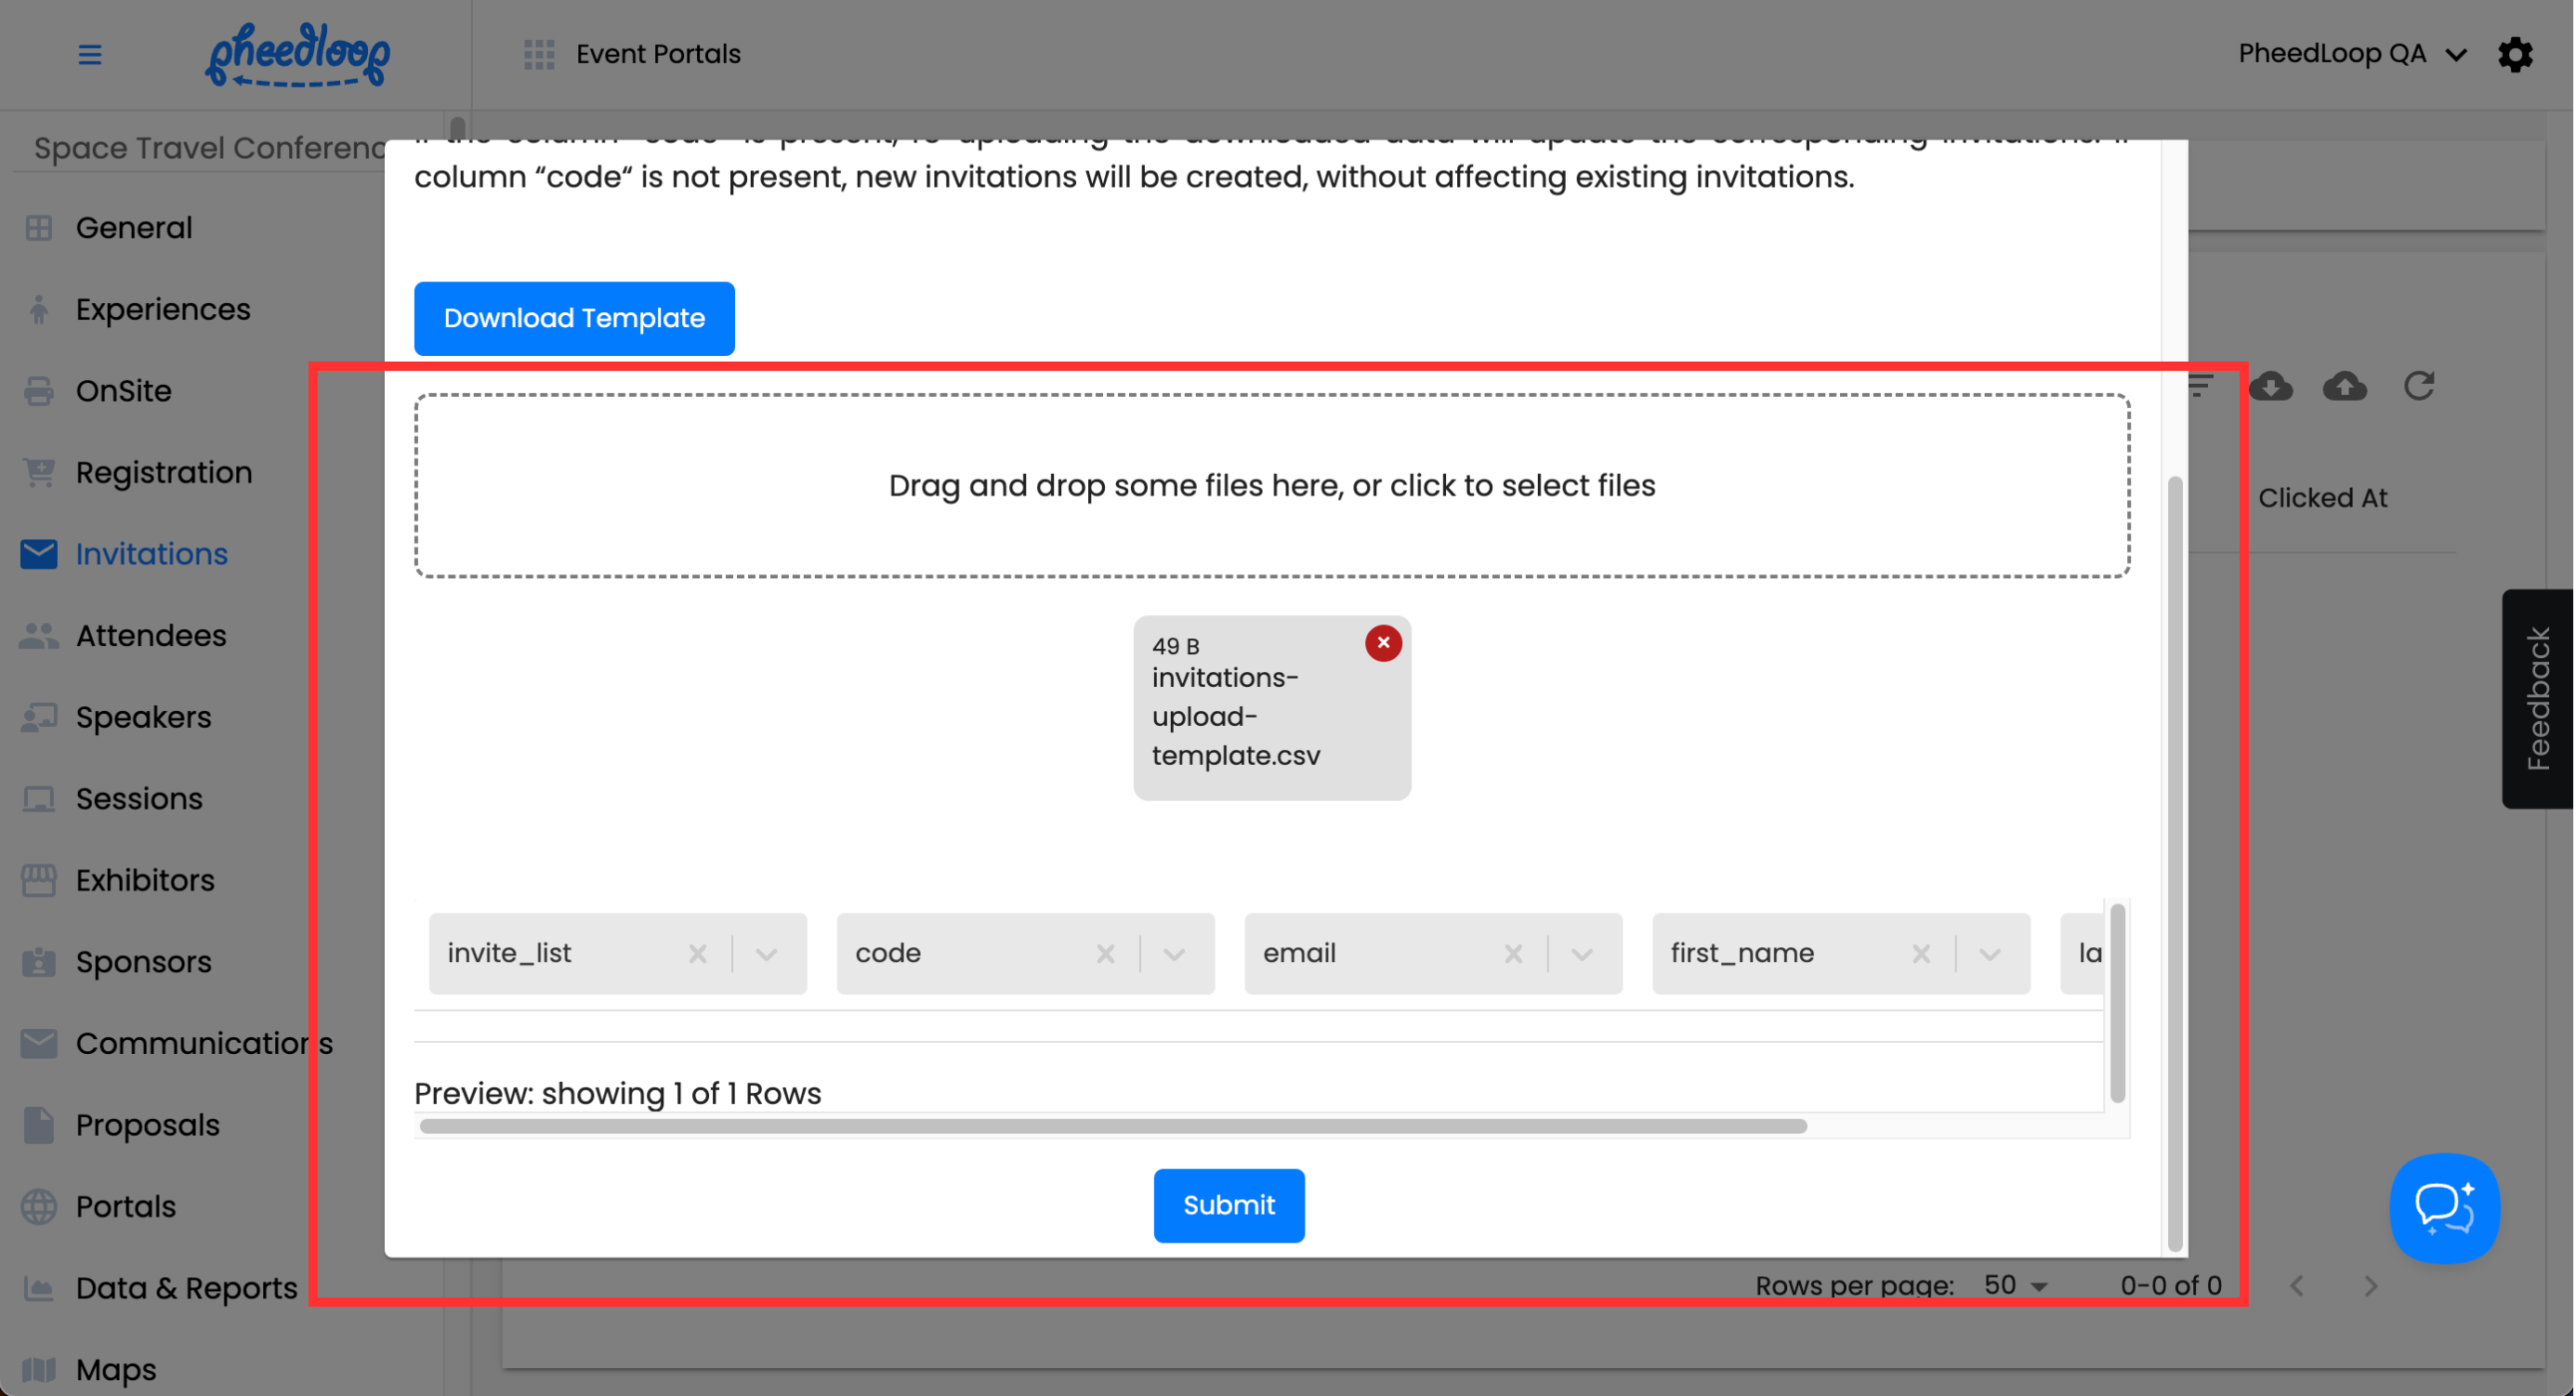
- Open the Invites template file
- Fill out the file with the information outlined in the Headings in the Invites Template step below
- Save the document as a CSV file
- From the Event Dashboard, navigate to Invitations > Invitations
- Above the Invites table, select the upload button
- Select the Drag and drop some files here, or click to select files button to upload your template
-
Select Submit

Headings in the Invites Template
| invite_list | List the code of the invite list you wish to assign the invitee to. This code can be found by clicking on an Invite List in the dashboard and copying the code that appears at the end of the URL(e.g. INVLOQ020P0YTTKVKHB). This field is required in order for the upload to work. |
|---|---|
| code | This field is only necessary if you intend to edit an existing invitee. Enter the Invitee code under this column to edit their information. This code can be found by clicking on an invitee in the dashboard and copying the code that appears at the end of the URL (e.g. INVT9G5WX7WXK0U5PNC). |
| The email for the invitee. | |
| first_name | The first name for the invitee. |
| last_name | The last name for the invitee. |
You can also use bulk uploading when opening an Invite List. This is useful if you simply wish to make a quick upload without needing to worry about other Invite Lists.
- From the Event Dashboard, navigate to Invitations > invite Lists
-
Select the Invite List you wish to use and above the Invite Lists table, select Actions > View Invitations

-
In the new window, select the Upload button and complete the upload process through the steps outlined above


Sending Invitations
Once your Invite Lists are set up and assigned, you can send your invites out at any time from the Event Dashboard. Invitations must be sent manually from the Event Dashboard; there is no way to send the email out automatically.
- From the Event Dashboard, navigate to Invitations > Invite Lists
- Select the Invite List you wish to adjust from the list
-
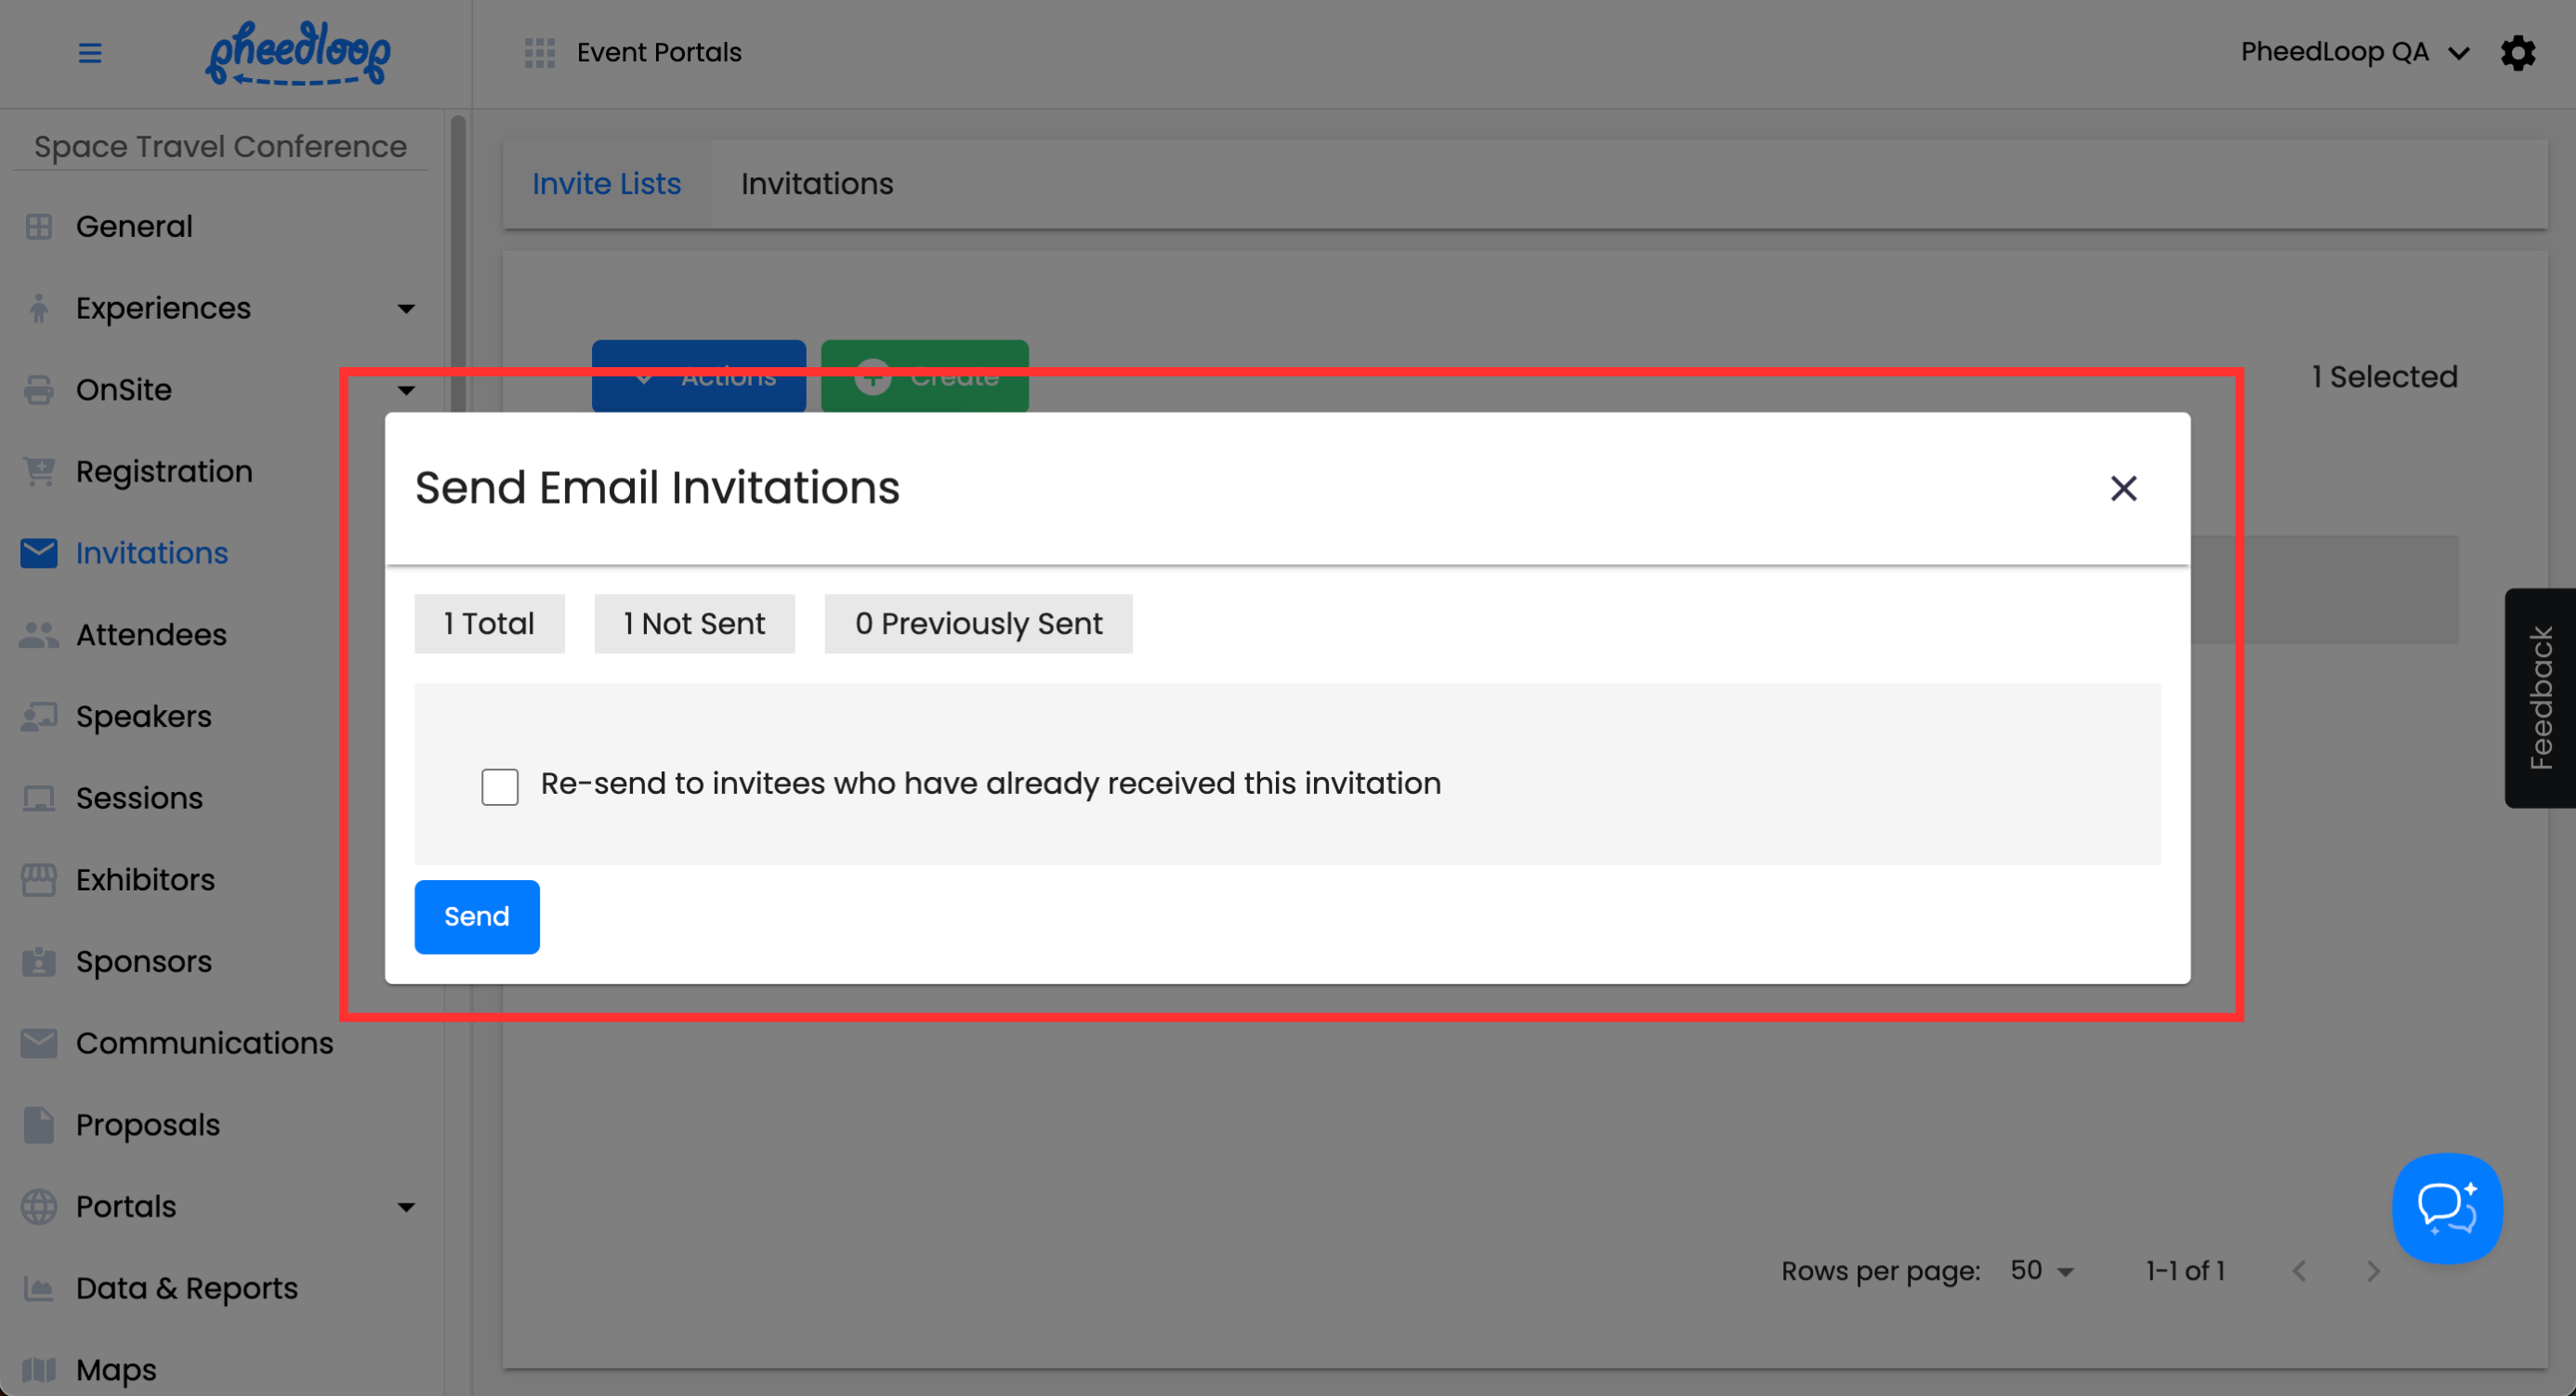
Above the Invite Lists table, select Actions > Send Email Invites

- Select Send
-
If you would like to send another invitation to an invitee, toggle on the Re-send to invitees who have already received this invitation checkbox.
-


Quick Tip - If you would like to send an email to one invitee only, select Actions > View Invitations and after selecting the Invitee, select Actions > Send Invitations.

Reviewing Sent Invitations
As your invitees review the emails sent to them, their progress will be displayed in the Event Dashboard.
- From the Event Dashboard, navigate to Actions > View Invites
- Select the Invite List you wish to adjust from the list
-
Above the Invite Lists table, select Actions > View Invites


A new window will appear displaying all the invitees on the list. As mentioned previously, use the Opened At and Clicked At columns to see which invitees have opened the invite and clicked the call to action button.

In addition, the columns also display links to the Invite List and registration order, as well as the status of the registration.

Deleting Invite Lists and Invitees
Invitees can be removed from an Invite List individually.
- From the Event Dashboard, navigate to Invitations > Invite Lists
- Select the Invite List you wish to adjust from the list
-
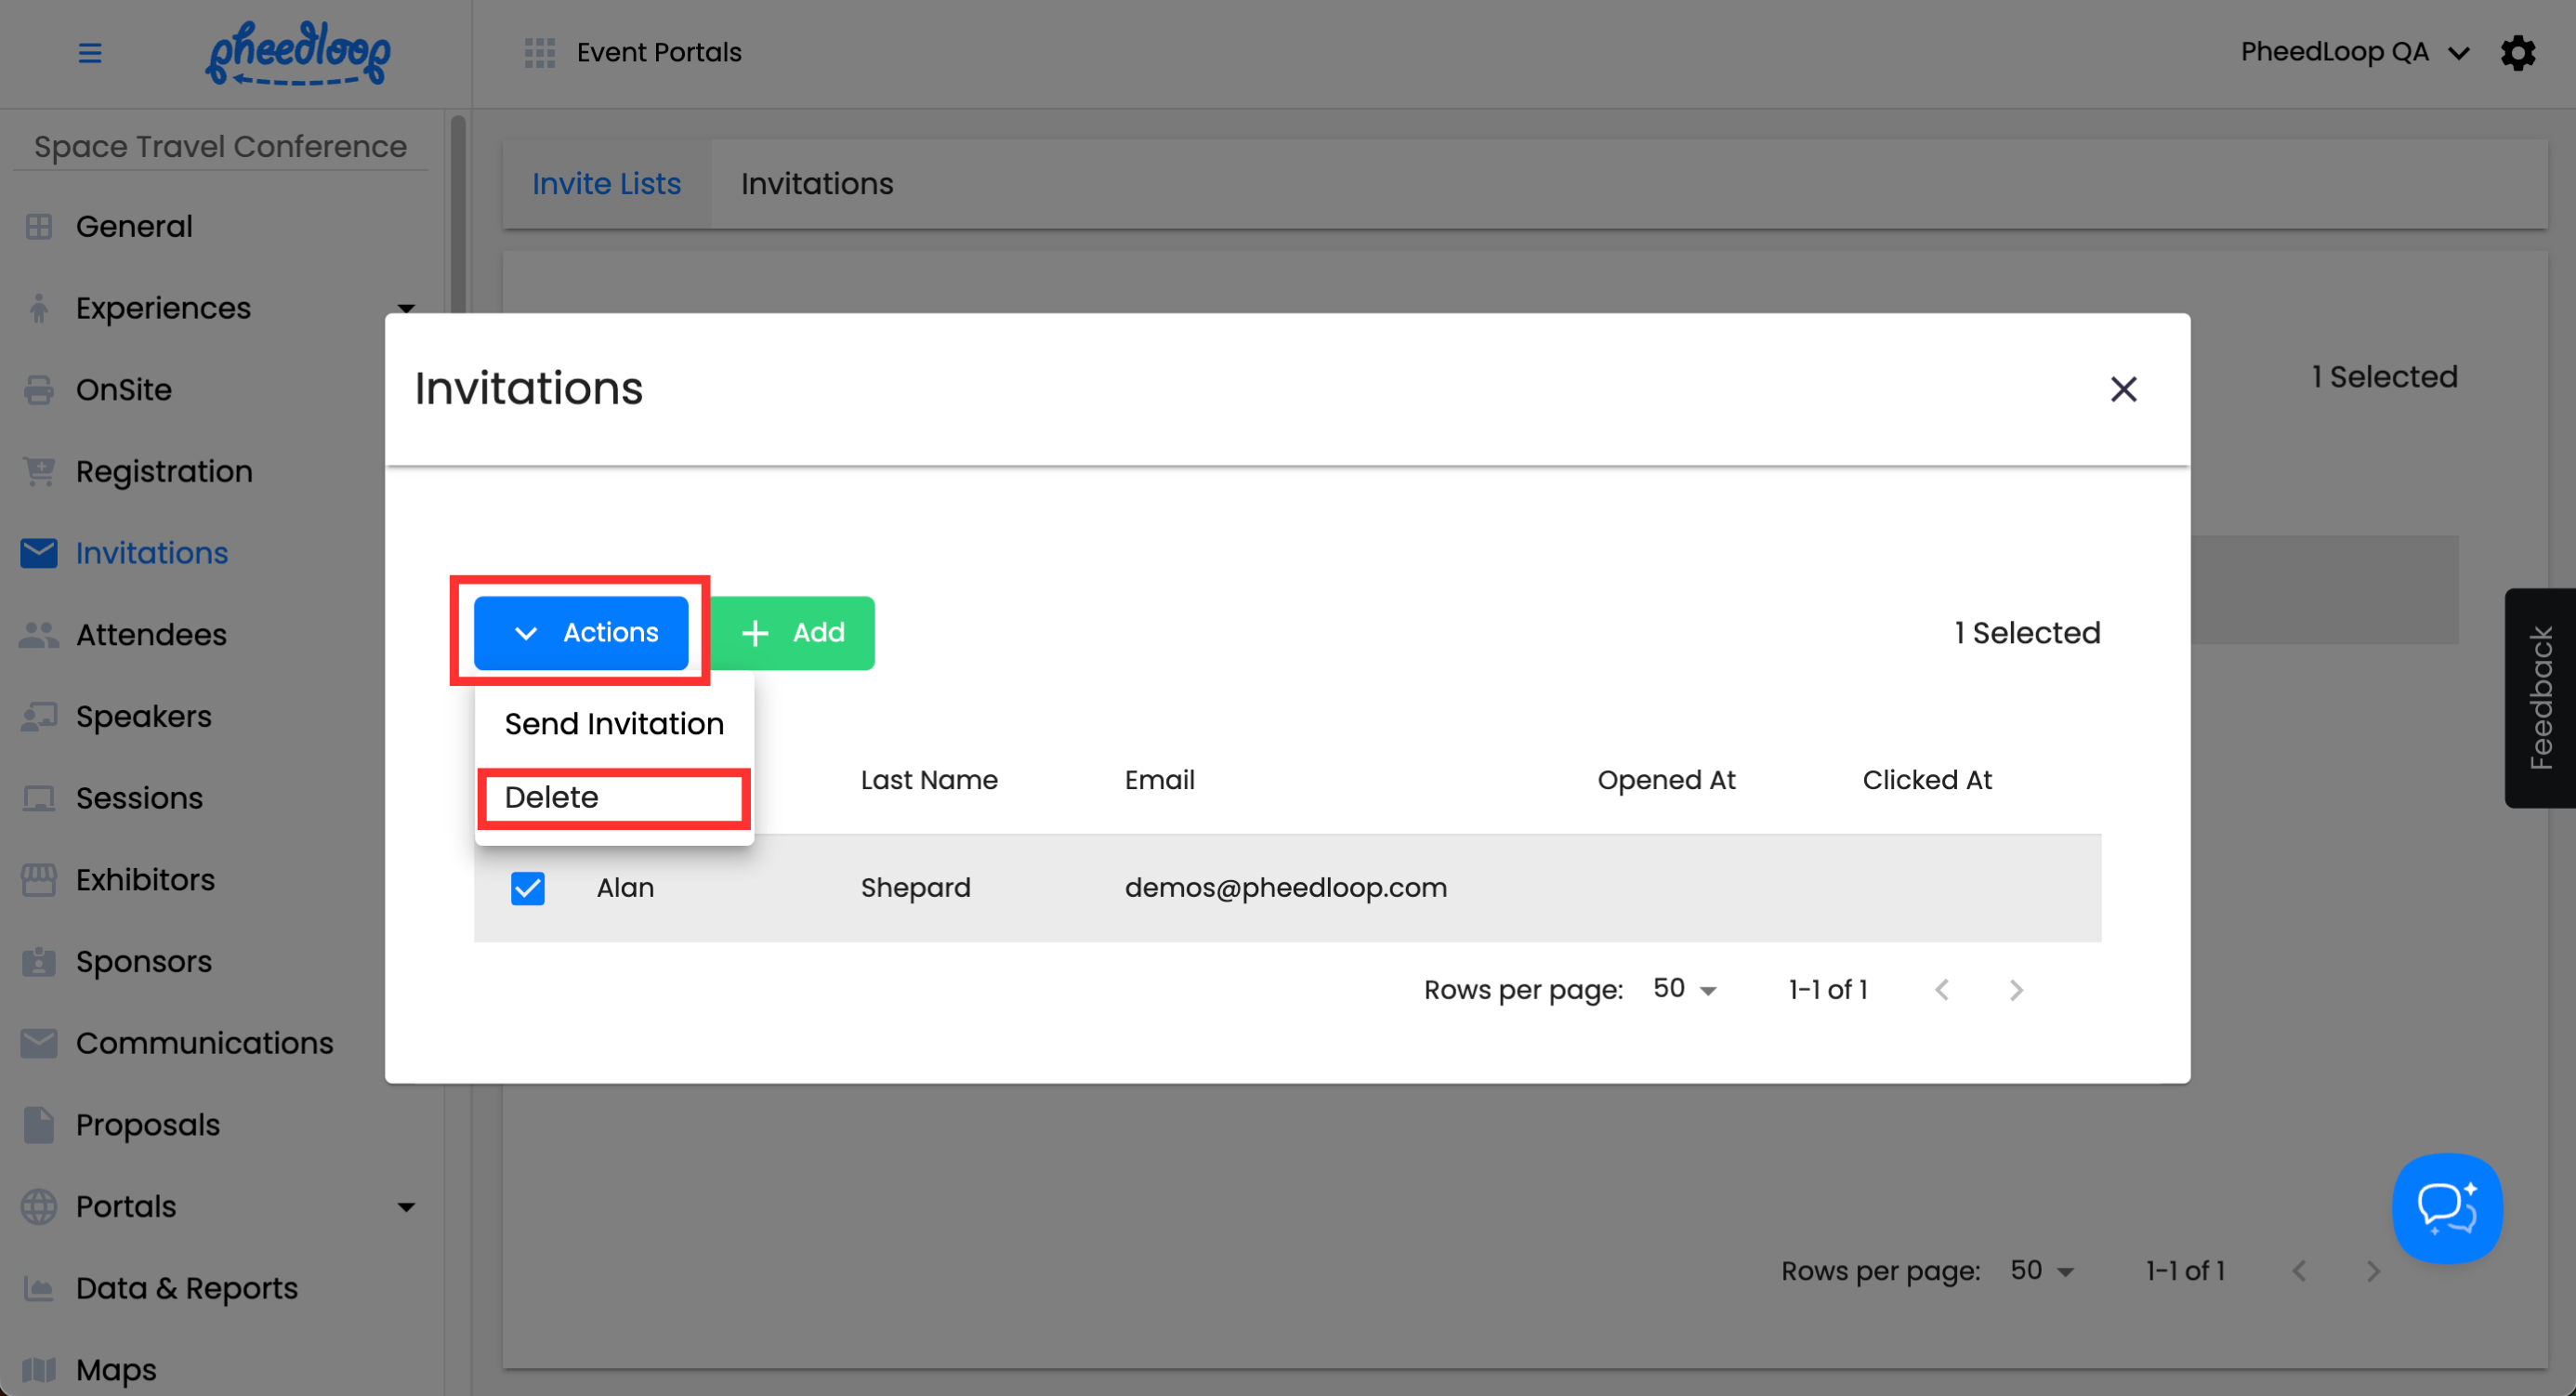
Above the Invite Lists table, select Actions > View Invites
-
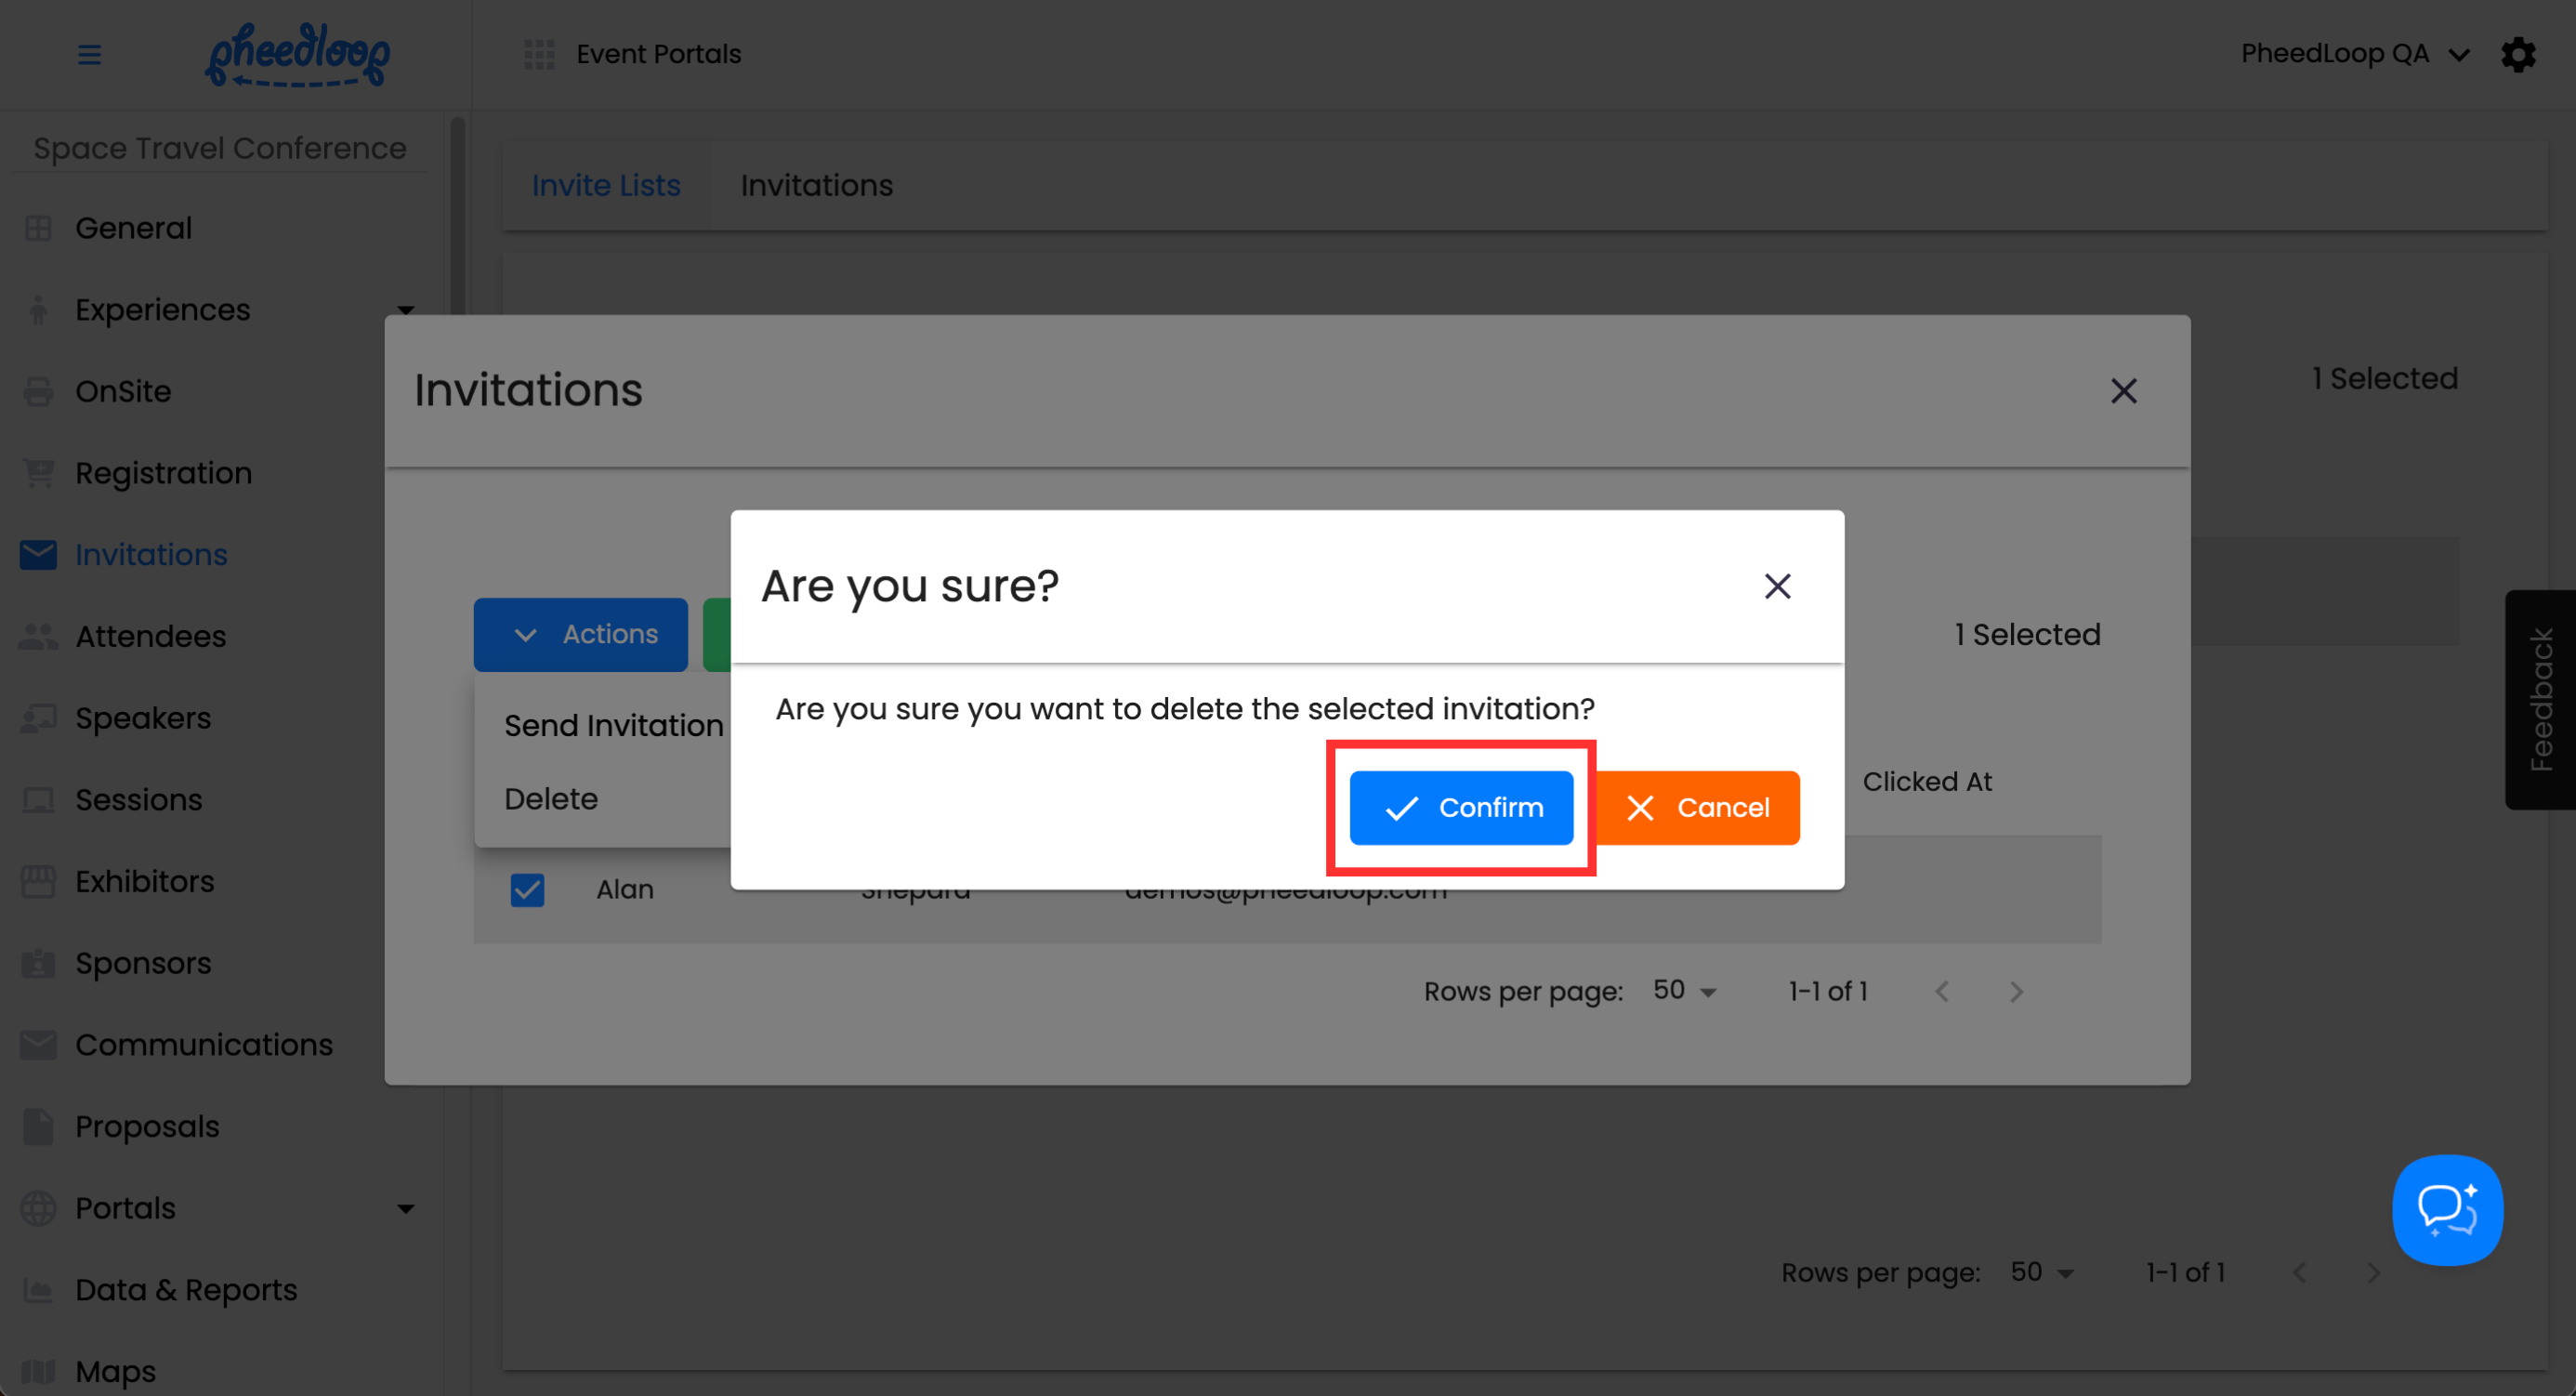
In the new window, select the Invitee you wish to remove from the list and select Actions > Delete
-
Select Confirm


Quick Tip - You can also remove Invitees from the Invites tab.

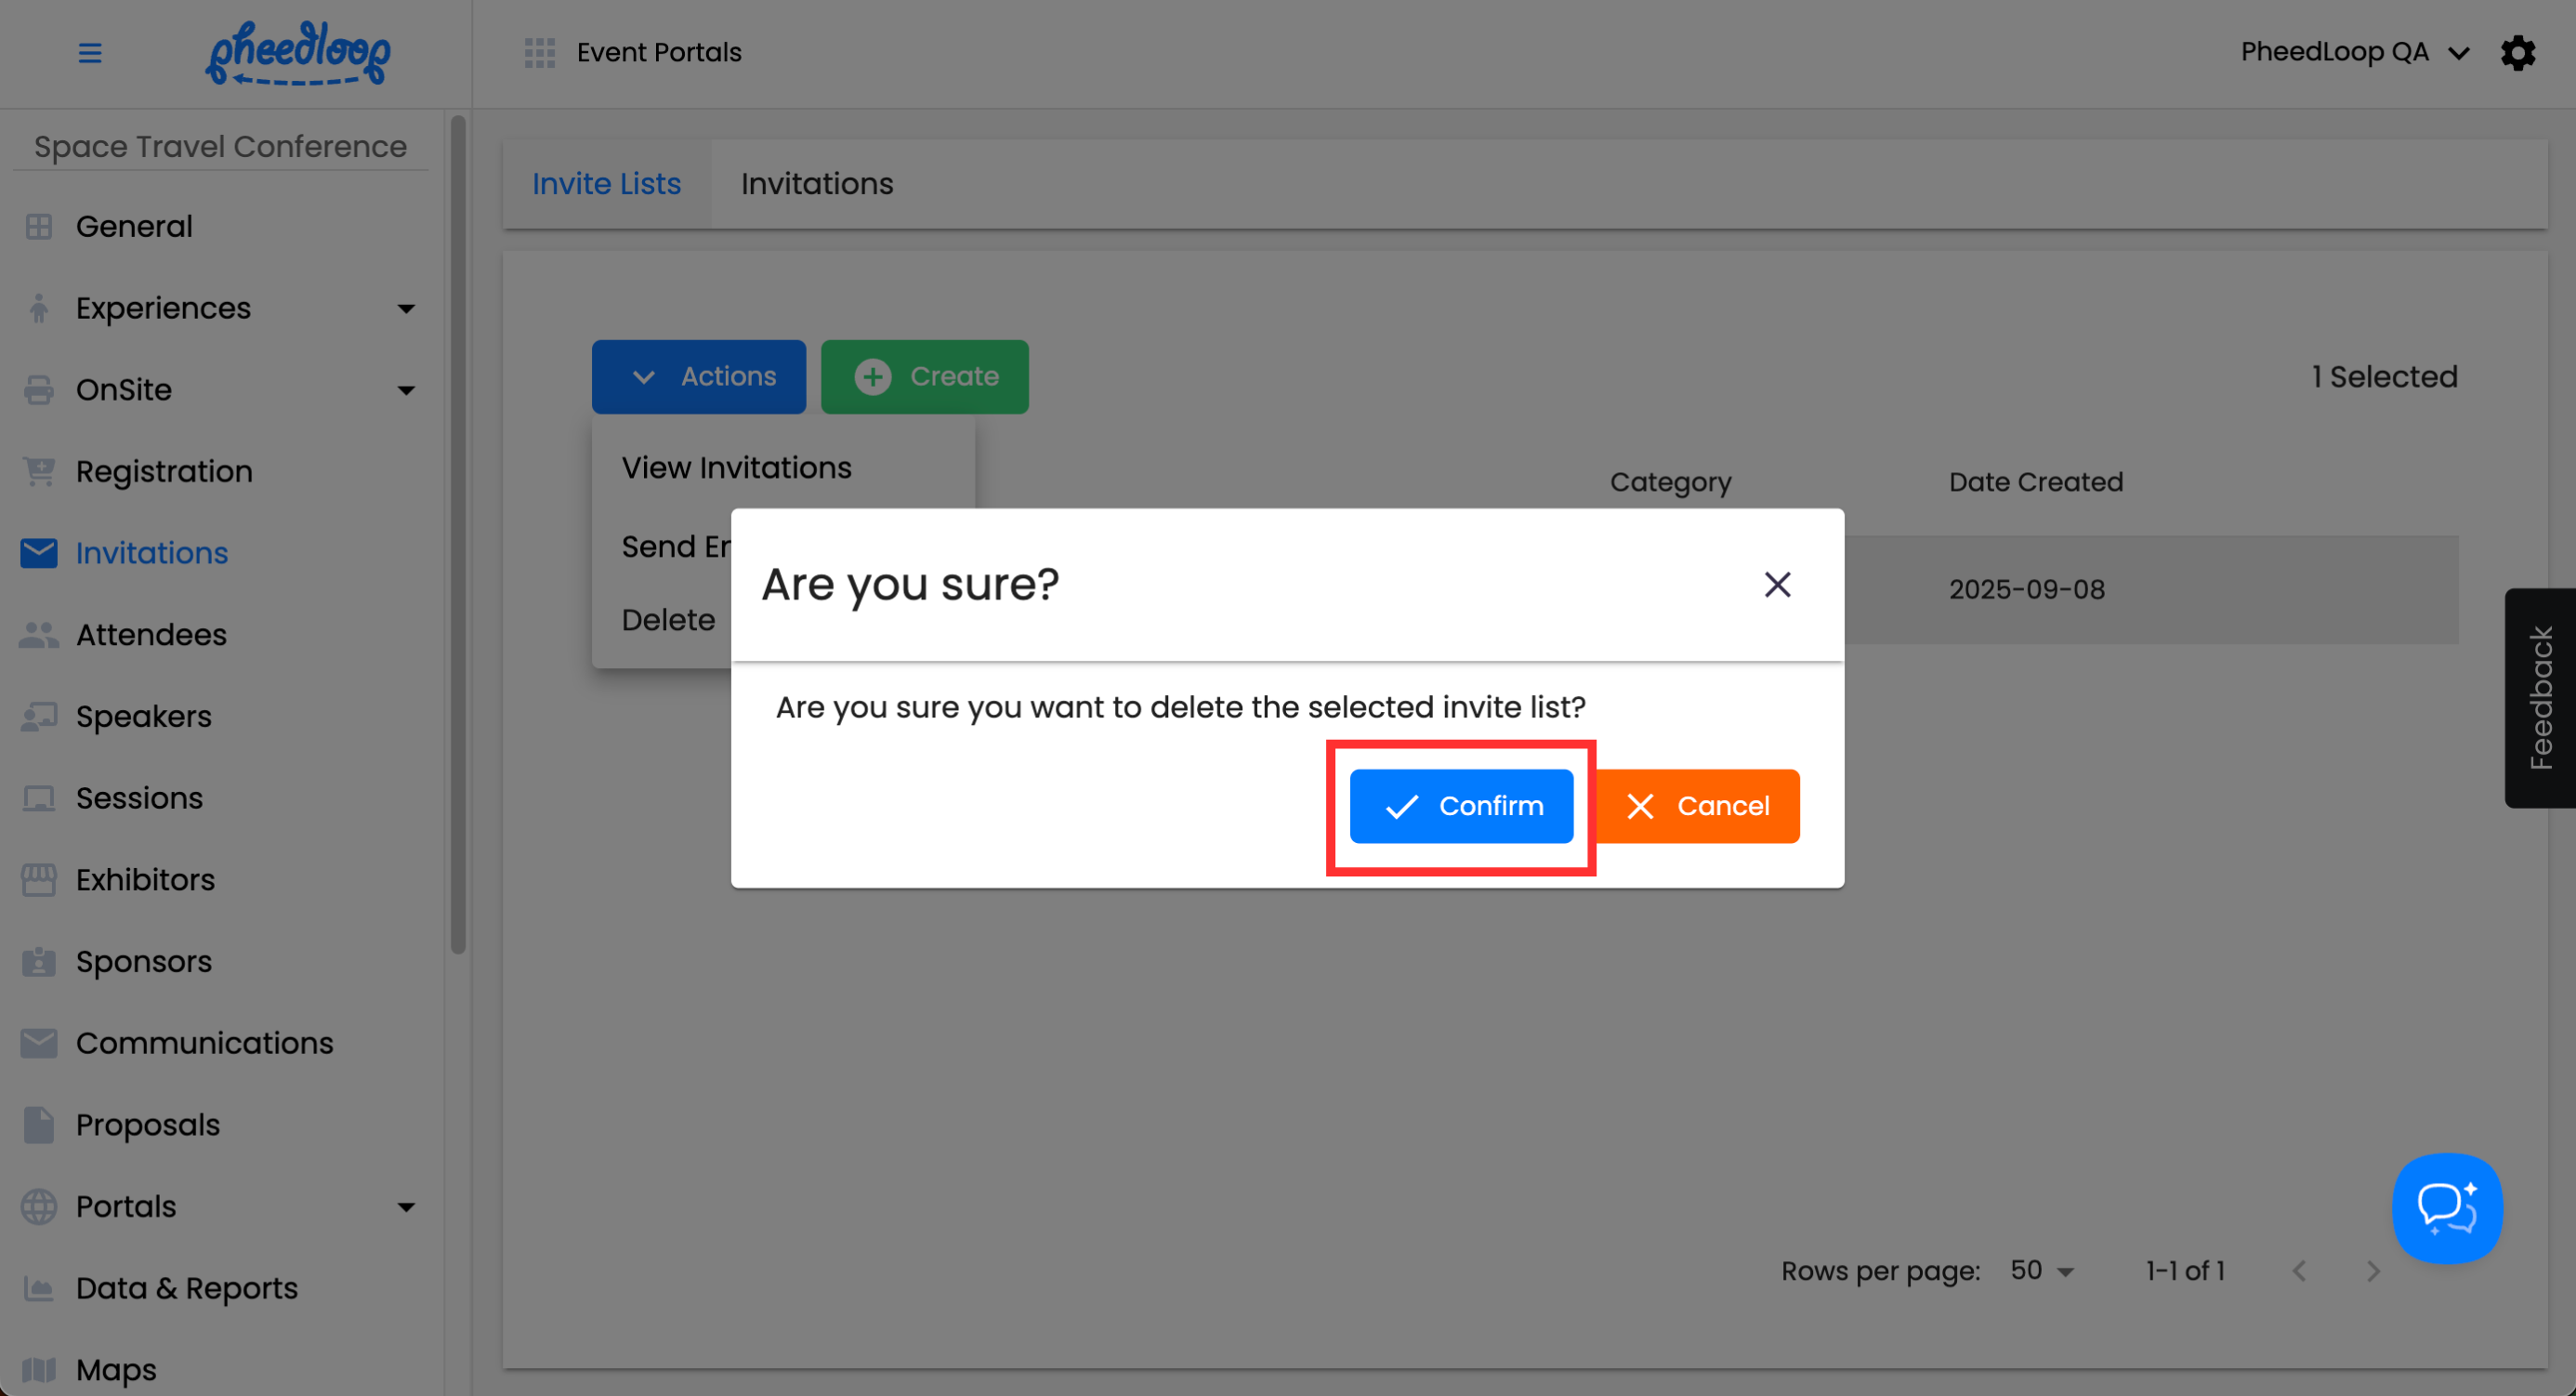
You can also delete an Invite List entirely if no longer necessary, though we do not recommend doing this for record-keeping purposes. Deleting an Invite List will remove all Invitees associated with the list. If an Invitee is listed in multiple Invite Lists, they will remain until all relevant lists have been deleted.
- From the Event Dashboard, navigate to Invitations > Invite Lists
- Select the Invite List you wish to adjust from the list
-
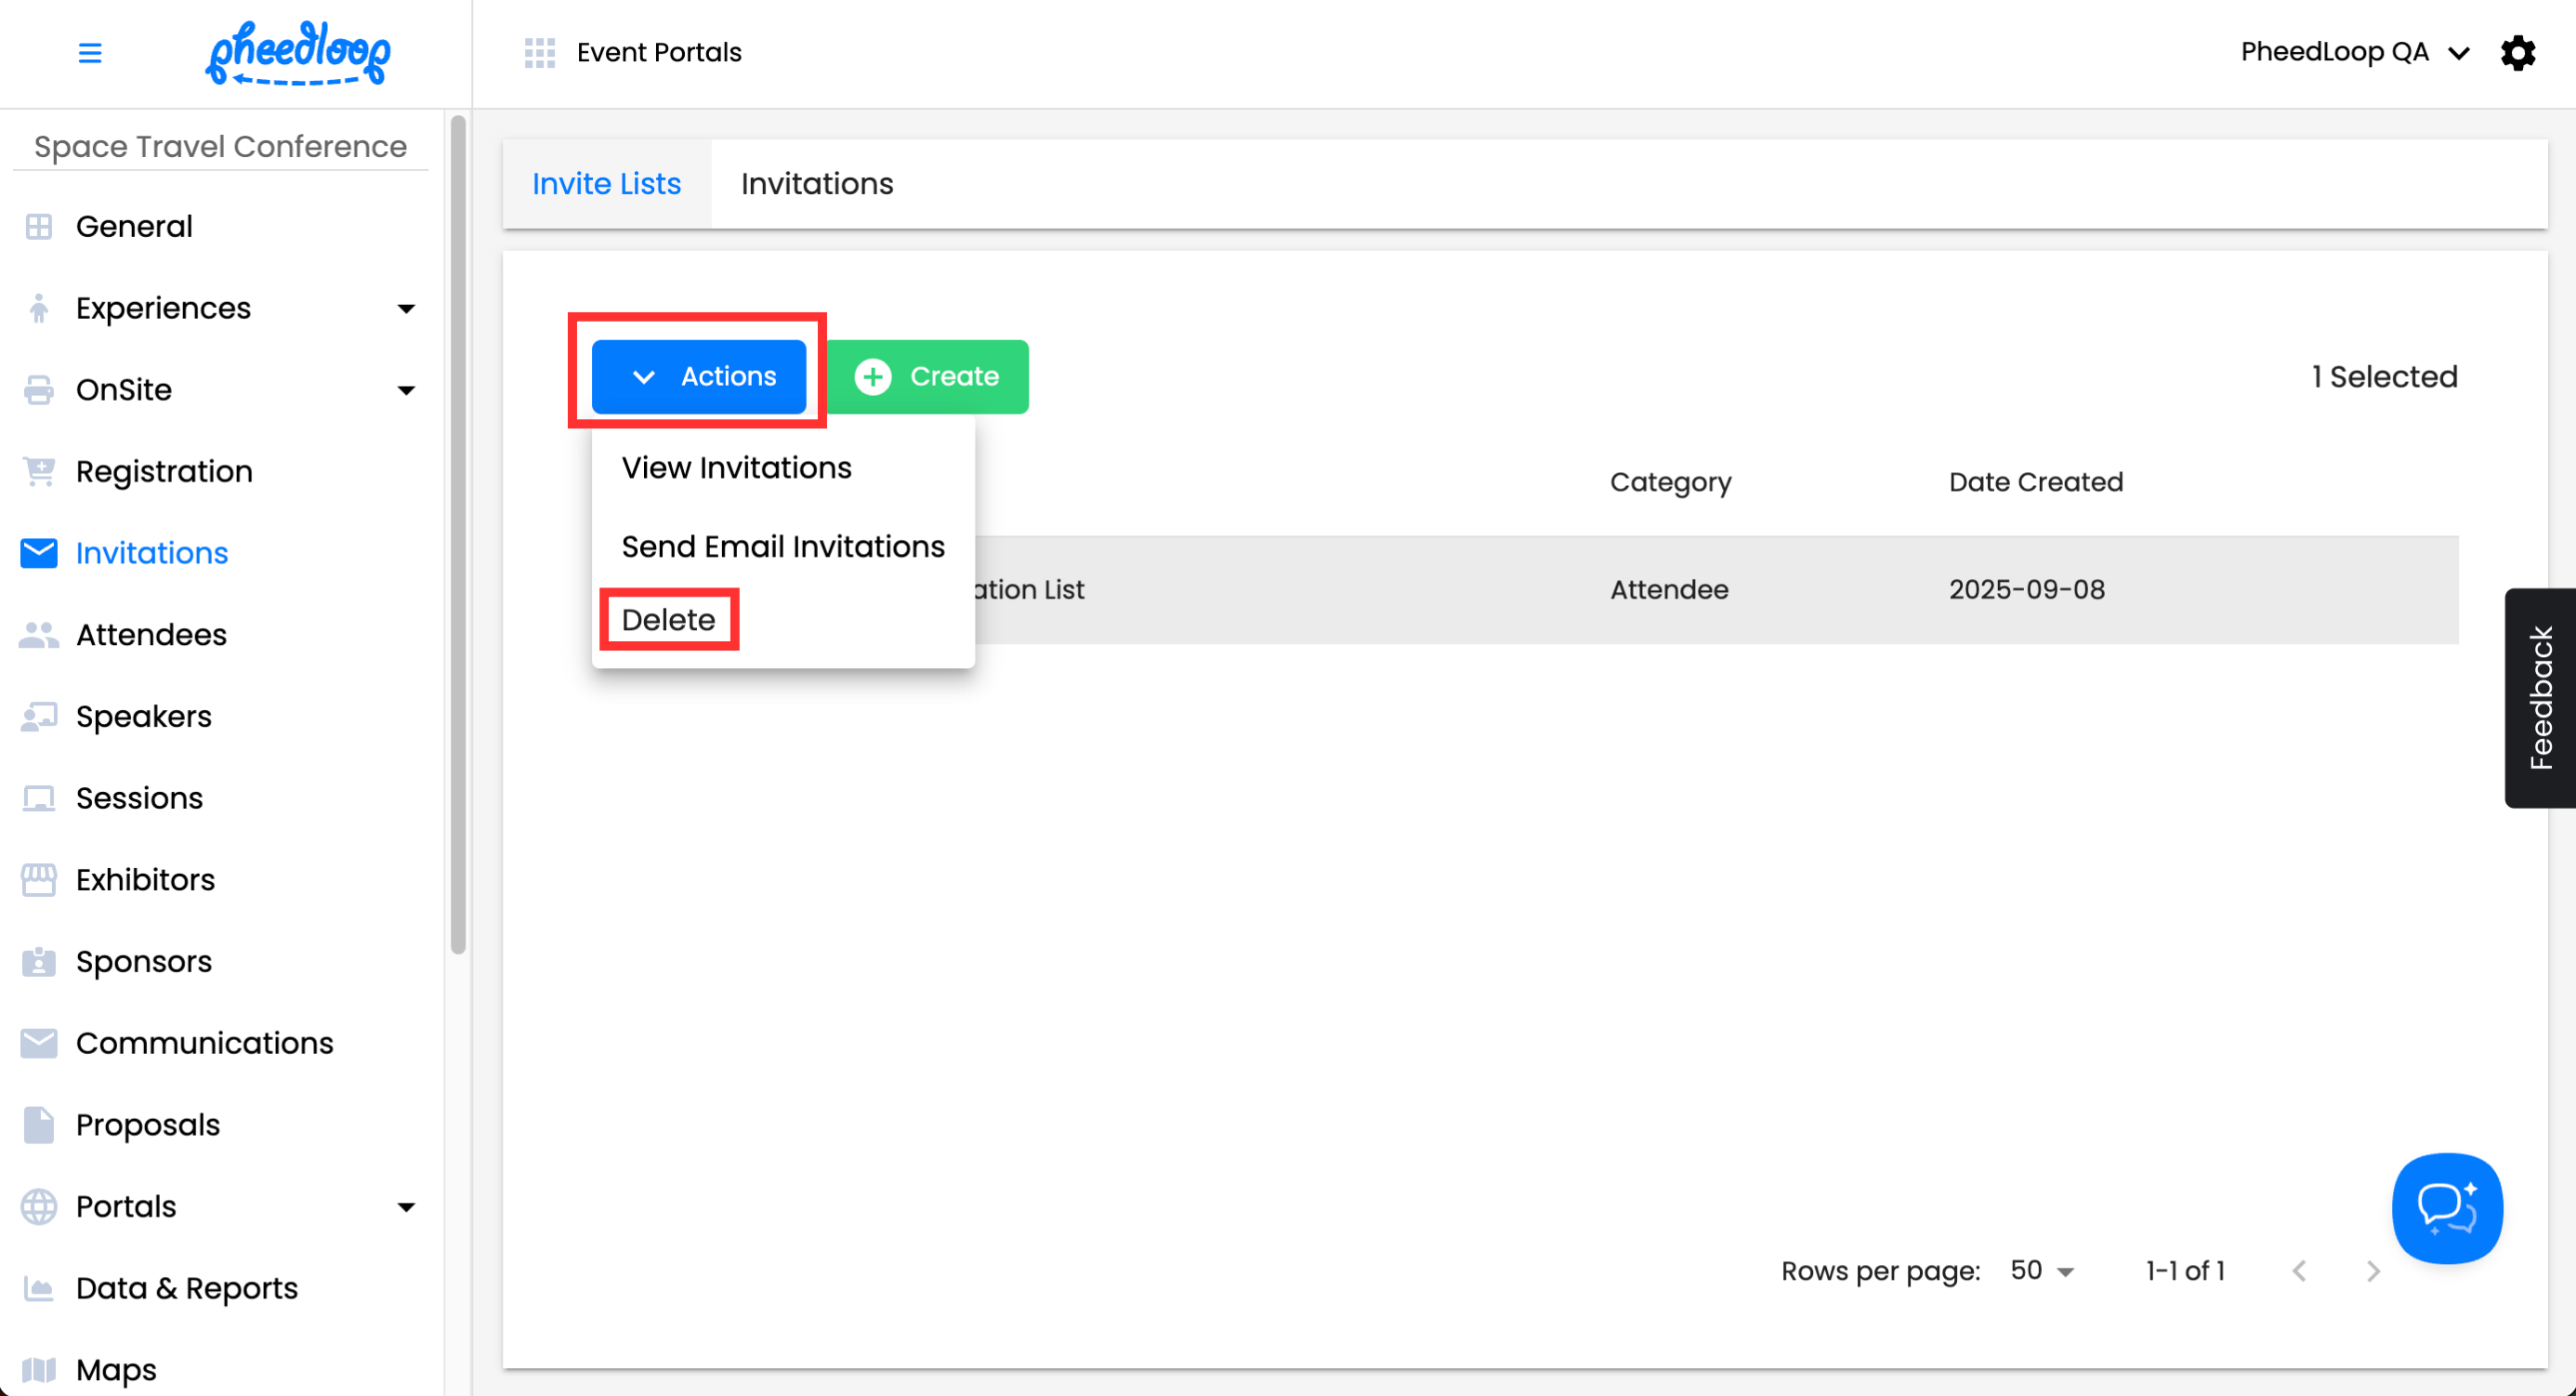
Above the Invite Lists table, select Actions > Delete
-
Select Confirm