Manually Processing Orders and Payments for Exhibitors
In the same way that an Event Administrator can send receipts and invoices manually to attendees, the same can be done for exhibitors. Manually processing orders and payments can include things like standard invoices, adding promotions, products, and more.
This is something that you may want to consider using if you are looking to manually process an Exhibitor application on the backend as an event admin. However, please note that all exhibitor applications that come through the application system will show up in the same area, and you will be able to edit them accordingly.
Please note, you will need to have the Sponsor & Exhibitor Application System module purchased for this processing feature.
Contents
- Manual Processing Payments for Exhibitors
- Adding Refunds to Exhibitors
- Downloading and Sending Contracts to Exhibitors
- Downloading Reports for Exhibitor Orders
Manual Processing Payments for Exhibitors
Adding Purchases to Exhibitors
- From the Event Dashboard, navigate to Exhibitors > Exhibitors
- Select an exhibitor you would like to adjust from the list
- In the exhibitor editor form, navigate to Order Summary
-
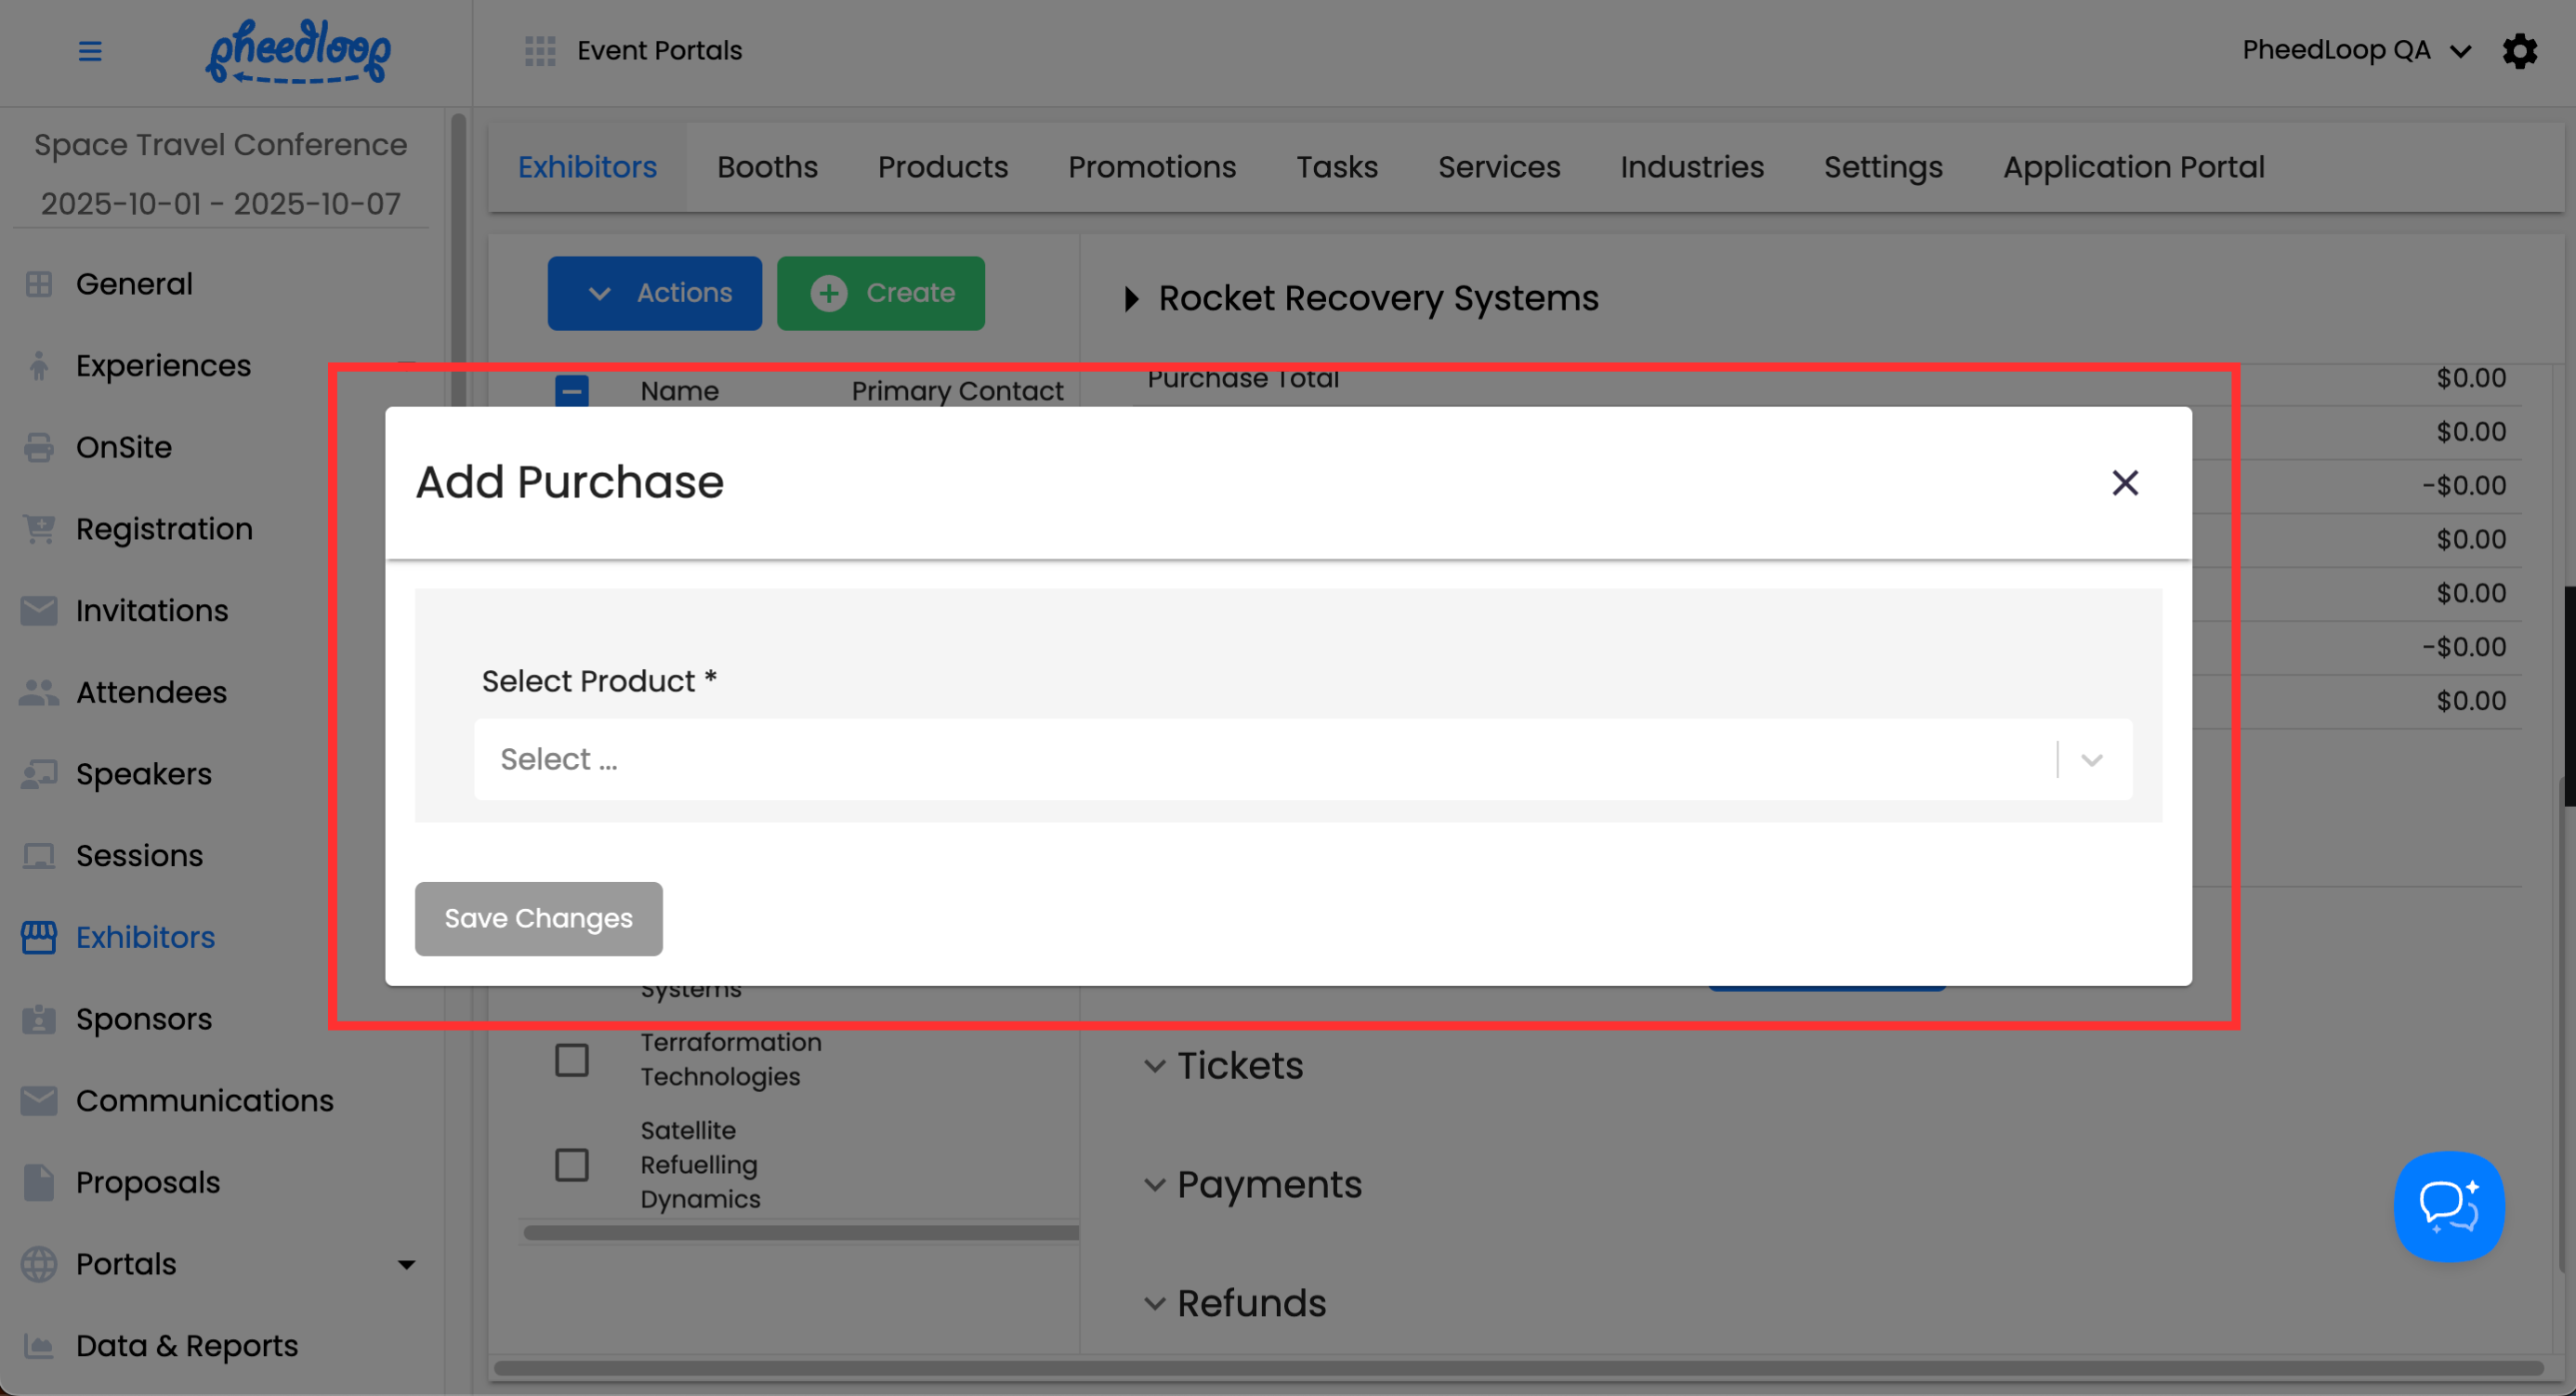
Under Purchases, select Add Purchase > Select Product
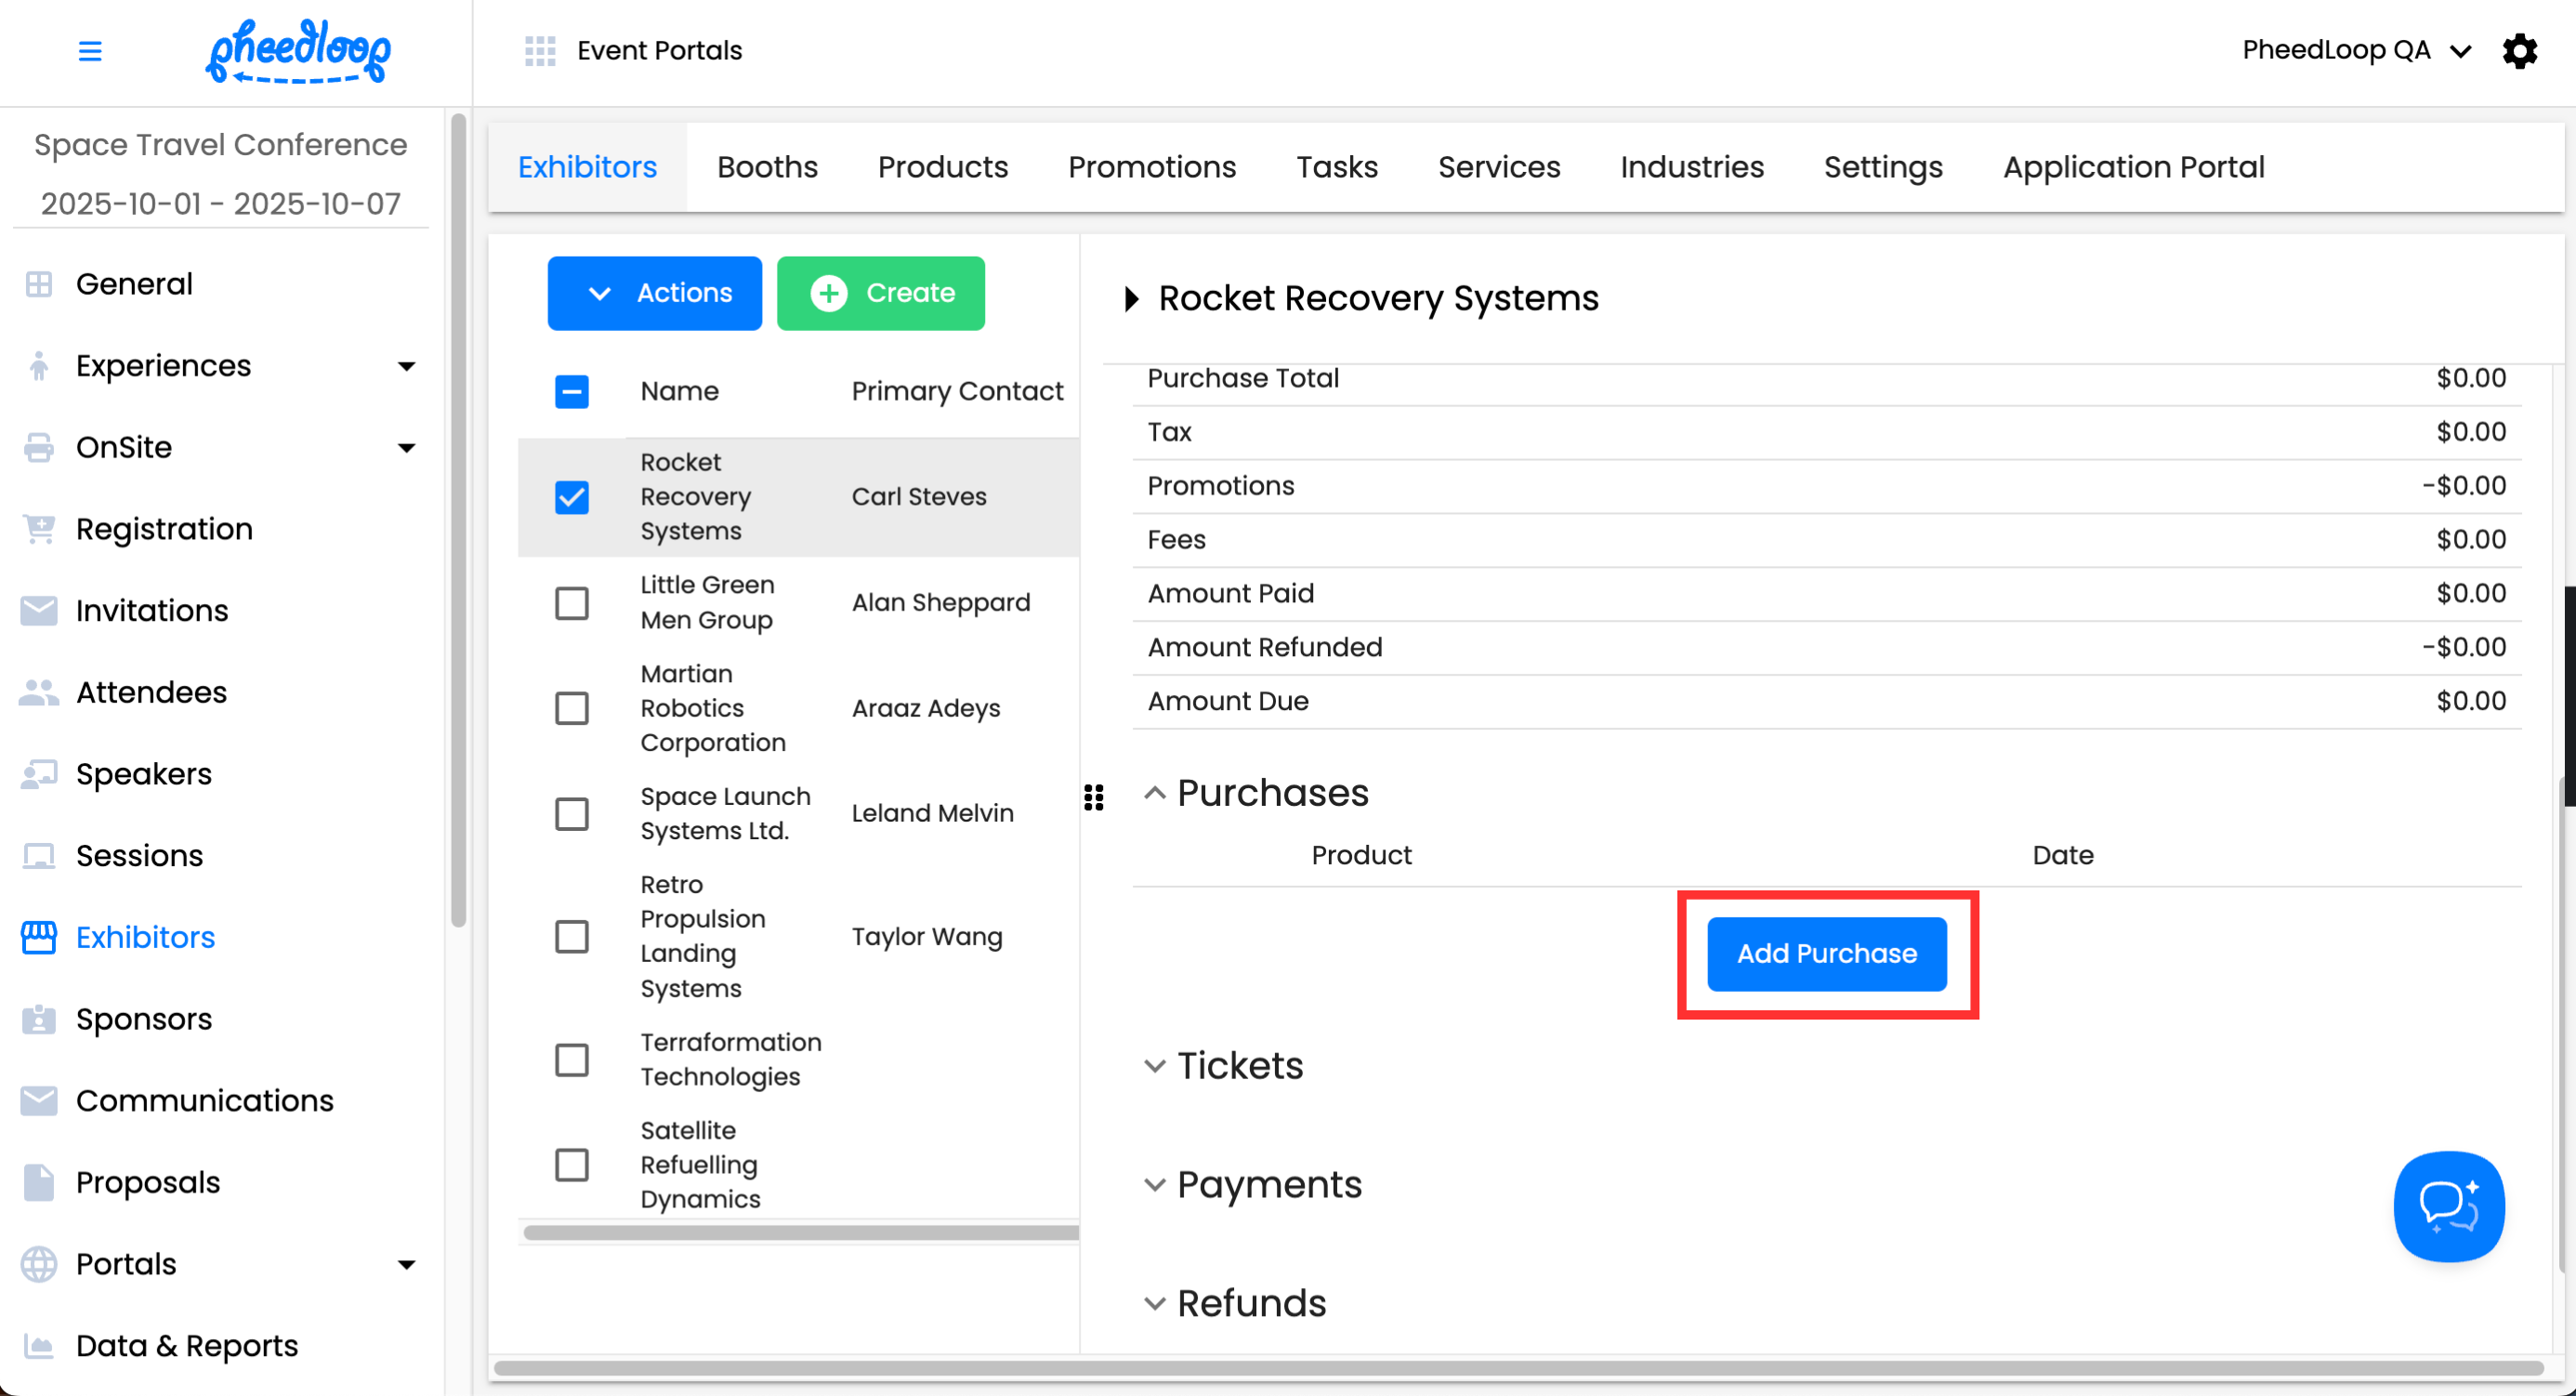
- A new window will appear, select the product you wish to assign under the Select Product field
-
Select Save Changes


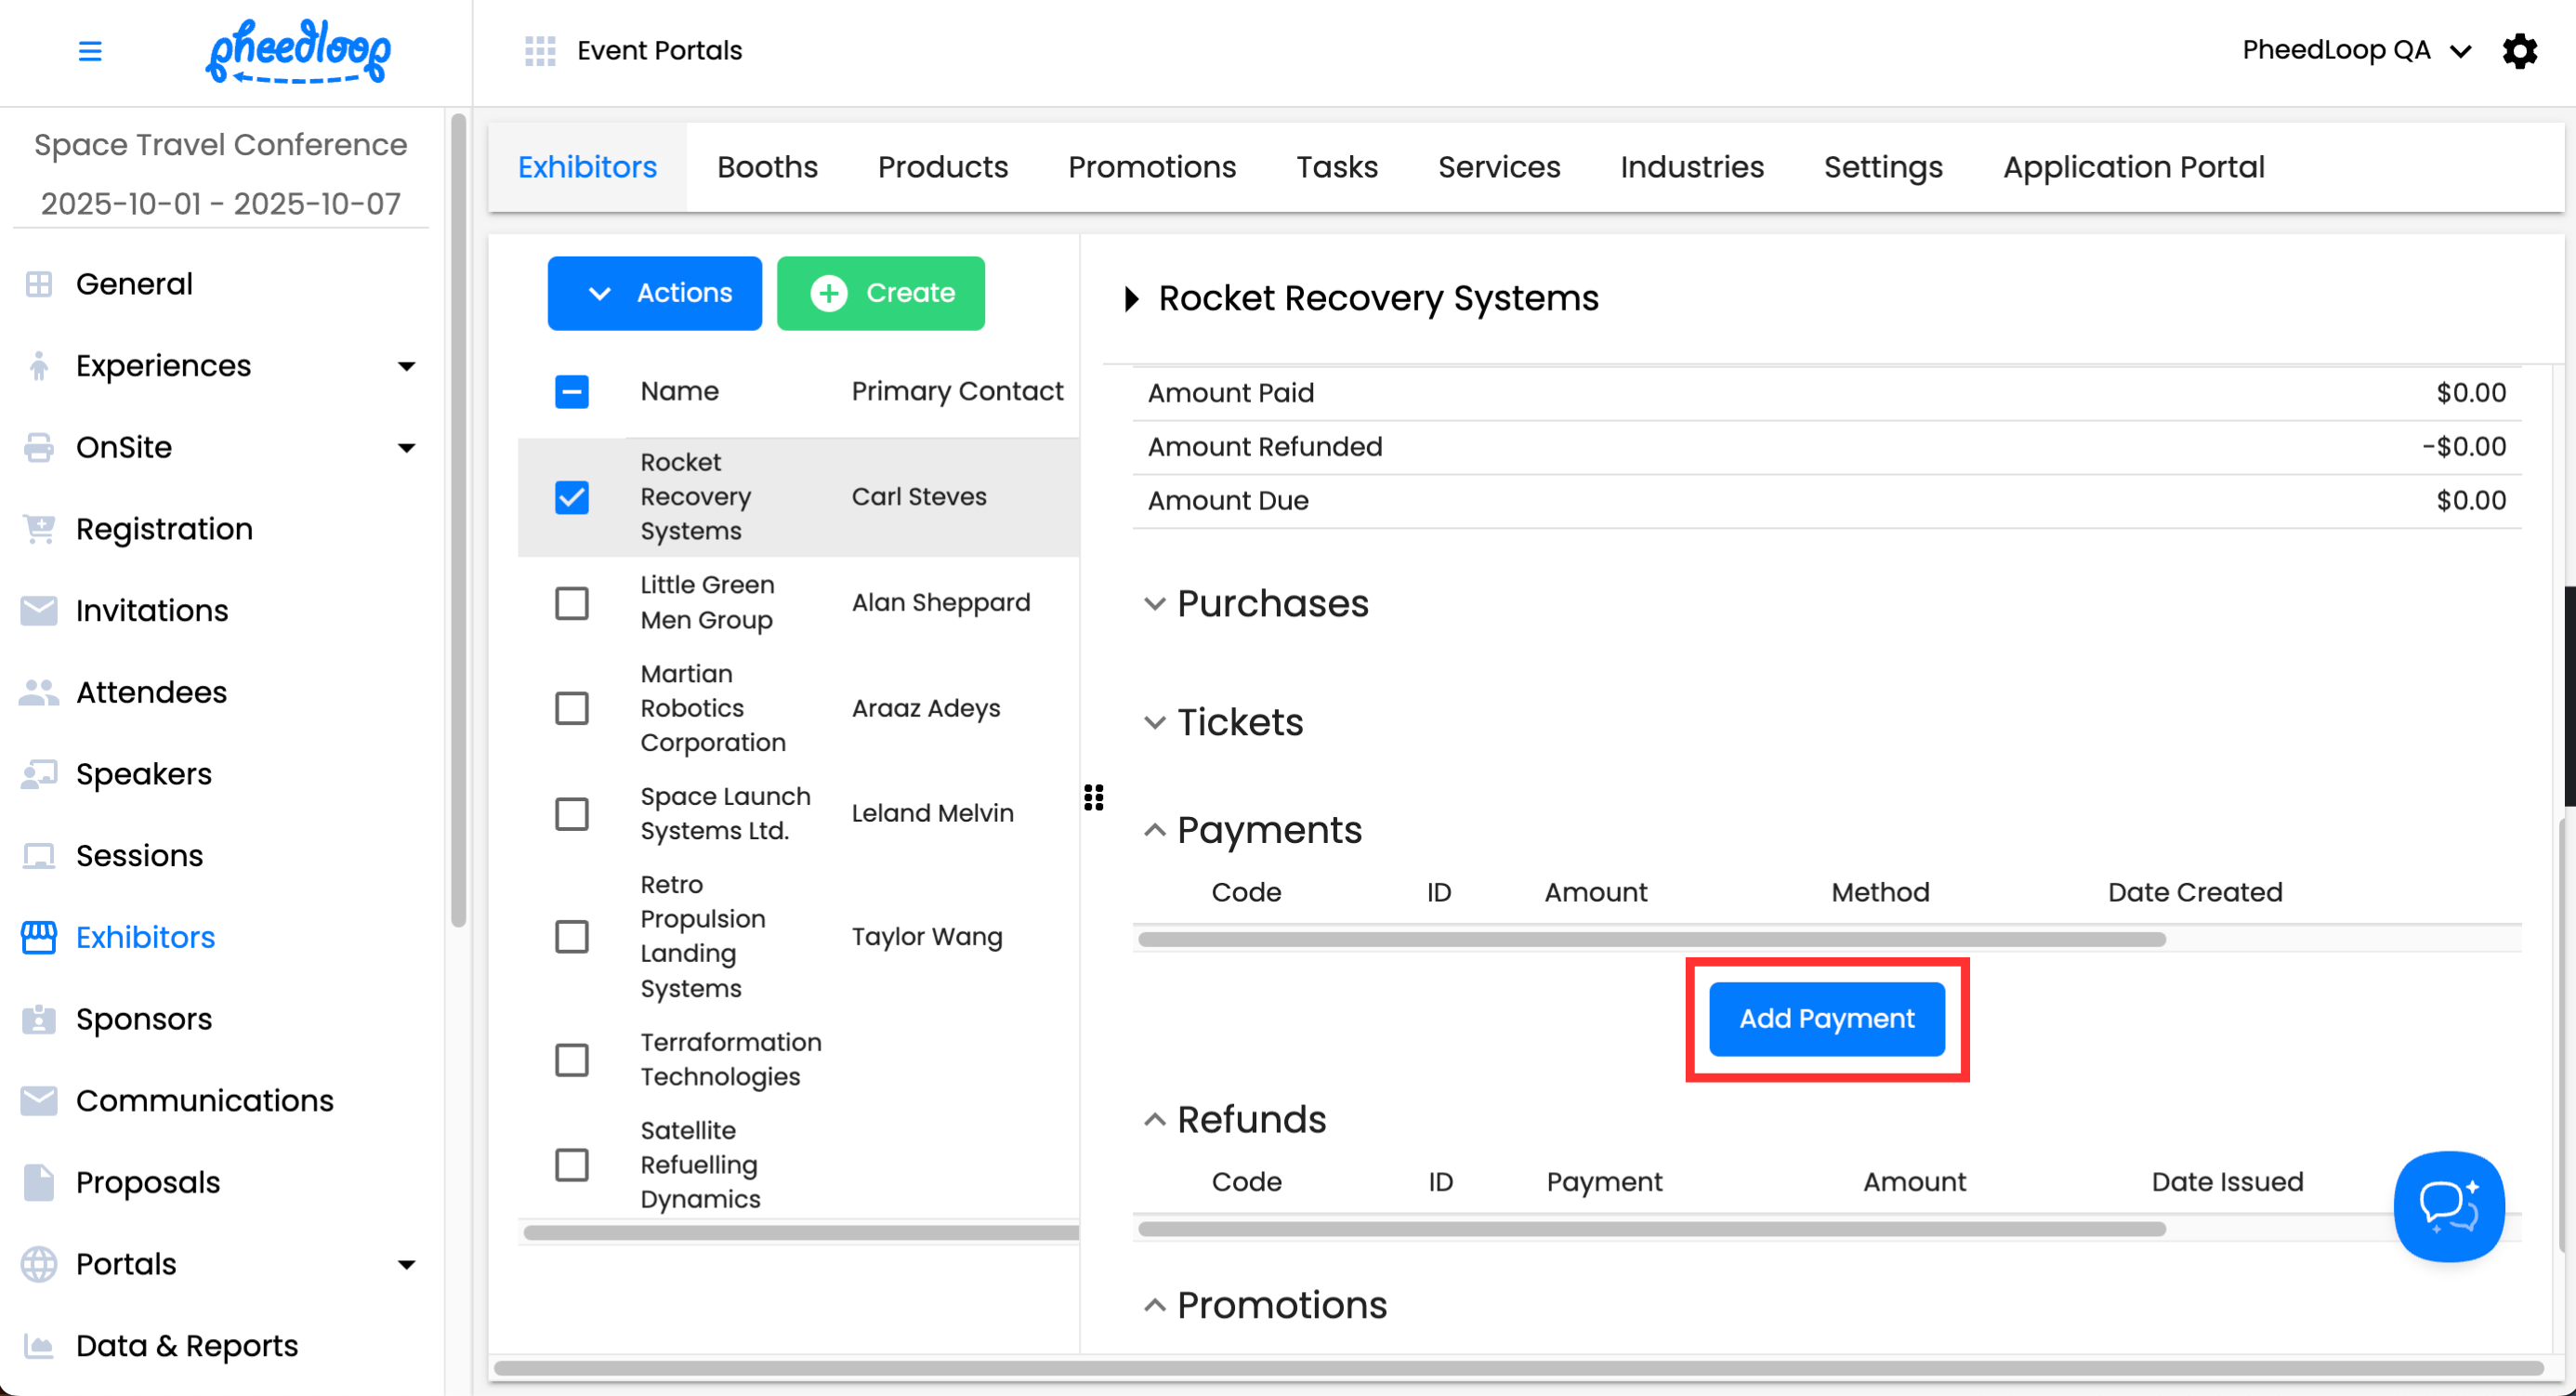
Adding Payments to Exhibitors
- From the Event Dashboard, navigate to Exhibitors > Exhibitors
- Select an Exhibitor you would like to adjust from the list
- In the Exhibitor editor form, navigate to Order Summary
-
Under Payments, select Add Payment
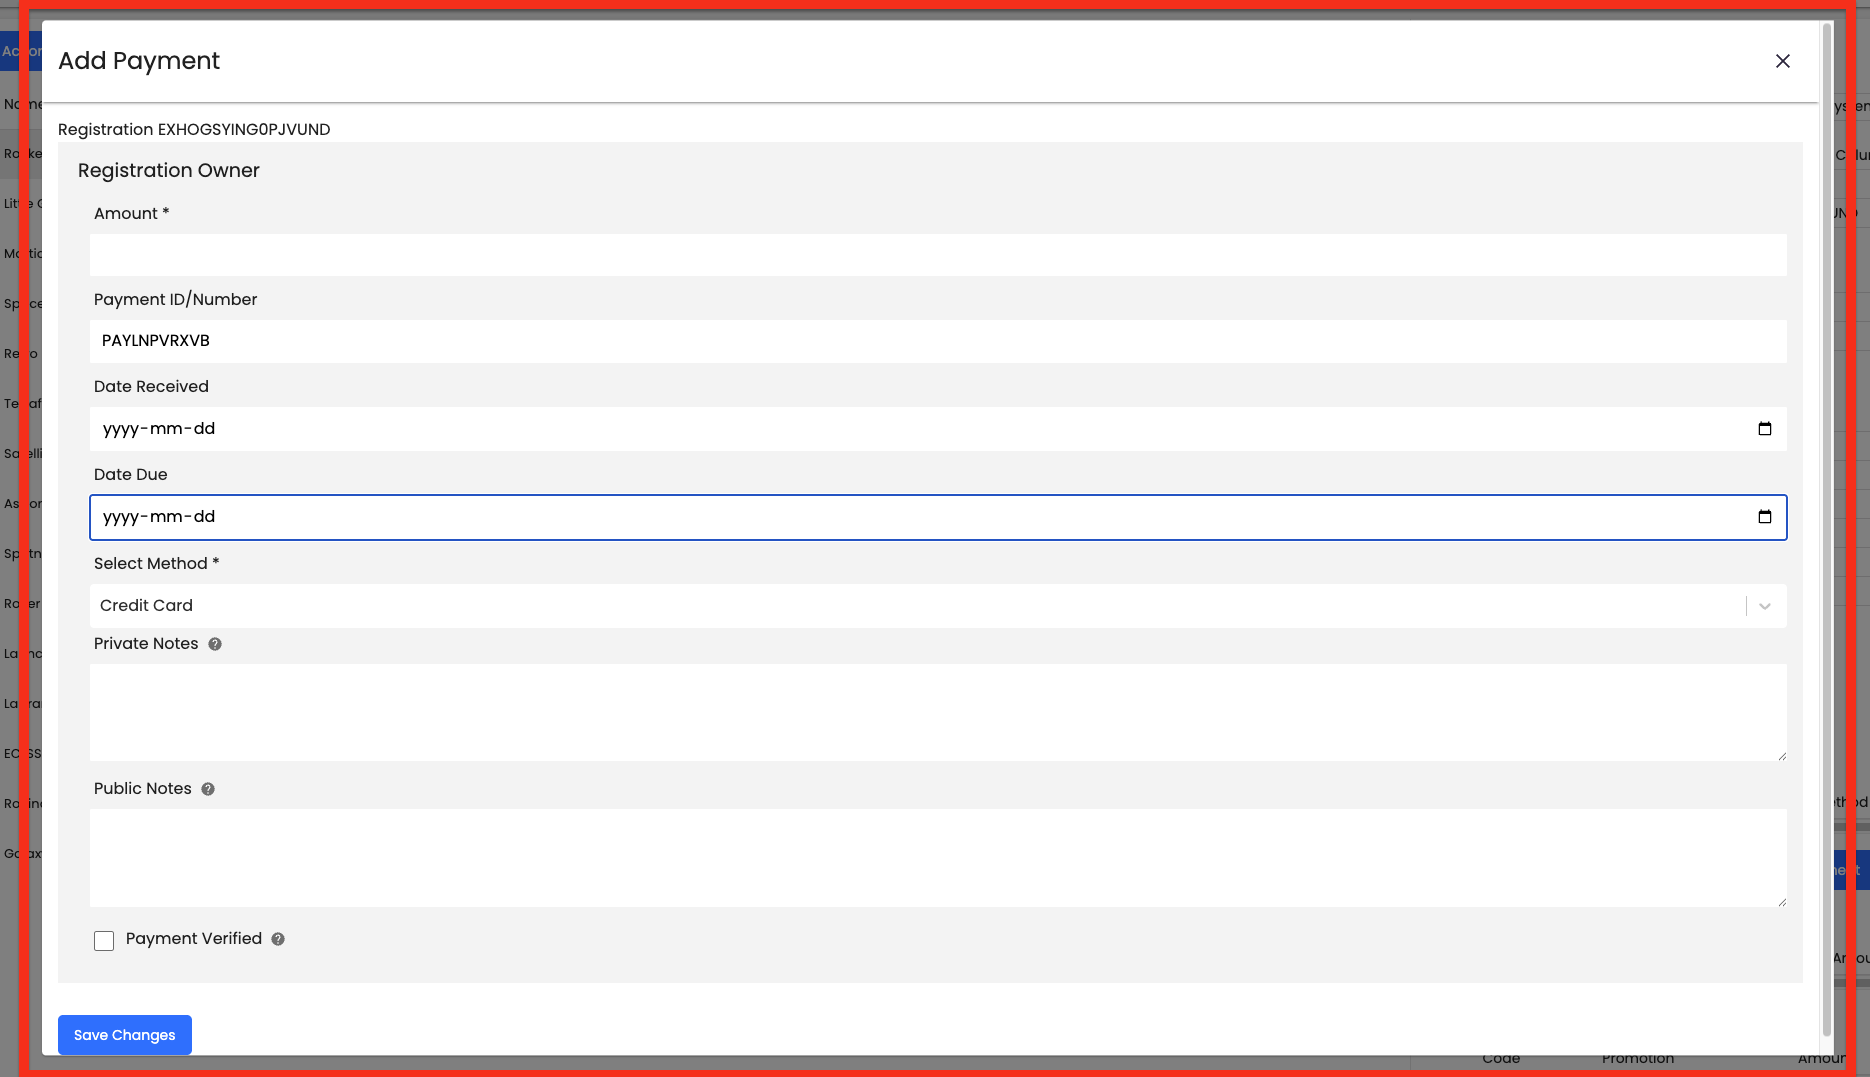
- Fill out Amount, Payment ID/Number, Date Received, Date Due, Private Notes, and Public Notes.
- Under Select Method, choose the payment method
- If you select a Credit Card payment method, you will be able to then send them a payment link. This payment link will also be shown in their Exhibitor Portal.
- Toggle on the Payment Verified checkbox
- This is only used if you ever want to verify the payment method. Typically used if the payment method is outside of the credit card. For example - if the method is checked, you receive the check and then verify it.
-
Select Save Changes


Editing Payments for Exhibitors
- From the Event Dashboard, navigate to Exhibitors > Exhibitors
- Select an Exhibitor you would like to adjust from the list
- In the Exhibitor editor form, navigate to Order Summary
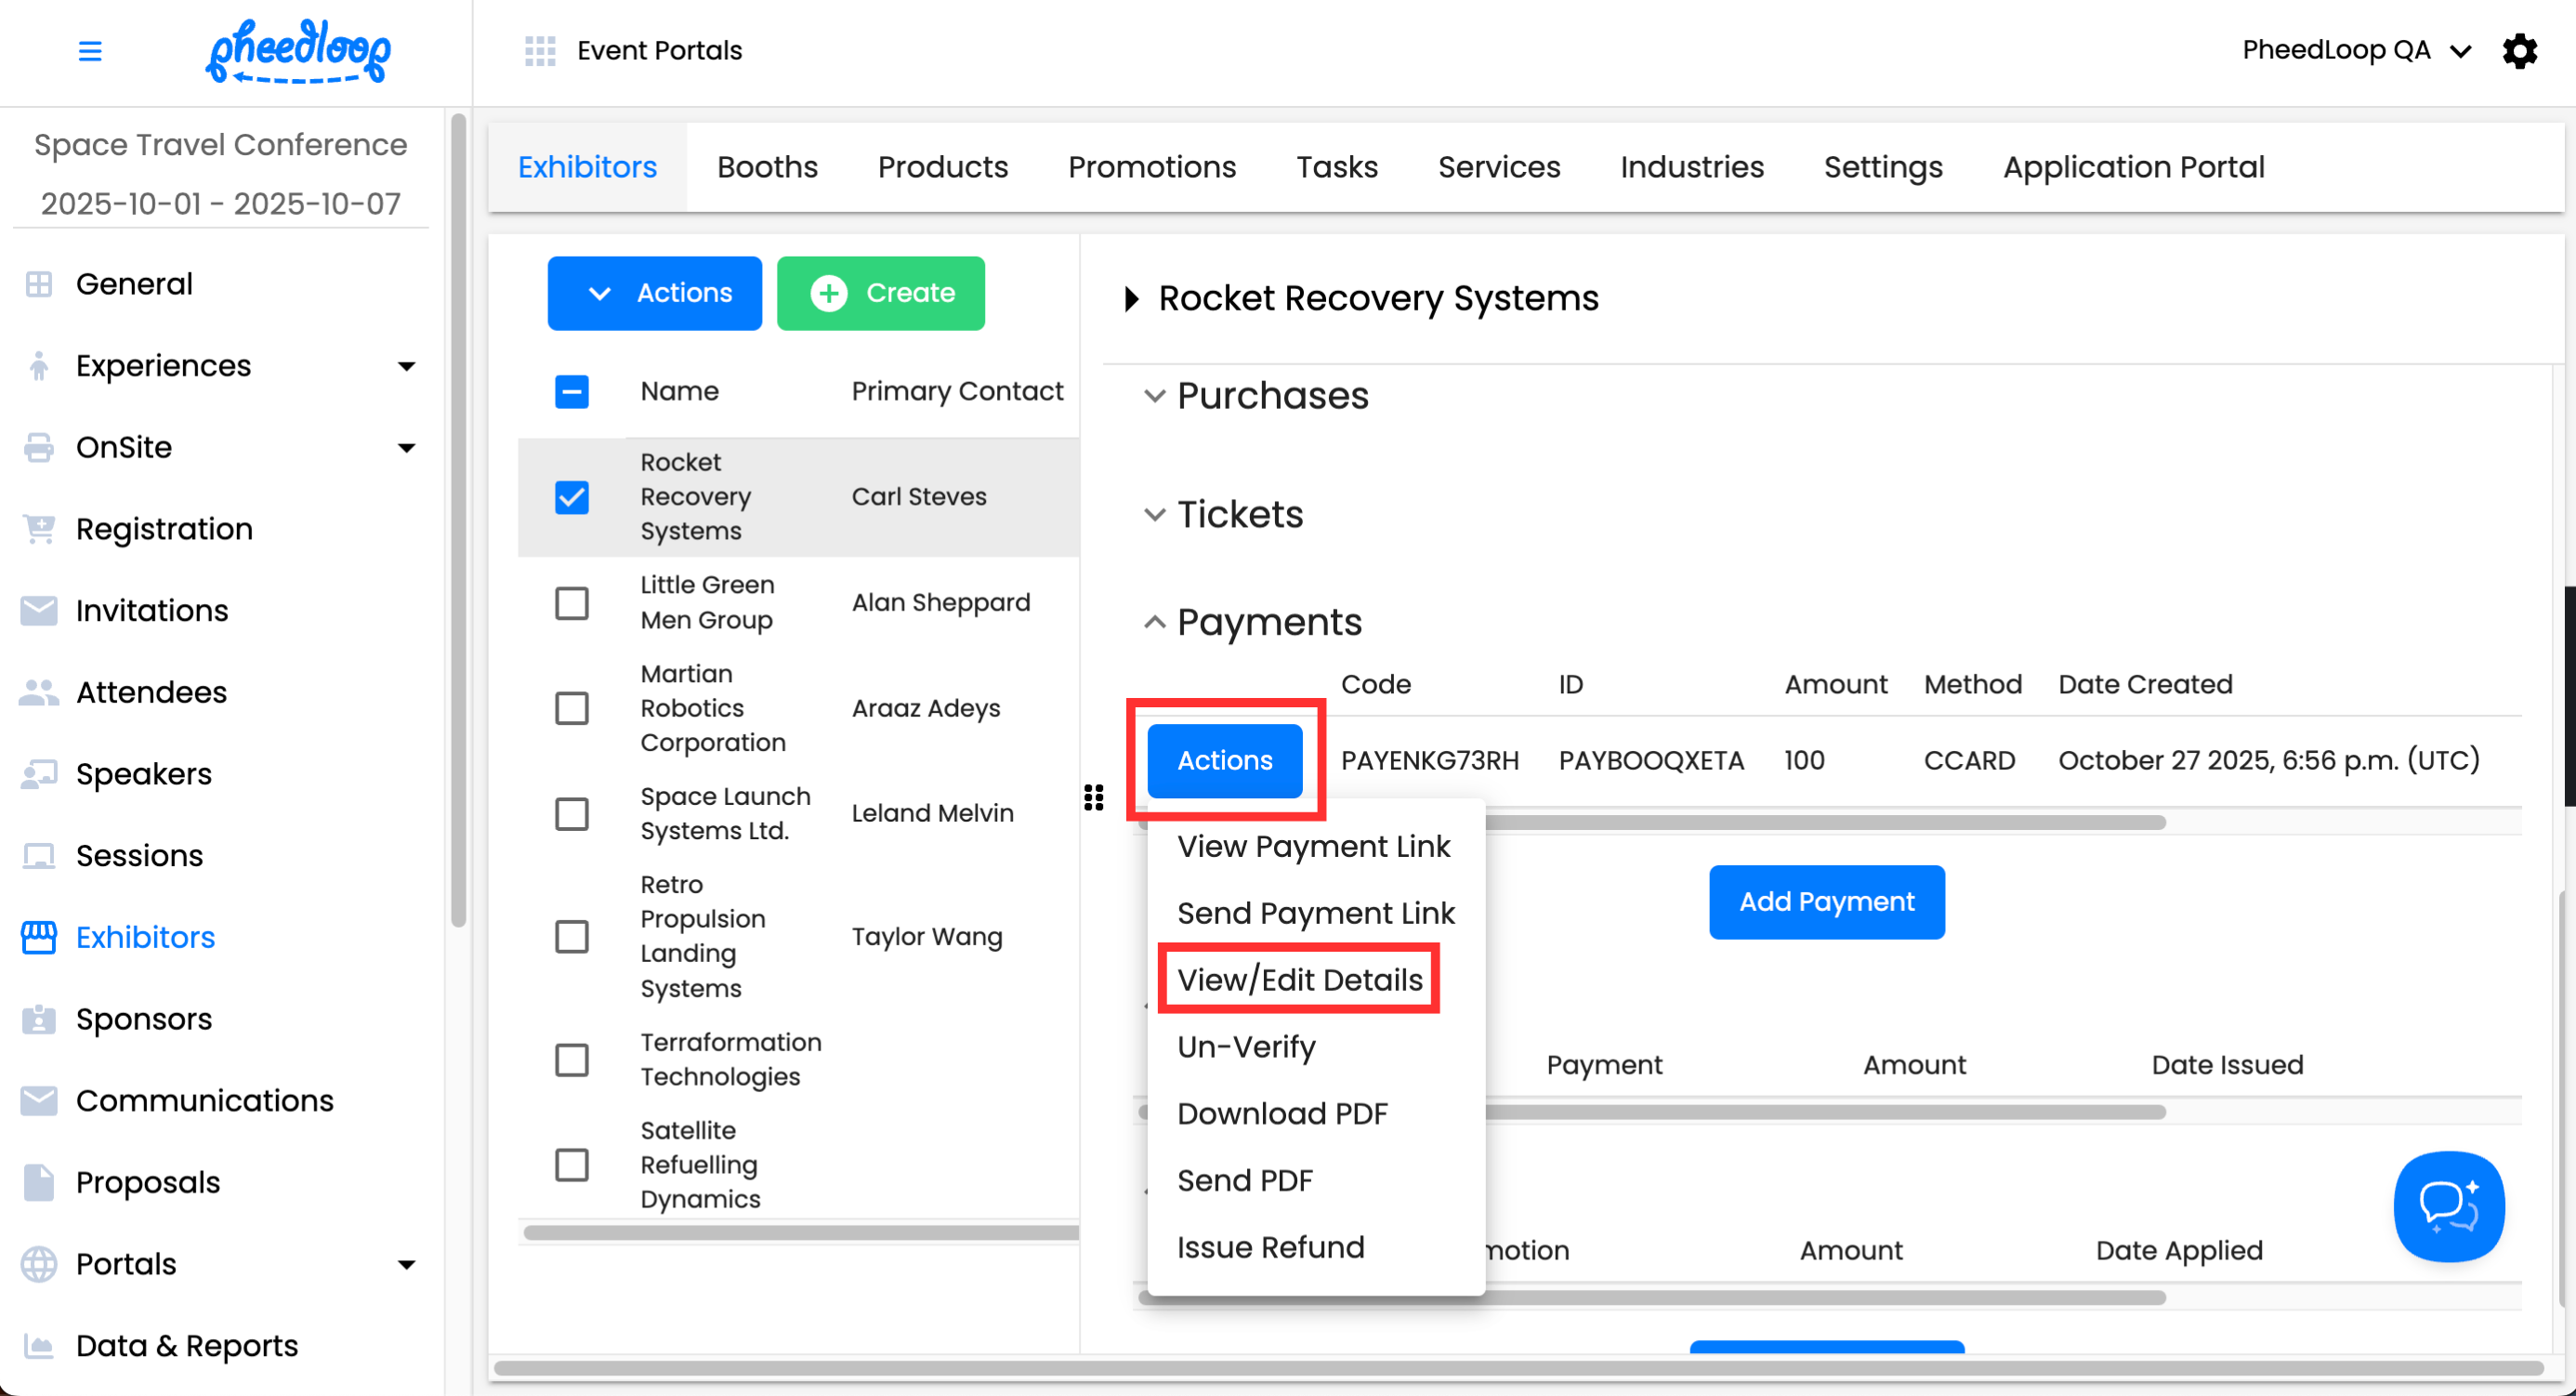
- Under Payments, select Actions beside the existing payment you would like to edit from the list
-
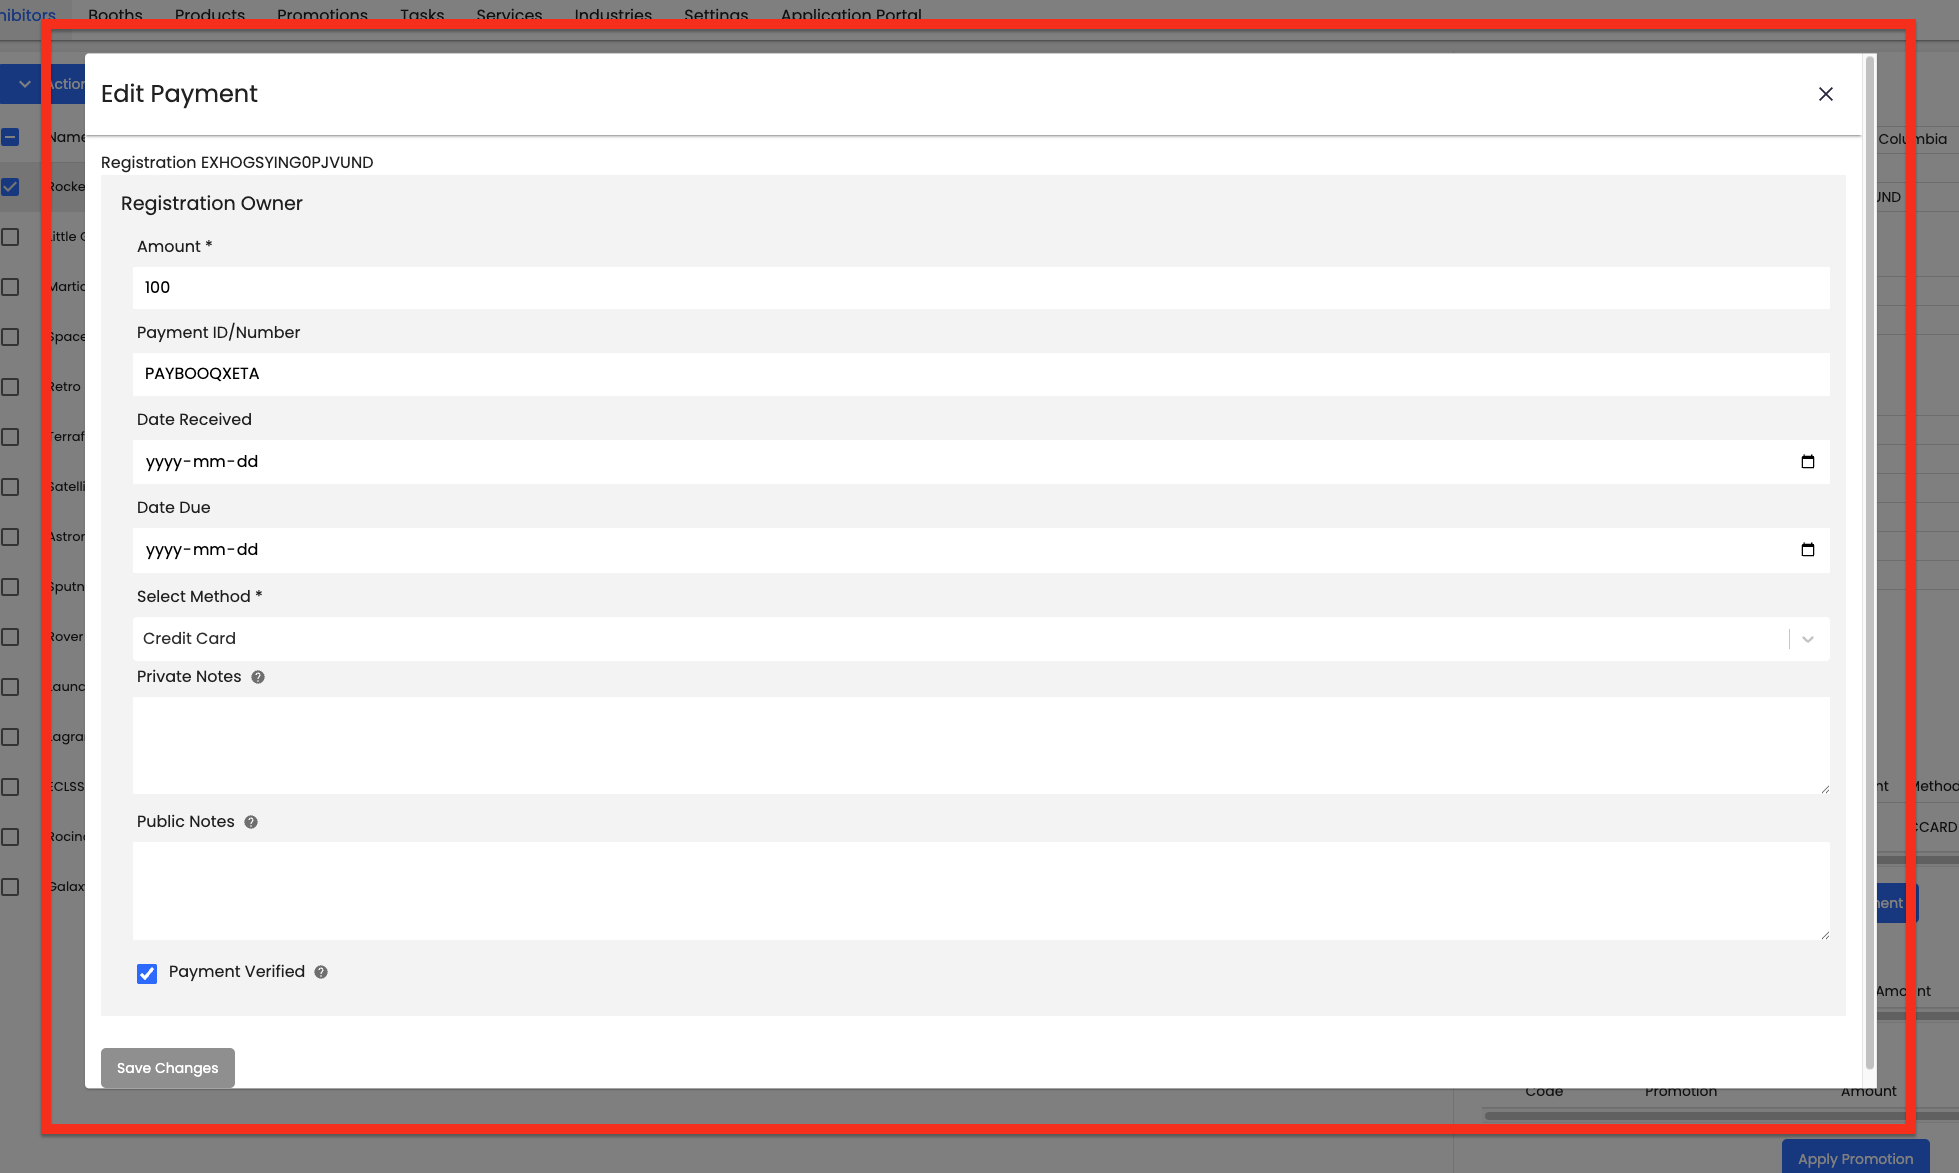
Select View/Edit Details
- In the payment editor form, adjust Amount, Payment ID/Number, Select Method, and more
-
Select Save Changes


Sending Payment Link to Exhibitors
Please note, this should only applies to payments with a Credit Card. This feature is not intended for other payment methods.
- From the Event Dashboard, navigate to Exhibitors > Exhibitors
- Select an Exhibitor you would like to adjust from the list
- In the Exhibitor Editor Form, navigate to Order Summary
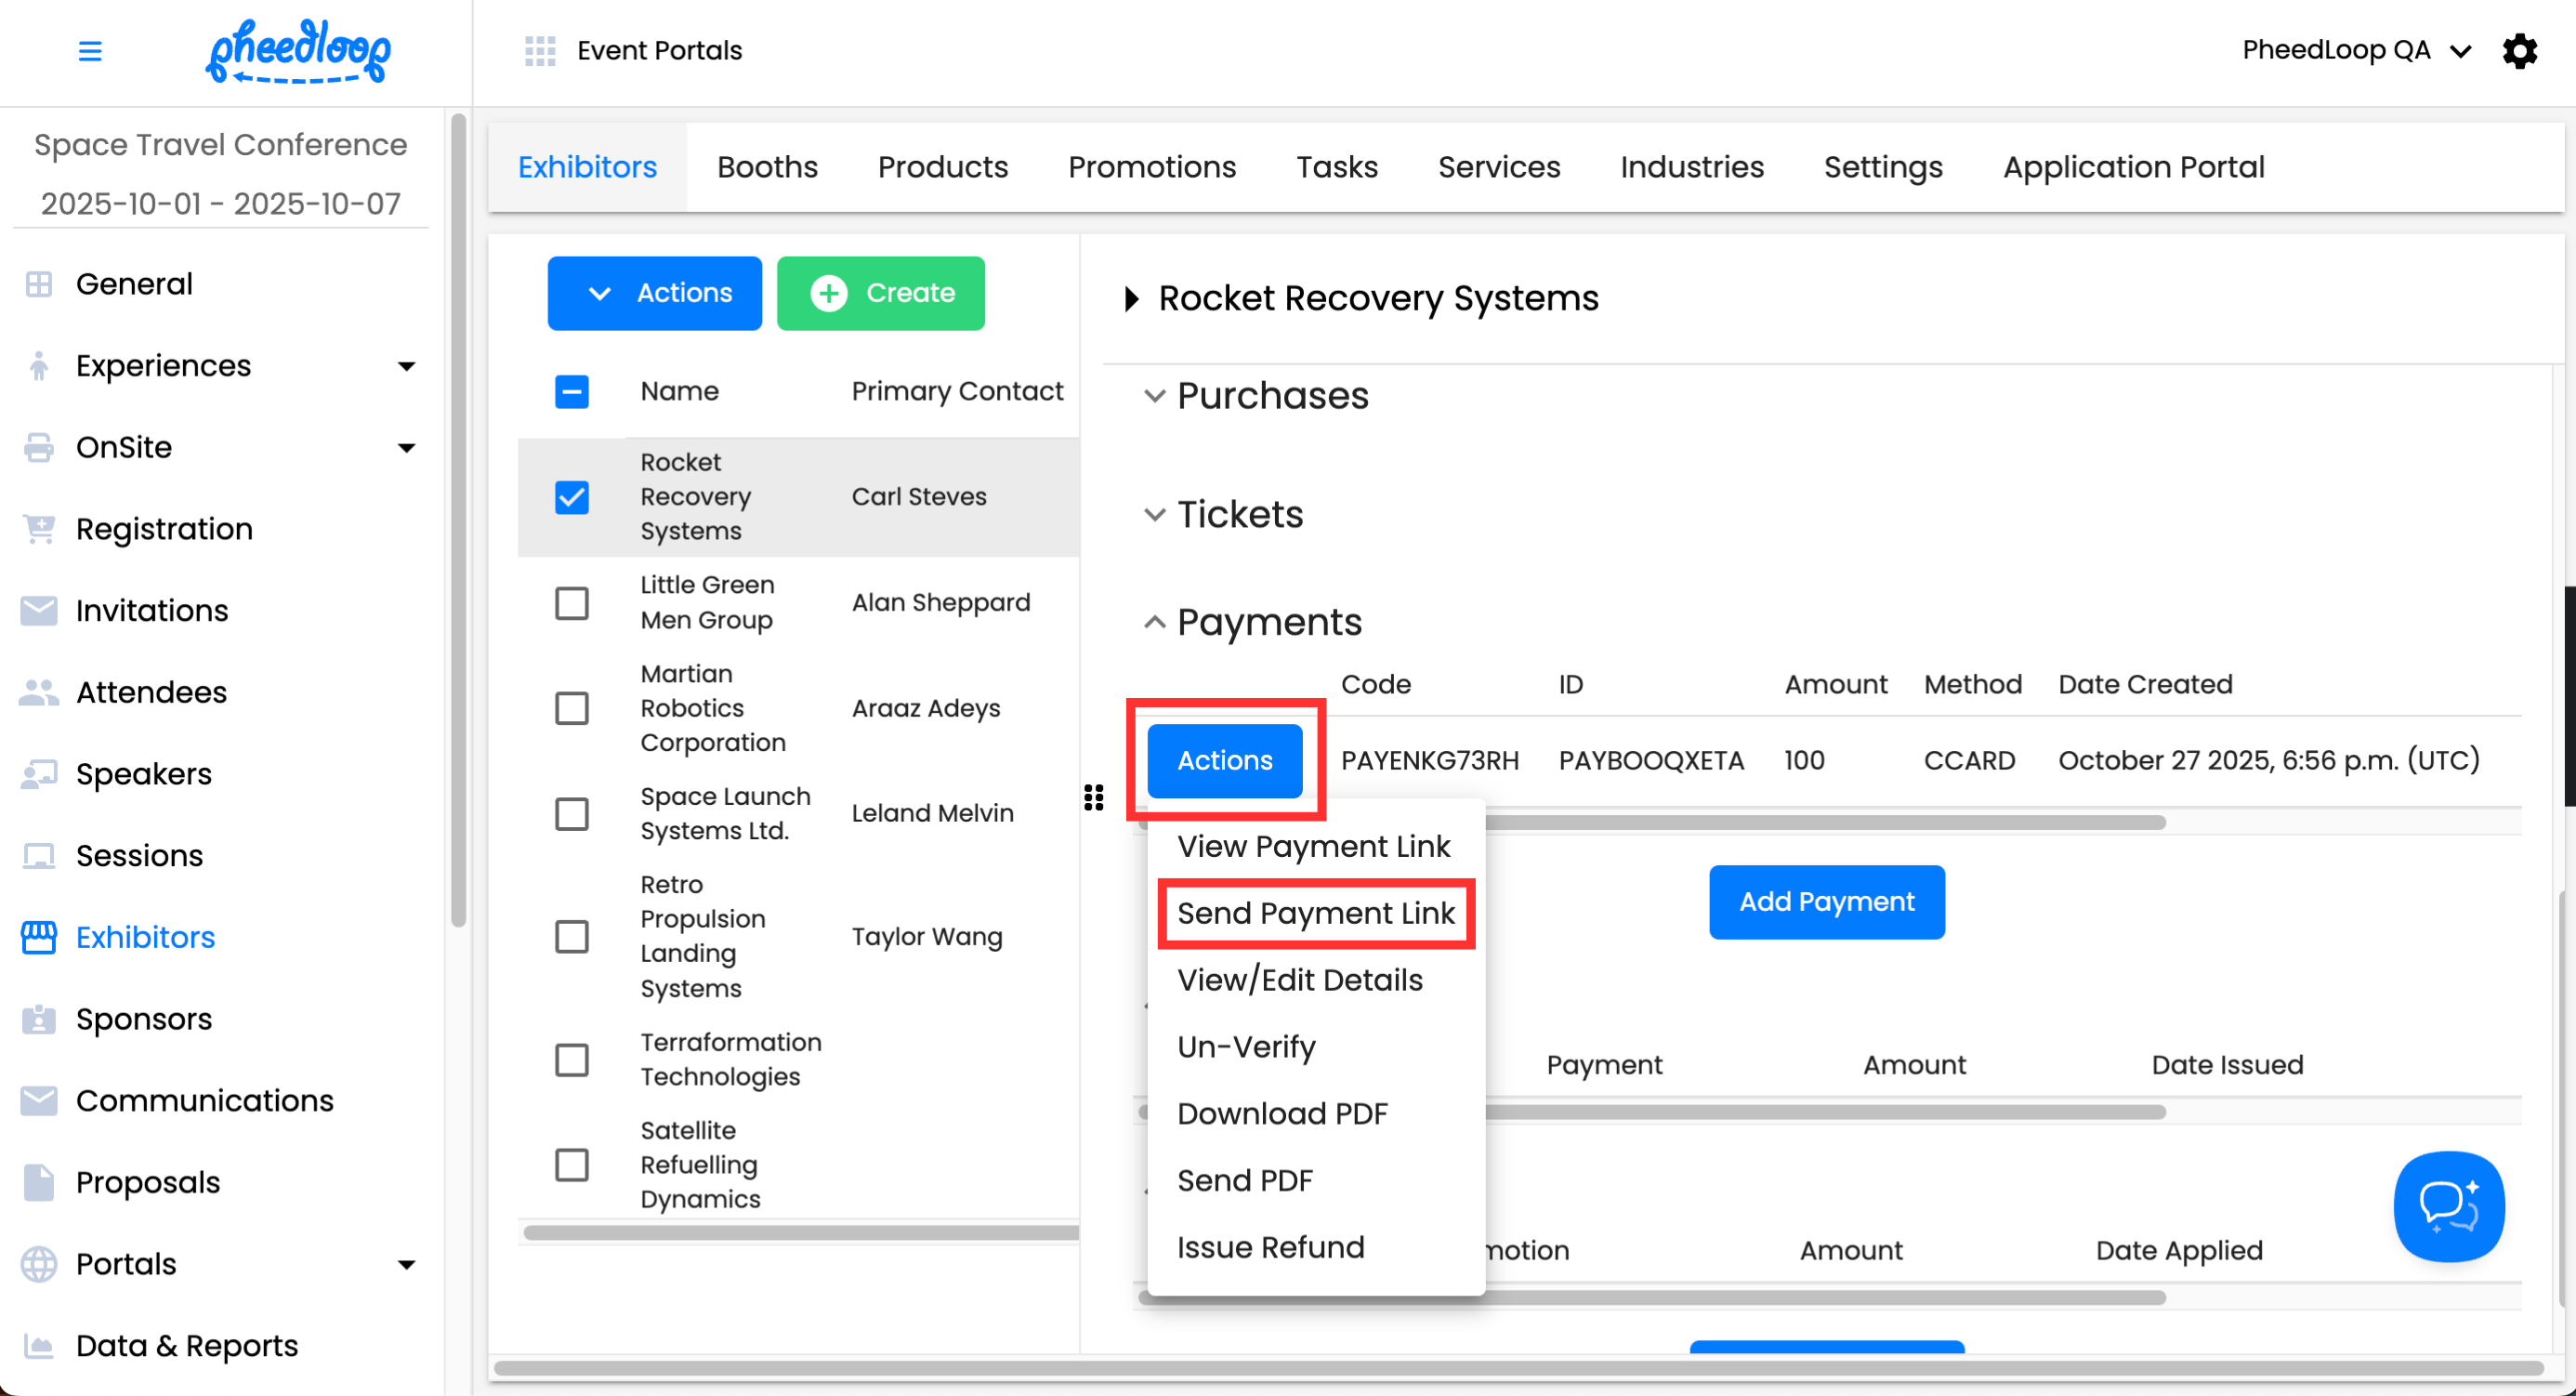
- Under Payments, select Actions beside the payment you want to send out from the list
- Select Send Payment Link
-
If you select View Payment Link, you can review the link in a new tab.
-

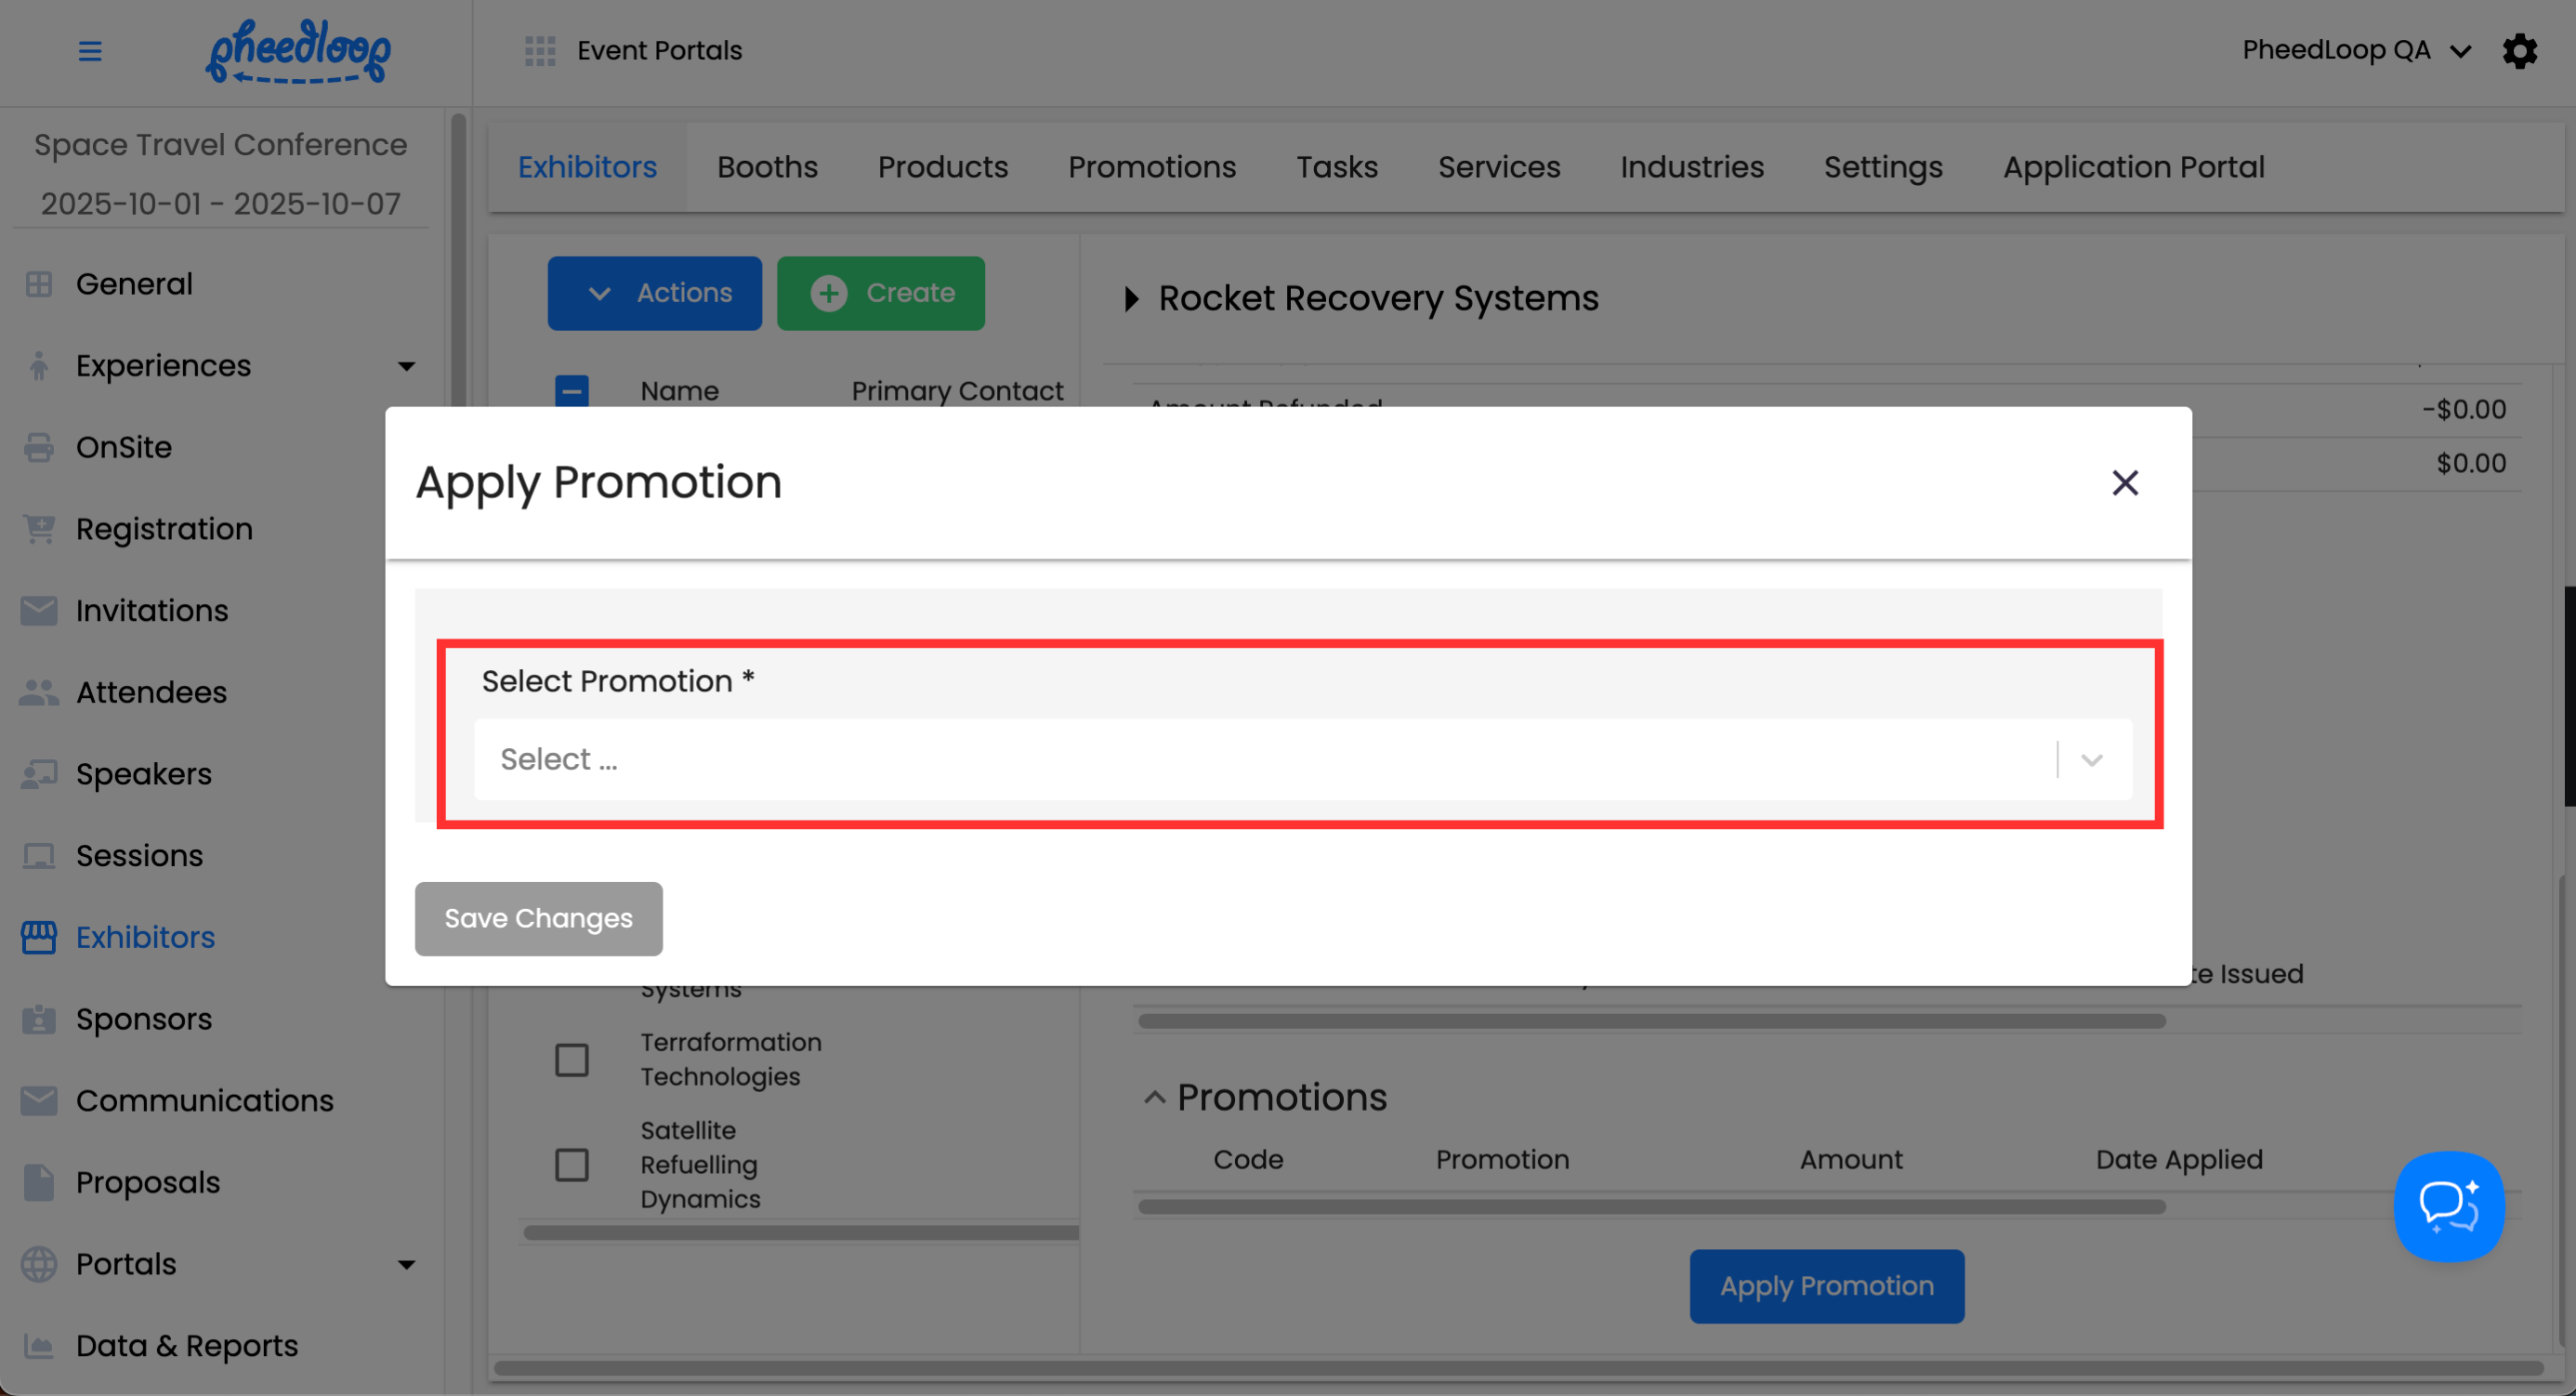
Applying Promotions to Exhibitors
- From the Event Dashboard, navigate to Exhibitors > Exhibitors
- Select an Exhibitor you would like to adjust from the list
- In the Exhibitor Editor Form, navigate to Order Summary
-
Under Promotions, select Apply Promotion
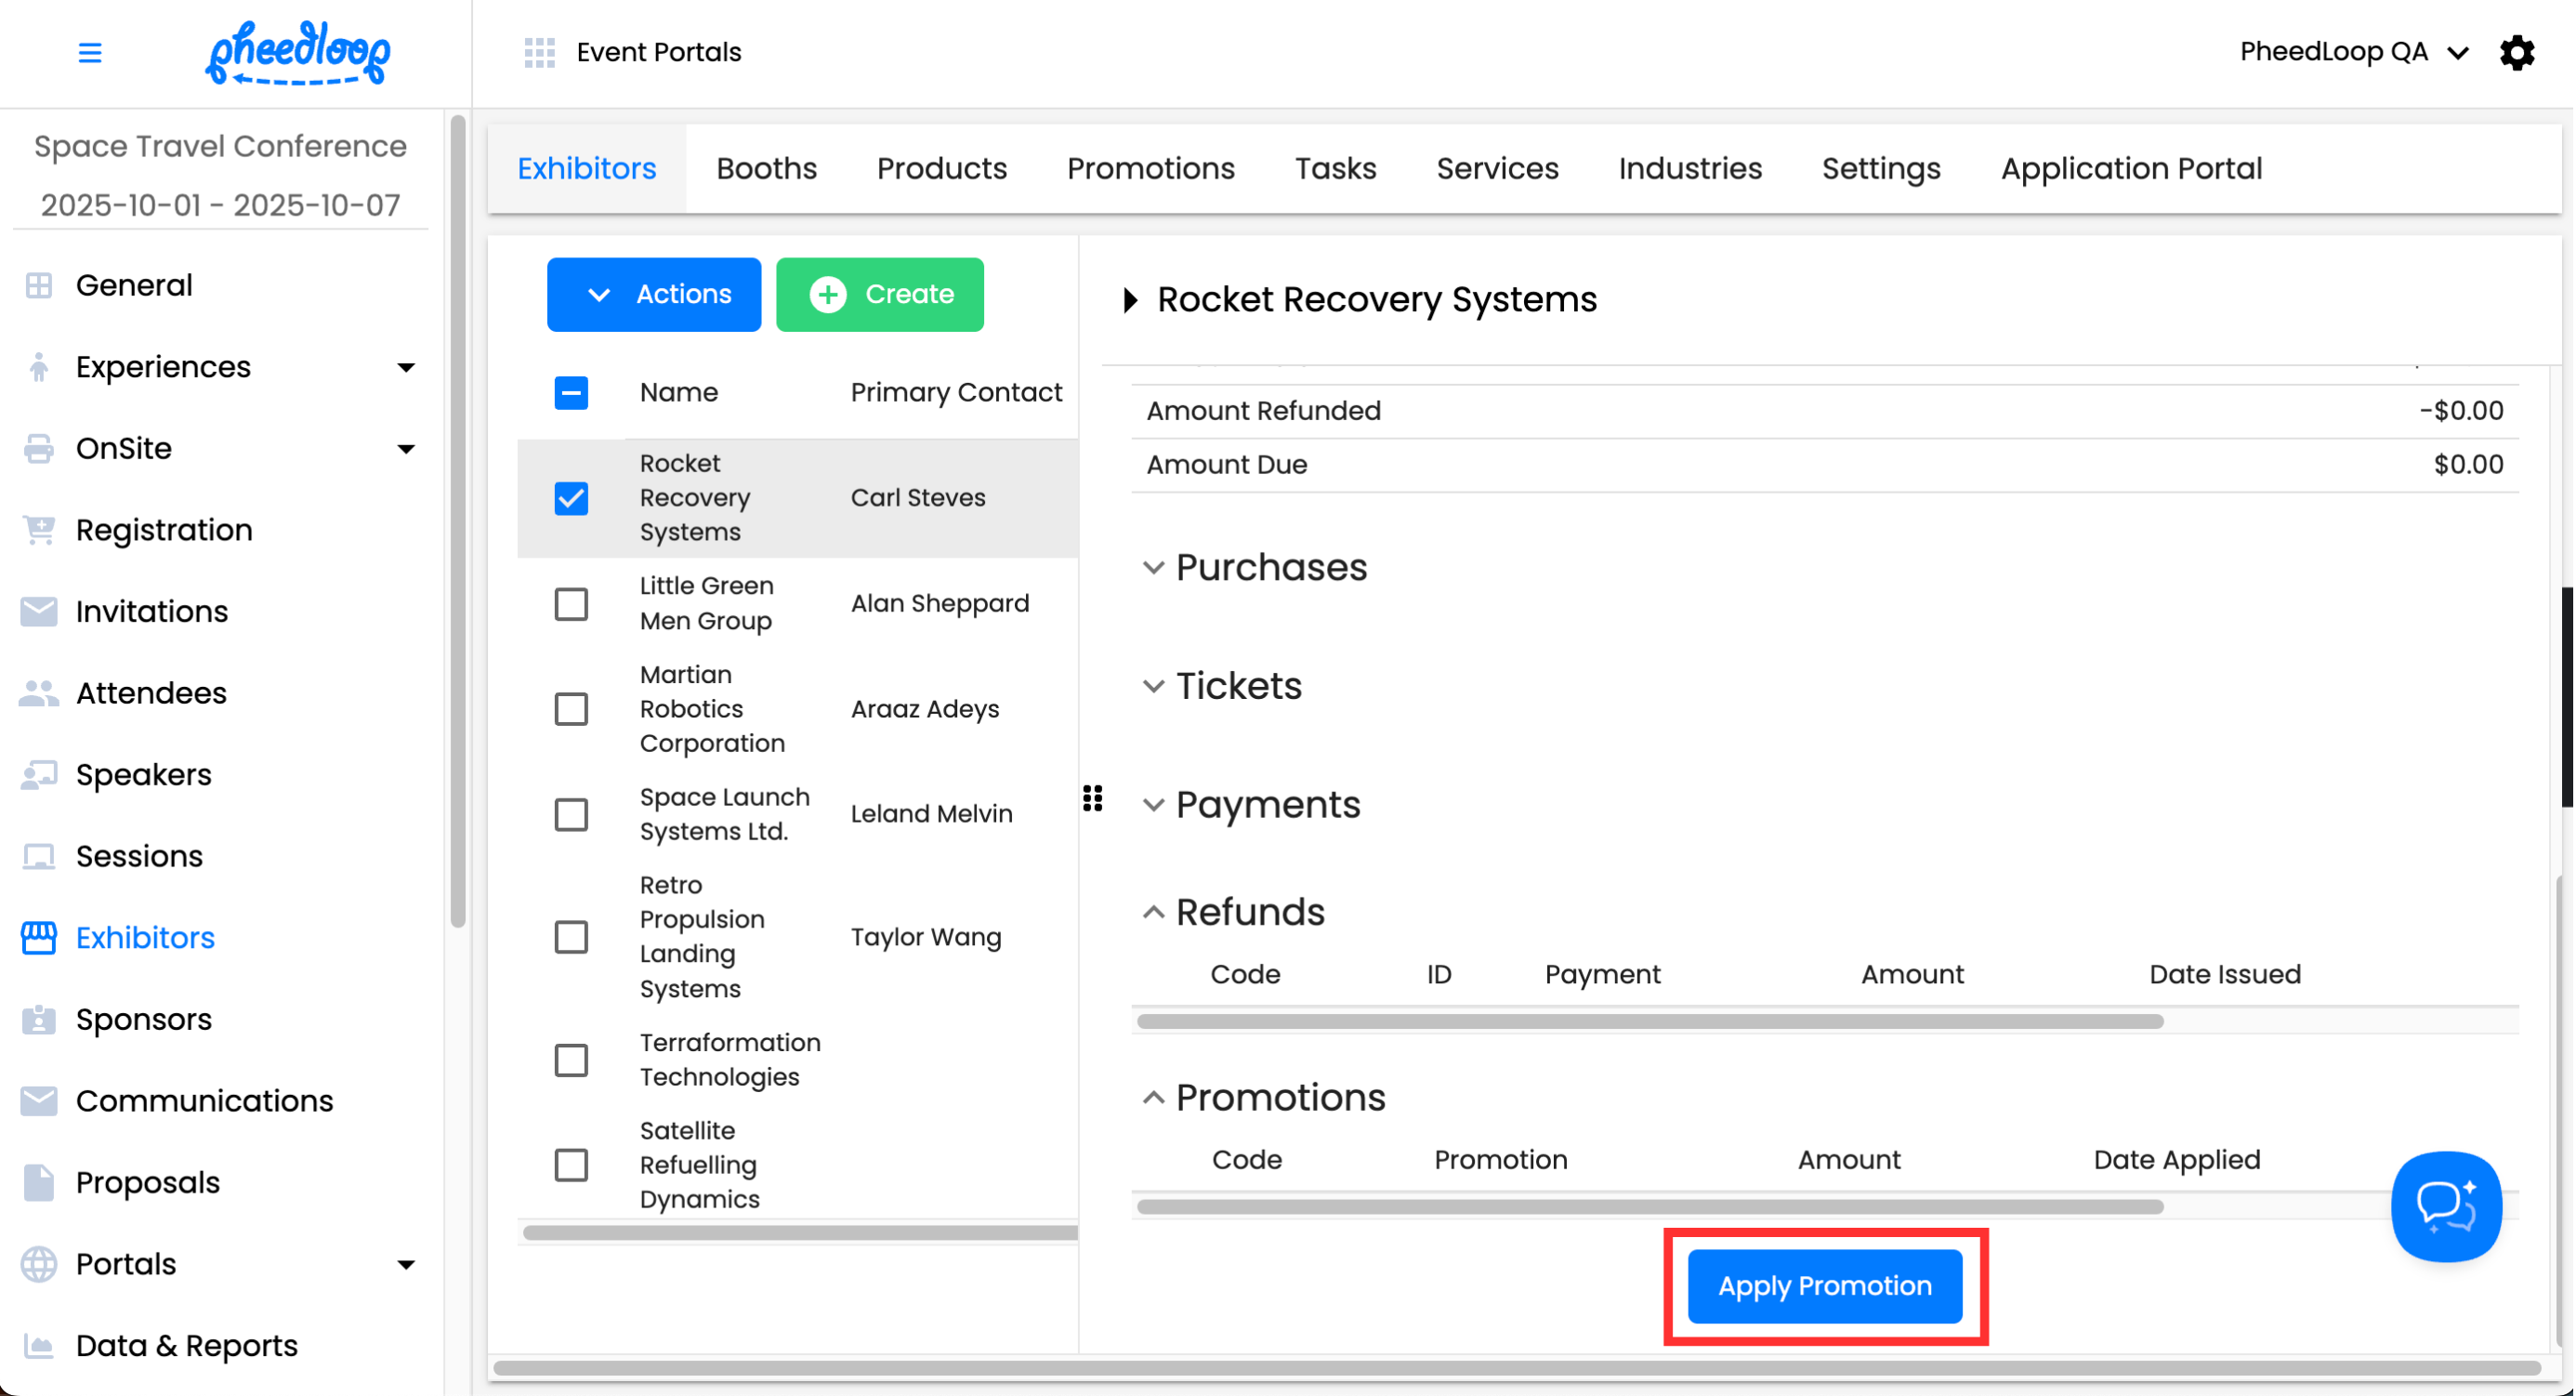
- Select the promotion you wish to apply under the Select Promotion field
- Choose a promo code which you created in Exhibitors > Promotions.
- The promotions that are added must be financially based, not percentage-based.
-
Select Save Changes


Adding Refunds to Exhibitors
- From the Event Dashboard, navigate to Exhibitors > Exhibitors
- Select the Exhibitor you would like to adjust from the list
- Navigate to Order Summary
- Scroll down to Payments
-
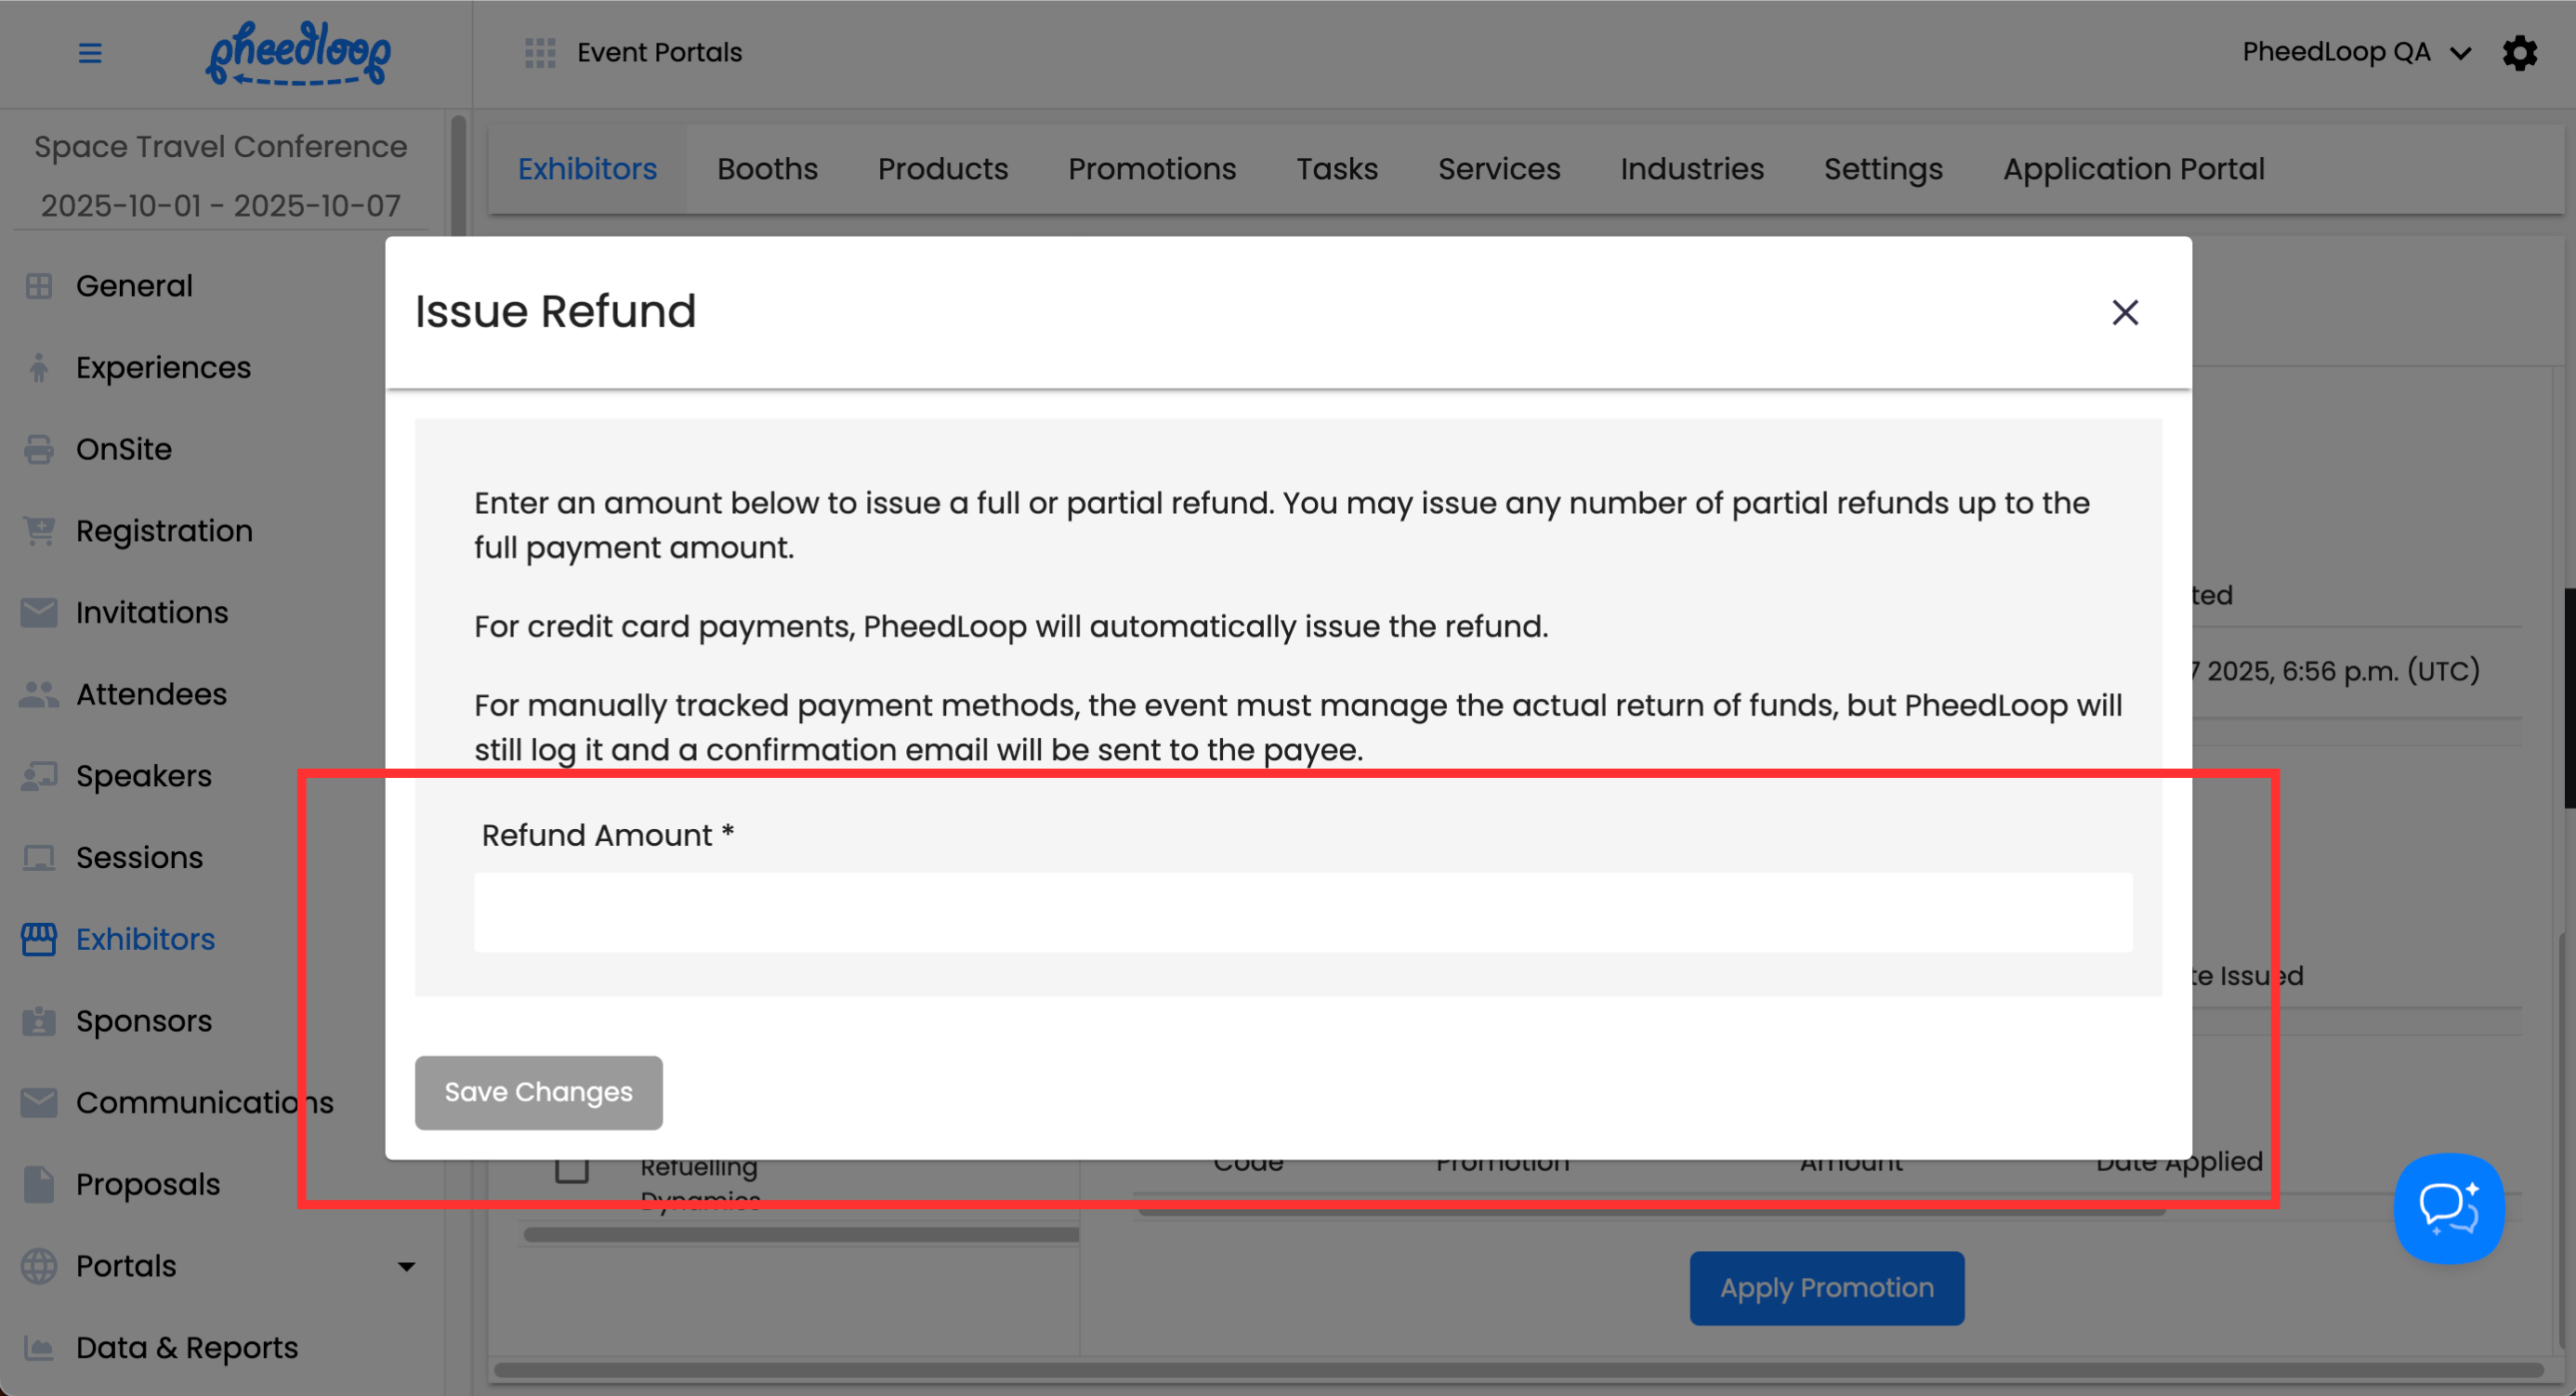
Select Actions > Issue Refunds
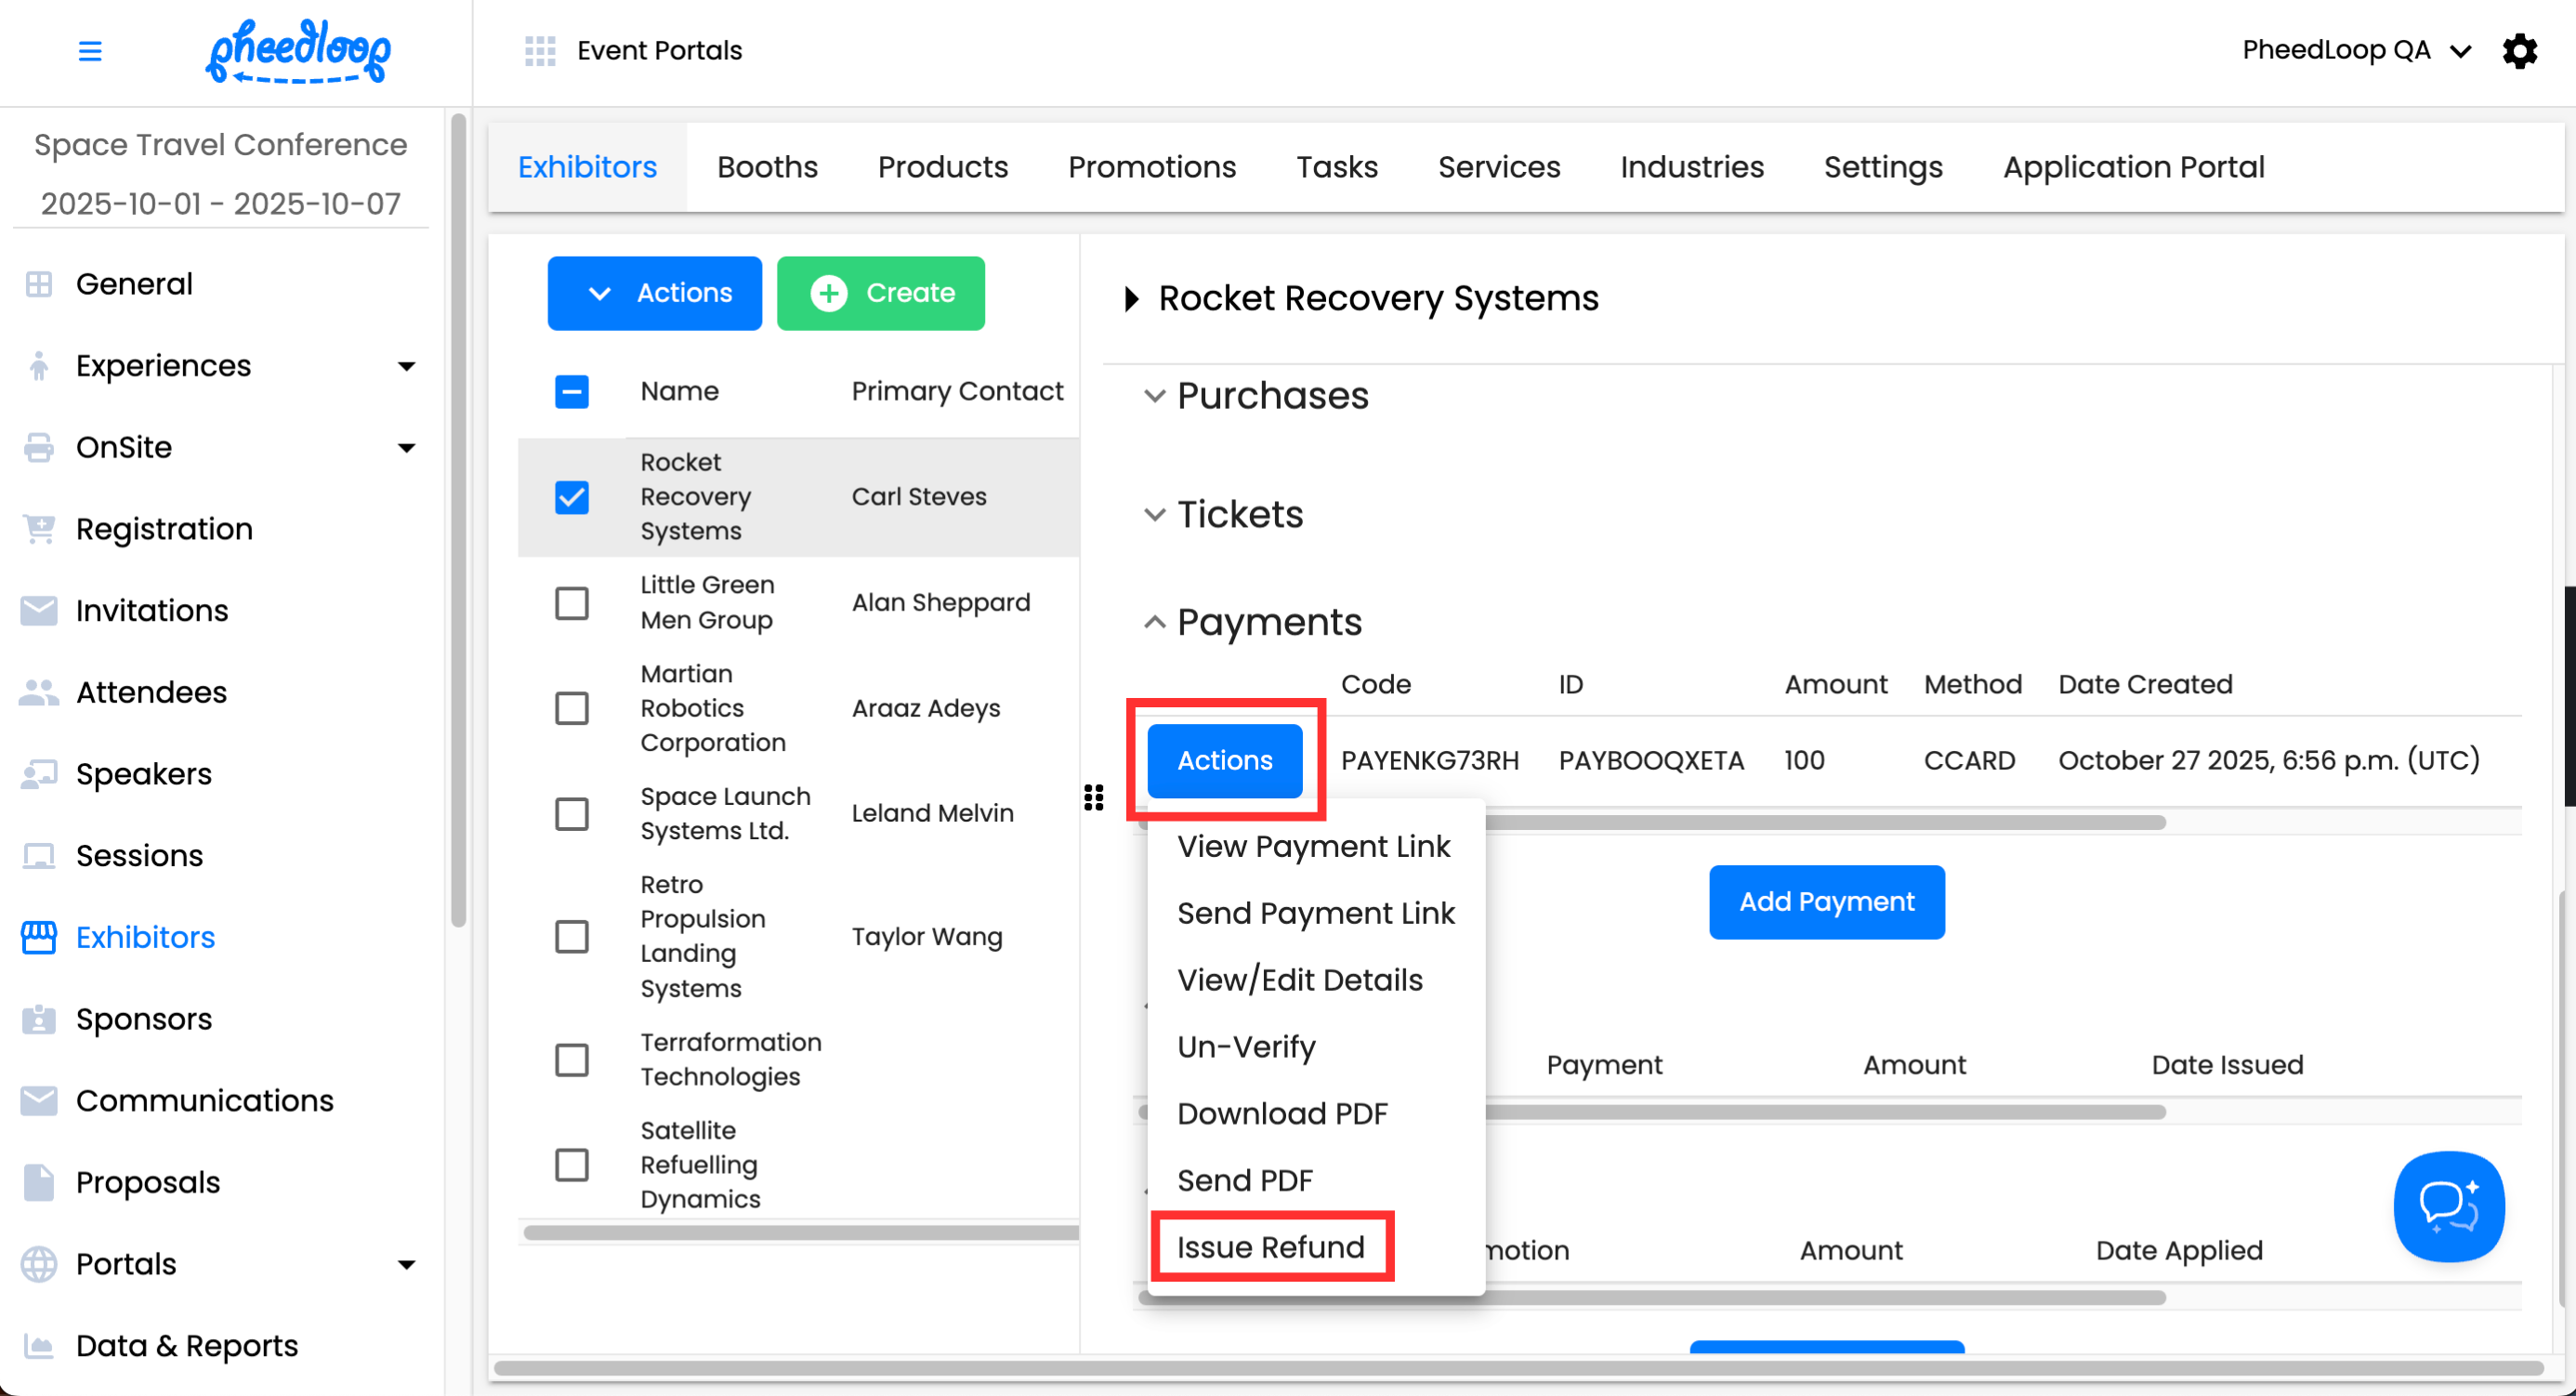
- Enter the refunded amount under Refund Amount
-
Select Save Changes


You can also delete refunds by navigating to the Refunds section of the Order Summary and selecting Actions > Delete Refund.

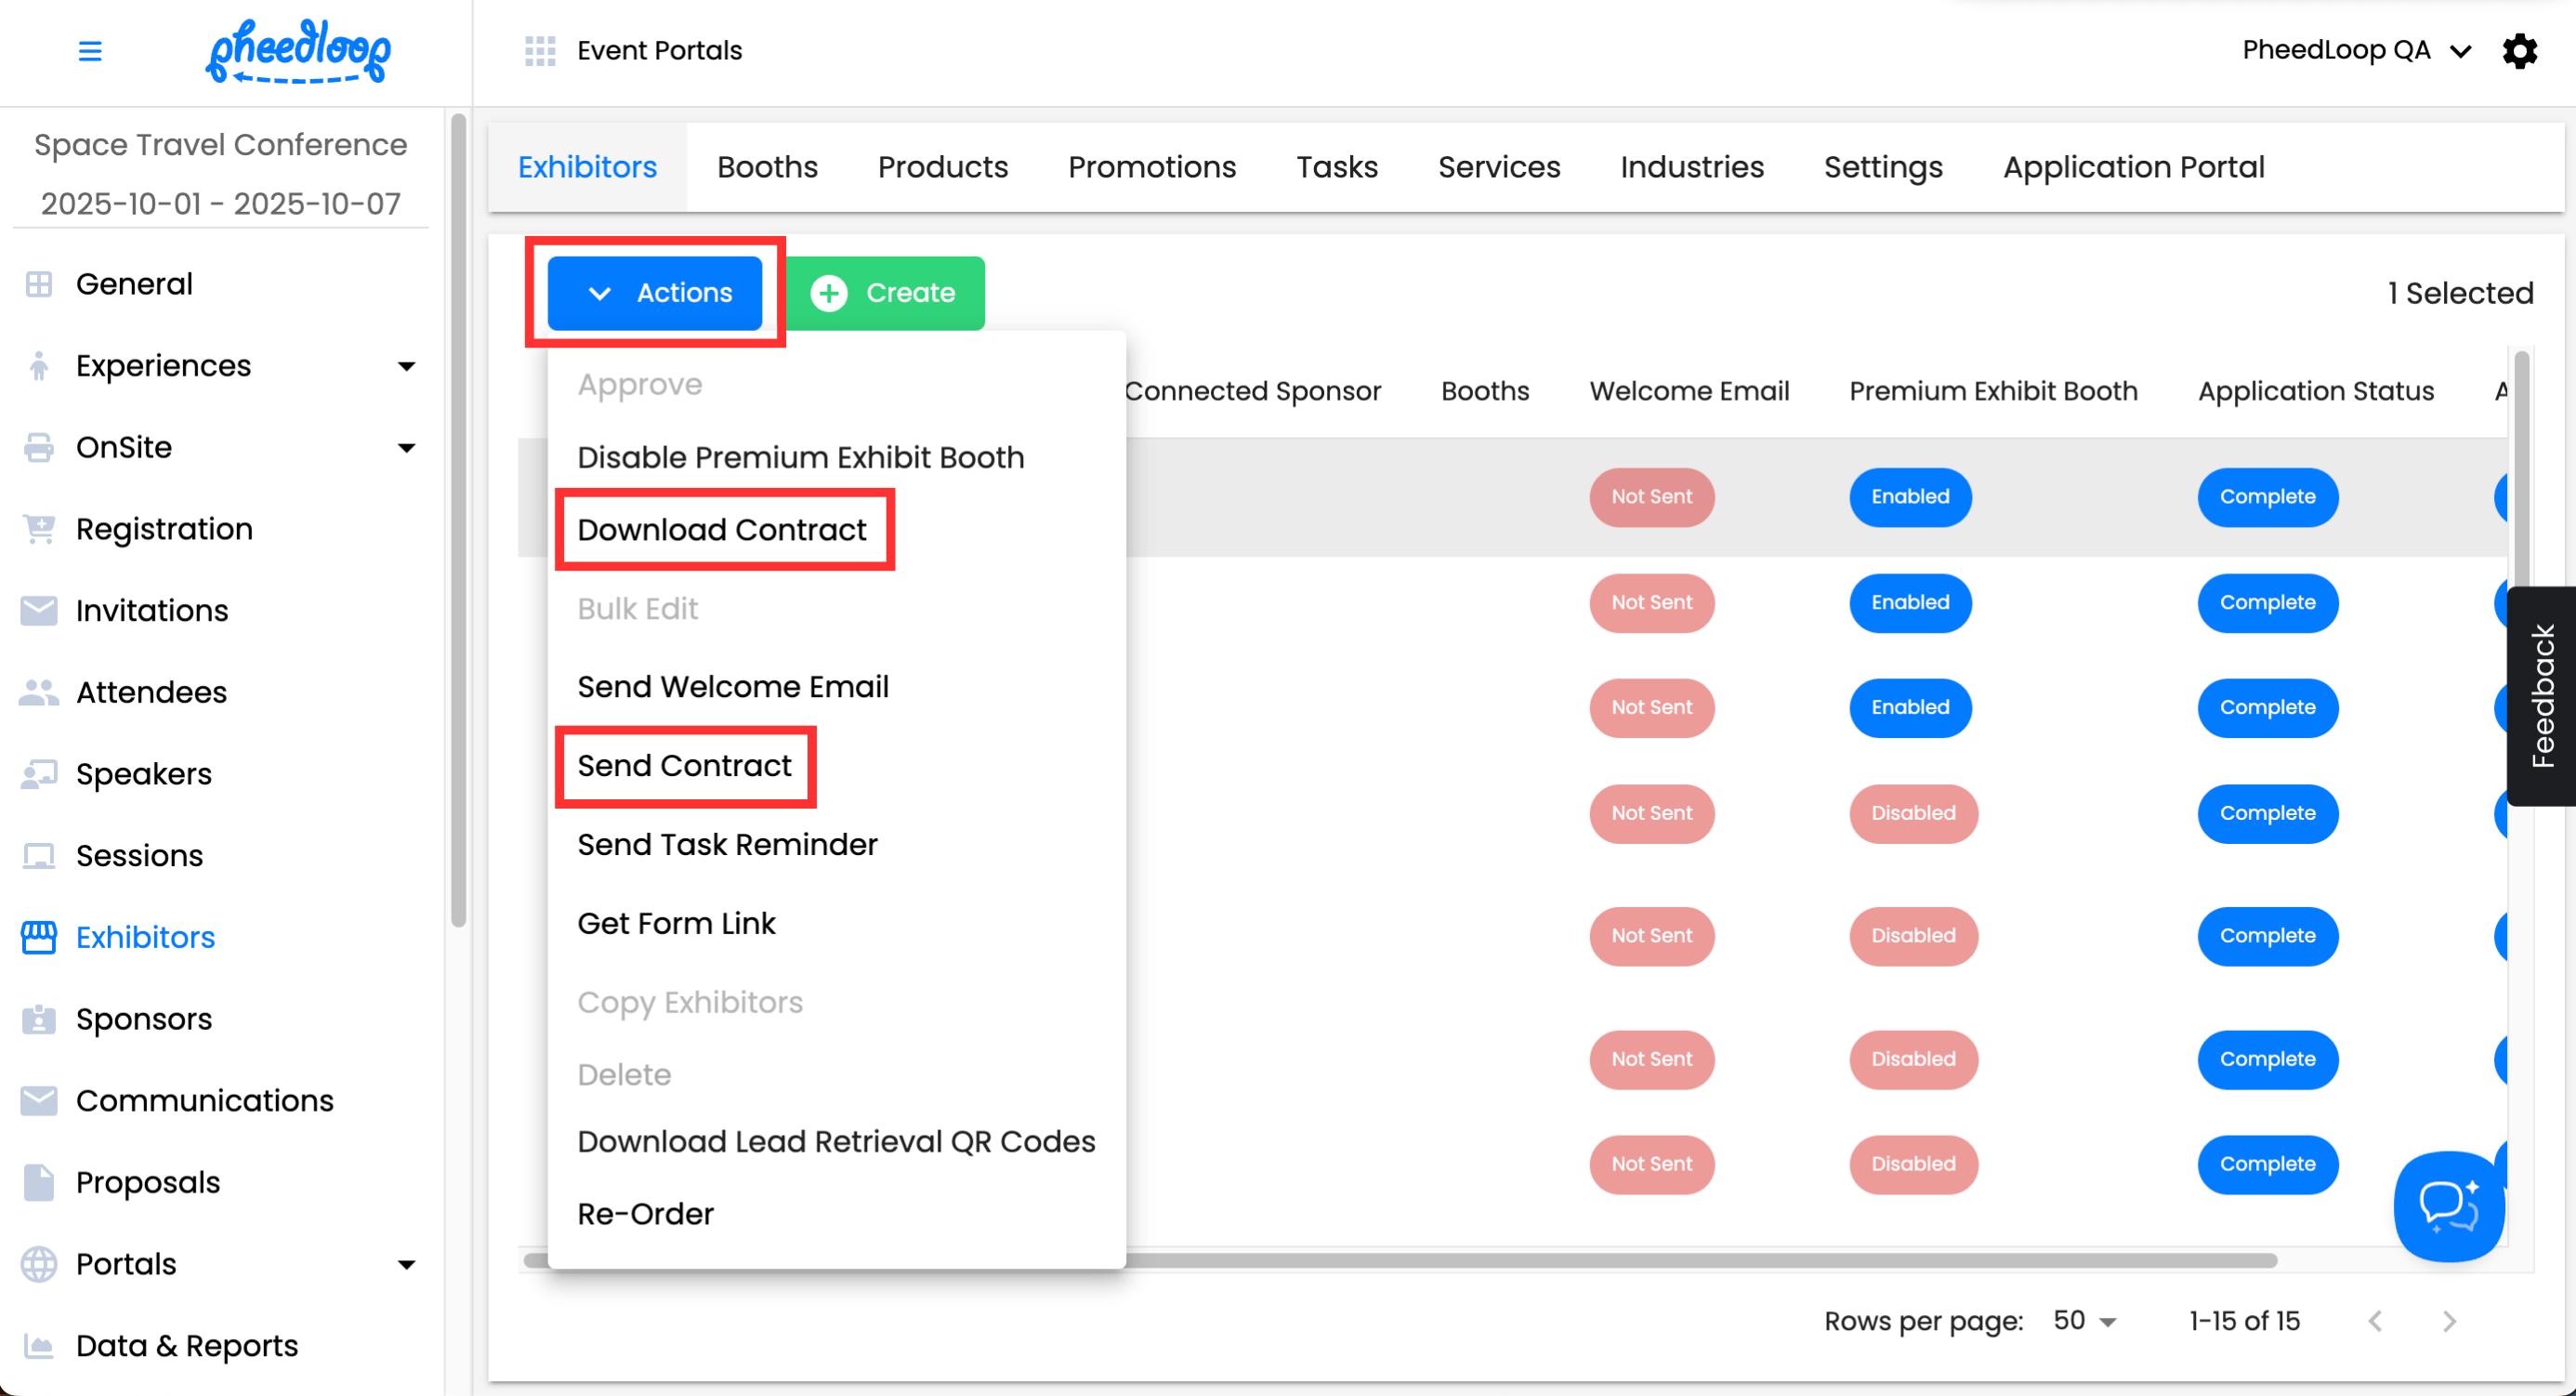
Downloading and Sending Contracts to Exhibitors
Contracts contain all the products and tickets purchased by the Exhibitor as well as the payment method for the purchase.
- From the Event Dashboard, navigate to Exhibitors > Exhibitors
- Select an Exhibitor you would like to access their contract for from the list
- Above the Exhibitors table, select Actions > Download Contract
- A new tab will open with the contract.
- Select Send Contract if you would like to send it to the Exhibitor
-
This will send the contract to the primary contact email address.
-

Adding Text in the Exhibitor Contract
Custom text can be added for the Exhibitor Contract. If set, this text will appear at the bottom of the Exhibitor Contract PDF file.
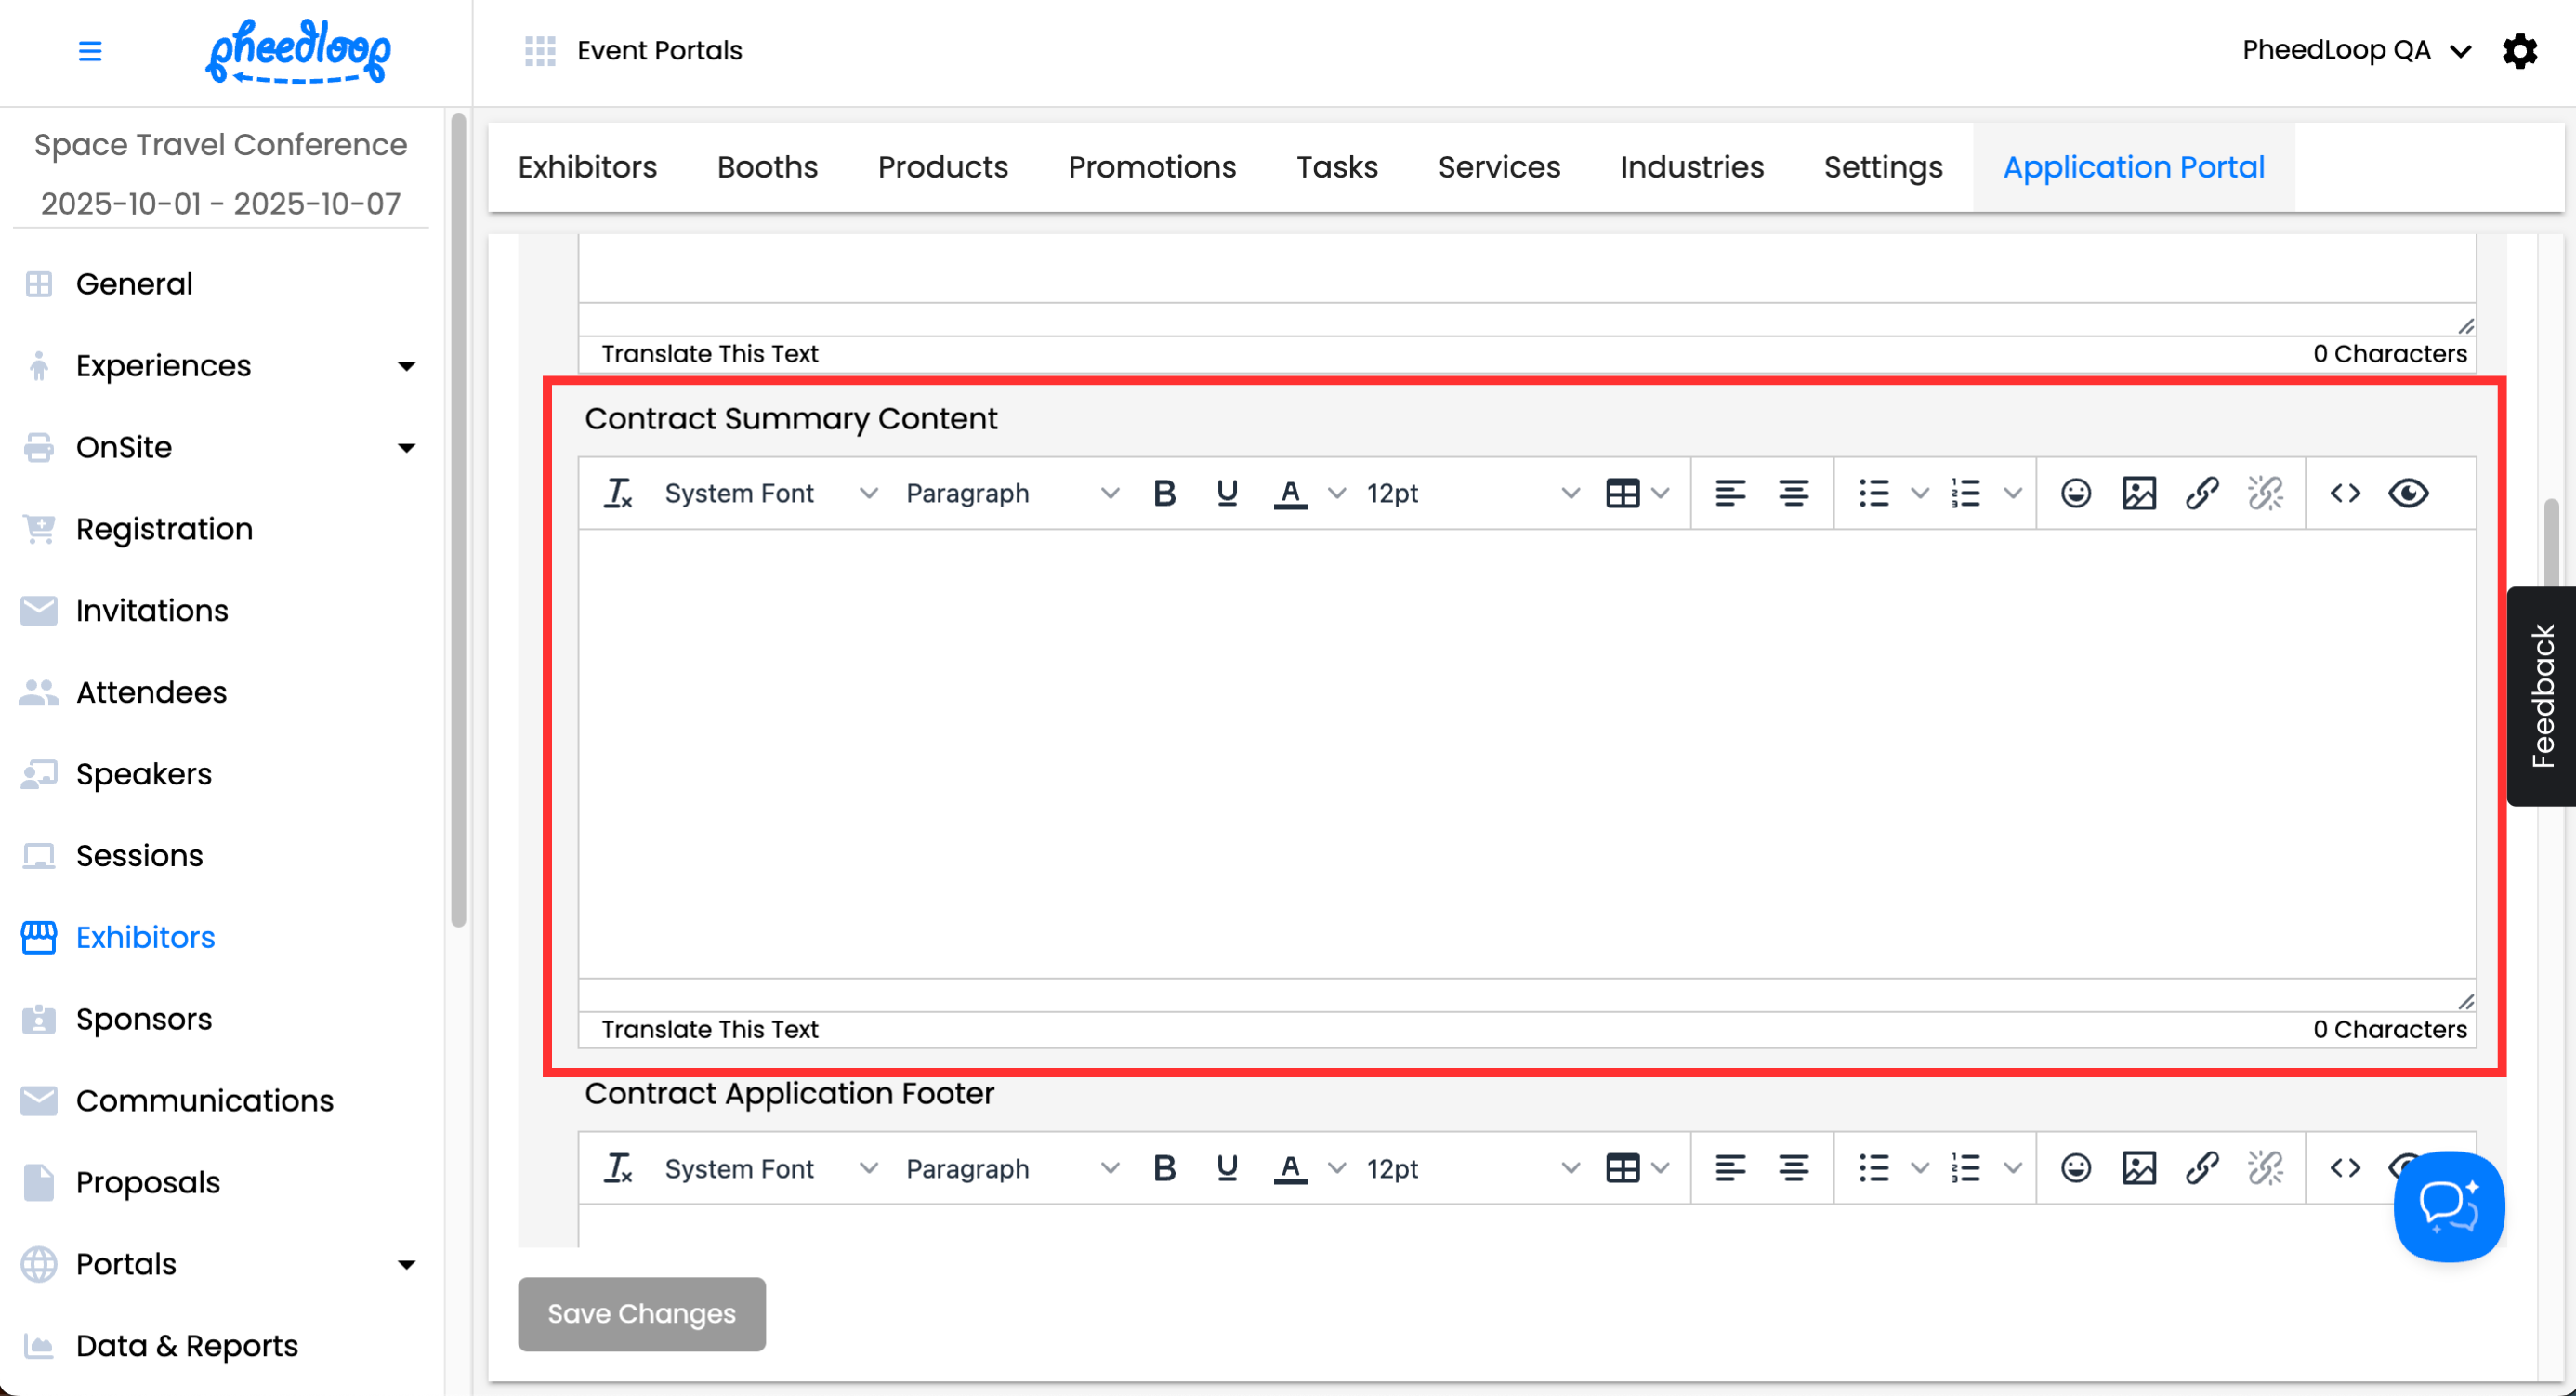
- From the Event Dashboard, navigate to Exhibitors > Application Portal
- Under the Contract Summary Content field, enter the information you wish to convey in the contract
-
Select Save Changes

Downloading Reports for Exhibitor Orders
- From the Event Dashboard, navigate to Data & Reports > Custom Reports
-
Above the custom report table, select Create

- Under Report Type, select Exhibitors
- Under Fields, select Name, Purchase Total, Payment ID, Payment Due, Purchases, and Status
- Use the Start Date and End Date fields if you would like to filter exhibitors by the date of the their application
-
Select Save Changes


Select the custom report, above the custom report table, select Actions > Generate Report. Once the report is generated, you can select Download Previous Report.

Quick tip - you can also download the payment data report which will contain payment information for exhibitors, sponsors and registrations.