Using Wild Apricot with PheedLoop
WIld Apricot is one of the many integrations available for use when you partner with PheedLoop for your event management needs. This article will walk you through configuring your Wild Apricot to use with PheedLoop as well as the unique requirements to use
Wild Apricot Configurations
Creating a Wild Apricot Account
The first step is to create a Wild Apricot Account. This article is written with the assumption that your organization already has this account set up. If you would like instructions on how to create a Wild Apricot account, please refer to the How do I create a WildApricot account? article.
Configuring Wild Apricot
Once your Wild Apricot account is created, you will want to configure your account for PheedLoop. Please note, some of the items mentioned here will need to be remembered for later use.
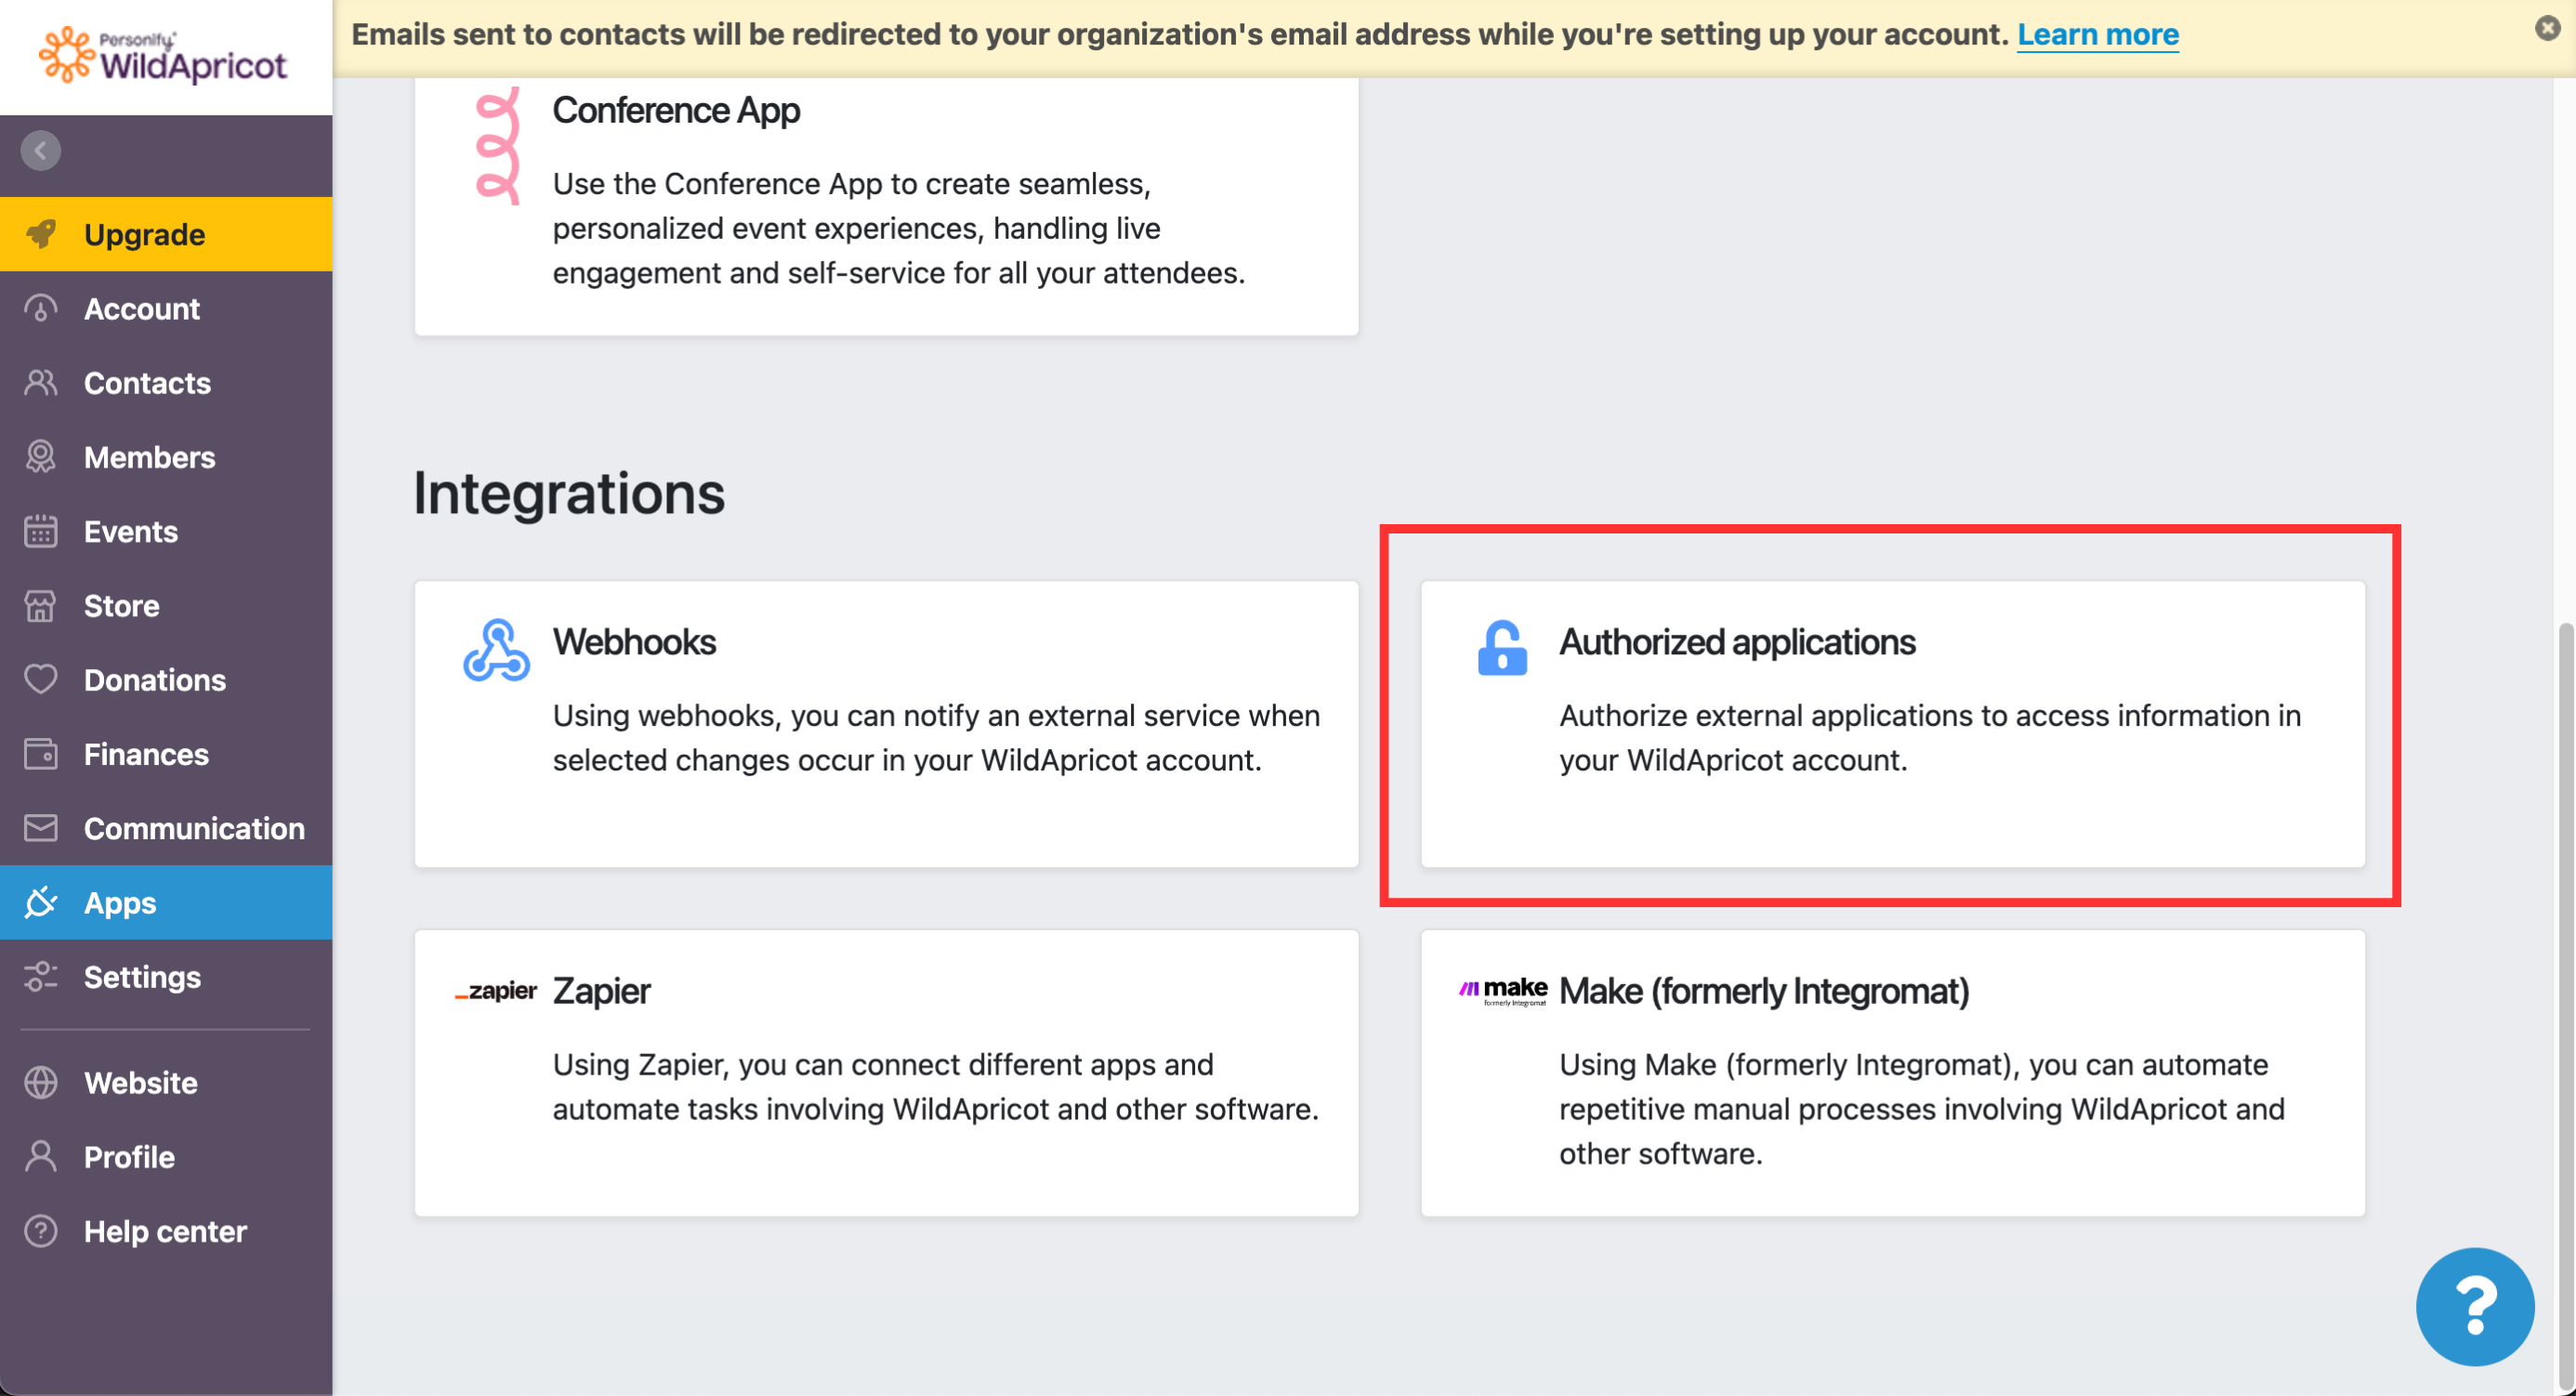
From the Wild Apricot Dashboard, navigate to Apps > Authorized Applications
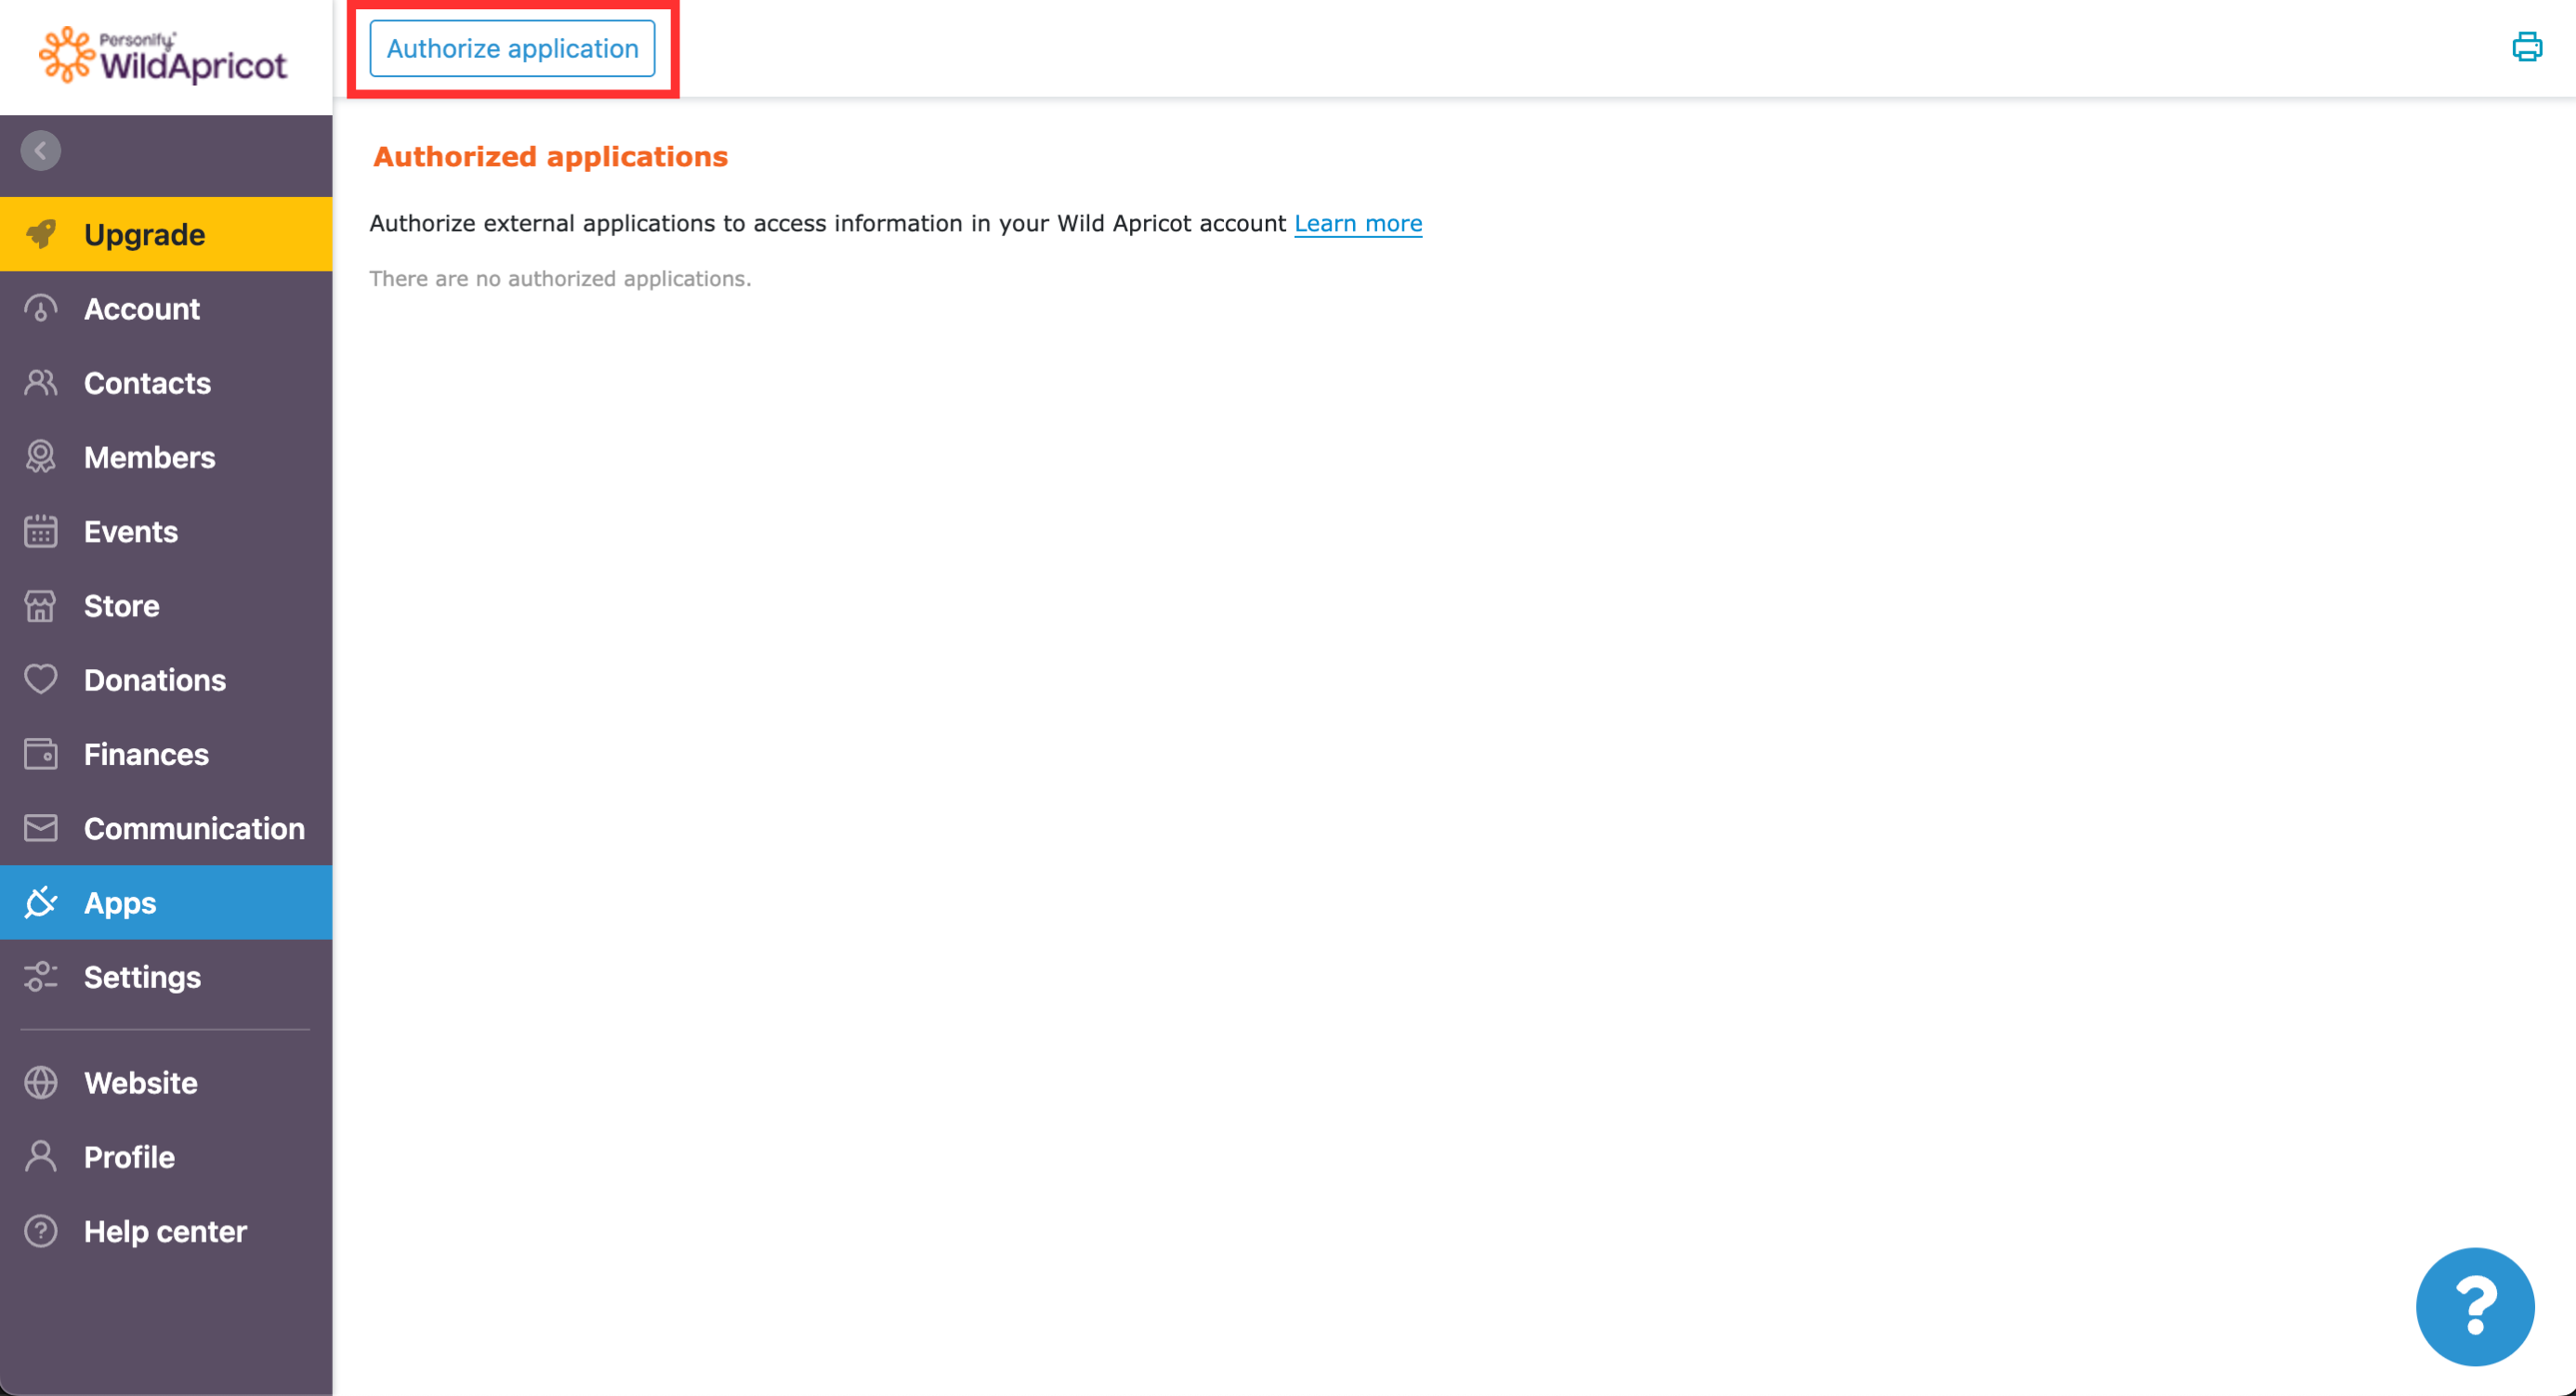
Select Authorize Application at the top of the page
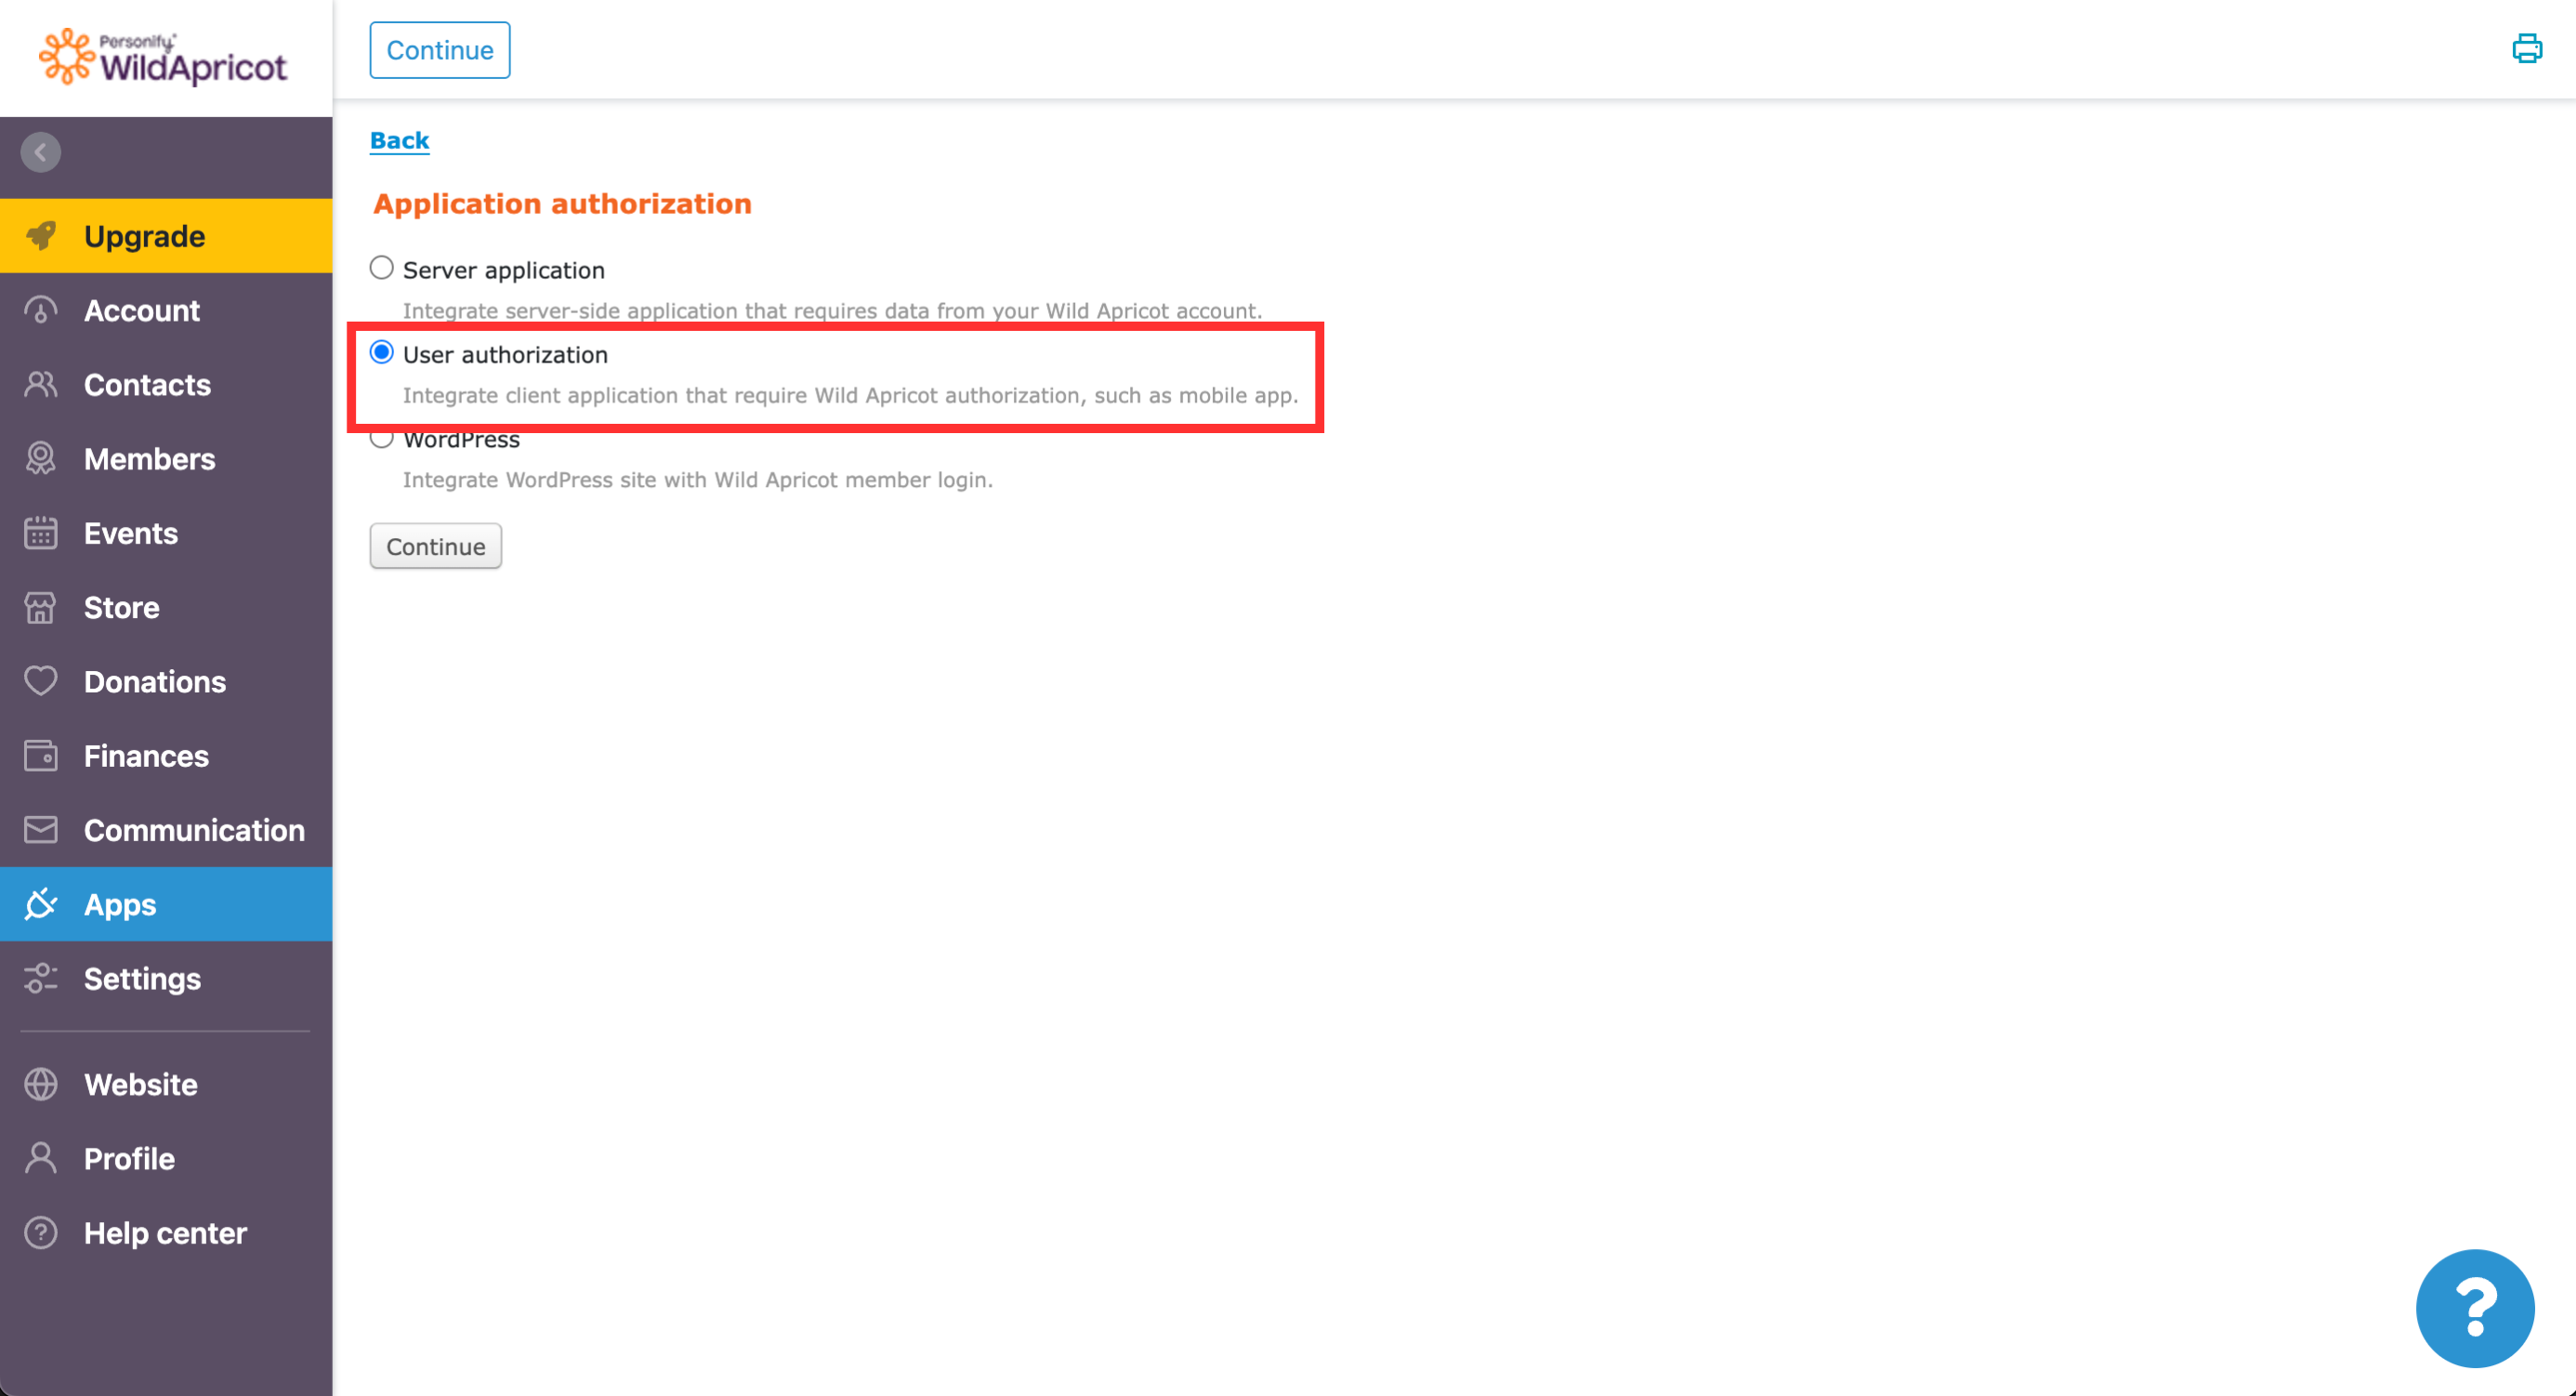
Select User Authorization and select Continue
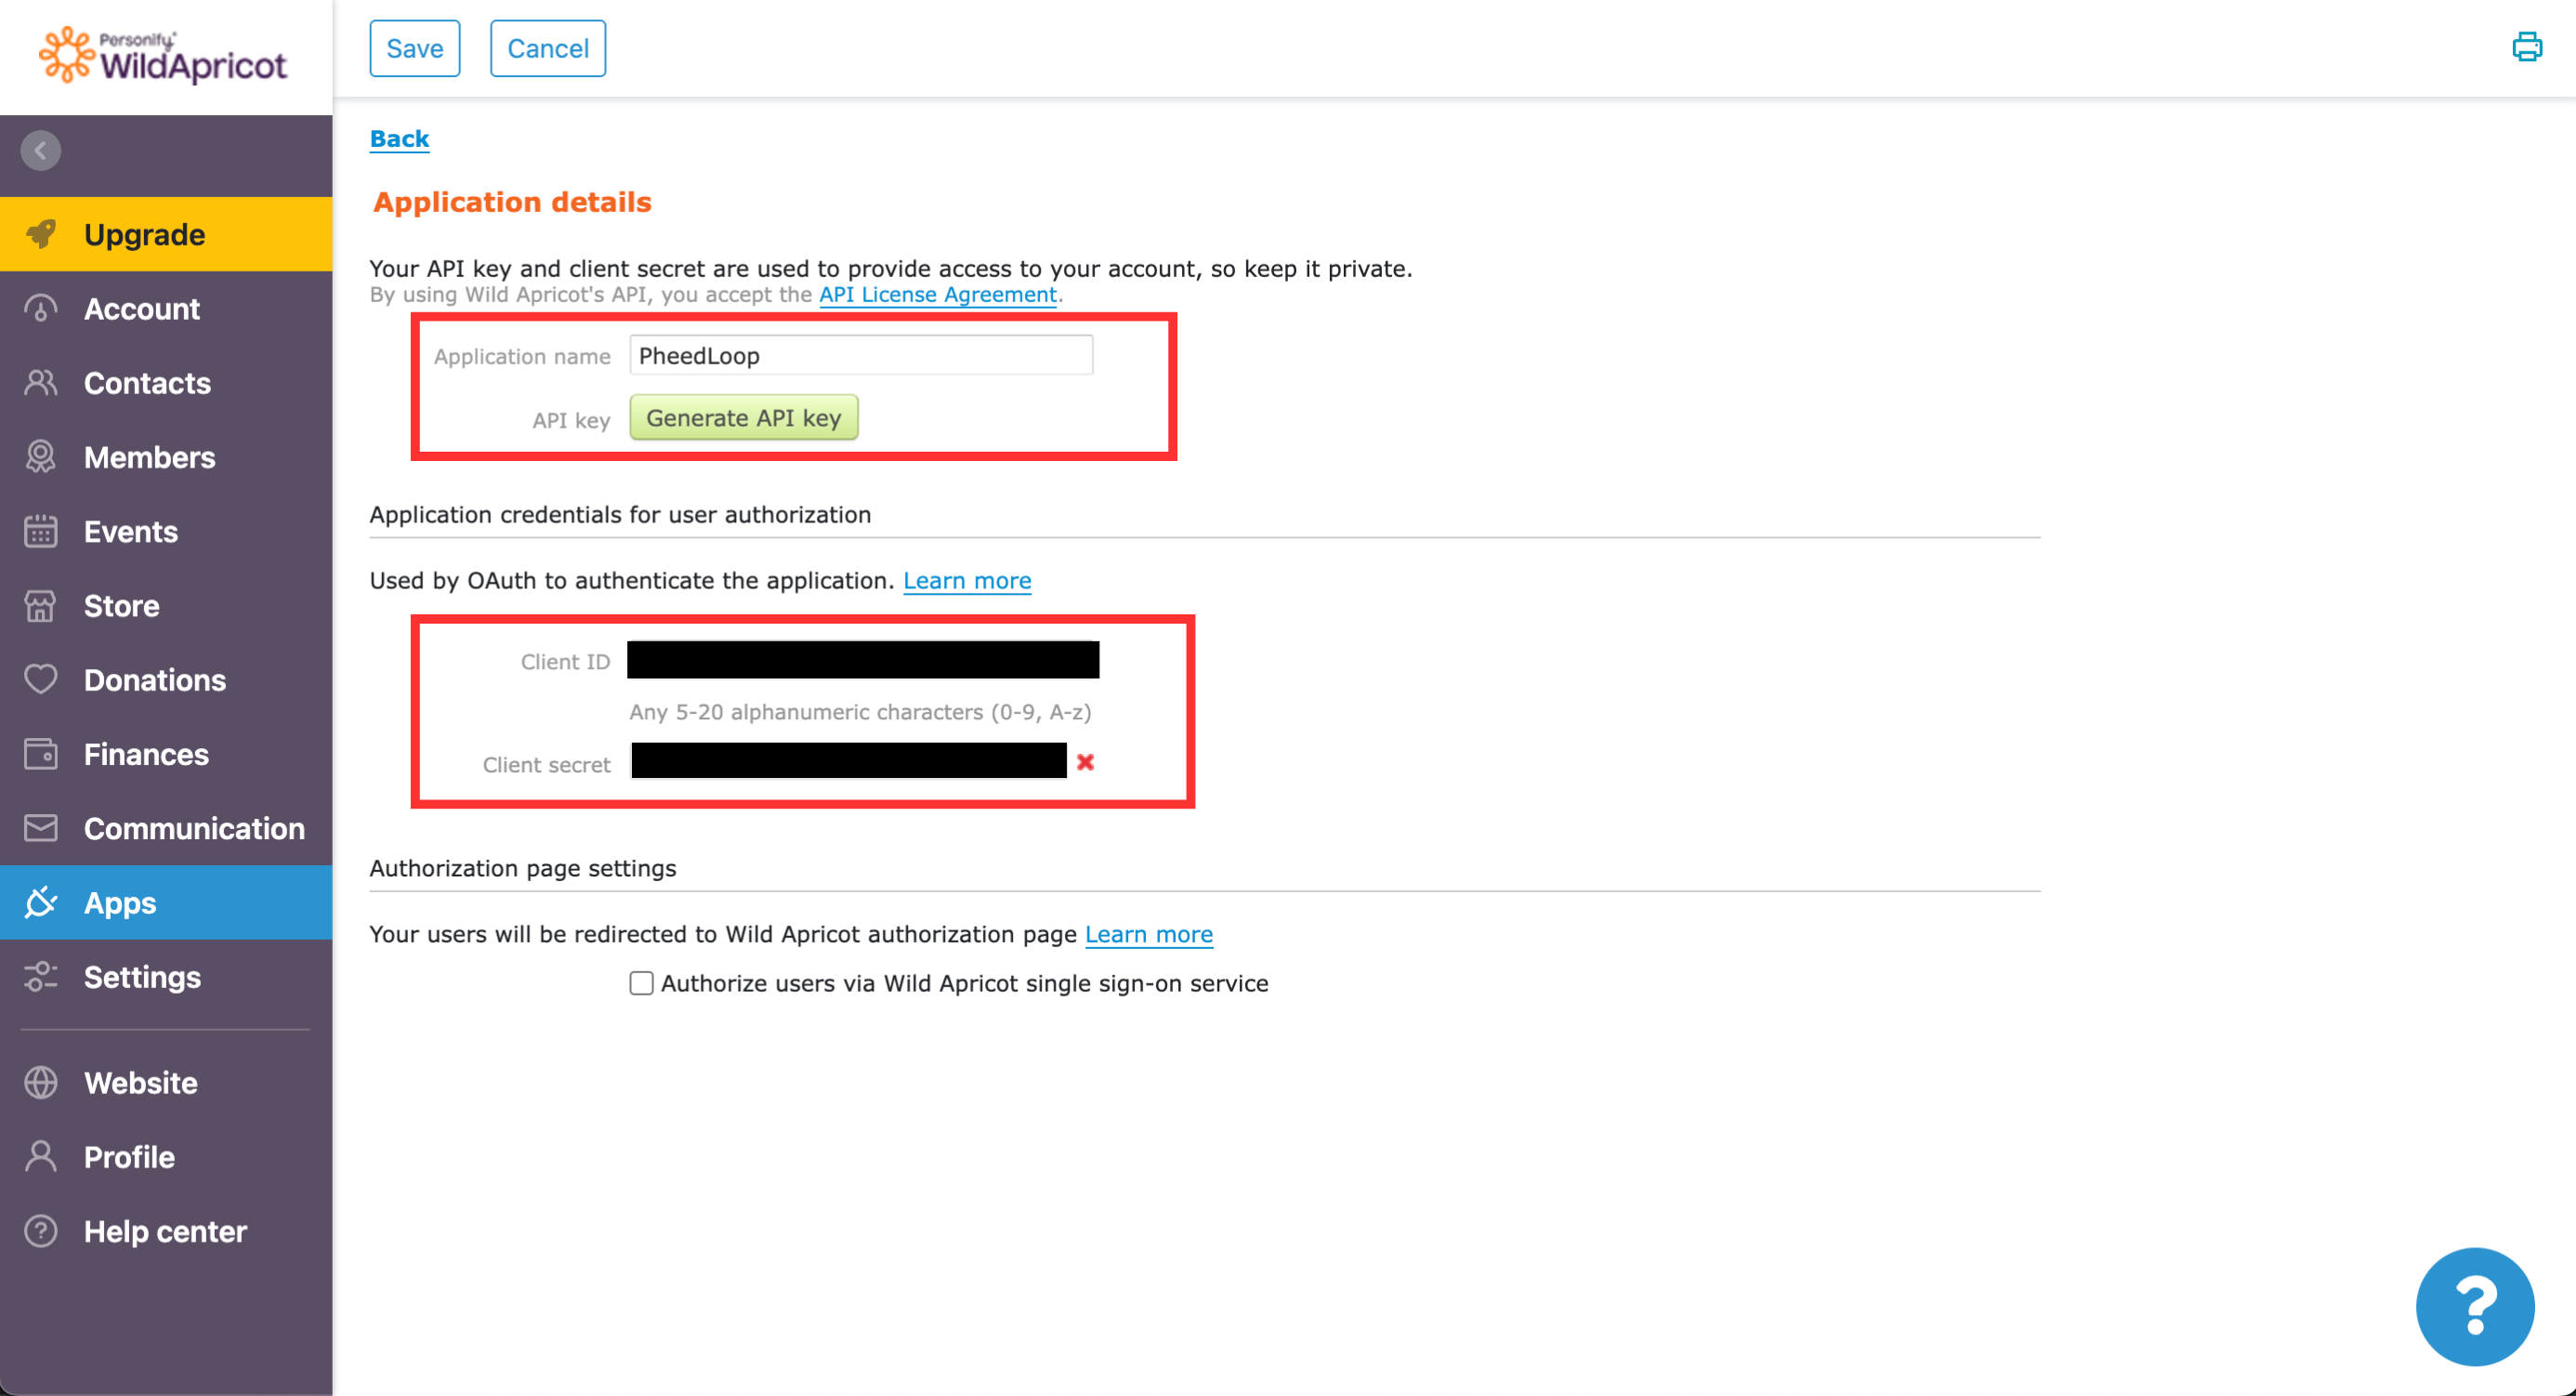
- Enter your application name under the Application name field
- Select Generate API Key leave it on Read only
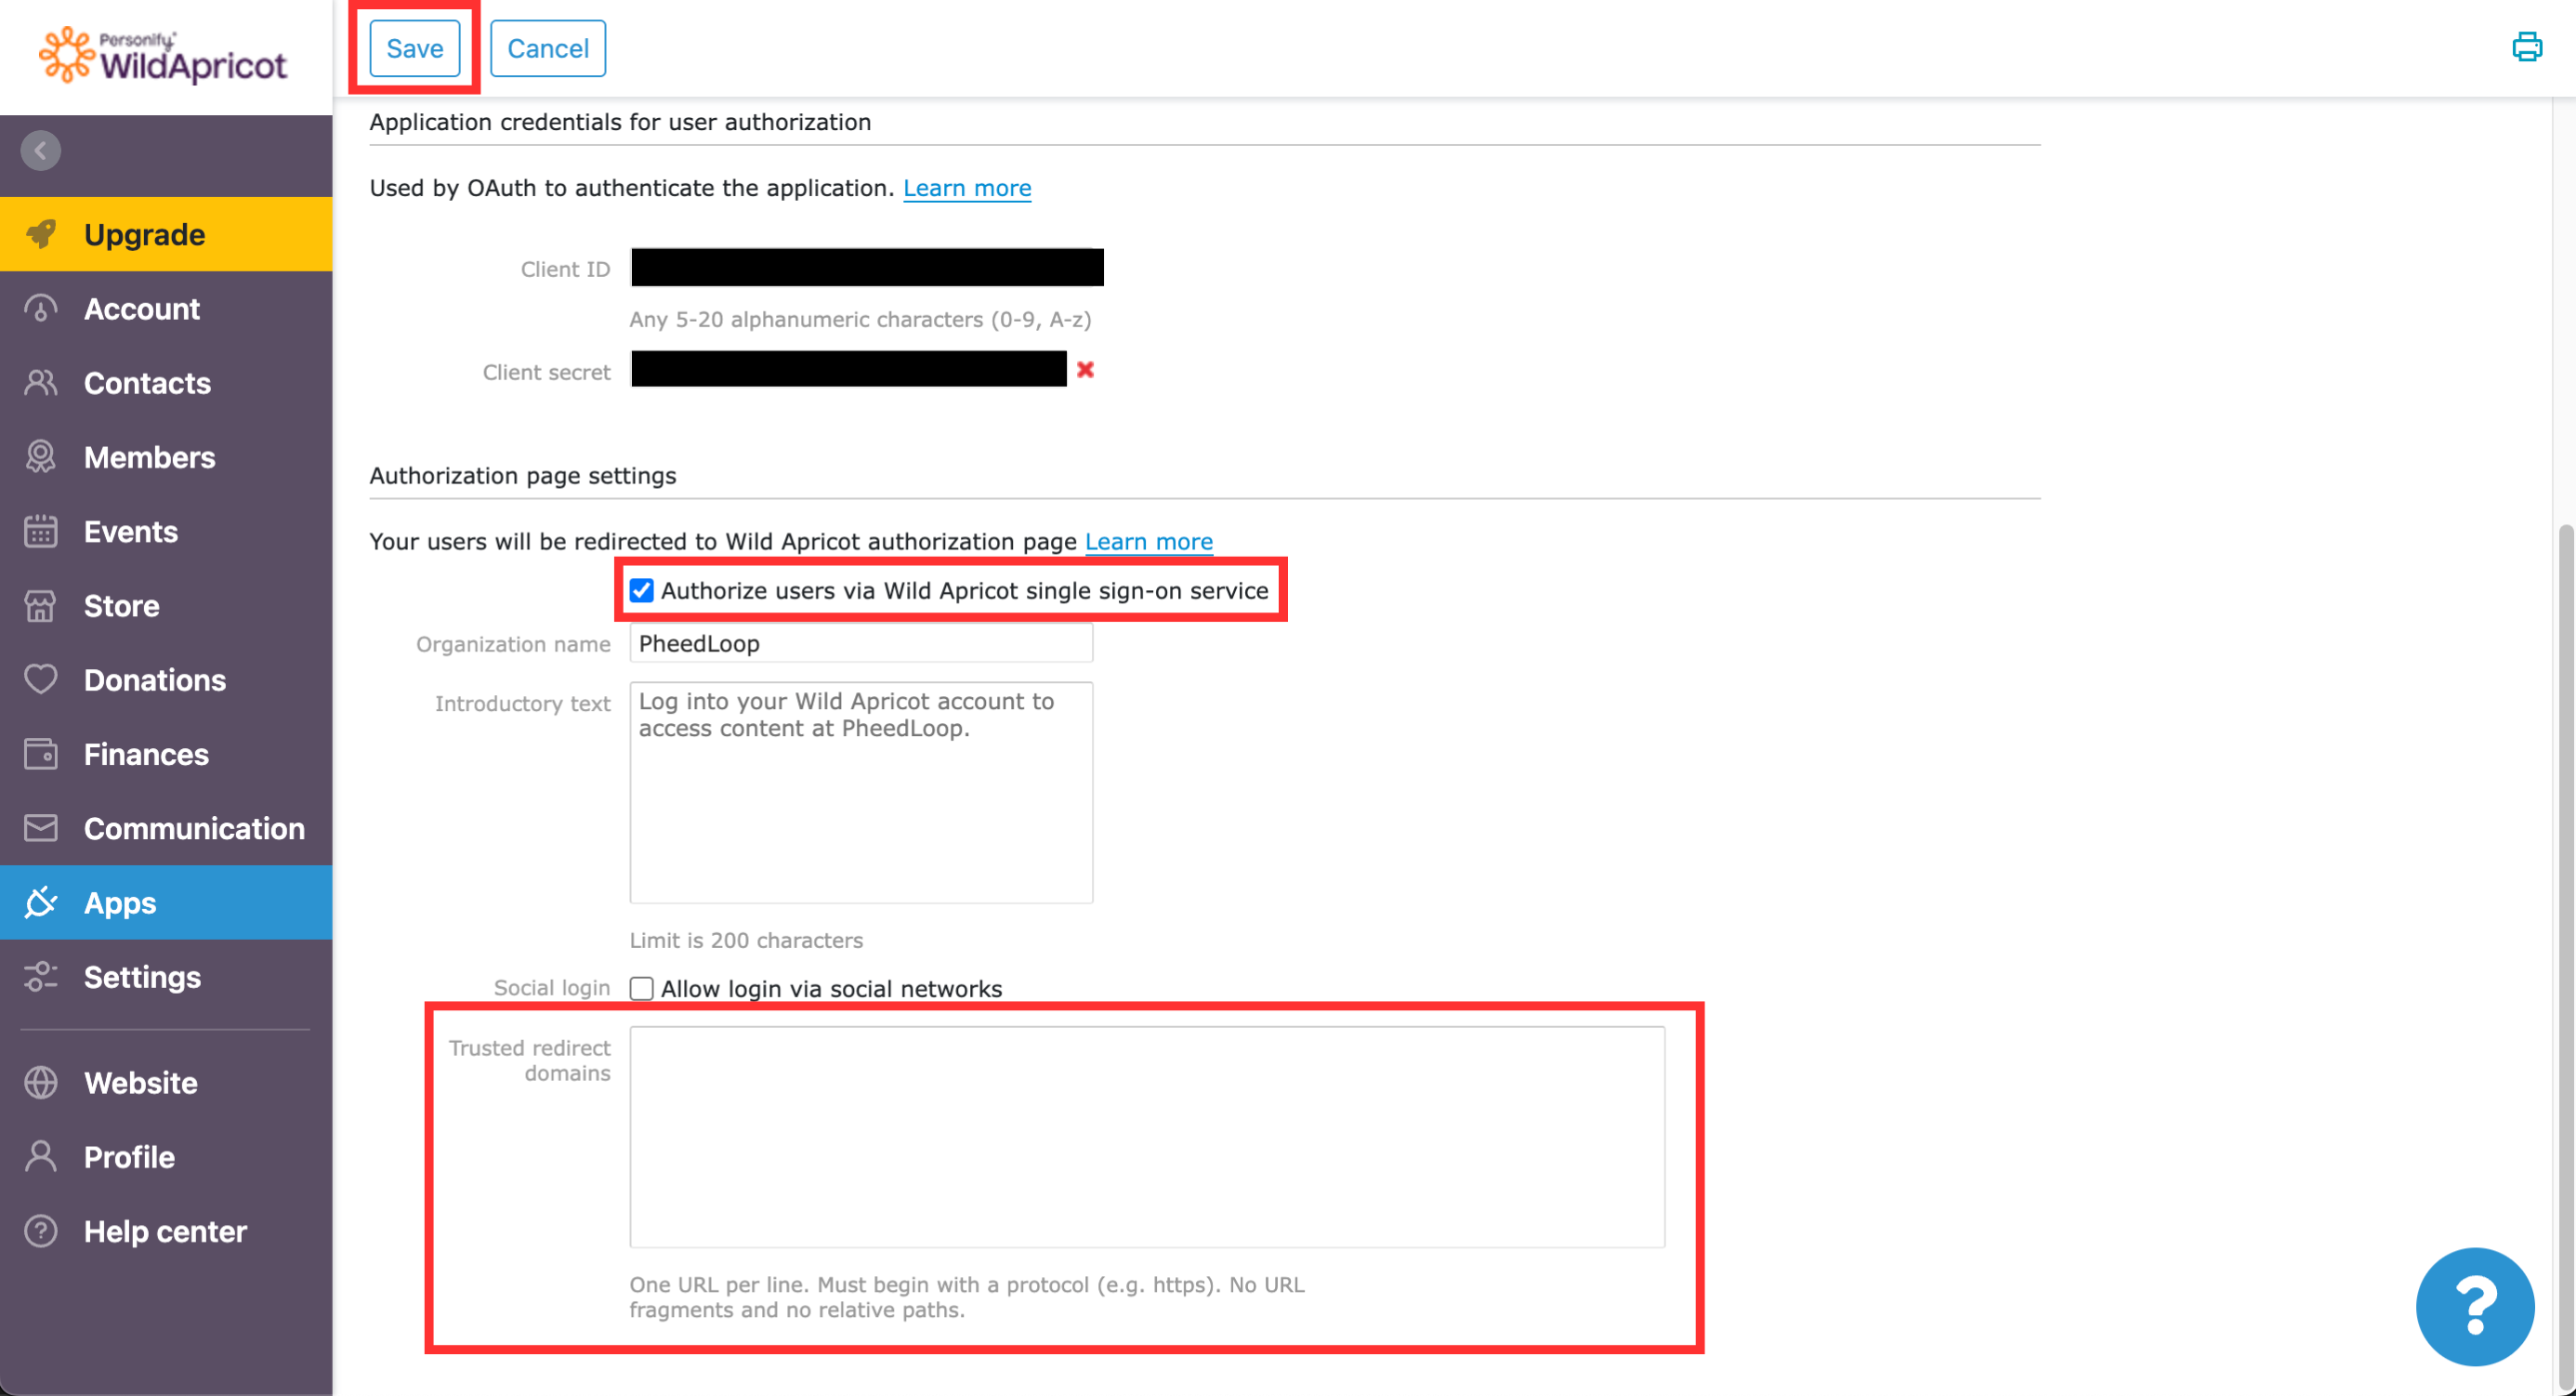
- Under the Client ID field, save this data for later use
- Under the Client secret field, save the data for later use
Important: Never share this data publicly for security reasons. It is recommended to change your security key if this is ever revealed.
- Toggle on the Authorize users via Wild Apricot single sign-on service checkbox
- Under the Trusted redirect domains field, you must add 'https://site.pheedloop.com/sso/redirect'
- If you are using a custom domain, you will need to edit use your domain URL instead of 'site.pheedloop.com' (i.e. 'https://<your_custom_domain>/sso/redirect').
Select Save


Adding Contacts to Wild Apricot
As part of the login process, you will need to have users added to Wild Apricot before they can log in through PheedLoop. This article assumes you already have contacts in your account. If you would like instructions on adding contacts, please refer to the Adding contacts manually article.
PheedLoop Configurations
At this point, you will have completed all the configuration steps necessary on Wild Apricot. Now that this is done, you need to copy and paste certain information to PheedLoop before this process can be complete.
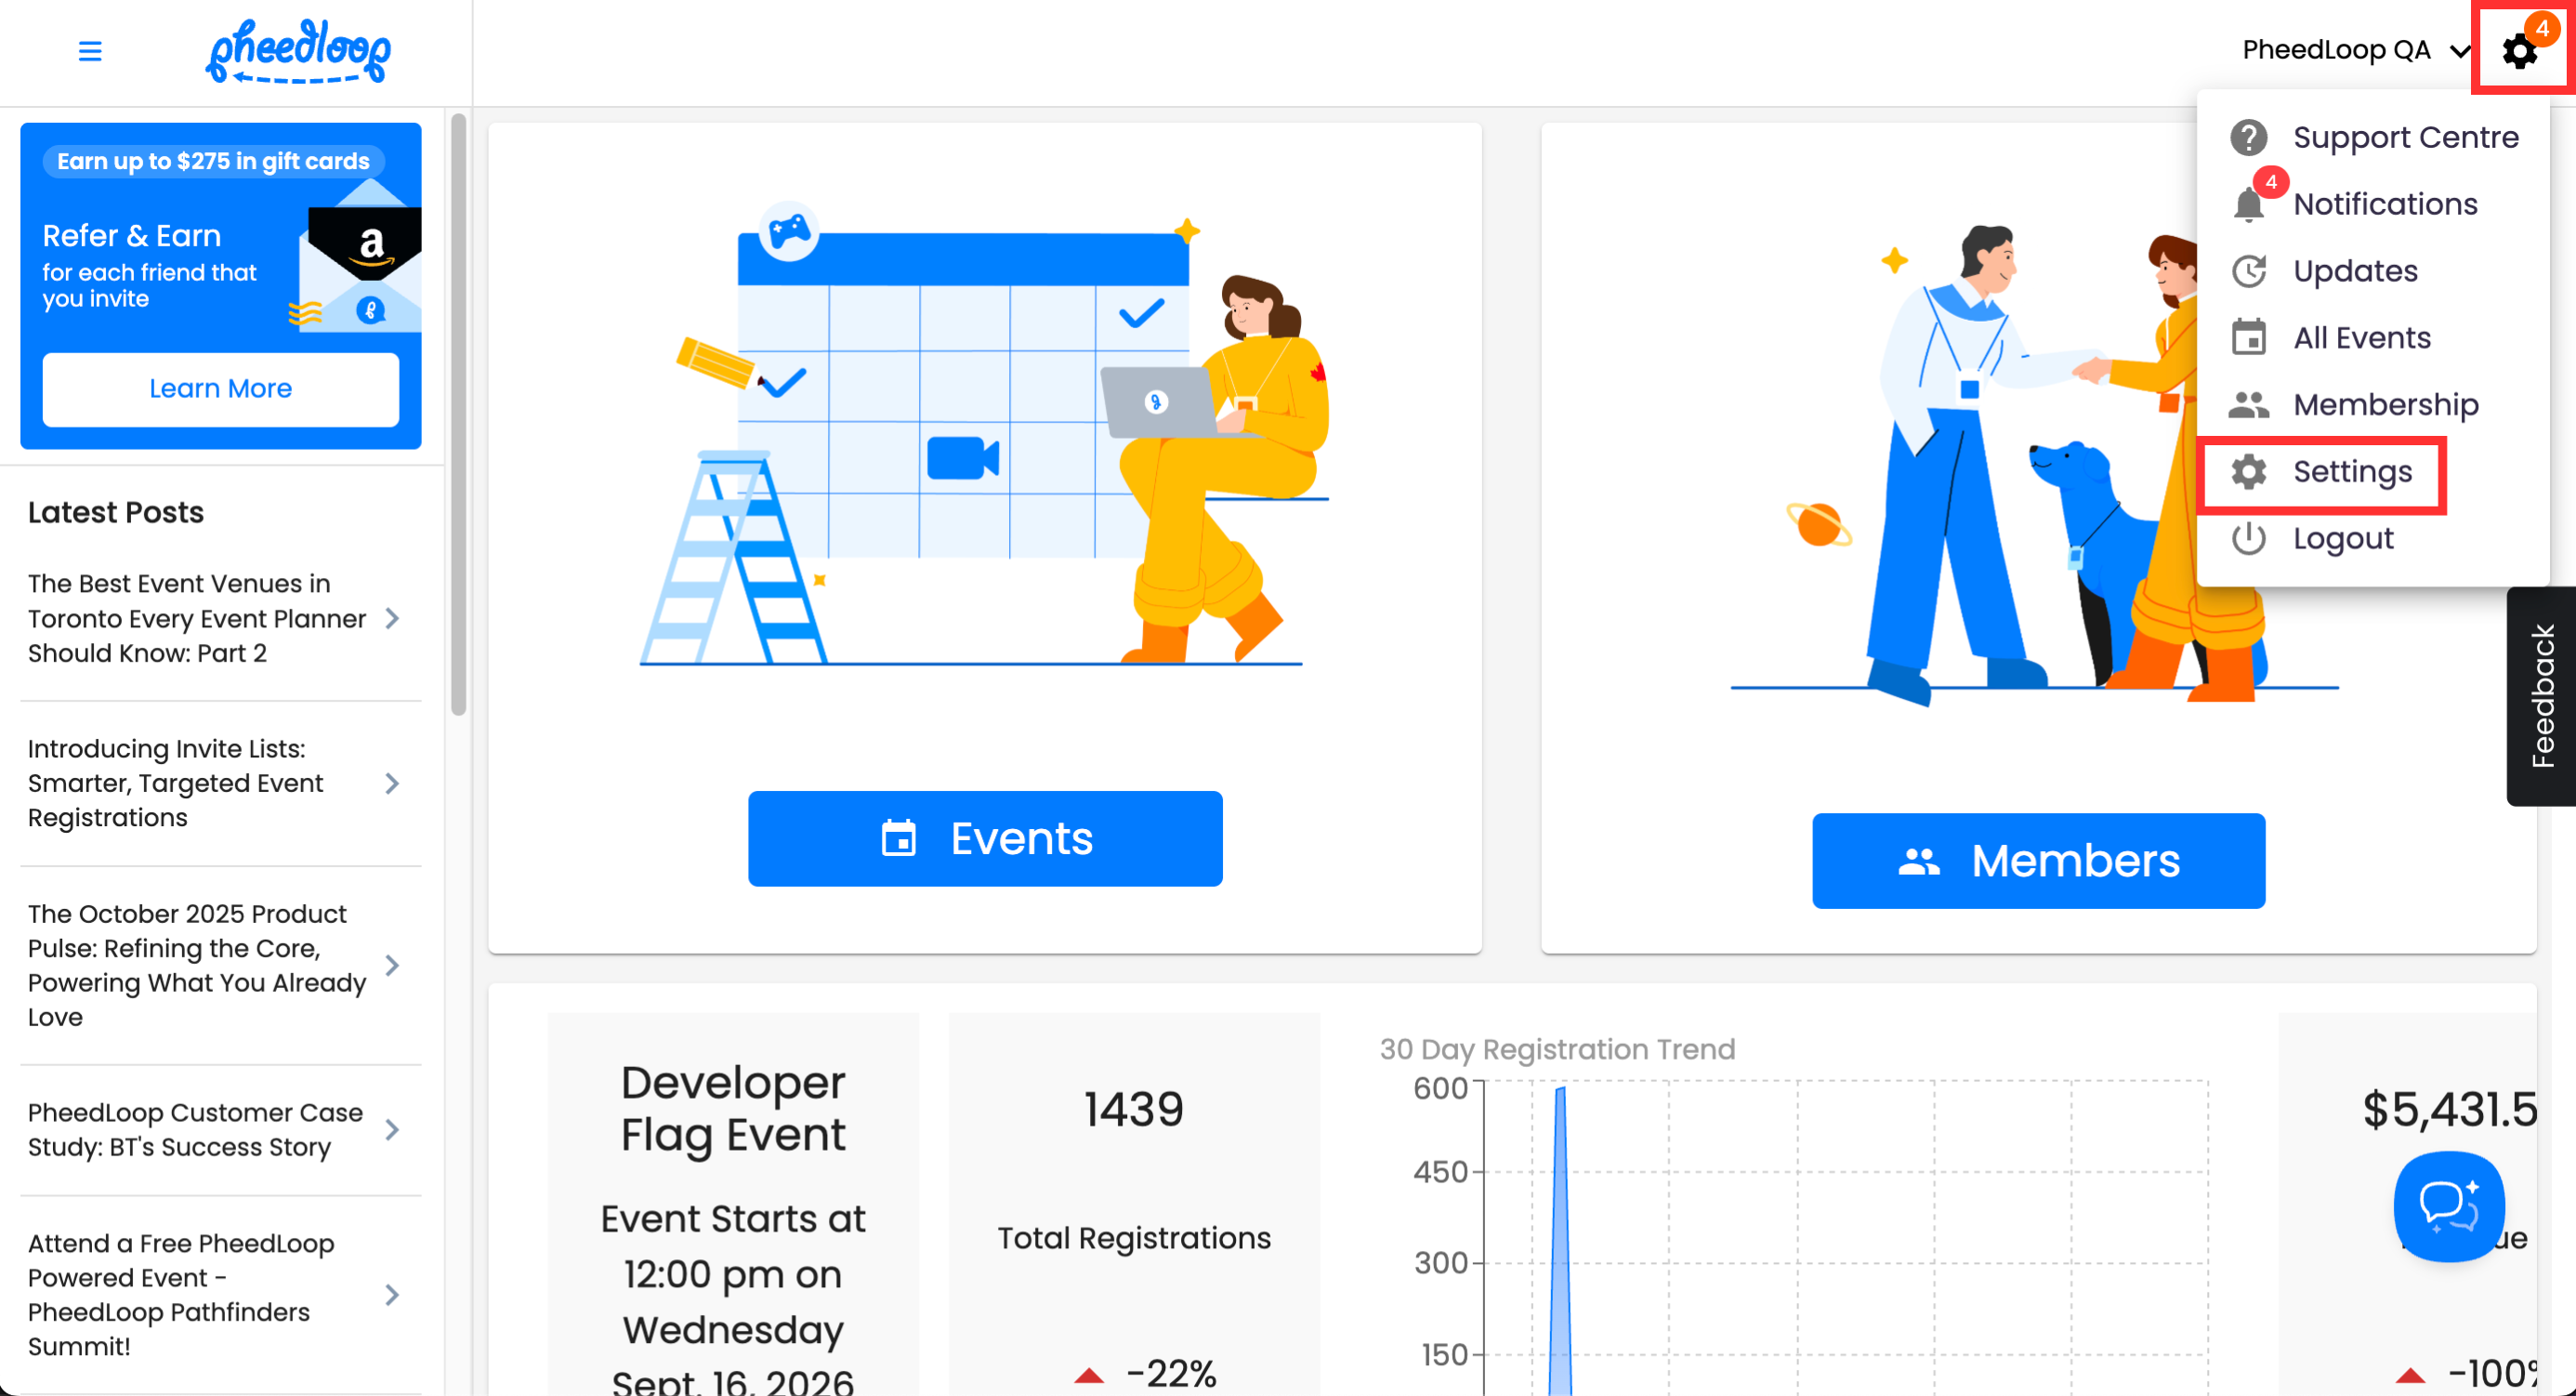
Log in to your Event Dashboard on PheedLoop and select the gear icon followed by Settings
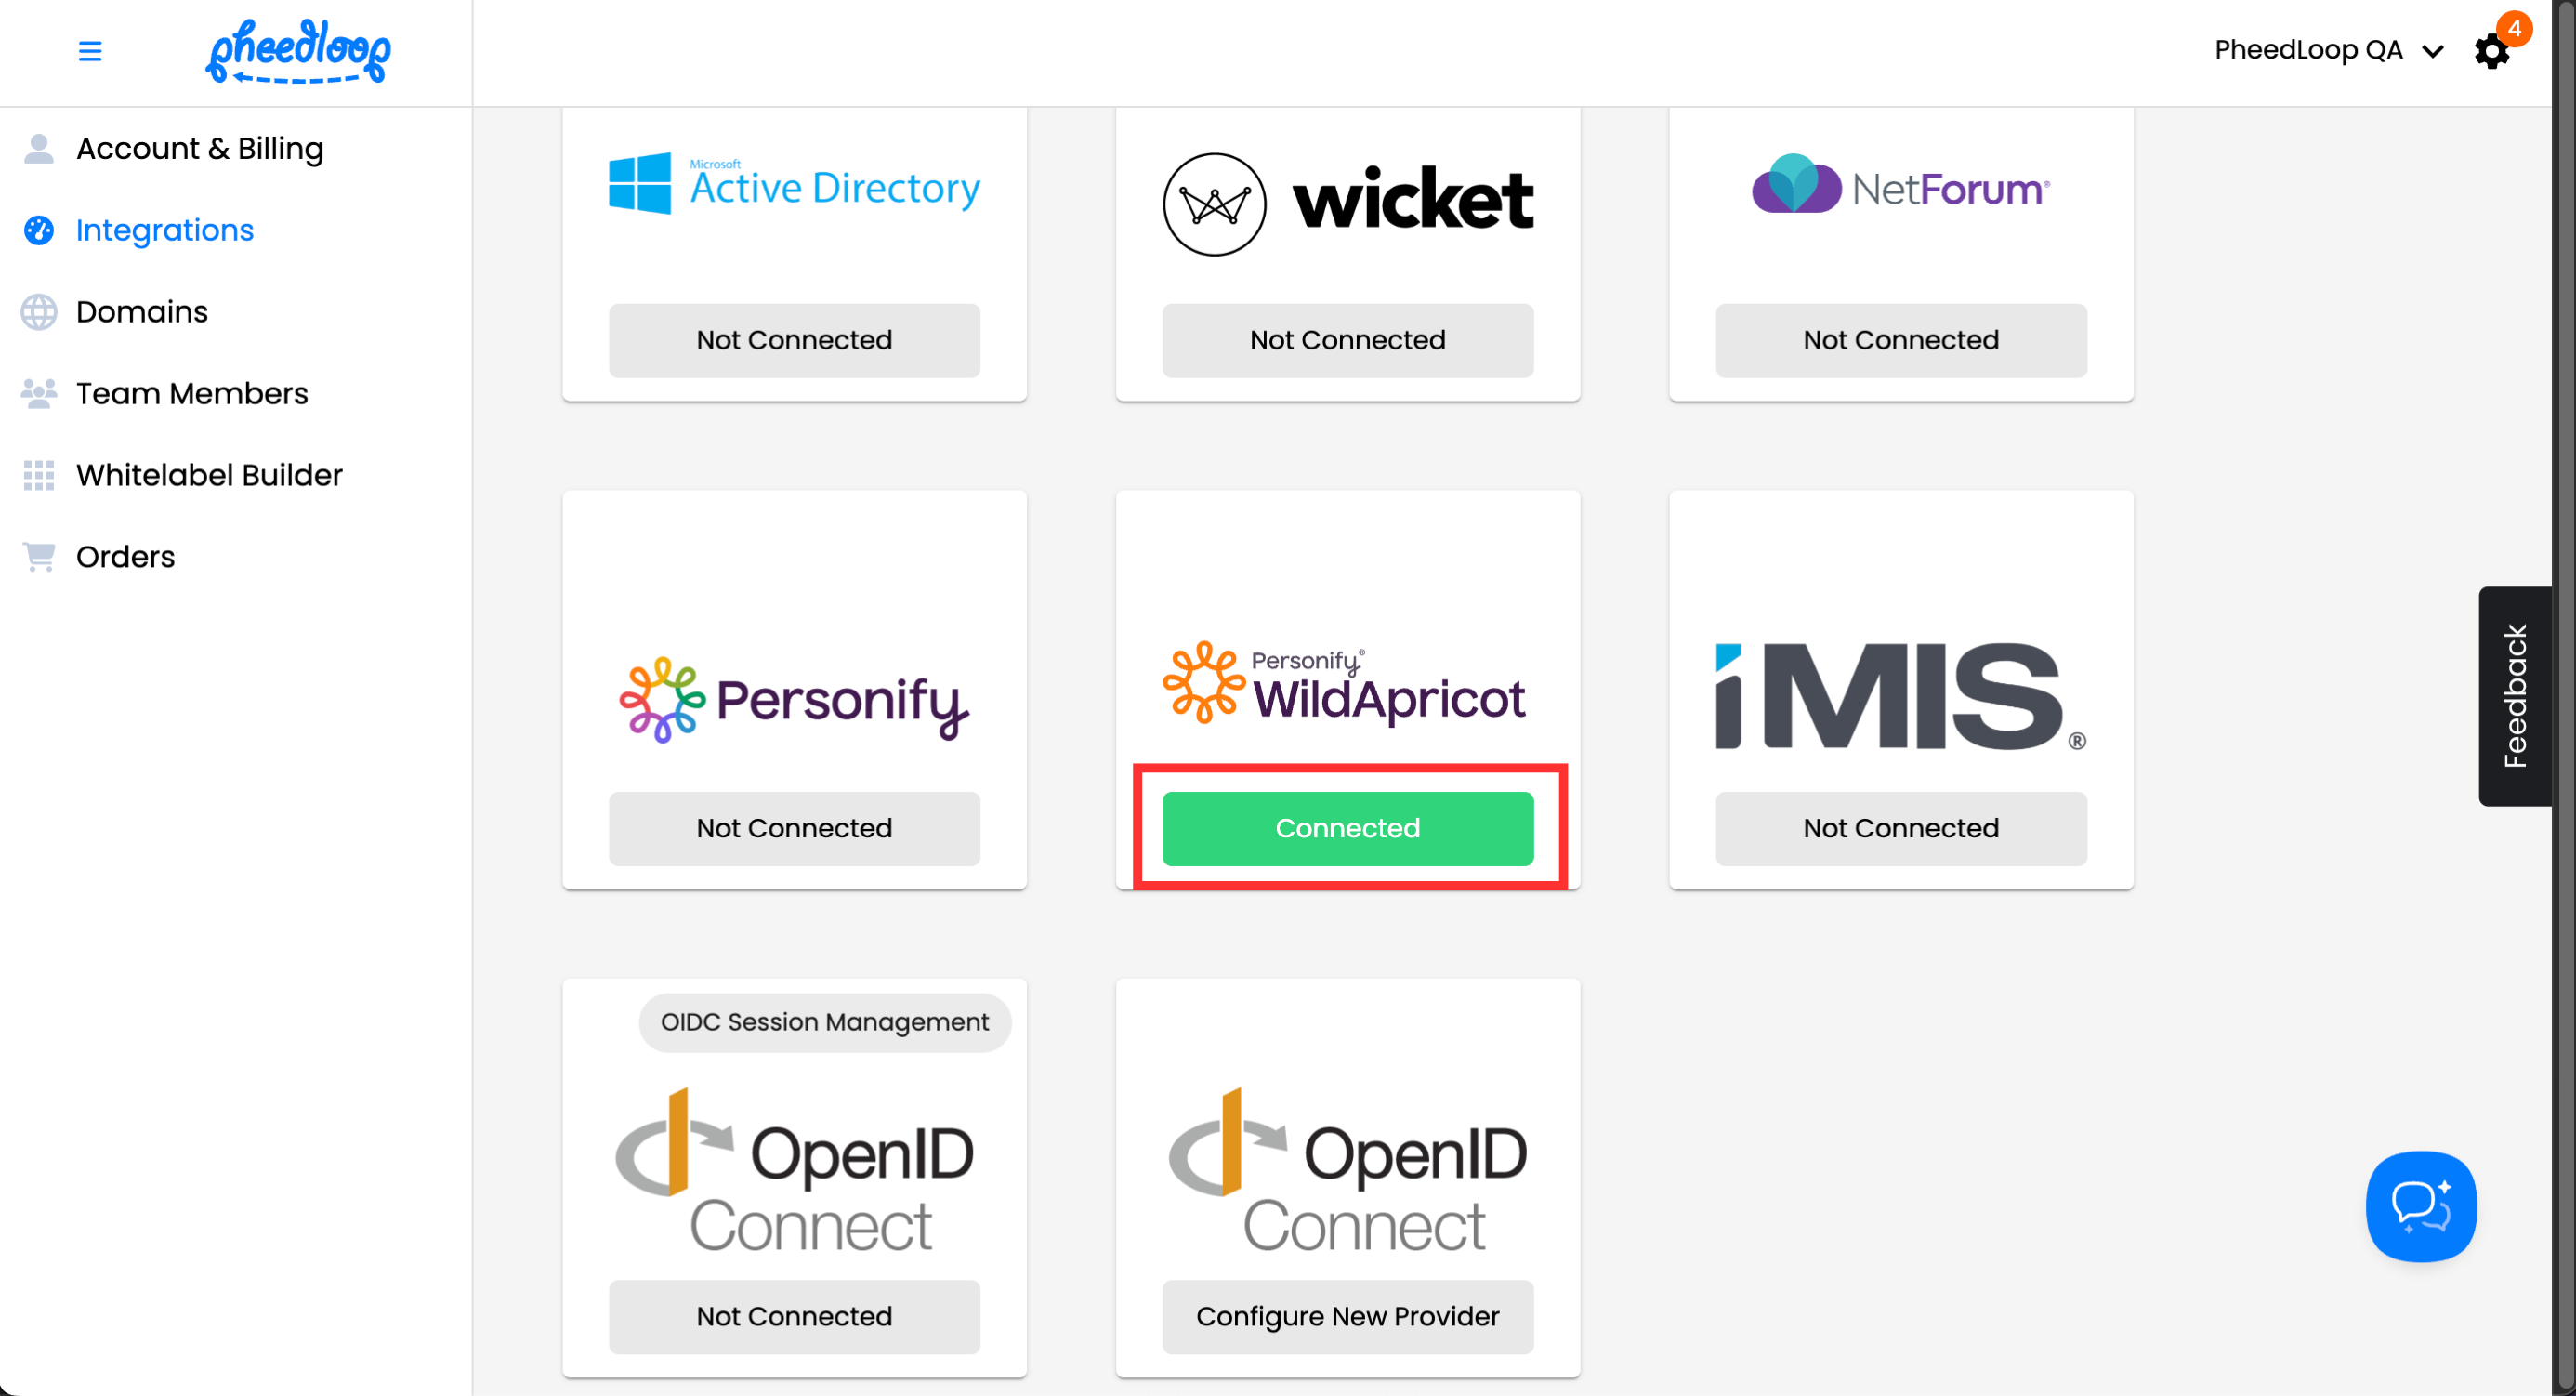
- Navigate to the Integrations tab and scroll down to Single Sign On Integrations
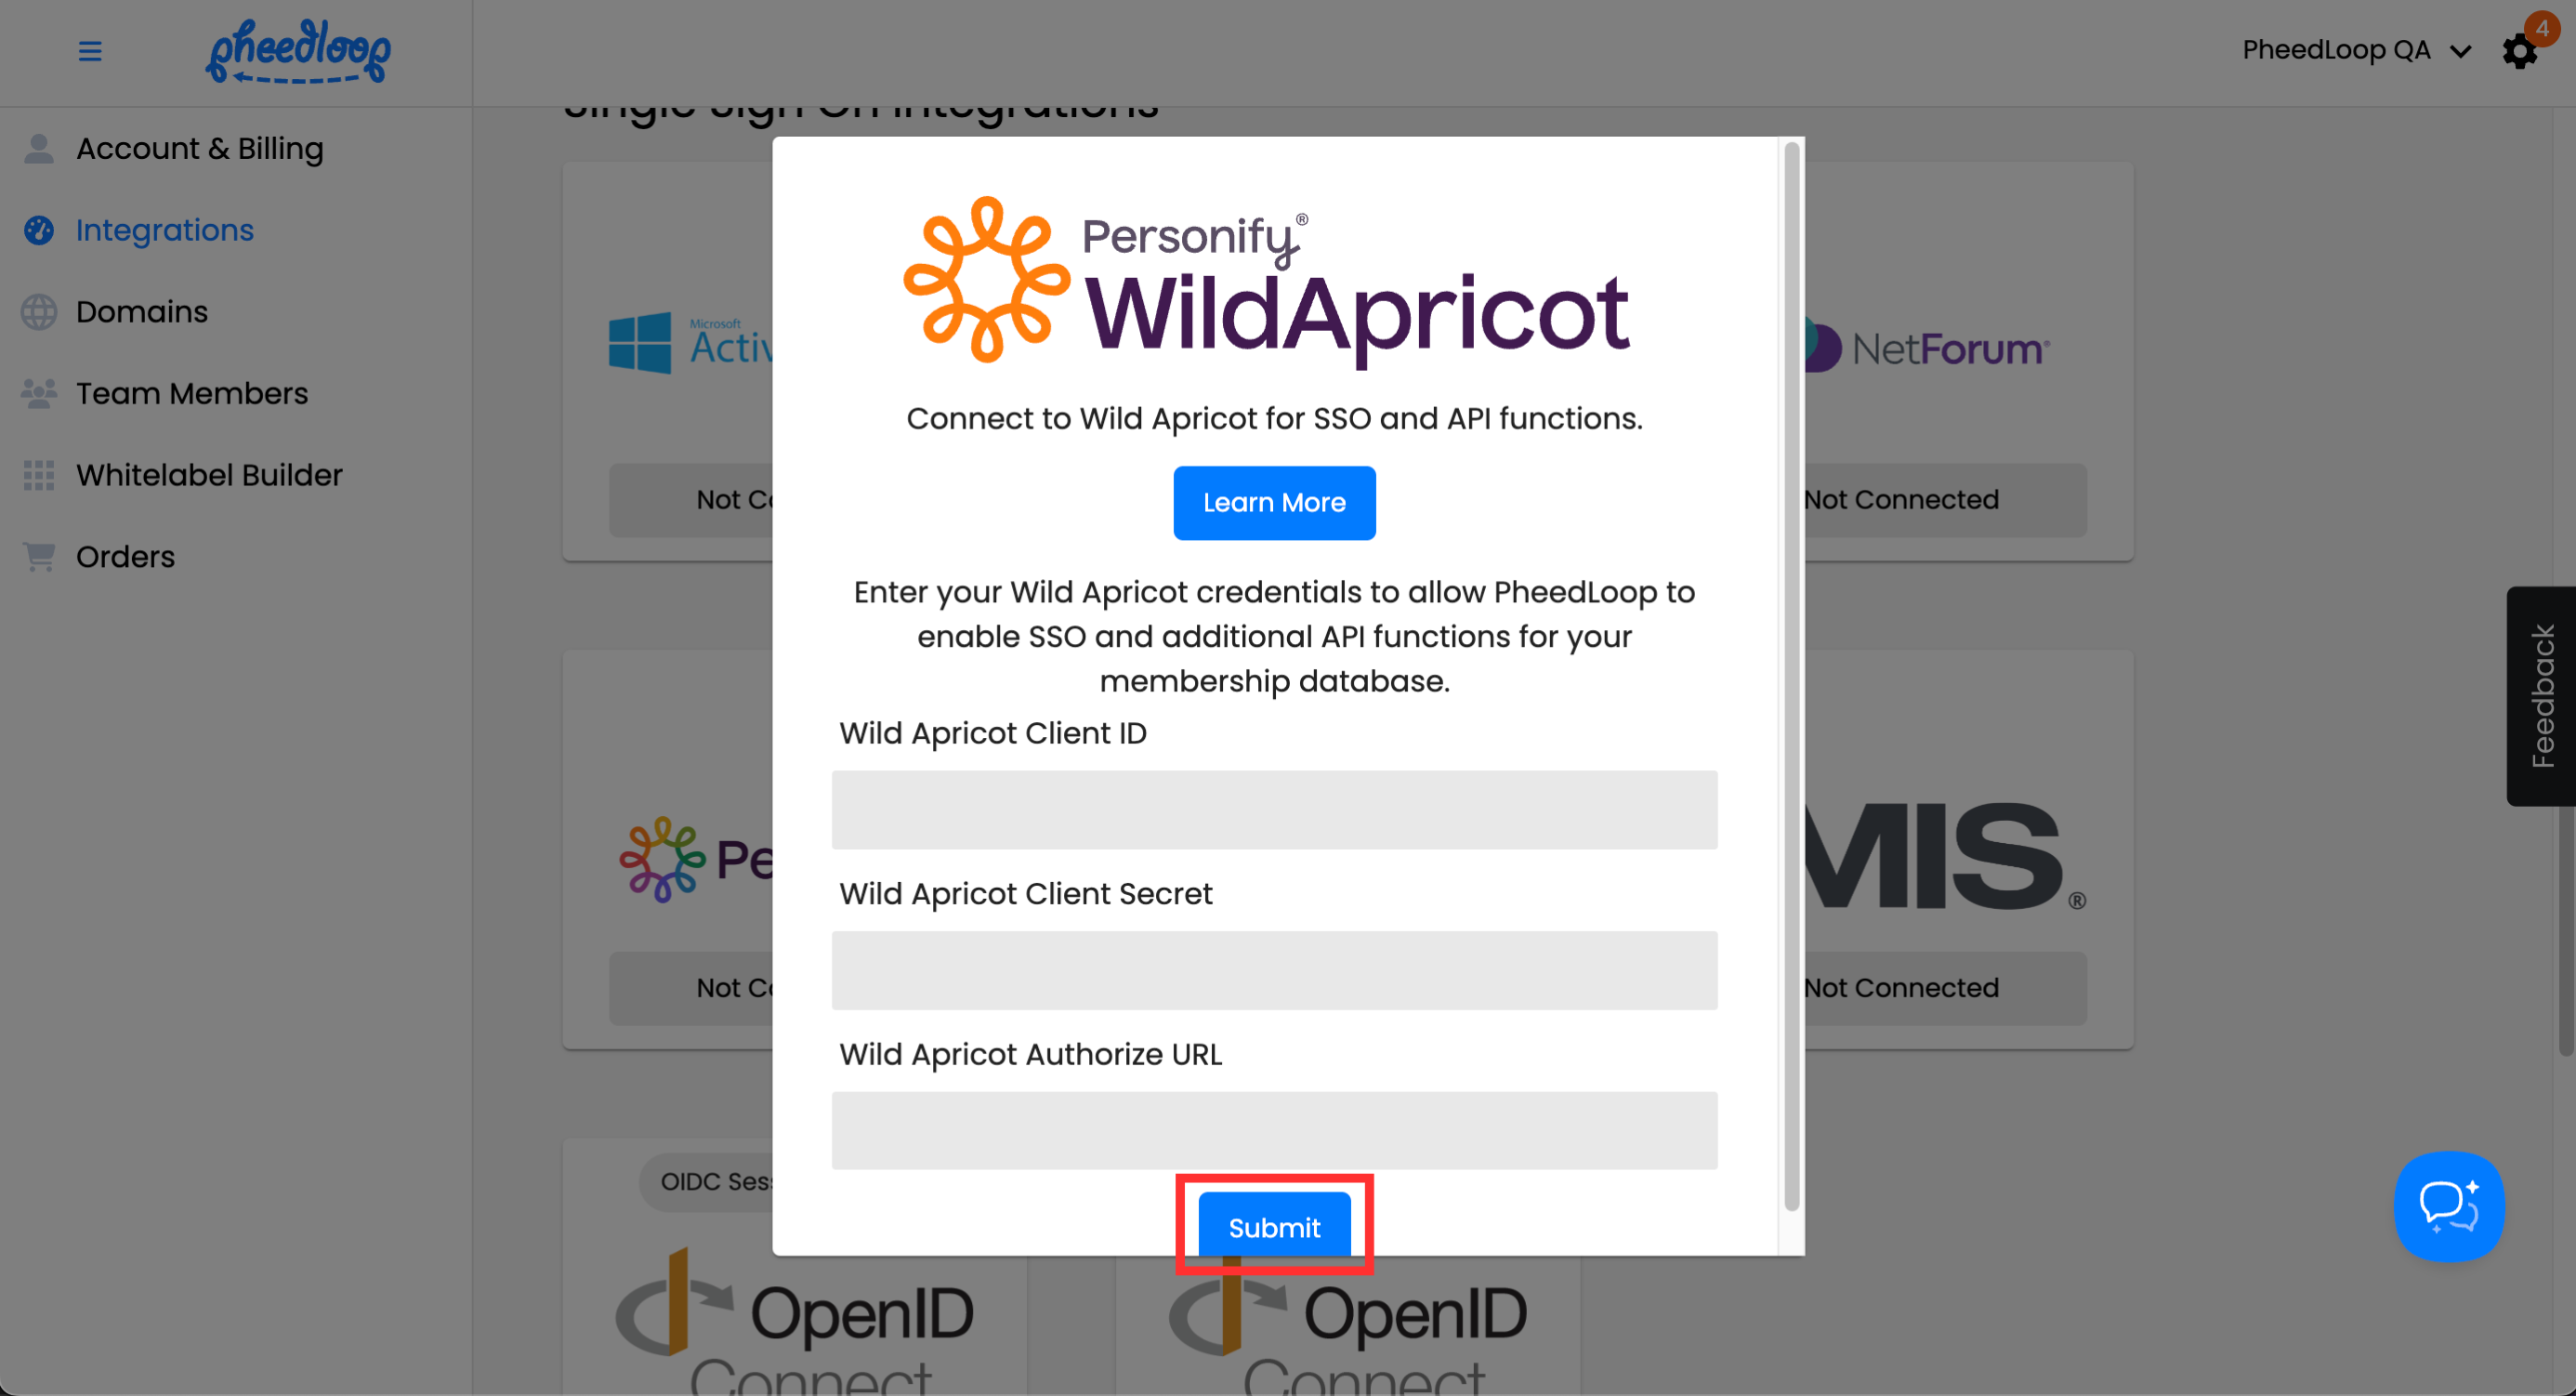
Select Not Connected under Wild Apricot

You will now need to copy over your Wild Apricot Client ID, Client Secret, and Authorize URL
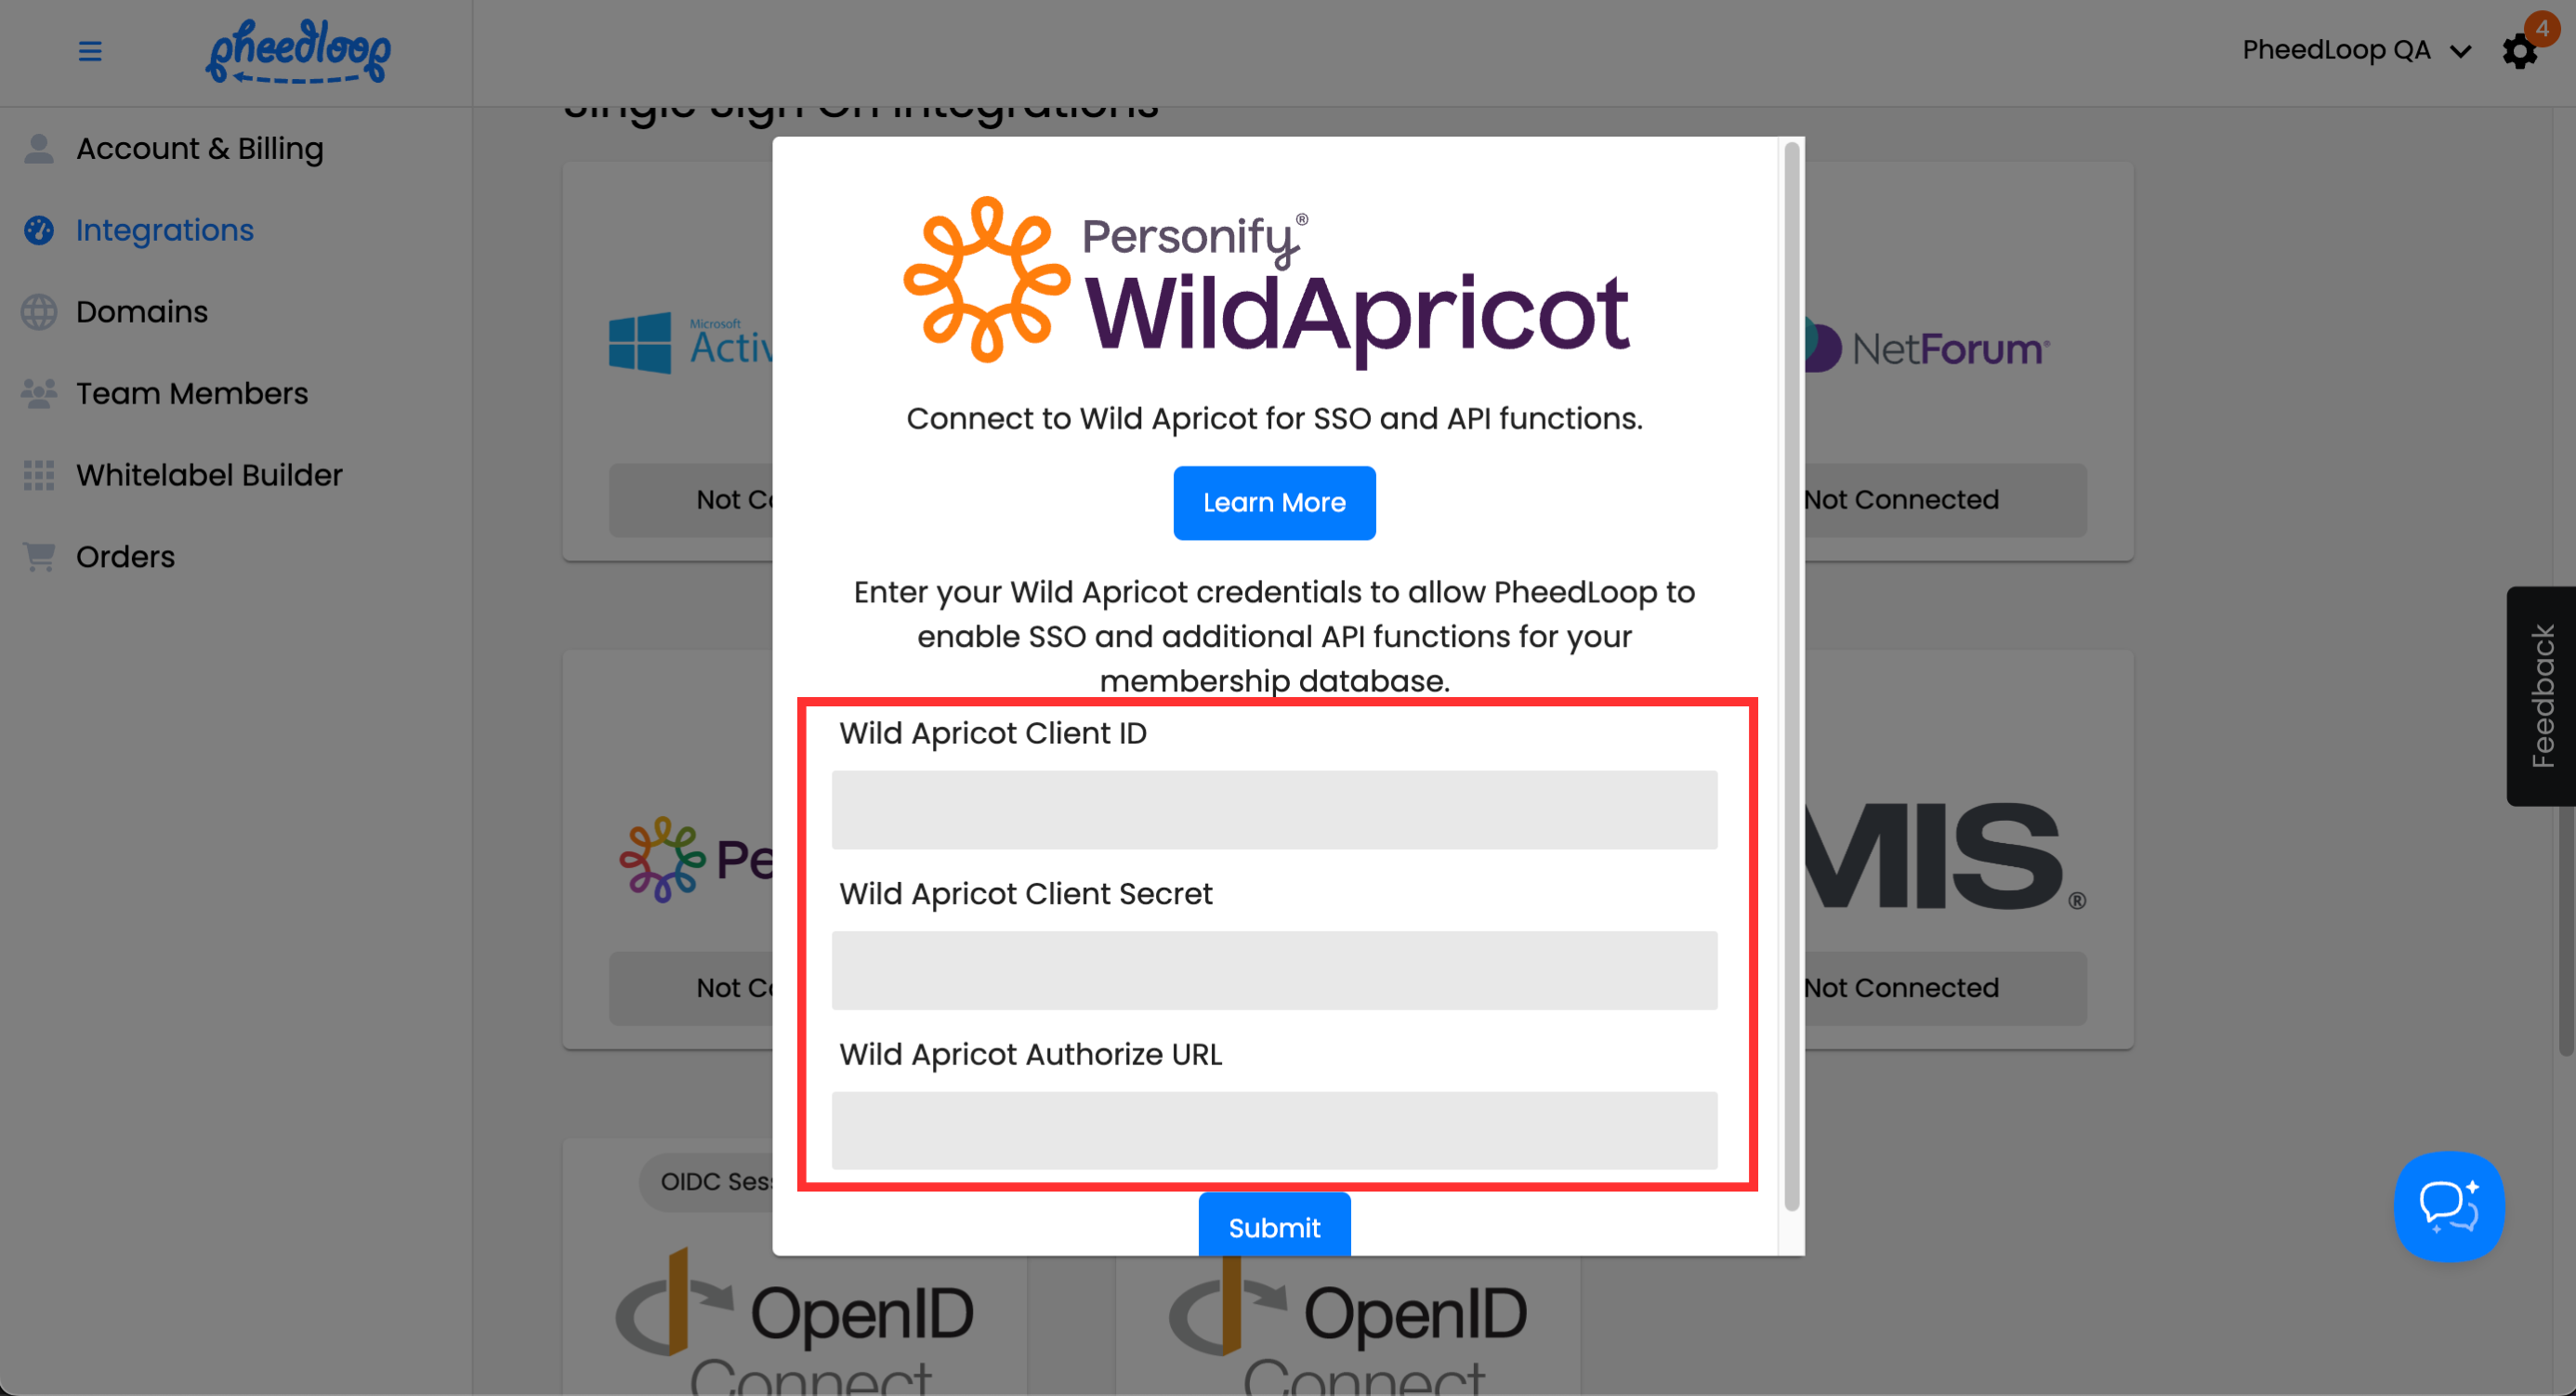
As a reminder, the client ID and client secret are both found in your Application details on the Wild Apricot Dashboard

The Authorization URL requires some additional set up. First, you will want to go to the Account Dashboard in Wild Apricot and note the website address you are using.
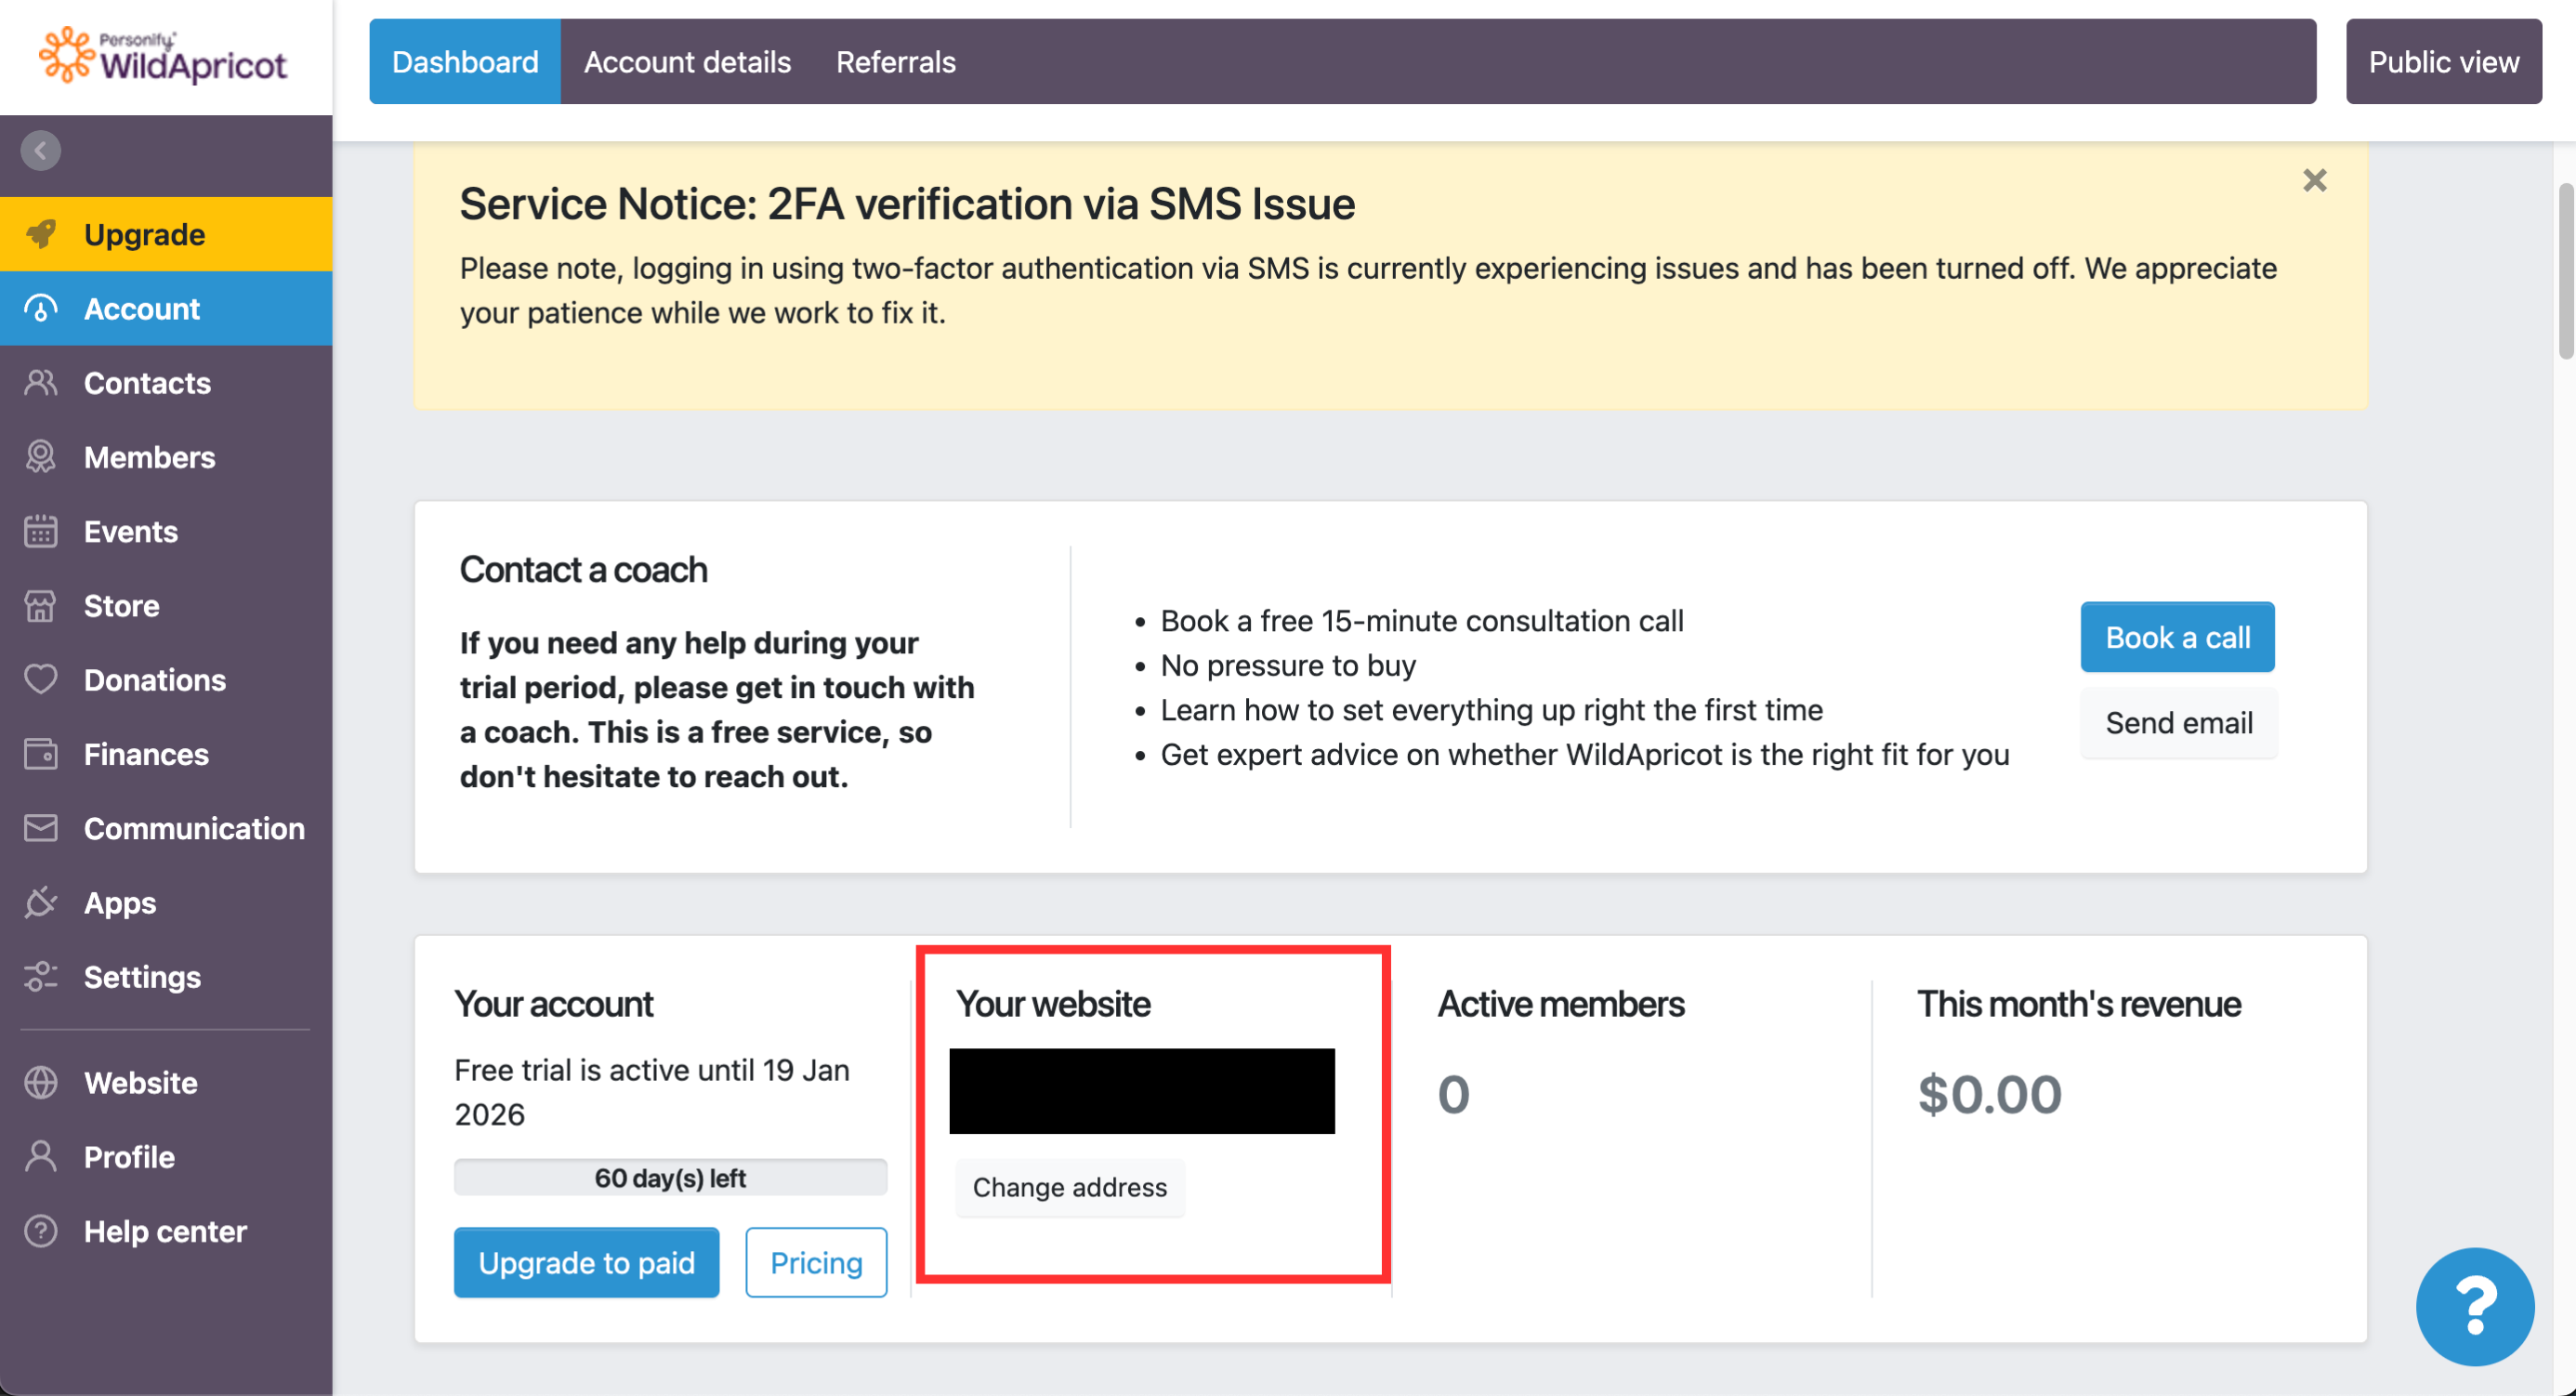
- Second, take this URL and enter it under the following format: 'https://<org_wildapricot_url>/sys/login/OAuthLogin' where <org_wildapricot_url> is your Wild Apricot website address
- Important: You must add '/sys/login/OAuthLogin' at the end or this integration will NOT work.
Select Submit


Your integration should now be connected and users may now login with their Wild Apricot user credentials.
Testing out the SSO login
To ensure everything is working, we recommend doing a quick test from the Event Website. This is where your attendees will purchase their tickets and complete their registration information. You can open the Event Website from the Event Dashboard by selecting Event Portals > Event Website

From the Event Website, select Register Now

Select a registration category and then select Login with Wild Apricot
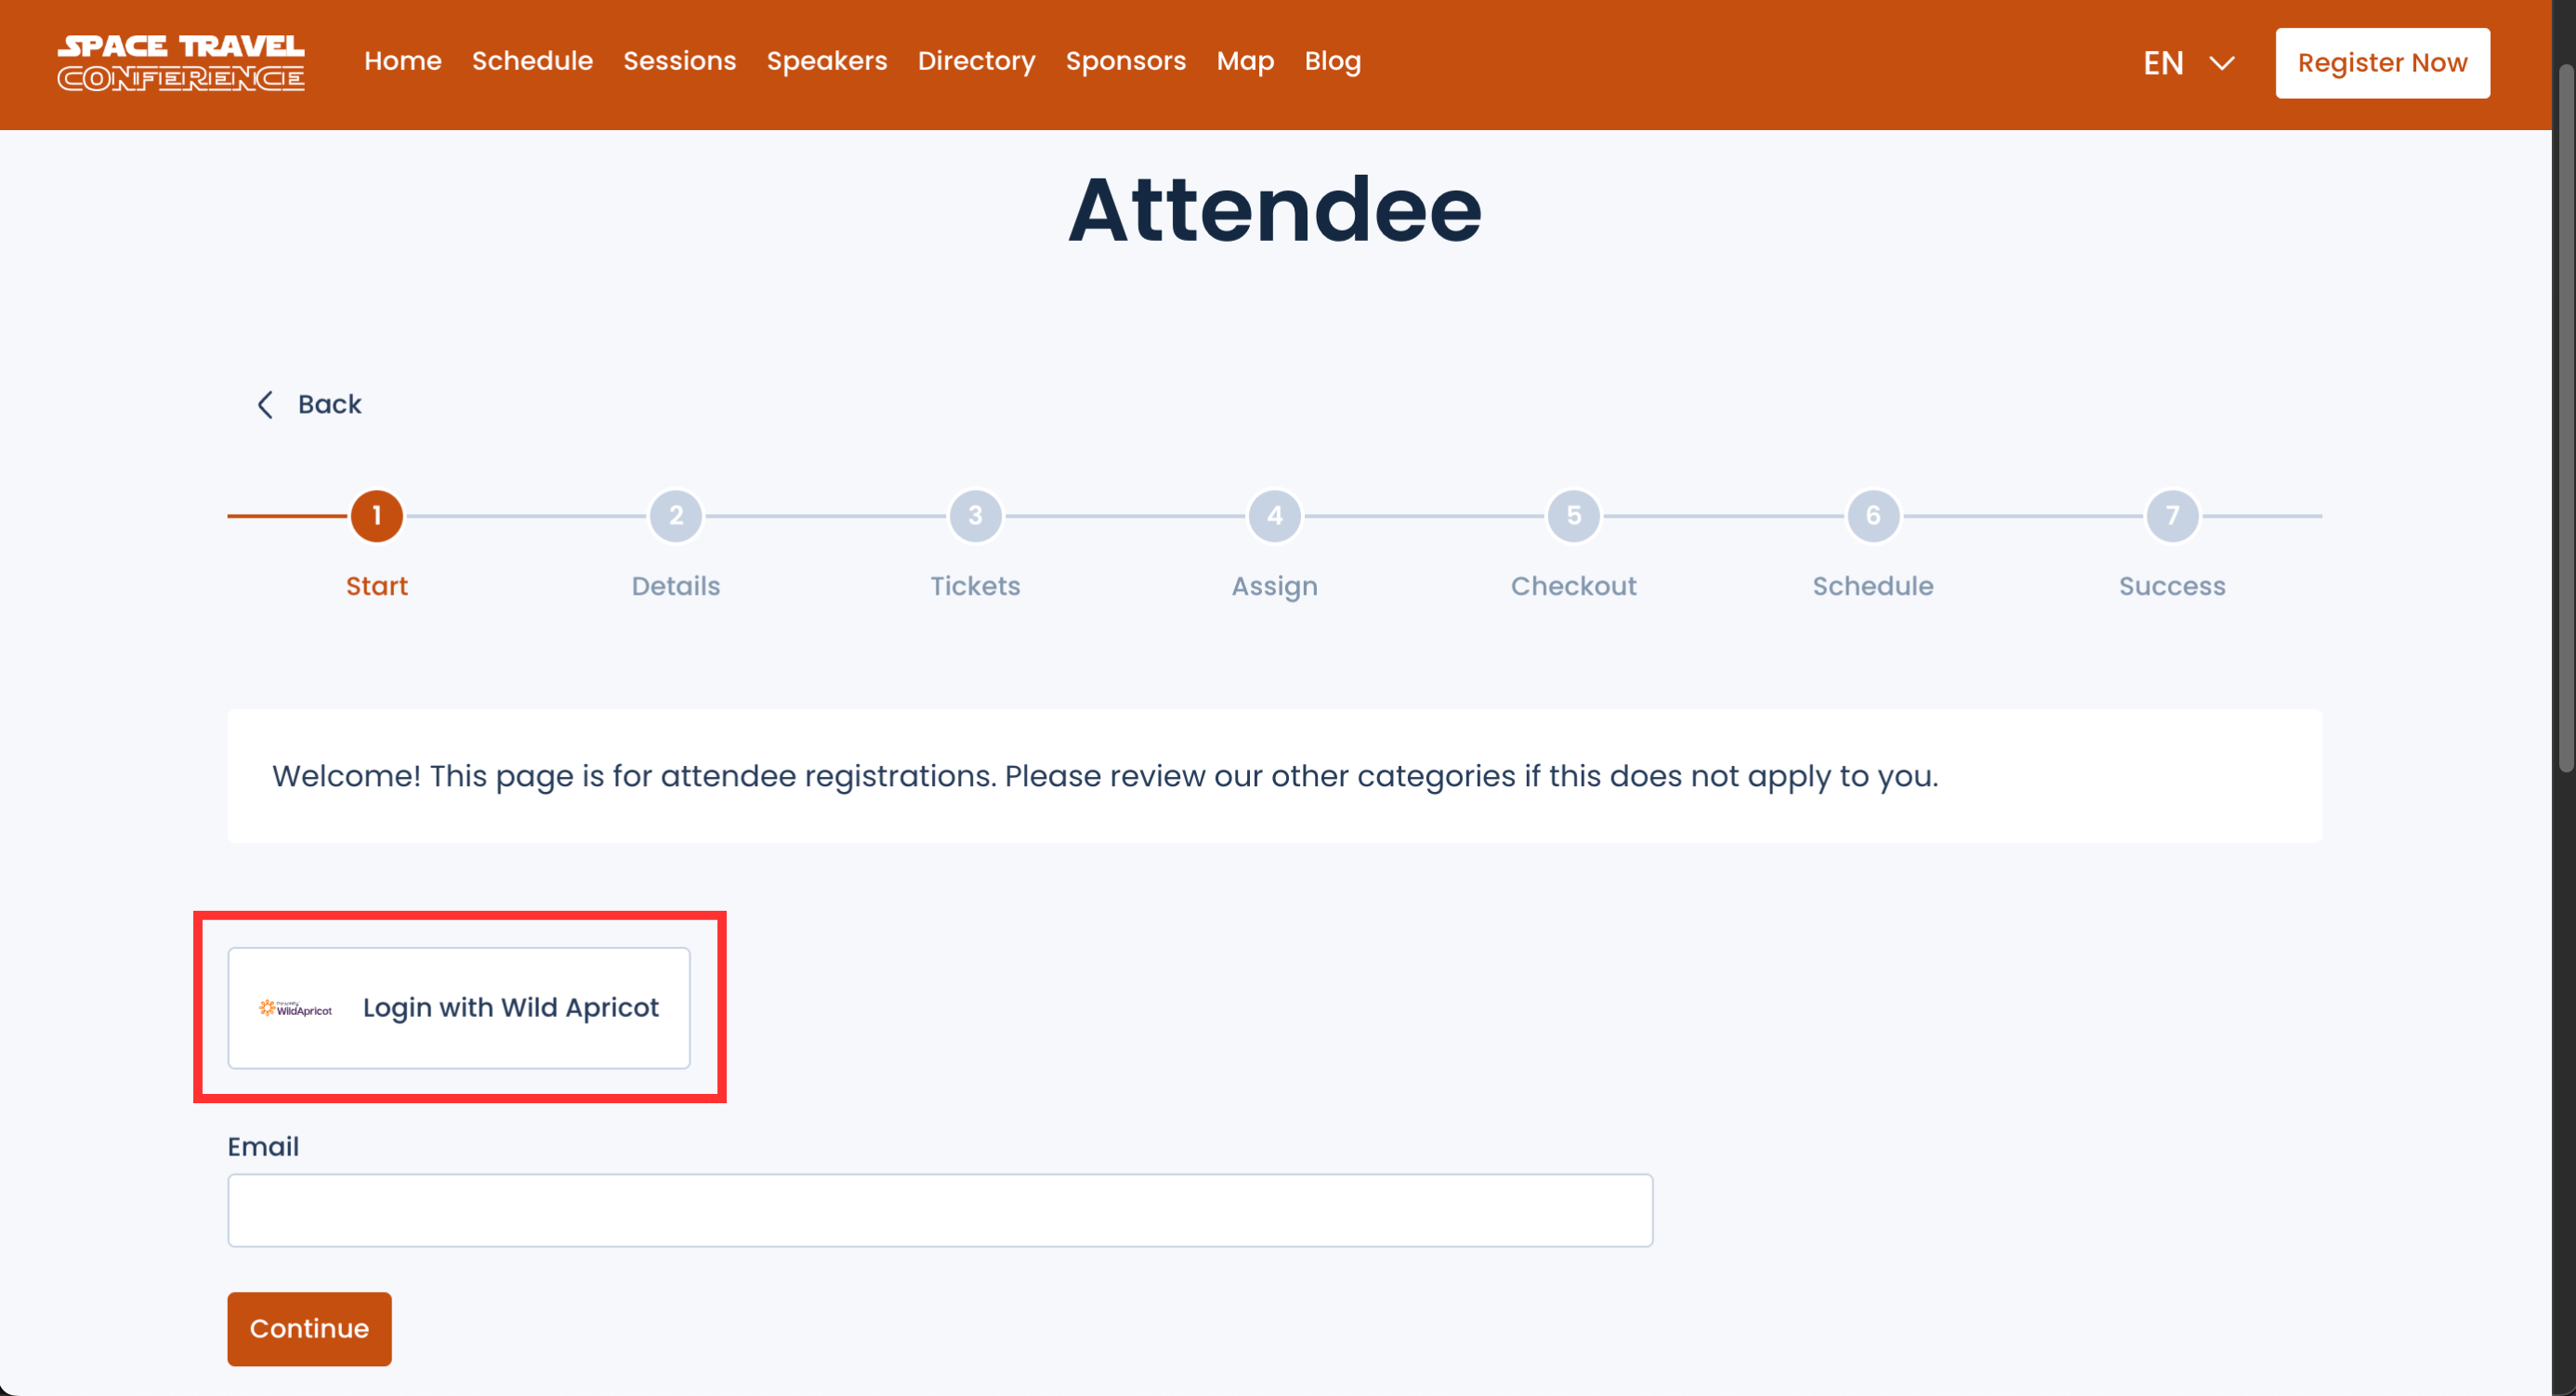
- You will now be signed in with your Wild Apricot account, where you can continue with your registration.
- If you aren’t currently signed in, you’ll be prompted to log in first and can then proceed as usual.


Deleting the Wild Apricot Integration from PheedLoop
If you ever need to remove the Wild Apricot integration, you can easily do so from the Event Dashboard.
From the Integrations menu, select Connected under Wild Apricot
Select Clear Keys
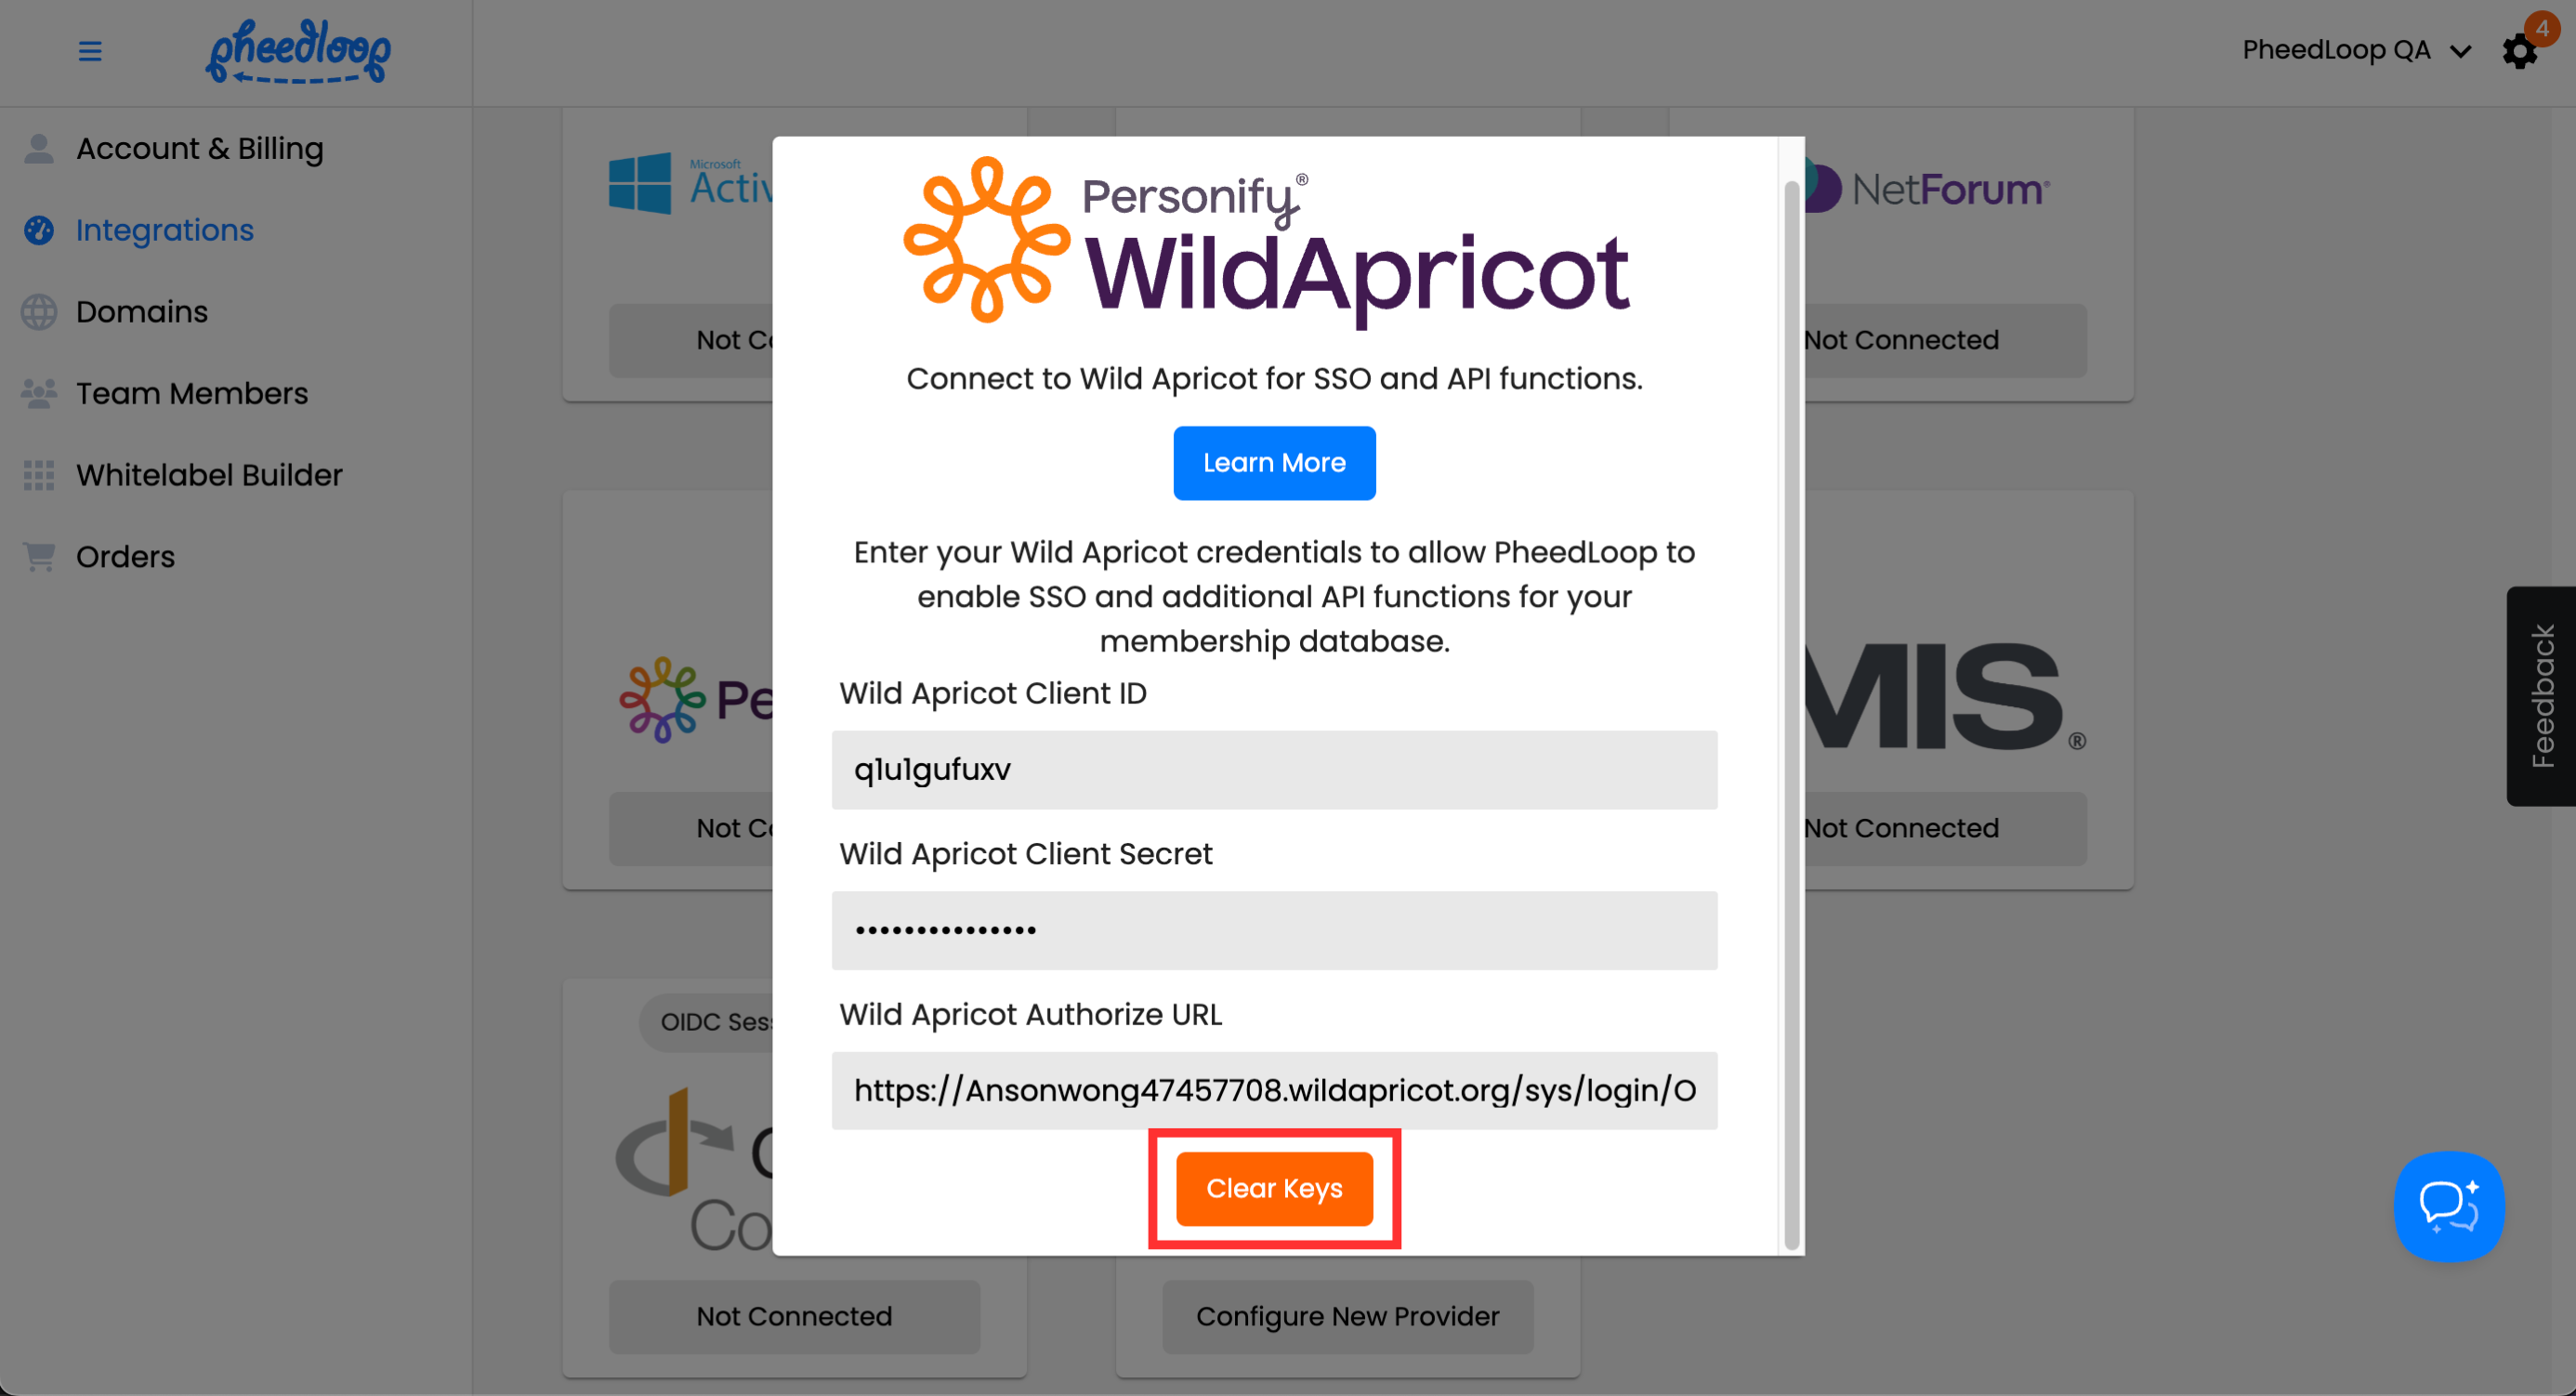


Your Wild Apricot integration will now be disconnected.