Customizing “Add to Calendar” Details for Your Event
The Add to Calendar feature allows attendees to easily save your event to their personal calendars (such as Google Calendar, Outlook, or Apple Calendar). By default, PheedLoop automatically generates these calendar details using your event information.

Event Planners can now customize what attendees see when they add your event to their calendar, while still keeping sensible defaults in place.
How Add to Calendar Works by Default
If no custom settings are provided, PheedLoop automatically fills in calendar details using your event’s existing information:
- Title: Event name
- Description: Event name
- Location: The address of the venue set in the Event Dashboard
- Start Date & Time: Event start date and time
- End Date & Time: Event end date and time
- Timezone: The event timezone set in the Event Dashboard
This default behavior ensures that Add to Calendar links continue working even if no customization is applied.
Customizing Add to Calendar Details
Event organizers can optionally override the default calendar information shown to attendees.
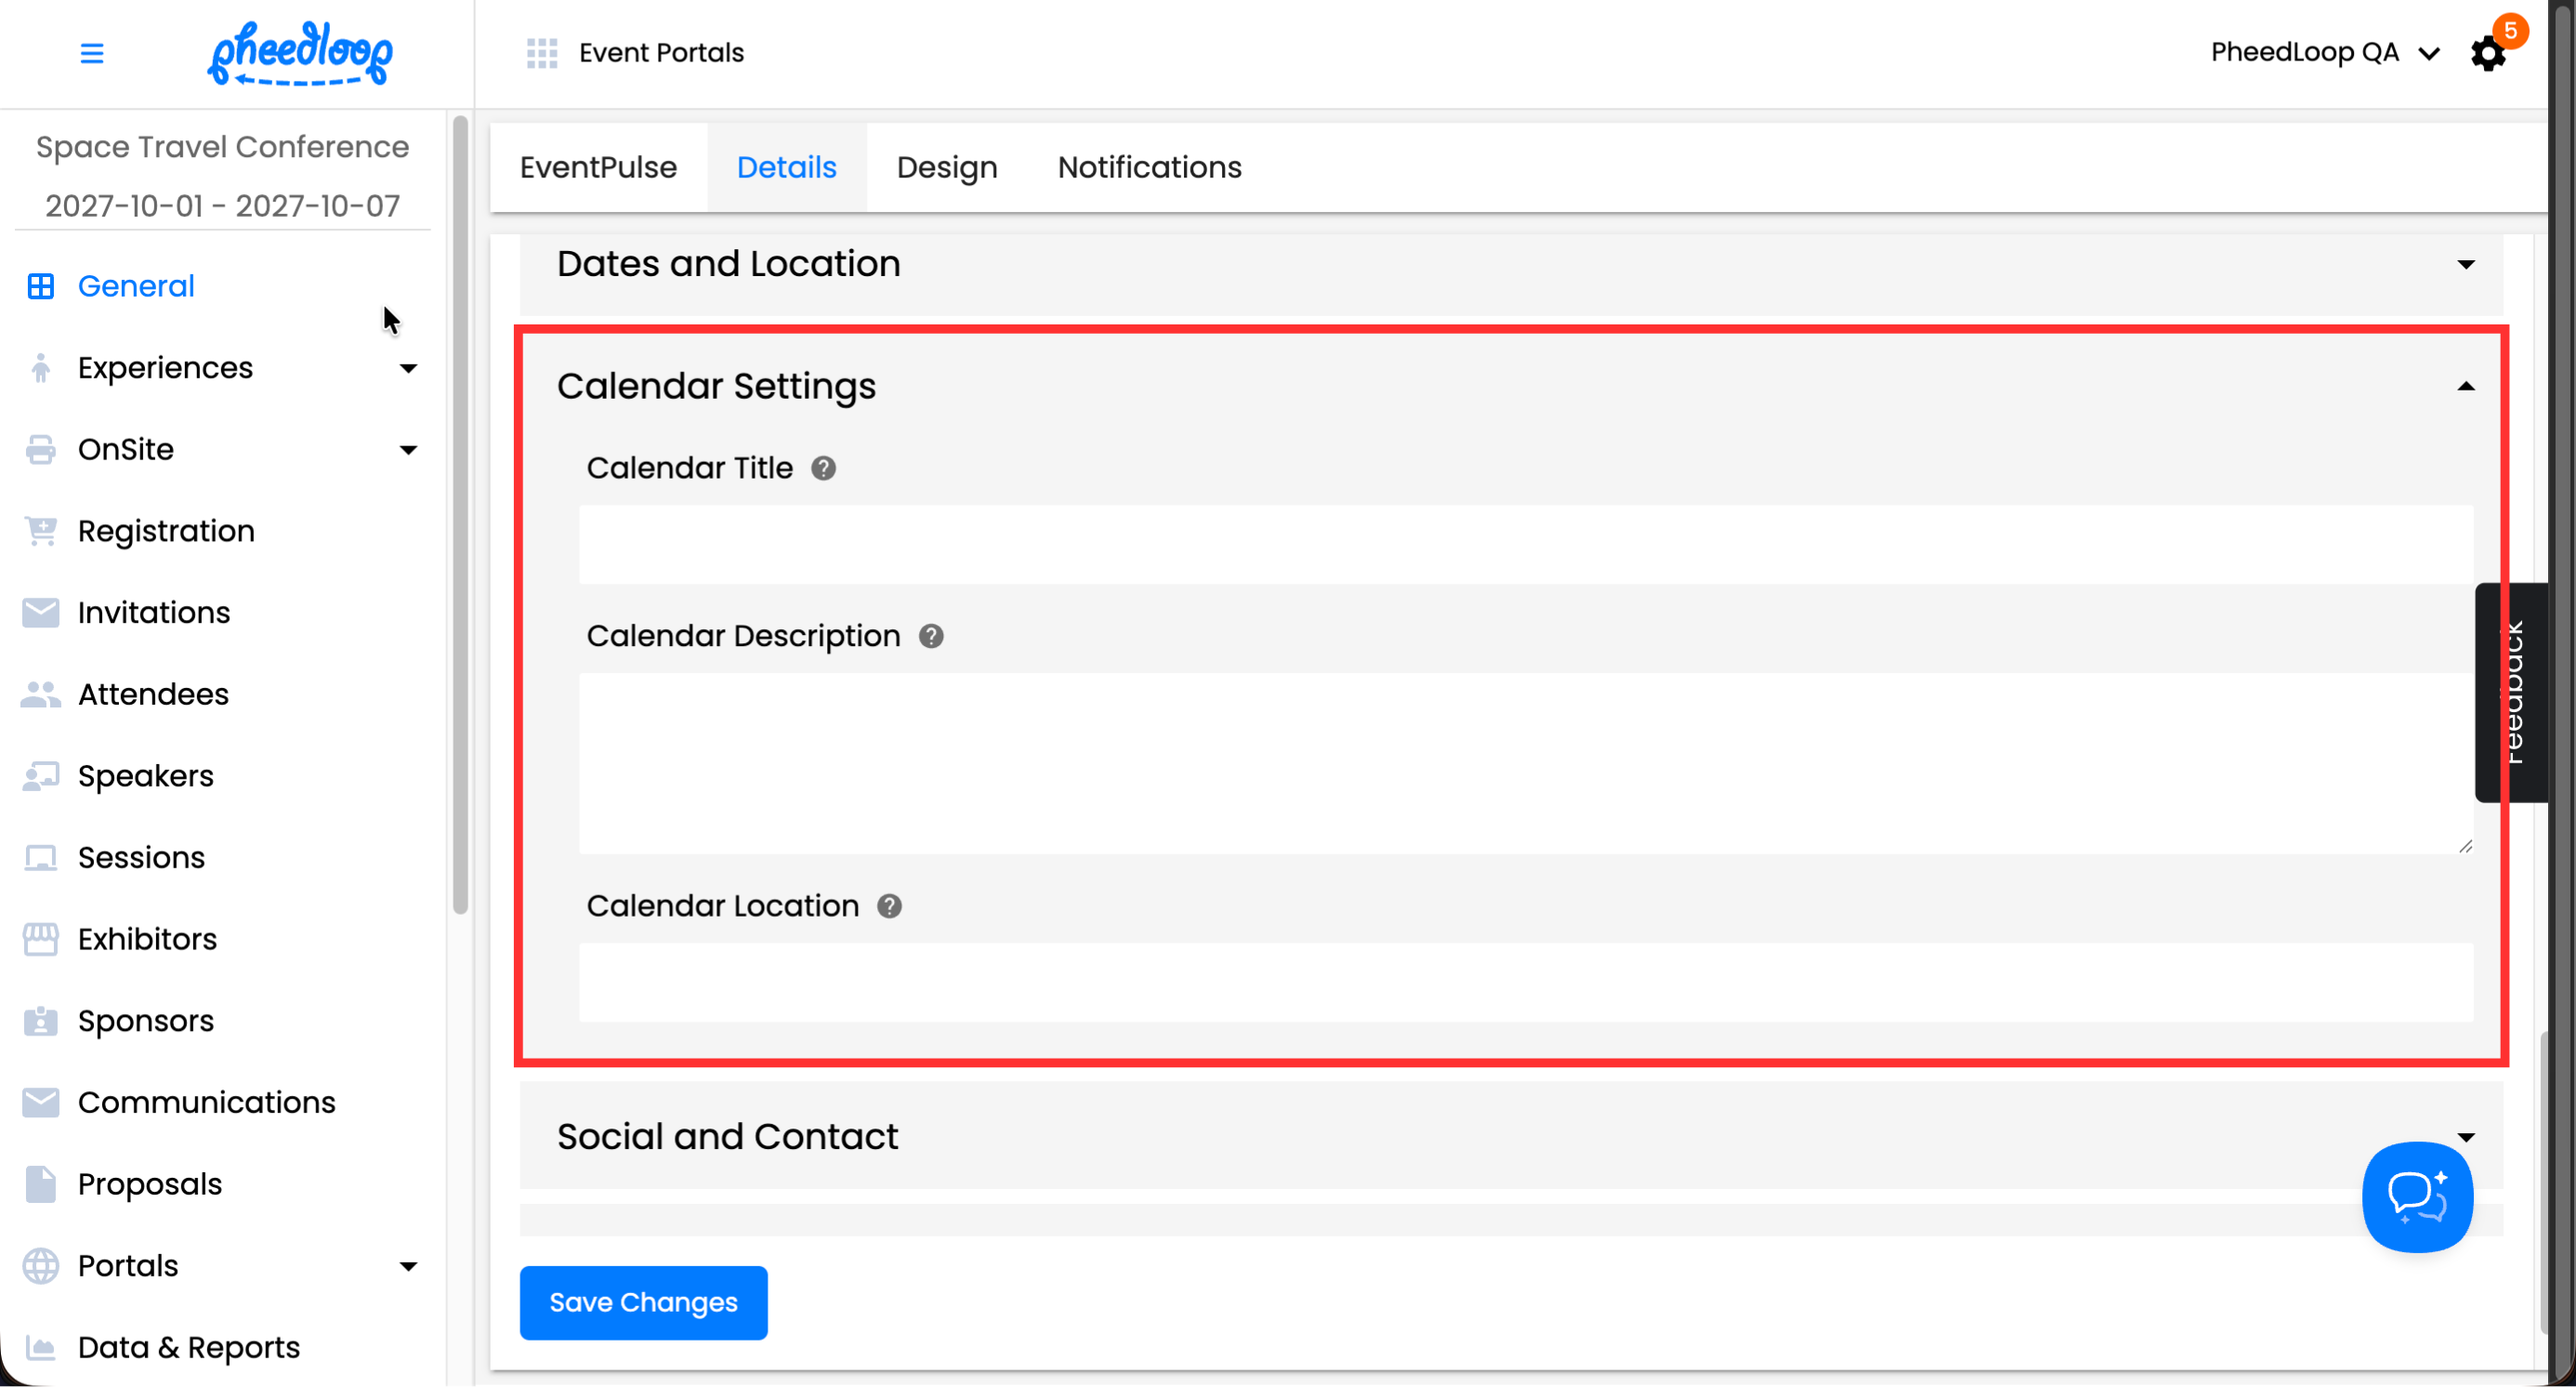
- From the Event Dashboard, navigate to General > Details
- Scroll down to Calendar Settings
- Under the Calendar Title field, enter the title that will show in your attendees' calendars when they add your event
- Under the Calendar Description field, enter the description that will appear in attendee calendars
- Under the Calendar Location field, enter the address that will populate the location field in the calendar invite
-
Select Save Changes

Other fields, such as Event Date and Time, are based on your event's default information and are not editable.
Once you update these settings, any newly generated Add to Calendar links will reflect your changes. Please note that changes are not retroactive, so you will need to send a new email for attendees to see the updated calendar information.
