How the Sessions Channels Feature Works with the Virtual Portal and Event App
Channels offer an alternate way to present content in your Virtual Event Portal and Mobile App by acting as a continuous stream of sessions. They’re ideal for attendees who prefer to stay on one screen rather than click through individual sessions.
Functionally, channels are the same as sessions—they pull from the same data source. Much like how the Showcase serves as a secondary Exhibit Hall, channels simply offer a different viewing experience.
Most events use channels to embed a continuous stream (e.g., a Zoom meeting or RTMP feed) where speakers rotate in and out, making it easy to deliver back-to-back content. Attendees seeking more interactive features—like chat, Q&A, surveys, and personalized schedules—can use the standard Sessions view instead.
Please note, channel sessions are not differentiated on the Event Website and will appear on the Schedule and Sessions pages alongside other non-Channel Sessions.
Contents
- 1. Enabling Channels
- 2. Designate Sessions as Channel Sessions
- 3. Common Use Cases for Channel Sessions
1. Enabling Channels
The Channels section in both the Virtual Event Portal and Mobile Event App have to be enabled for them to appear in either front facing applications.
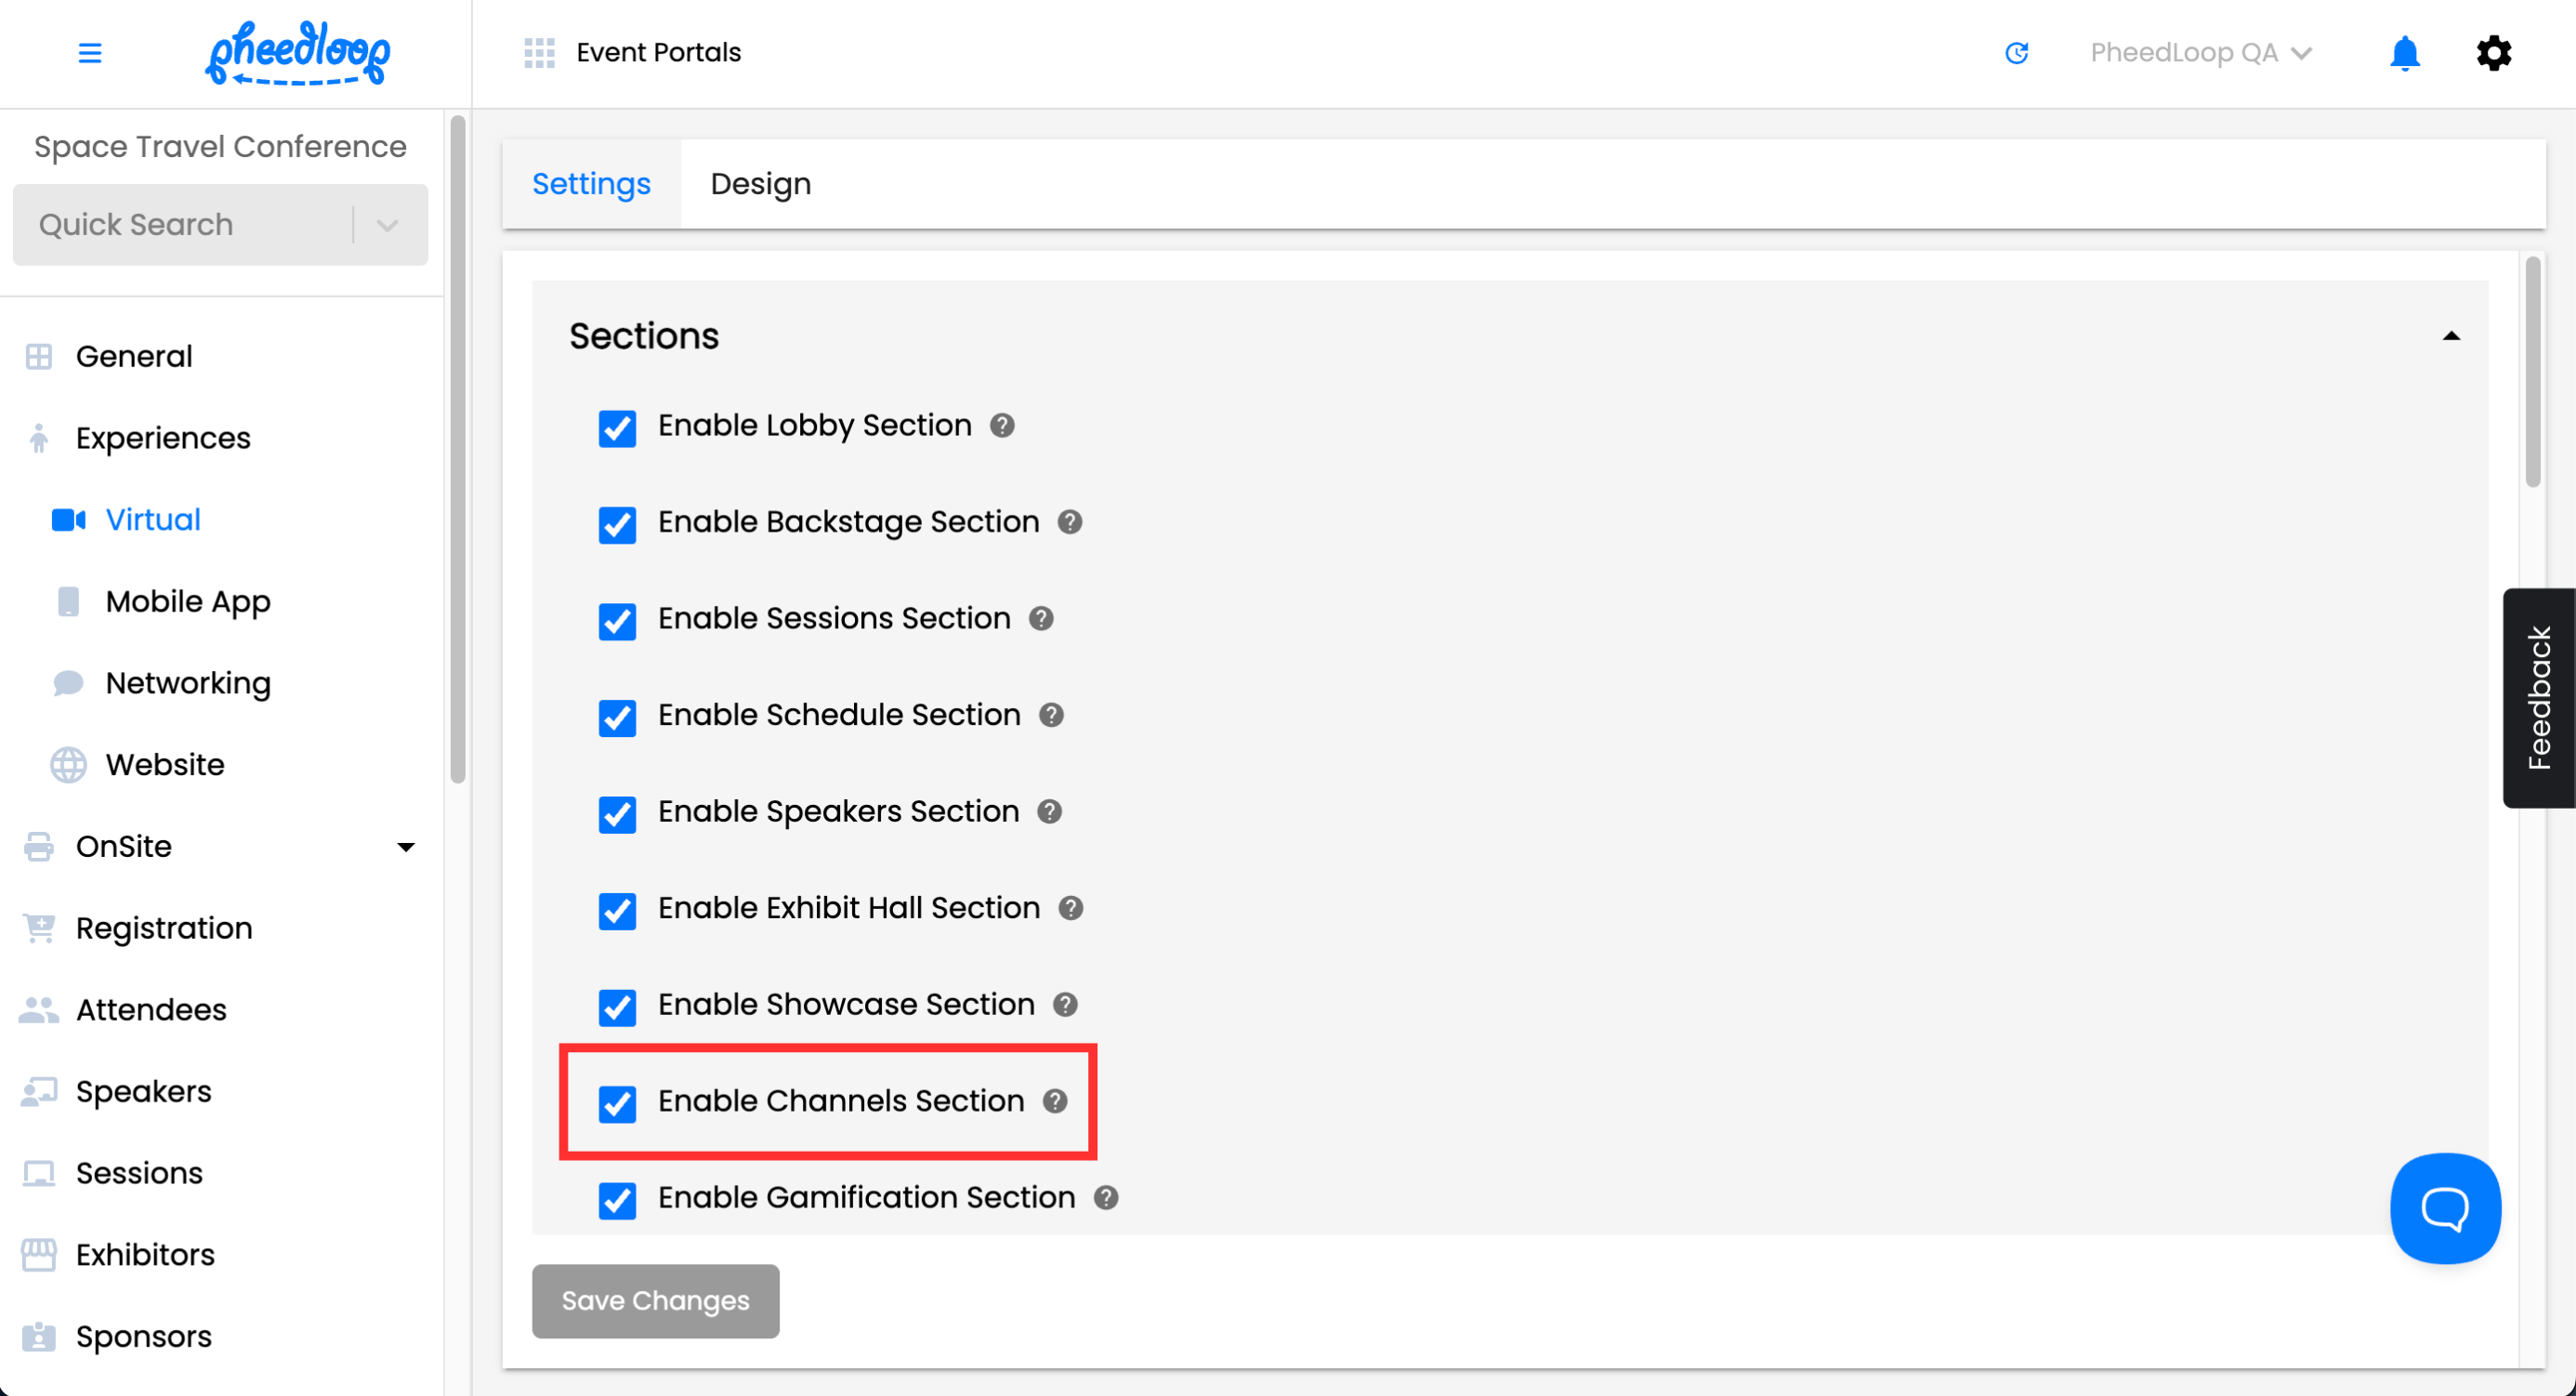
1 (A). Enabling Channels in the Virtual Event Portal
- From the Event Dashboard, navigate to Experiences > Virtual > Settings
- Under Options, toggle on the Enable Channels Section checkbox
Select Save Changes

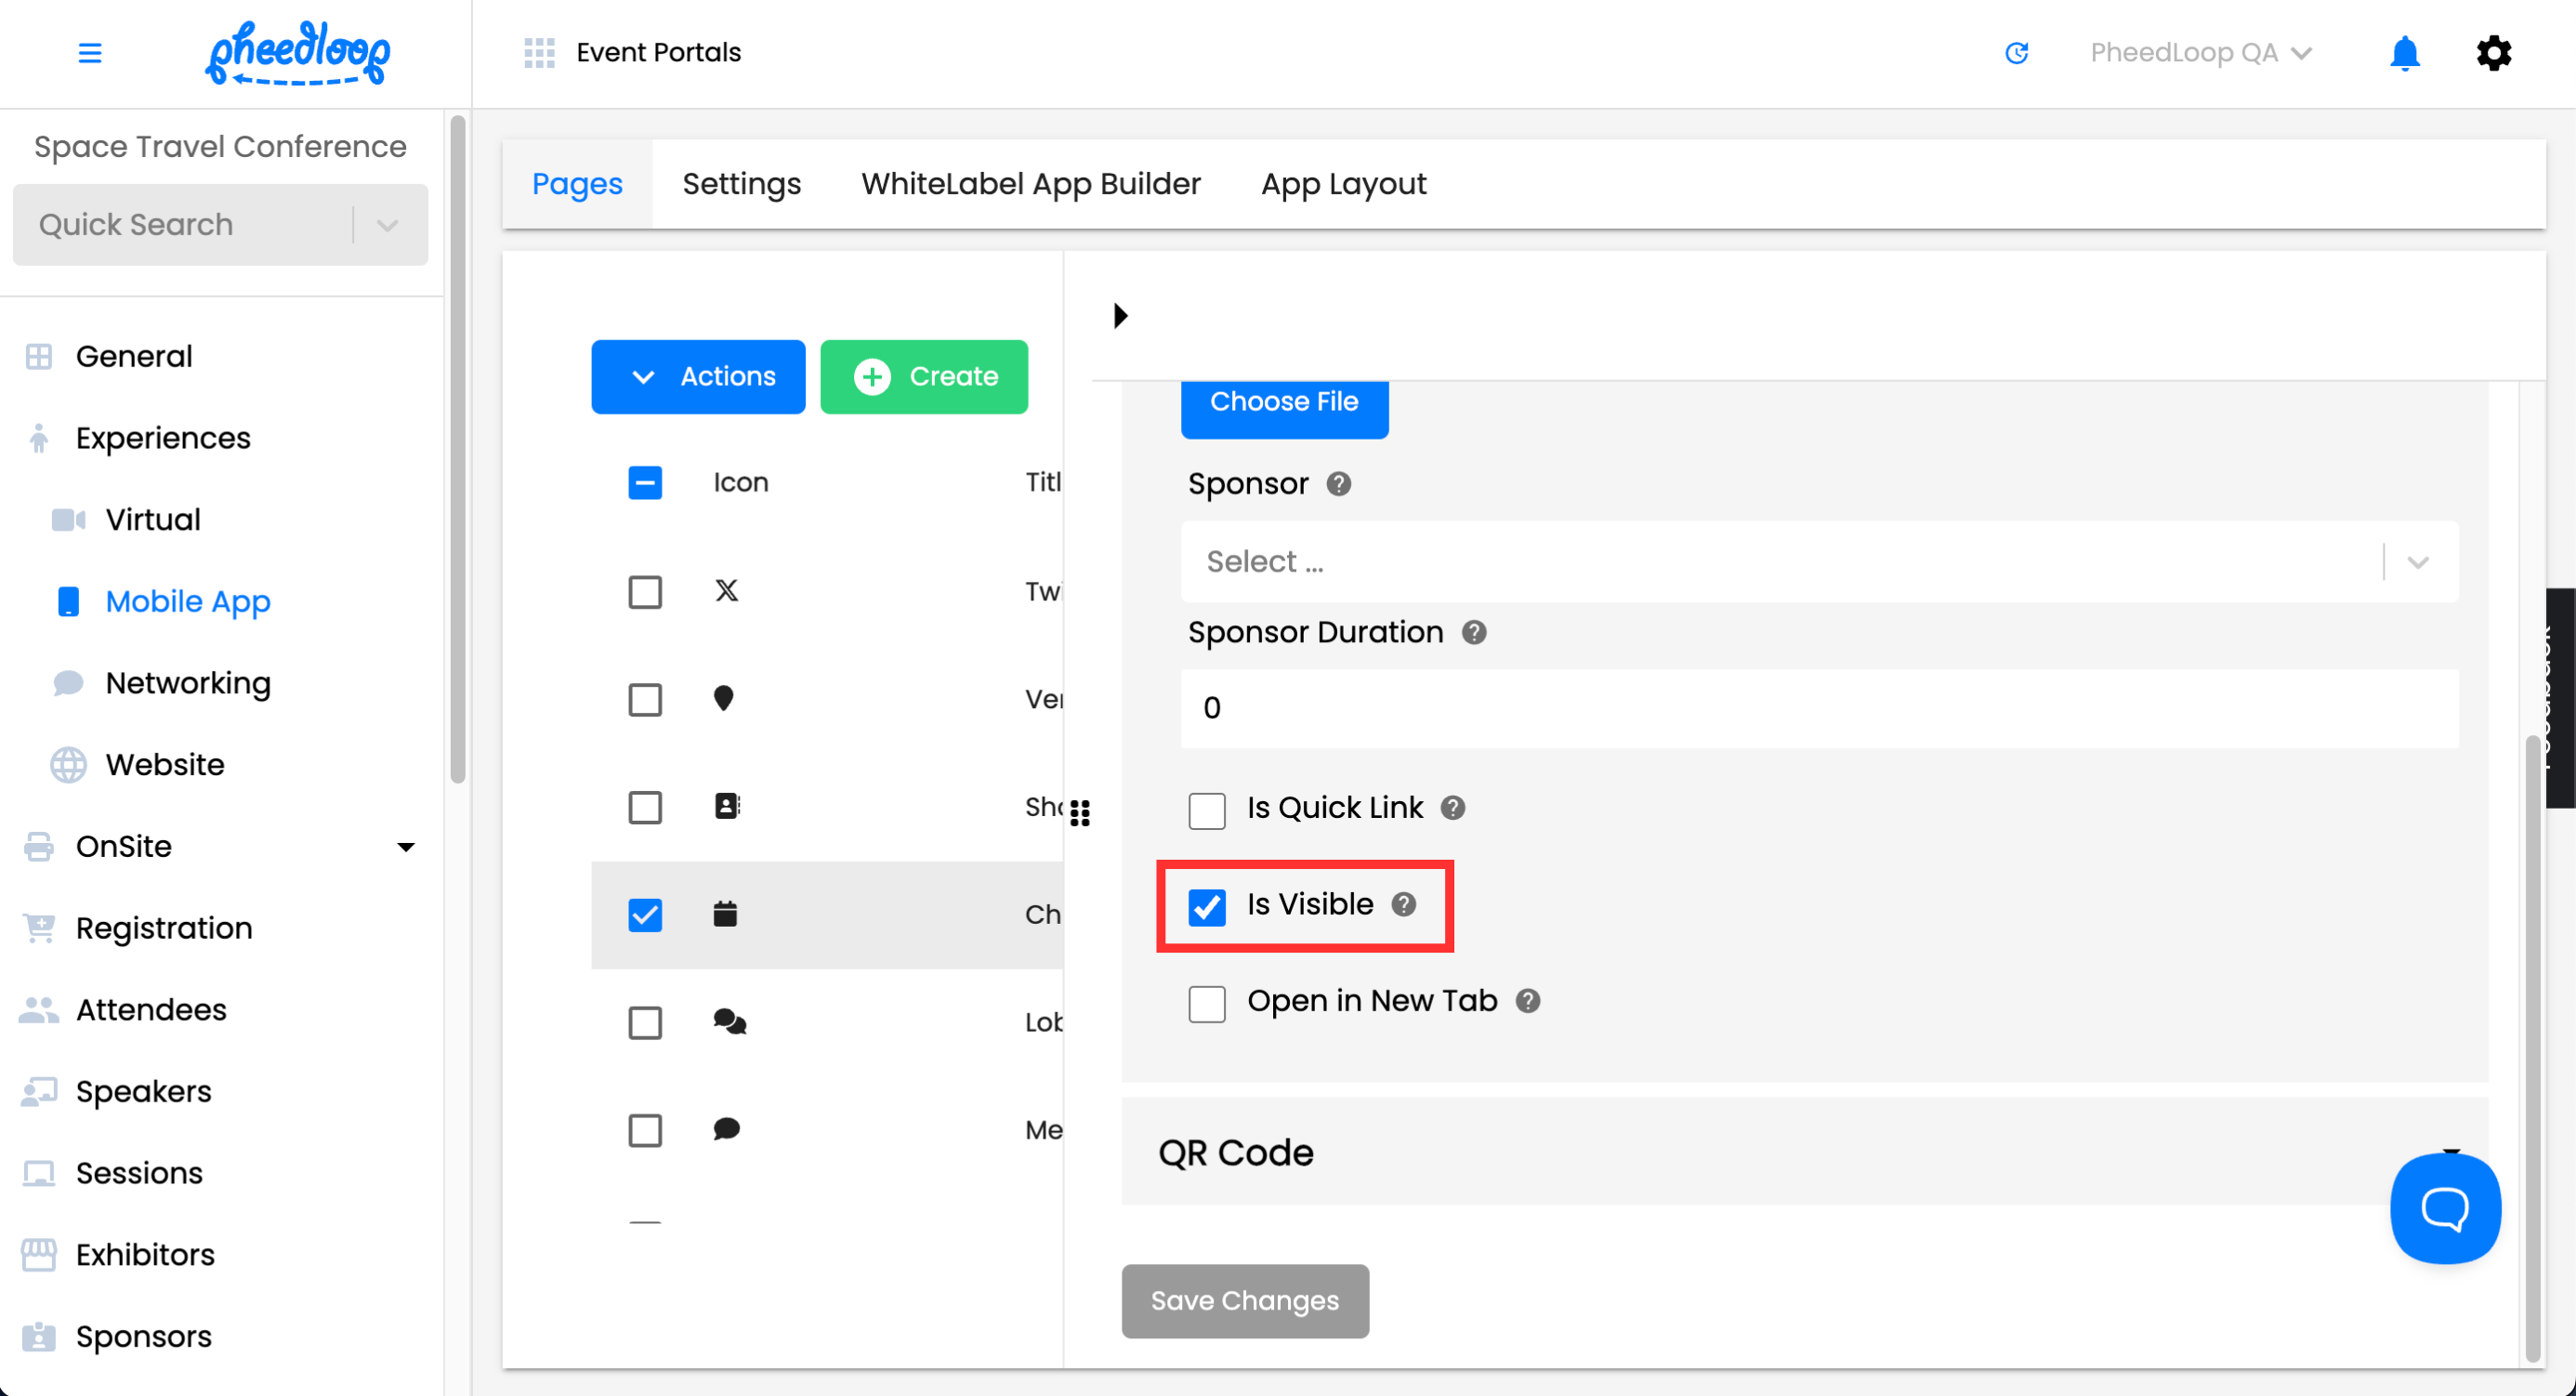
1 (B). Enabling Channels in the Mobile Event App
Similarly to sessions in the Virtual Portal, the Channels section for the Event App will allow attendees to view the time of the session, the speakers list, live attendee check in list, personalized schedules, accessing session files along with all the hybrid capabilities of chats, attendees list, polls, feedback surveys, and Q&A. It does not, however, have the option to stream the sessions directly.
- From the Event Dashboard, navigate to Experiences > Mobile App > Pages
- Select Channels from the list
- In the channels editor form, toggle on the Is Visible checkbox
Select Save Changes

Please note: a session can either be part of the Channels section or the regular Sessions list—but not both. Sessions cannot appear in both areas simultaneously.
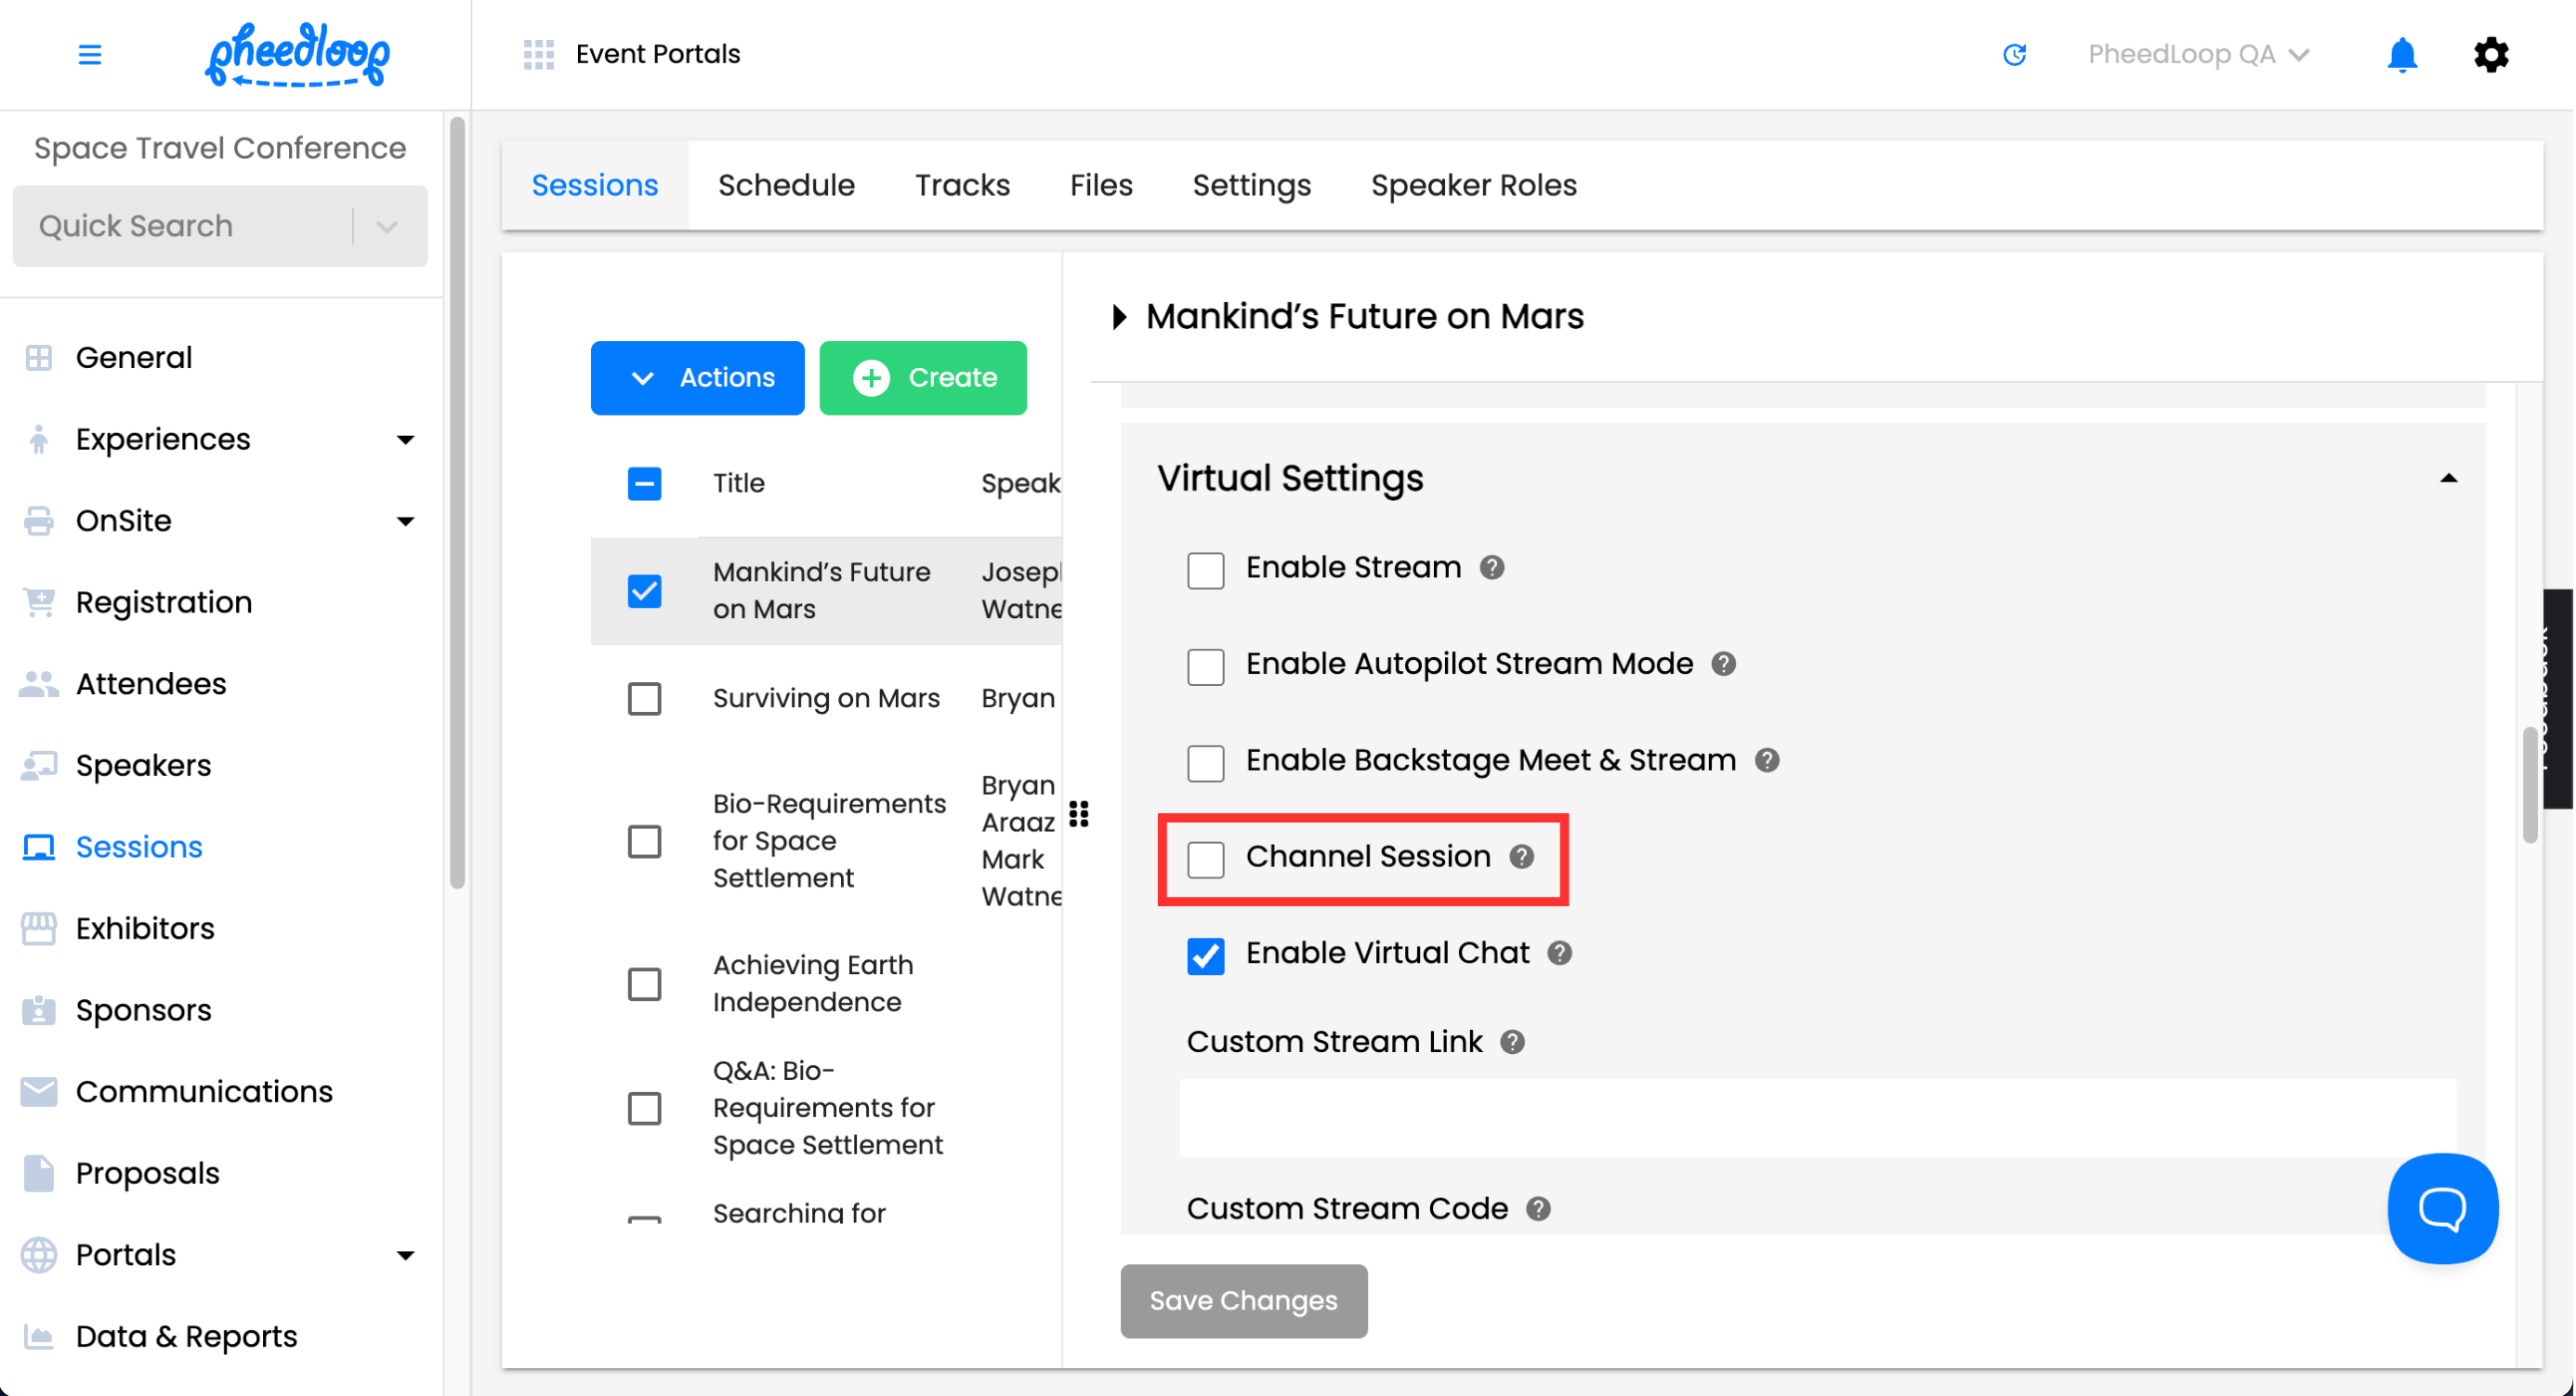
2. Designate Sessions as Channel Sessions
To separate sessions in your PheedLoop dashboard between the sessions and channels section in your Virtual Event Portal, you will have to designate sessions as channel sessions.
- From your Event Dashboard, navigate Sessions > Sessions
- Select a session you would like to designate from the list
- In the session editor form, navigate to Virtual Settings
- Toggle on the Channel Session checkbox
Select Save Changes

After designating a session, it will automatically update in the Virtual Event Portal and appear in the Channels section in the left hand side Navigation Menu. If you log into the Mobile Event App you can find the Channels section in the left hand side Navigation Menu as well.
Virtual Event Portal

Mobile Event App

3. Common Use Cases for Channel Sessions
Although the intended use-case for Channel Sessions is to embed continuous streams for sessions, we've seen events use the channels function for all sorts of creative applications:
- Separating English Content and French Content
- On-Demand Content and Live Content
- Breakout Sessions and Regular Sessions