Setting Up Your OnSite Check-in Tablets and Customizing the Attendee Check-in Experience
Setting up PheedLoop’s on-site check-in kiosk is fast, simple and intuitive. By now you should have your printers connected to your Event Dashboard. For more information, please review our Setting Up Your Rented On-Site Printer to Connect to PheedLoop Servers article. Your printers should show up as Online under Experiences > On-Site > Badge Printers.
With the printer(s) set up, now is the time for you to connect your tablets to PheedLoop’s on-site check-in system so that attendees can check in and print badges. Please note that any tablet or device that is internet-enabled will be able to connect to your printers. Bluetooth is not required to connect the tablets to the printers.
Connecting Your Tablets
- From the Event Dashboard, navigate to Event Portals > On-Site Portals > OnSight (Check-In Kiosk)
- A new tab will open up and this will be the live page where your on-site check-in system will live. Copy this link and paste it into your tablet’s internet browser.

- You will be prompted to sign-in if you haven’t signed in previously, please use your admin credentials
If you are asked for the Event Code, please enter it. You can find your event code from the Event Dashboard by heading to the drop-down menu at the top right corner of your Dashboard and navigating to Settings > Account & Billing > Event Power-Ups. The Event Code will appear in the Code column next to your event.
Once you are logged in, click on the gear icon located at the top right corner of your check-in interface’s screen. Select the printer you’d like to test and badge template you’d like to designate for badges printed for this kiosk. Keep in mind that multiple tablets can be connected to a single printer, all with their own settings that can be customized in real time.
Customize Your Check-in Experience
Before you check-in, don't forget to customize your check-in experience! Here are a few pointers for you to consider:
1. Customize the Design:
By uploading a check-in kiosk banner, the image will be shown at the top of the check-in interface.
- From the Event Dashboard, navigate to General > Design > Banners
- Under Check-In Kiosk Banner Image, upload your image by selecting Choose File
2. Customize the Check-in Welcome Email
By default when attendees check-in, they will receive a check-in welcome email that directs attendees to the event app.
If you would like to customize this email:
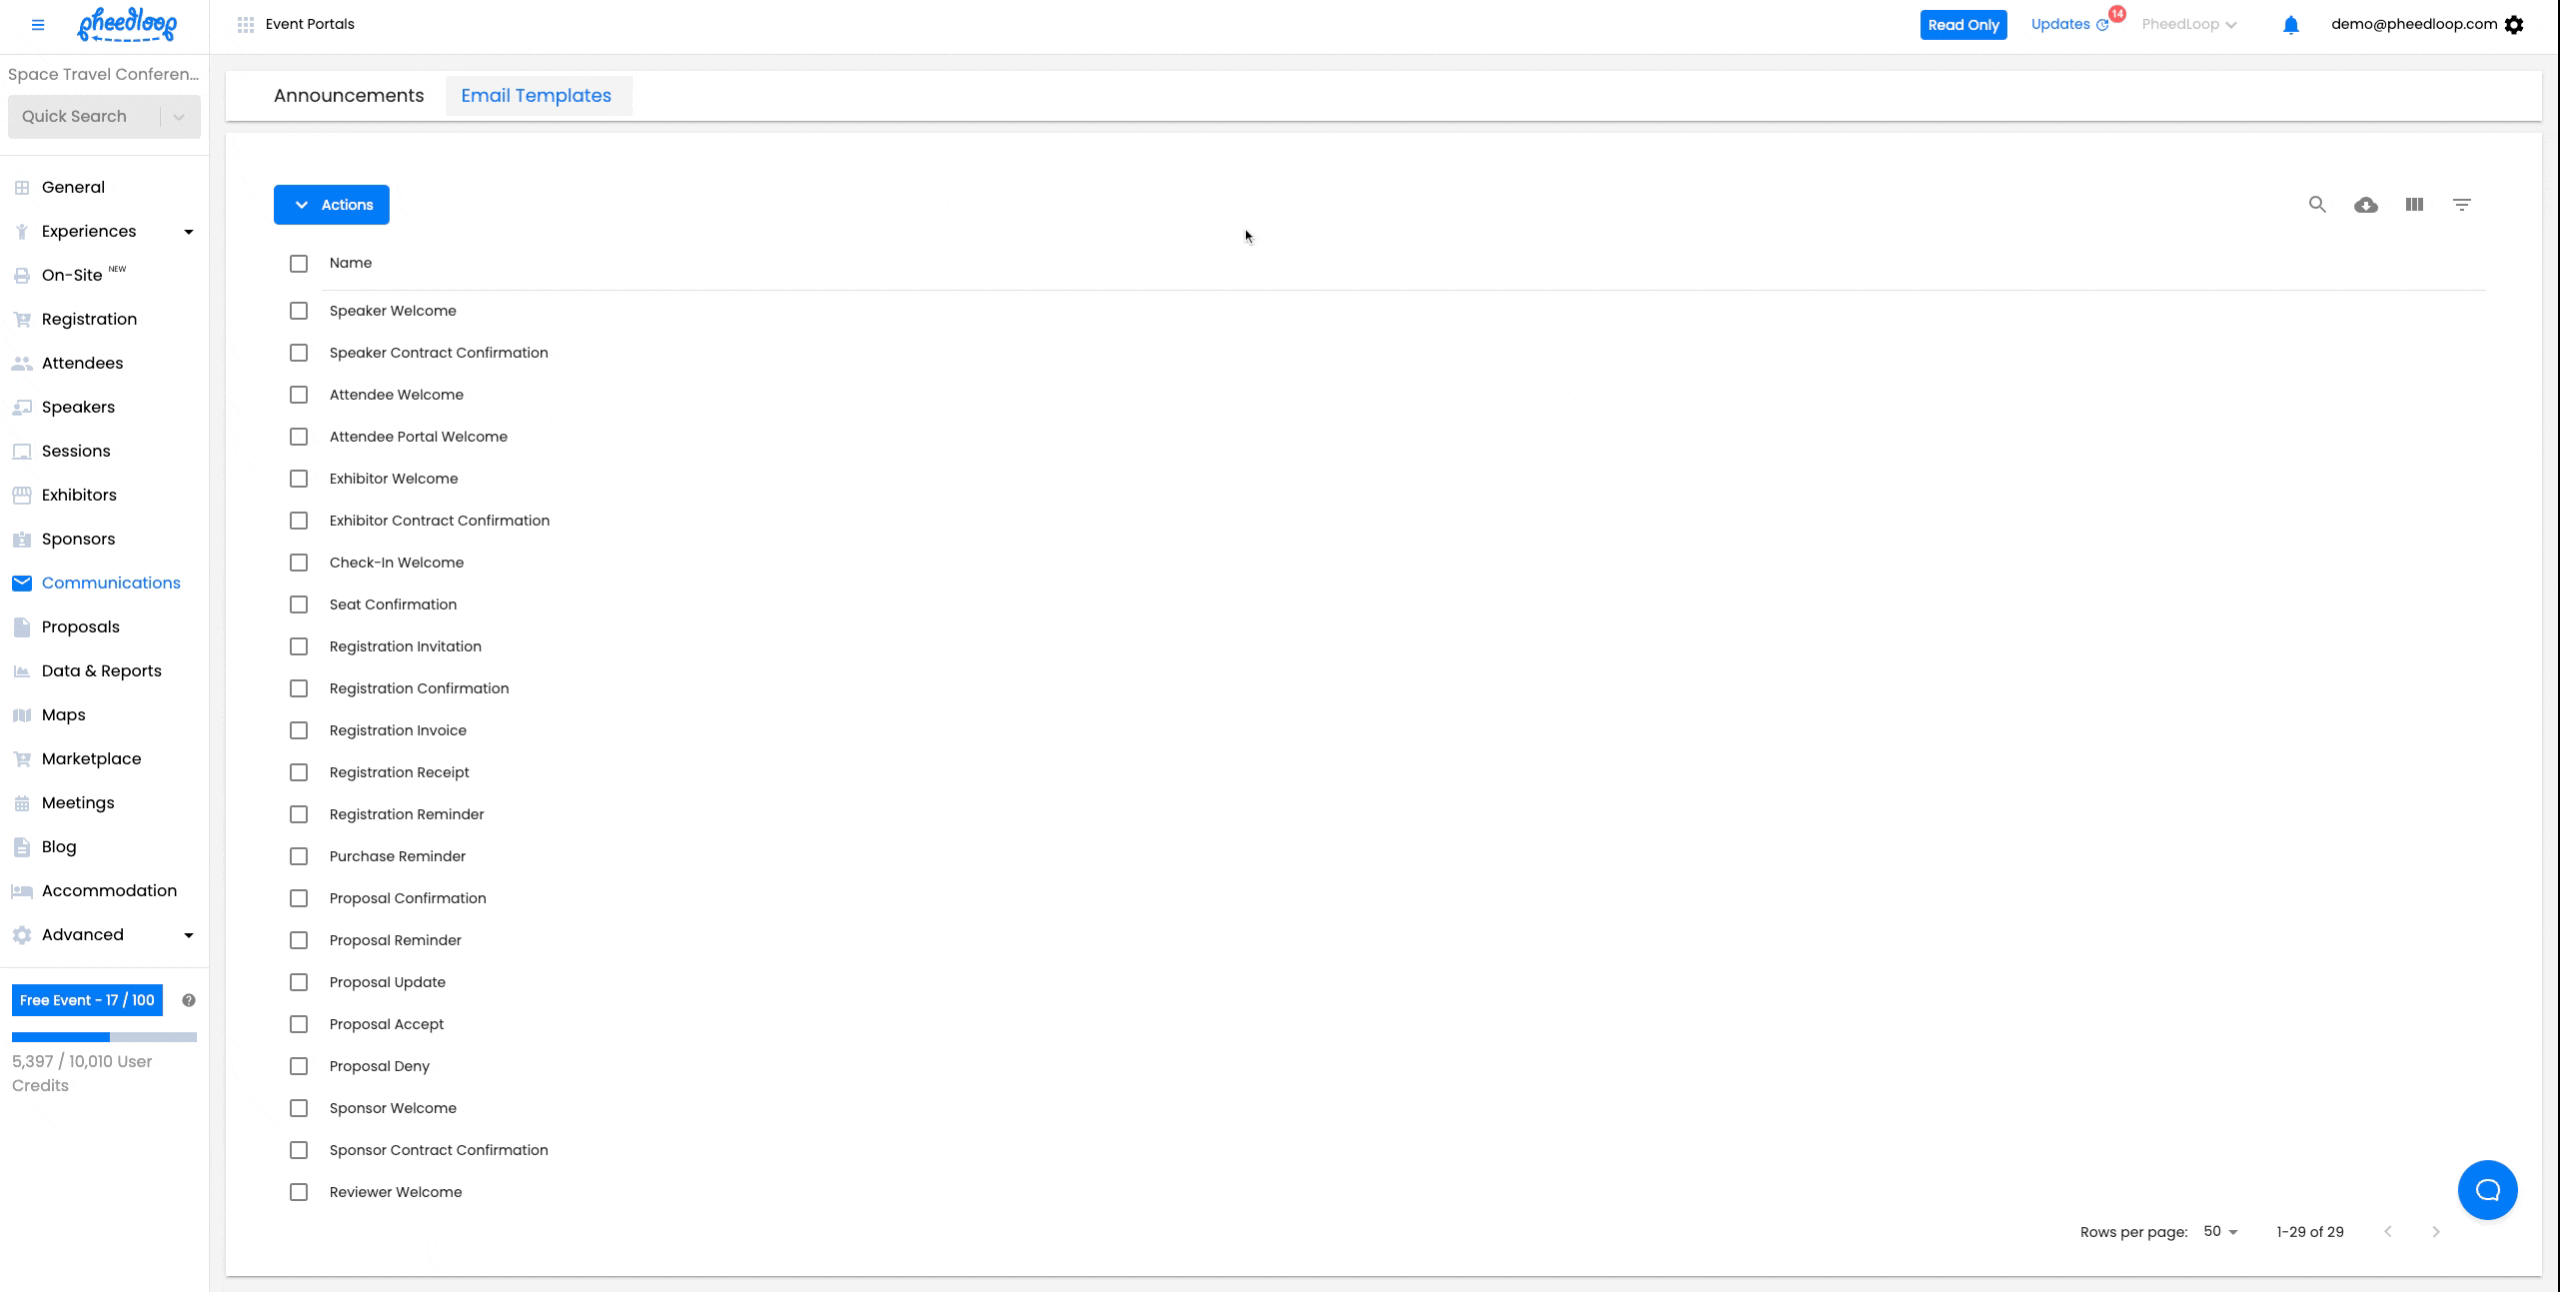
- From the Event Dashboard, navigate to Communications > Email Templates
- Select the Check-In Welcome email template from the list
- Edit the Subject Line and Body Text as you like
- Select Save Changes
If you want to disable this email:

- From the Event Dashboard, navigate to On-Site > Settings
- Toggle off the Send Check-in Welcome Email checkbox
3. Customize the Check-in Experience
The Event Dashboard allows you to enable several features you want to give to your attendees when they sign in through the event.
To access these restrictions:

- From the Event Dashboard, navigate to On-Site > Settings
- Scroll down to Check In
Under this section, you will see various settings to enable or disable:
Send Check-In Welcome Email
Enabling this option to send the welcome email to all attendees that check in to the event.
Allow Badge Reprints
This allows attendees to re-print badges after having checked in already.
Allow Profile Edits
When an attendee selects their name from the kiosk, they will see the fields that will be printed along with their name. When the Allow Profile Edits checkbox is toggled on, attendees will be able to make edits to these fields before printing. If the checkbox is toggled off, the profile details will still be visible but attendees will not be able to edit them.
Hide Search Avatars
This checkbox will prevent the Avatars of attendees from being visible. Their names will still appear on the list.
Hide Search Tags
Toggle on this checkbox if you would like to hide the tags associated with attendees when searching in the kiosk.
Hide Scan Option
Toggle on this checkbox if you would like to disable the ability for attendees to scan their badges in the OnSight check-in kiosk.
Check-in Terms and Conditions
Any text written in this box will be presented to attendees on the self check-in interface. It is a great way to explain the check-in process to your attendees. You can use this to explain any special rules or requirements that your attendees must adhere to when checking in.
Check-In Information
This will show on the main page of the check-in kiosk screen behind the Information button. If custom check-in information is not set, your event's description will be shown.
On-Site Check-In Tag Exclusions
Any attendees with selected tags will be excluded from the on-site check-in experience and will not show up in searches. They can still be checked-in and have badges printed via your admin dashboard.
On-Site Check-In Ticket Exclusions
Any attendees with selected tickets will be excluded from the on-site check-in experience and will not show up in searches. They can still be checked-in and have badges printed via your admin dashboard.
4. Enable On-Site Registration
If you are using PheedLoop's registration system, you can have individuals process registration in the tablet itself. You can go through the full registration process if this checkbox is toggled on.
To Enable On-Site Registration:

- From the Event Dashboard, navigate to On-Site > Settings
- Under Check In, toggle on the Enable On-Site Registration checkbox
- Select Save Changes
A new option will appear on the kiosk page called Register, this page functions similarly to the Registration page in the Event Website and Virtual Portal.
5. Exclude On-site Check-in for Certain Individuals
If you do not wish for certain individuals to appear in check-in, you can enable this by excluding them based on their tag or ticket purchased.
To hide attendees based on tags:

- From the Event Dashboard, navigate to On-Site > Settings
- Scroll down to Check In
- Under On-Site Check-In Tag Exclusions, select the tags you would like to use to hide attendees
To hide attendees based on tickets:

- From the Event Dashboard, navigate to On-Site > Settings
- Scroll down to Check In
- Under On-Site Check-In Ticket Exclusions, select the tickets you would like to use to hide attendees
Multiple tickets or tags can be selected to hide attendees.