How to Import and Export Contacts in Membership Management
Contacts offer valuable insight into the people who are interested in your event. These are people who have attended your event(s) or entered their email during the registration process. Having this information is crucial for sending follow up emails for future events or other membership opportunities.
PheedLoop offers the ability to import these contacts to the Membership Dashboard from third party sources.
Importing Contacts in Membership Dashboard
From the Membership Dashboard, navigate to Contacts > Profiles and select the upload icon

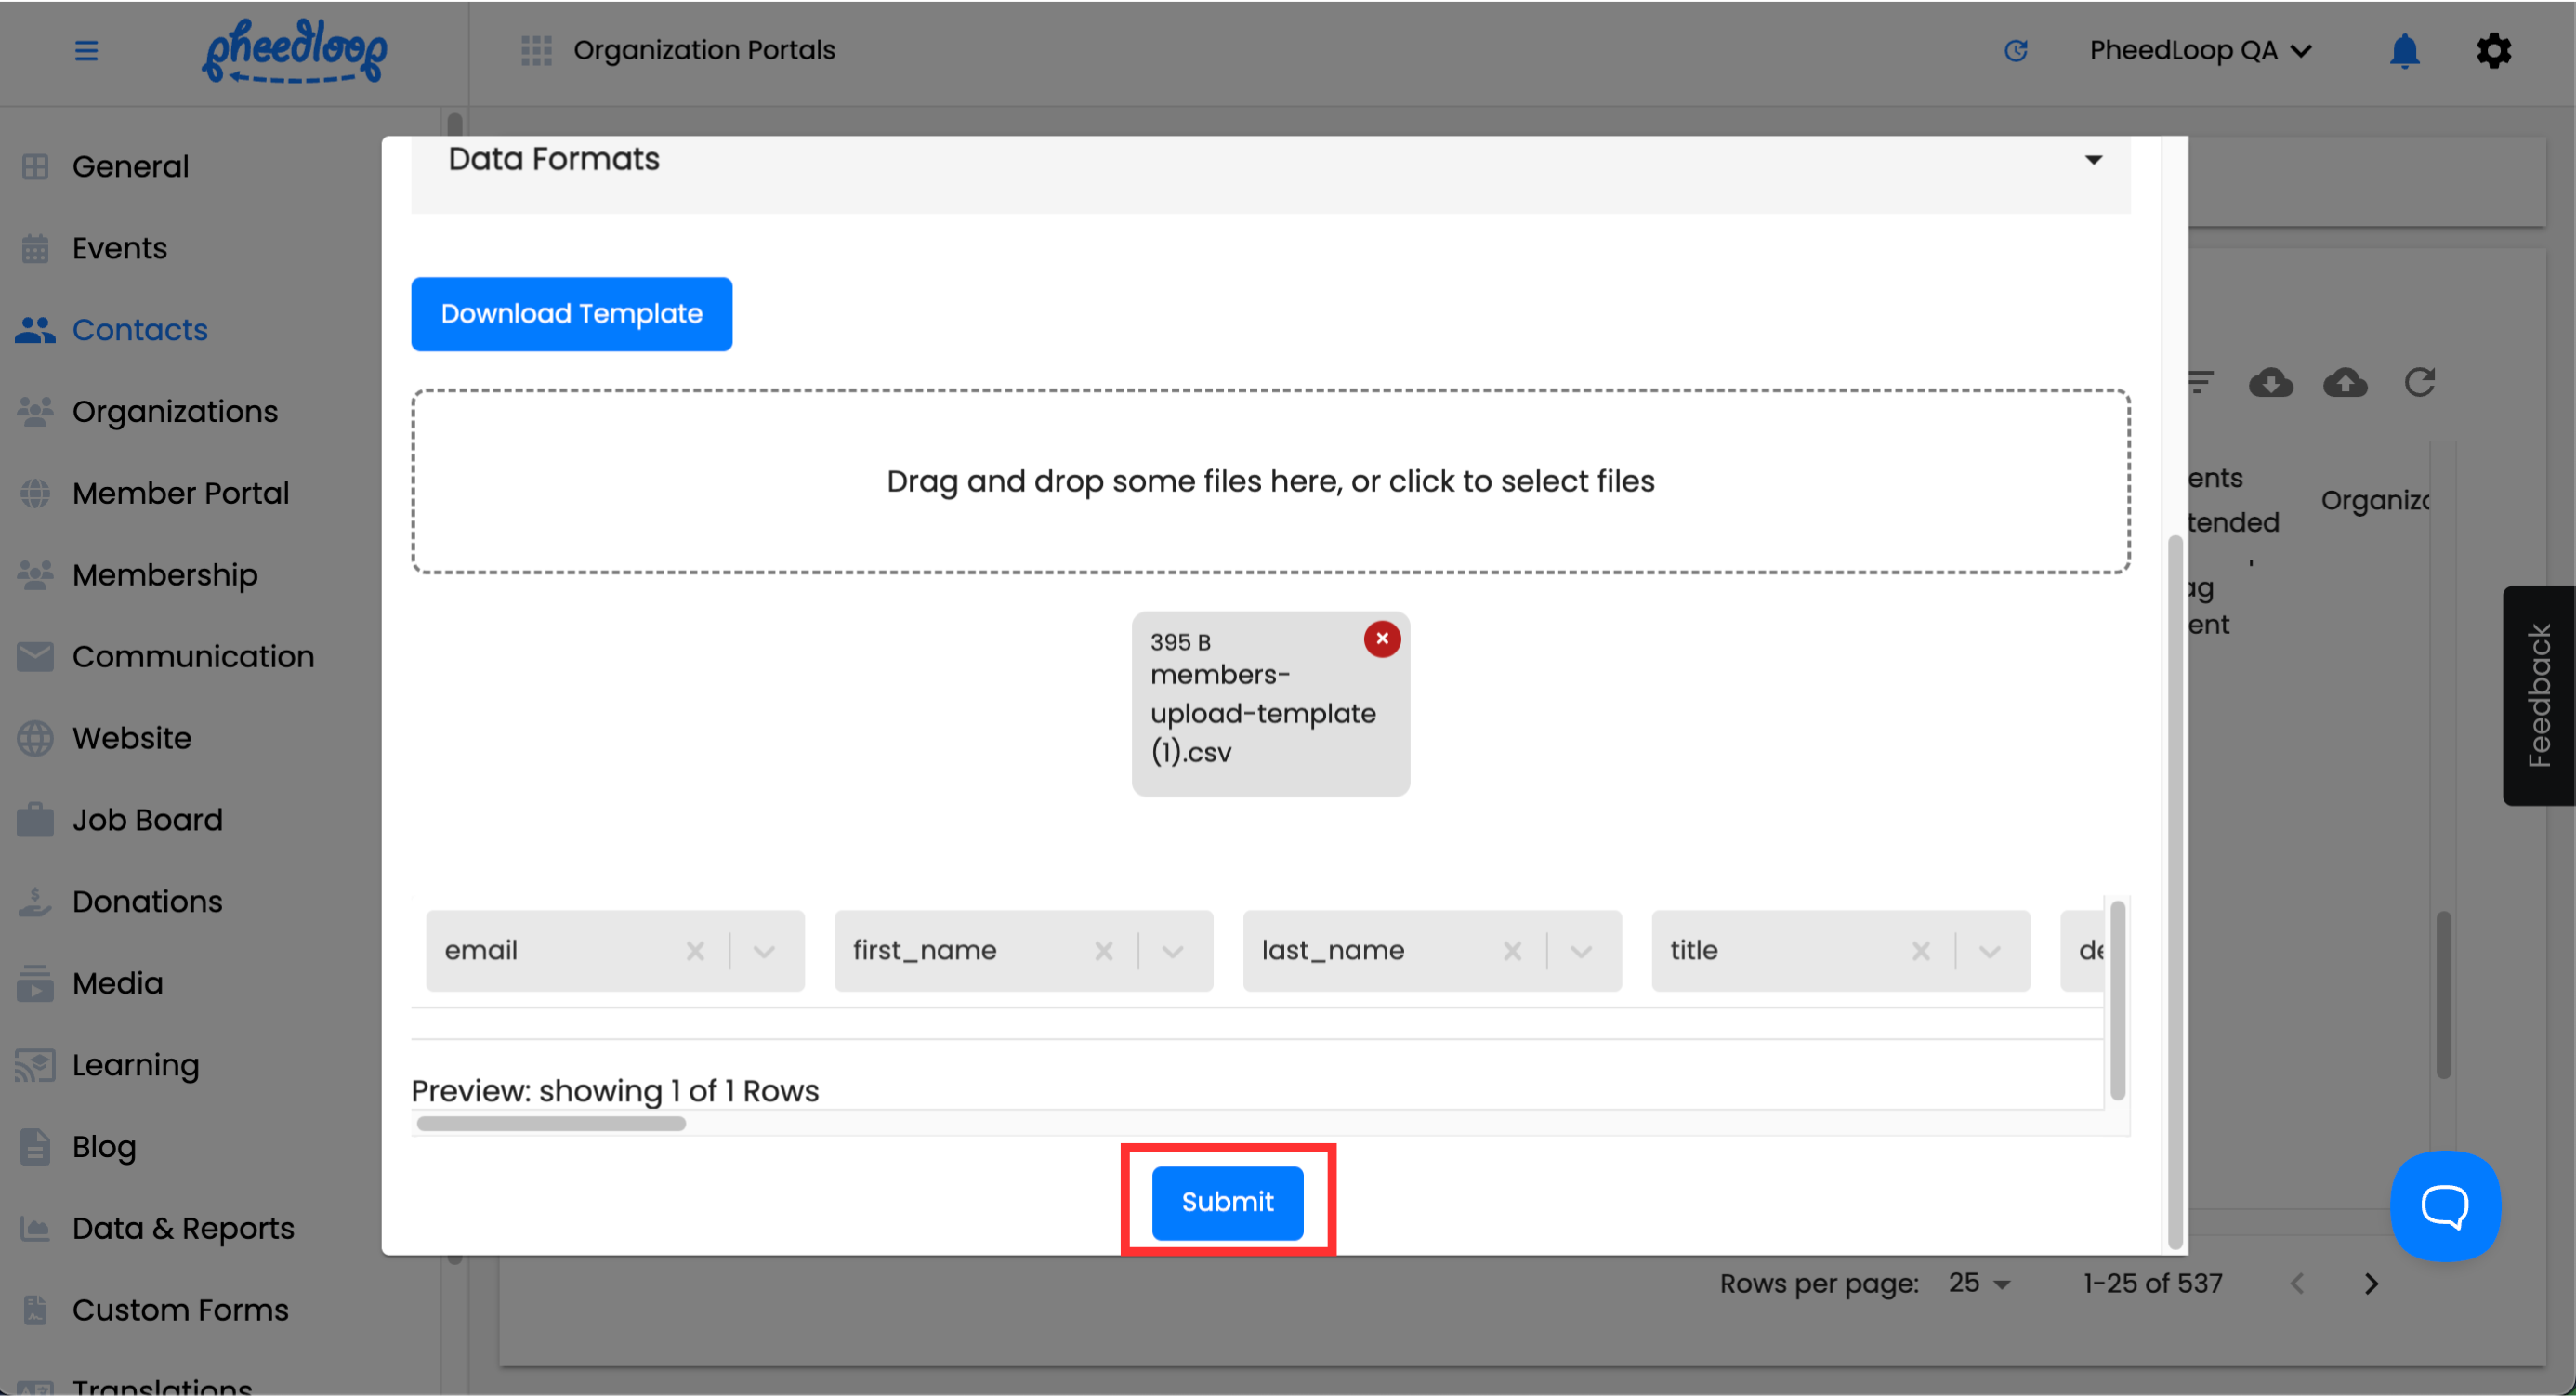
Select Download Template

- Fill out the information outlined in the Headings in the Contacts Upload Template step below
- Save the document as a CSV file
- From the Membership Dashboard, navigate to Contacts > Profiles and select the upload button
Select the Drag and drop some files here, or click to select files button to upload your template

Select Submit


Headings in the Contacts Upload Template
The Contacts template has multiple columns to fill out. Below we will define each column and their purpose.
| This is the email which will be designated to the attendee profile. This is a required field. | |
| first_name | The first name of the contact. This is a required field. |
| last_name | The last name of the contact. This is a required field. |
| title | The title of the contact. |
| designations | The designation of the contact. |
| pronouns | Enter the preferred pronouns of the individual under this column. |
| organization | The organization the contact belongs to. |
| code_internal | Used if the event or organization has internal codes for individual profiles, for example, a contact ID. This column will populate in the Attendee's Internal Code field under Other Details in the Membership Dashboard. |
|
dietary_restrictions
|
List any dietary restrictions the contact might have. |
|
accessibility_requirements
|
List the accessibility requirements the contact might have. |
| about | This column is the Bio of the contact. Text entered here will populate the Bio/About field. |
| address_line_1 | Enter the first address of the contact |
| address_line_2 | This is the second address of the contact, typically used for secondary locations. |
| address_city | Enter the city of the contact under this field. |
| address_state | Enter the state of the contact under this field. |
| address_zip | Enter the zip or postal code of the contact under this field. |
|
address_country
|
Enter the country of the contact under this field. |
| address_phone | Enter the phone number of the contact under this field. |
|
unsub_announcement_email_notifications
|
This will toggle on or off from the Unsubscribe From Announcements checkbox, fill out TRUE or FALSE. This is set to false by default. |
|
is_allowing_chat_requests
|
This will toggle on or off from the Attendee Messaging Allowed checkbox, fill out TRUE or FALSE. This is set to true by default. |
| profile_visible | This will toggle on or off from the Profile Visible checkbox, fill out TRUE or FALSE. This is set to true by default. |
| tags | Fill out the code of the tags to be assigned to the attendee for the event. |
| contact_groups | Fill out the code of the contact group to be assigned to the contact. |
| contact_tags | Fill out the code of the contact tag to be assigned to the contact. |
|
contact_organization
|
Fill out the code of the contact organization to be assigned to the contact |
Downloading Contacts from the Membership Dashboard
Contacts can be downloaded as a report through the Members report.
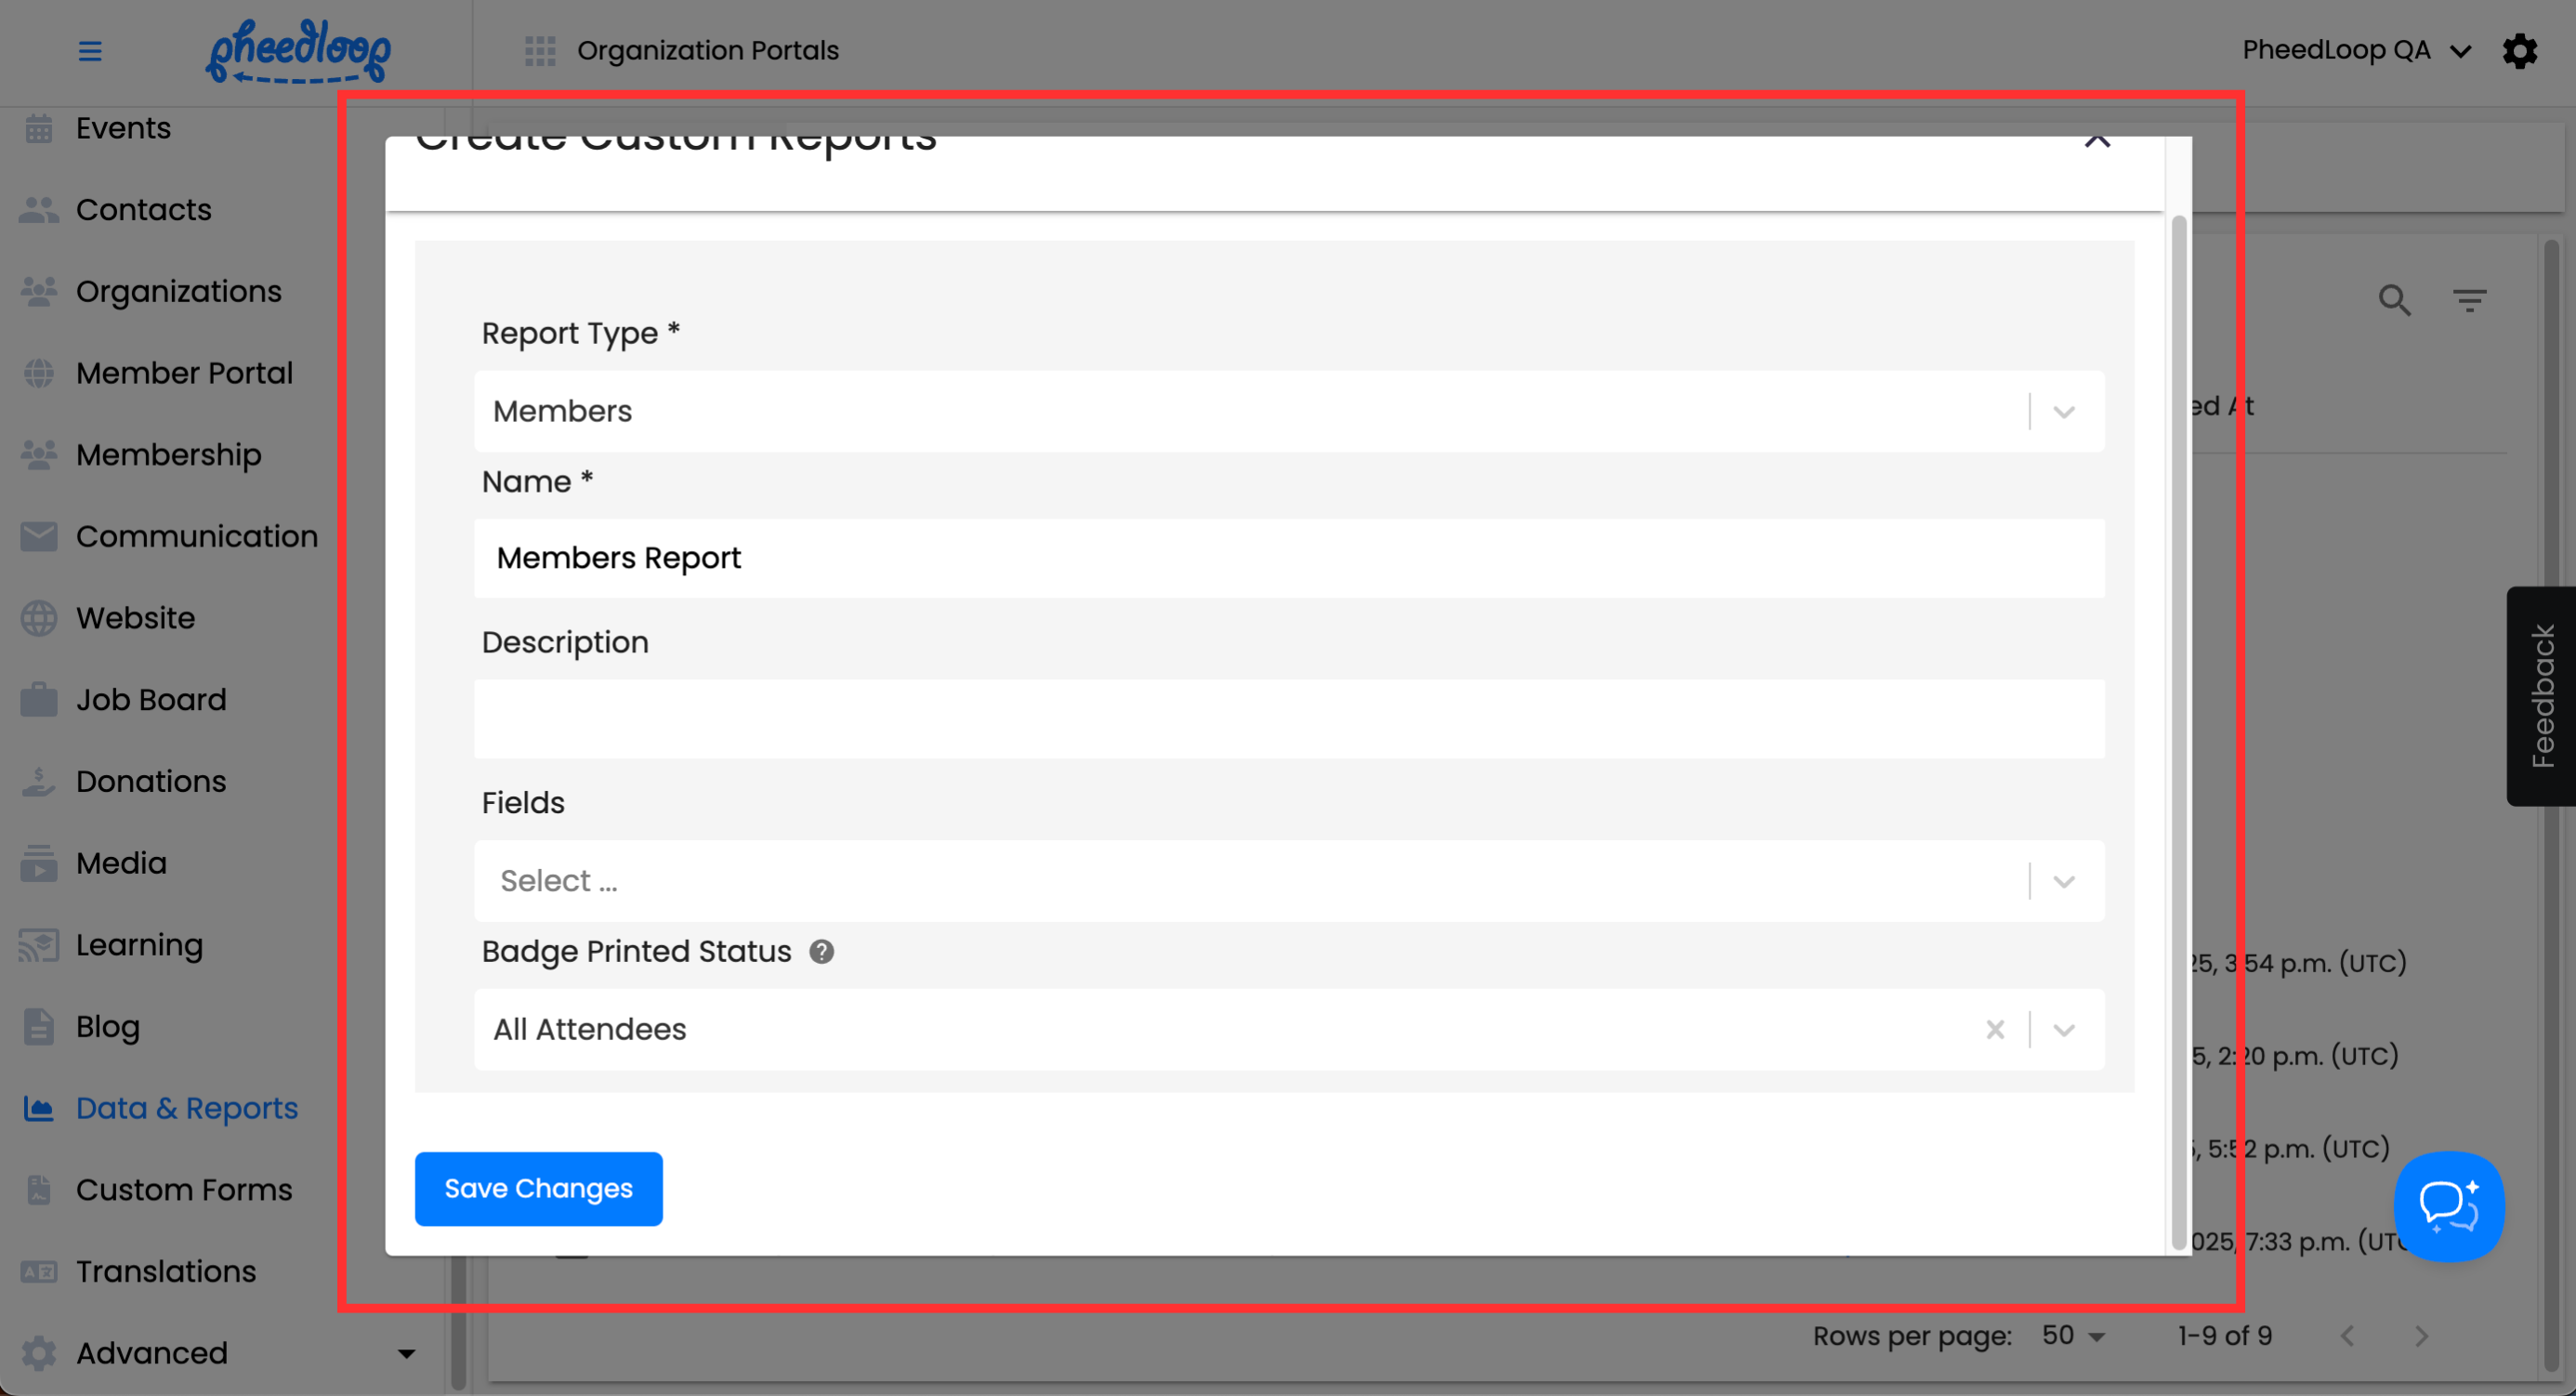
- From the Membership Dashboard, navigate to Data & Reports > Custom Reports
- Above the Reports table, select Create
- Under Report Type, select Members
- Enter the name under the Name field
- Under Fields, select the information that applies to you
- Under the Badge Printed Status field, filter the attendees (members) by their badge printing status for the current event
- All Attendees – Includes every registered participant, regardless of badge printing status.
- Badge Printed – Identifies attendees whose event badges have already been printed.
- Badge Not Printed – Refers to attendees who are registered but have not yet had their badges printed.
Select Save Changes

Now that your report is created, you will want to generate the report in order to download it.
- Select the checkbox of your newly created report
Above the Custom Reports table, select Actions > Generate Report
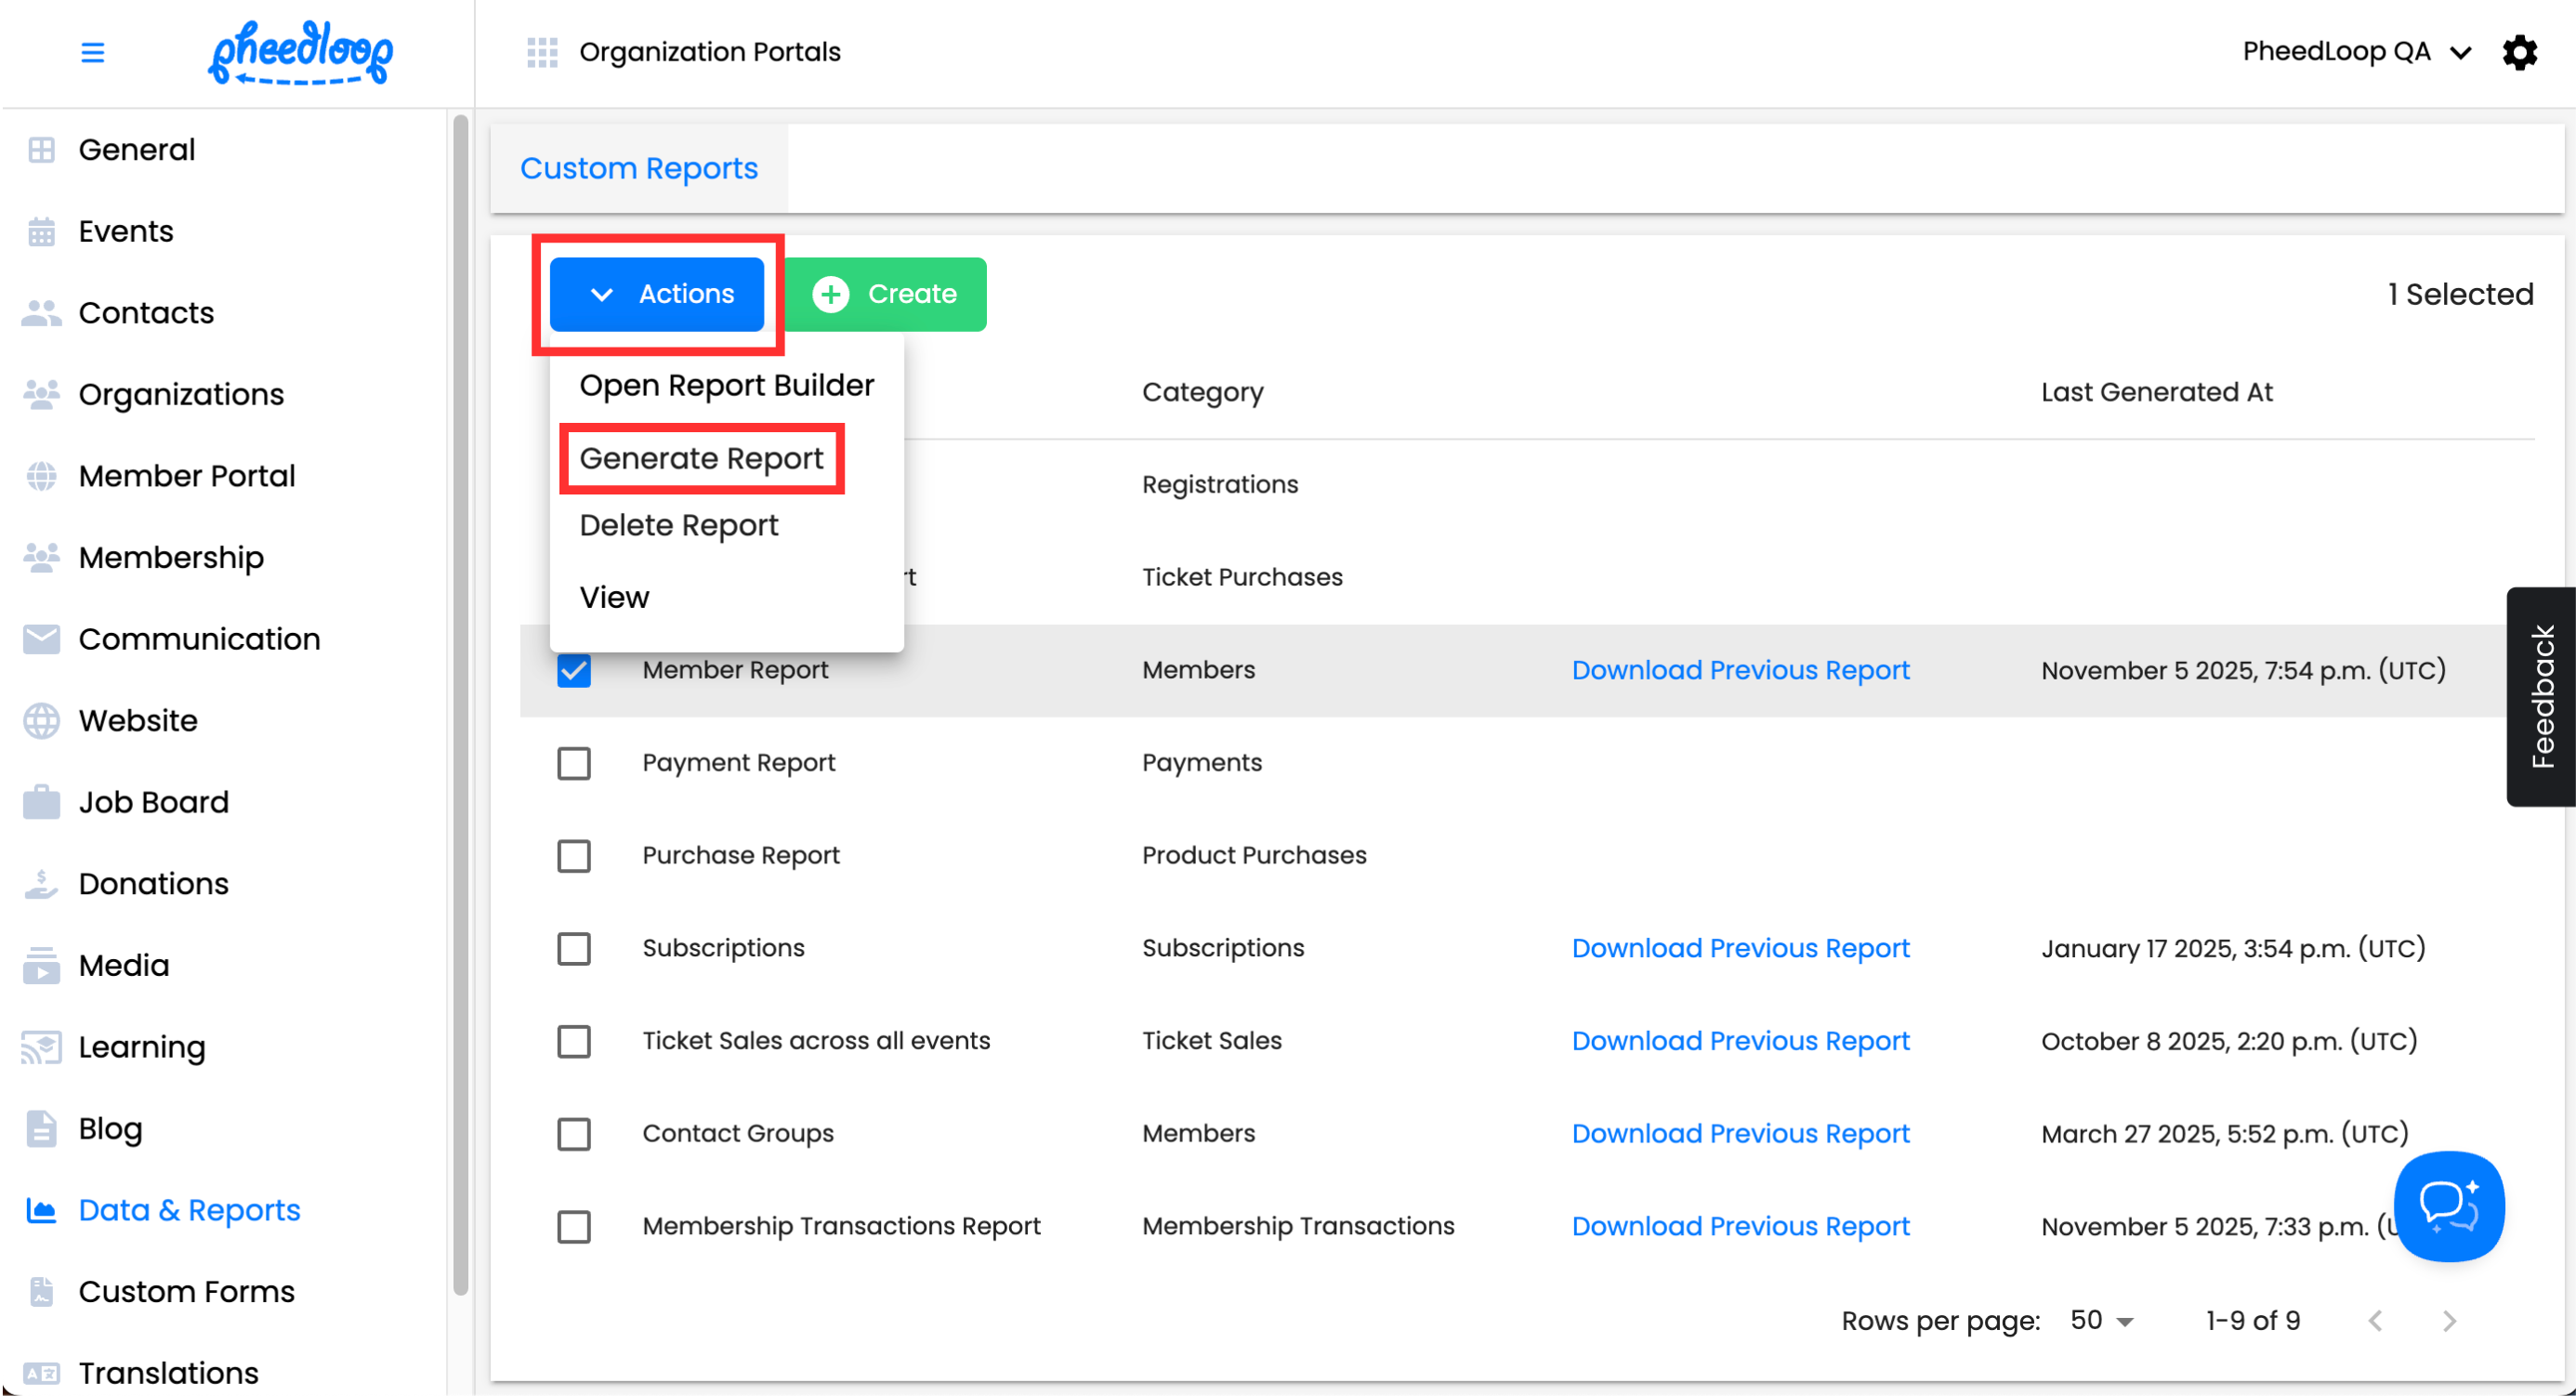
Select Download Previous Report


