Collecting Donations in Membership Management
The Membership Dashboard can be used to accept donations from interested Members. By making the Donations page on the Organization Website visible, members can create a donation for your organization.
Making the Donations page visible in the Organization Website
In order for donations to be accessible to members, the Donations page must be visible in the Organization Website.
- From the Membership Dashboard, navigate to Website > Pages
- Select Donations from the list
- Toggle off the Hide Page checkbox
Select Save Changes
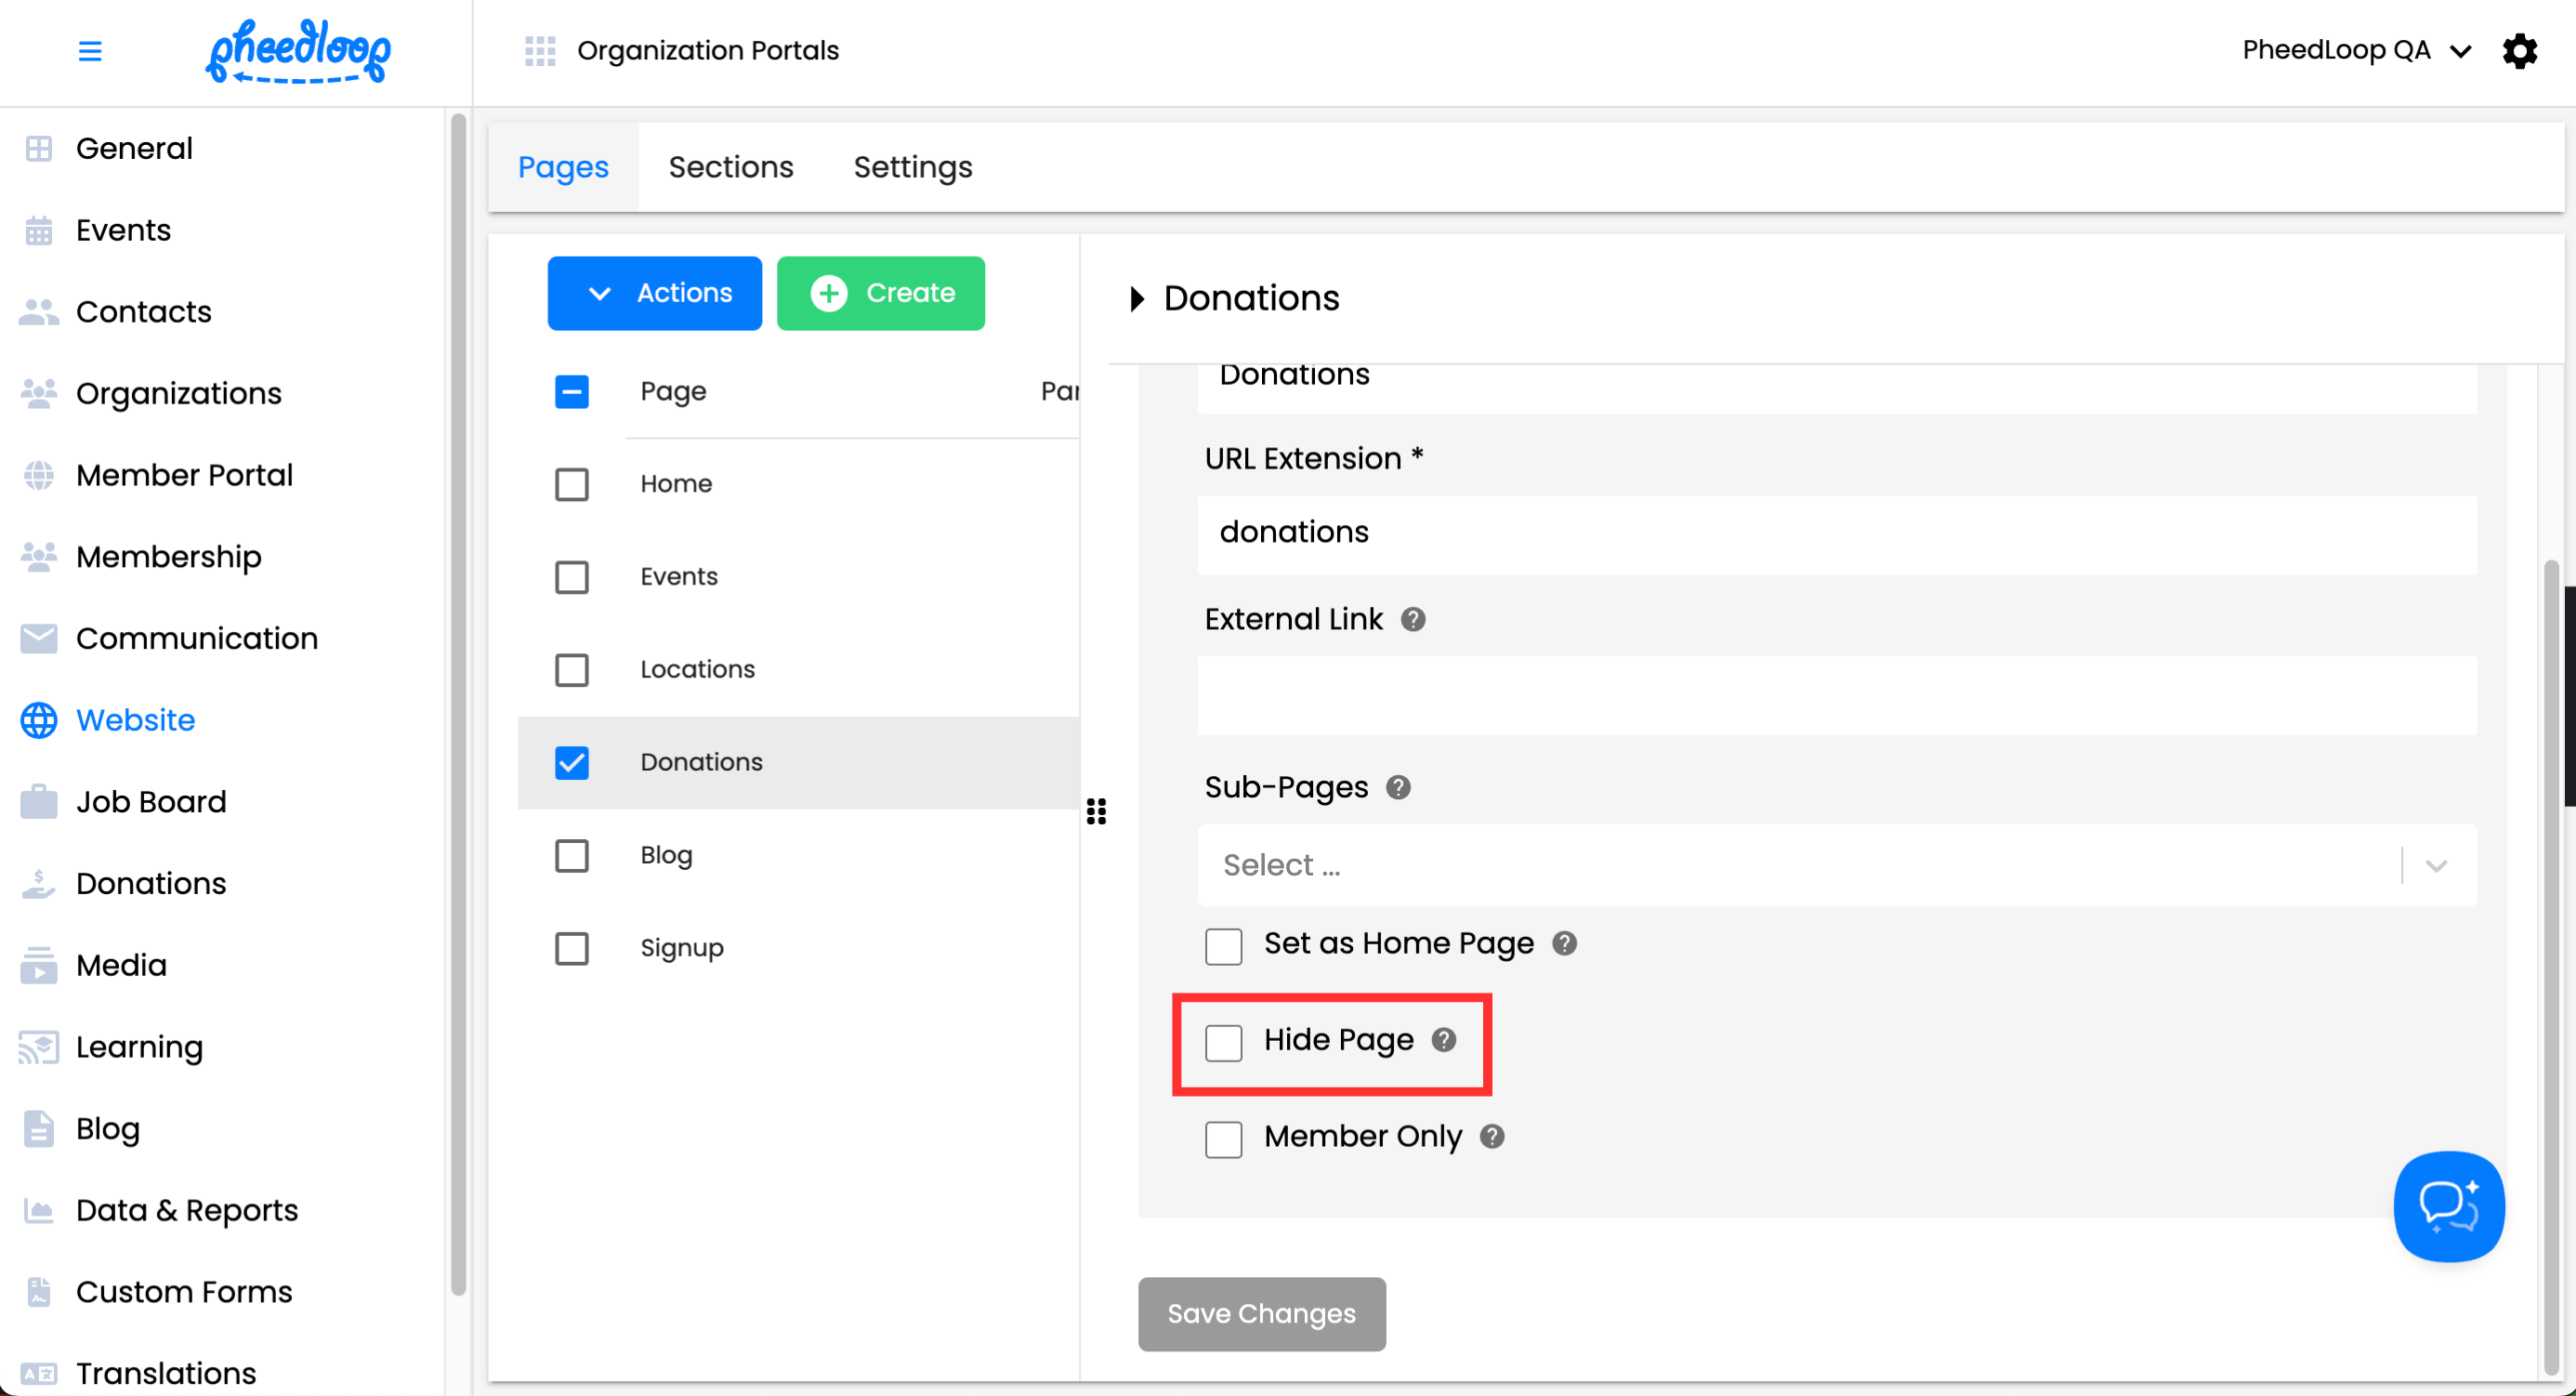

The Donations page will now appear in the Organization Website.
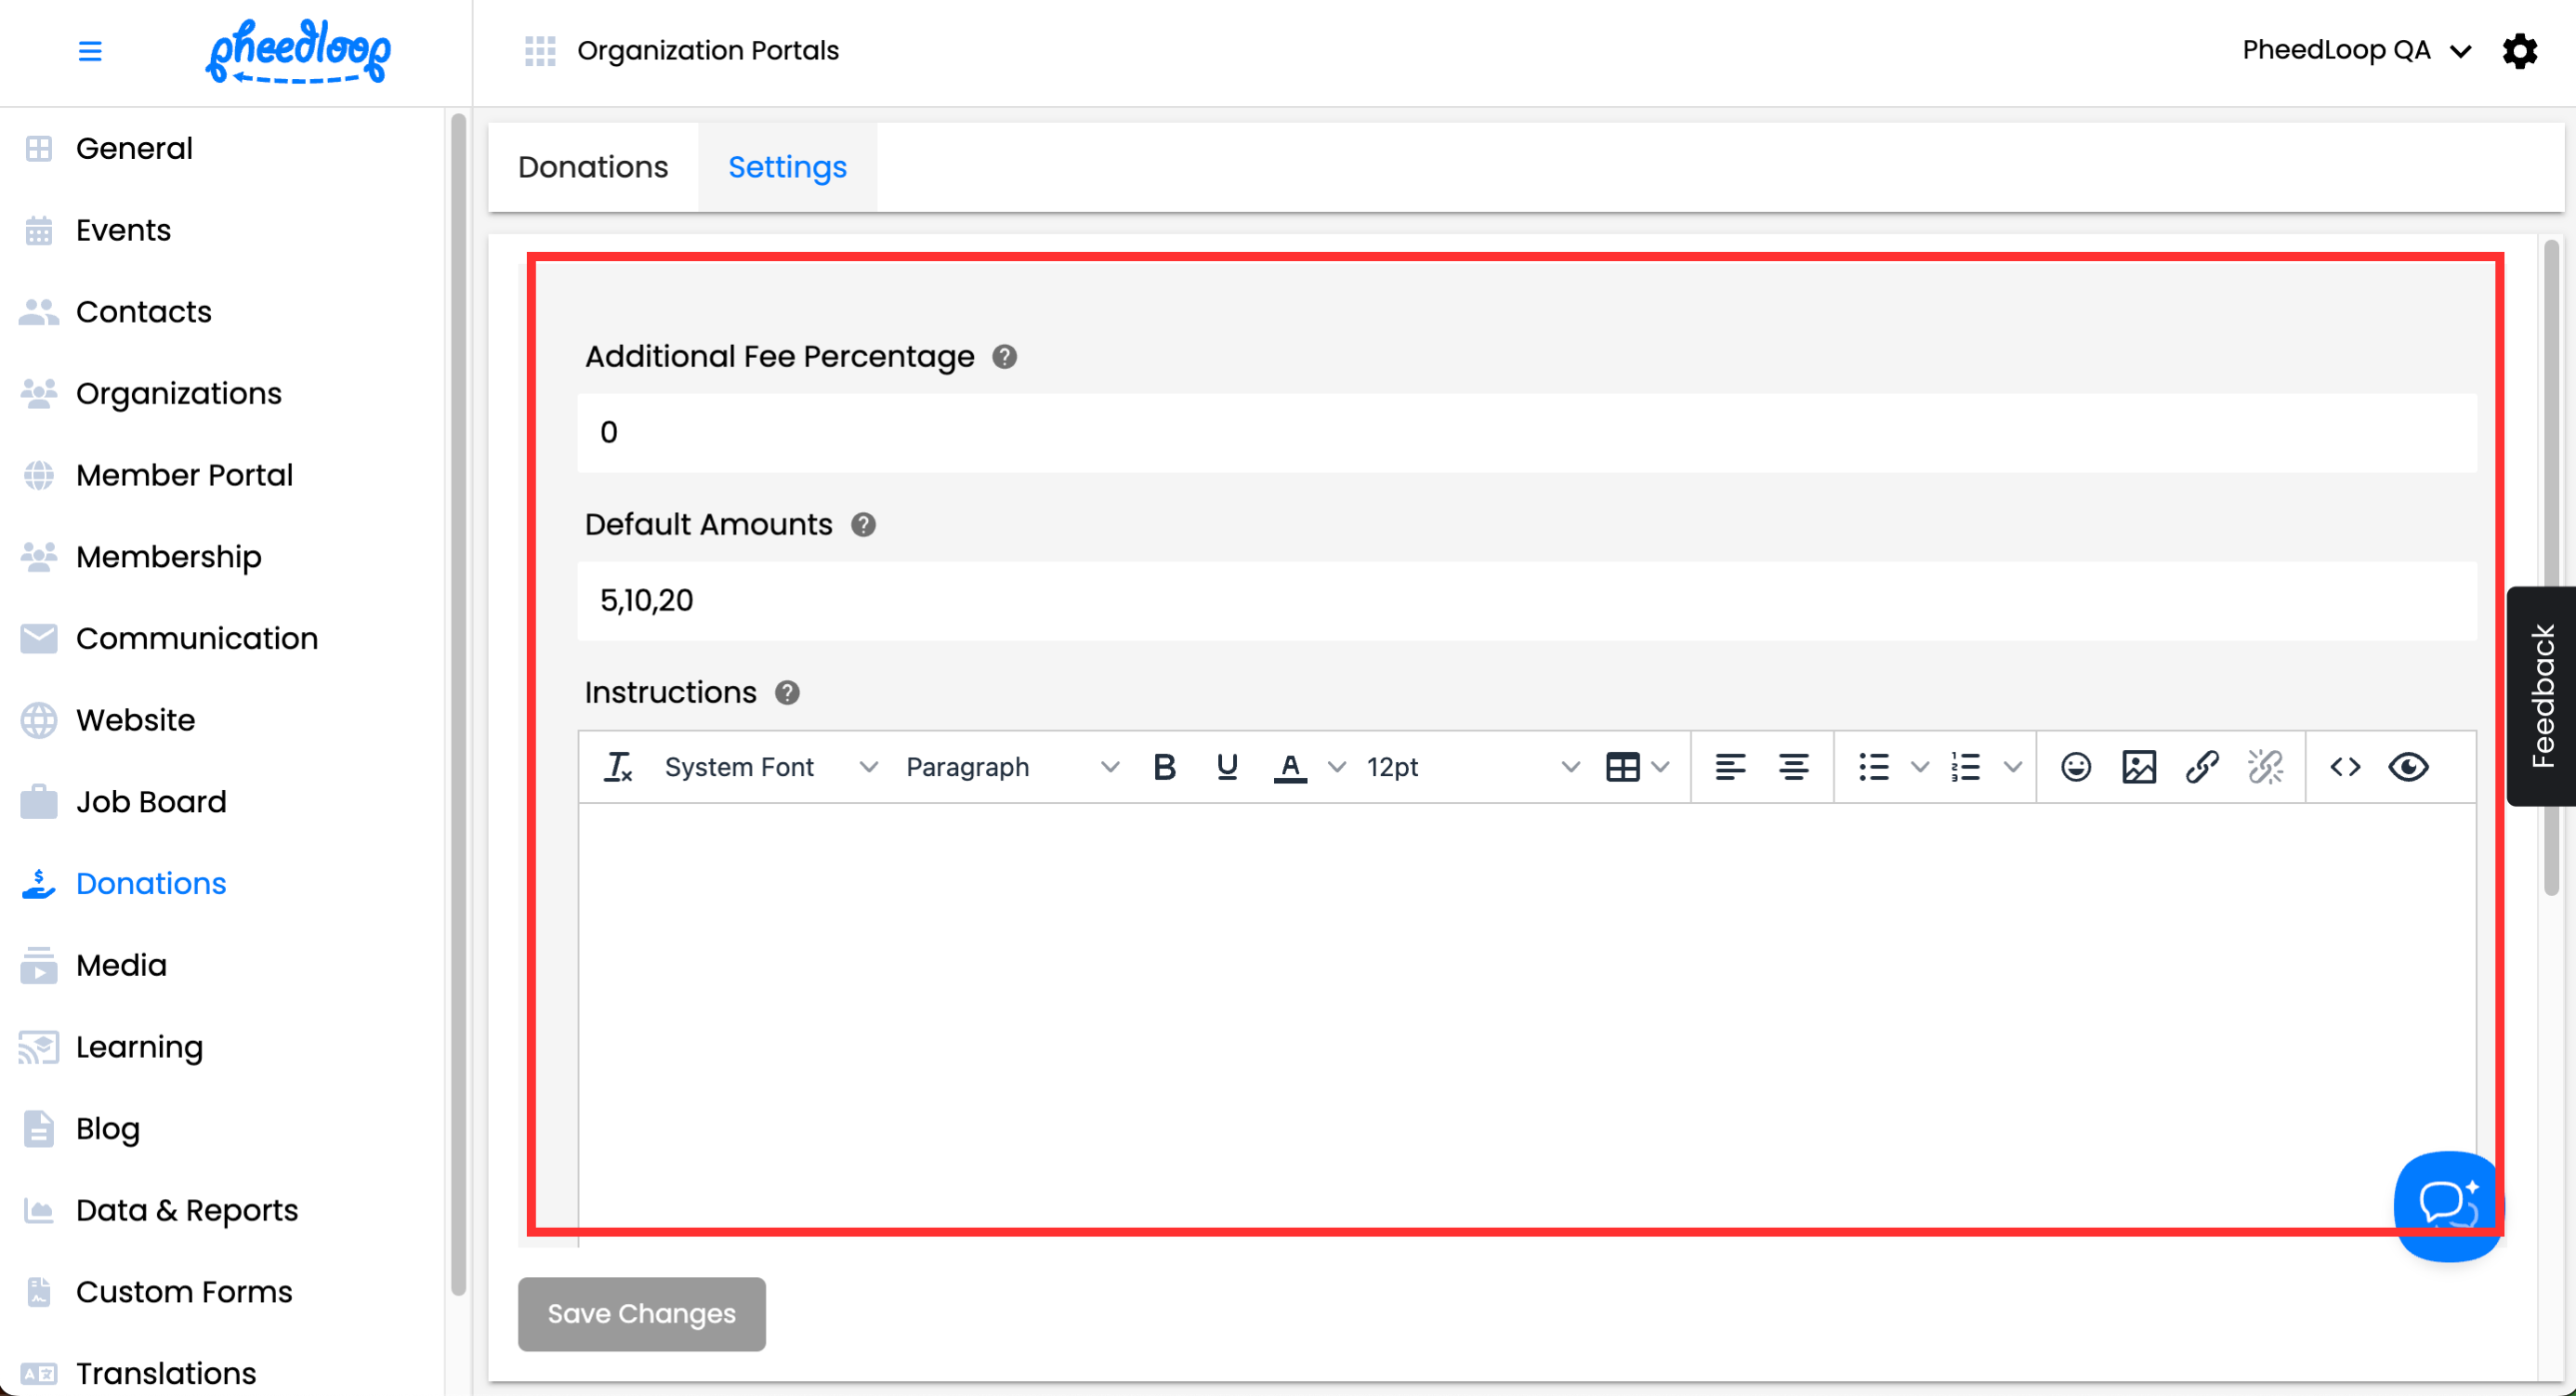
Utilizing Settings in the Organization Website
The Membership Dashboard can be used to customize the Donations page such as the option to include additional donations listings and displaying a customized message.
- From the Membership Dashboard, navigate to Donations > Settings
- Under the Additional Fee Percentage field, enter an extra percentage to charge members during checkout.
- Under the Default Amounts field, enter dollar amounts for Members to choose from in the donation page. The amounts must be divided with commas for the amounts to be displayed.
- Under the Instructions field, enter any custom instructions your organization wishes to share with members.
- Under the Receipt Footer field, enter any information your organizations wish to convey in the receipt. This message will appear at the bottom of the receipt.
Select Save Changes

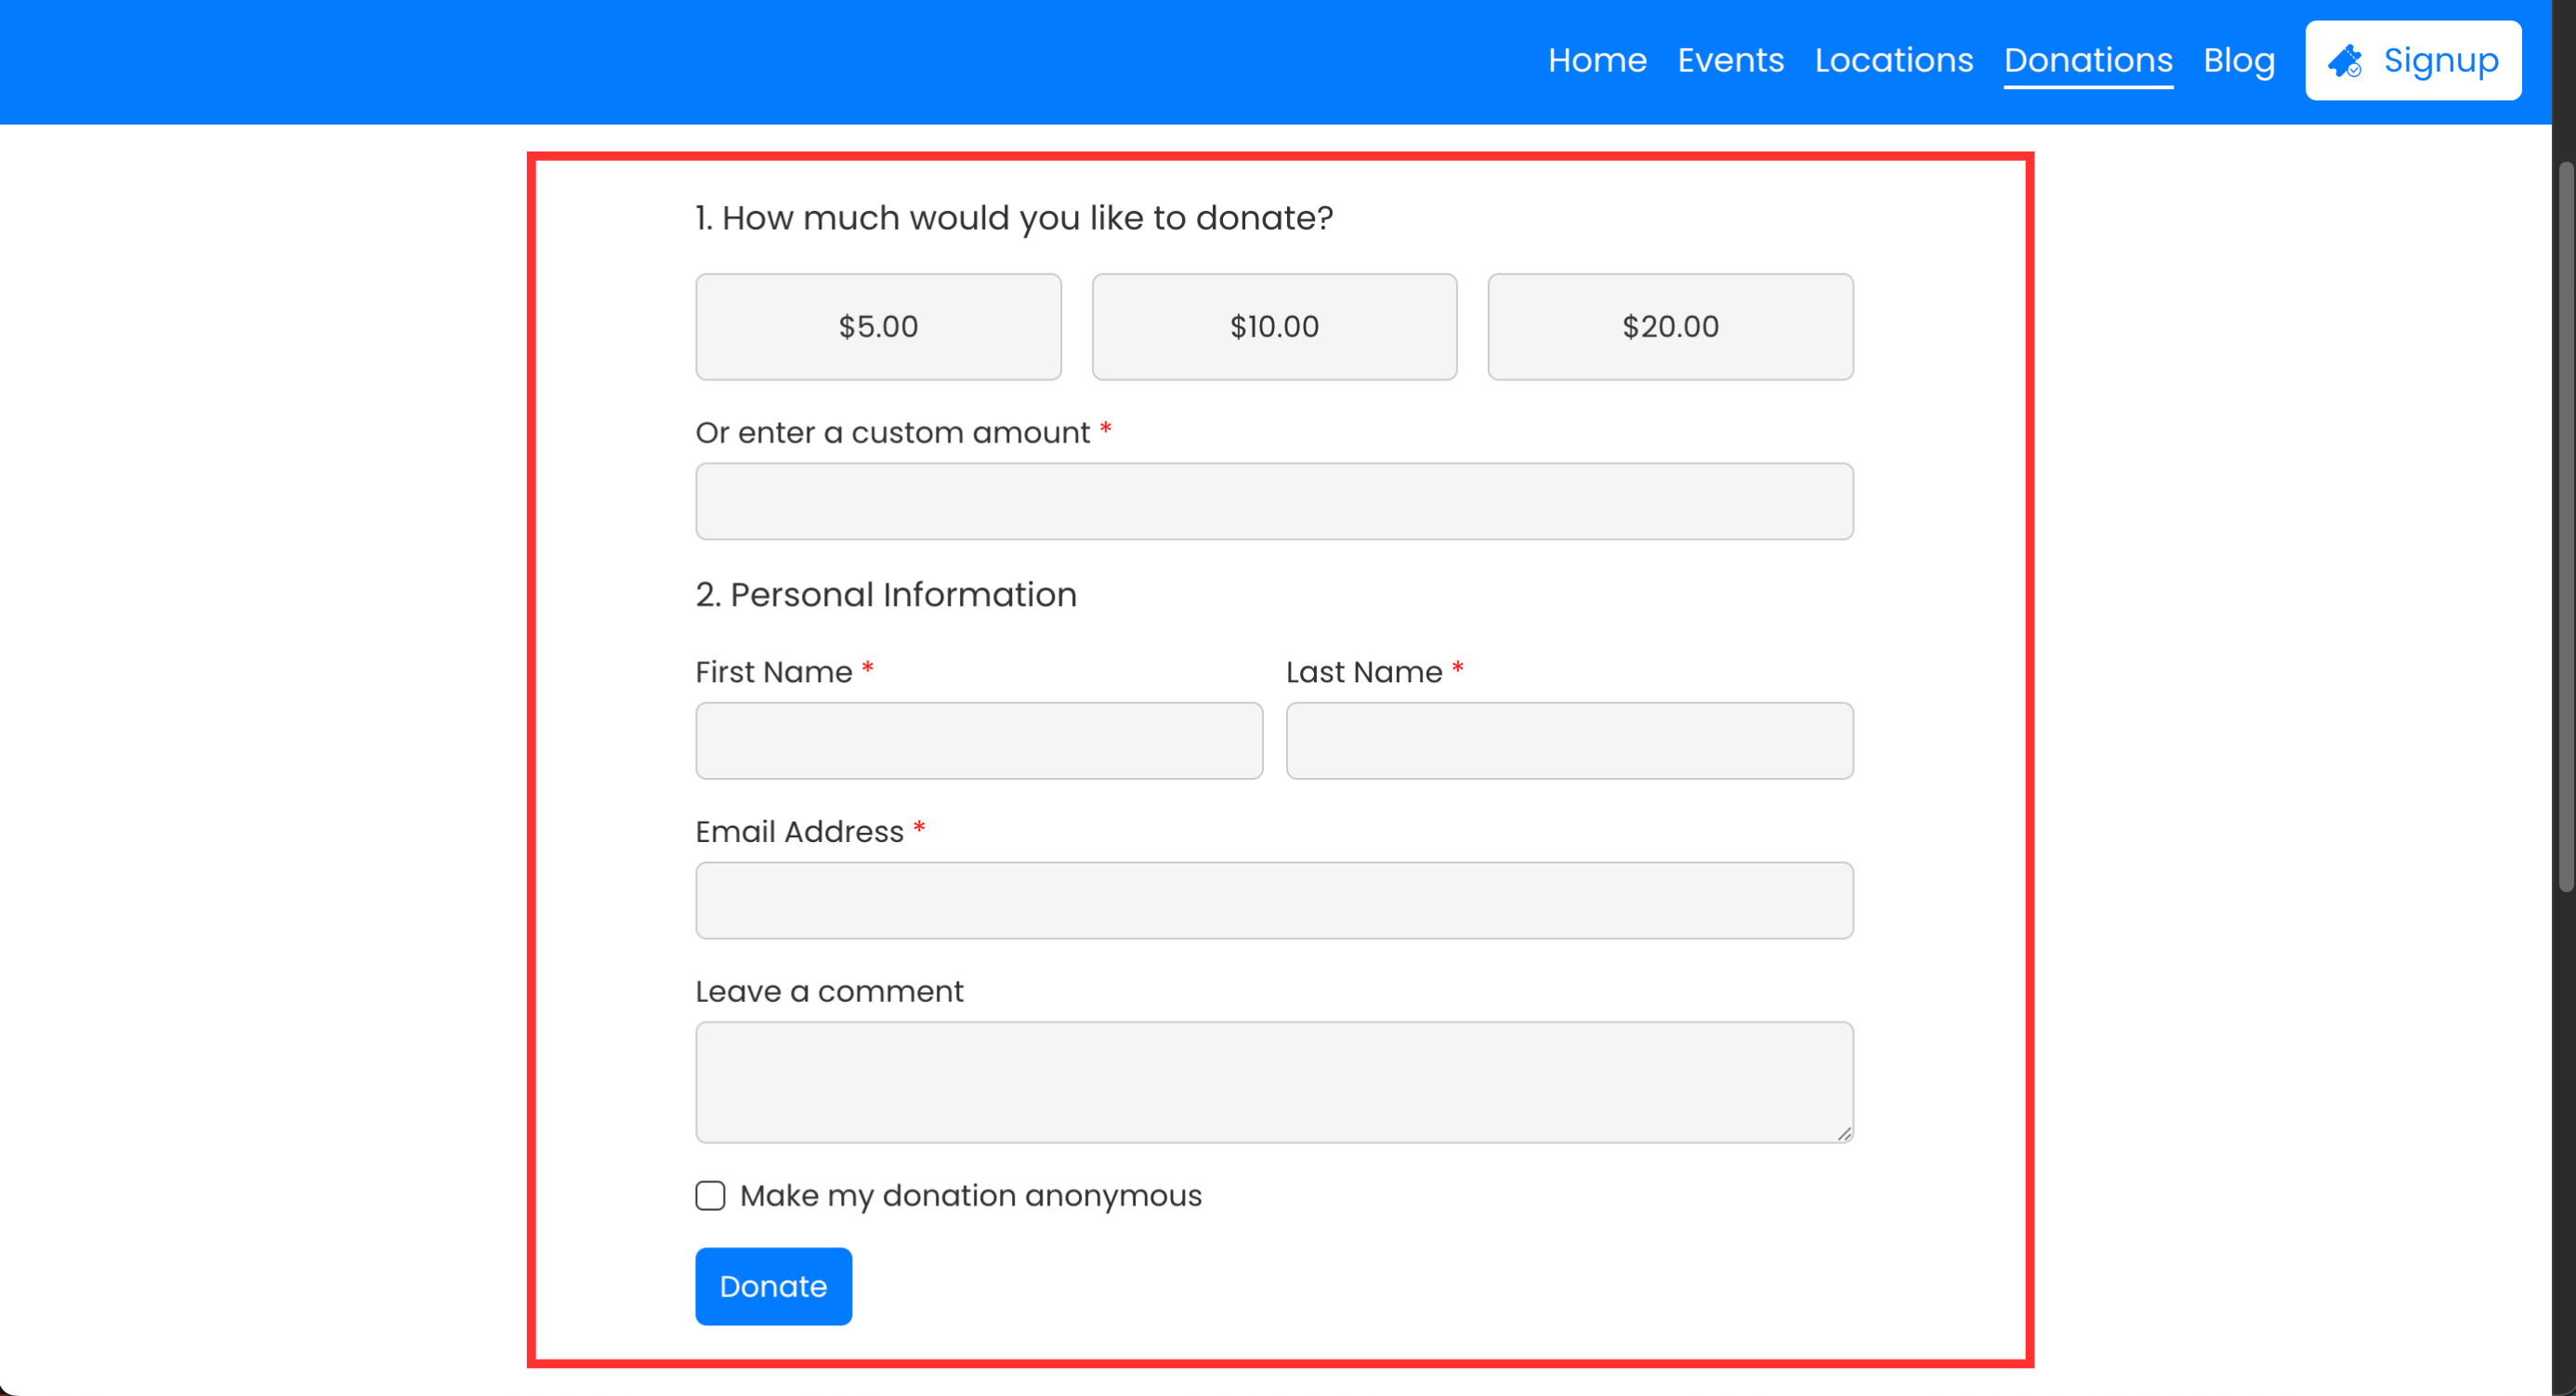
Submitting Donations In the Organization Website
Once everything is configured, Members will now be able to donate.
- From the Organization Website, navigate to the Donations page
- Under the How much would you like to donate? field, select one of the predetermined amounts
- Alternatively, enter a custom amount under the Or enter a custom amount field.
- Under the Personal information fields, enter your first name, last name, and email address
- Under the Leave a comment field, optionally enter any message you wish to pass onto the Organization
- Toggle on the Make my donation anonymous checkbox if you wish to make your donation anonymous
Select Donate

If you are seeing a "Payment is not setup for this organization yet. Please contact the organization manager for more information" error message, you must have your account integrated with a financial processor like Stripe.
Exporting information with the Donations Report Type
By default, the Donations page in the Membership Dashboard displays information on all donations. This includes the name, amount, date, and whether the member has opted to keep their donation anonymous. If the donation is anonymous, their name will not be included in the name column.
Like with other aspects of the Membership Dashboard, custom reports can be used to gather information on donations. We recommend using custom reports for additional information on donations.
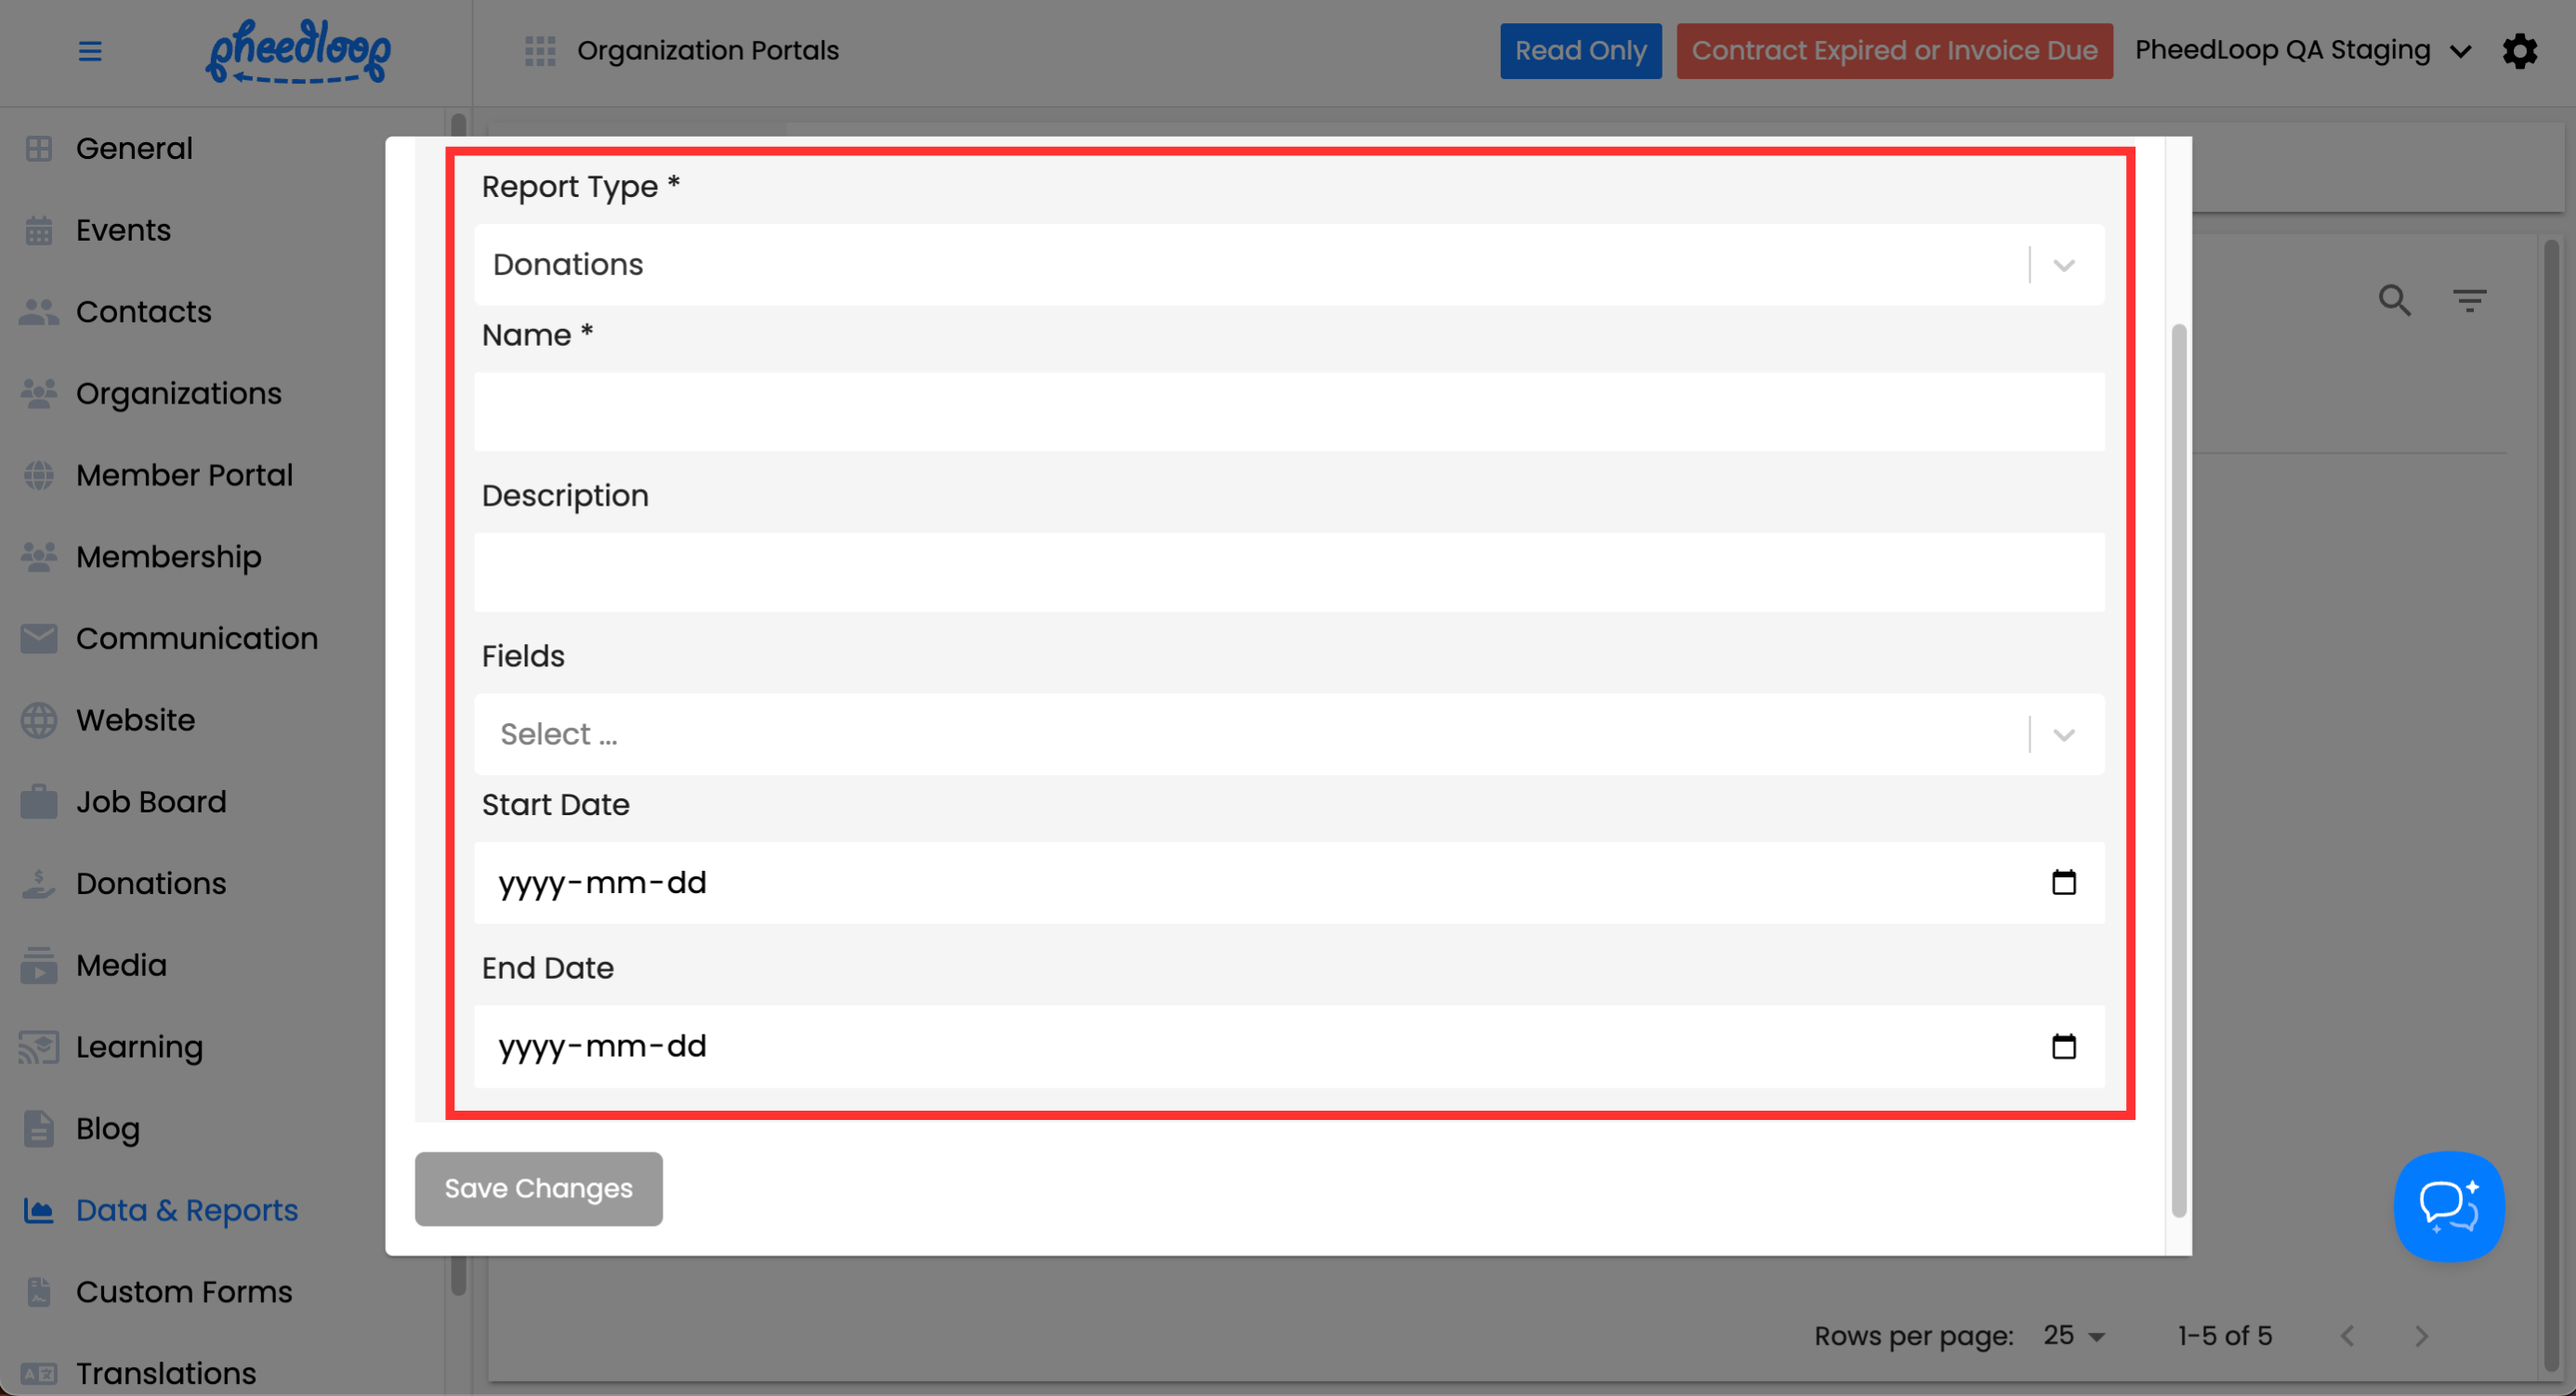
- From the Membership Dashboard, navigate to Data & Reports > Custom Reports
- Above the Custom Reports table, select Create
- Under the Report Type field, select Donations
- Under the Name field, enter a name for your report
- Under the Description field, enter a description for your report
- Under the Fields field, select any information you wish to include in your report such as Member information, donation amount, comments, and much more.
- Under the Start Date field, enter a date for the report to begin collecting information. Information before this date will not be included in the report. Leave blank to include all information.
- Under the End Date field, enter a date for the report to stop collecting information on. Information after this date will not be included in the report. Leave blank to include all information.
Select Save Changes

Now that your report is created, you will want to generate the report in order to download it.
- From the Membership Dashboard, navigate to Data & Reports > Custom Reports
Select the checkbox of your newly created report
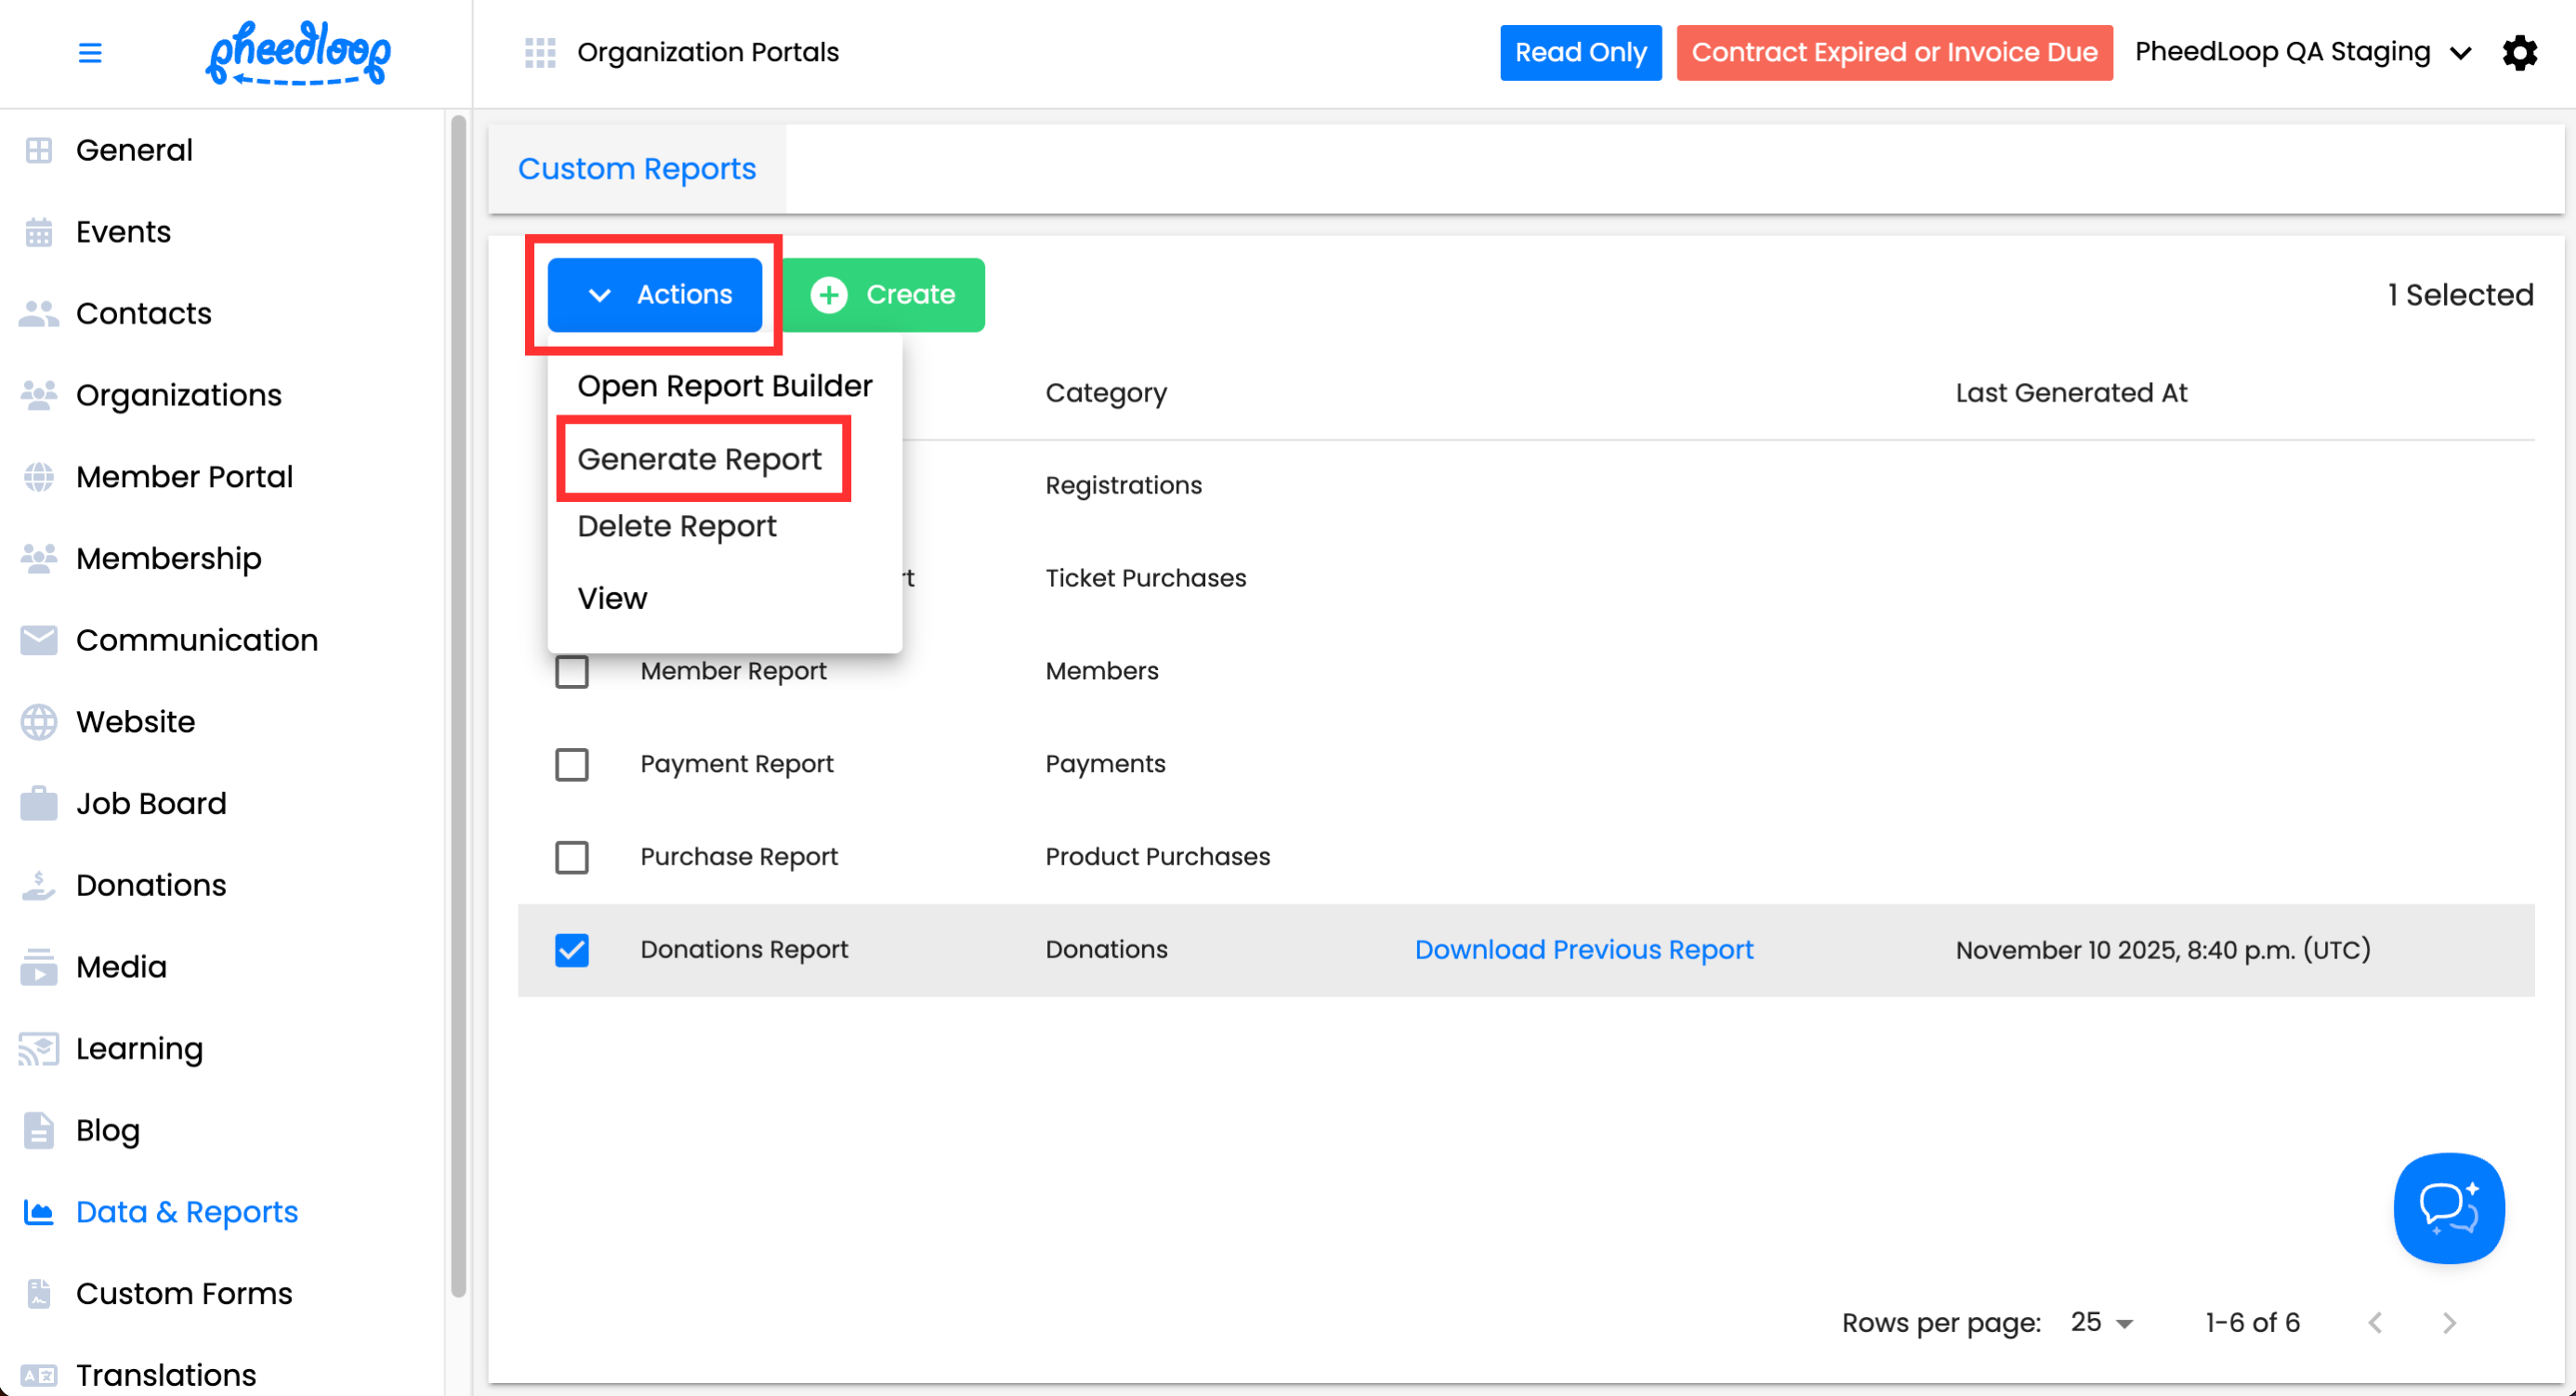
- Above the Custom Reports table, select Actions > Generate Report
Select Download Previous Report
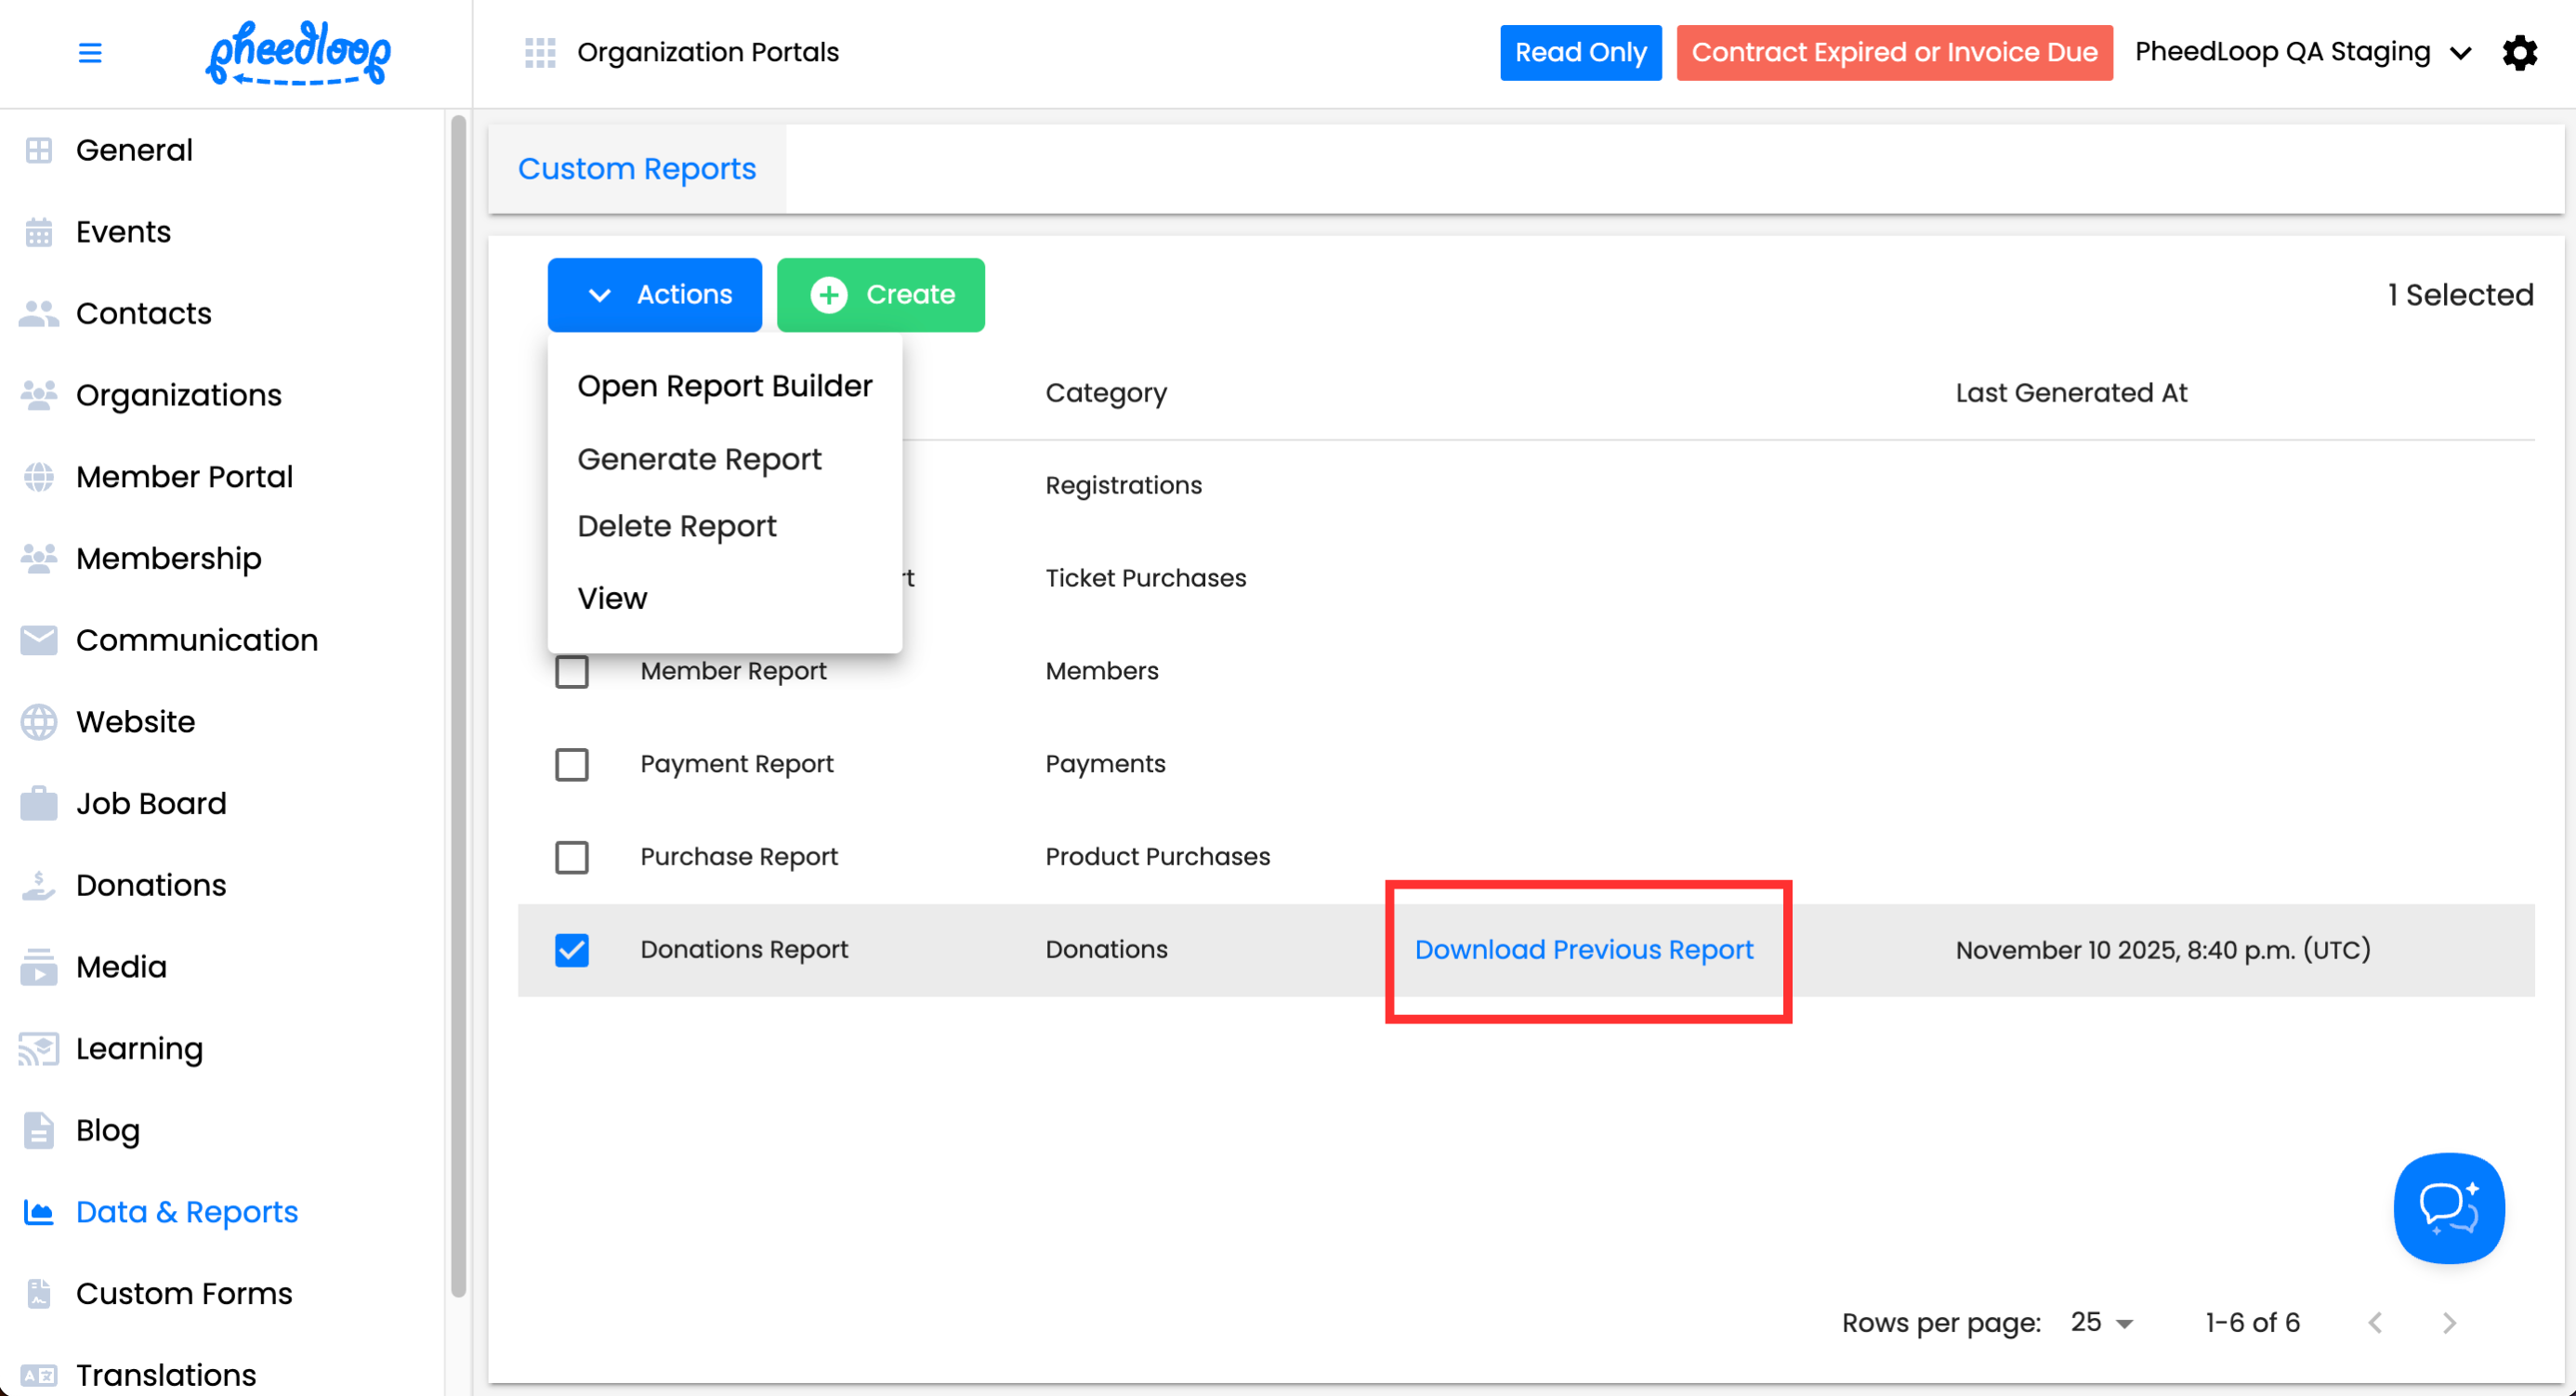


The report will now be downloaded on your device.