How can I include custom text throughout my registration flow?
Custom content can be added in select parts of the registration flow. This feature is useful for adding additional information and instructions for attendees or sending a personalized thank you message for their registration.
Beyond text, these instructions can also GIFs and several formatting options for an easier reading experience.
Custom content can be added for the following pages:
- Welcome Text
- Footer Text
- Terms and Conditions
- Ticketing Instructions
- Success Message
Contents:
- Welcome Text for Registration
- Welcome Text for Individual Categories
- Footer Text for Registration
- Footer Text for Specific Categories
- Terms and Conditions
- Success Message
- Ticketing Instructions and more
Welcome Text for Registration
Welcome Text can be added at the category selection screen on the Event Website. This will appear at the top of the category selection page.

To update the Welcome Text on the Registration Page:
- From the Event Dashboard, navigate to Registration > Settings and scroll down to Advanced Options
- Under the Welcome Text field, enter the text you wish to be displayed
-
Select Save Changes


Welcome Text for Individual Categories
Welcome Text can be set on a per-category basis. Please note, the Welcome Text will only be displayed at the Start Page of the Registration Flow.

To update the Welcome Text for individual categories:
- From the Event Dashboard, navigate to Registration > Categories and select the Category you wish to adjust from the list

- Scroll down to Other and under the Welcome Text field, enter the text you wish to be displayed on the Start page of the Registration Flow
- Select Save Changes

Footer Text for Registration
Footer Text can be added at the category selection screen on the Event Website. This will appear at the bottom of the category selection page.

To update the Footer Text on the Registration page:

- From the Event Dashboard, navigate to Registration > Settings and scroll down to Advanced Options
- Under the Footer Text field, enter the text you wish to be displayed
- Select Save Changes
Footer Text for Specific Categories
Footer Text can be set Welcome Text can be set on a per-category basis. Footer Text will be displayed on all pages of the registration flow.

To update the Footer Text for individual categories:
- From the Event Dashboard, navigate to Registration > Categories and select the Category you wish to adjust from the list

- Scroll down to Other and under the Footer Text field, enter the text you wish to be displayed on the Registration Flow
- Select Save Changes

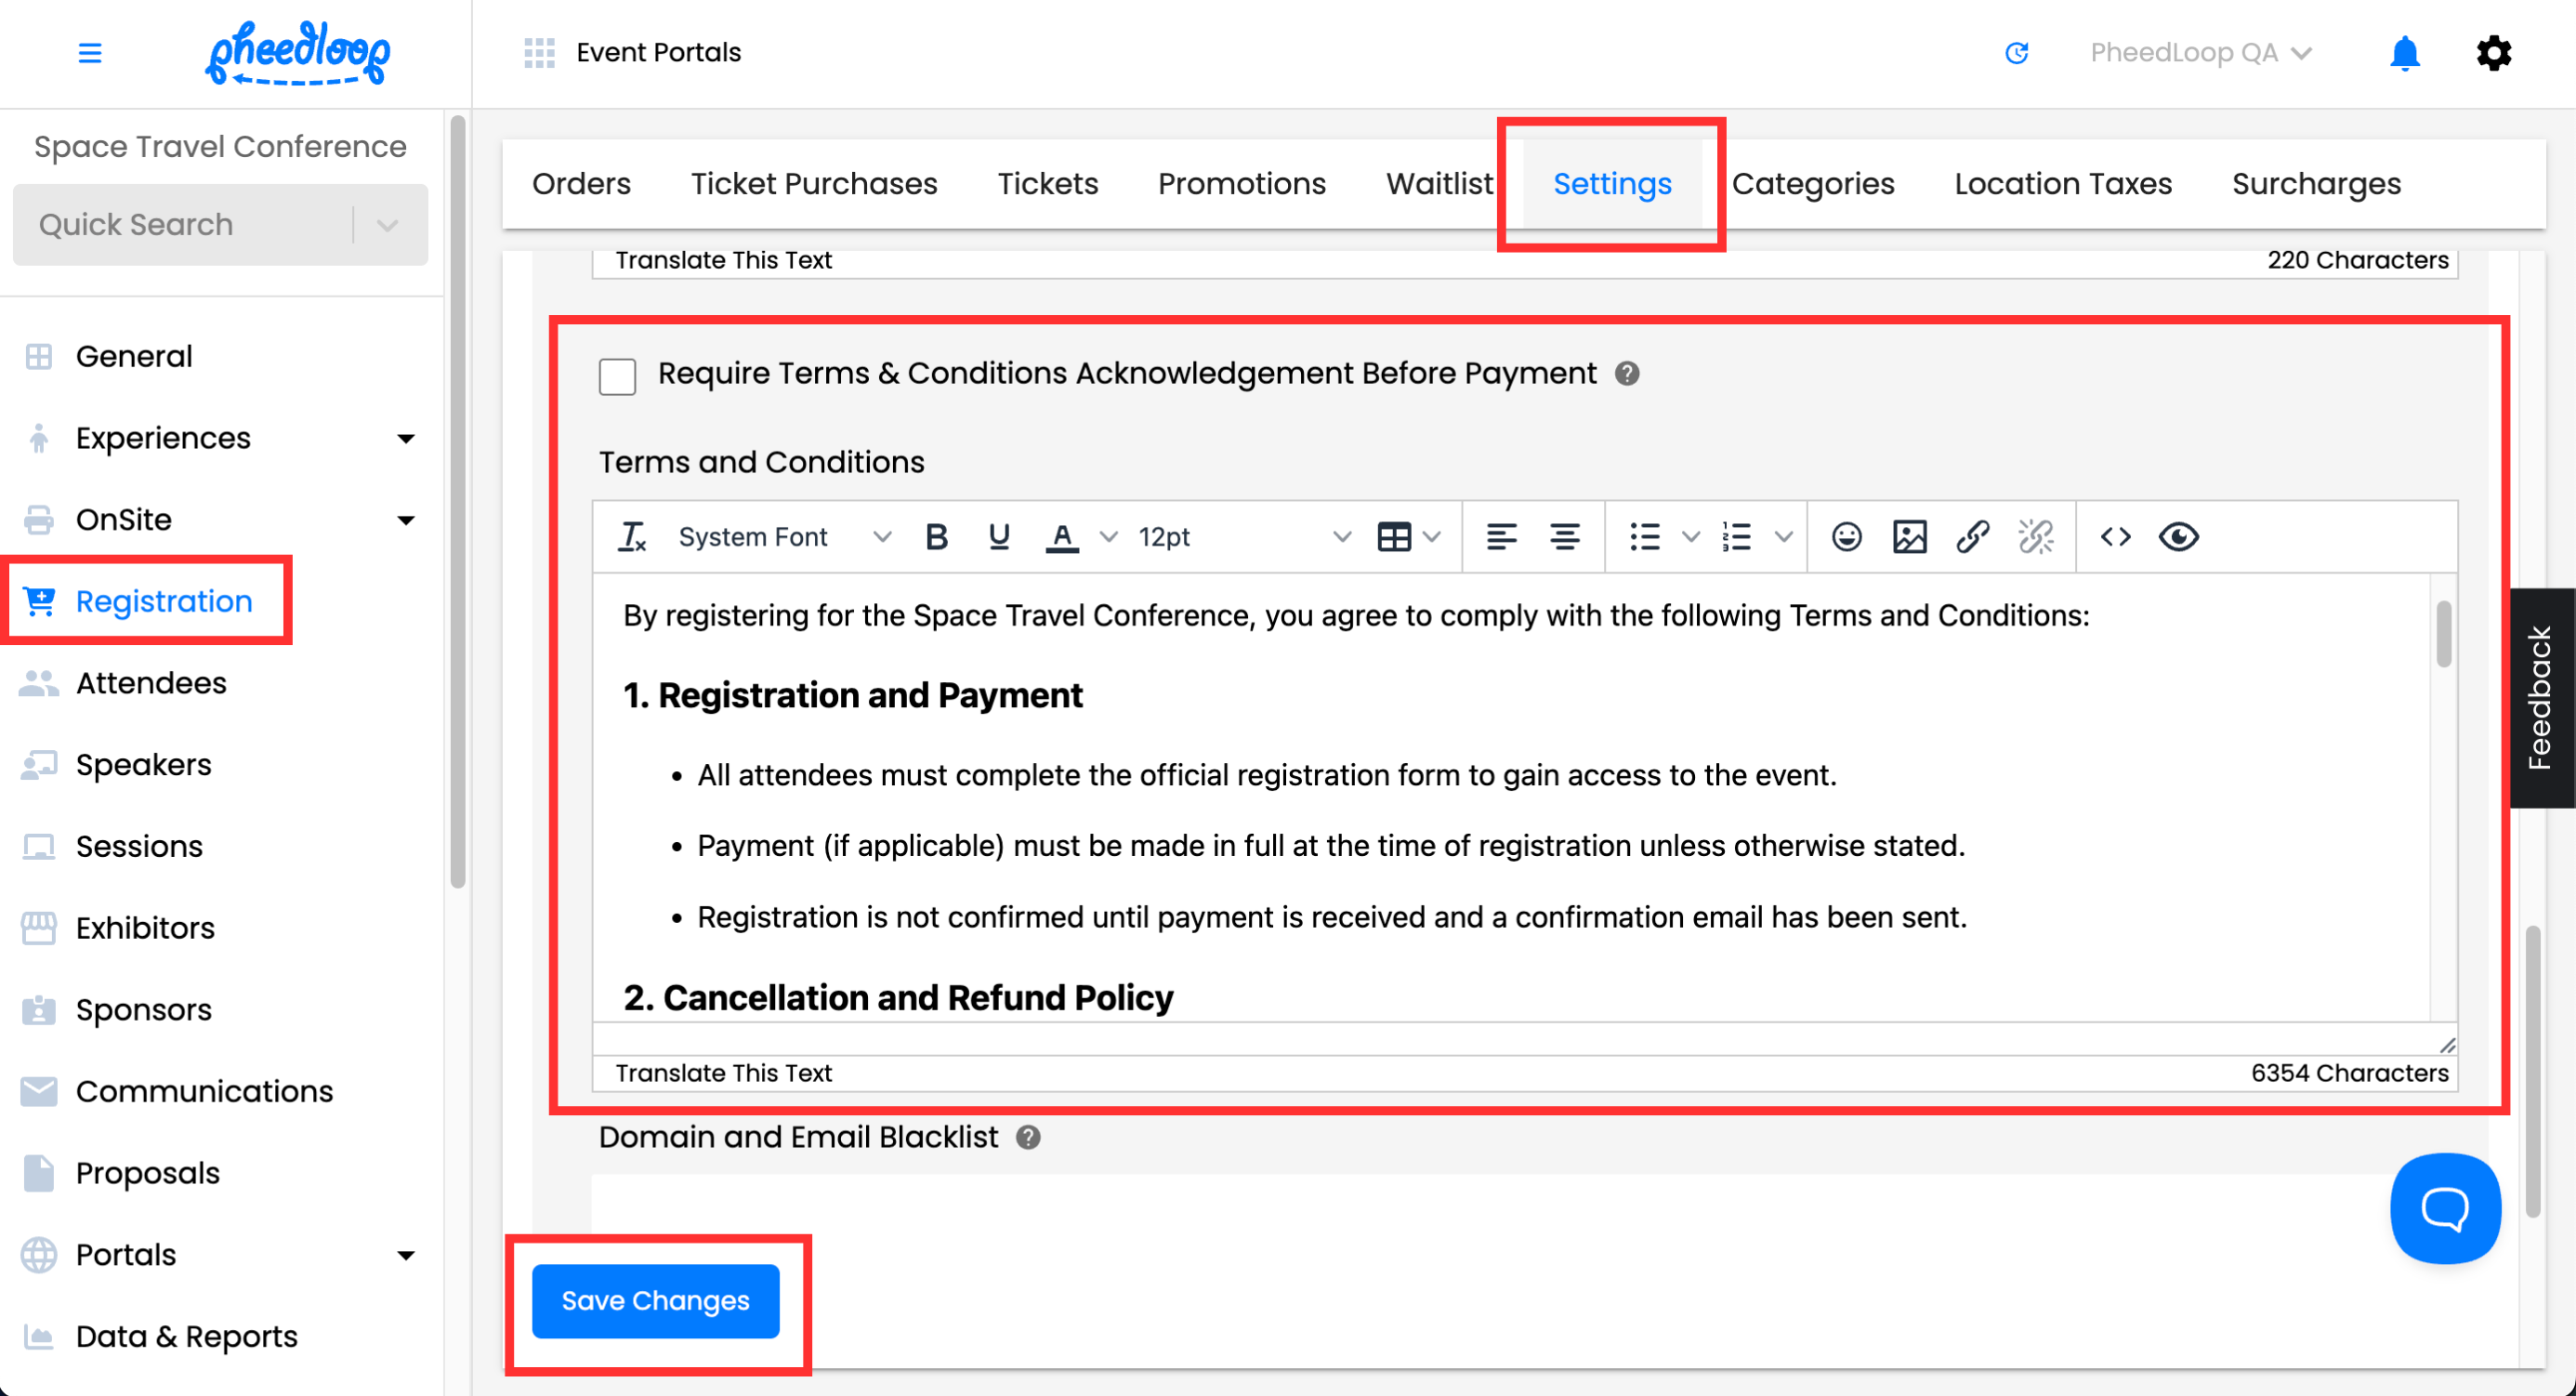
Terms and Conditions
Terms and Conditions are displayed from the Tickets step onwards. Select terms and conditions to view them.

The Terms and Conditions will be displayed on a new pop-up.

To update the Terms and Conditions:
- From the Event Dashboard, navigate to Registration > Settings
- Scroll down to Advanced Options
- Under the Terms and Conditions field, enter the text you wish to be displayed at the checkout page
- If you would like to require registrants to agree to the Terms and Conditions prior to paying, toggle on the Require Terms & Conditions Acknowledgement Before Payment checkbox.
-
Select Save Changes

Success Message
A customized Success Message can be added for each individual category. There is currently no option to add a success message for all categories simultaneously. This custom text will appear under the Success! message on the Success page.

- From the Event Dashboard, navigate to Registration > Categories and select the Category you wish to adjust from the list
- Scroll down to Other and under the Success Message field, enter the text you wish to be displayed on the Success Page
- Select Save Changes

Instructions for each step
Instructions can be added for each step in the registration flow. Instructions will appear at the top of each page.

To add instructions for each step:
- From the Event Dashboard, navigate to Registration > Categories and select the Category you wish to edit

- Scroll down to Other

- Under the Ticketing Instructions field, enter the instructions to appears in the Tickets page
- Under the Schedule Instructions field, enter the instructions to appear in the Schedule page
- Under the Seat Instructions field, enter the instructions to appear in the Seats page
- Under the Accommodation Instructions field, enter the instructions to appear in the Hotels page
- Select Save Changes
