Sending push notifications to the Virtual Portal
Push notifications are a powerful tool for keeping attendees engaged and informed throughout your event. Whether you’re sending important announcements, reminders, or personalized messages, push notifications ensure that your audience receives timely updates directly on their devices.
In this guide, we’ll walk you through the process of creating and managing push notifications effectively. You’ll learn how to craft, test, and send announcements. Additionally, we’ll cover how to ensure notifications appear in the Announcements section on your Virtual Portal’s Lobby section, maximizing visibility and engagement.
Contents
Creating Push Notifications
Push notifications are created and managed directly from the Event Dashboard. Any announcement that has the Push Notifications Enabled checkbox toggled on will be delivered through PheedLoop Go! And the Virtual Portal, if applicable.
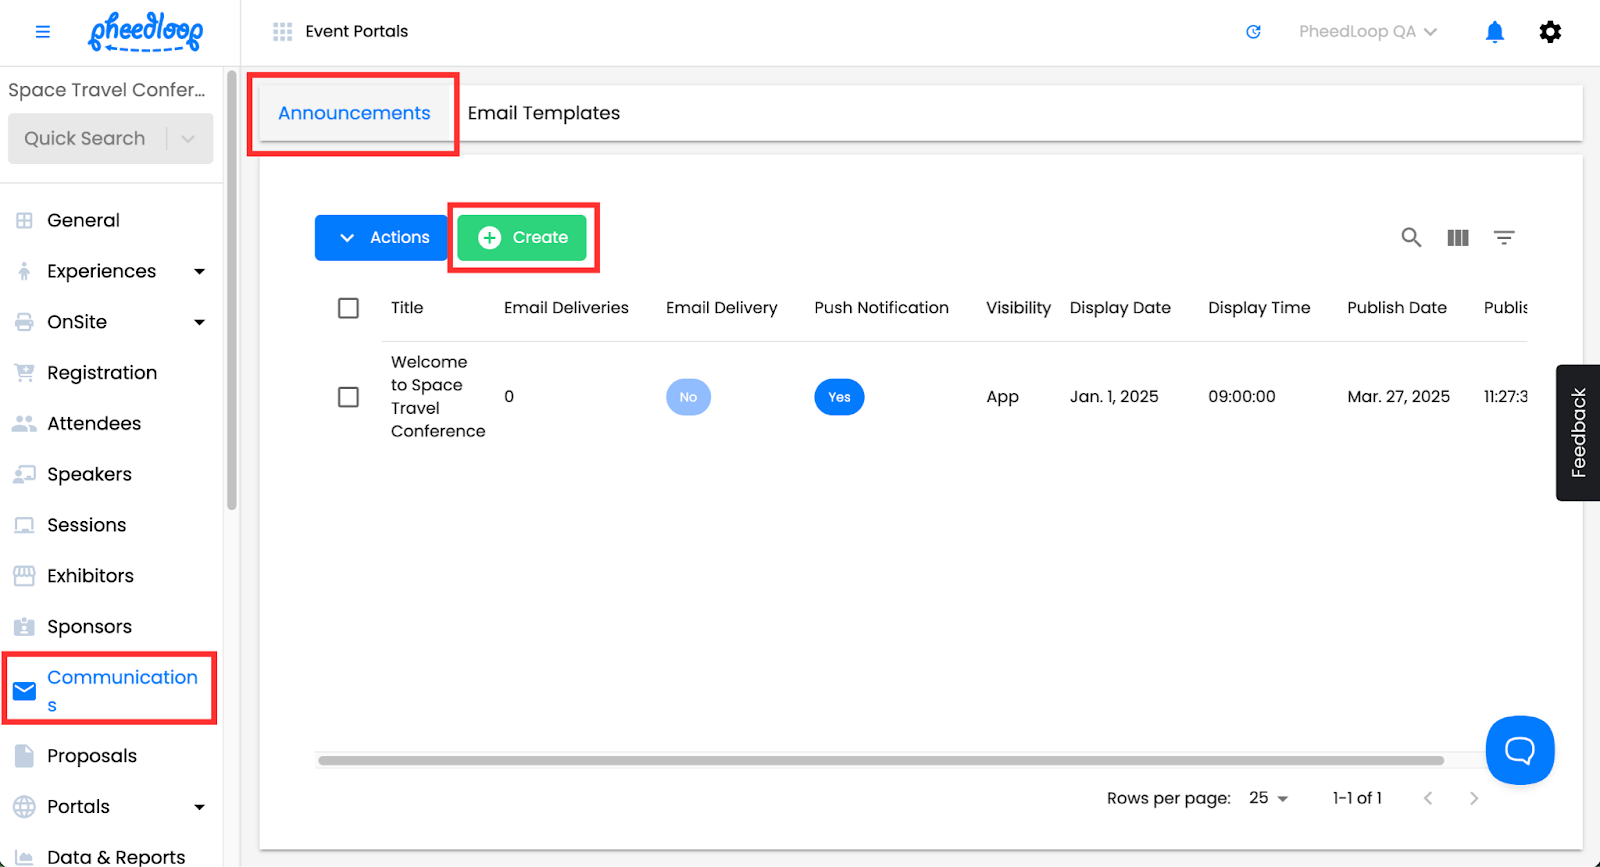
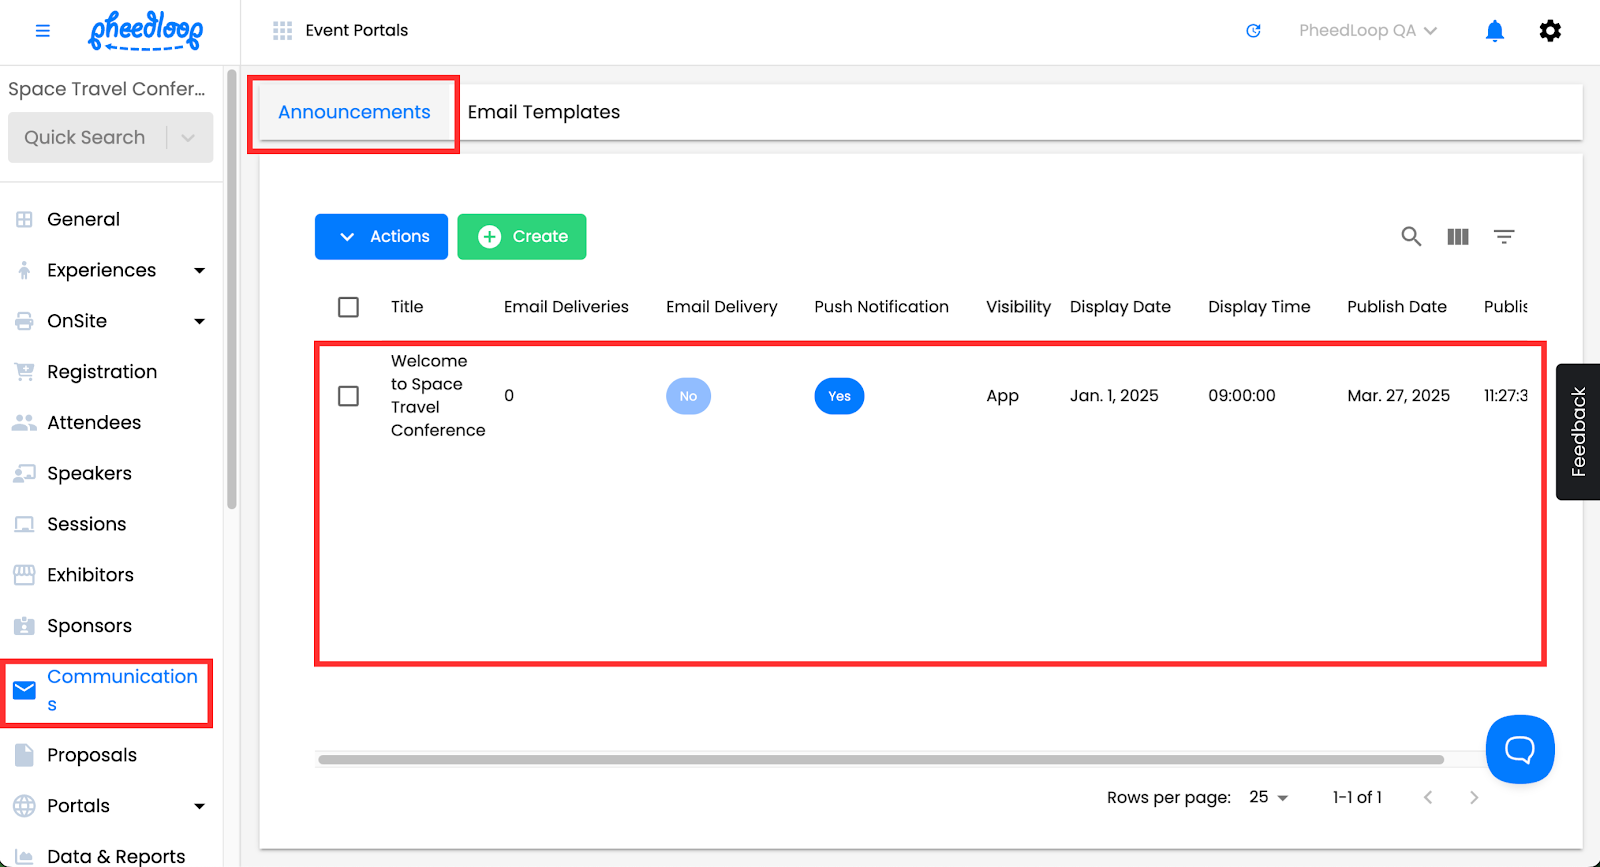
- From the Event Dashboard, navigate to Communications > Announcements
Above the Announcements table, select Create
- Under the Announcement Title field, enter the title of your announcement
Under the Description field, enter the contents of your announcement
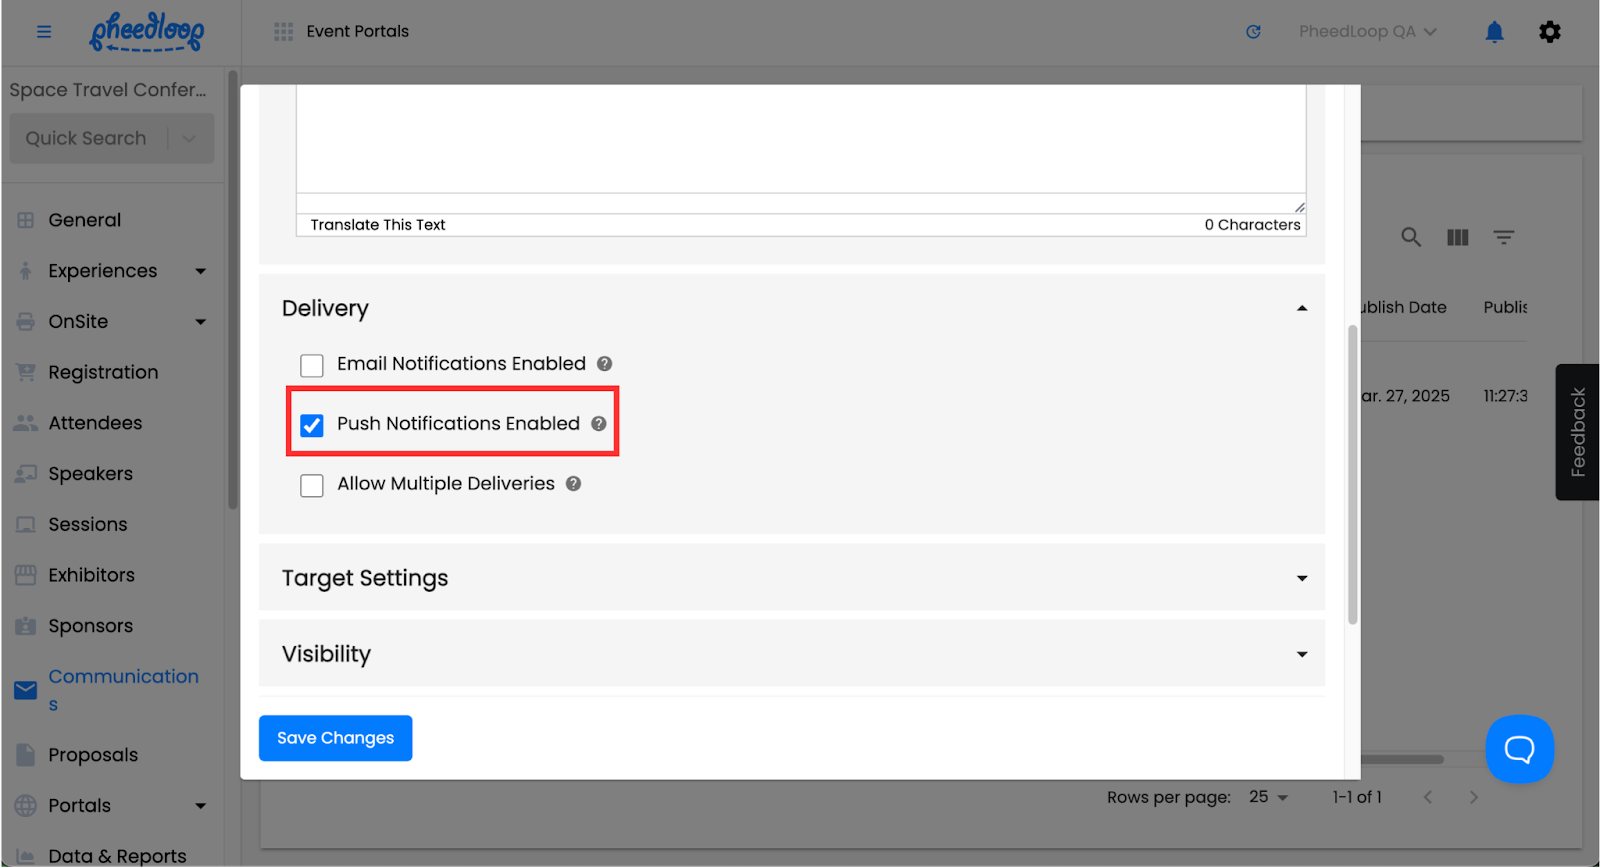
- Scroll down to Delivery
Toggle on the Push Notifications Enabled checkbox to send the announcement through PheedLoop Go! and the Virtual Portal (if applicable)
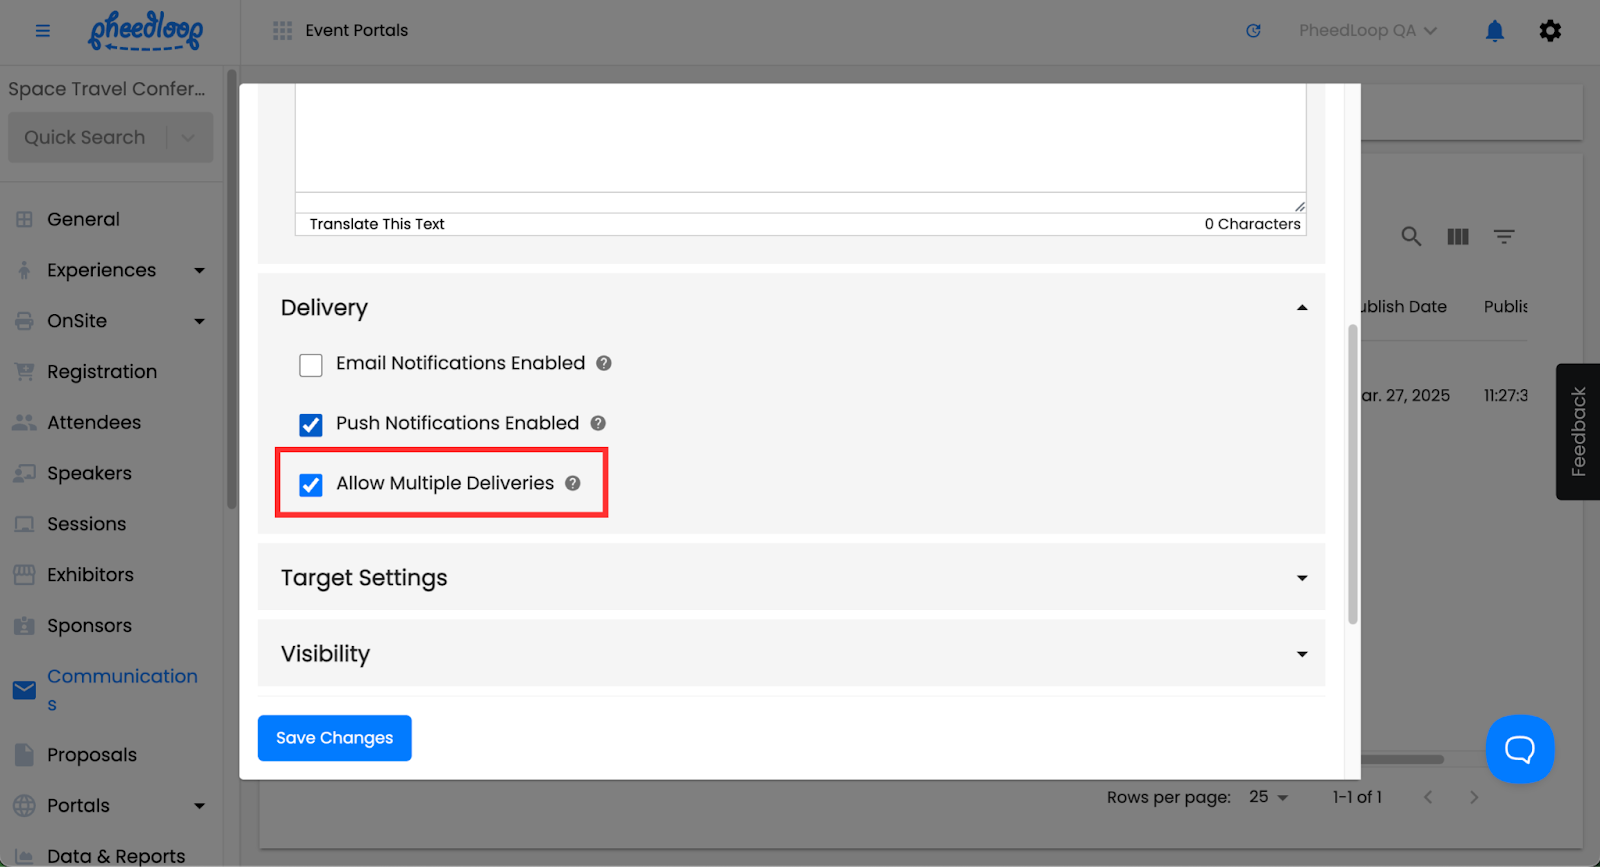
- Toggle on the Allow Multiple Deliveries checkbox to permit the announcement to be sent multiple times
If this checkbox is turned off, each announcement will be delivered to attendees only once, and any further attempts will not be sent.
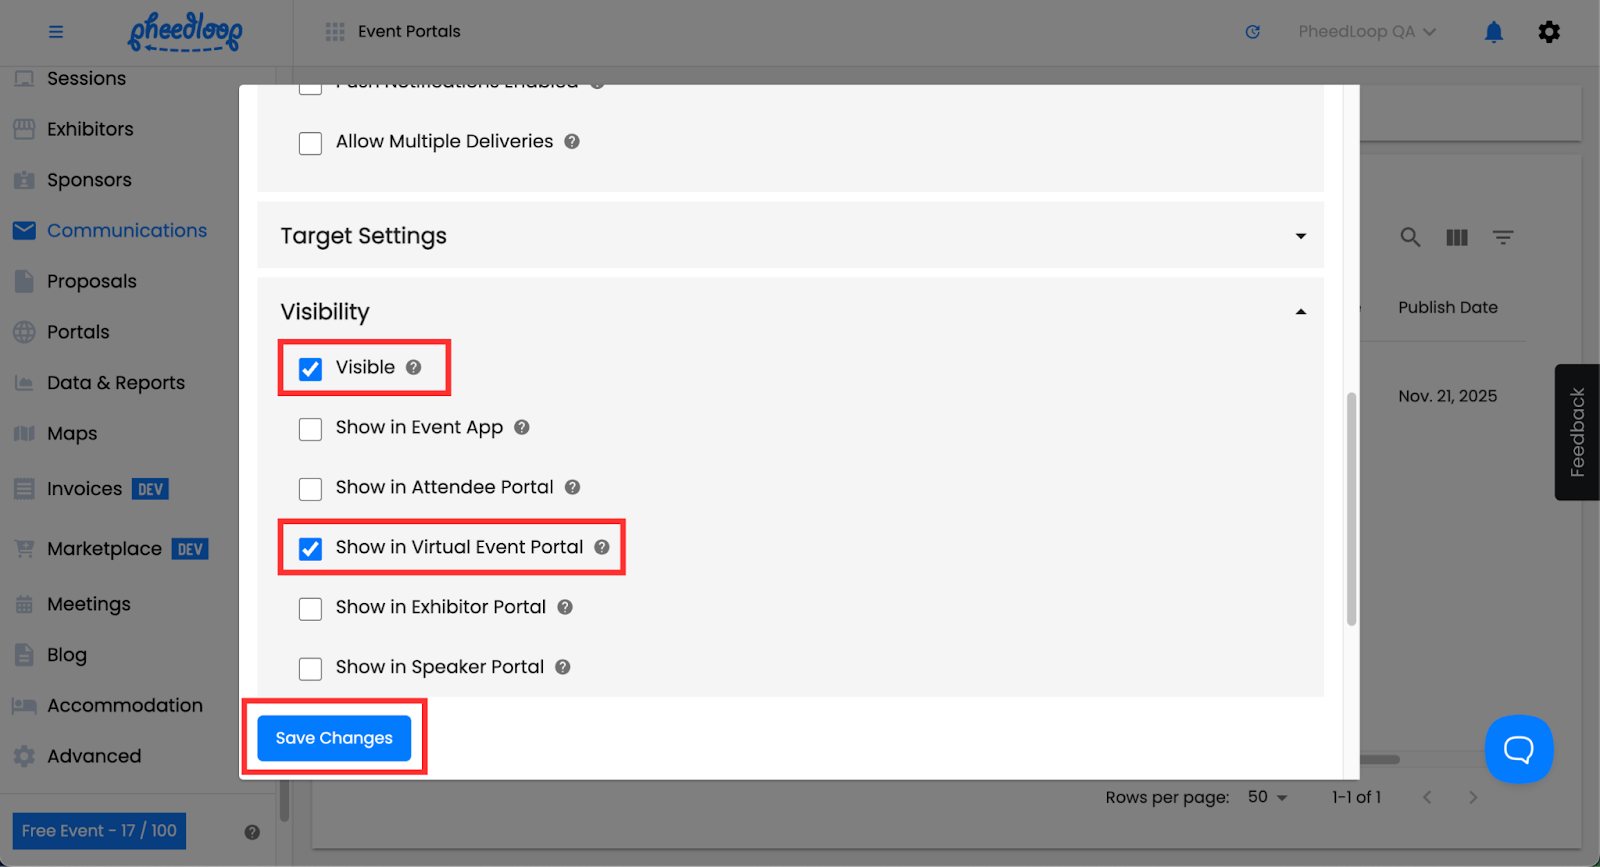
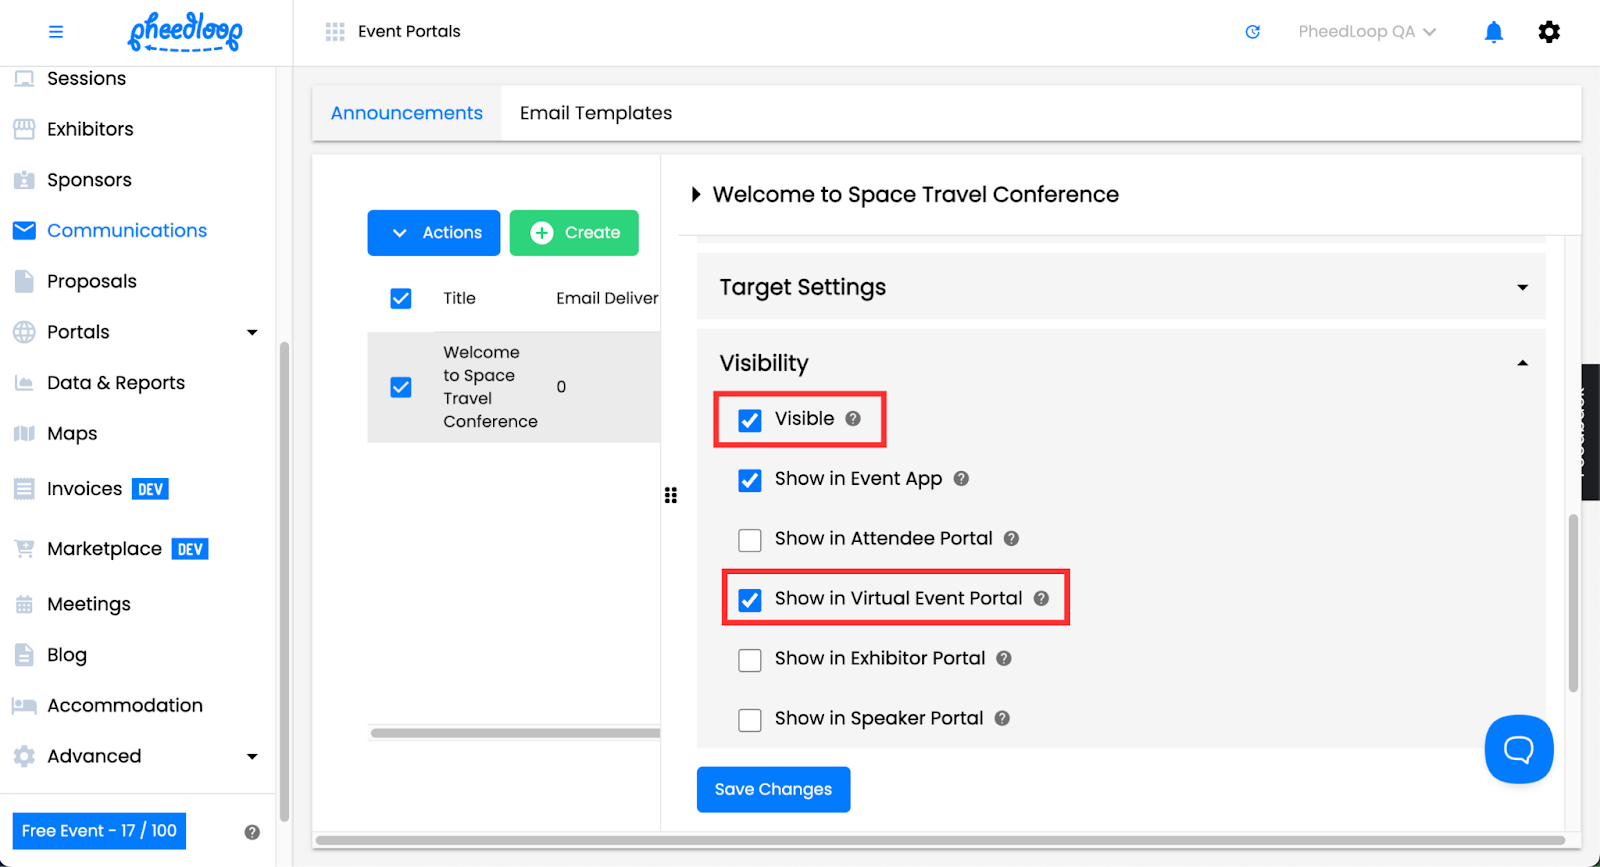
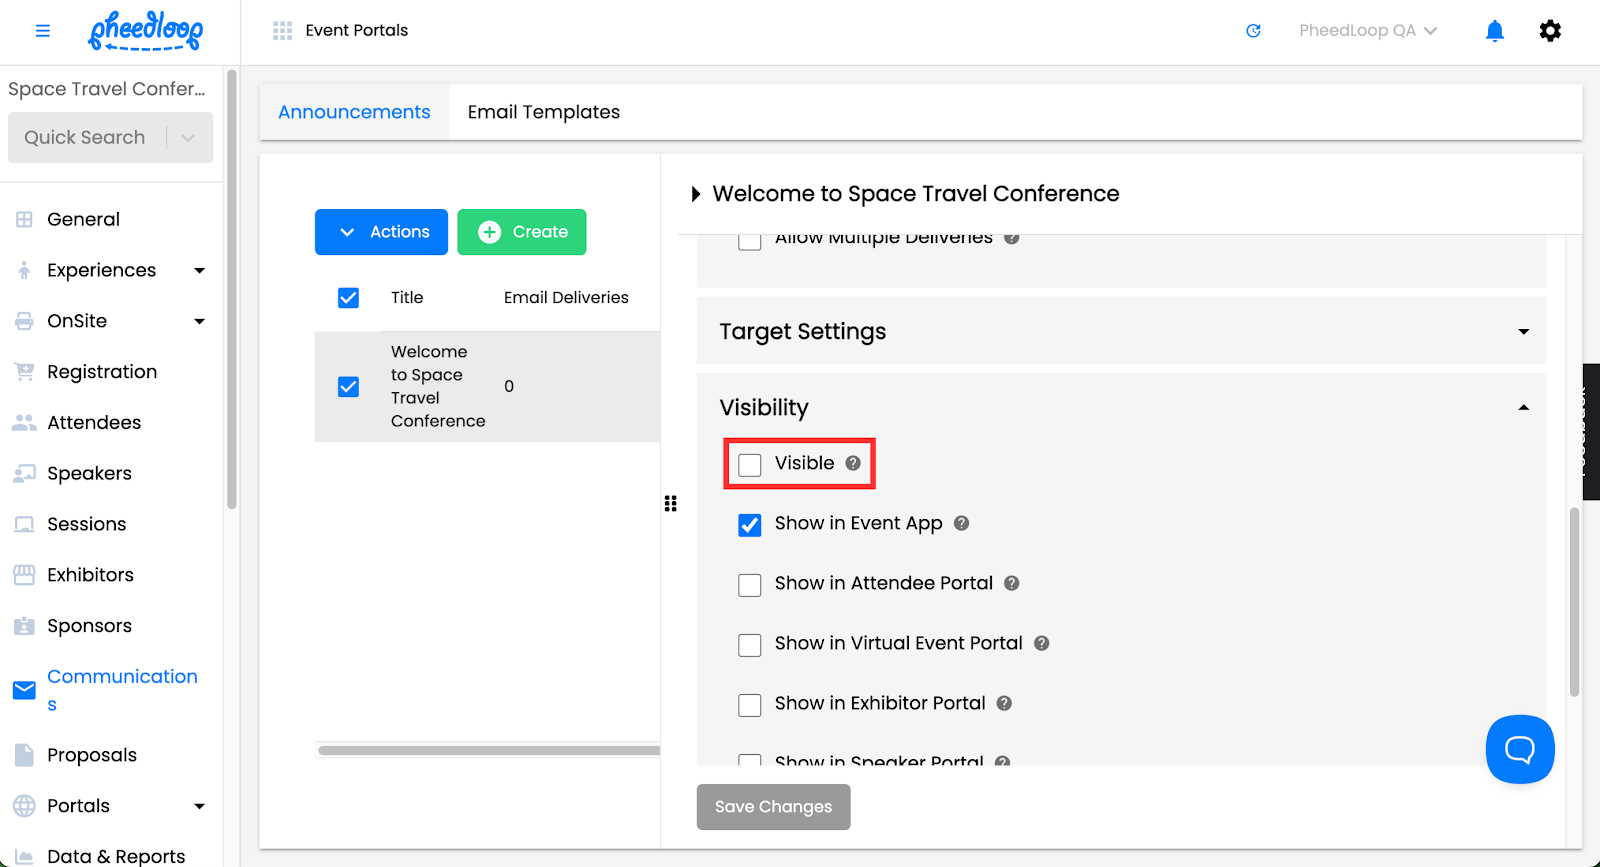
- Scroll down to Visibility
- Toggle on the Visible checkbox
- Toggle on the Show in Virtual Portal checkbox
- Both checkboxes must be toggled on for the announcement to appear in the Virtual Portal.
Select Save Changes

These are the basic settings for the Announcements feature, but many more options are available. For a complete guide on our Announcements feature, please refer to our Customizing, Sending, and Automating Announcements article.
Automating Push Notification Deliveries
Push notifications can also be delivered at a specified time in the Schedule section of the announcement settings. Configured announcements will be delivered based on the Event's timezone set under General > Details.
- From the Event Dashboard, navigate to Communications > Announcements
Select your announcement from the list
- Scroll down to Visibility and toggle off the Visible checkbox
- This must be toggled off, or else the announcement will not be sent out properly.
- Toggle on the Show in Virtual Event Portal checkbox
This must be toggled on or else the announcement won't appear on the Virtual Portal when it's published.
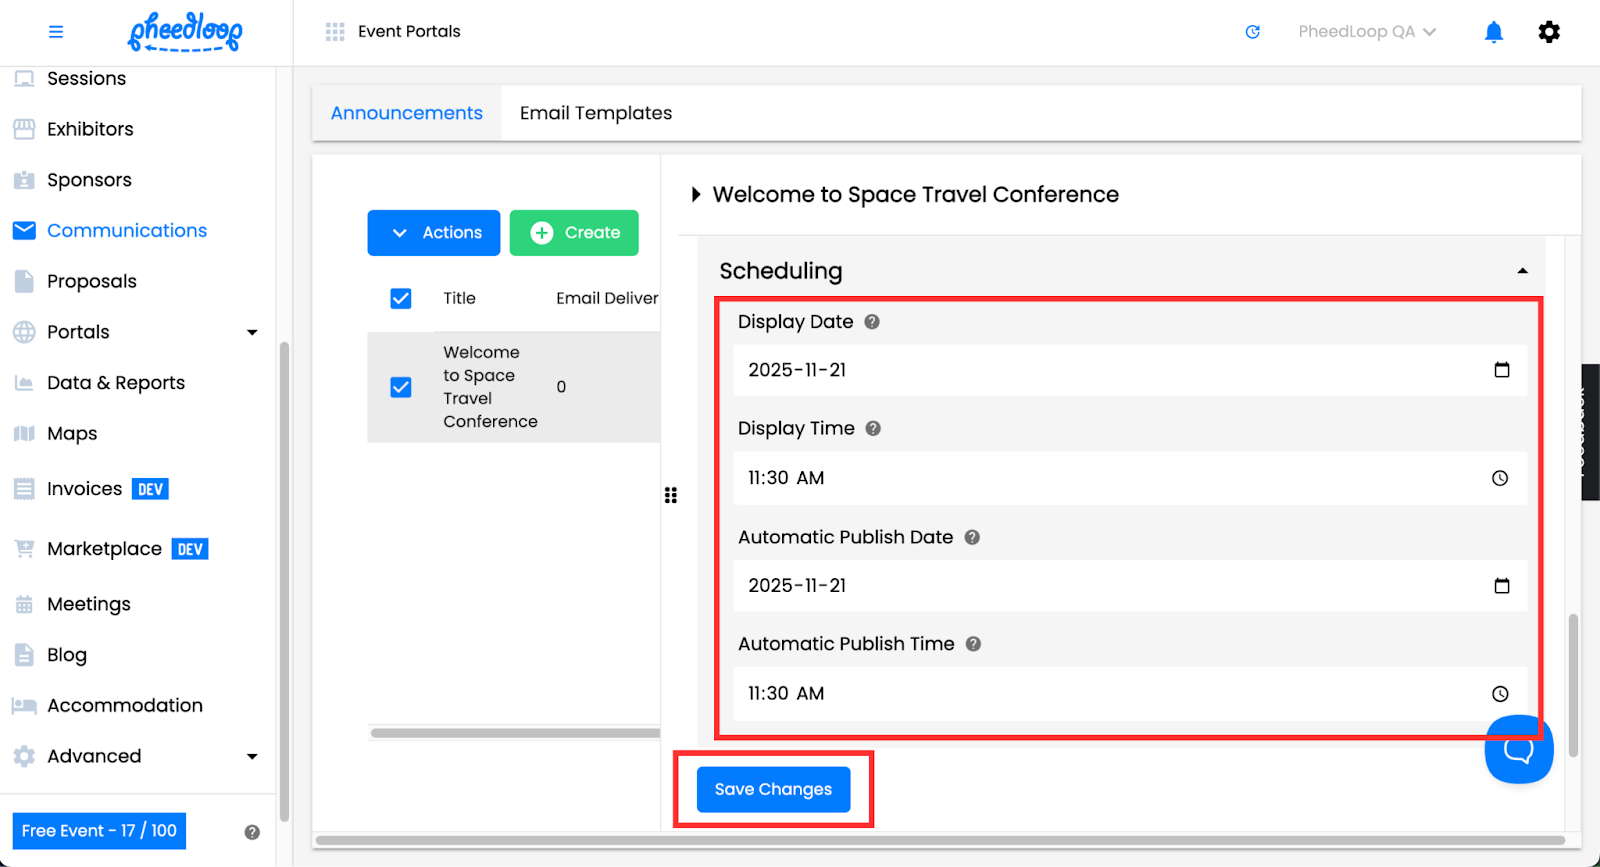
- Scroll down to Scheduling and fill out the Automatic Publish Date and Automatic Publish Time
- The Display Date and Display Time will automatically be set to the Automatic Publish Date and Automatic Publish Time once it's been published.
Select Save Changes
Testing Push Notifications
Once your announcements have been created, you may want to send out a few test notifications to ensure everything is working properly. This can be done from the Event Dashboard.
Please note, even if an announcement is deleted, delivered notifications will still be visible to attendees from the bell icon in the top right corner. Please send notifications only if you're comfortable with them remaining accessible to the attendee. Alternatively, consider sending announcements to a test account to prevent other attendees from viewing them.
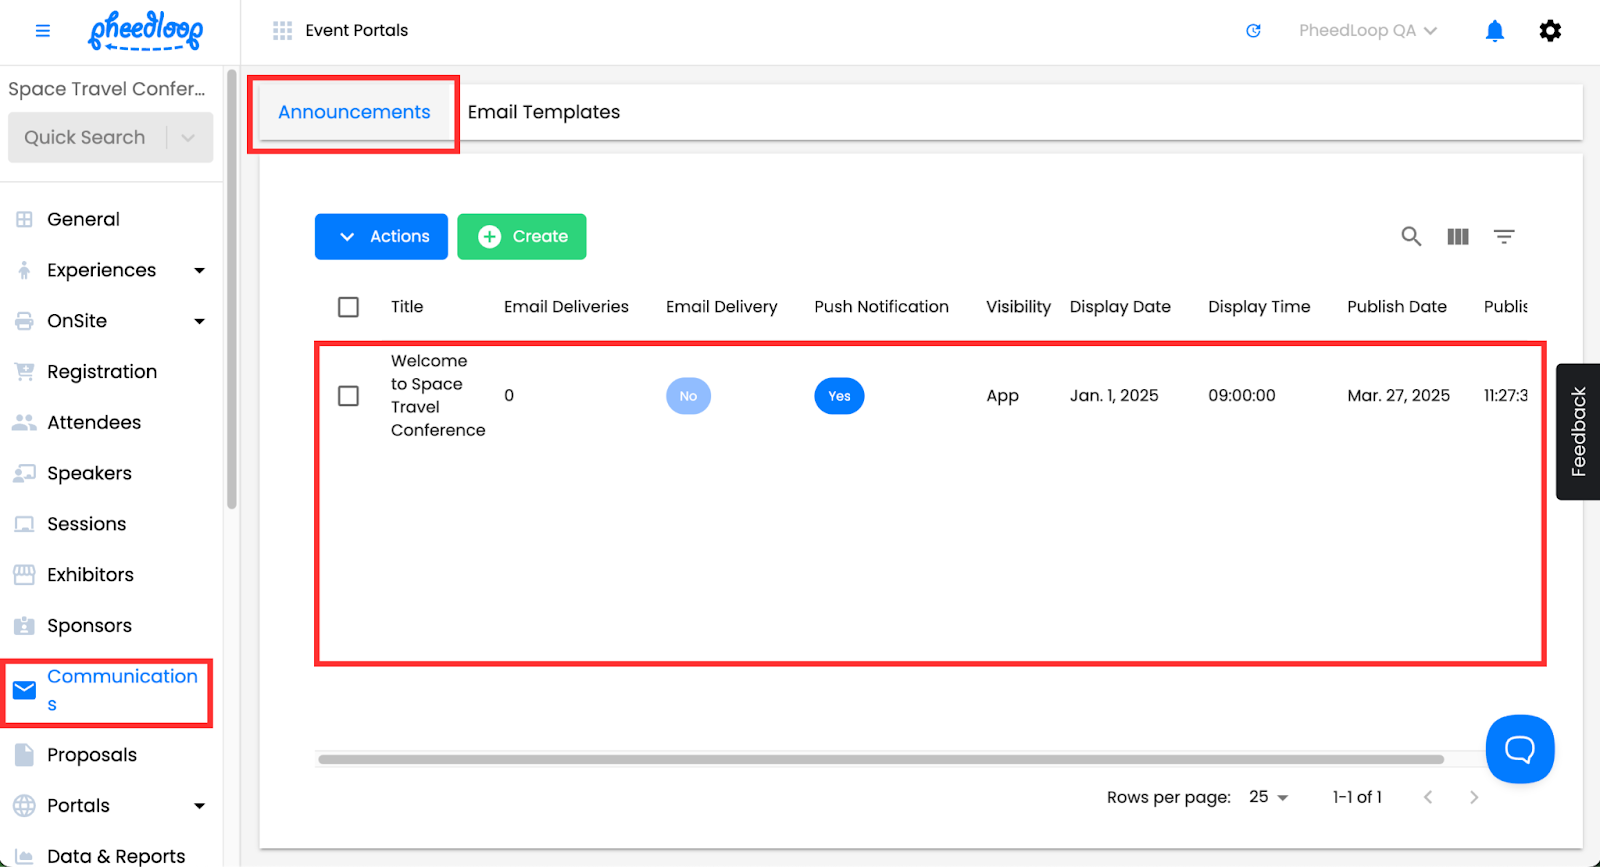
- From the Event Dashboard, navigate to Communications > Announcements
Select the email you wish to send
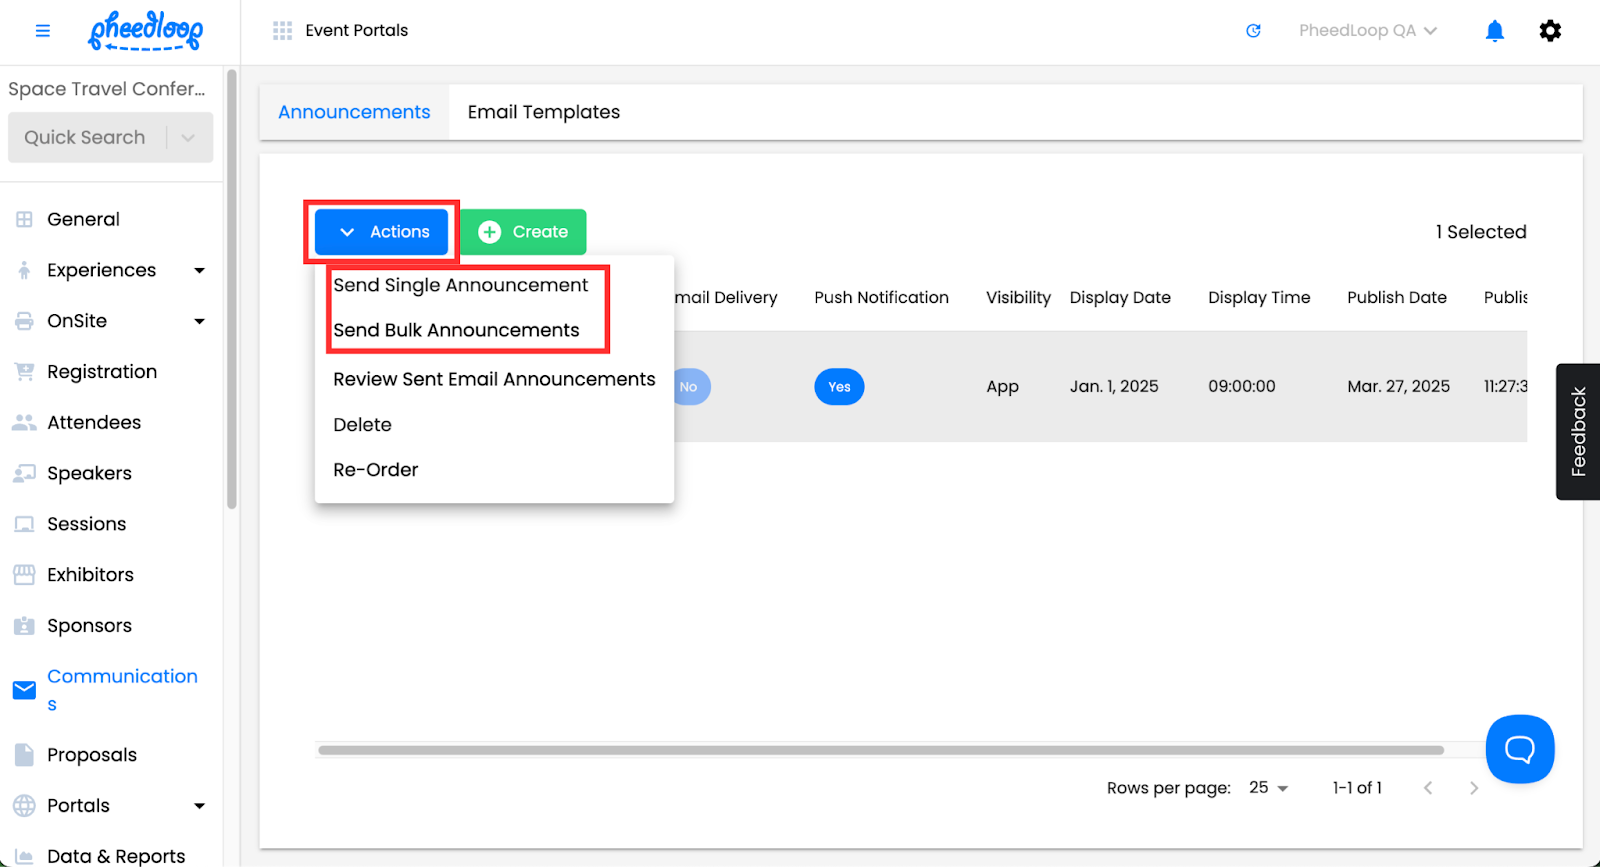
- Above the Email table, select Actions > Send Single Announcement or Send Bulk Announcements
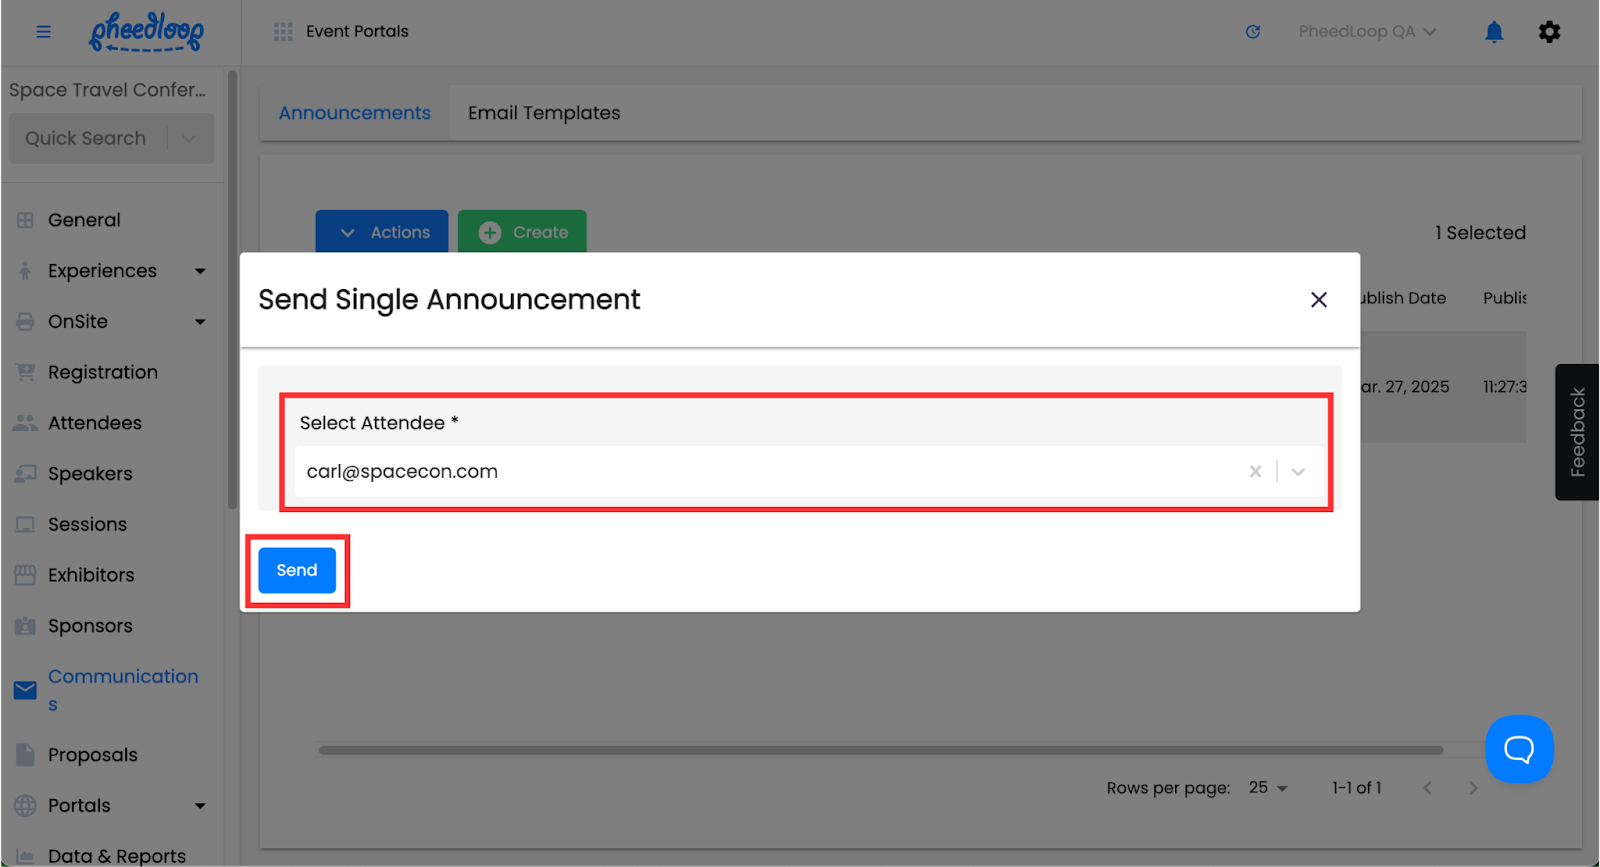
- Select Send Single Announcement to send the email to one attendee. Use the Select Attendee field to choose your desired attendee.
Select Send Bulk Announcements to send the announcement to all attendees. If the Allow Multiple Deliveries checkbox is toggled off, the announcement will automatically exclude attendees who have already received it.
Select Send
The push notification will now be delivered to the selected attendees. Open the virtual portal and select the bell icon in the top right corner to view the message.
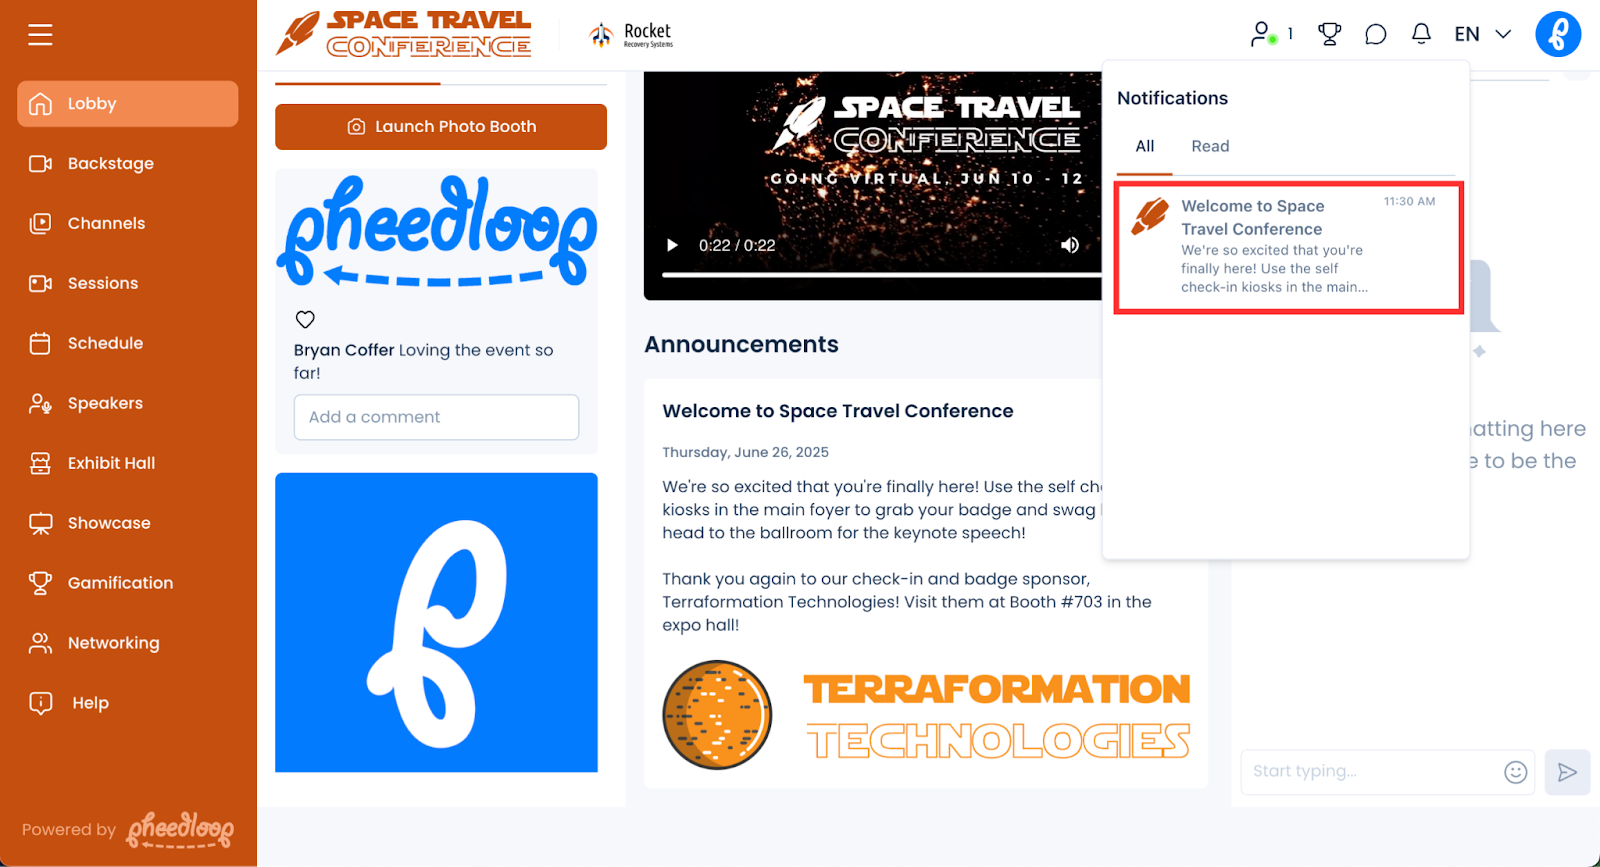
The notifications will appear on the Announcements portion in the Lobby section as long as the Show in Virtual Event Portal checkbox is enabled.

Removing Push Notifications
As stated previously, push notifications cannot be removed from the notifications menu once they are sent to the attendee.
Sending Multiple Push Notifications
Multiple push notifications can be sent out simultaneously in the Event Dashboard.
- From the Event Dashboard, navigate to Communications > Announcements
Select the announcement you wish to deliver
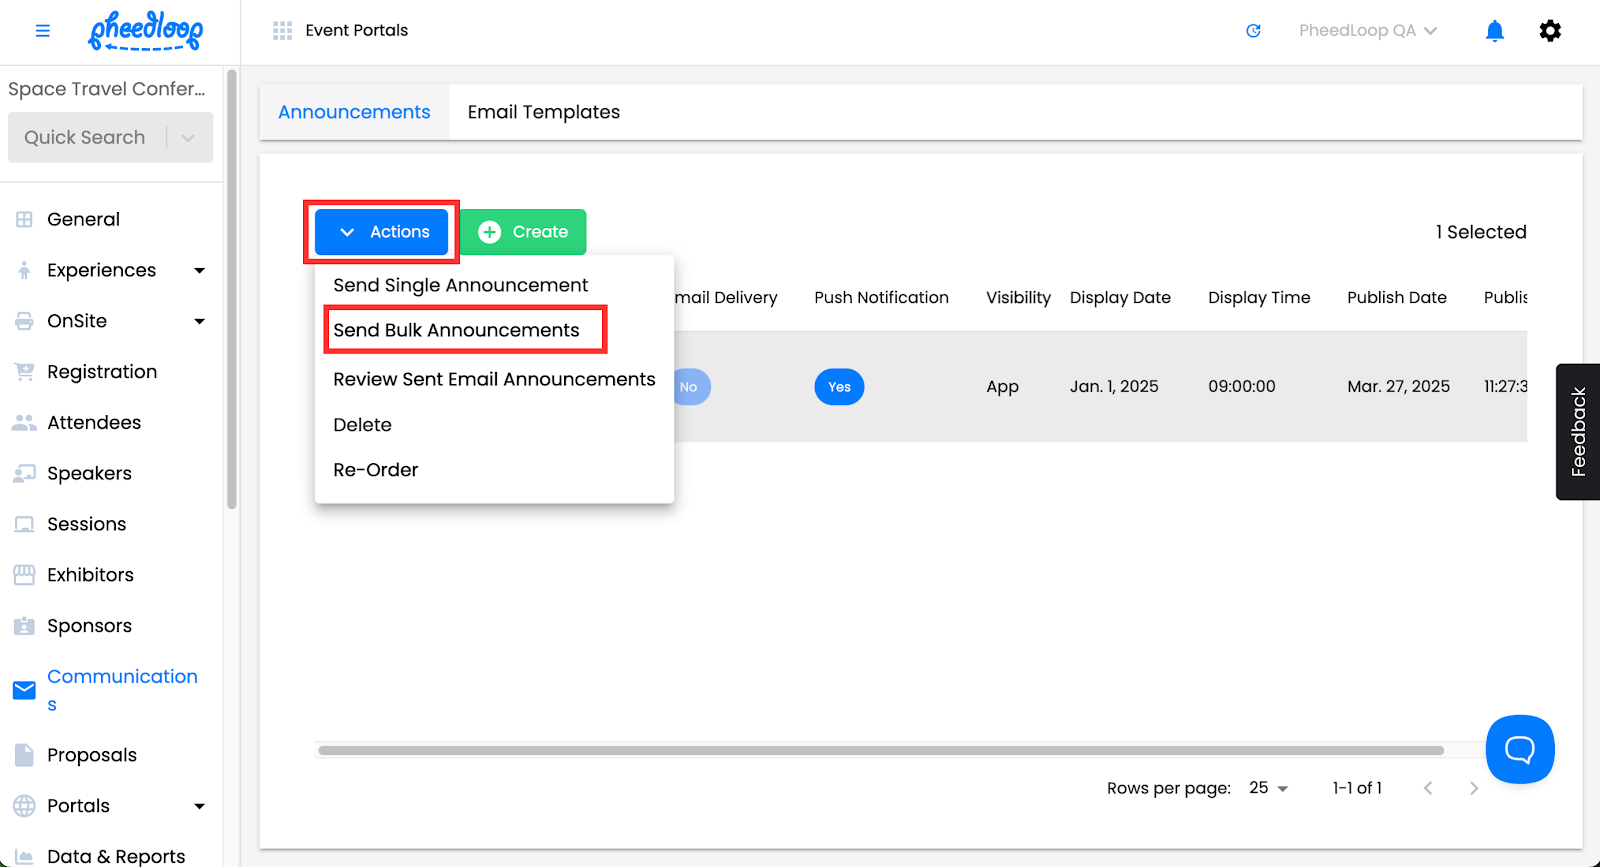
- Above the Announcements table, select Actions > Send Bulk Announcements
Select Send to

Common Troubleshooting Items
My push notifications are not being sent out
Please ensure the Visible checkbox is toggled off for the announcement. If this checkbox is toggled on, automatic delivery will not work.
Conclusion
Effectively using push notifications can greatly enhance attendee engagement and communication throughout your event. By following the steps outlined in this guide, you can create, test, and manage announcements to ensure timely updates reach your audience. Remember to configure visibility settings properly so notifications appear in the Announcements section of your Virtual Portal, maximizing their impact. While push notifications cannot be removed from attendees' notification menus once sent, you have full control over managing announcements within the Virtual Portal. With these best practices in place, you can streamline communication and keep attendees informed with ease.