How can I set up Event Feed for the Virtual Portal?
Getting the selfie photo booth up and running for your event takes no time at all! It allows your attendees to contribute selfies directly to the event feed, which will be visible in the virtual event lobby and the physical event mobile event app - contributing to an exciting suite of hybrid event features to bring physical and virtual attendees closer together.
Quick Set-Up
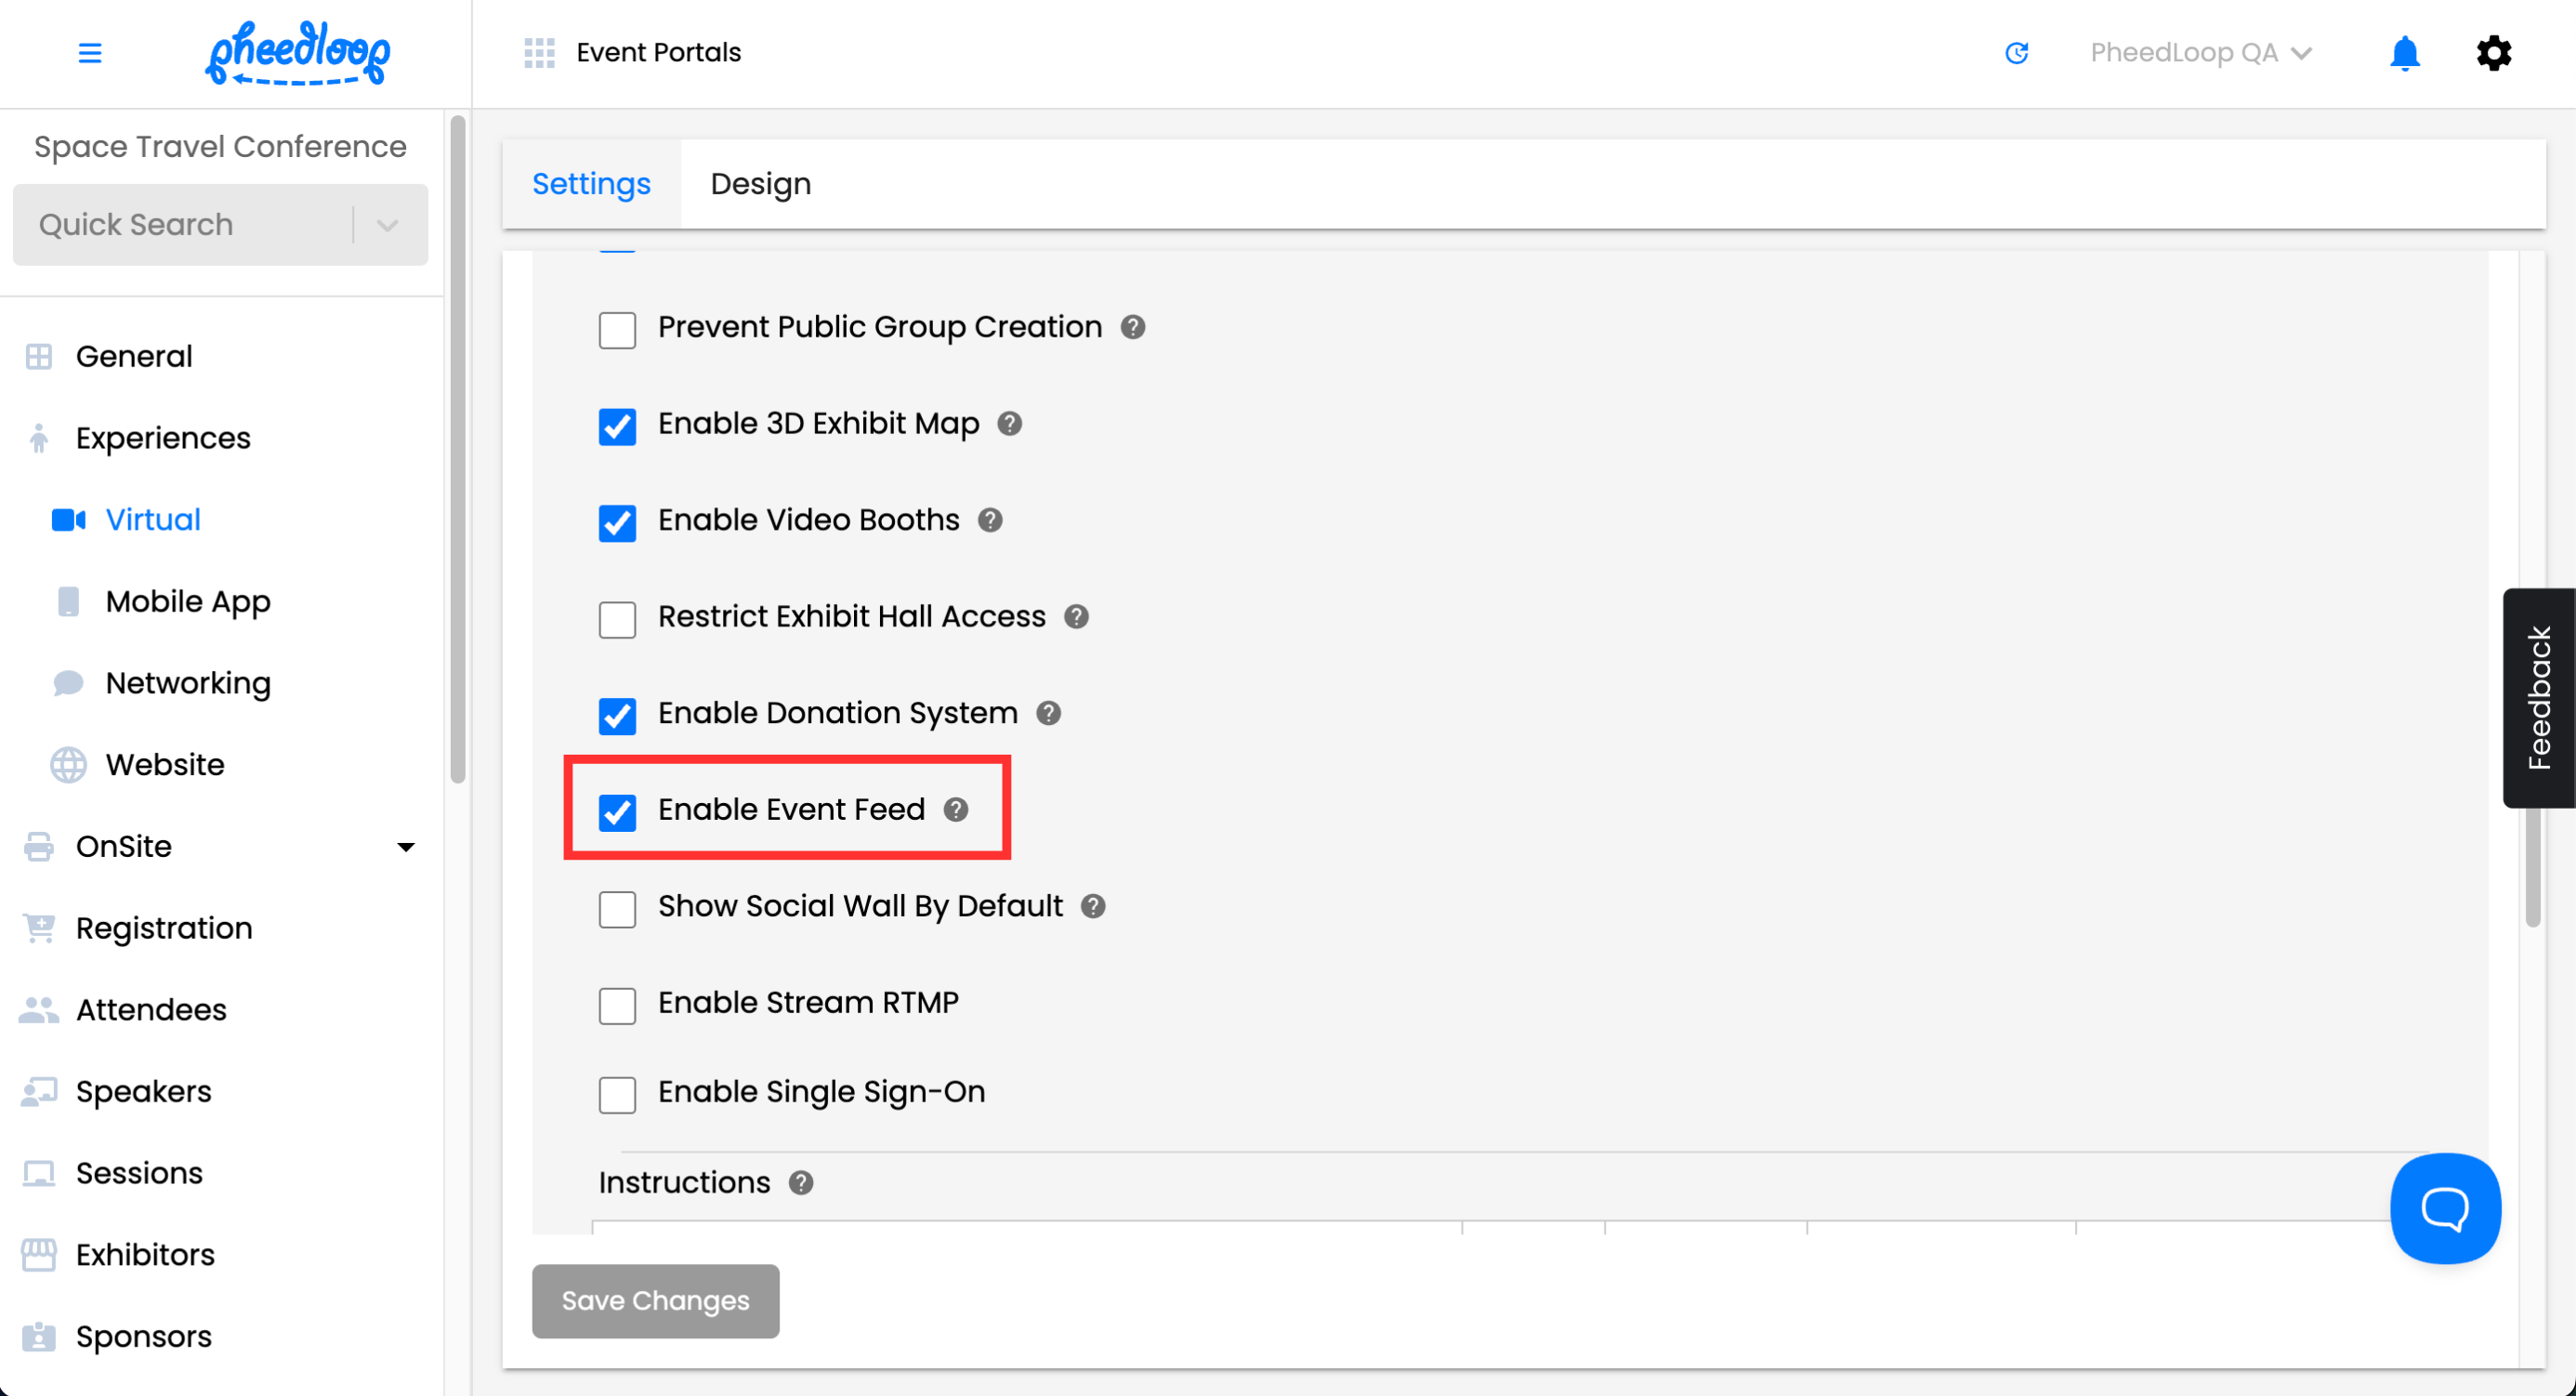
Before attendees can make use of the Photo Booth, administrators will need to make a few adjustments in the Event Dashboard.
- From the Event dashboard, visit Experiences > Virtual > Settings
- Toggle on the Enable Event Feed field
Select Save Changes

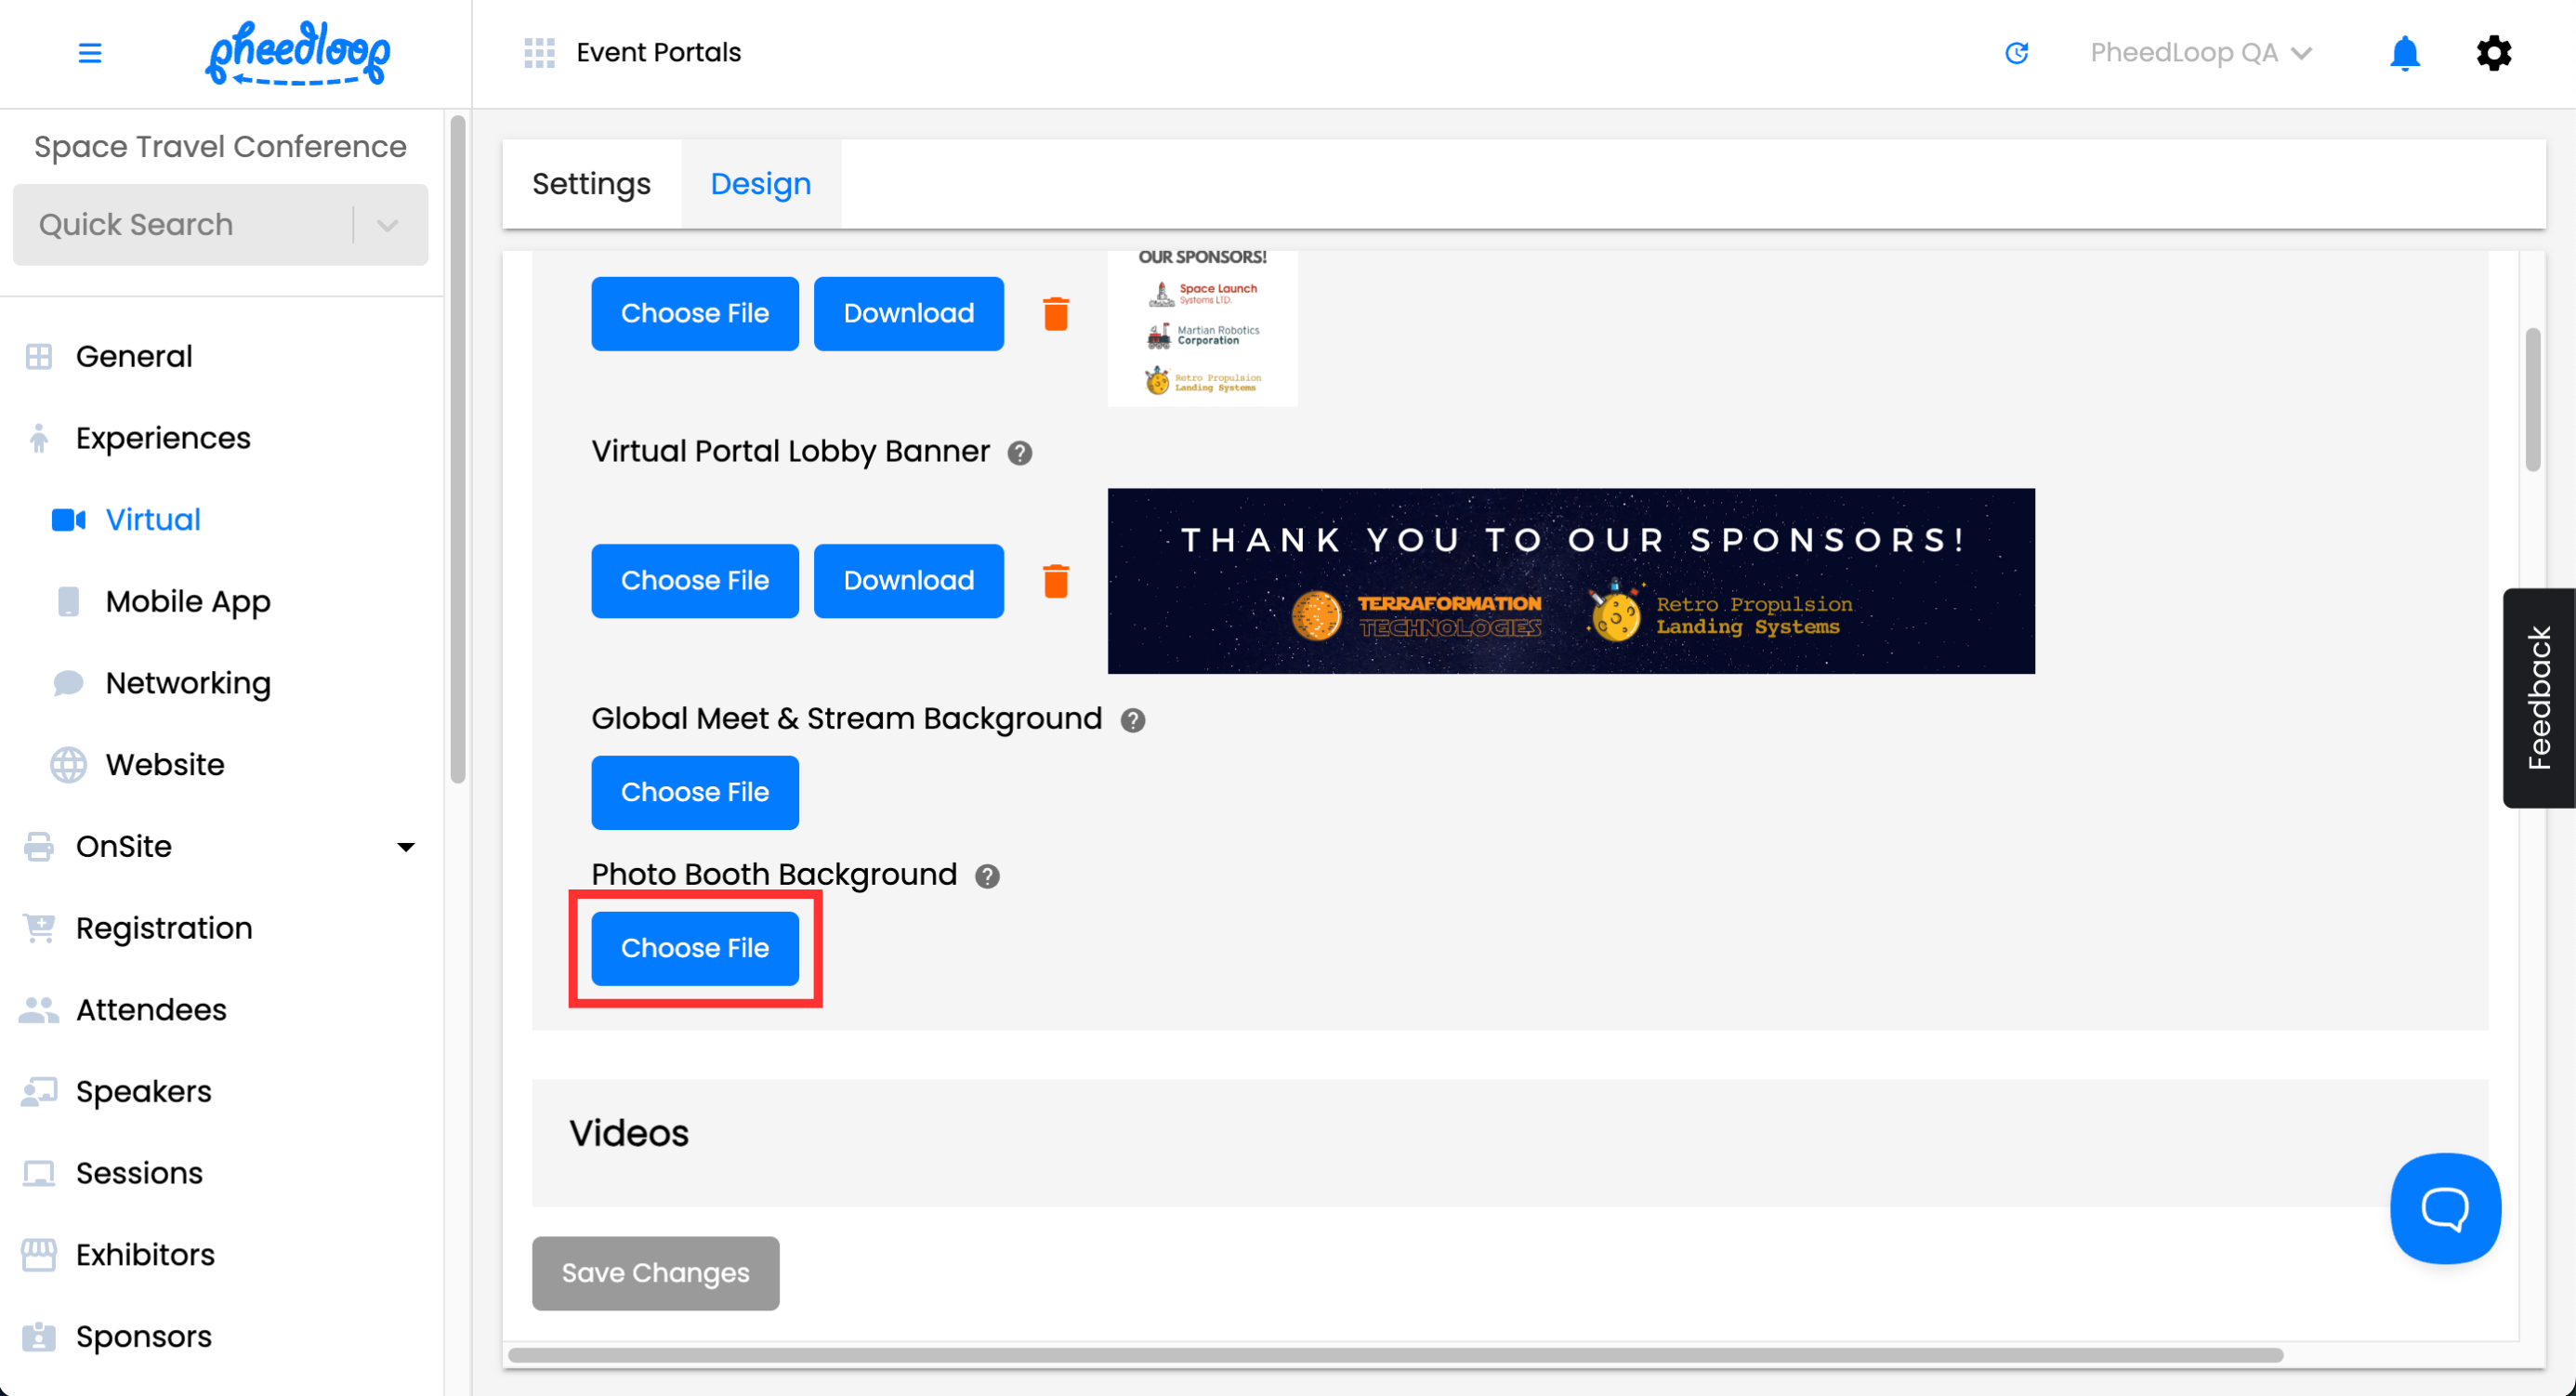
You can optionally set a custom background image for your Event Feed posts.
- From the Event dashboard, visit Experiences > Virtual > Design
- Under the Photo Booth Background field, select Choose File to upload your desired image
- We recommend uploading an image with 640w x 480h. If you do not set an image here, the background will default to your event's primary color.
Select Save Changes

Testing the Event Feed
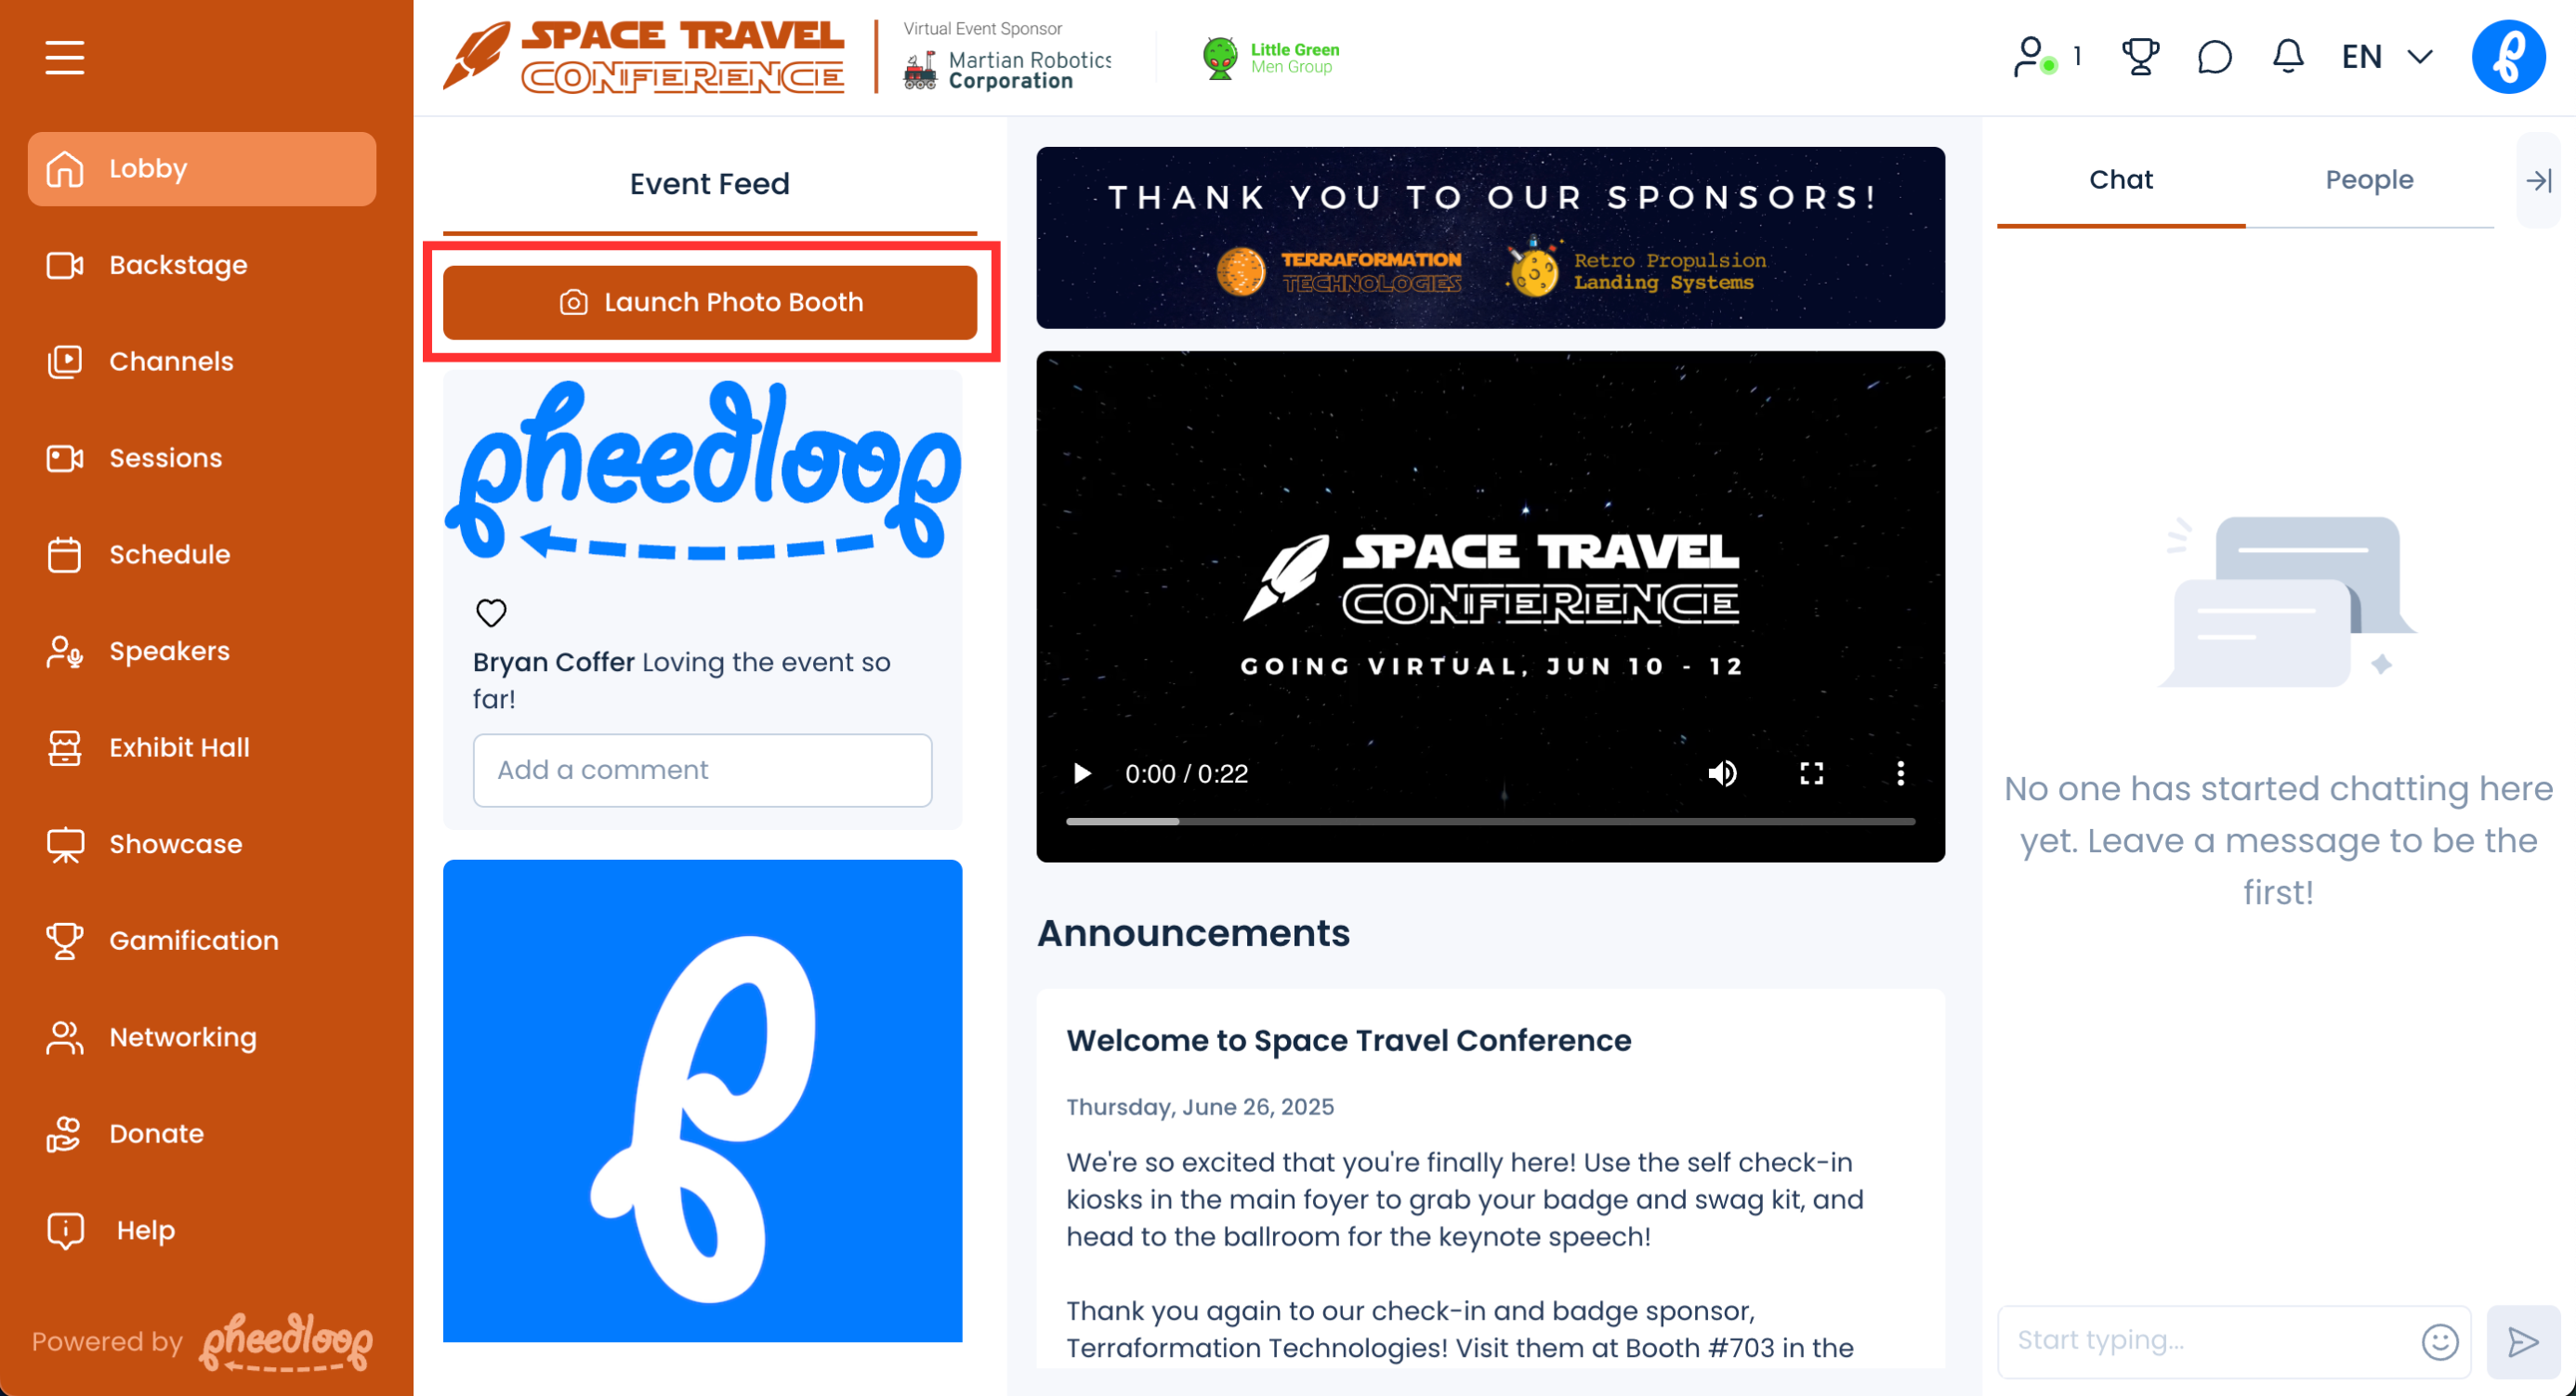
Once your Event Feed is set up, we recommend taking a photo as a test to ensure everything is working properly.
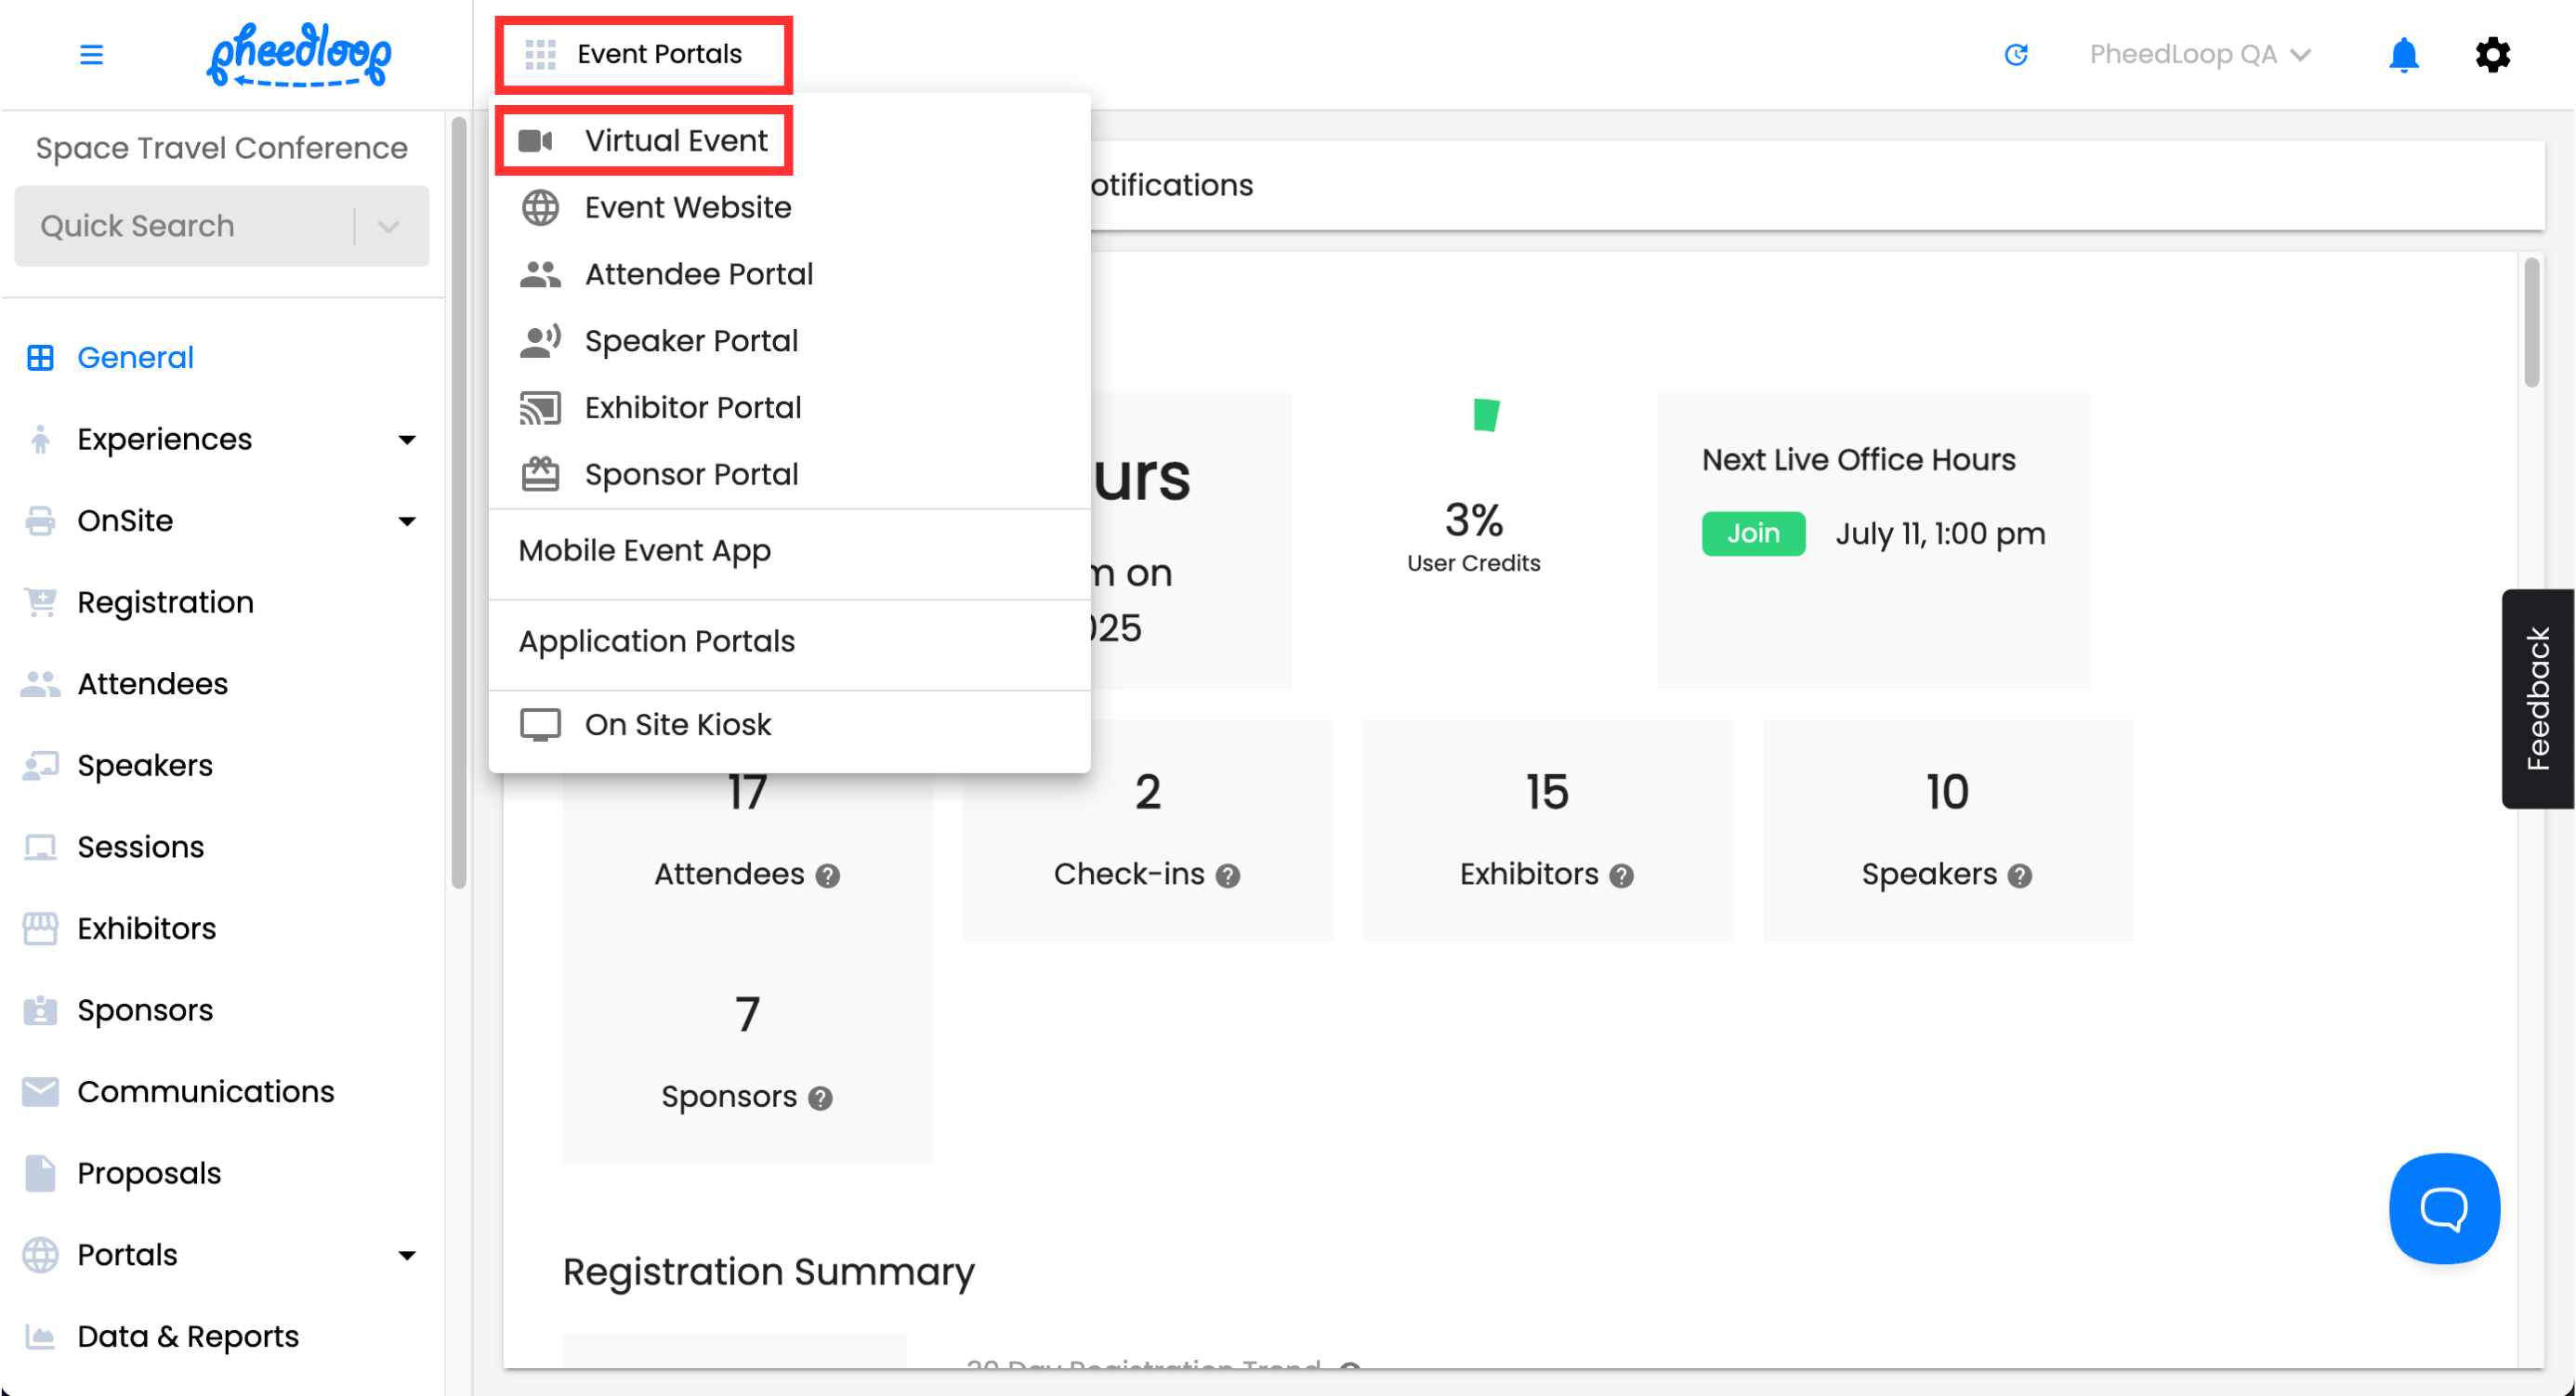
From the Event Dashboard, navigate to Event Portals > Virtual Portal
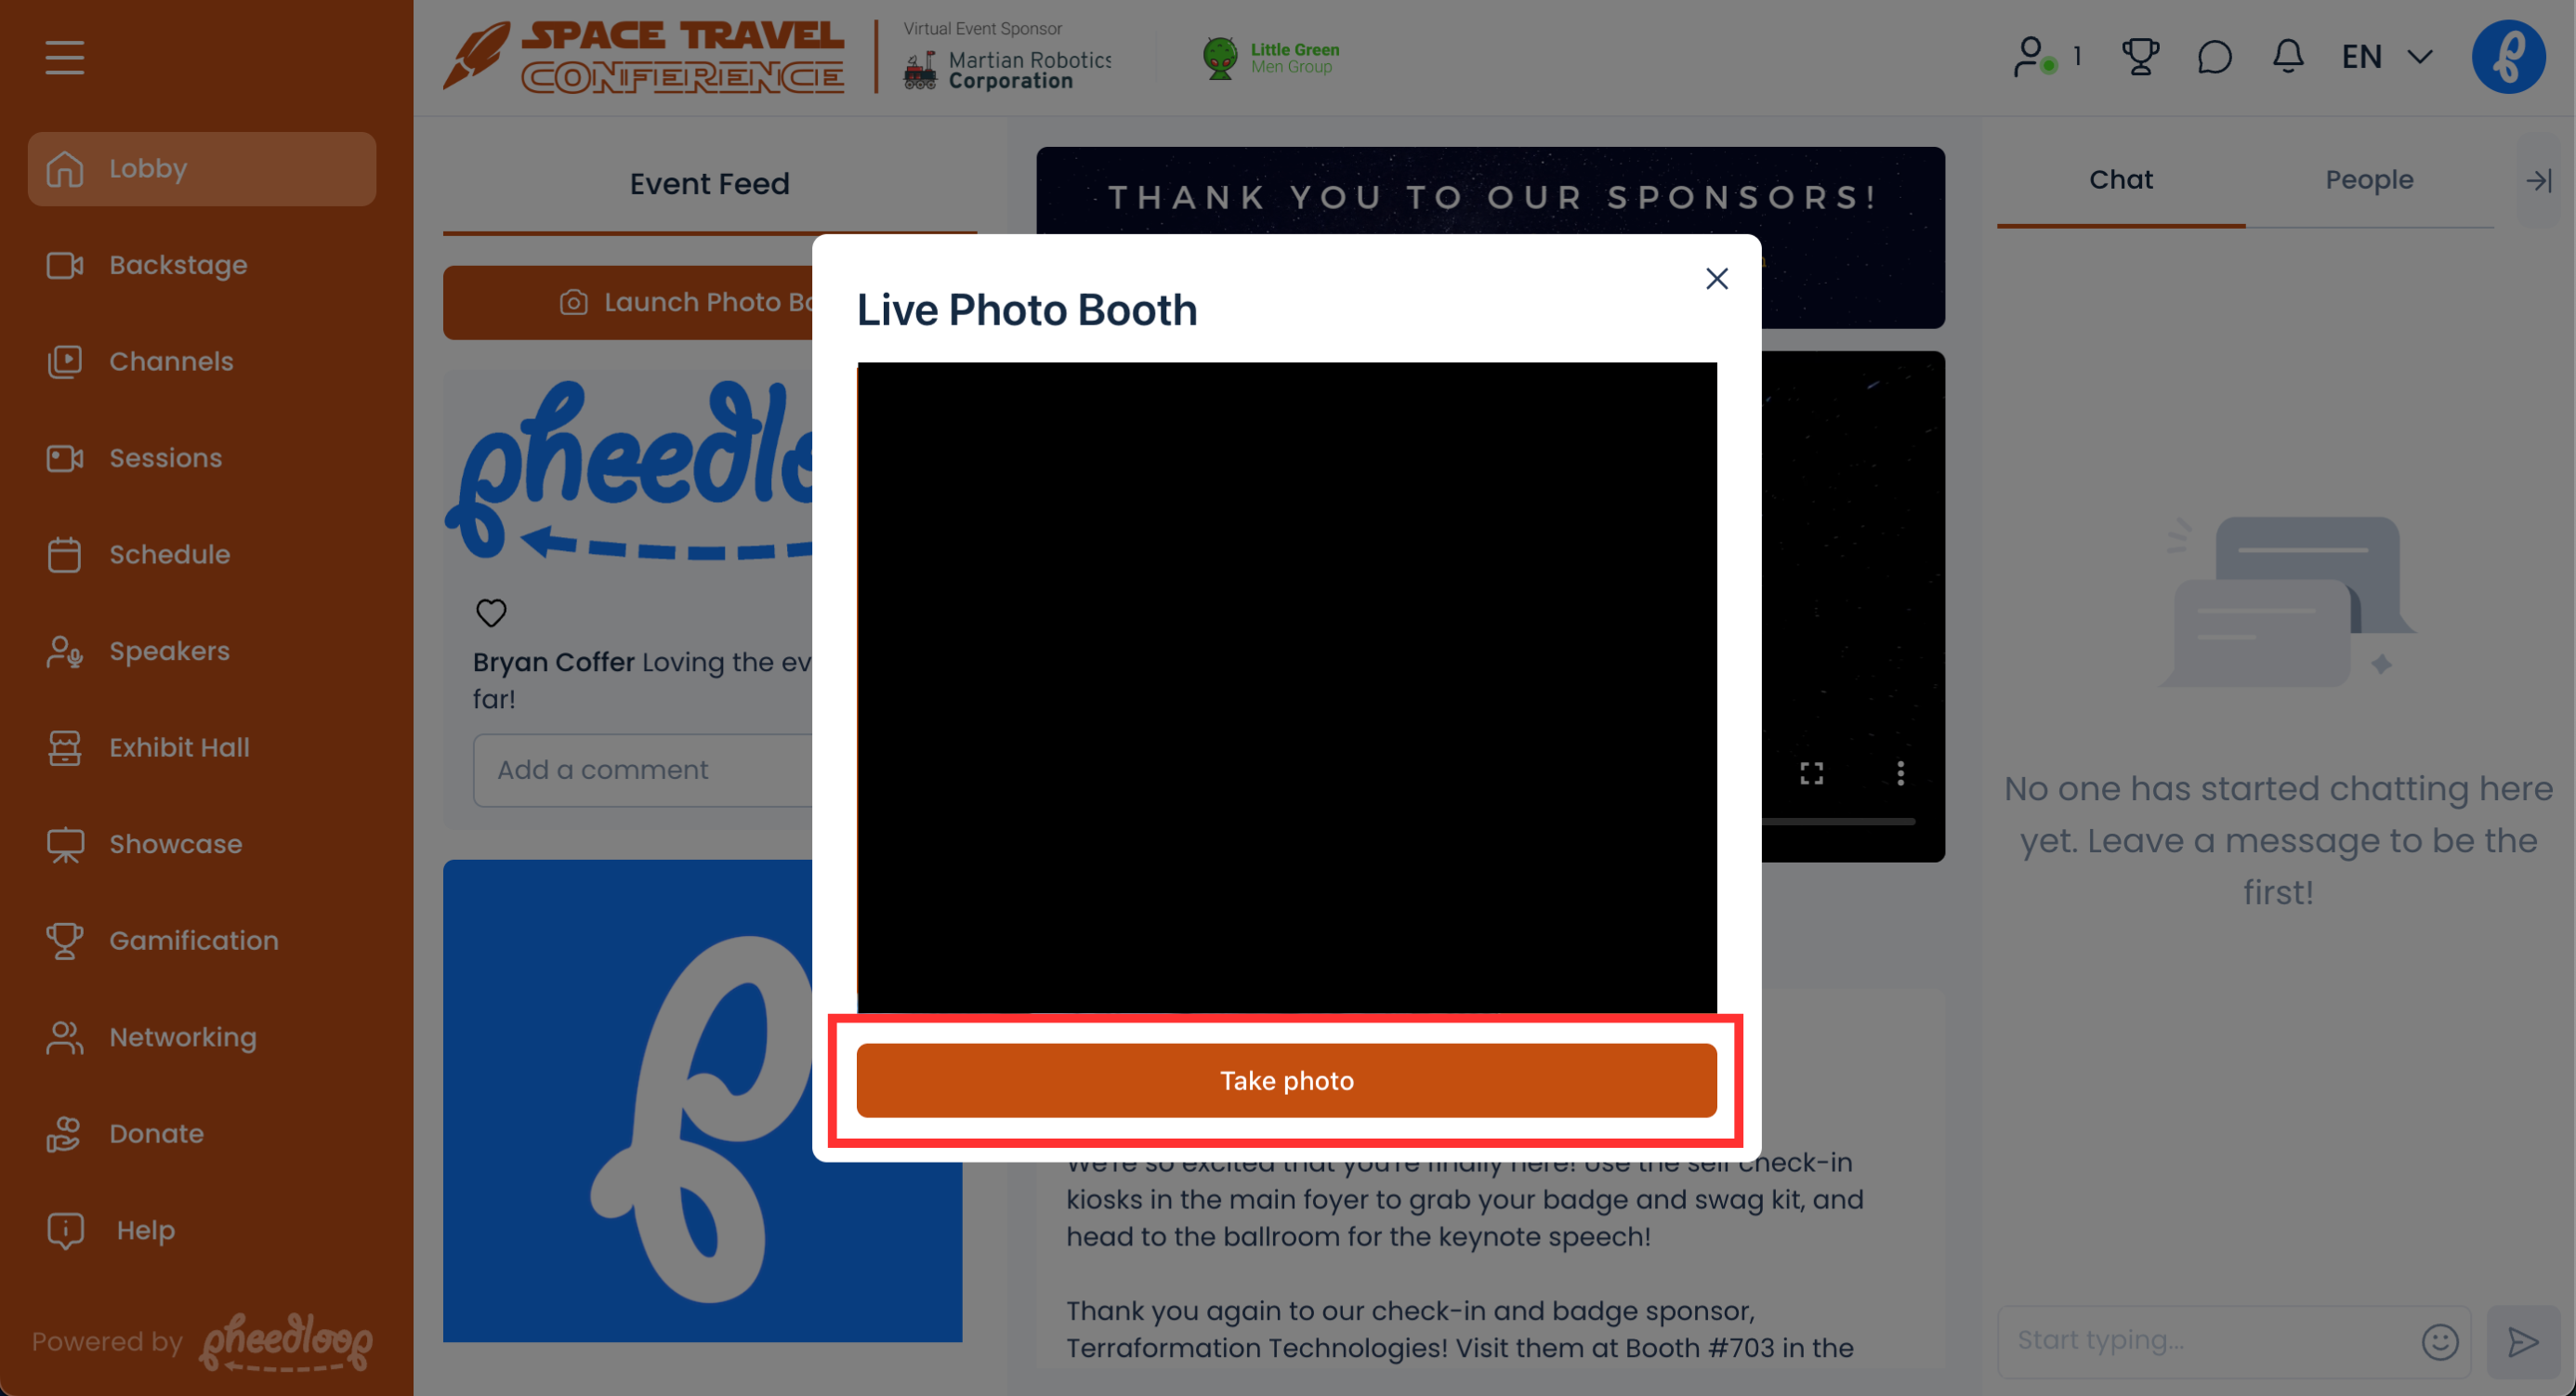
In the Virtual Portal, select Launch Photo Booth
Once your happy with the photo, select Take Photo
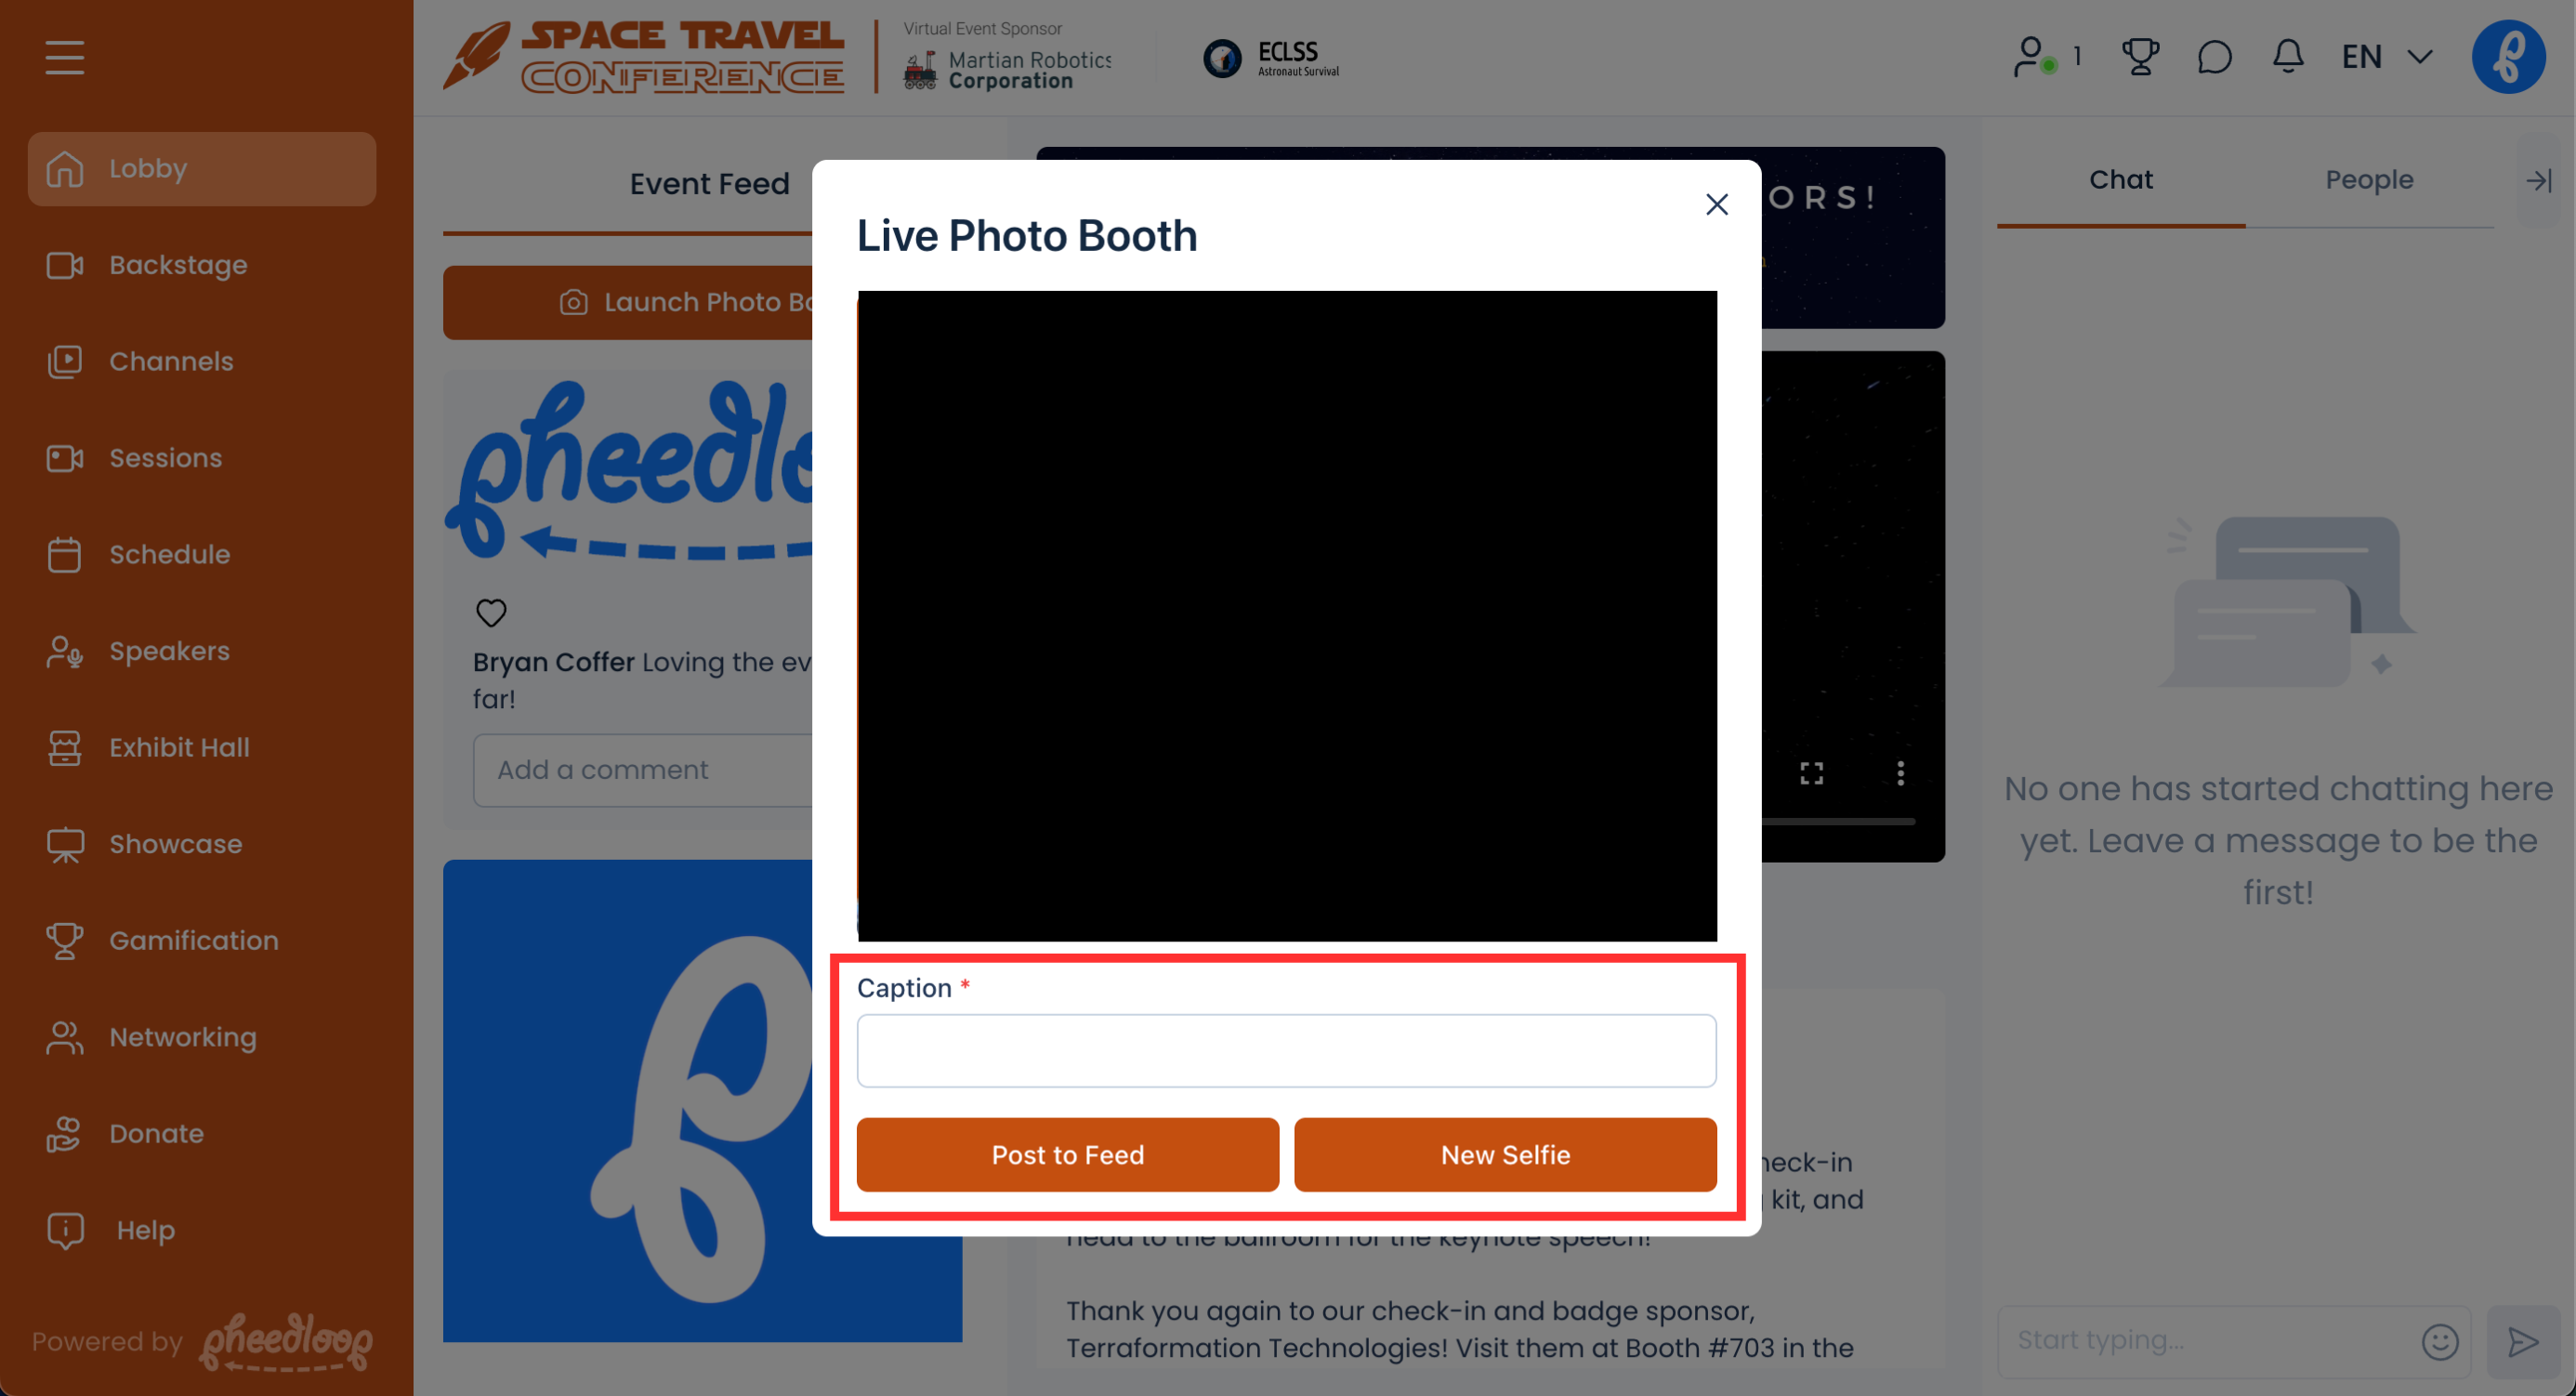
- If you would like to retake your photo, select New Selfie
- Under the Caption field, enter any text you wish to add along with the photo
Select Post to Feed to create your post


Moderating the Event Feed
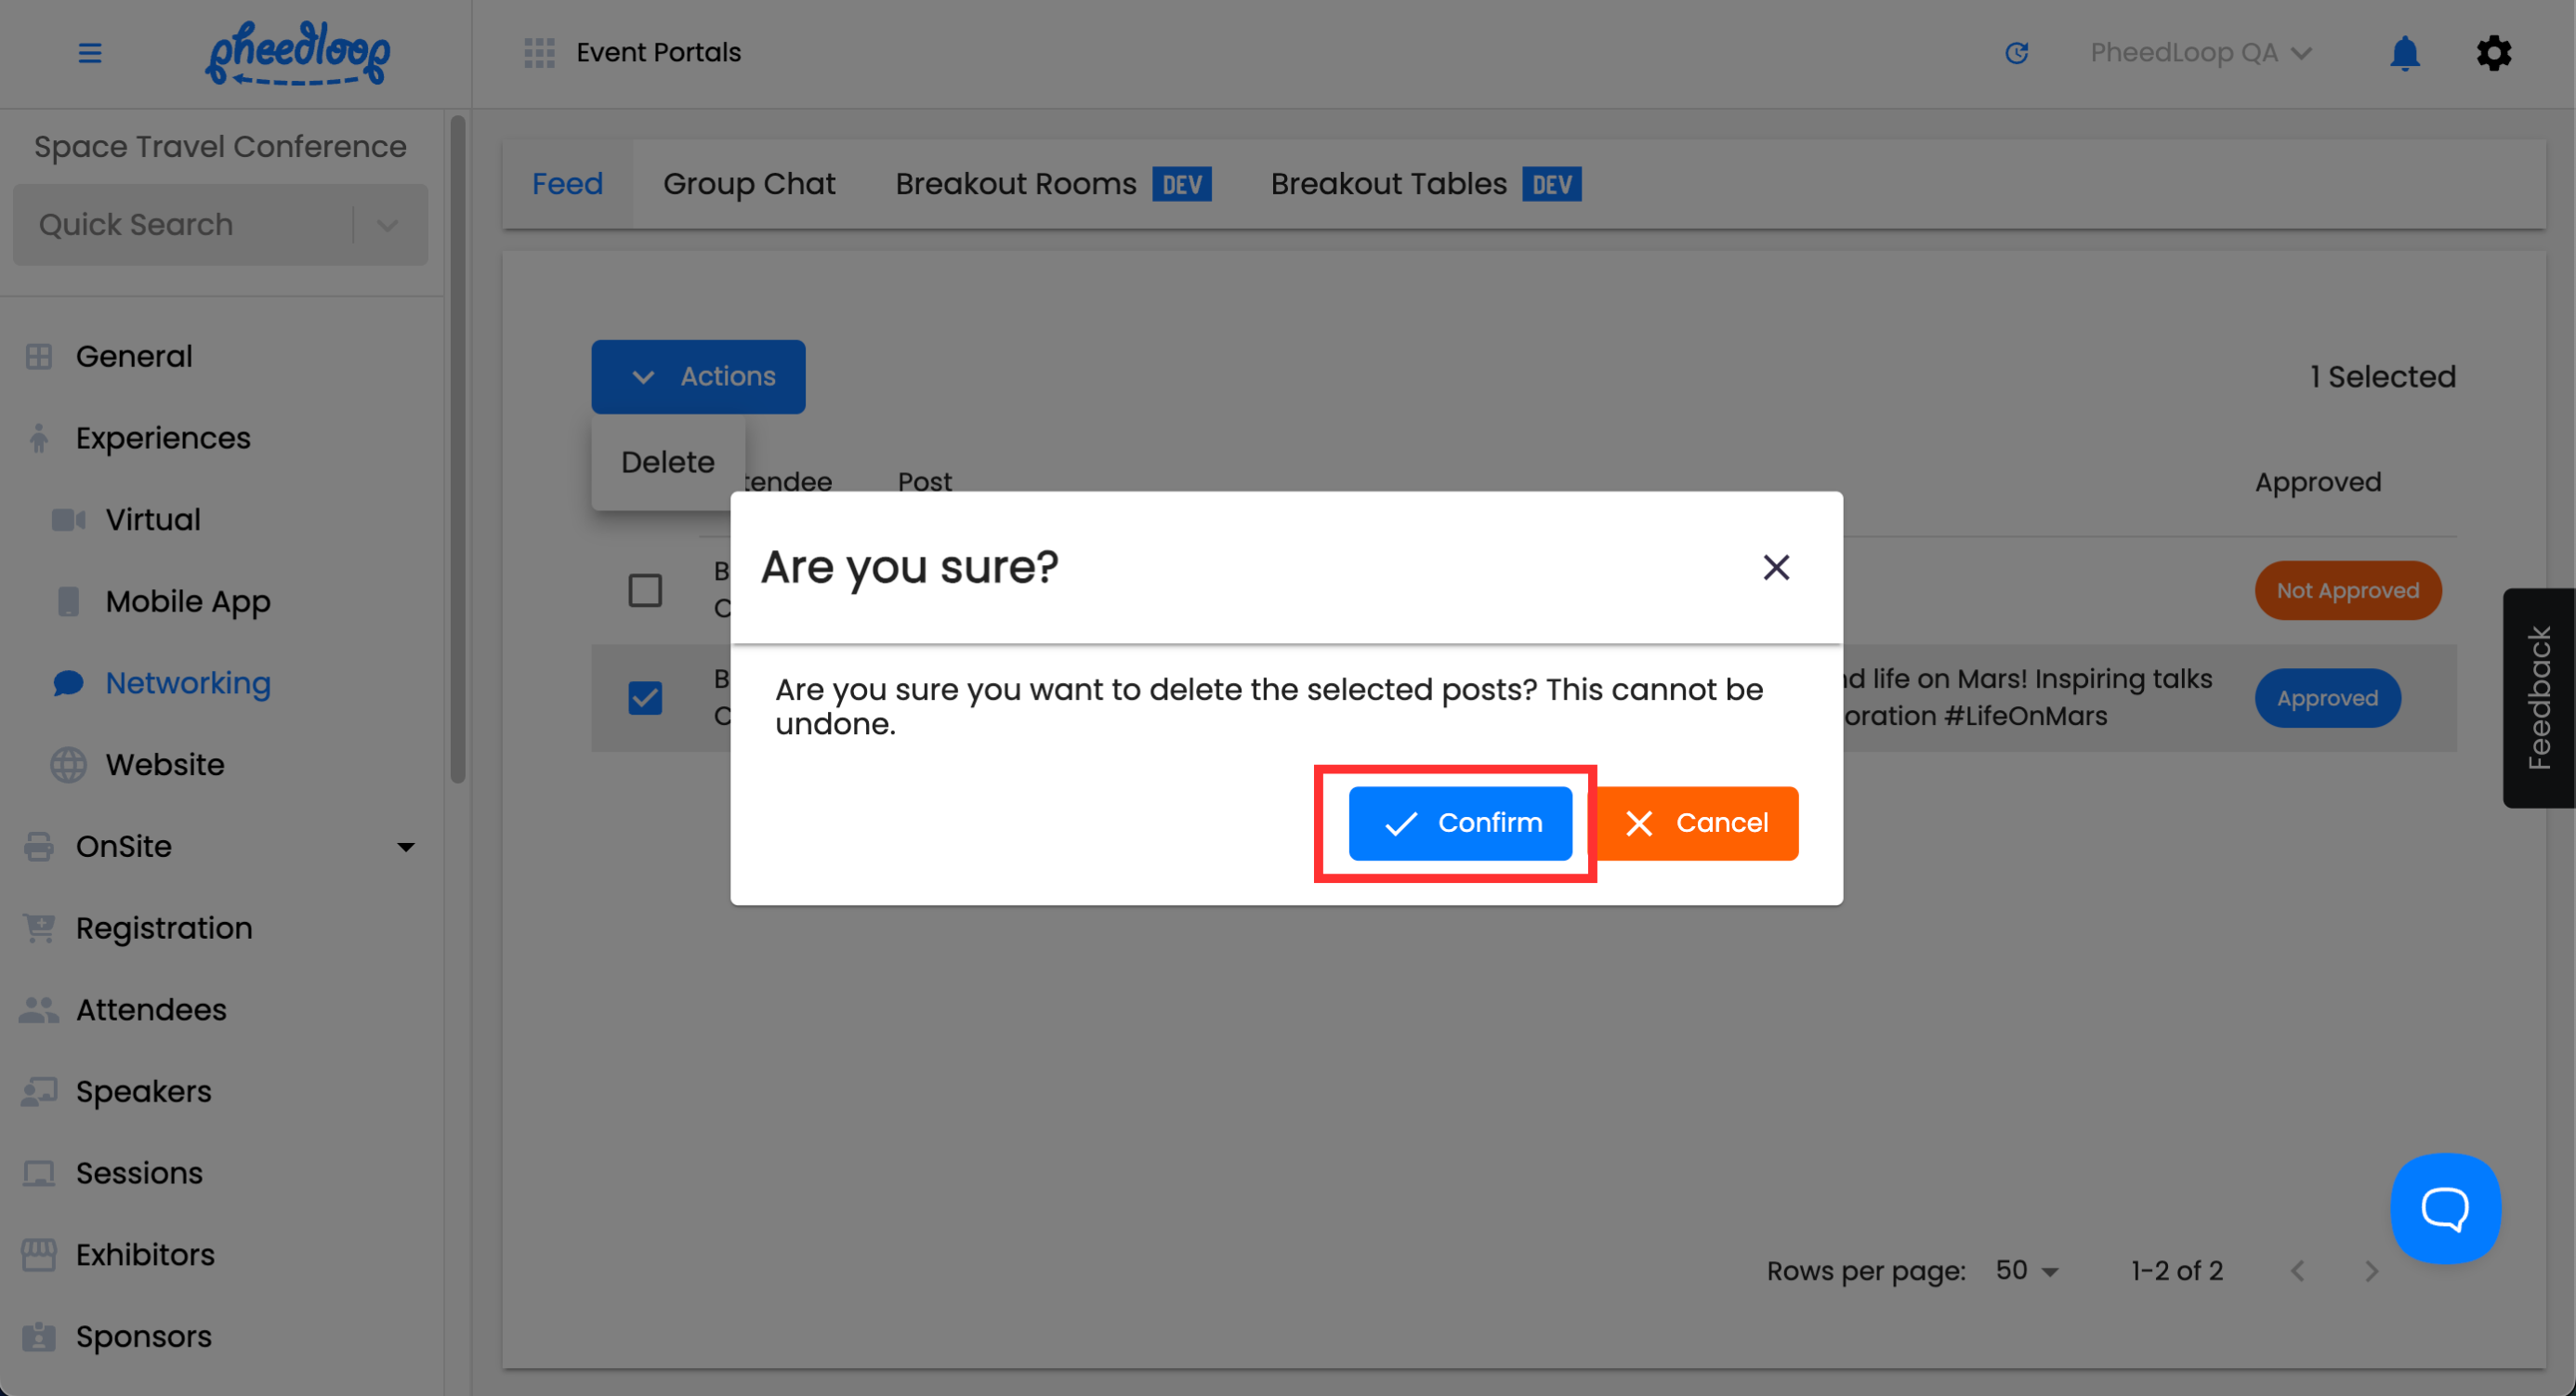
If you'd like to remove posts from the event feed, you can do so from the Event Dashboard.
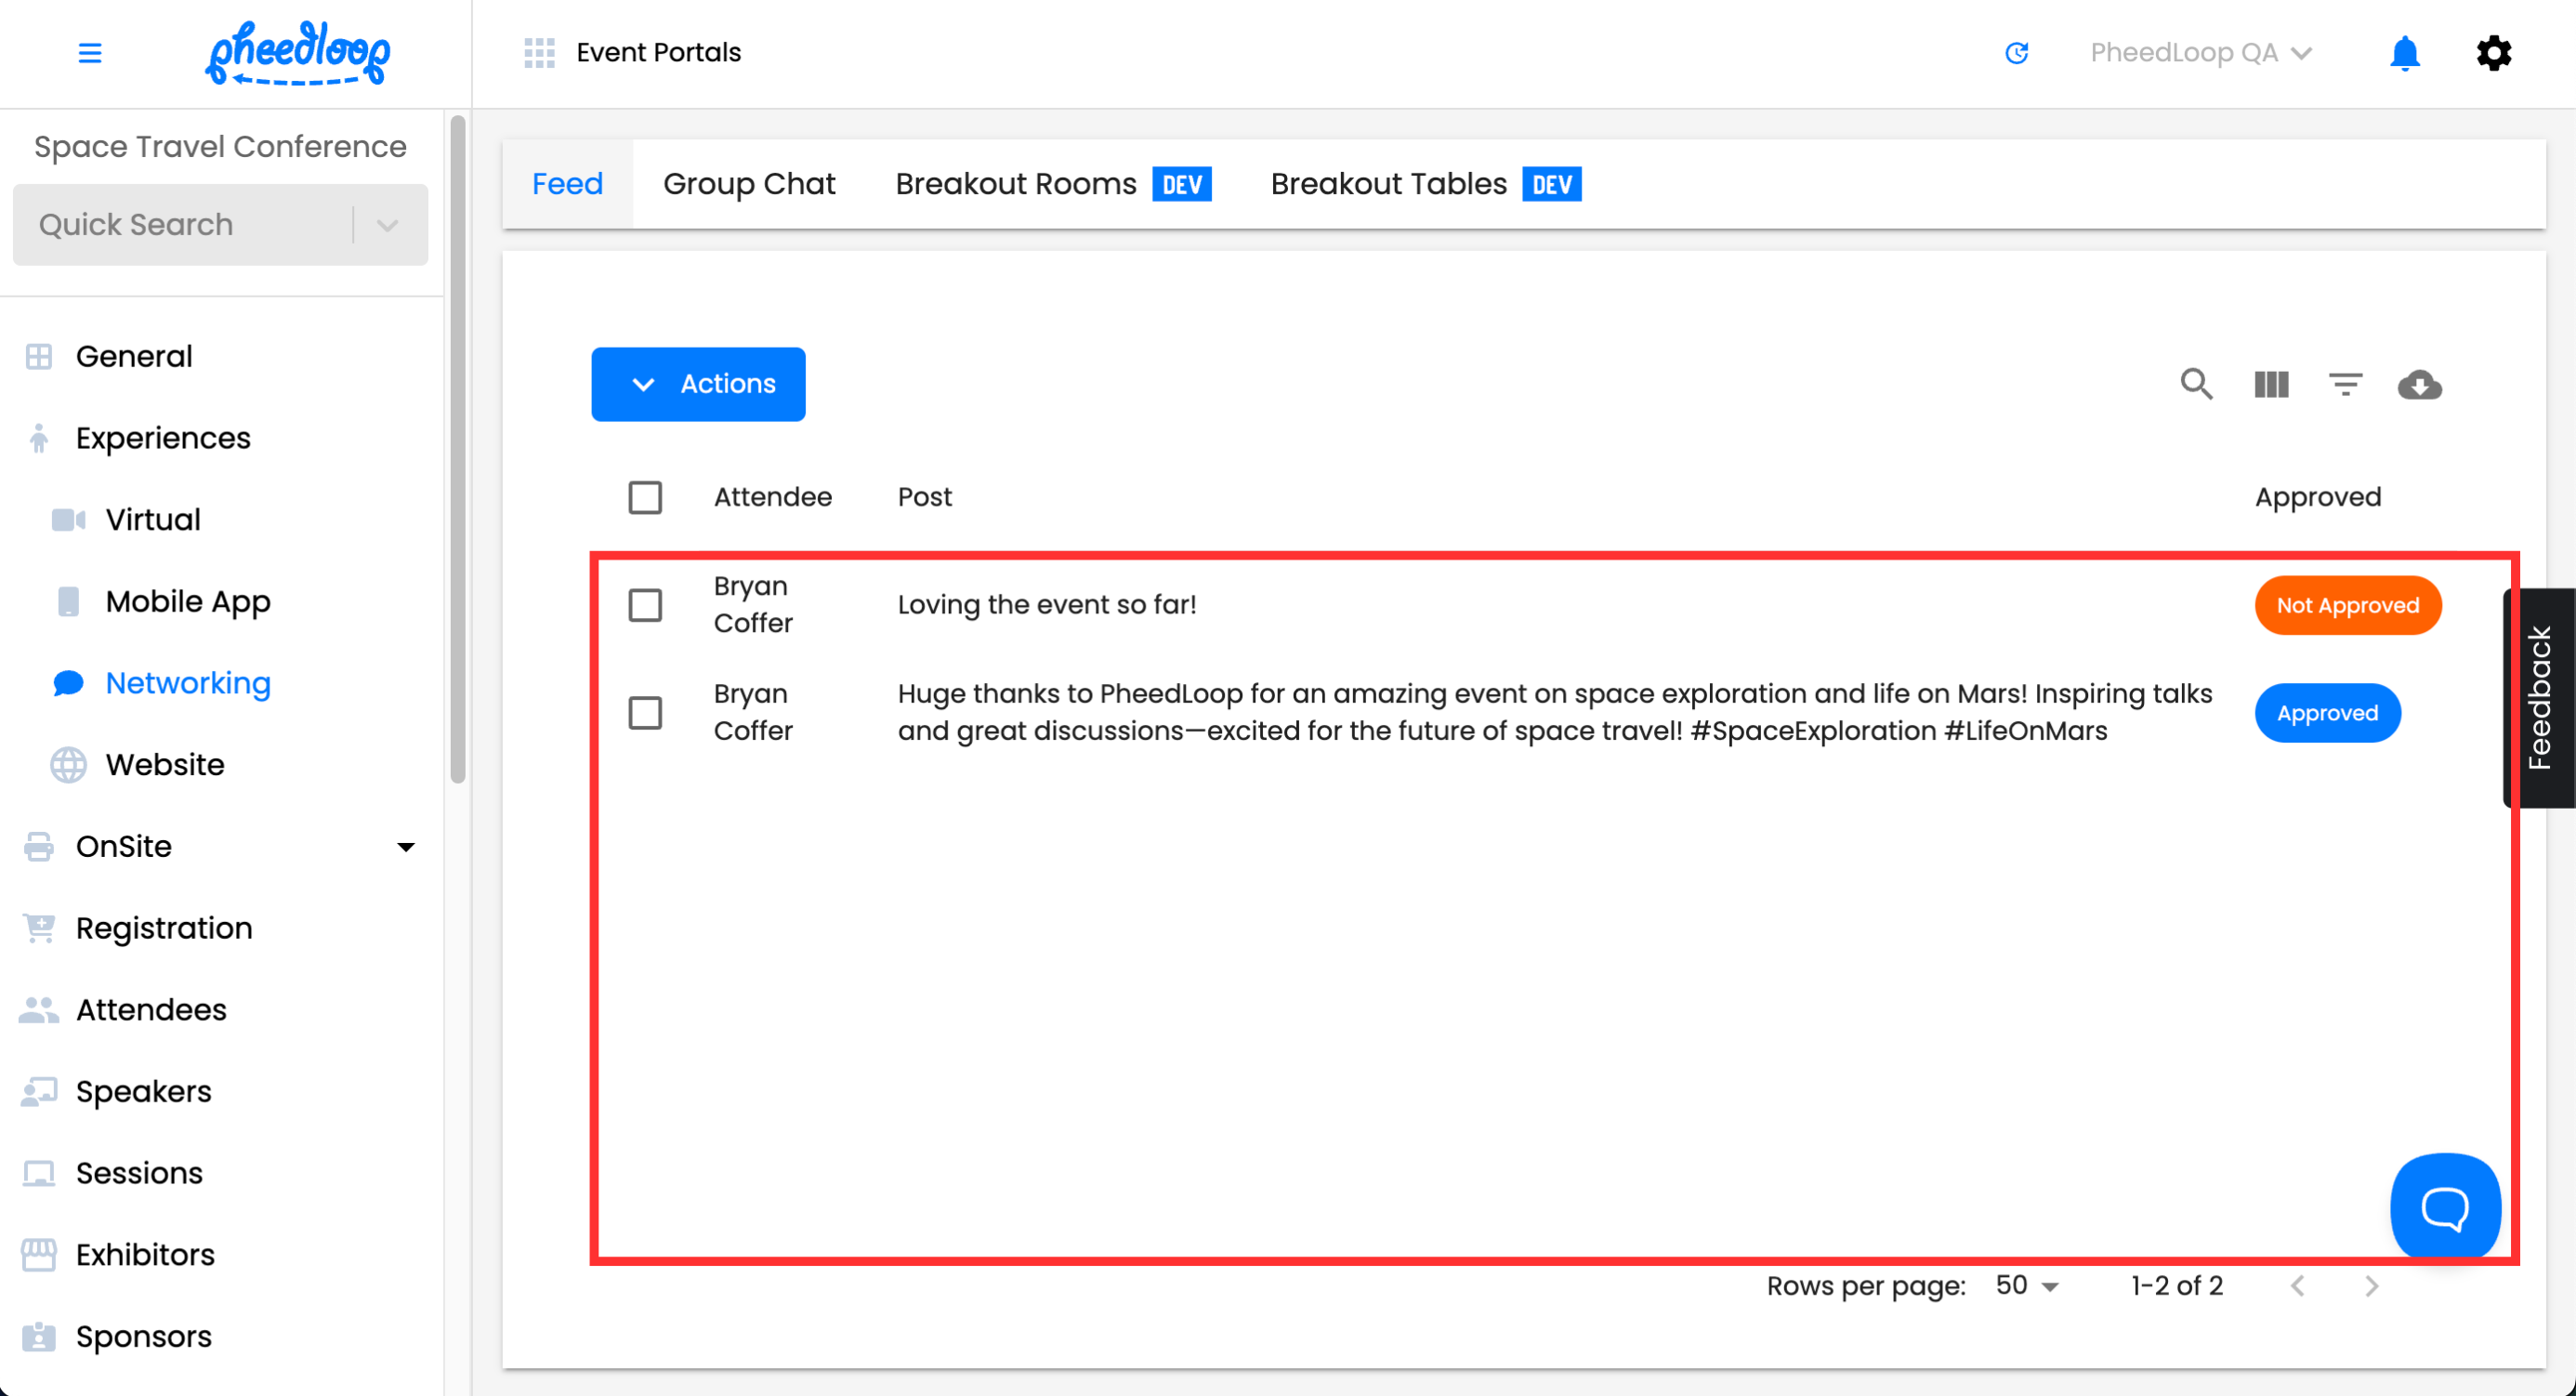
- From the Event Dashboard, navigate to Experiences > Networking > Feed
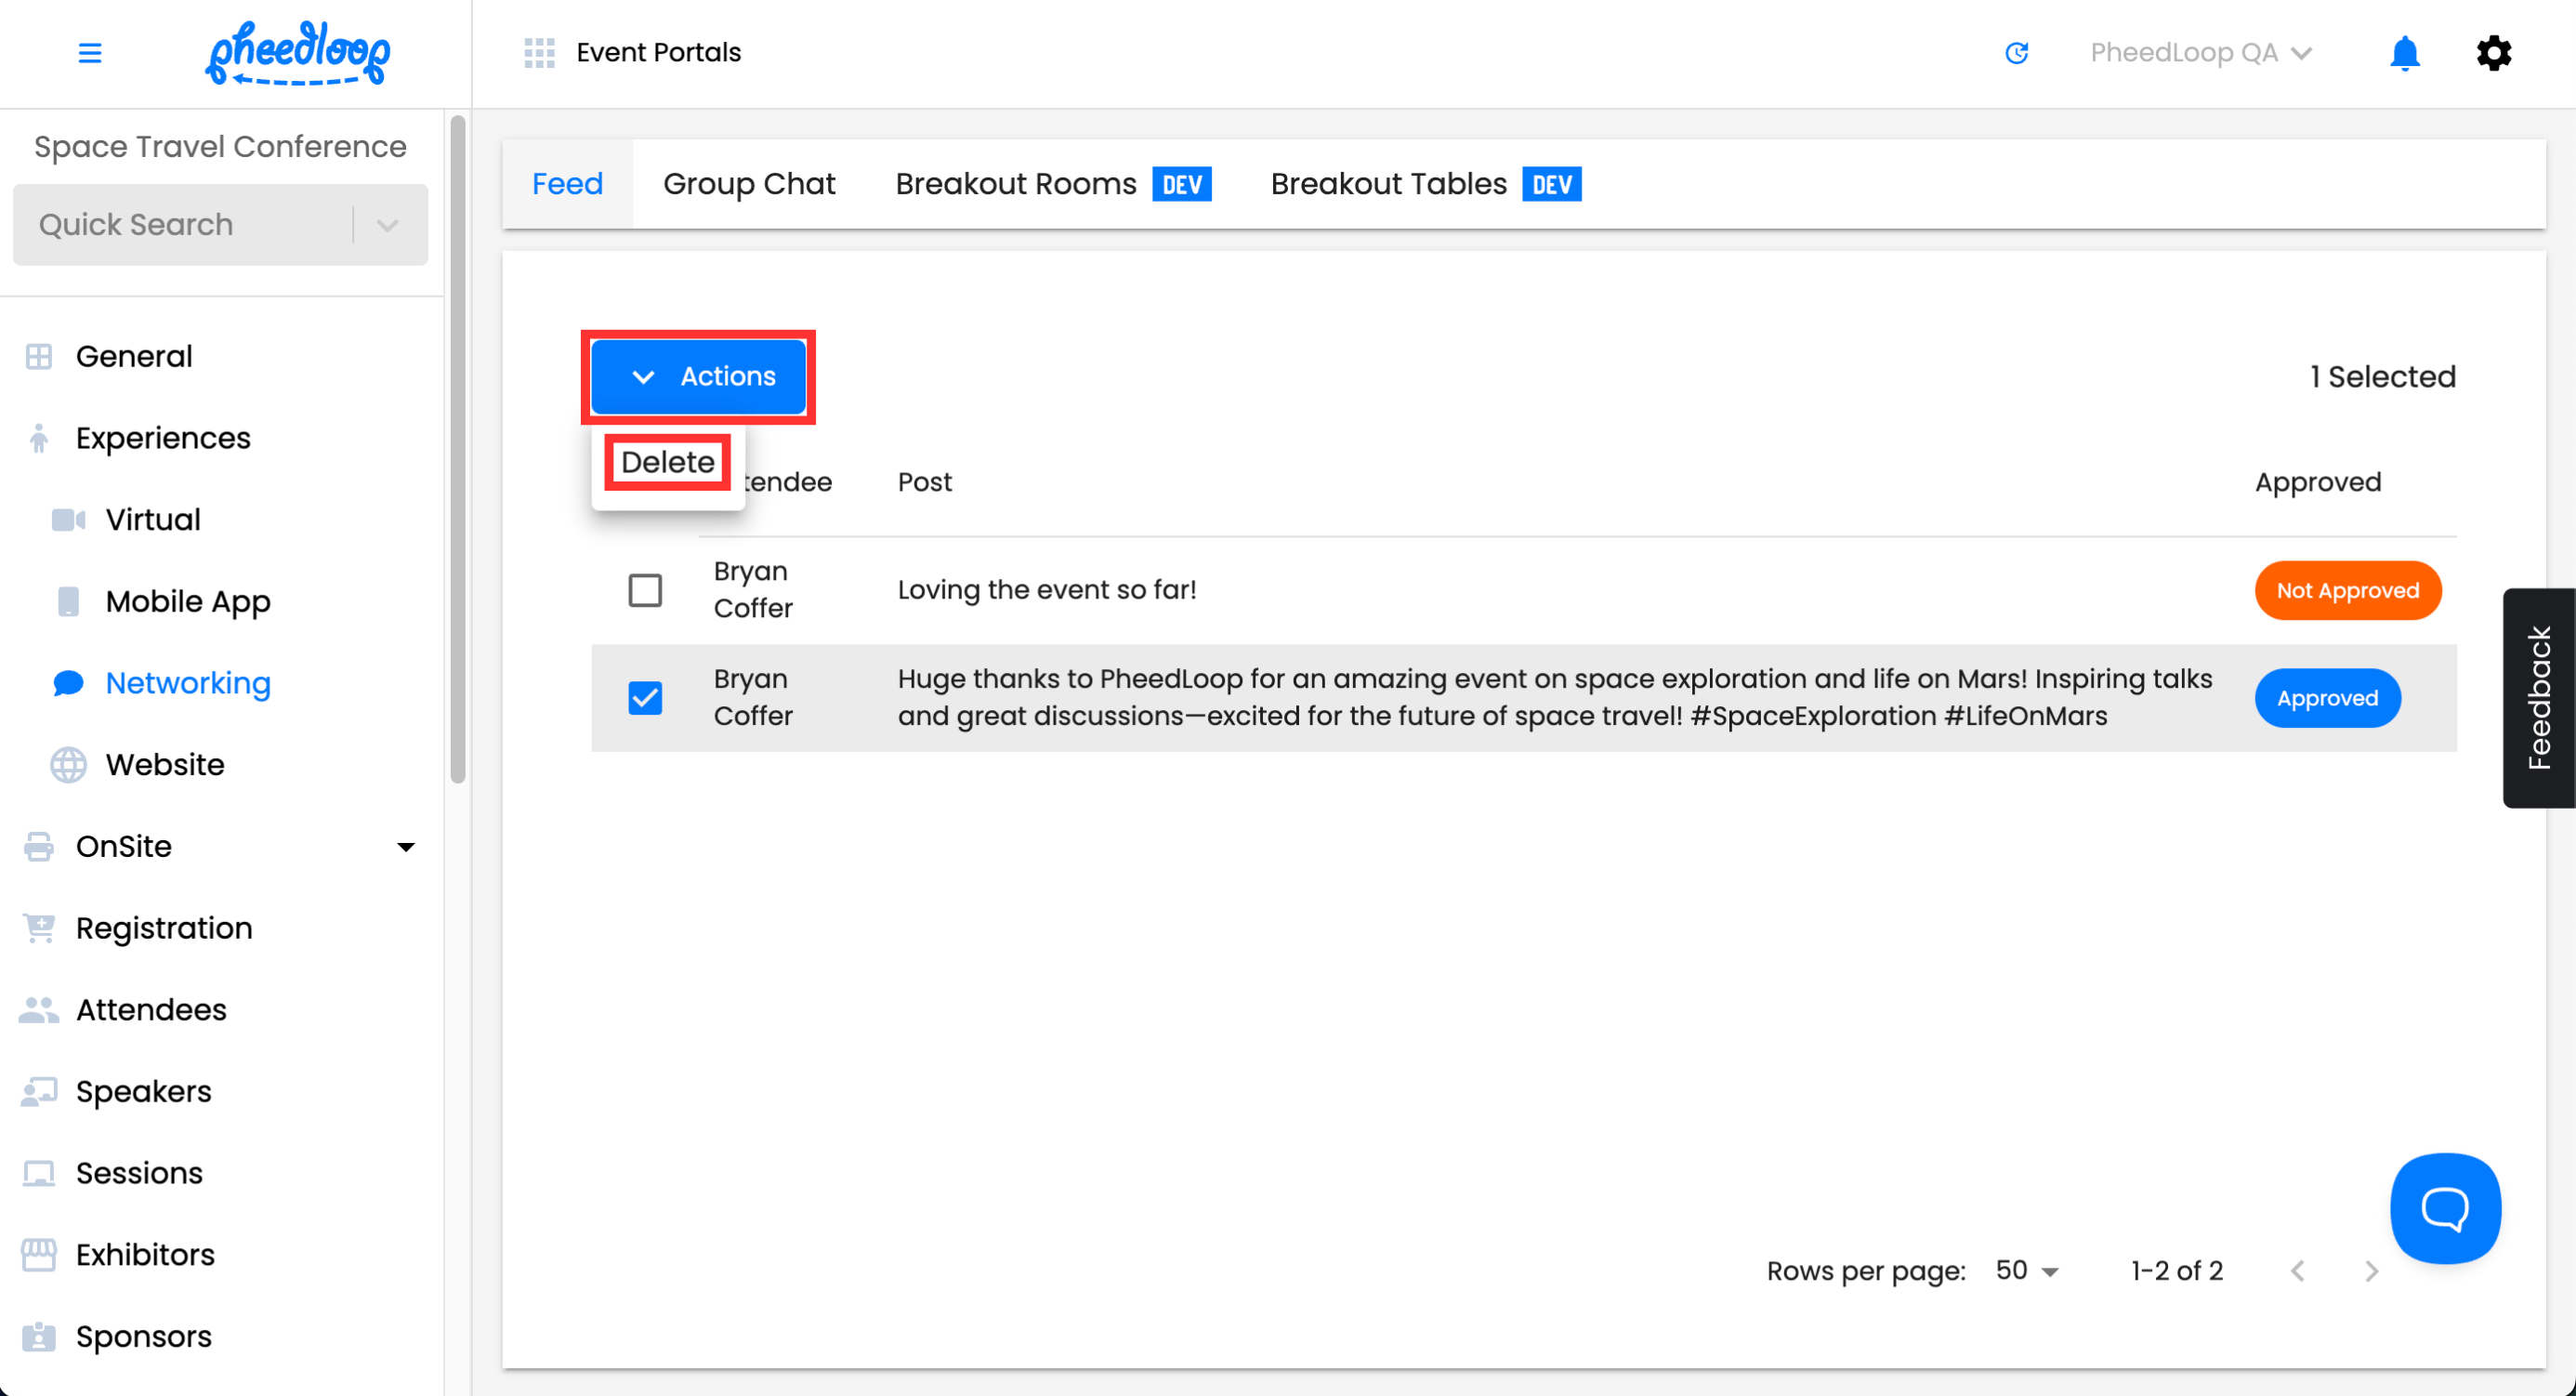
Select the checkbox of the post you wish to remove
Above the Event Feed table, select Actions > Delete
Select Confirm


Alternatively, you can hide the post by selecting the post and toggling off the Approved checkbox. Remember to select Save Changes to save your progress.

For more information on moderation, please review our Using the Event Feed Moderation Feature article.