How to Assign Custom Forms to Attendees
Forms are a great way to gather data and other information from your attendees. Attendees have the option to fill out forms not only during the registration process but also at any time through their Event portal. For more information on setting up the Event Portal, please review our Enabling, Accessing, and Customizing the Member Portal.
This article will cover how to assign forms and how to access them from the Event Portal.
How to Assign Forms from the Event Dashboard

- From the Event Dashboard, navigate to Attendees > Attendees
- Select the attendee you wish to assign the form to
- You can also assign multiple attendees simultaneously by selecting their checkboxes. Above the Attendees table, select Actions > Bulk Edit before scrolling down to Forms, toggle on the checkbox, and assign the form there.
- Scroll down to Forms
- Under Form Assignment, select the form for them to complete
- Select Save Changes
How to Complete a Form as an Attendee
Attendees can complete any forms assigned to them in the Event Portal.
To share the Event Portal

- From the Event Dashboard, navigate to Event Portals
- Select Attendee Portal
A new page will appear showing the Event Portal. Please note, the Event Portal is based on the account logged into PheedLoop. Event organizers will need to login as the attendee to gain access to their Member Portal.
To complete an assigned form
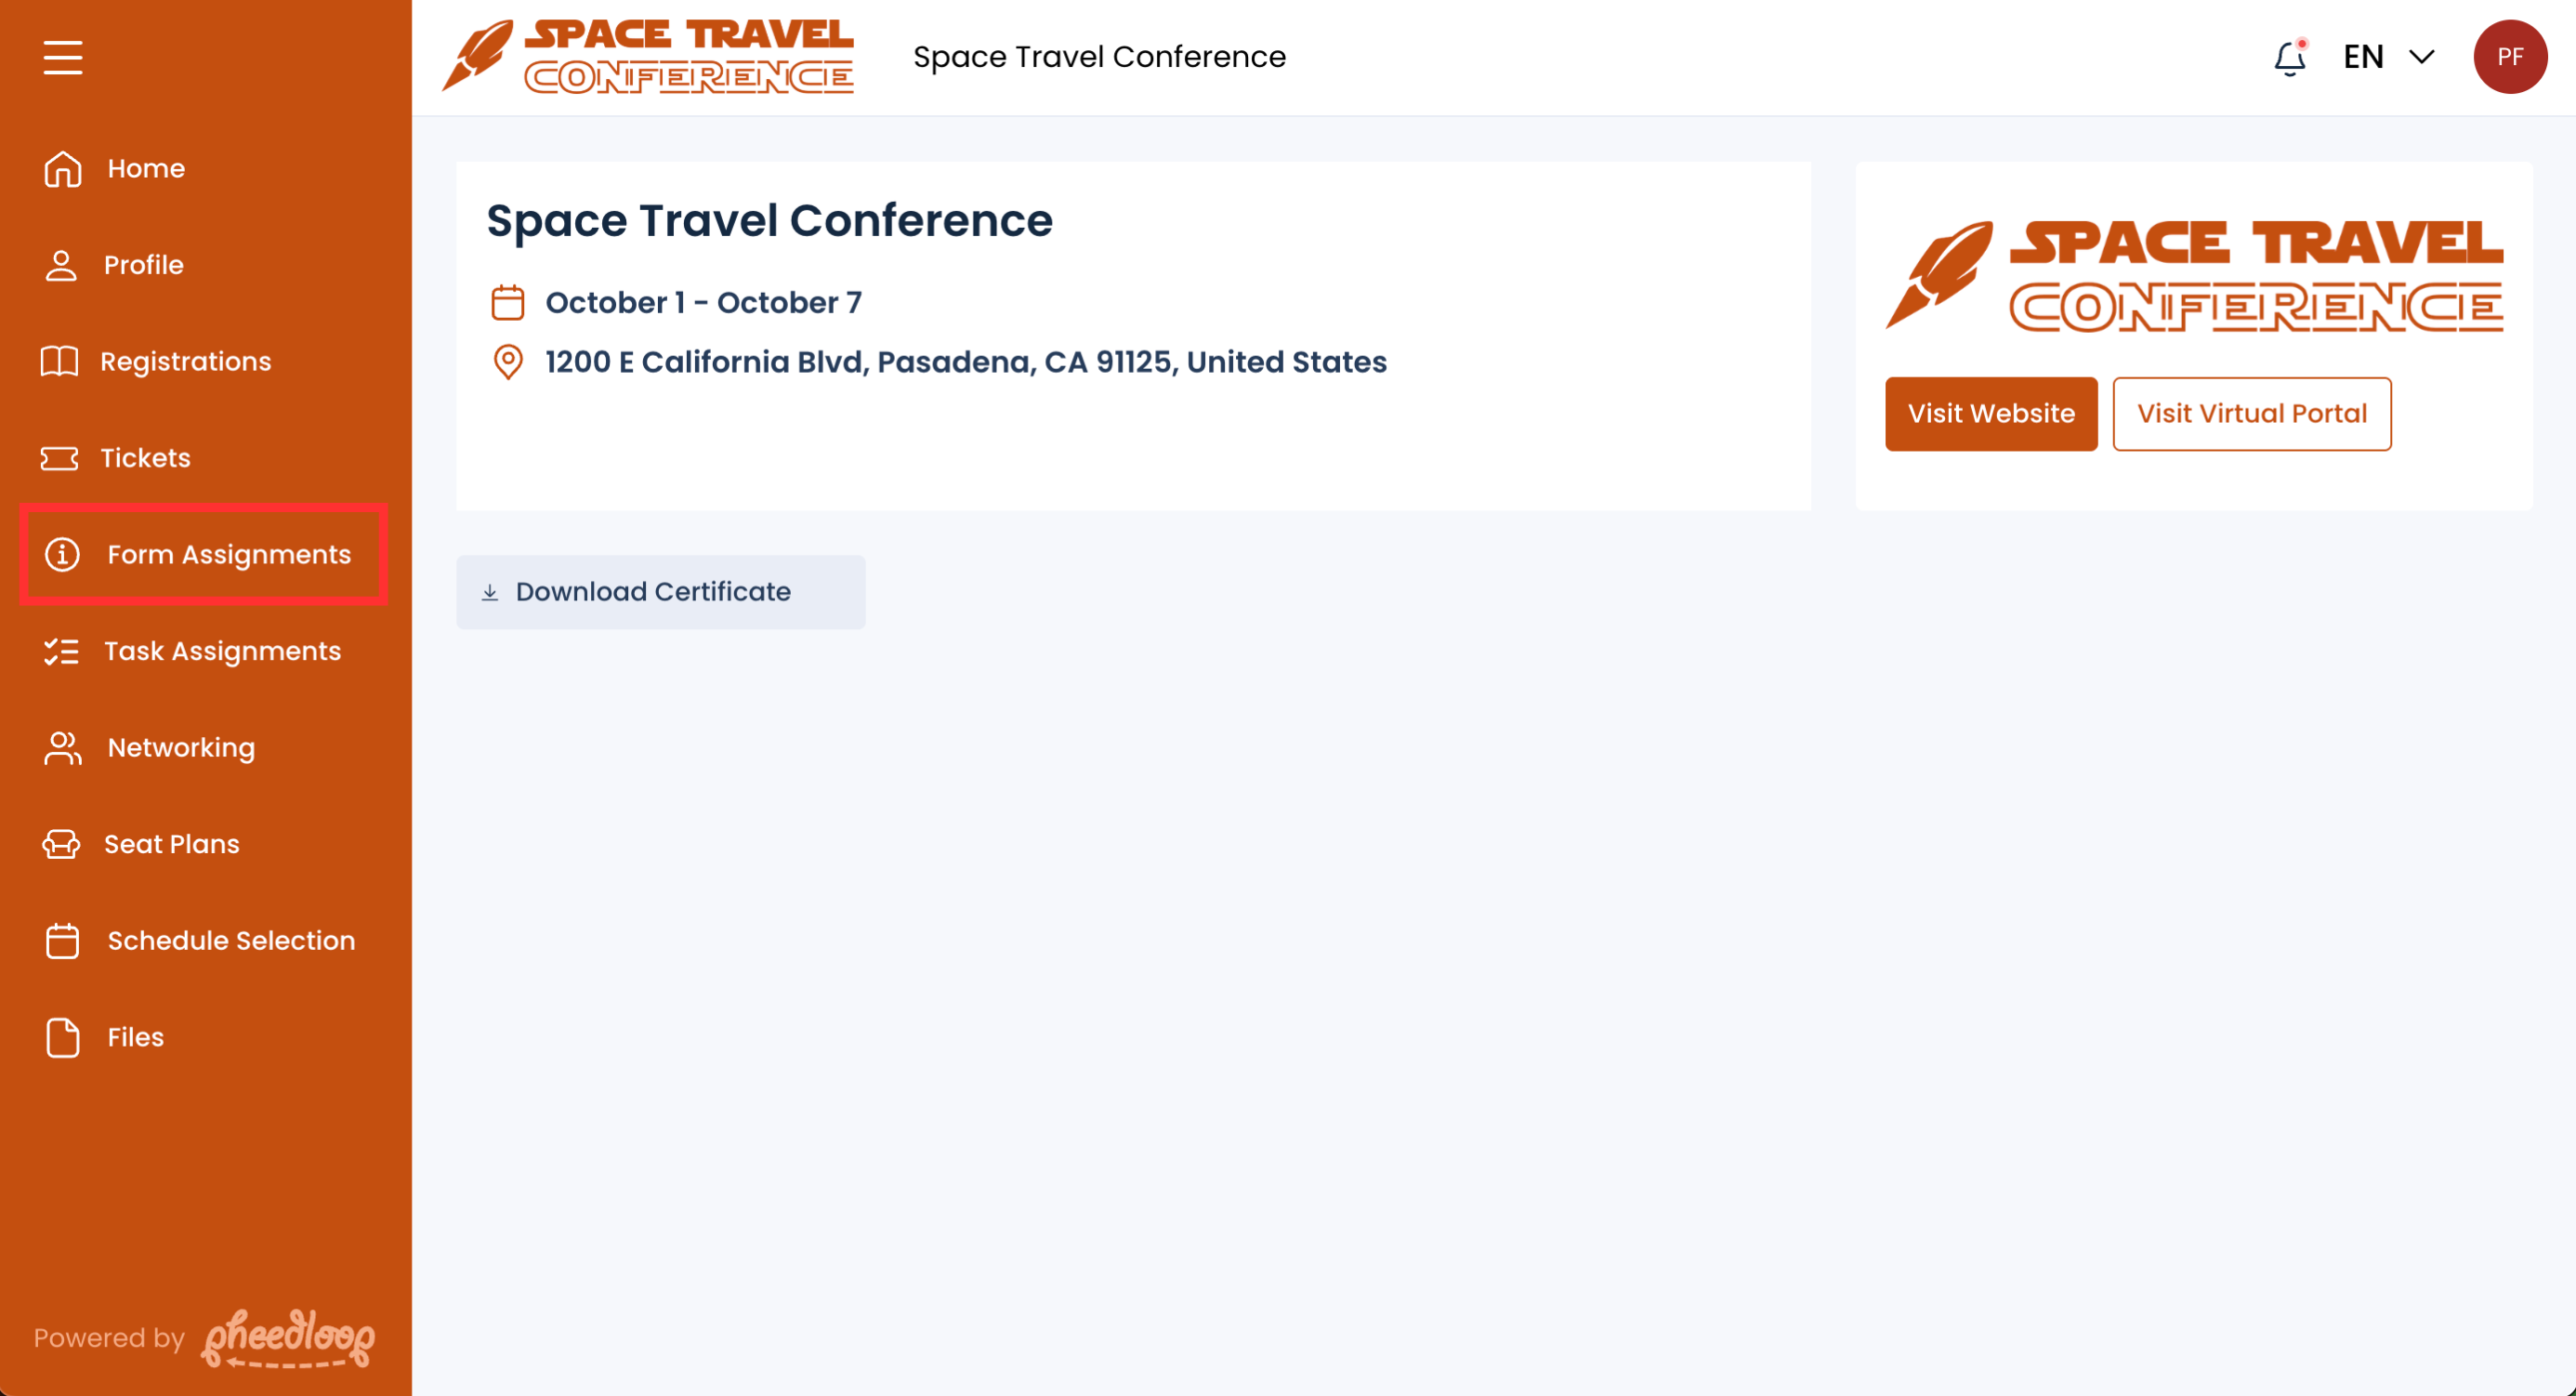
- From the Event Portal, navigate to Form Assignments
- Select the form assigned
- Fill out the form
Select Submit

Downloading Results with the Form Response Report
Once the submission period of your form has concluded, results can be downloaded with the Form Response Report.

- From the Event Dashboard, navigate to Data & Reports > Custom Reports
- Above the Custom Report table, select Create
- Under Report Type, select Form Responses
- Select the Fields dropdown and select the fields you want populated inside of this report.
- Select Save Changes
Now that your report is created, you will want to generate the report in order to download it.

- Select the checkbox of your newly created report
- Above the Custom Reports table, select Actions > Generate Report
- Select Download Previous Report