Enabling, Accessing, and Customizing the Member Portal
PheedLoop’s Member Portal allows attendees to manage their registrations, transfer tickets, and purchase additional tickets. With advanced capabilities to have your users control their account and customizable information, attendees can seamlessly edit their profiles ensuring a comfortable event experience.
1. Enabling and Accessing the Member Portal
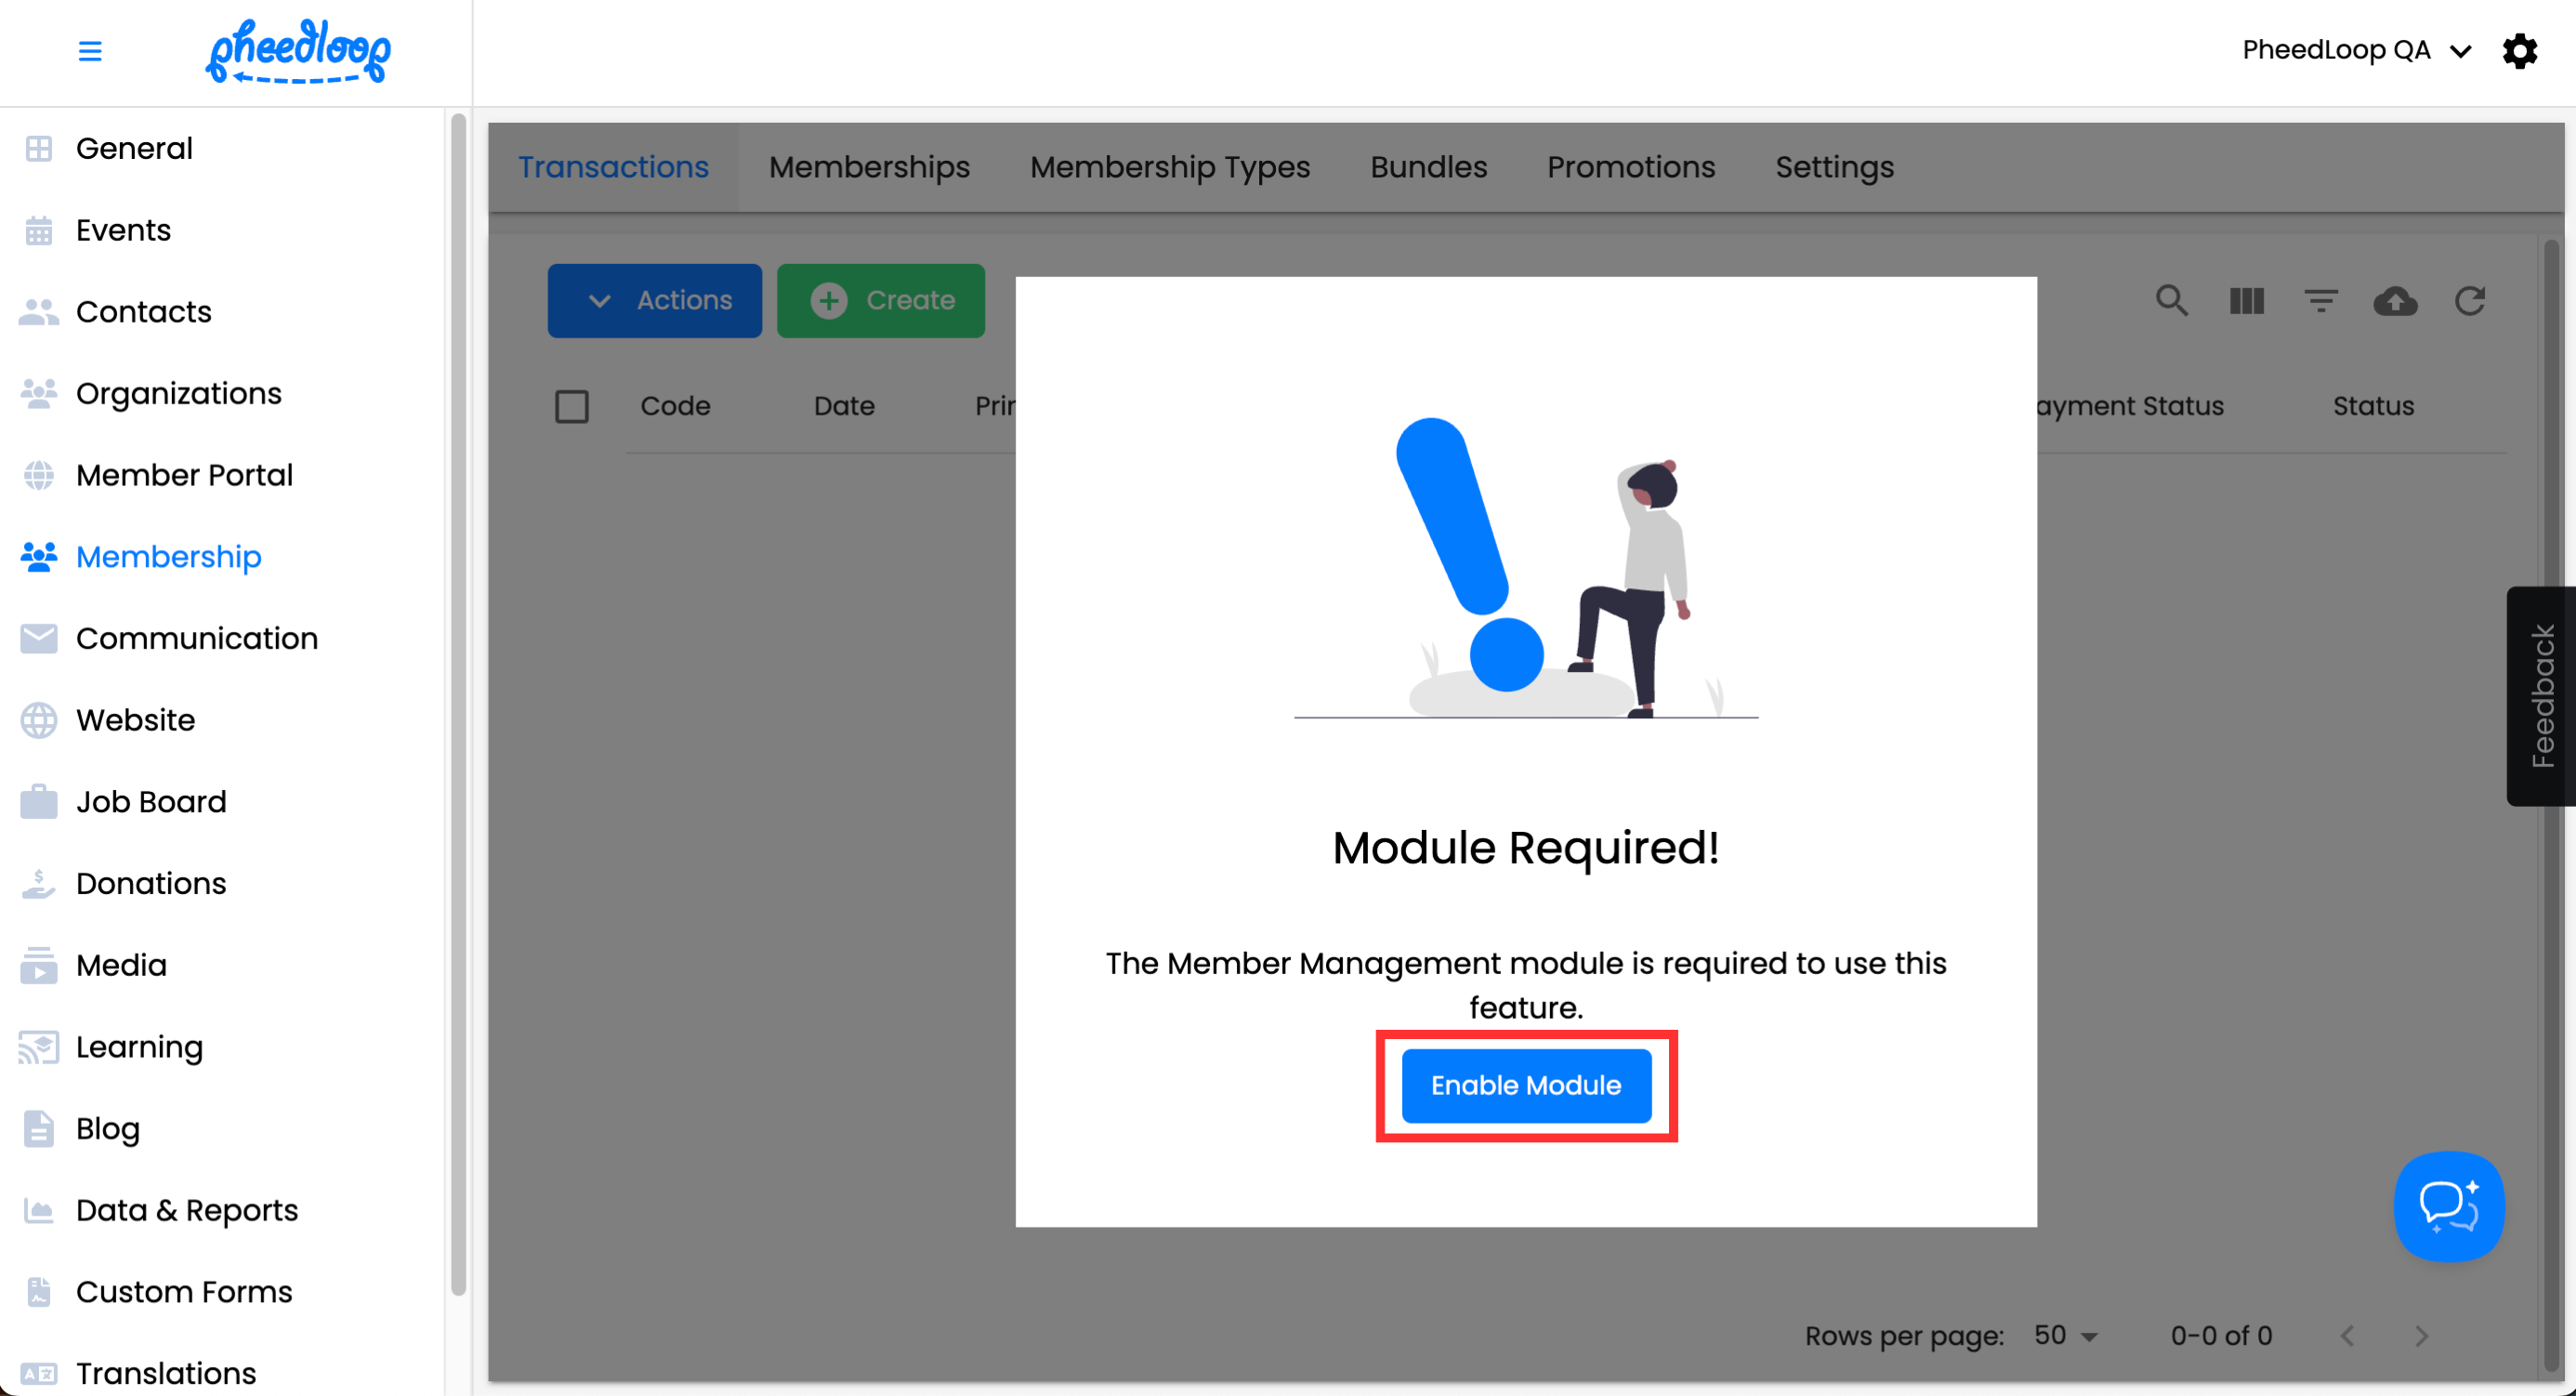
To use this feature, you must first activate the Member Portal capability within PheedLoop’s Community Management system.
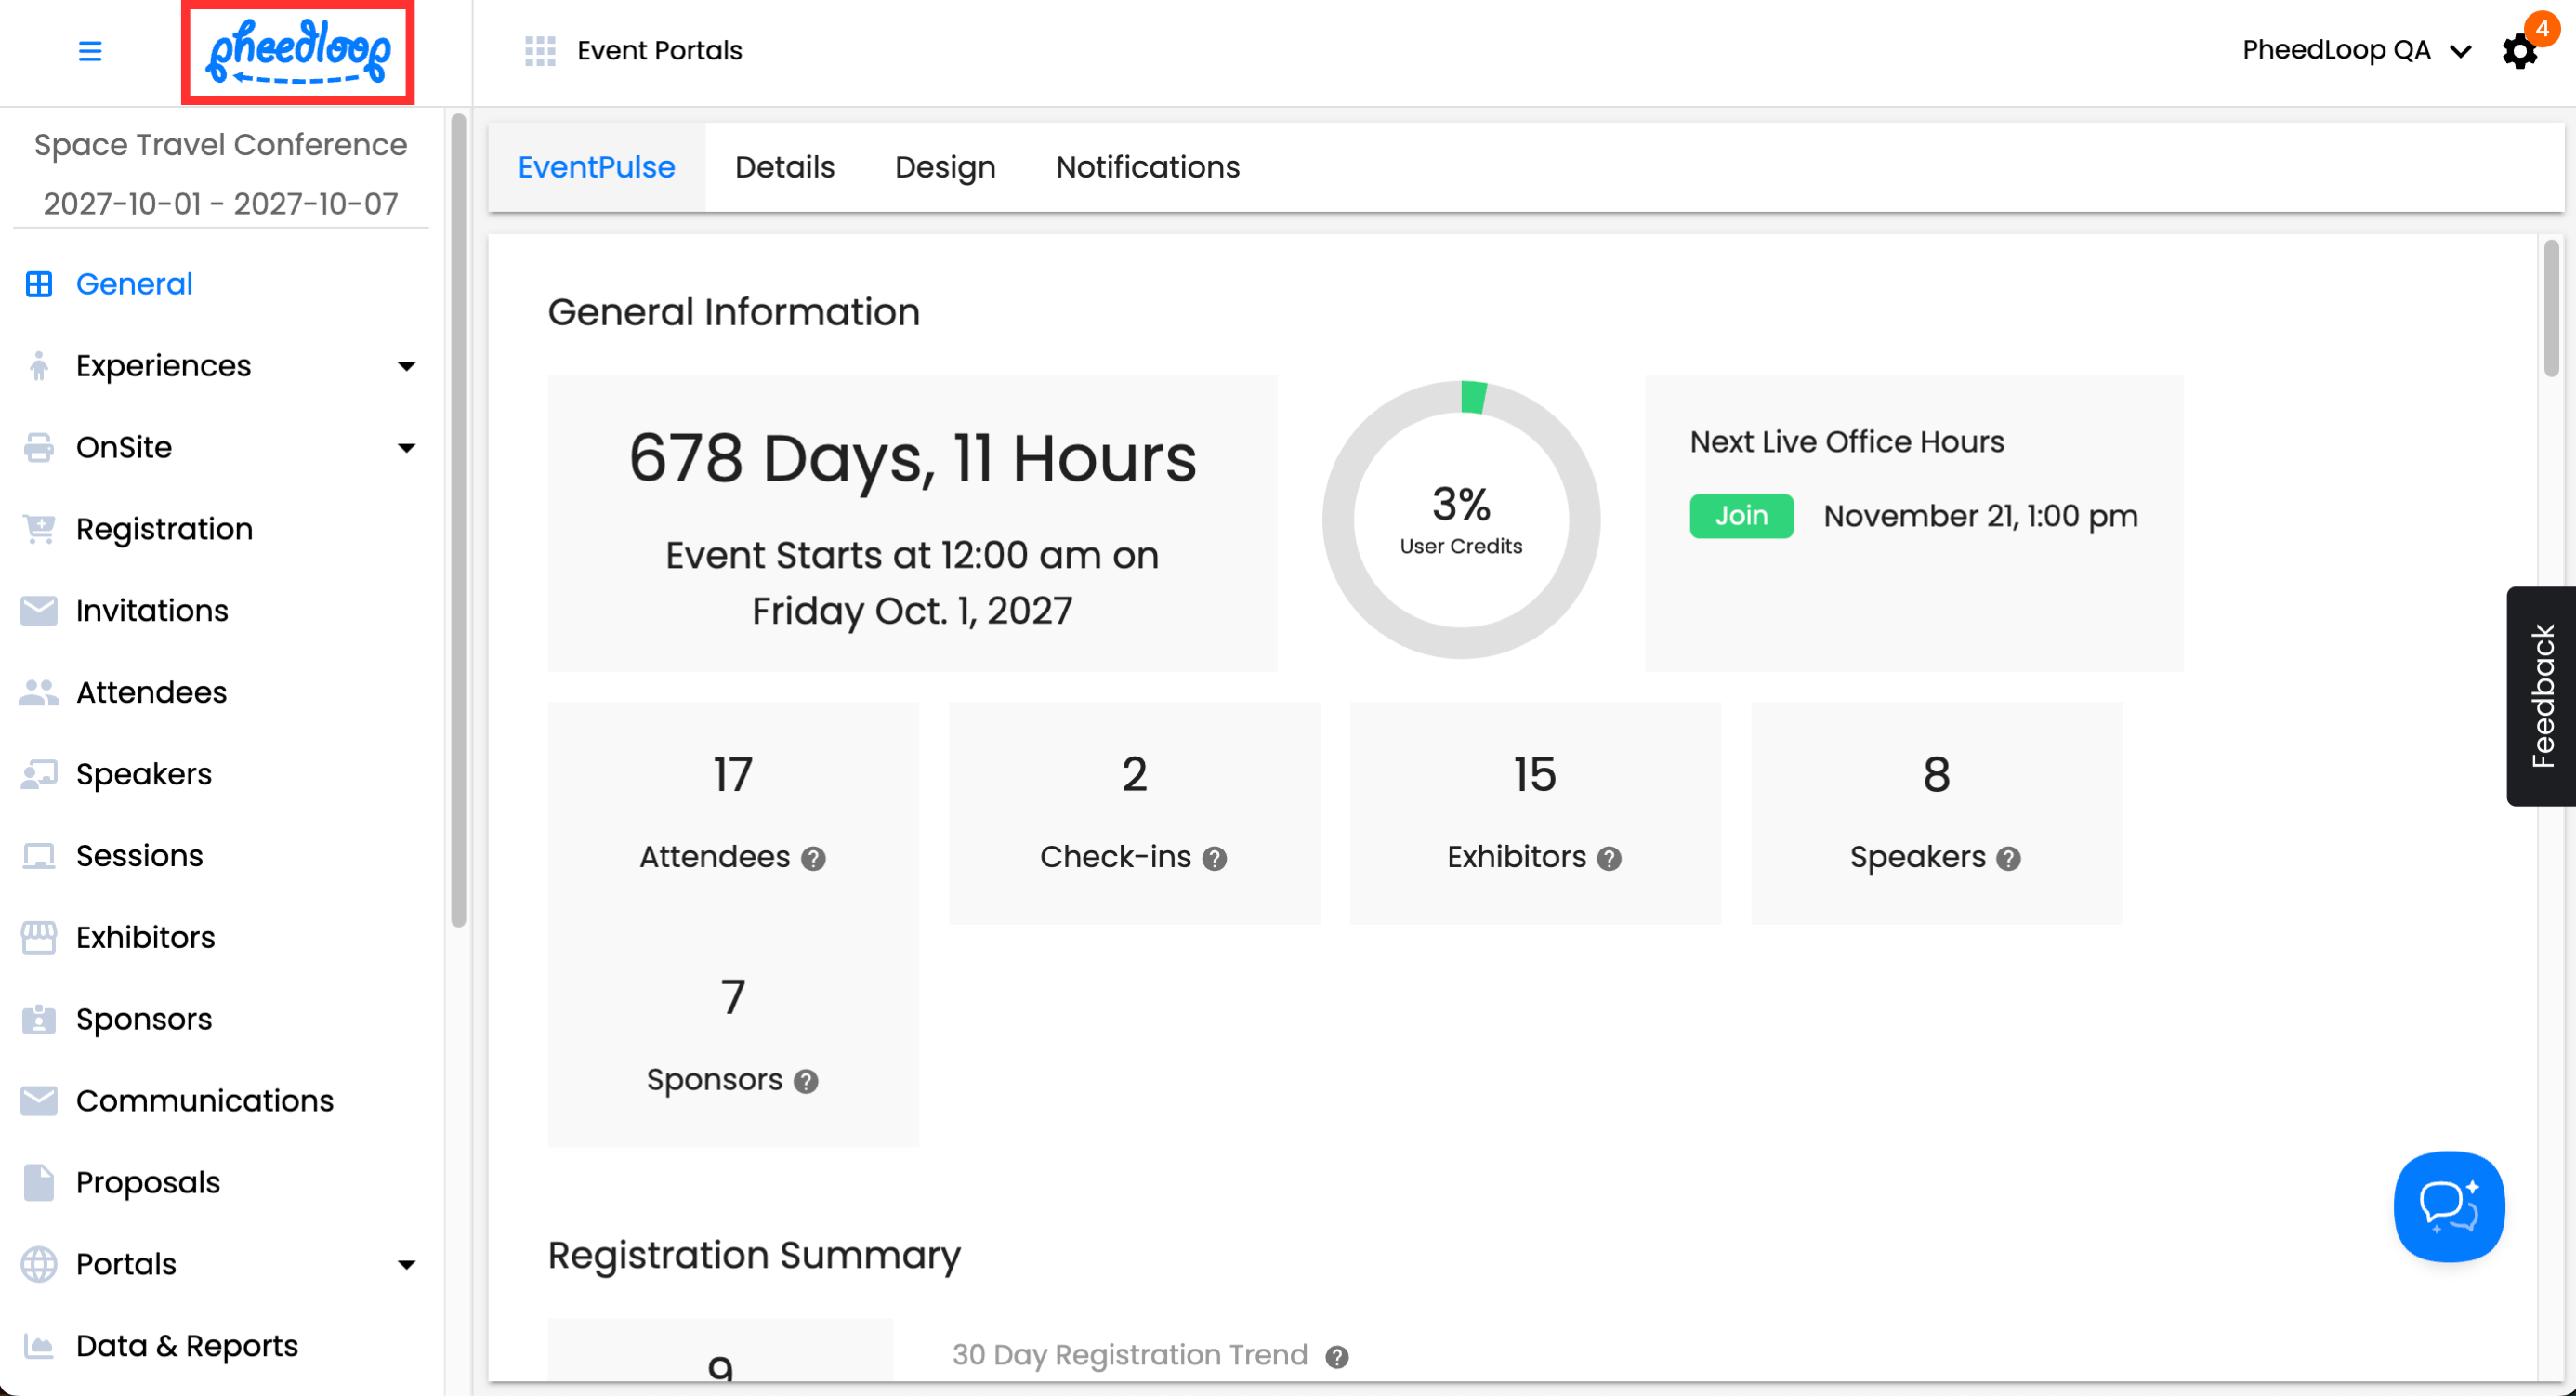
- Select the PheedLoop logo on the top left of your dashboard to access the Home Page
-
Select the Member tab

- On the left hand side select Member Portal
-
Select Enable Module


Once this feature has been activated, you and your attendees will be able to access the Member Portal for your organization via a generic link. To access:
-
From your Membership Dashboard, select Organization Portals > Member Portal

-
Login with your account credentials in the new window


Sharing Temporary Passwords for the Member Portal to Attendees
If you would like to share access to the Member Portal, they must first be added as a contact. This contact will then need to use a temporary password. The contact will be able to reset their password once they login to the Member Portal.
- From the Membership Dashboard, navigate to Contacts > Profiles
-
Above the Contacts table, select Create
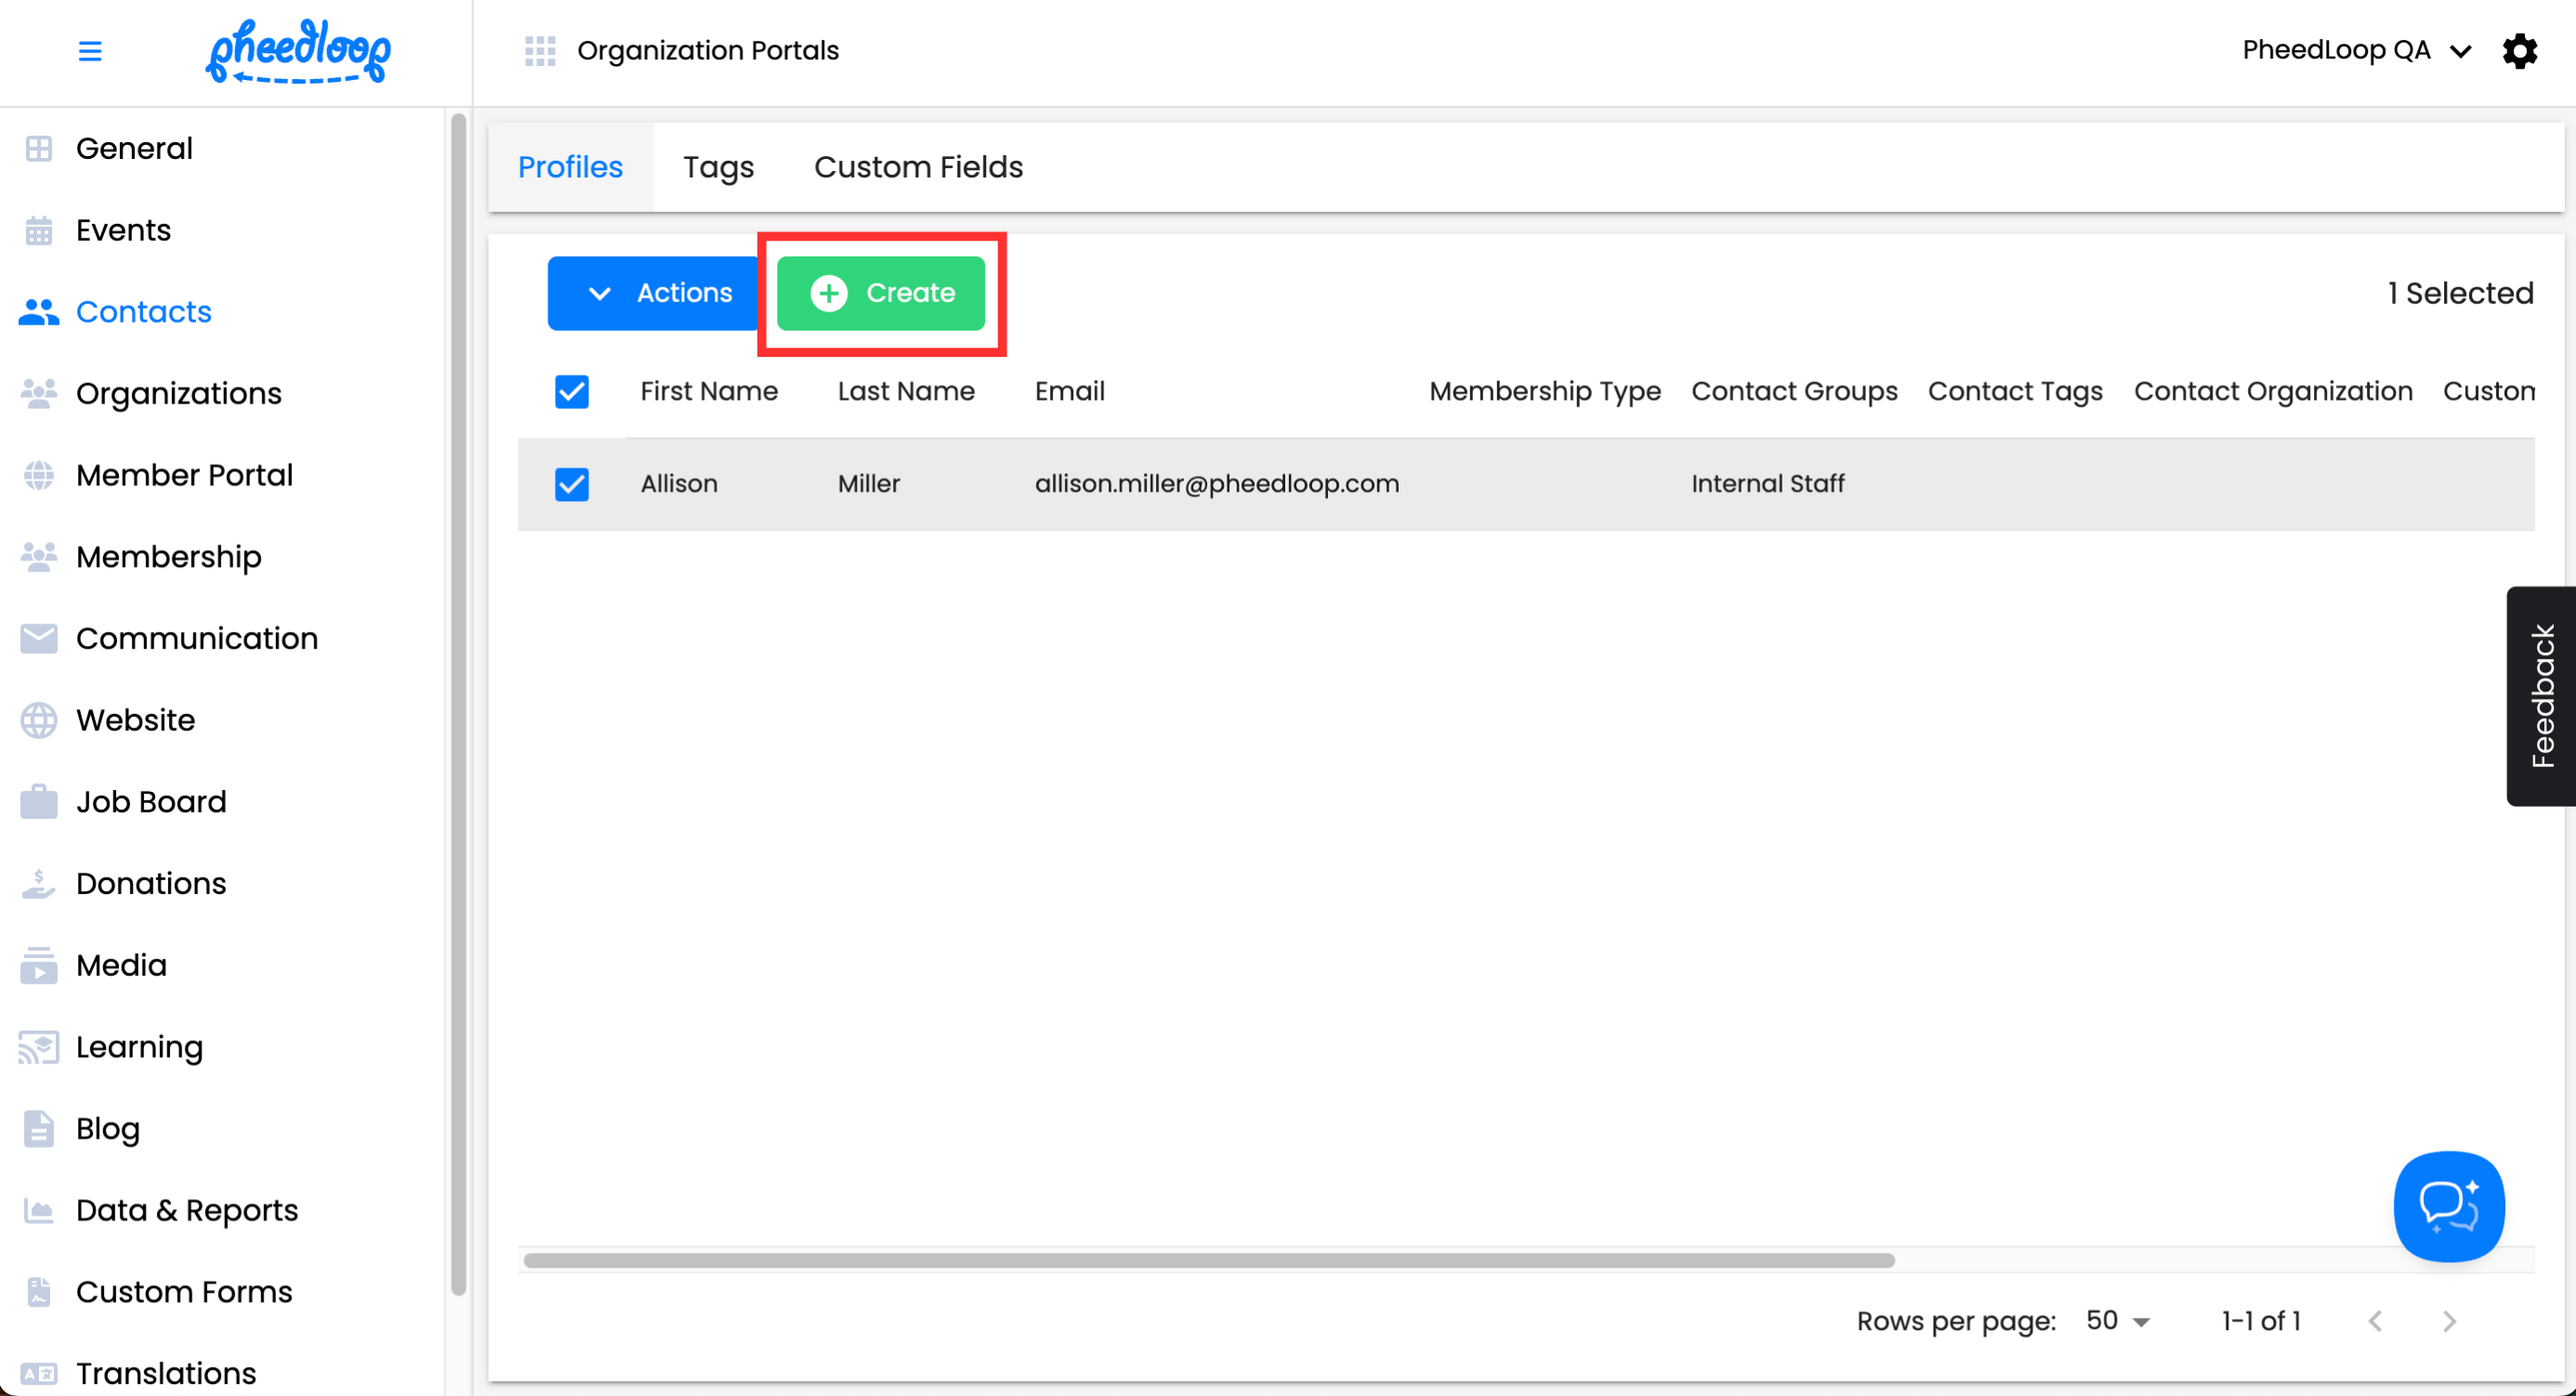
- While there are many settings available, only the Email, First Name, and Last Name fields are required
-
Select Save Changes


After they are created, the contact will have a temporary password available. This password can be found on the Contacts page when you select your member.

Sending the Member Portal to Members:
-
From the Event Dashboard, navigate to Event Portals > Member Portal

- Copy the URL from the website
- Share this URL with Members

Individuals can sign in using a one-time unique code, or they may request a password reset from the login.
3. How to Customize the Member Portal
The Member Portal has various customization options depending on the configuration of your event and what you want your members to see. In the case that you want things to be simple, you have the choice to hide the pages completely.
-
Select the PheedLoop logo on the top left of your dashboard to access the Home Page
-
Select the Member tab

-
On the left hand side navigation menu select Member Portal > Settings


You will now see all the applicable settings for the Member Portal.
Pages

| Setting | Effect |
|---|---|
| Hide Information Page | Hides the Information page in the Member Portal. |
| Hide Events Page | Hides the Events page in the Member Portal. |
| Hide Profile Page | Hides the Profile page in the Member Portal. |
| Hide Announcements Page | Hides the Announcements page in the Member Portal. |
| Hide Purchases Page | Hides the Purchases page in the Member Portal. |
| Hide Form Assignments Page | Hides the Form Assignments page in the Member Portal. |
| Hide Seat Selection Page | Hides the Seat Selection page in the Member Portal. |
| Hide Member Organization Detail Page | Hides the Member Details page in the Member Portal. |
| Hide Membership Page | Hides the Membership page in the Member Portal. |
| Hide Networking Page | Hides the Networking page in the Member Portal. |
| Filter Network Page by Organizations | Members only see others in the same organization; all others hidden. For more information on organizations, please review our Creating Organizations in the Membership Dashboard article. |
| Filter Network Page by Members Only | Members only see others with the same Membership Type; all others hidden. For more information on Membership Types, please review our How to Set Up Membership Types article. |
| Hide Job Board Page | Hides the Job Board Posts page. For more information on Job Boards, please review our Setting up the Membership Job Board article. |
| Hide Manage Organization Page | Hides the Manage Your Organization page (visible only to organization managers). |
| Hide Learning Page | Hides the Learning page in the Member Portal. |
Events

| Setting | Effect |
|---|---|
| Hide Past Events | Hides all past events in the Member Portal, including their Announcements, Form Assignments, Registrations, and Seat Plans. |
Profile Settings

| Setting | Effect |
|---|---|
| Lock Profile Edits | Prevents members from editing their profile on the Profile page in the Member Portal. |
| Enable Download Certificates |
Allows members to download their CE certificate from the Profile page in the Member Portal. For more information on CE certificates, please review our Downloading the CE Certificate in the Member Portal article. |
Job Board Settings

| Setting | Effect |
|---|---|
| Enable Job Board Postings | Allows members to post their own job board postings in the Member Portal. For more information on Job Boards, please review our Setting up the Membership Job Board article. |
General

| Setting | Effect |
|---|---|
| Support Details | Allows you to enter contact information for members to use when they need assistance. Members can access this information by selecting the Help button at the bottom-left corner of the Member Portal. To remove support details, clear the field and select Save Changes. The Help button is automatically hidden if no content is provided in the Support Details field. |
| Welcome Text | Allows you to enter custom content that appears on the Information page of the Member Portal. This is useful for personalizing the portal to match your organization’s branding. |
Design

| Setting | Effect |
|---|---|
| Custom CSS | Allows you to enter any custom CSS you want applied to the Member Portal, enabling advanced styling and visual customization. |
Custom Code

| Setting | Effect |
|---|---|
| Custom Code | Allows you to enter custom code for the Member Portal. This is commonly used to hide specific buttons, individual fields, or apply other targeted customizations. |
Once all settings have been configured, select Save Changes to save your progress.
Creating Custom Pages in the Member Portal
Administrators can supplement PheedLoop’s default pages by creating custom pages that appear directly within the Member Portal. These pages are useful for highlighting important information and directing member attention to key details. Once created, custom pages are displayed on the left-hand navigation alongside the default options.
- From the Membership Dashboard, navigate to Member Portal > Custom Pages
-
Above the Custom Pages table, select Create

- Toggle on the Page Hidden checkbox if you wish to hide the page from the Member Portal
- Under the Name field, enter a name for the page
-
Under the Slug field, enter text here to serve as the slug
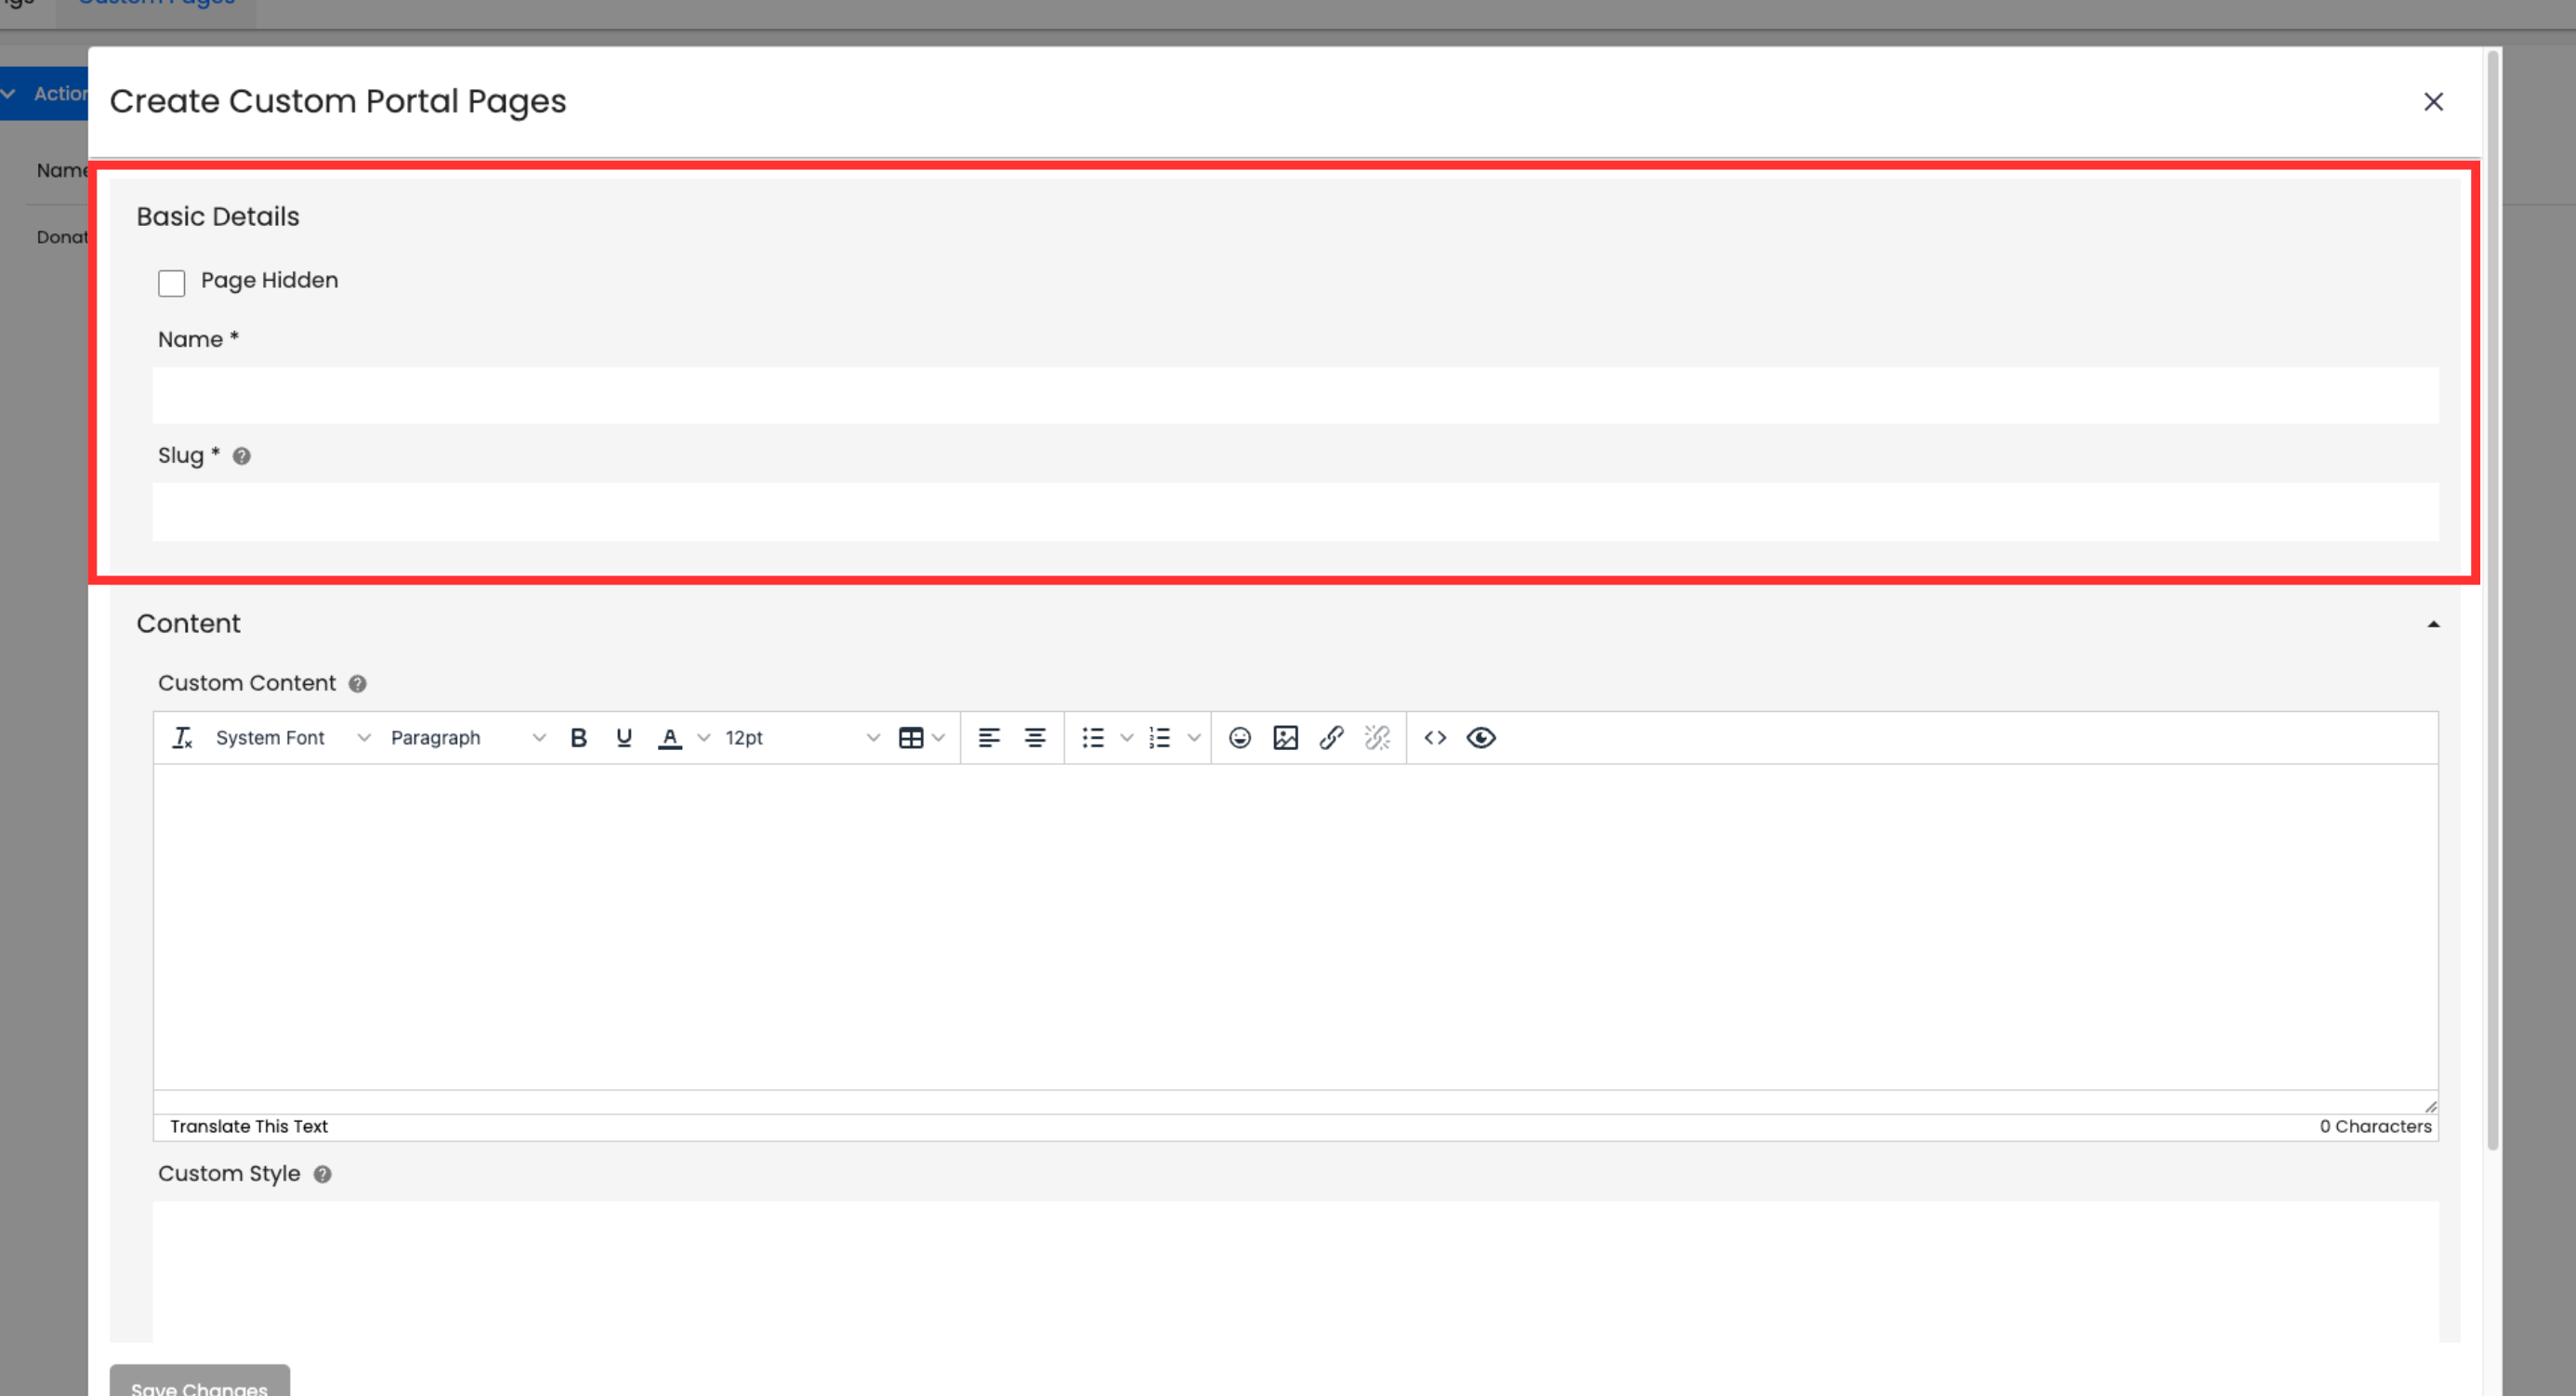
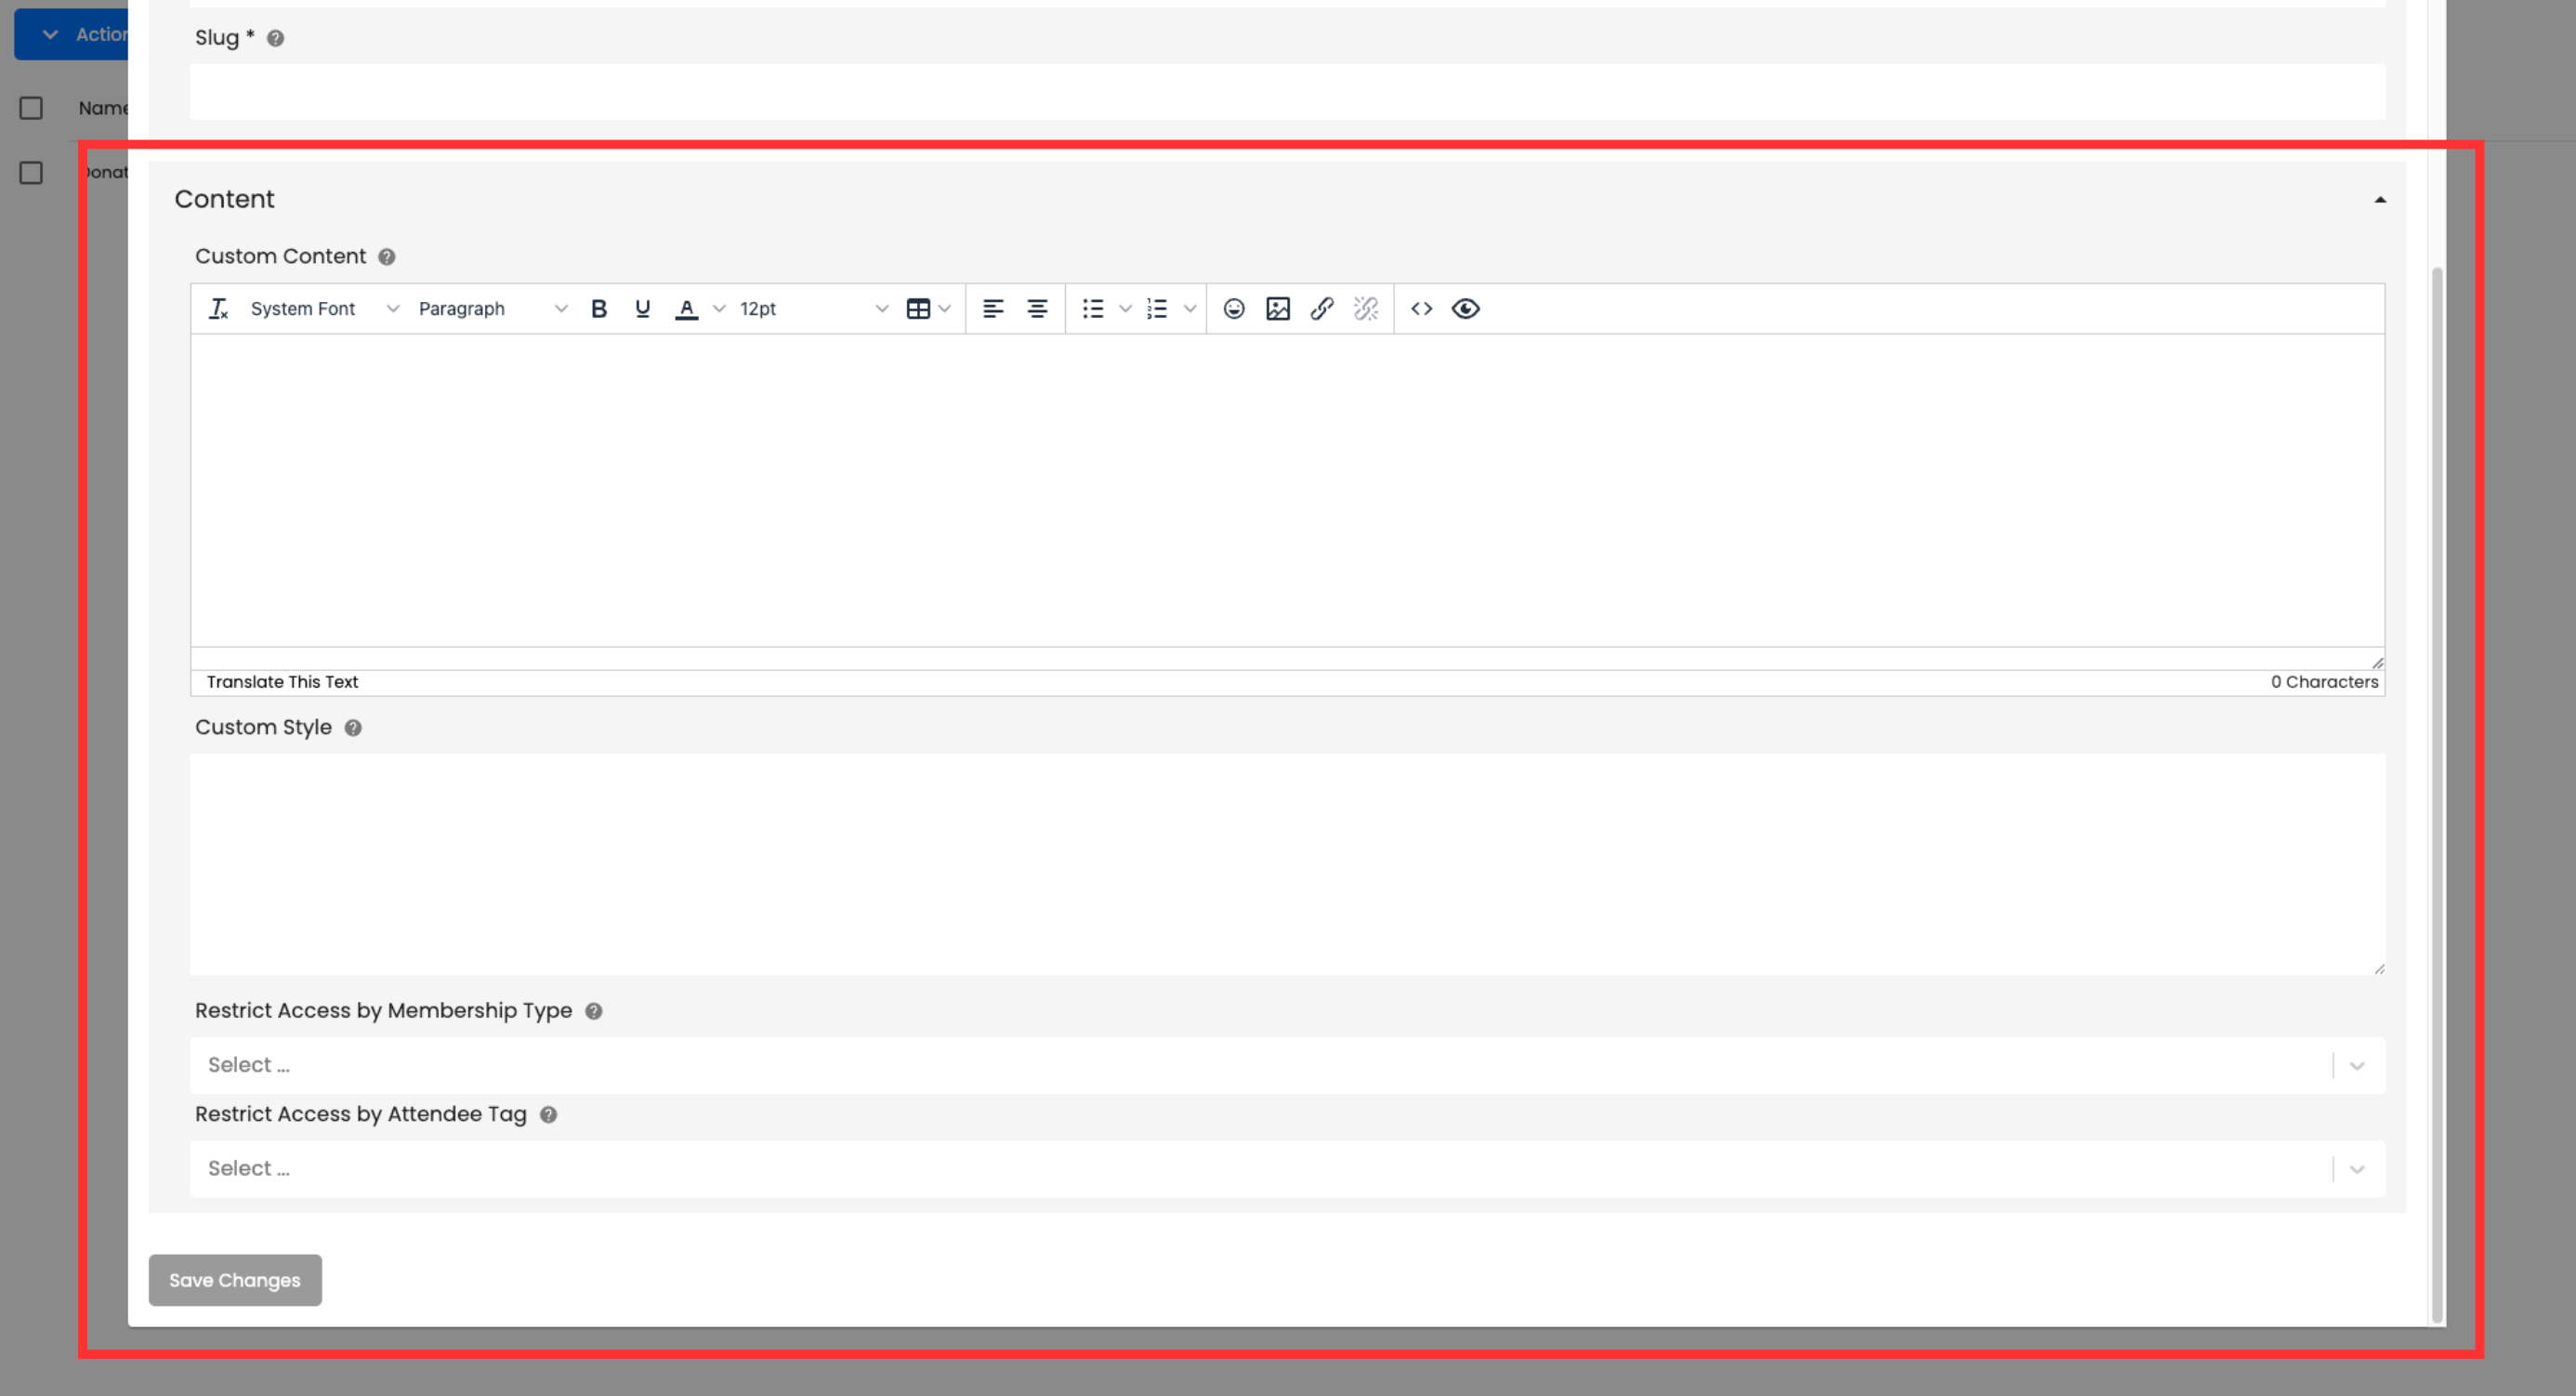
- Under the Custom Content field, enter the content for your page
- Under the Custom Style field, enter any custom CSS for the page
- Under the Restrict Access by Membership Type field, select any membership types the member must own in order to access the custom page
- Members without the Membership Type will not be able to view the page.
-
Select Save Changes


The page will now be created and found in the Member Portal if the Page Hidden checkbox is toggled off. If your custom page is no longer needed, you can delete it from the Membership Dashboard.
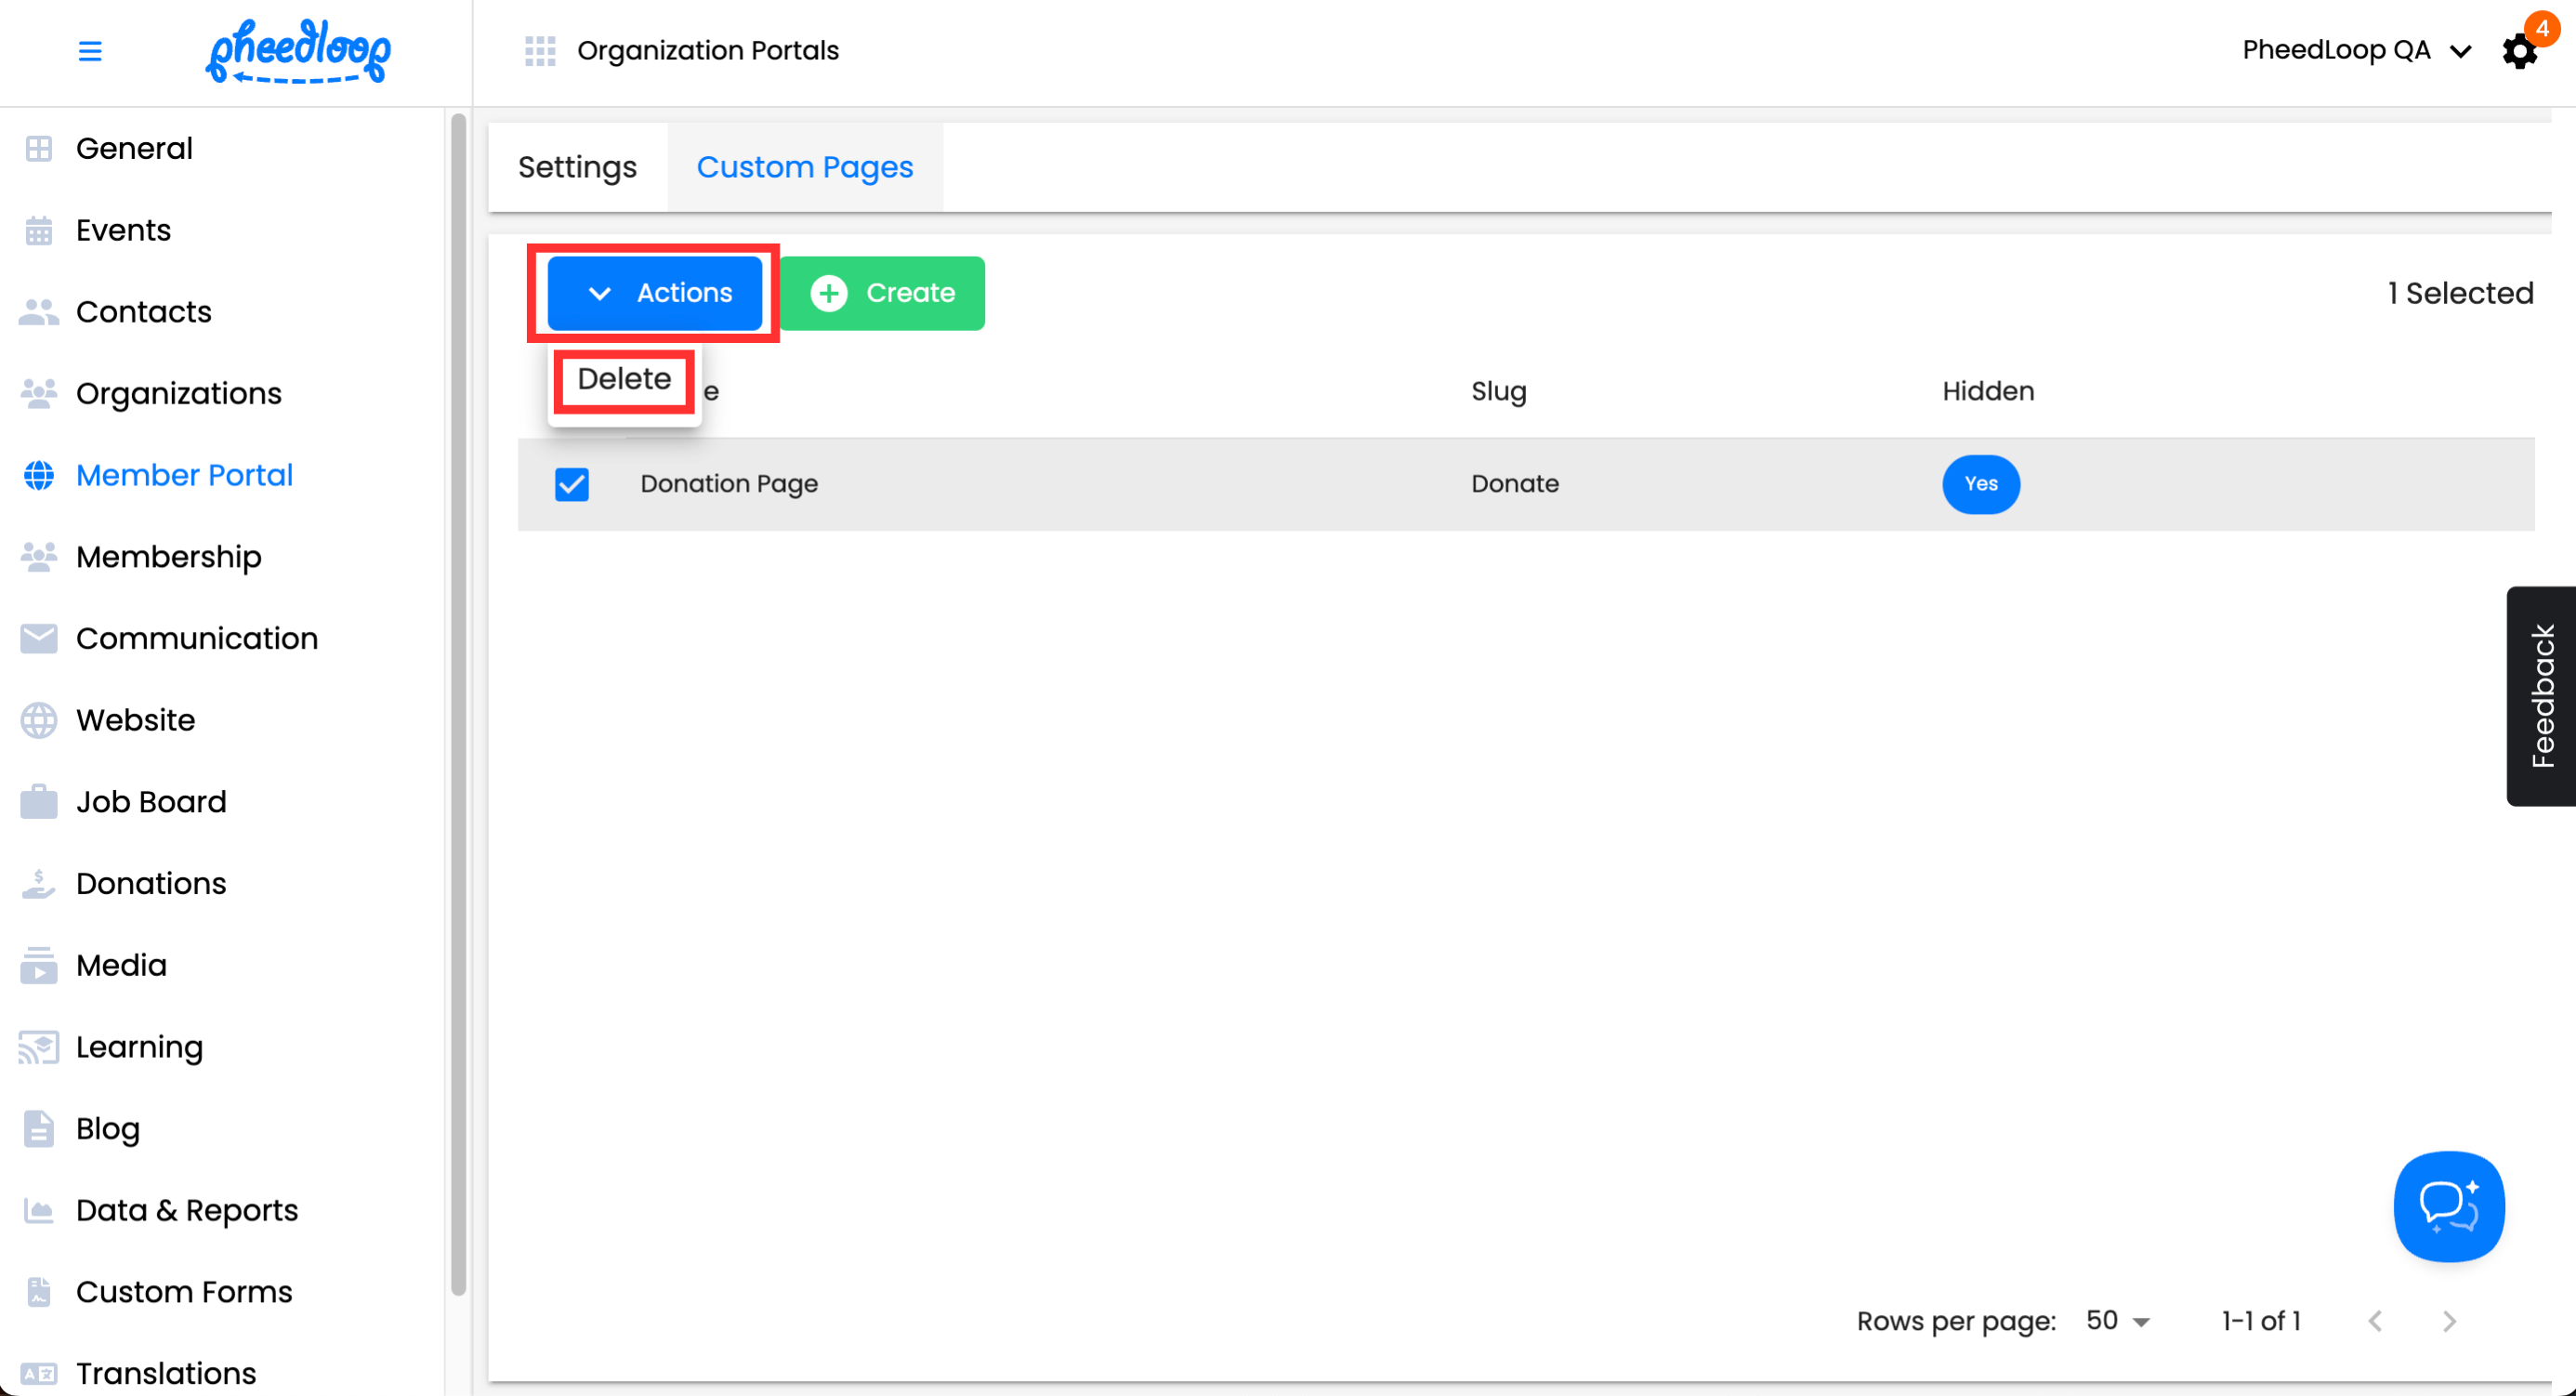
- From the Membership Dashboard, navigate to Member Portal > Custom Pages
- Select the checkbox of the page you wish to delete
-
Above the Custom Pages table, select Actions > Delete
-
Select Confirm


Please note, the page could also be hidden by toggling on the Page Hidden checkbox. This option may be preferable if you wish to keep some record of the custom page while restricting access.
Translating Pages in the Member Portal
Please note, translations in the Event Dashboard will not apply to the Member Portal. For instructions on using Translations in the Event Dashboard, please review our Translating Text, Button, Phrases, and Labels article.
The Member Portal fully supports PheedLoop's Translations feature, just as the Event Dashboard does. This allows page titles and other content to be easily customized without directly editing the underlying content.
- From the Membership Dashboard, navigate to Translations
-
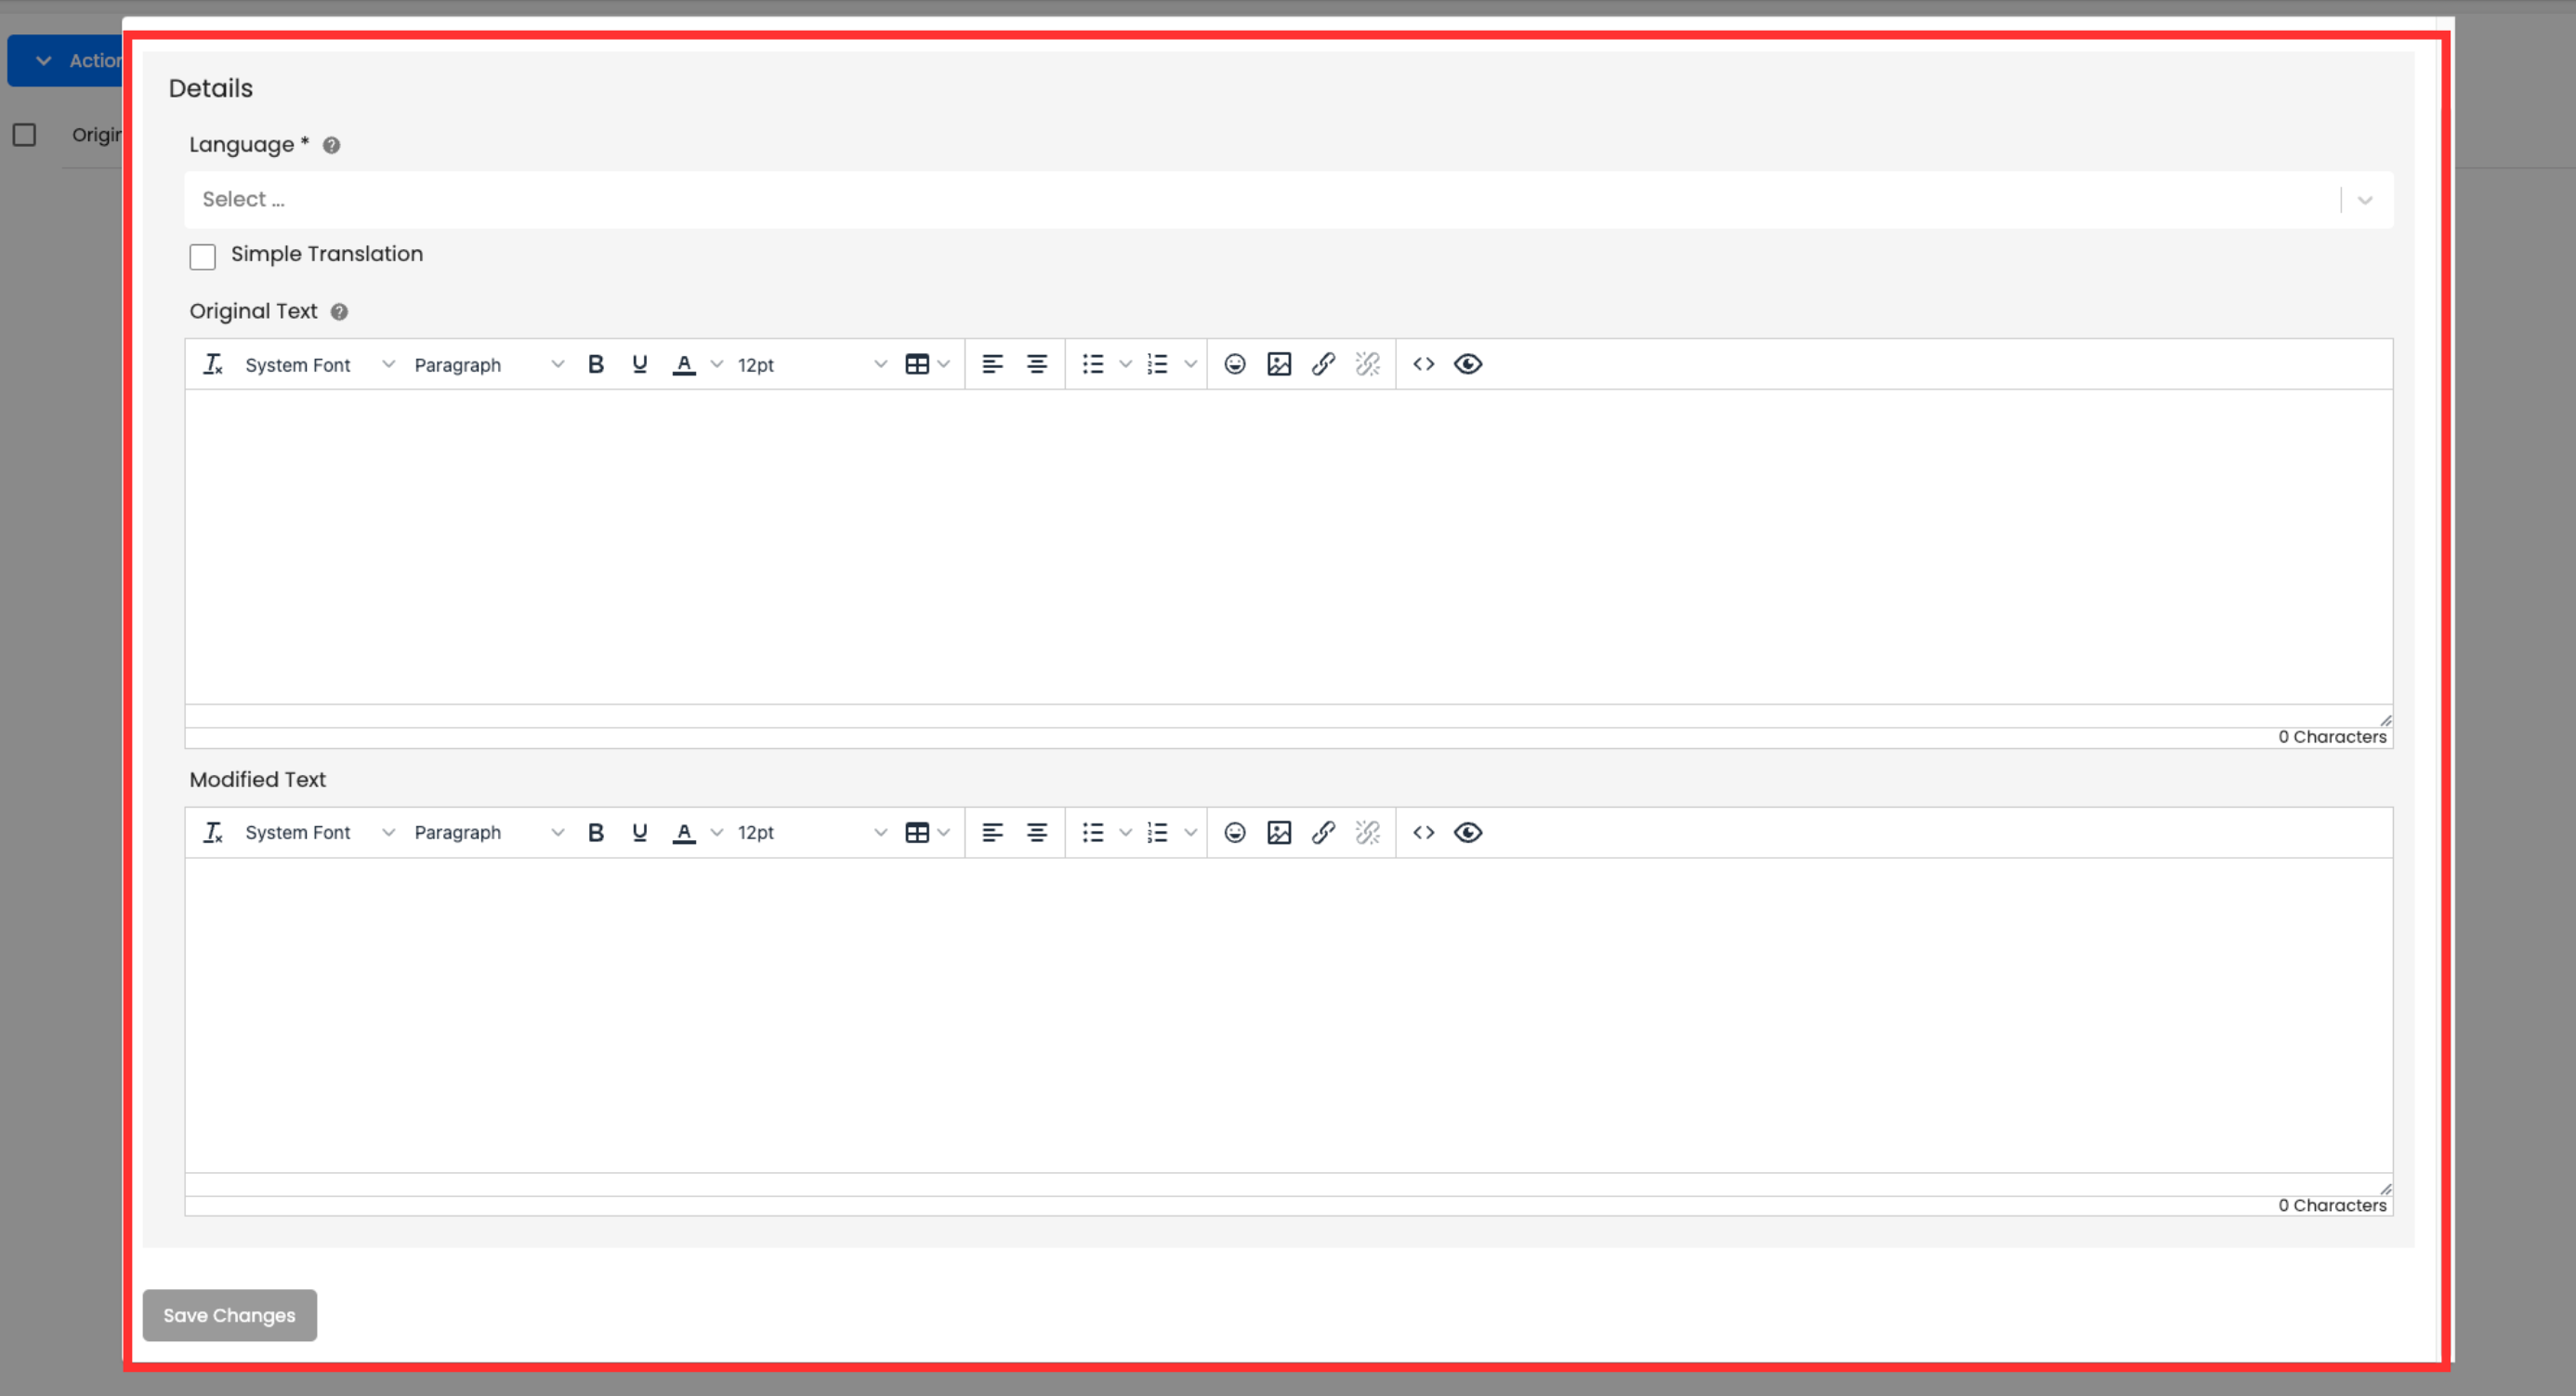
Above the Translations table, select Create

- Under the Languages field, select English or the language which your page is actively using
- Toggle on the Simple Translation checkbox if you would like to prevent the translation from implementing any HTML content.
- In most cases, toggling on this checkbox is not necessary.
- Under the Original Text field, paste the default text you would like to edit
- Be mindful of capitalization and spaces if you write the original text yourself.
- If changes are not being made try to do a plain paste (control + shift + V)
- Under the Modified Text field, write the new text that will overwrite the default text
-
Select Save Changes