How to Setup your Printers in the Event Dashboard
If you have rented printers from us here at PheedLoop, the printers are preconfigured to work with the PheedLoop system and the only step you need to do is confirm your printer’s serial number matches the printer’s serial number in your Event Dashboard.
Step 1.1 - Finding your printer’s serial number
Flip over your printer and you will notice a sticker as shown, and take note of your printer's "Serial No." (in this case, "D9N223901538"). Please note, you can also find the serial number by selecting Printer Info and reading the serial number of the Printer row from your printer’s touchscreen. This is ideal if moving the printer is ill-advised.

Step 1.2 - Connecting your printer to the Event Dashboard
If you are using printers outside of PheedLoop, you will need to take an additional step to configure them to connect to our PheedLoop servers. For instructions on how to do this, please review our Setting Up Your Rented On-Site Printer to Connect to PheedLoop Servers article.
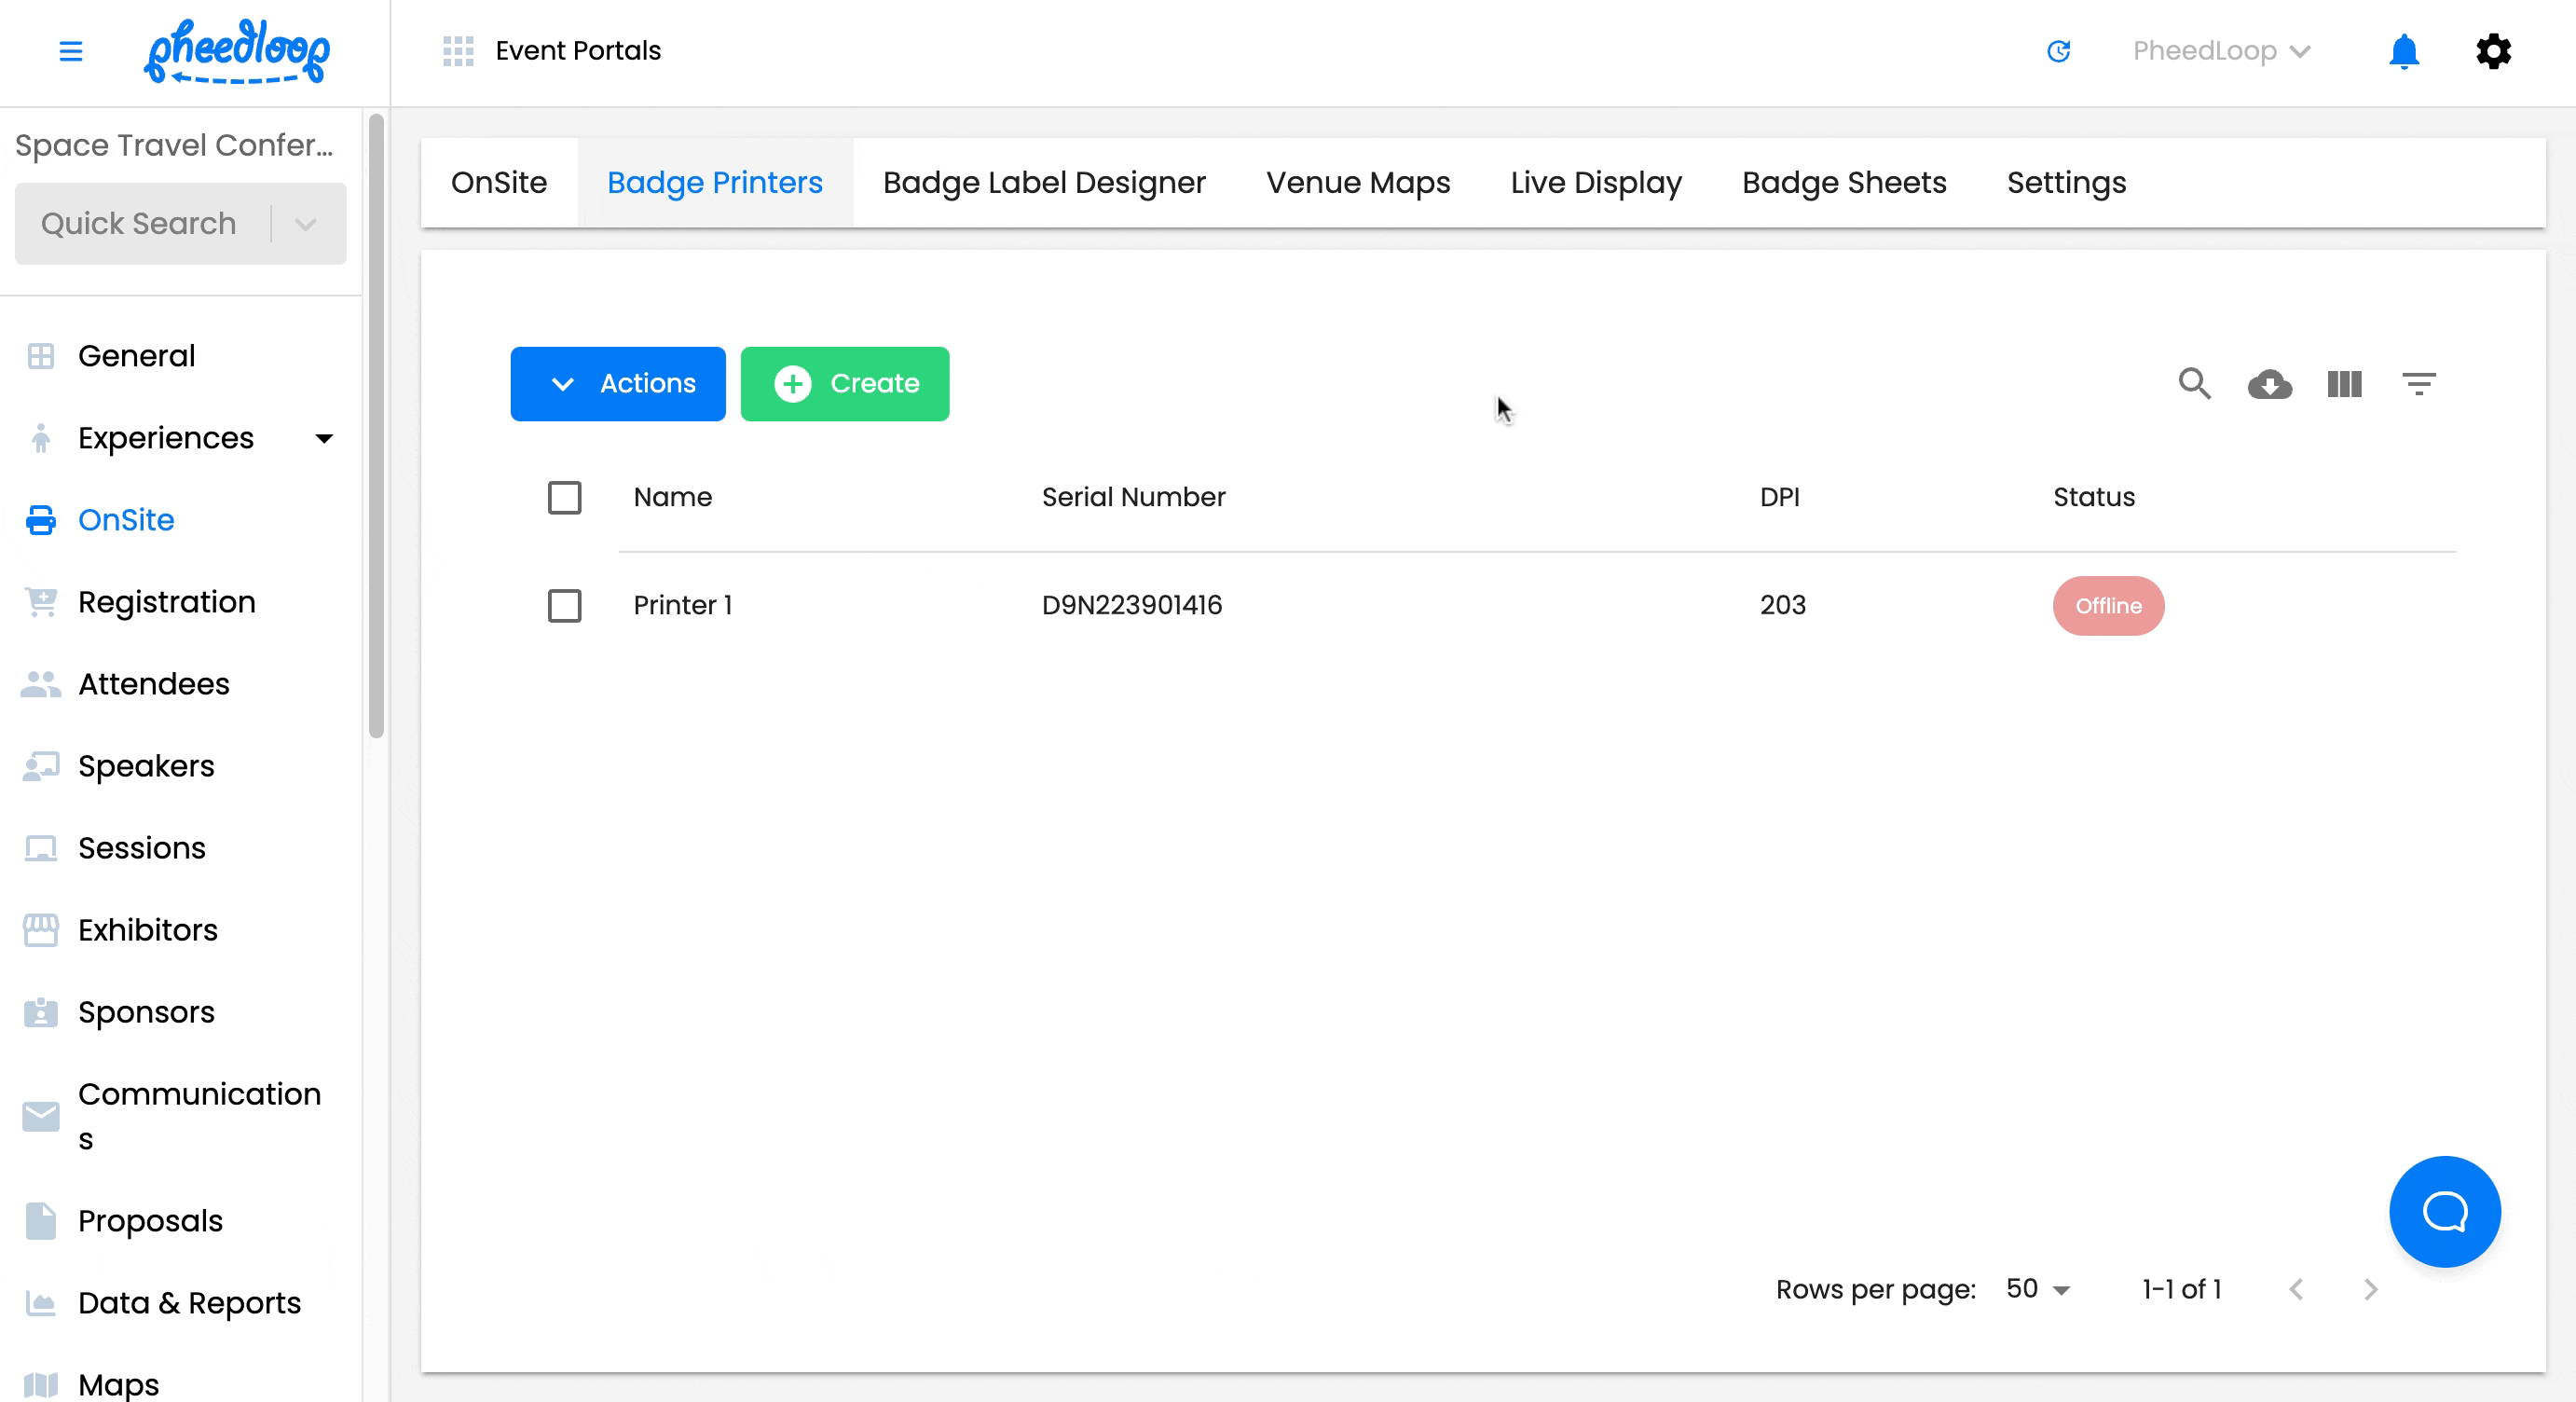
- From the Event Dashboard, navigate to OnSite > Badge Printers
- Above the printer table, select Create
- Under Name, enter any name you wish
- From our experience, most event organizers prefer to use the location the printer is stationed to easily identify them.
- Under Serial Number, enter the serial number belonging to your printer as discussed in Step 2.1 - Finding your printer’s serial number
- Under DPI, enter 203
- This DPI number is based on the printer model ZD621 which is PheedLoop’s flagship printer.
- Different models will have different ideal DPIs, if you are using a different model from the one listed above we strongly recommend testing prints with different DPIs to find the number that works for your printer(s).
- Under Media Type, select Mark (Black) if you have Transparent Labels with black bars on the back of the badge. Select Gap/Notch/Web if you have White Labels.
- In almost all cases, Mark (Black) is the setting you will need to select.
- Under Tear Off, select Advance Label for Automated Cutting
- If you wish to prevent the printer from cutting your badges, select Advance label to tear-off bar for manual tear-off.
- Under Tear Adjustment
- Enter 0 if you are using label rolls.
- Enter -25 if you are using Direct Thermal Badges. If the cut is off, use 65 instead.
- If neither number works, we recommend adjusting the number by increments of 5 until the ideal cut is made.
- Under Backfeed
- Select Backfeed before and after if you are using label rolls.
- Select Backfeed off if you are using Direct Thermal Badges.
- Under IP Address, enter your venue’s IP Address needed
- This step is optional. The IP Address will typically start with ‘192.’
As long as your printer is connected to the internet and you have performed the instructions under Step 1 - Configuring Your Printer correctly, your printer should now be connected and appear as Online under the Status column.
If the printer does not appear as Online under the Status column, it is likely that some sort of security measure is blocking access to the printer. If that is the case, you can manually connect the printer to wifi by following the steps in our Connecting your Printer to Wifi article.
Ensure the printer is not paused (the screen’s color scheme will appear yellow if it is paused) and ensure you have media to print on inside the printer to start printing.
Step 2 - Testing Your Printer
Testing your printer is important to ensure everything is functioning correctly. It's important that the following checks are accounted for if you are setting things up yourself:
- You have media in the printer itself with some of the badge sticking out
- Your printer is turned on and not paused
- Your printer is connected to the internet
Once both steps are accounted for, you can now print attendee badges from the Event Dashboard or OnSite Kiosk.
Step 2.1 - Printing Badges from the Event Dashboard
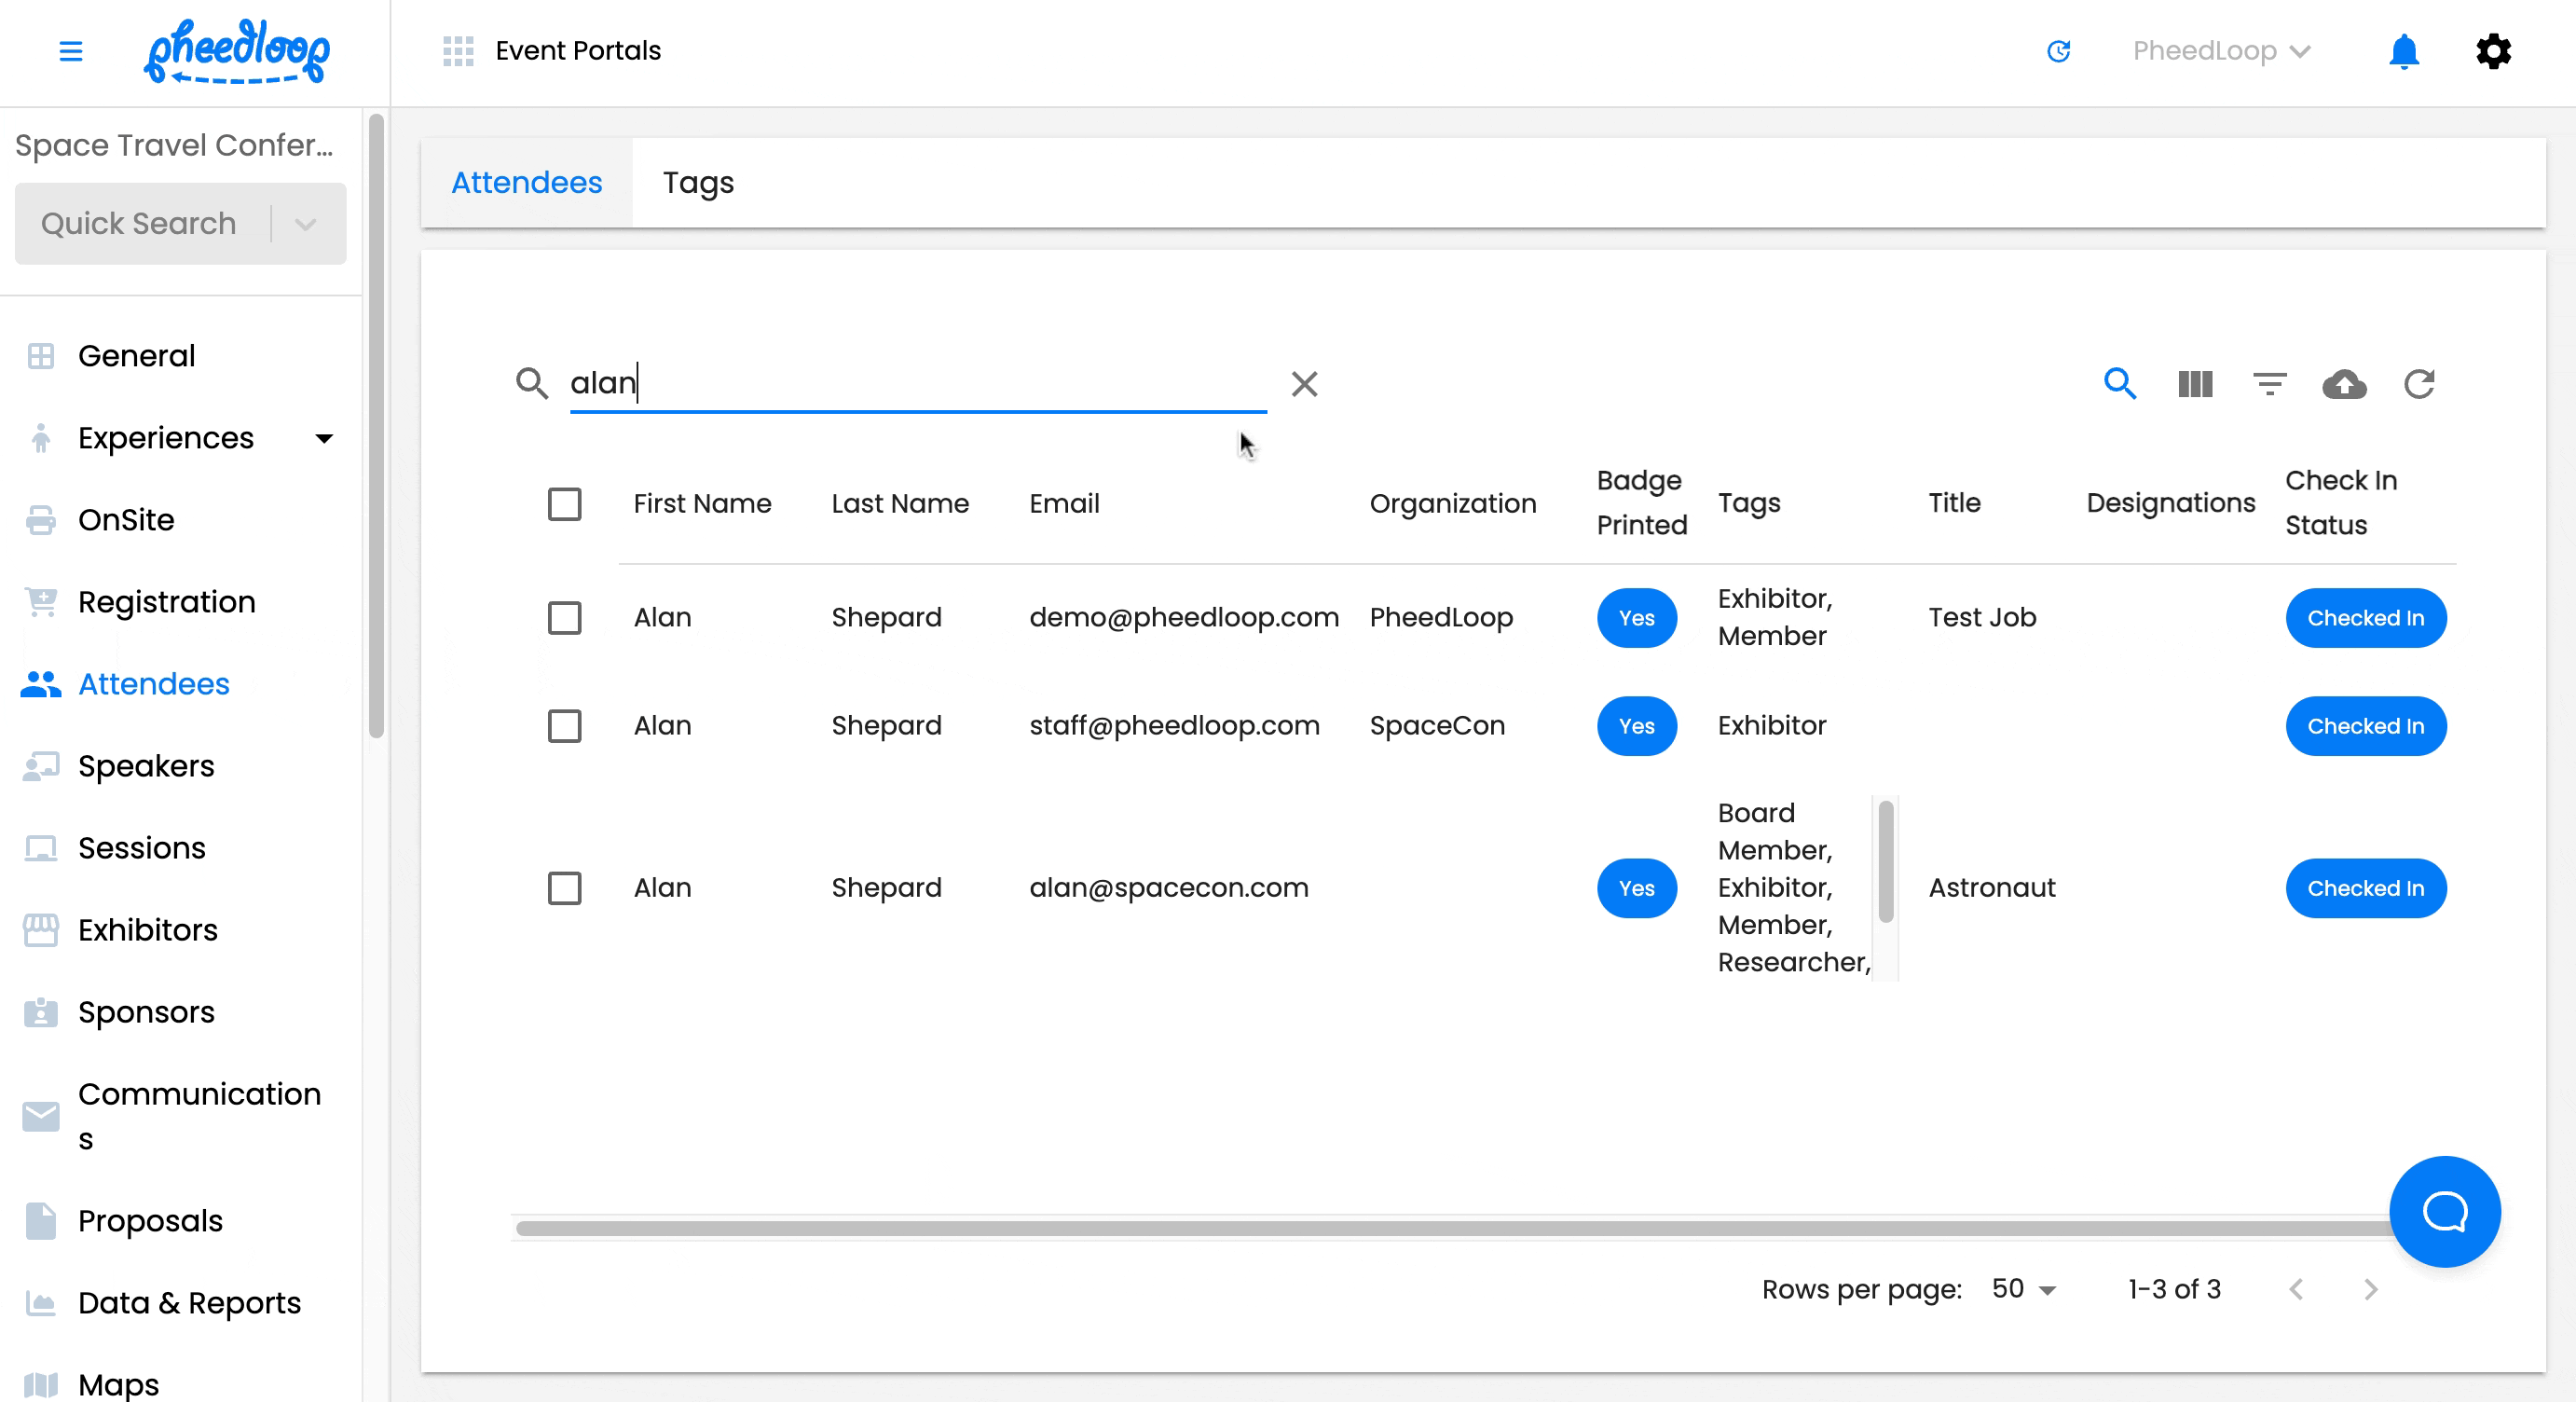
- From the Event Dashboard, navigate to Attendees > Attendees
- Select the attendee you wish to print
- You are able to print up to a maximum of 50 in one instance.
- Above the Attendees table, select Actions > Print Badge
- Under Select Printer, select one of the printers you wish to print from
- Under Select Template, select the template you wish to print the Attendee information to
- If you do not have your Badge Label Template set up and would like to learn more, please review our Setting Up Your Badge Label Template for On-site Badge Printing article.
Step 2.2 - Printing Badges from the OnSite Kiosk
- From the Event Dashboard, navigate to Event Portals > OnSite Portals > OnSite (Check-In Kiosk)
- Login to OnSite with a team member’s account
- Select the gear icon at the top right corner to access the settings
- Under Printers, select the printer you wish to restrict the Portal to print from
- Under Default Template, select the template you wish to restrict the Portal to
- From the Home Screen, select Search and enter the name of an attendee
- Alternatively, you can select Scan and present the ebadge of an attendee from the PheedLoop Go! App.
- Select the Attendee from the list
- Select Yes
Step 2.3 - Resetting the Badge Print Status from the Event Dashboard

- From the Event Dashboard, navigate to Attendees > Attendees
- Select the checkbox of the Attendee you wish to reset
- Above the Attendees table, select Actions > Reset Badge Print Status
- The status will now be reset and displayed as No instead of Yes under the Badge Printed column.
- Select Print Badge