How can I customize and enable Speaker Tags?
Speaker Tags are a useful feature to customize the way your speakers appear in the Event Website, Virtual Portal and Event App. By creating and assigning tags, you will be able to grant titles for any of your speakers.
Speaker Tags allow you to apply an event-wide label to all Speakers in the Speaker page. If Event Administrators would like to apply a Session-specific label, then Speaker Roles should be used.
By default, tags are ordered by when they are created, with the most recent one being at the bottom. This order can be changed at any time from the Event Dashboard.
Please note that Speaker Tags and Speaker Roles are two different concepts. For more information on how to set up Speaker Roles, please review our How can I enable and customize Speaker Roles? article.
Creating Tags
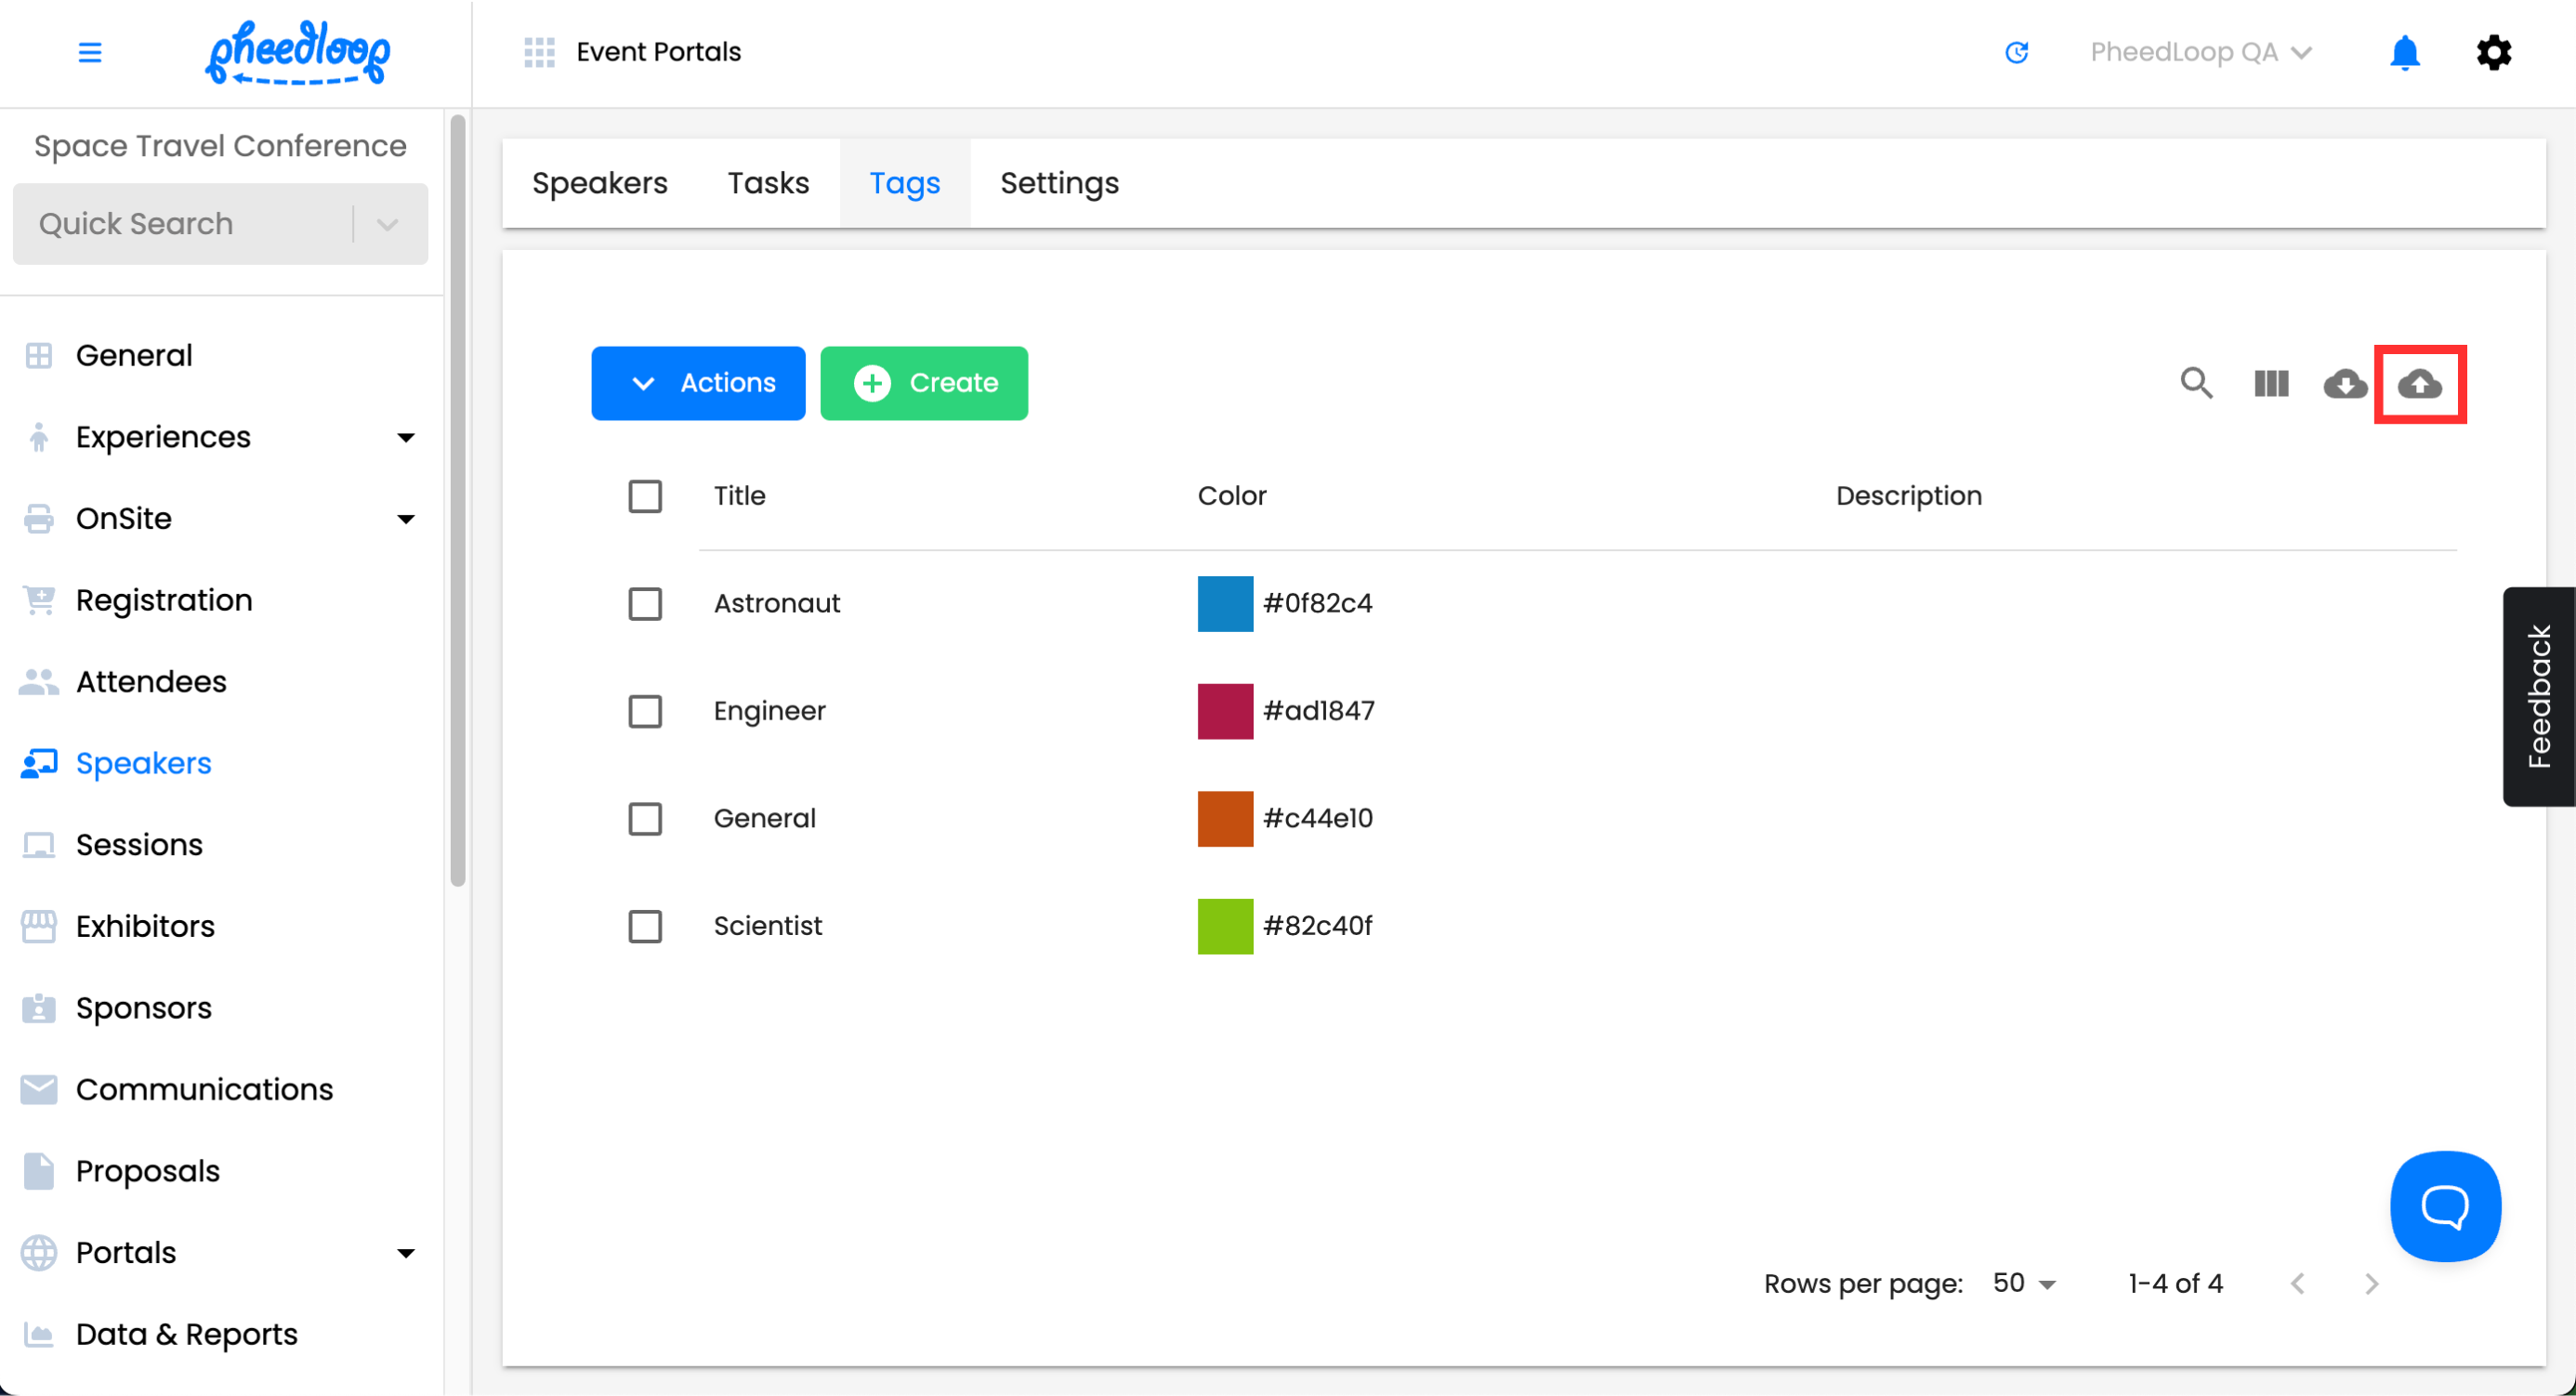
- From the Event Dashboard, navigate to Speakers > Tags
-
Above the Tags table, select Create

- Under the Title field, enter a name for your tag
- Under the Description field, enter an internal note for your tag
- Descriptions do not appear on front end portals such as the Event Website. They are only there for internal use.
- Under the Color field, enter a hex code for the color of your tag
-
Select Save Changes


The Tag will now be created based on your settings.
Assigning Tags
- From the Event Dashboard, navigate to Speakers > Speakers
-
Select the Speaker you wish to assign a tag to

- Scroll down to Advanced Options
- Under the Tags field, select the tag you want to assign to the speaker
-
Select Save Changes


How to Bulk Assign Tags
For convenience, multiple tags can be assigned at once.
- From the Event Dashboard, navigate to Speakers > Speakers
-
Select the checkboxes of the speakers

-
Above the Speakers table, select Actions > Edit

- Scroll down to Advanced Options
- Toggle on the Tags checkbox to unlock it
- Under the Tags field, select the tag(s) you wish to assign to the speakers
-
Select Save Changes


Using the Manage Formats tab
An optional feature is available when selecting the Manage button next to the Tags field. Selecting this will open the Manage Formats tab which can be used to add, edit and remove existing Speaker Tags. The Manage Formats tab serves the same purpose as the Tags Page in the Event Dashboard.
Edits made in this menu will be synced with the Tags page in real time.
-
From the Event Dashboard, navigate to Speakers > Speakers
-
Above the Speakers table, select Actions > Edit
- Scroll down to Advanced Options
-
Next to the Tags field, select Manage

- Select the Add Speaker Tag button to create a new speaker tag
- Select Download Table Data to download your tags in a .CSV file format
- Under the Title column enter the title of your tag
- Under the Color column, enter a hex code for the color of your tag
- Under the Description column, enter an internal note for your tag
-
Under the Actions column, select Save to save your progress or select Delete to remove the tag


How to Bulk Import Tags
Multiple tags can be created using our Tag template. Once information is filled out in the template, all data can be transferred into the Event Dashboard.
Downloading the Tags Template
- From the Event Dashboard, navigate to Speakers > Tags
-
Select the Upload button
-
Select Download Template
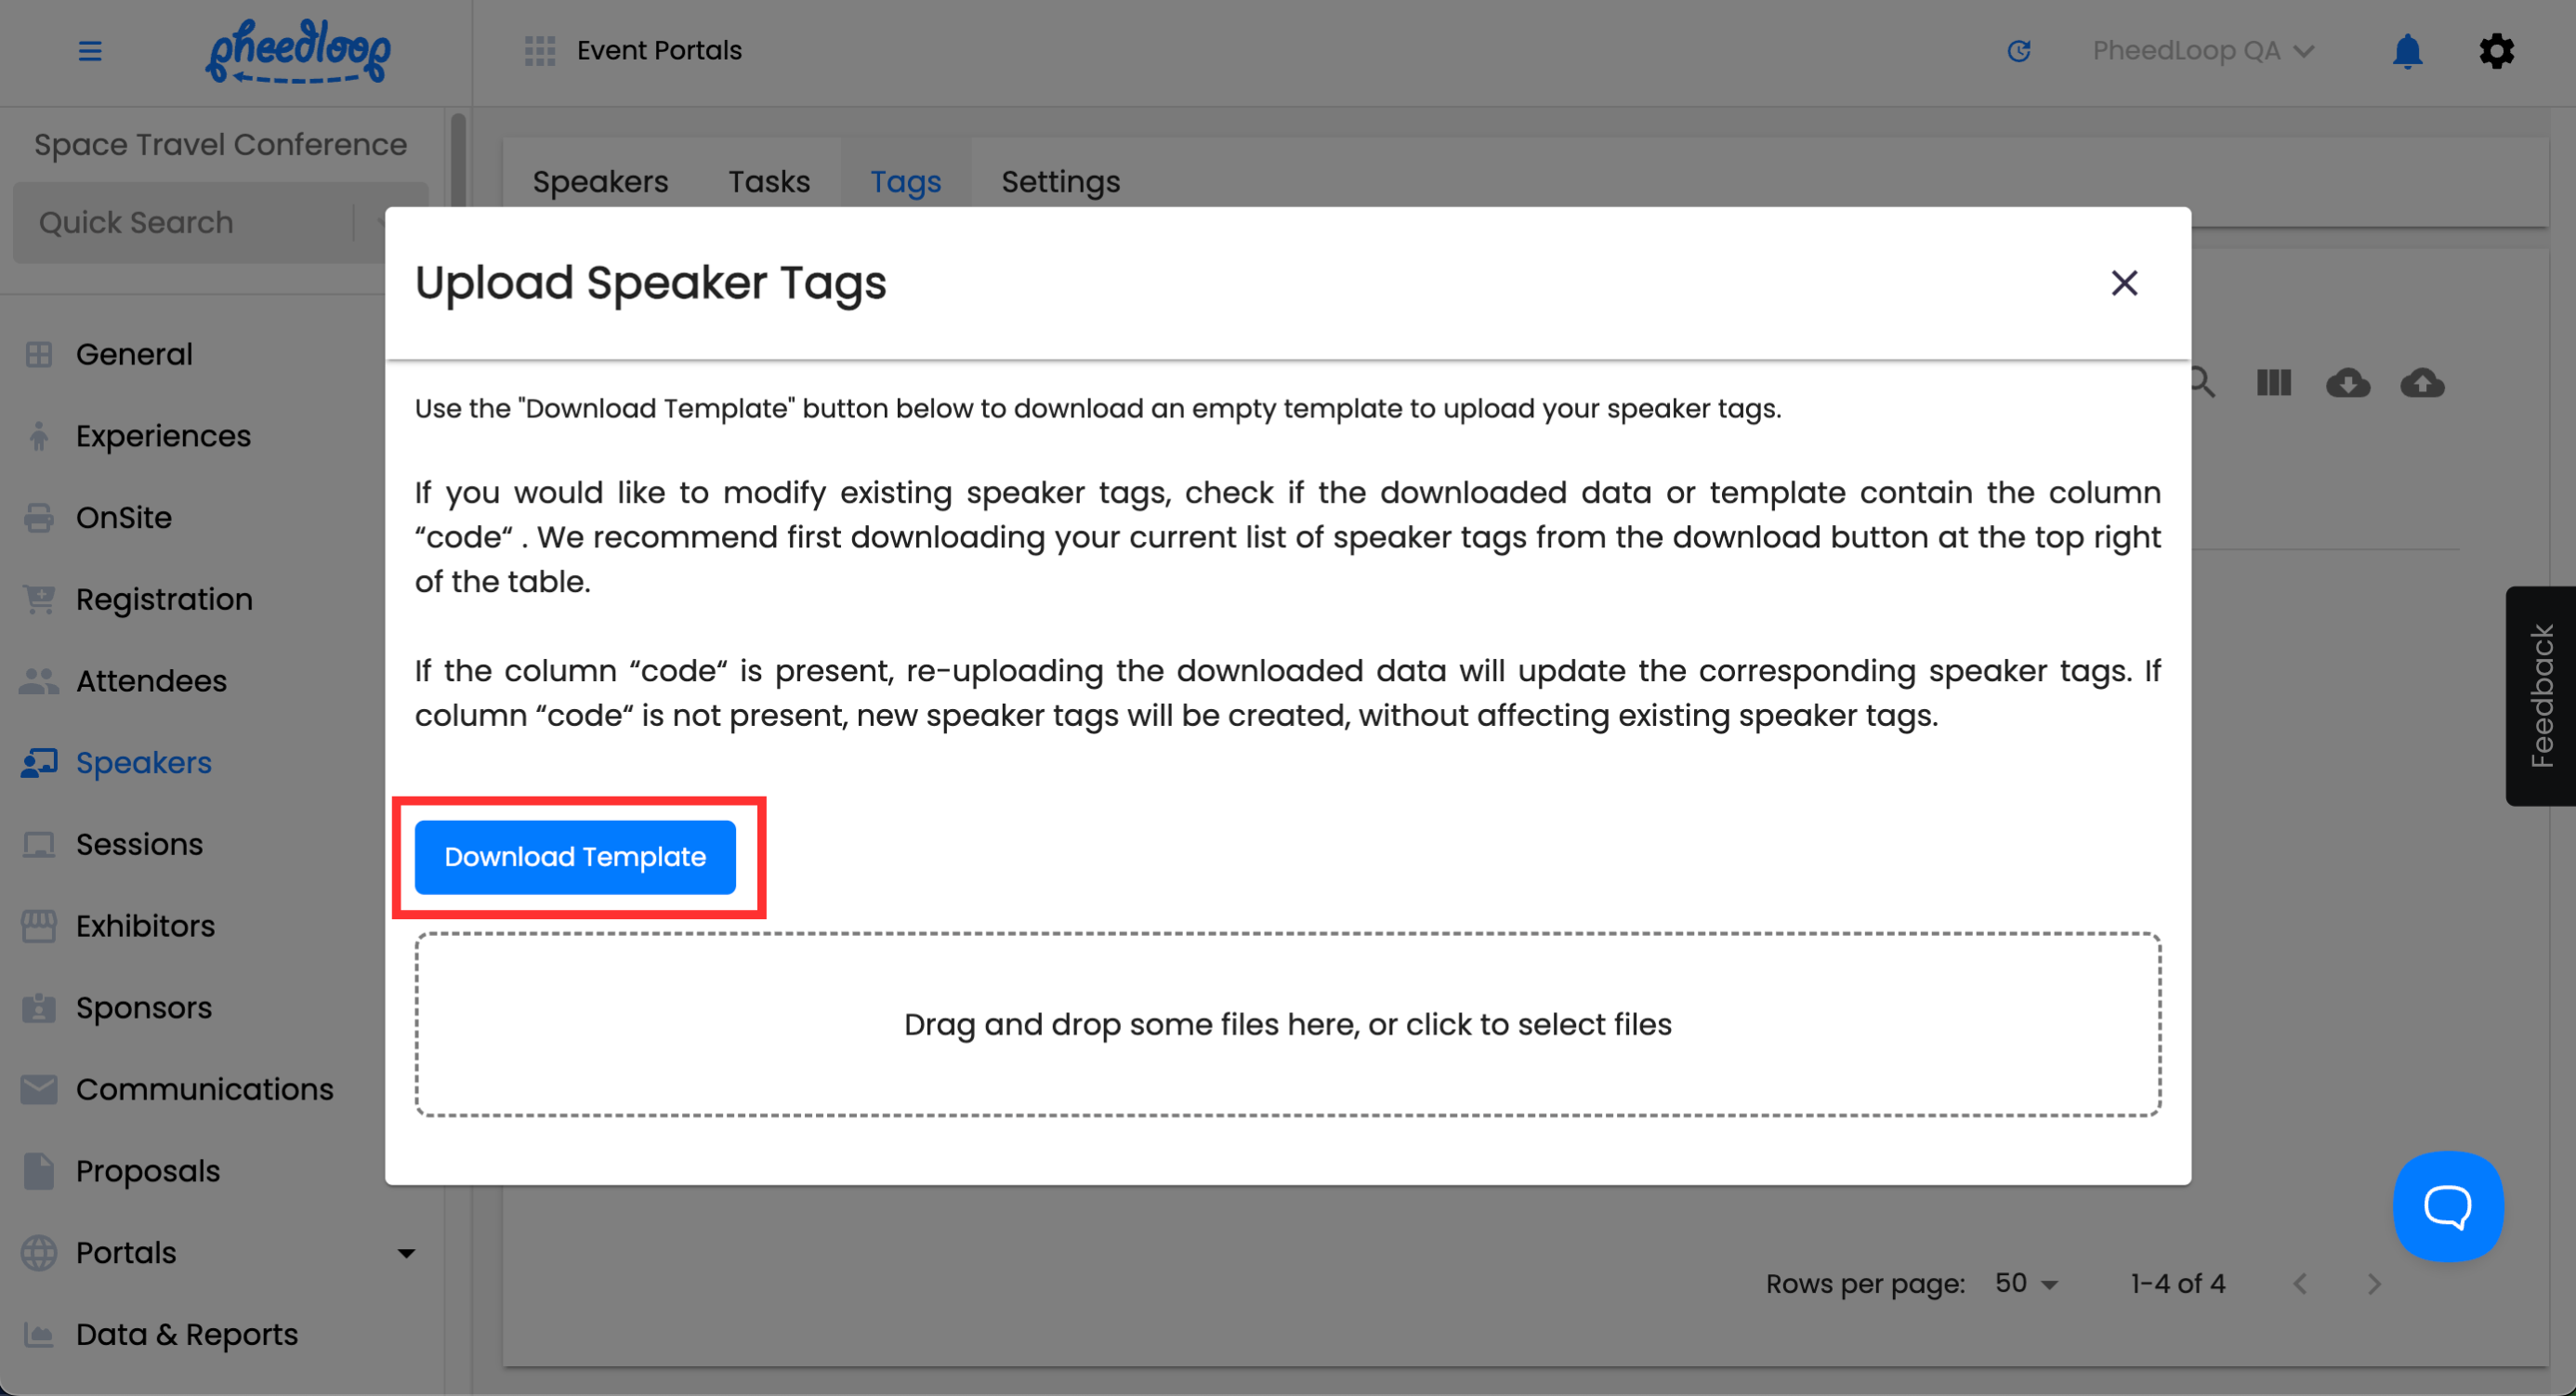


The tag template will now be downloaded into your device.
- Open the tag template file
- Fill out the information outlined in the Headings in the Tag Import Template step below
- Save the document as a CSV file
- From the Event Dashboard, navigate to Speakers > Tags
- Above the Tags table, select the upload button
- Select the Drag and drop some files here, or click to select files button to upload your template
-
Select Submit


Headings in the Tag Import Template
The tag template has multiple columns to fill out. Below we will define each column and their purpose.
| code | The code column is meant to be used only to update existing speaker tags. Please leave this column blank if you are creating new Speaker tags. |
| title | Enter the name of your tag under the title column. |
| description | Enter the description of your tag. Please note, that the description will not appear in front end portals like the Event Website. |
| color | Enter the color of the speaker tag you would like to assign the Speaker Tags. Colors only appear in the Virtual Portal and Event App. |