How Quizzes Work
The Learning Management System comes with a built-in quiz and form feature, which organizers can create for Members to fill out.
When creating a form, organizers can choose between a standard membership form or a quiz. Membership forms are not graded, making them ideal for data gathering purposes such as course feedback. Quizzes are graded and can be set to require a percentage to pass.
Creating a Membership Form
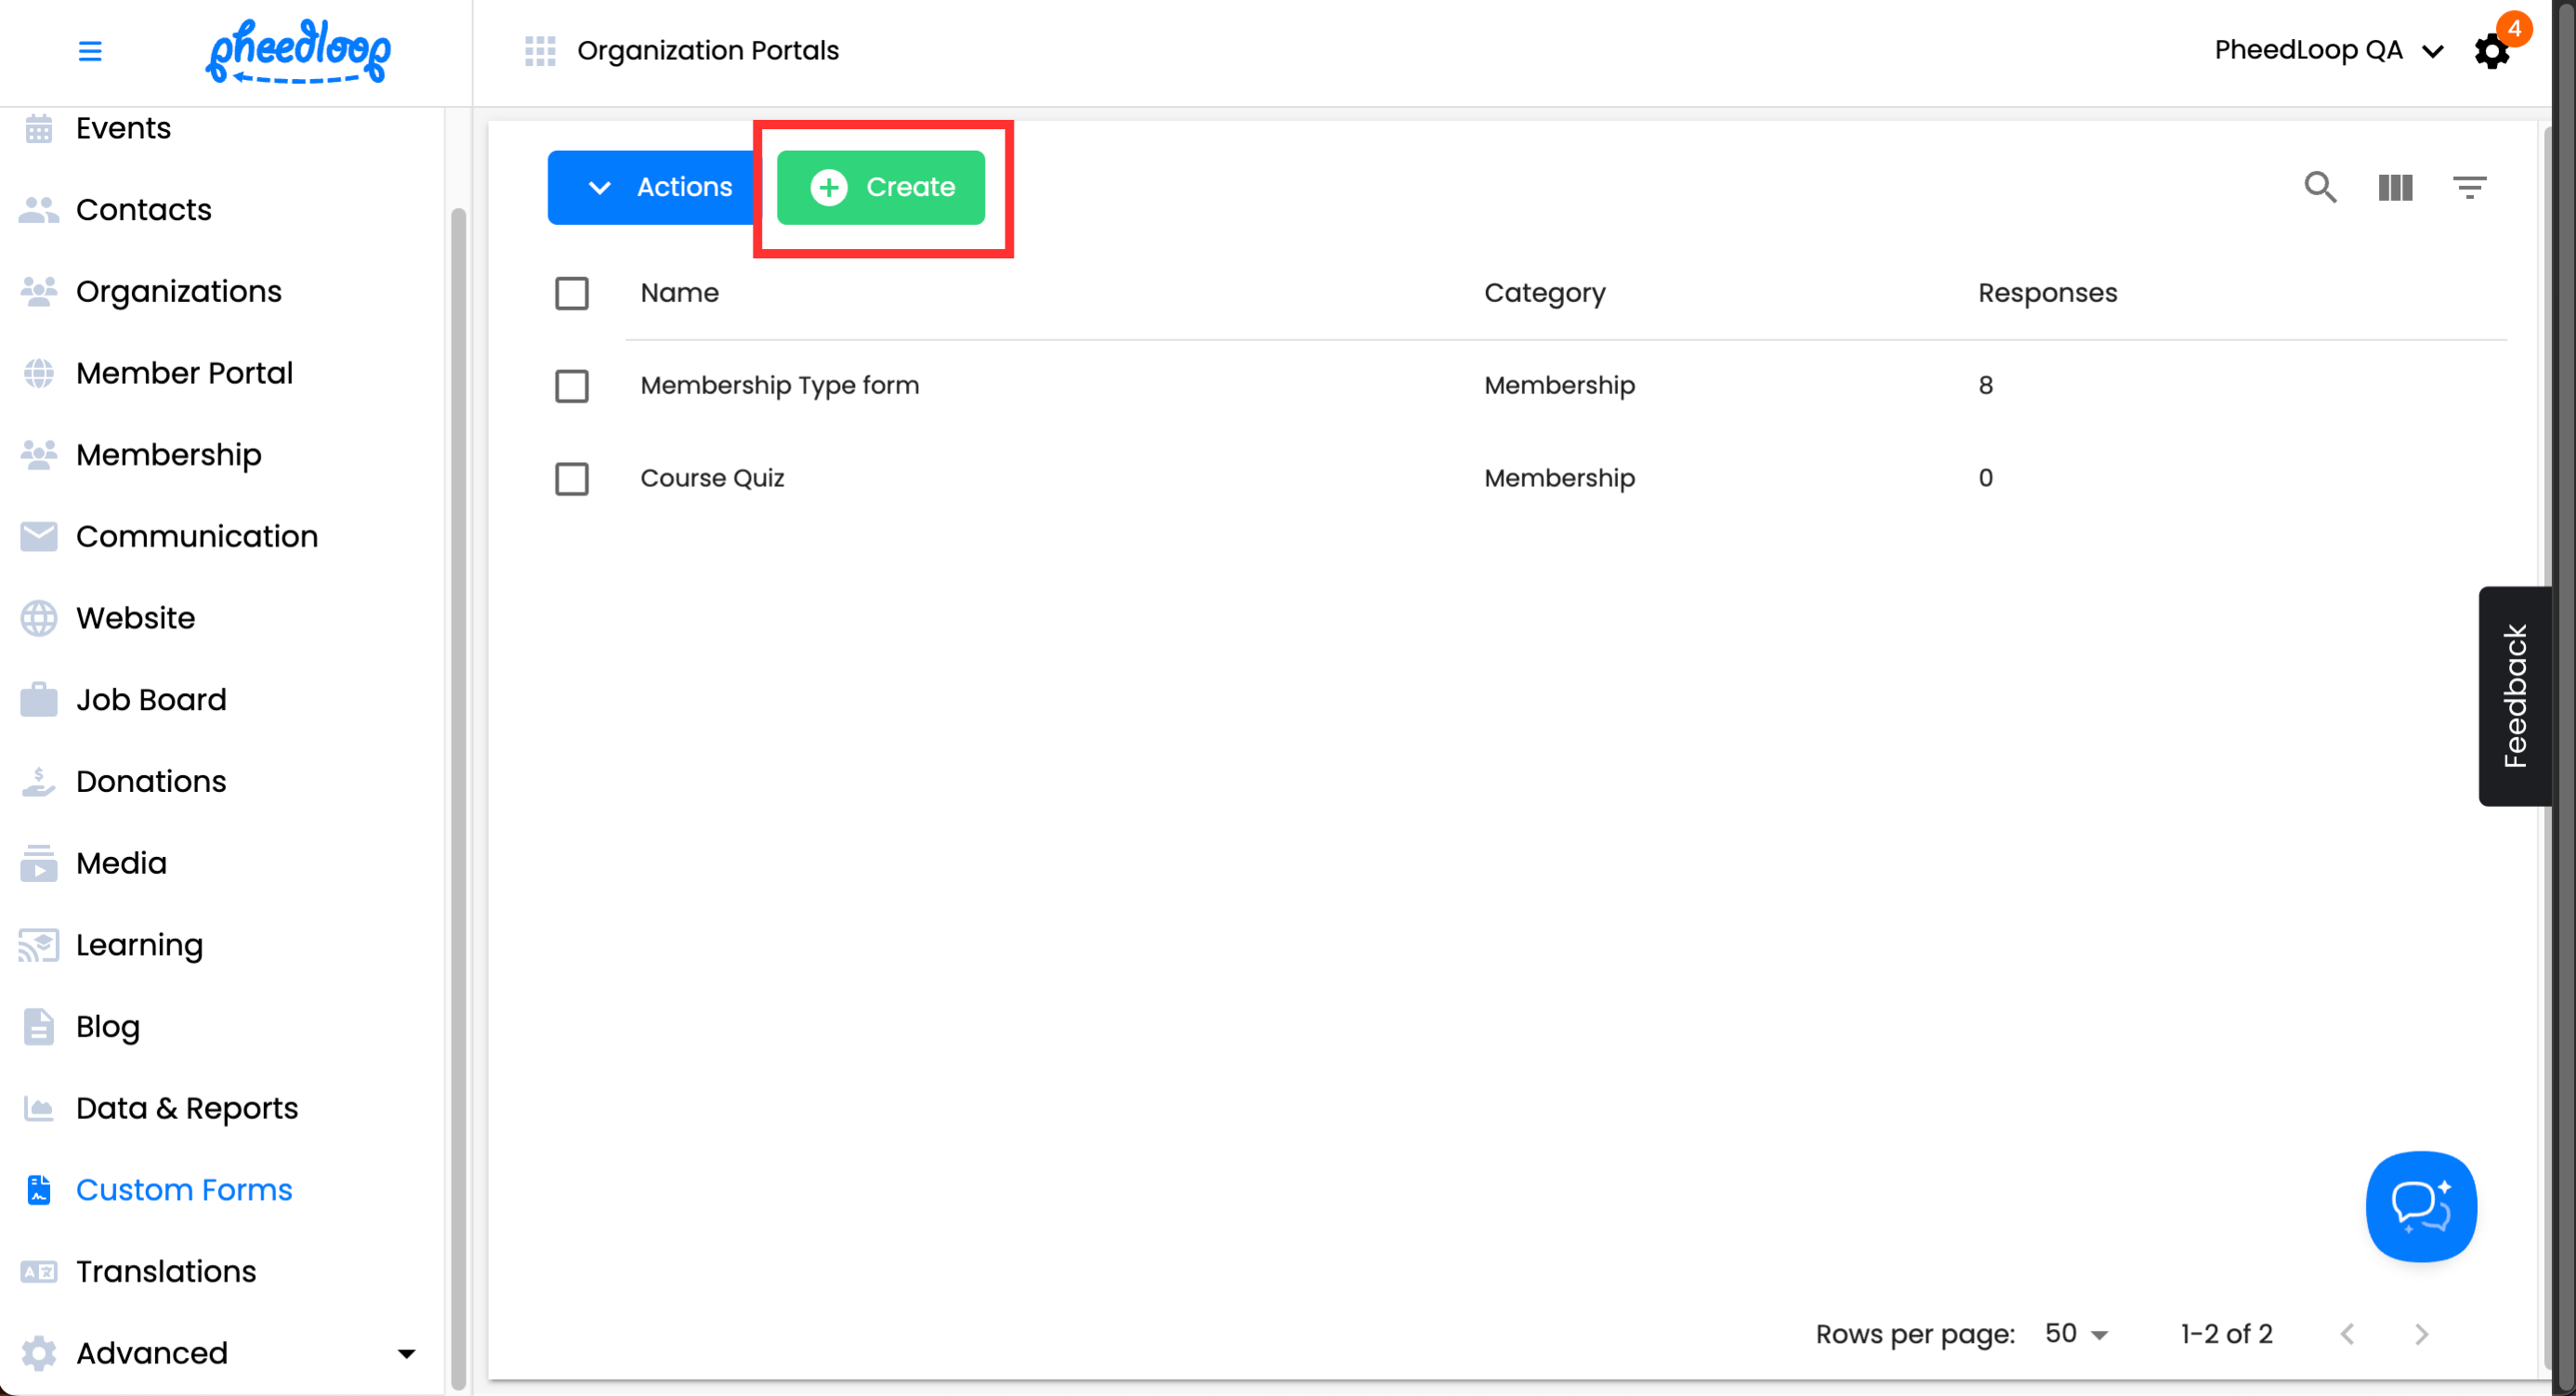
- From the Membership Dashboard, navigate to Custom Forms
Above the Custom Forms table, select Create
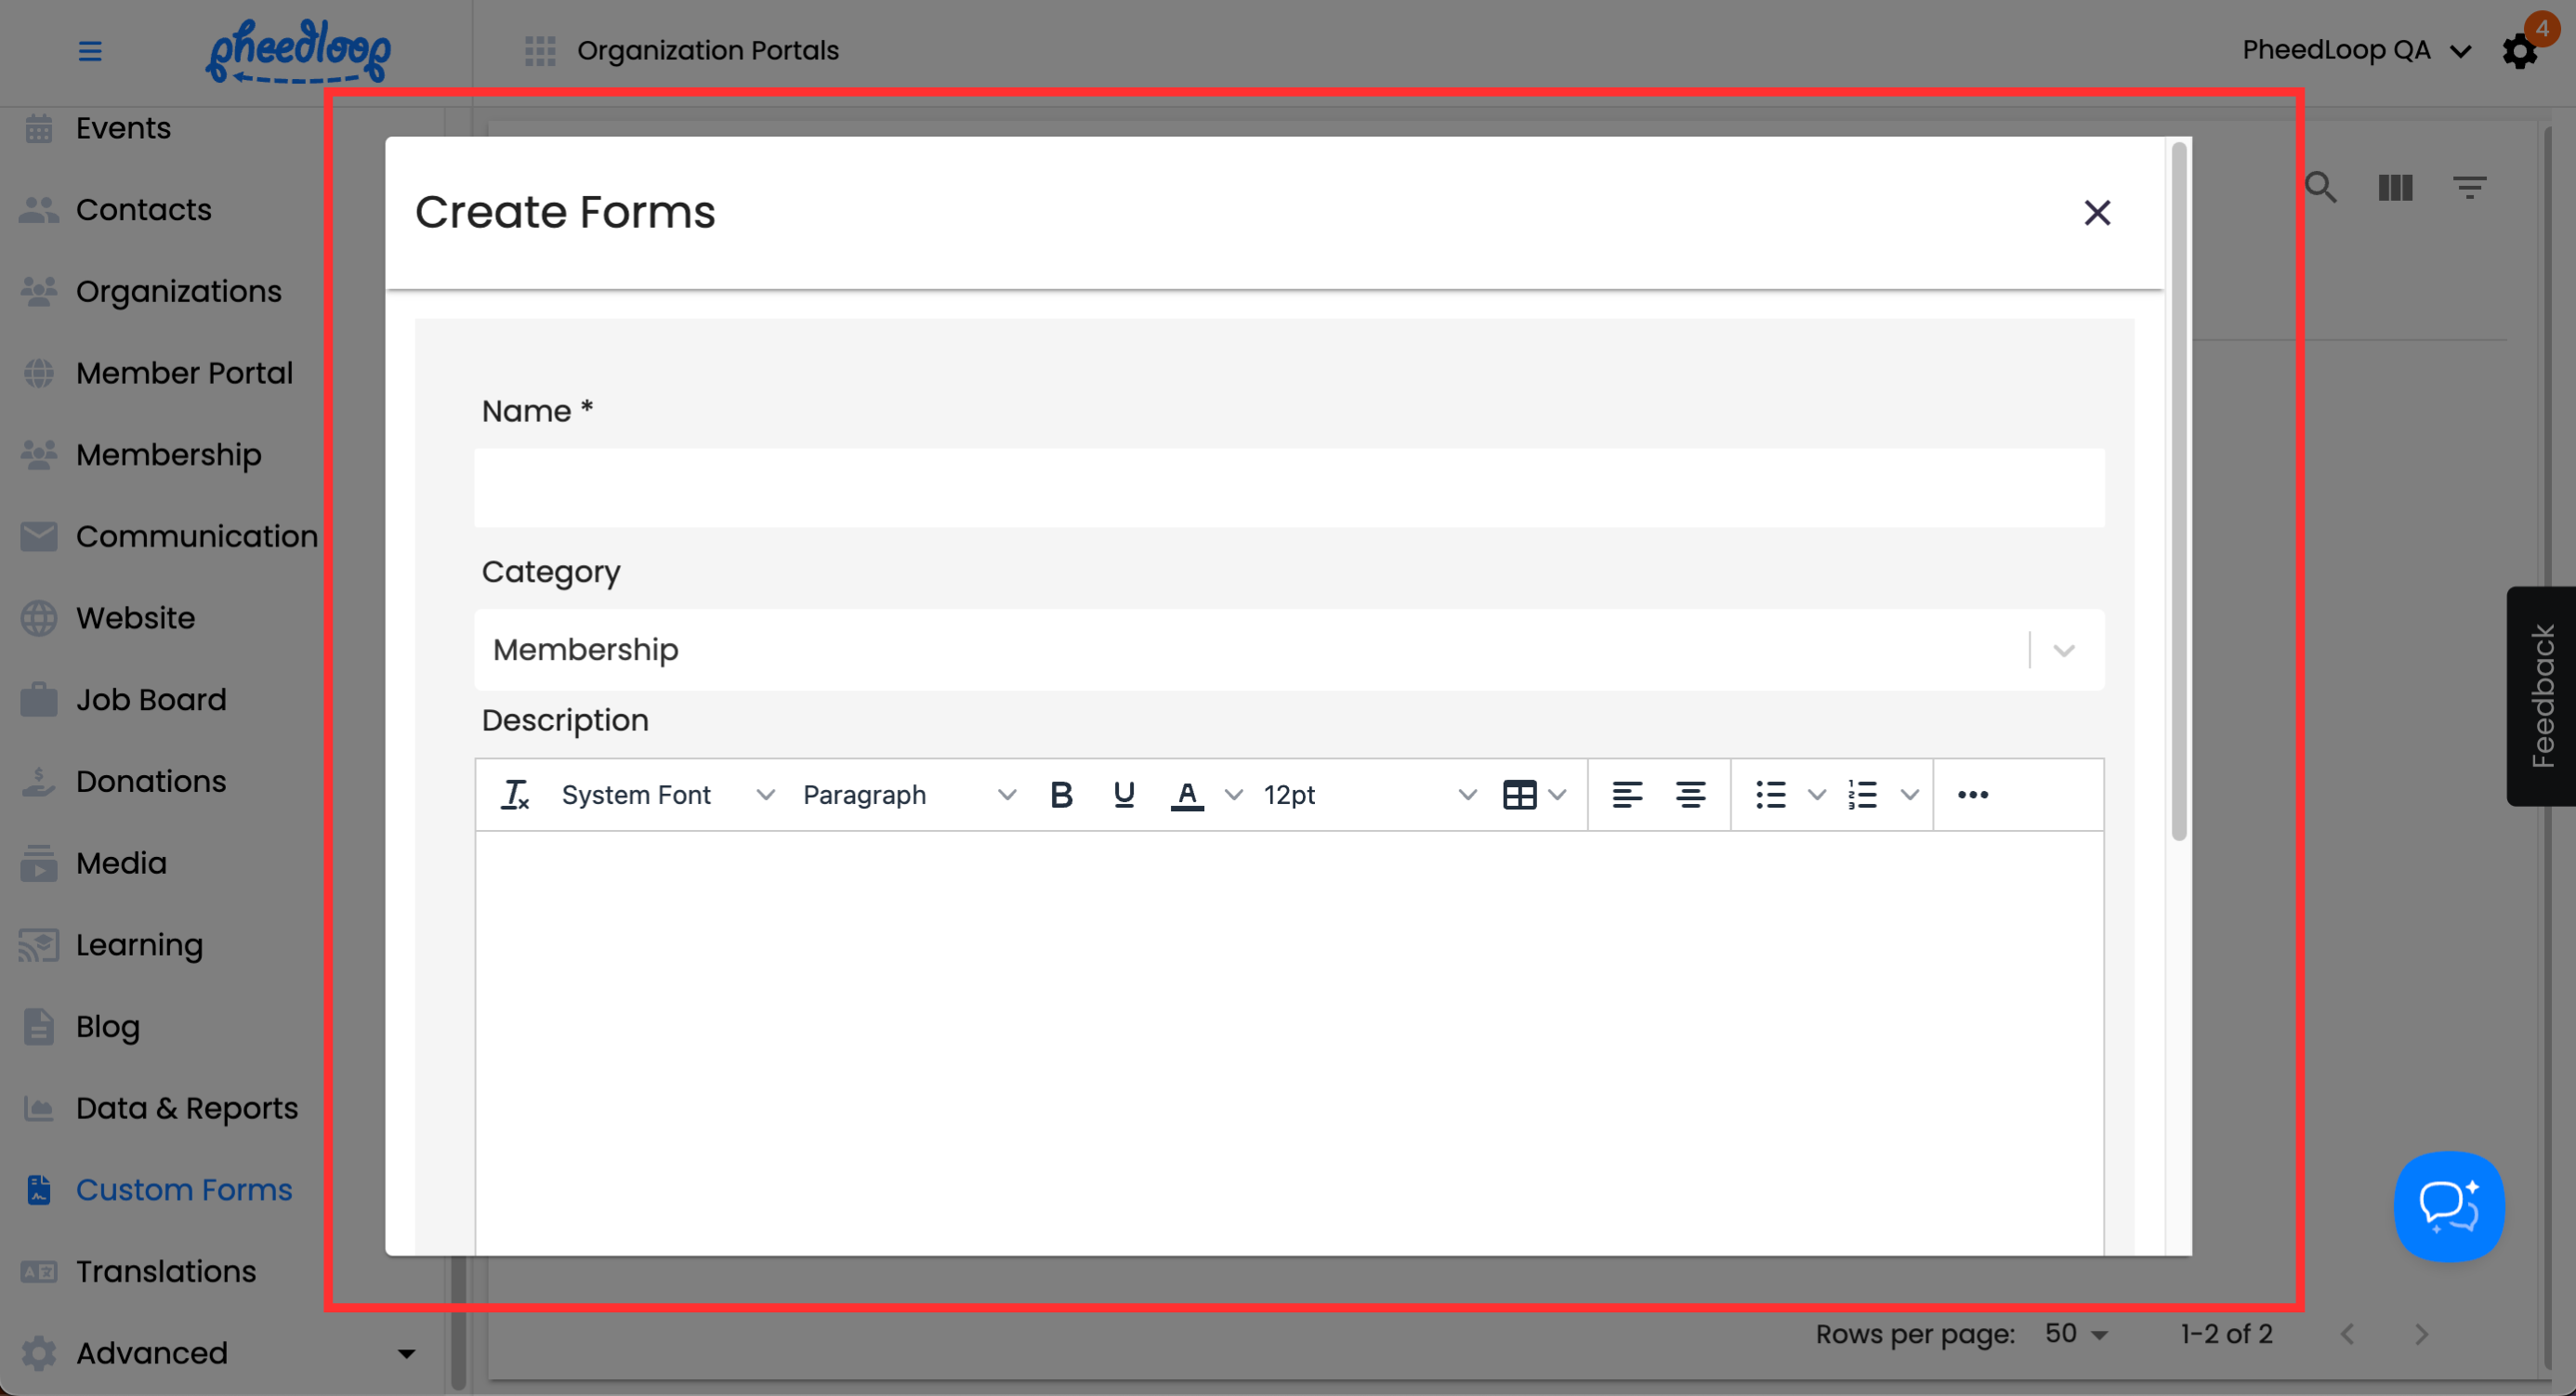
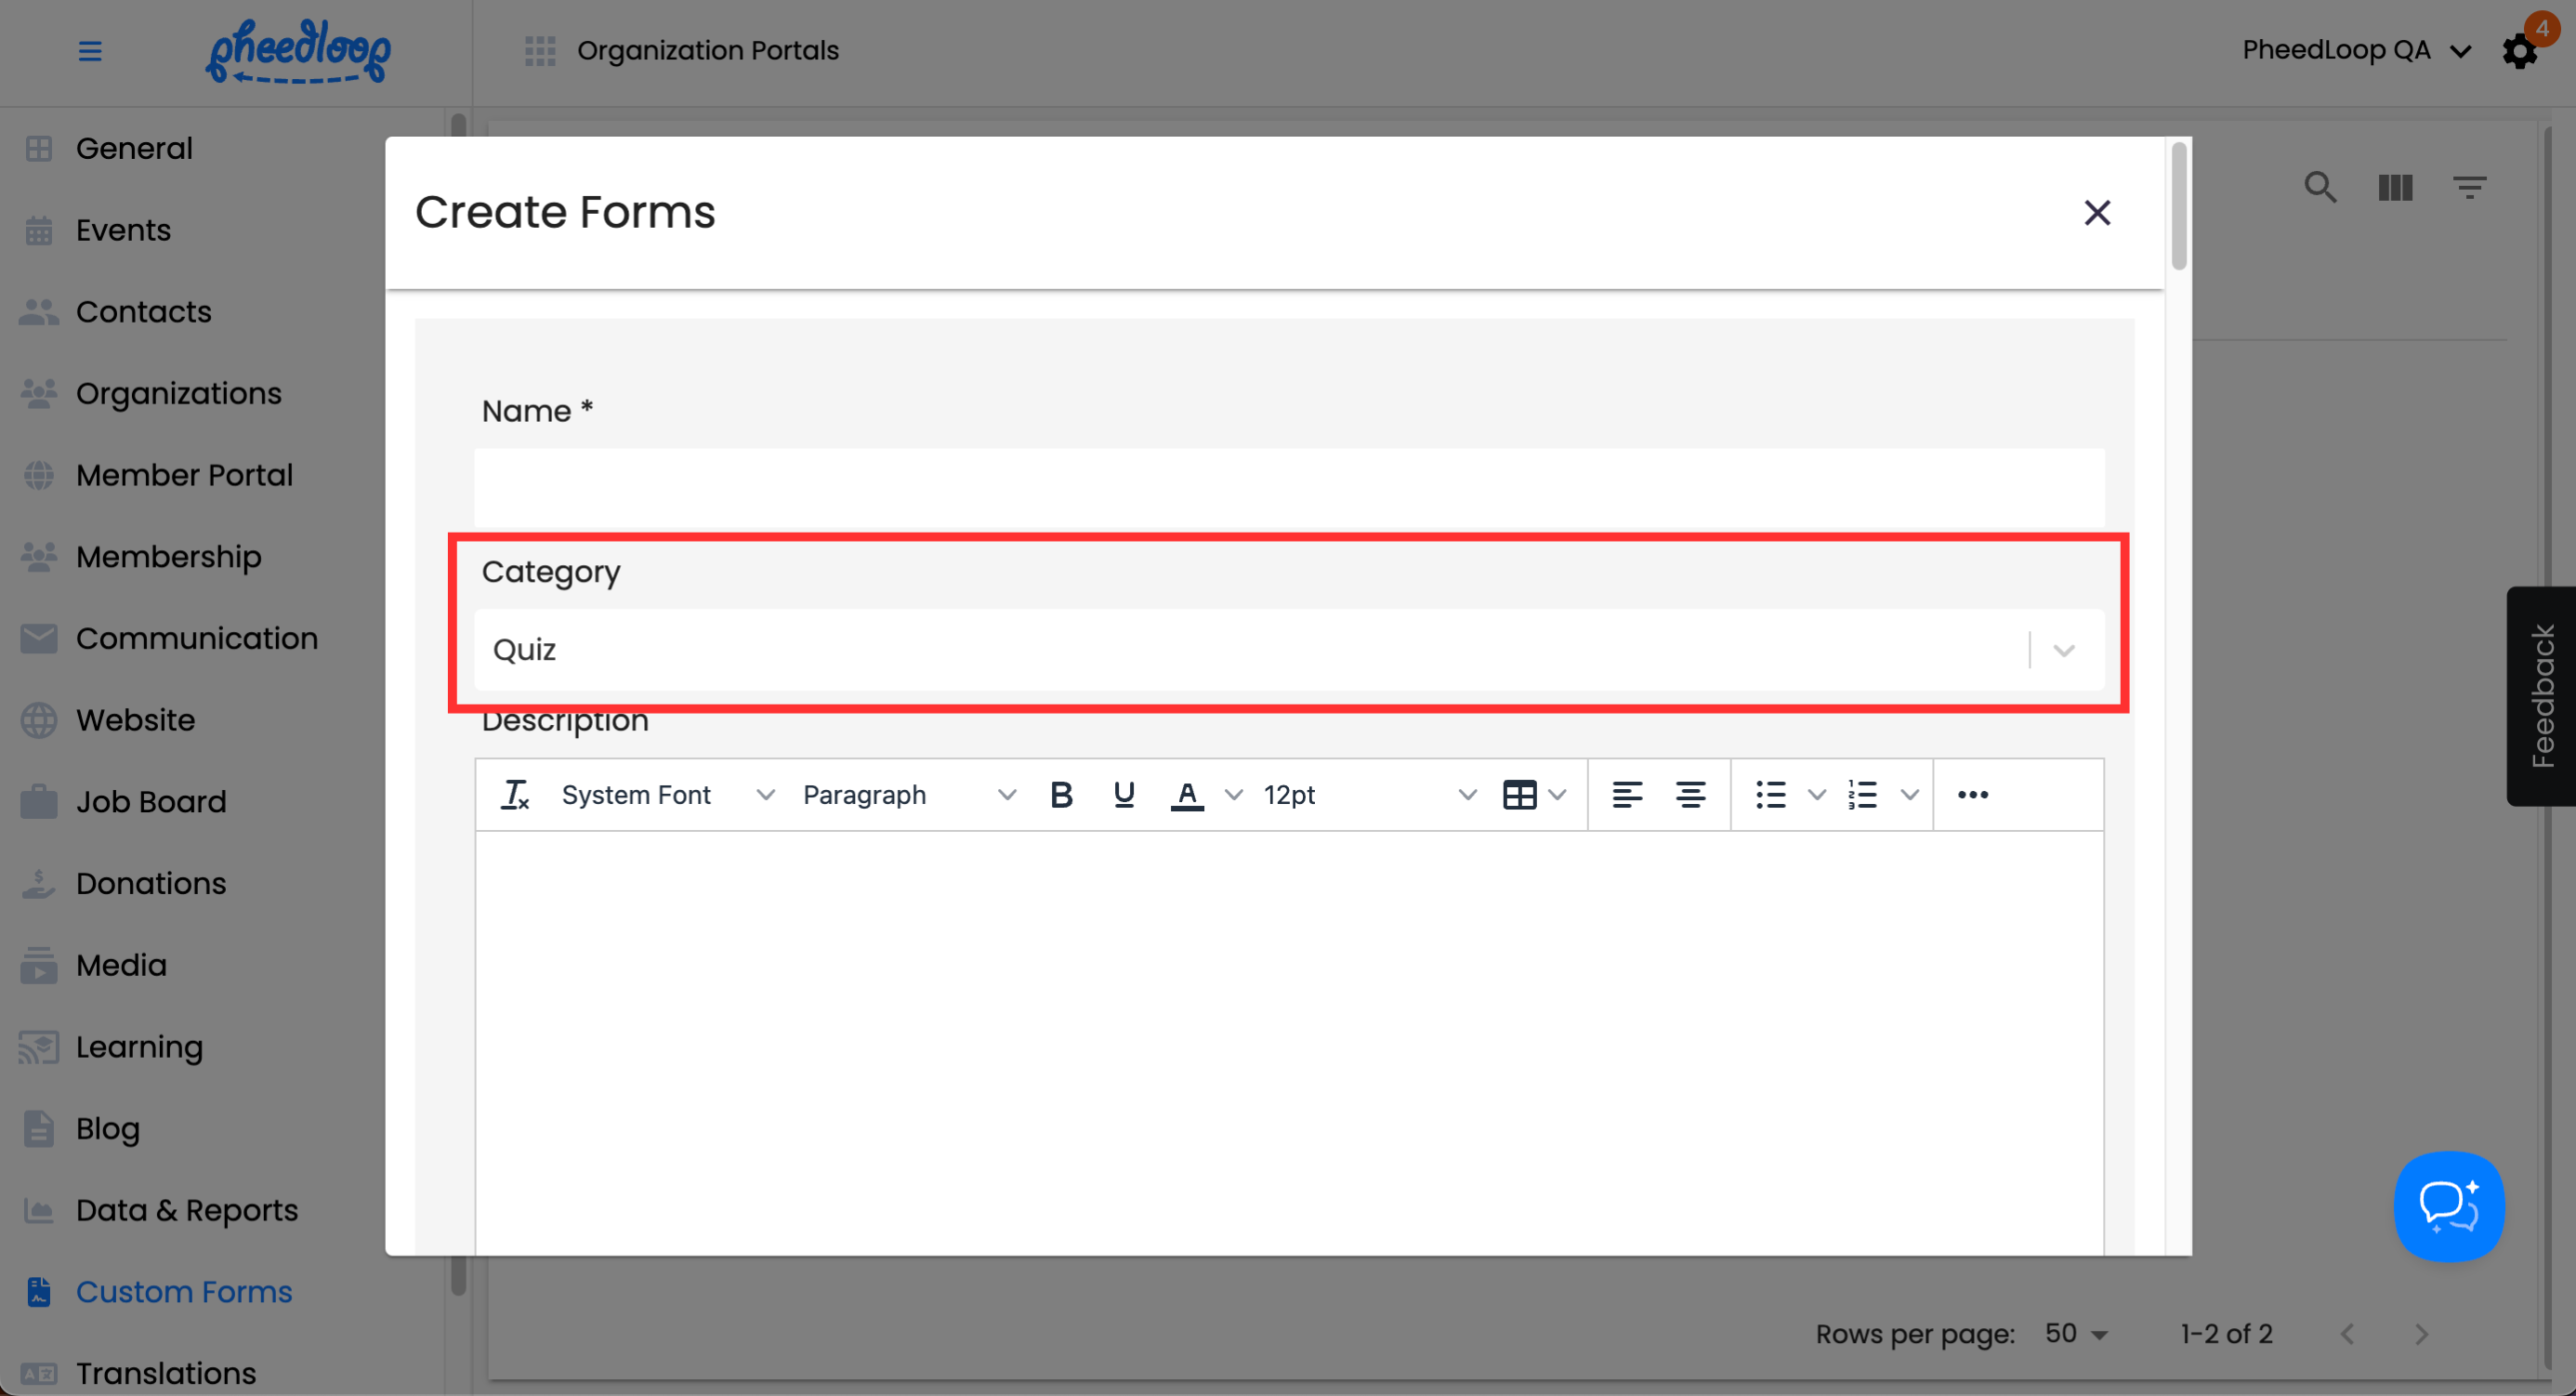
- Under the Name field, enter a name for the quiz
- Please note, this name will appear in the Learning Portal and is visible to members.
- Under the Category field, select Membership
- Under the Description field, enter a description for the quiz
The description will appear during the quiz and is visible to members.
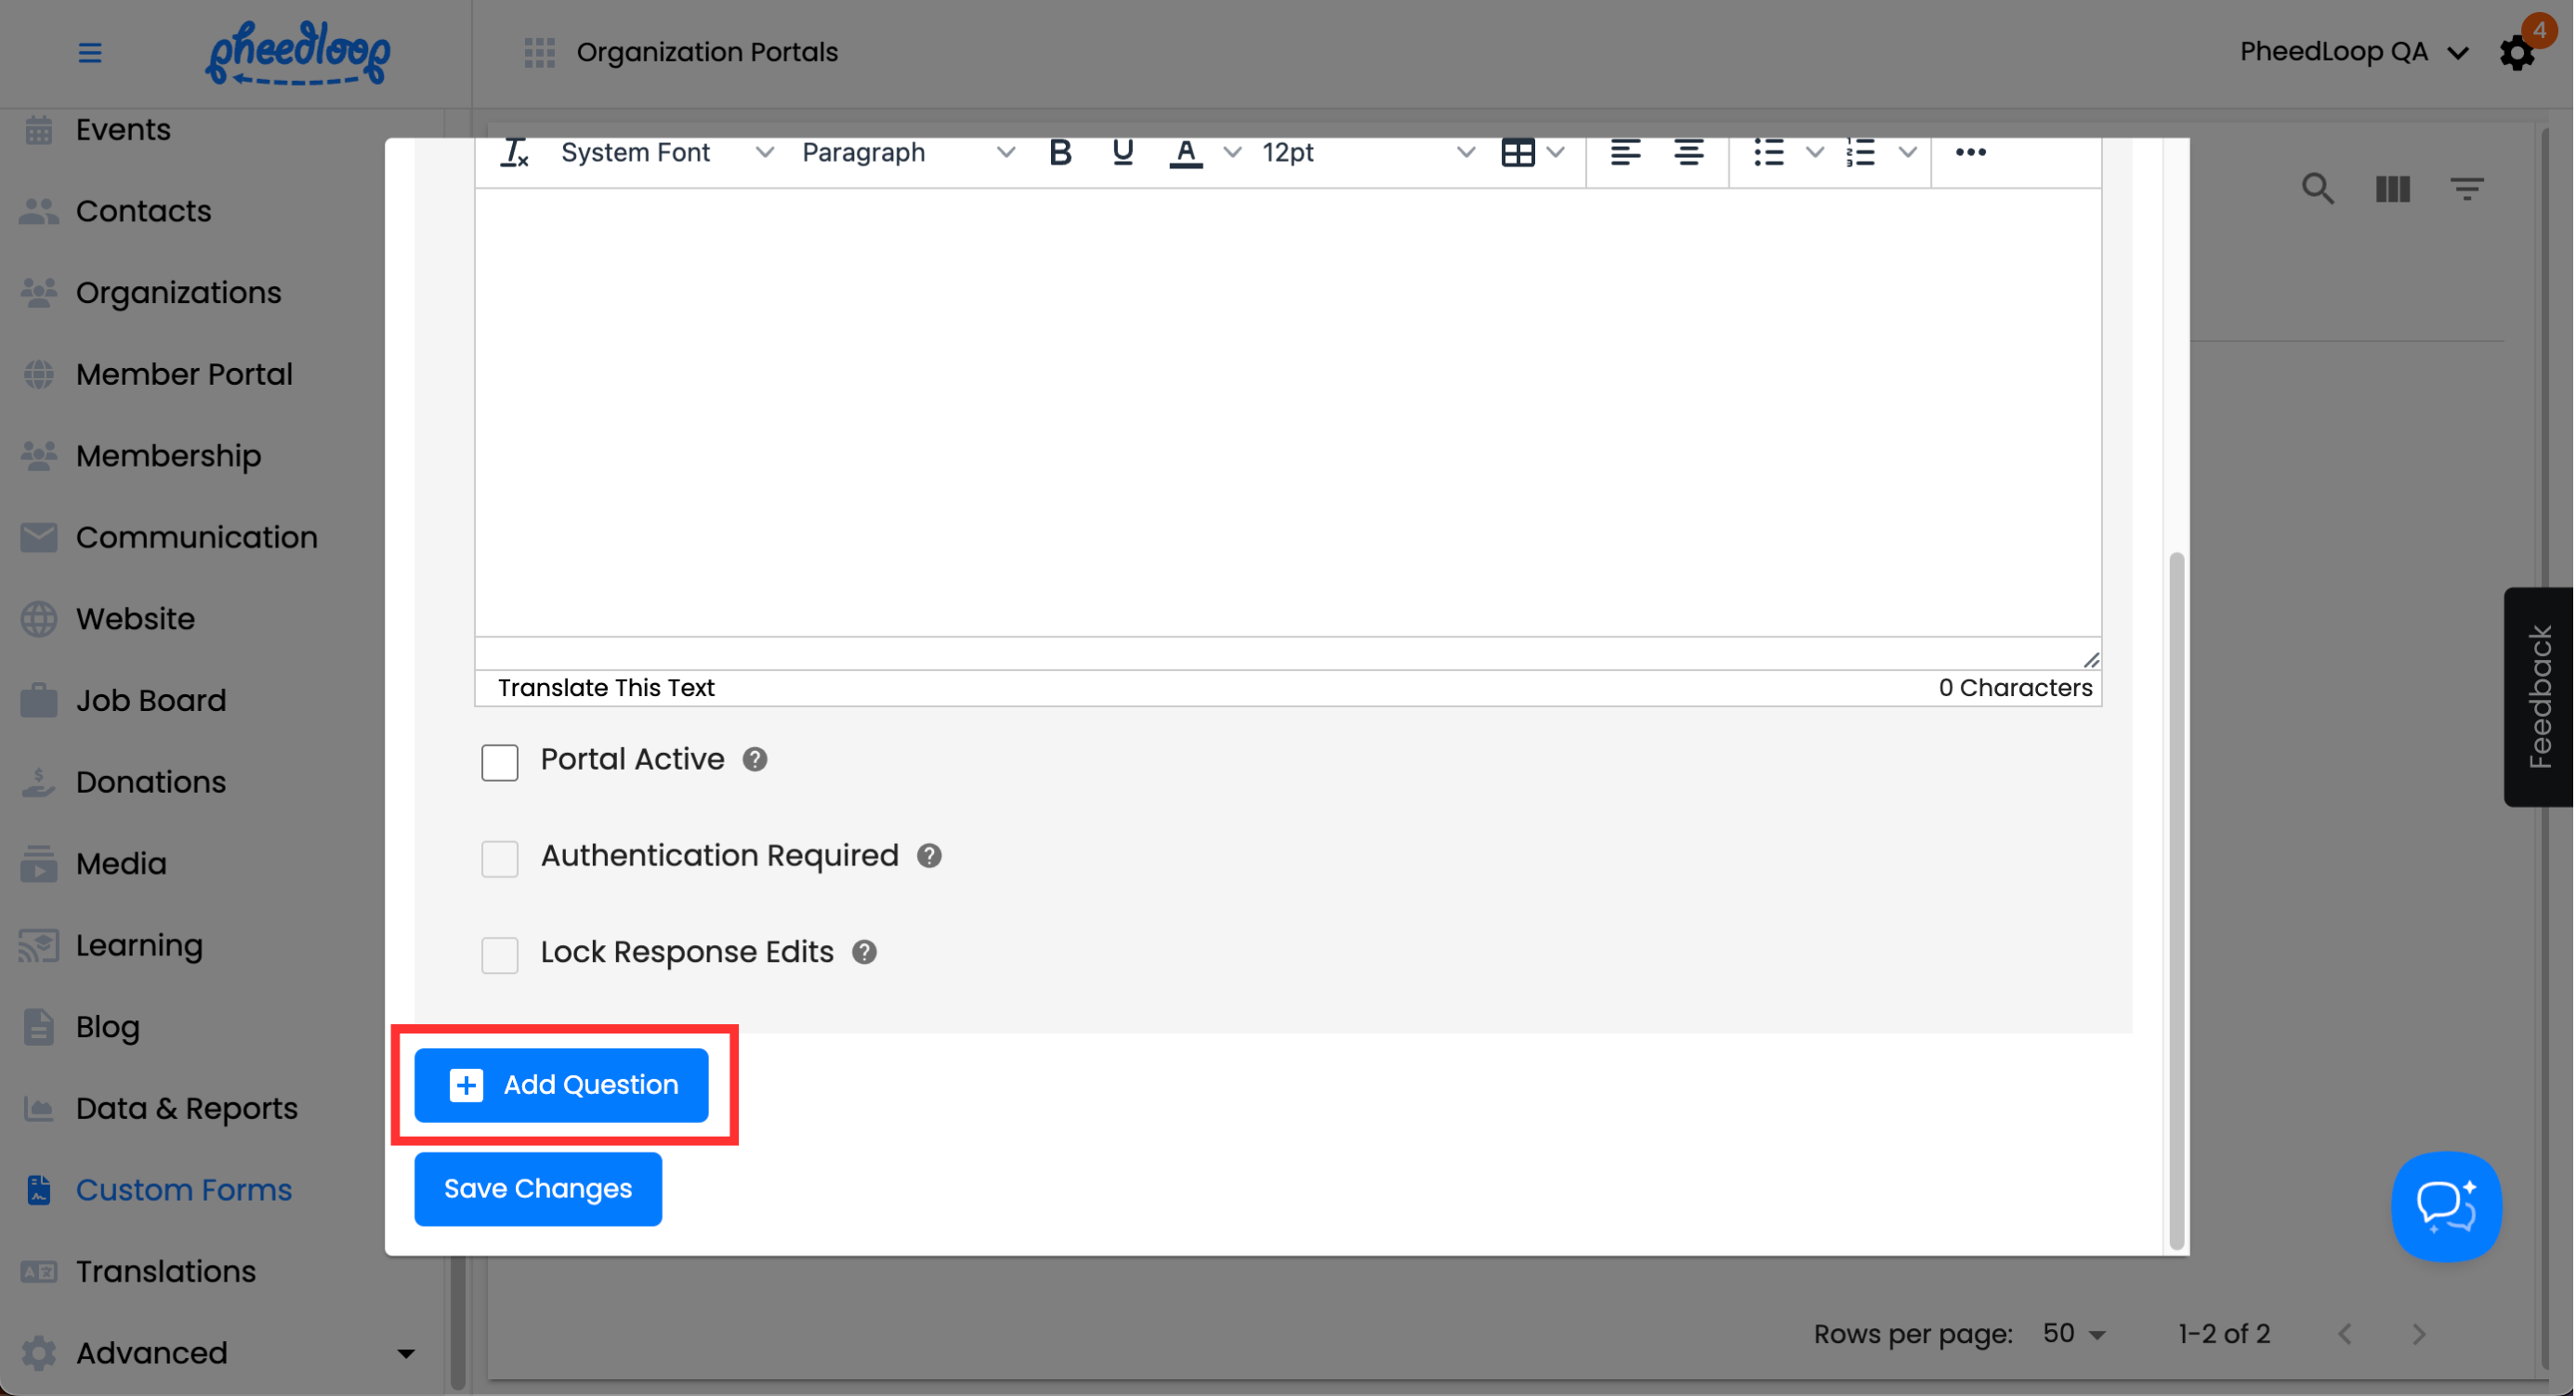
- Select Add Question
From here, you can include a variety of response types, including text answers, multiple choice, and questions requiring a file to be uploaded.


Adding Questions
When creating a form or quiz, you can add several types of inputs:
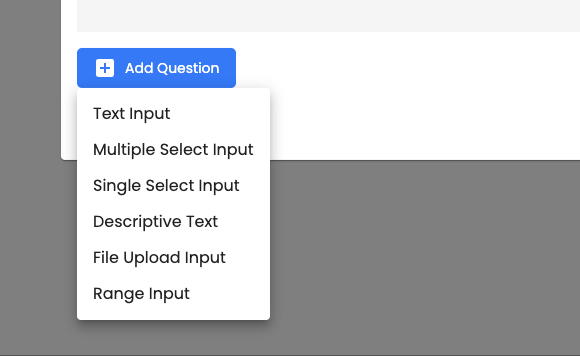
| Input Type | Description |
|---|---|
| Text Input | Members type a written response. |
| Multiple Select | Members can choose more than one option. |
| Single Select | Members choose only one option. |
| Descriptive Text | Displays information only; no response required. |
| File Upload | Requires members to submit a file. |
| Range Input | Requires members to select an answer from a predefined scale (i.e. on a scale of 1 to 10). |
Shared Settings for All Question Types
After selecting an input type, each question supports common configuration options:
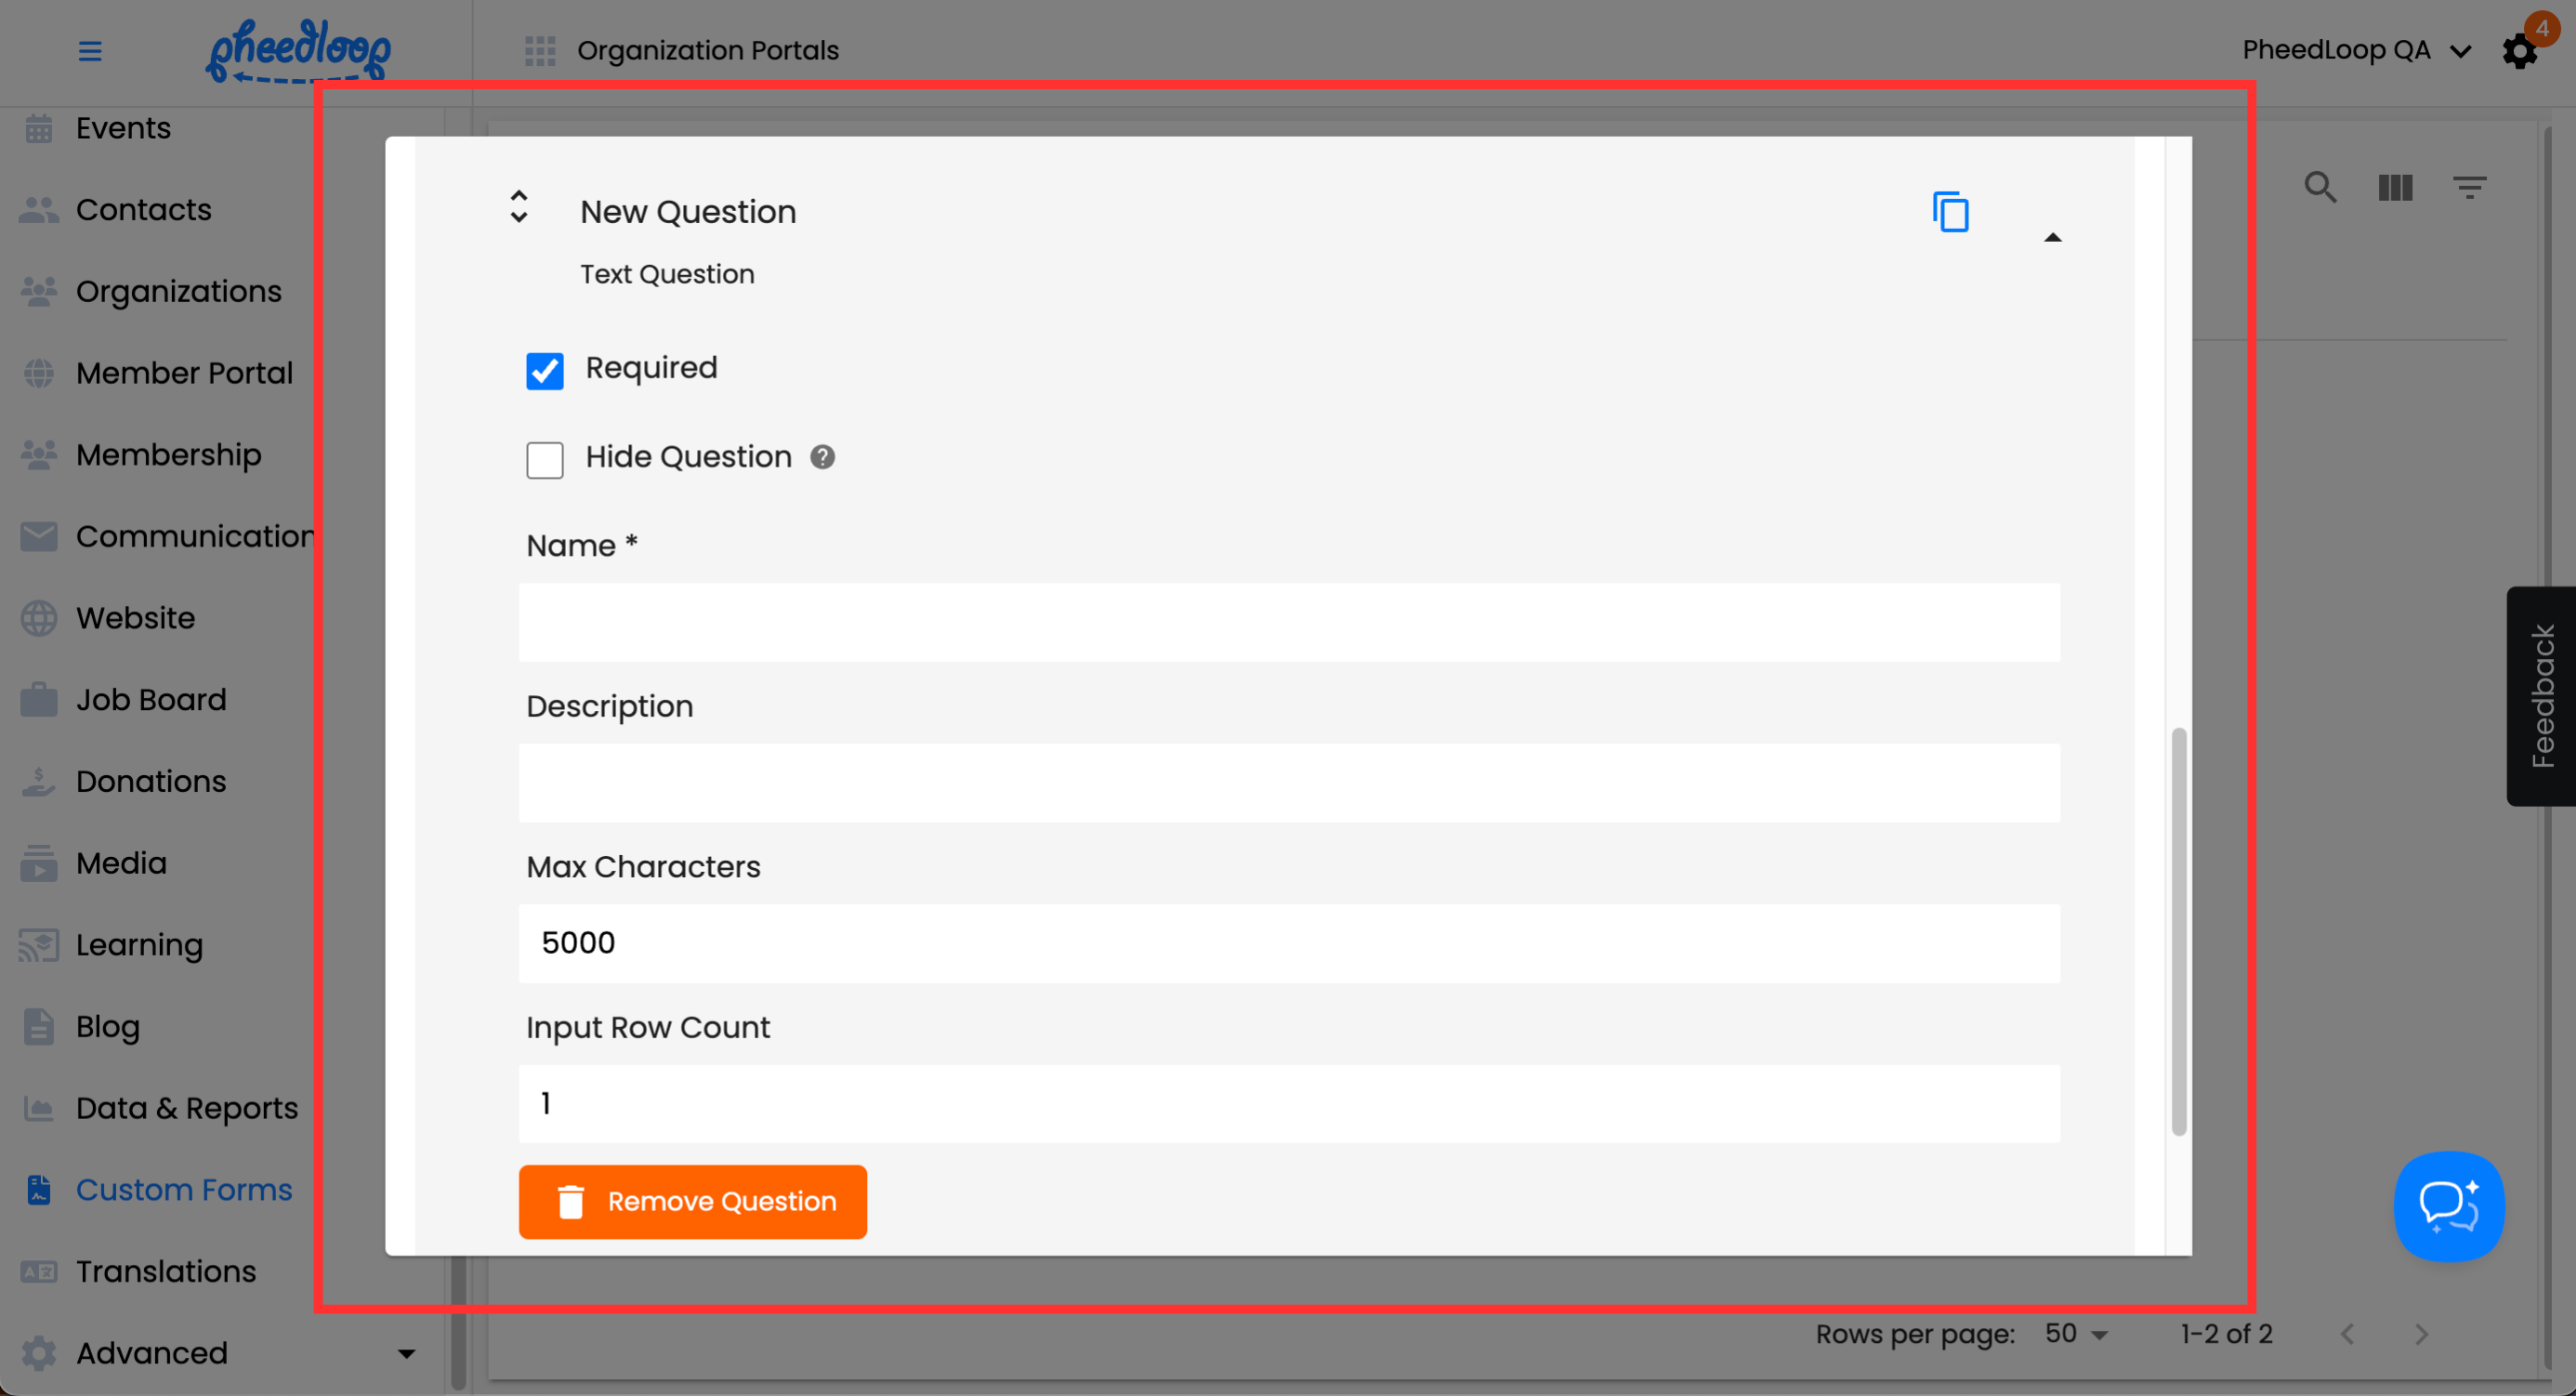
| Setting | Description |
|---|---|
| Required | Marks the question as mandatory before submitting. |
| Hide Question | Removes it from the visible form without deleting it. |
| Name | Internal label for the question (visible to members except for Descriptive Text). |
| Description | Additional details shown to members. |
| Save Changes | Saves the question to your form. |
| Remove Question | Deletes the question if no longer needed. |
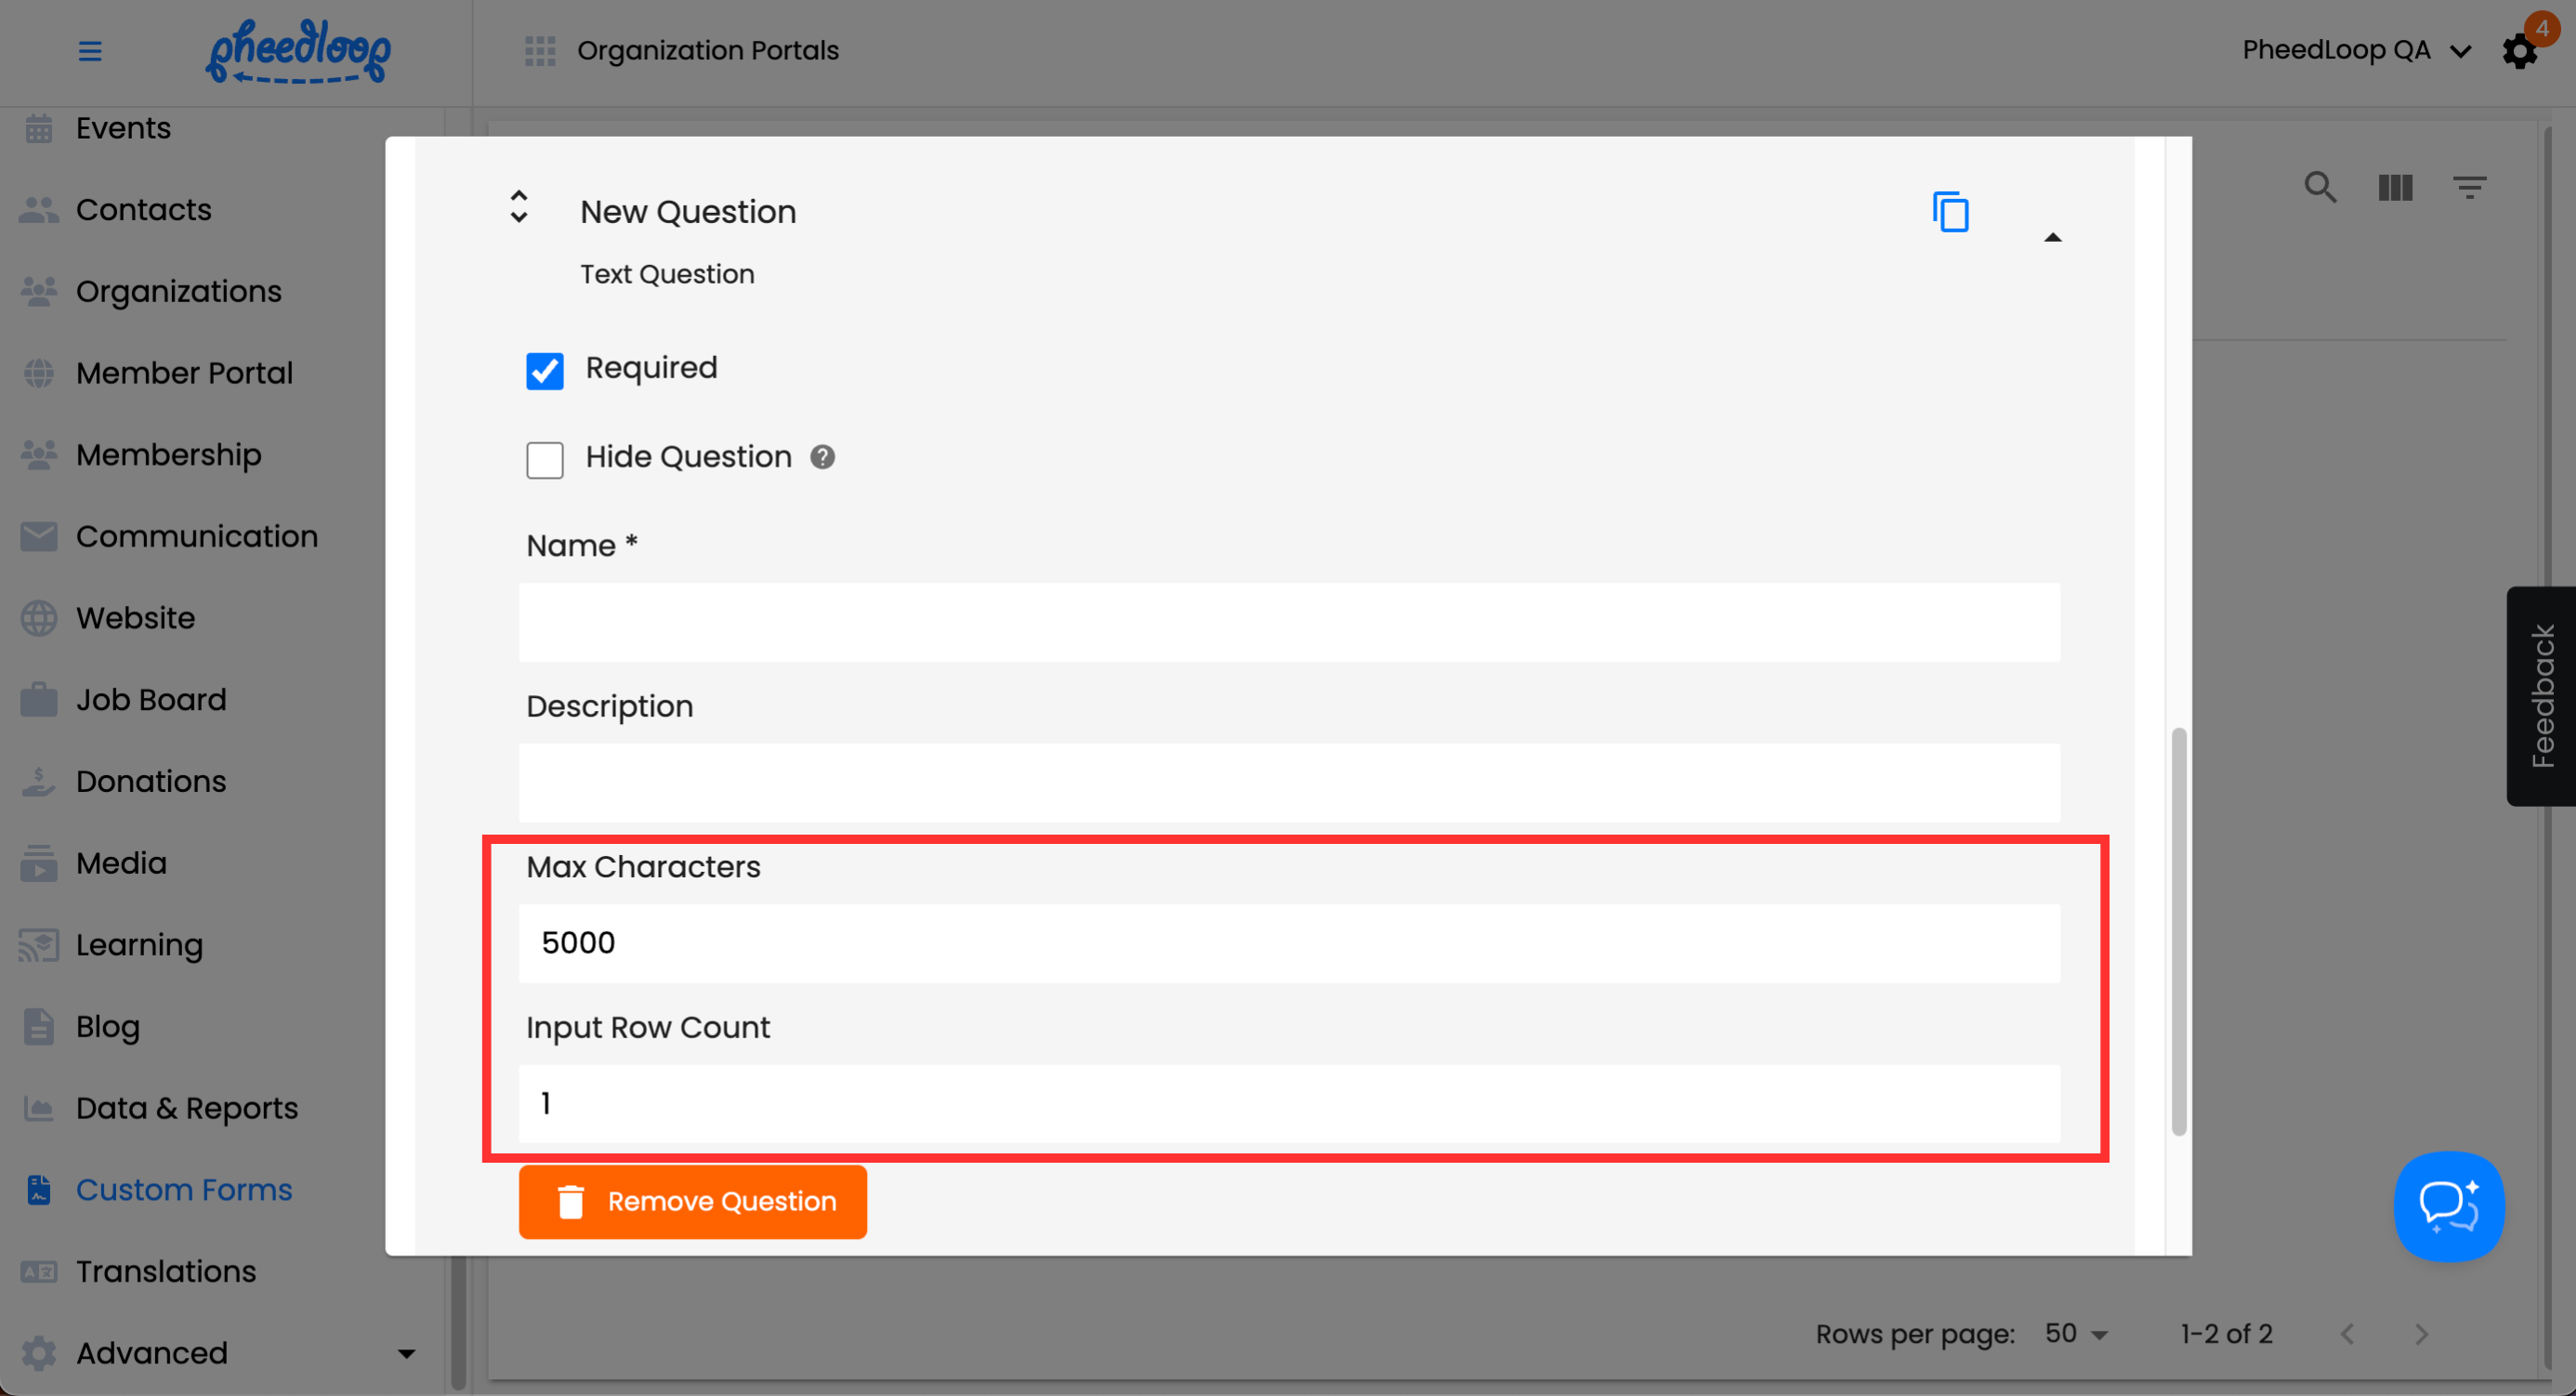
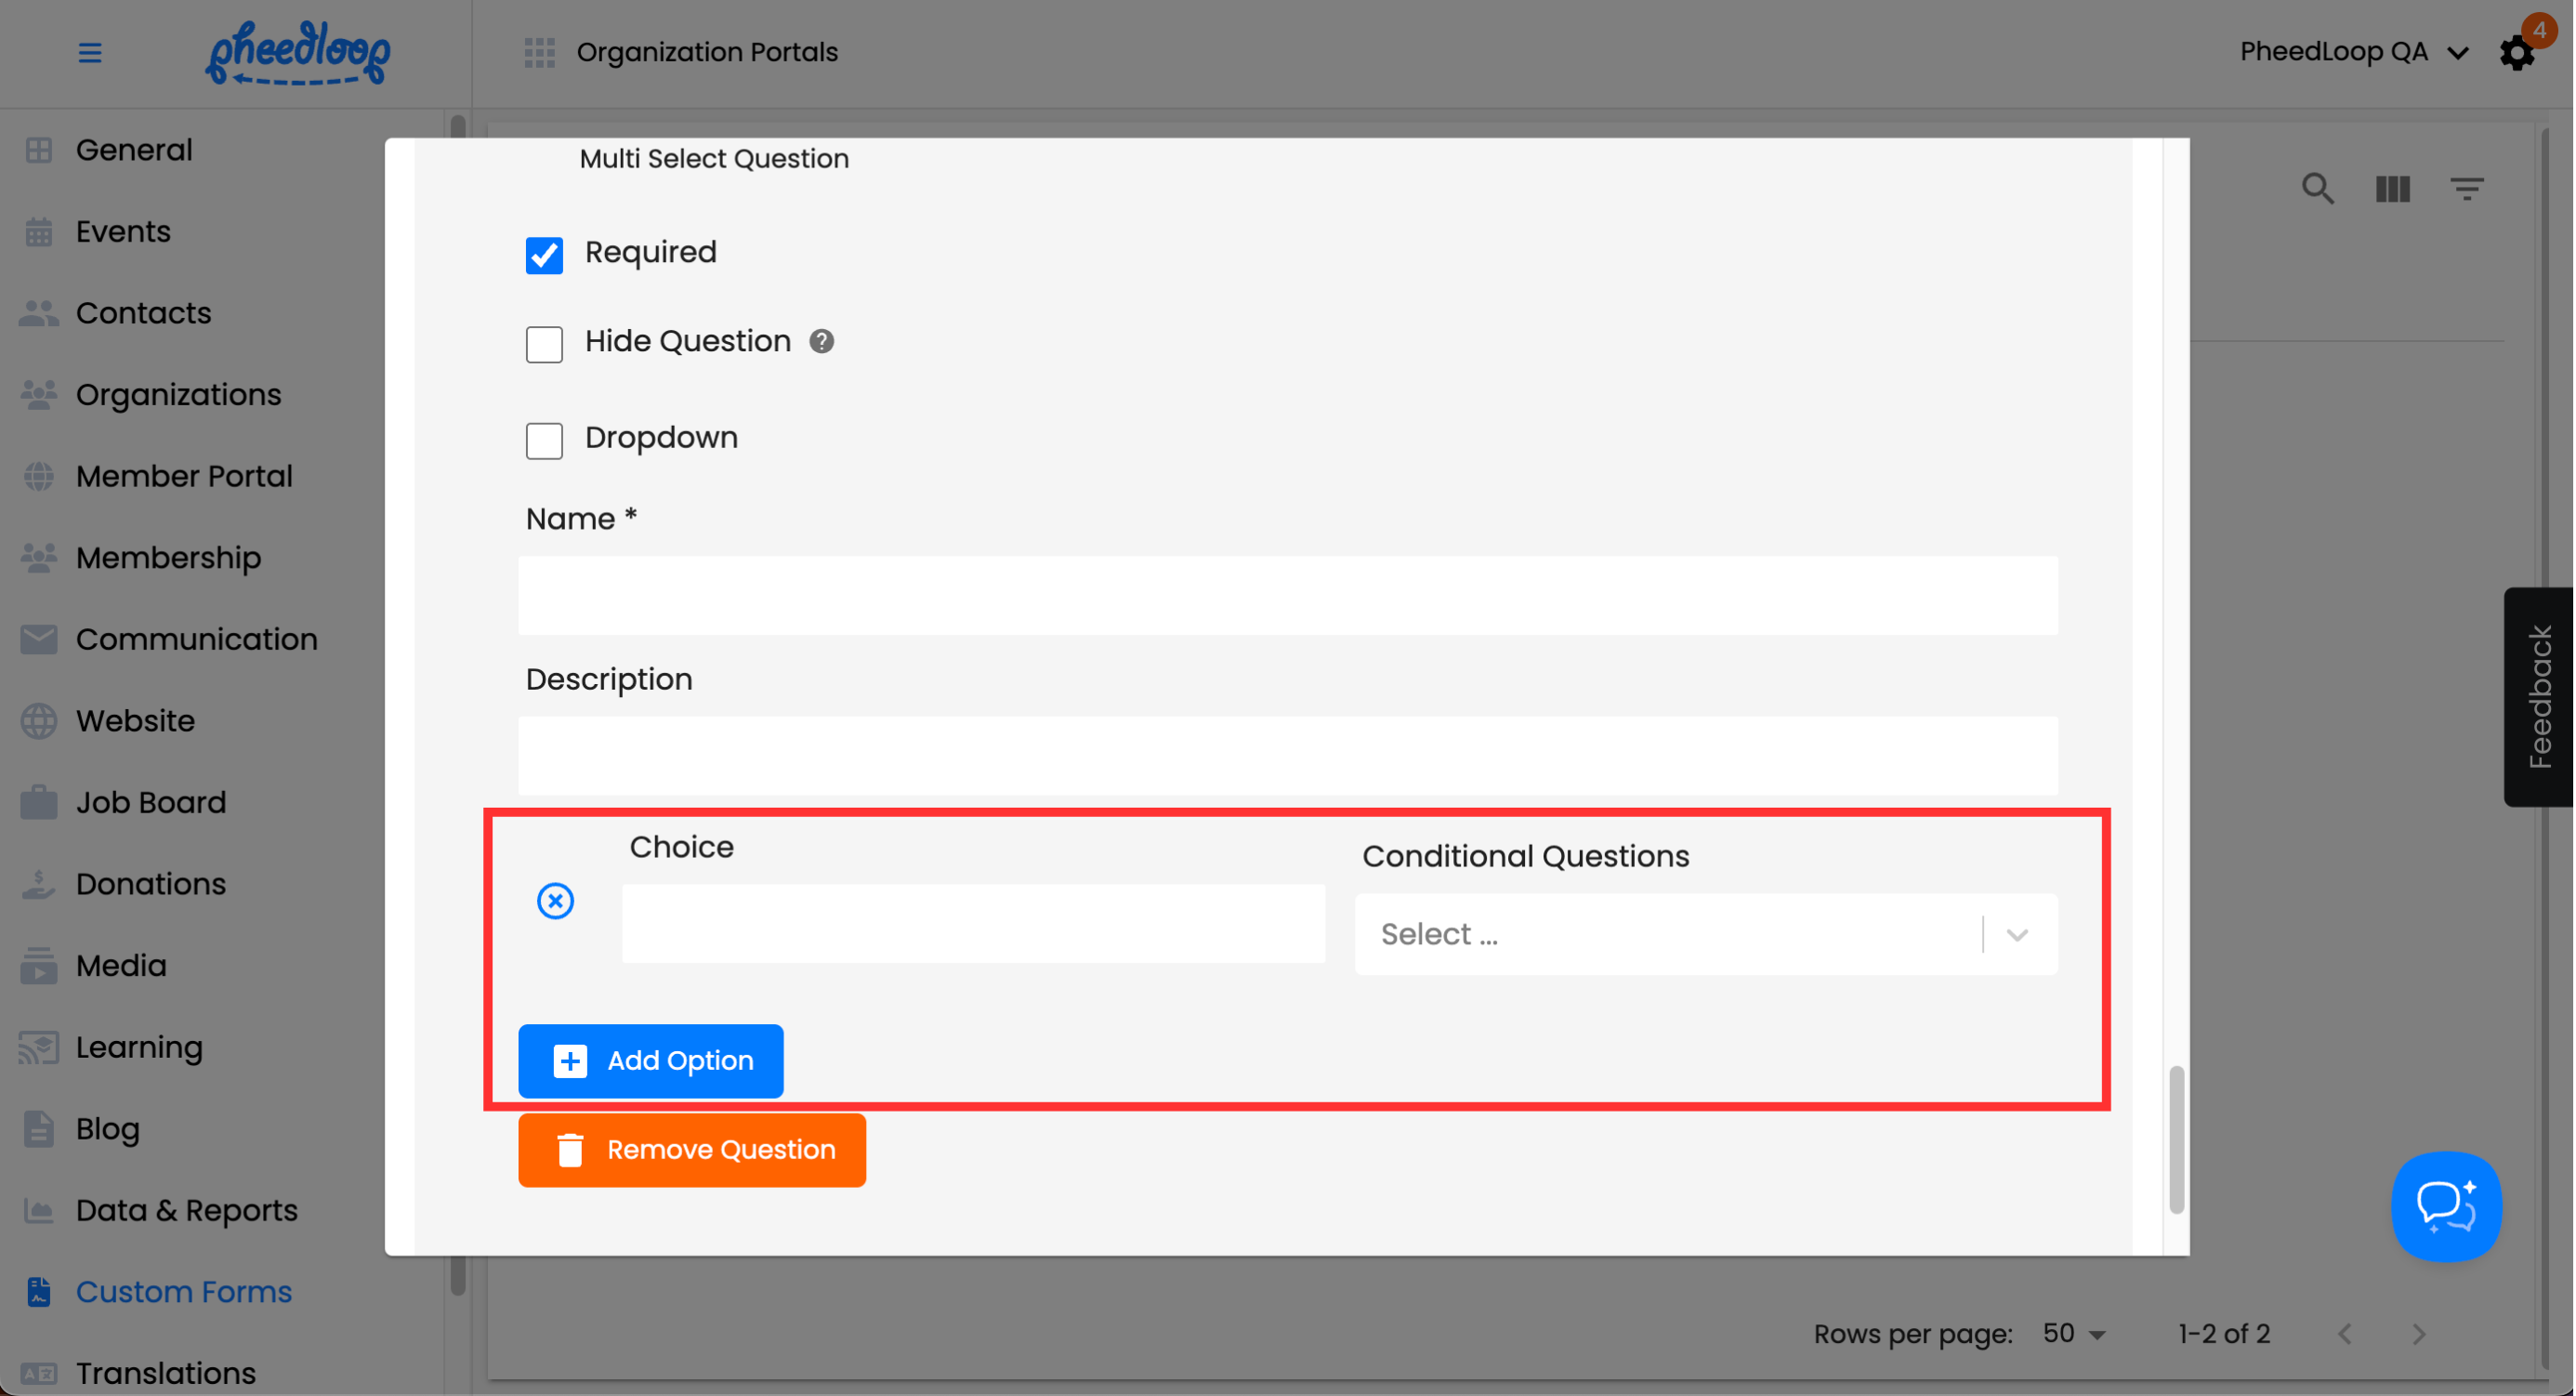
Input-Specific Options
Some question types include additional settings:
Text Input: Set max character limit and number of rows (5+ recommended for longer responses).
Multiple Select / Single Select: Add options to choose from, and configure conditional follow-up questions. Toggle on the Dropdown checkbox if you prefer a compact layout.


Creating a Quiz Form
Quizzes follow the same creation process as Membership forms, however there are a few more settings to take into account. To create a quiz, simply select Quiz under the Category field.
Scrolling down to Setting will present options unique to quizzes.
| Setting | Description |
|---|---|
| Maximum Number of Attempts | Enter how many times Members are allowed to retake the quiz. |
| Pass Mark | Set the minimum score required to pass the quiz. |
| Unit | Choose the grading format. Points calculates pass/fail based on total score earned. Percentage calculates pass/fail based on the Member’s percentage score. |
Assigning the Custom Form to a Course
Once created, forms can be attached to modules just like a lesson.
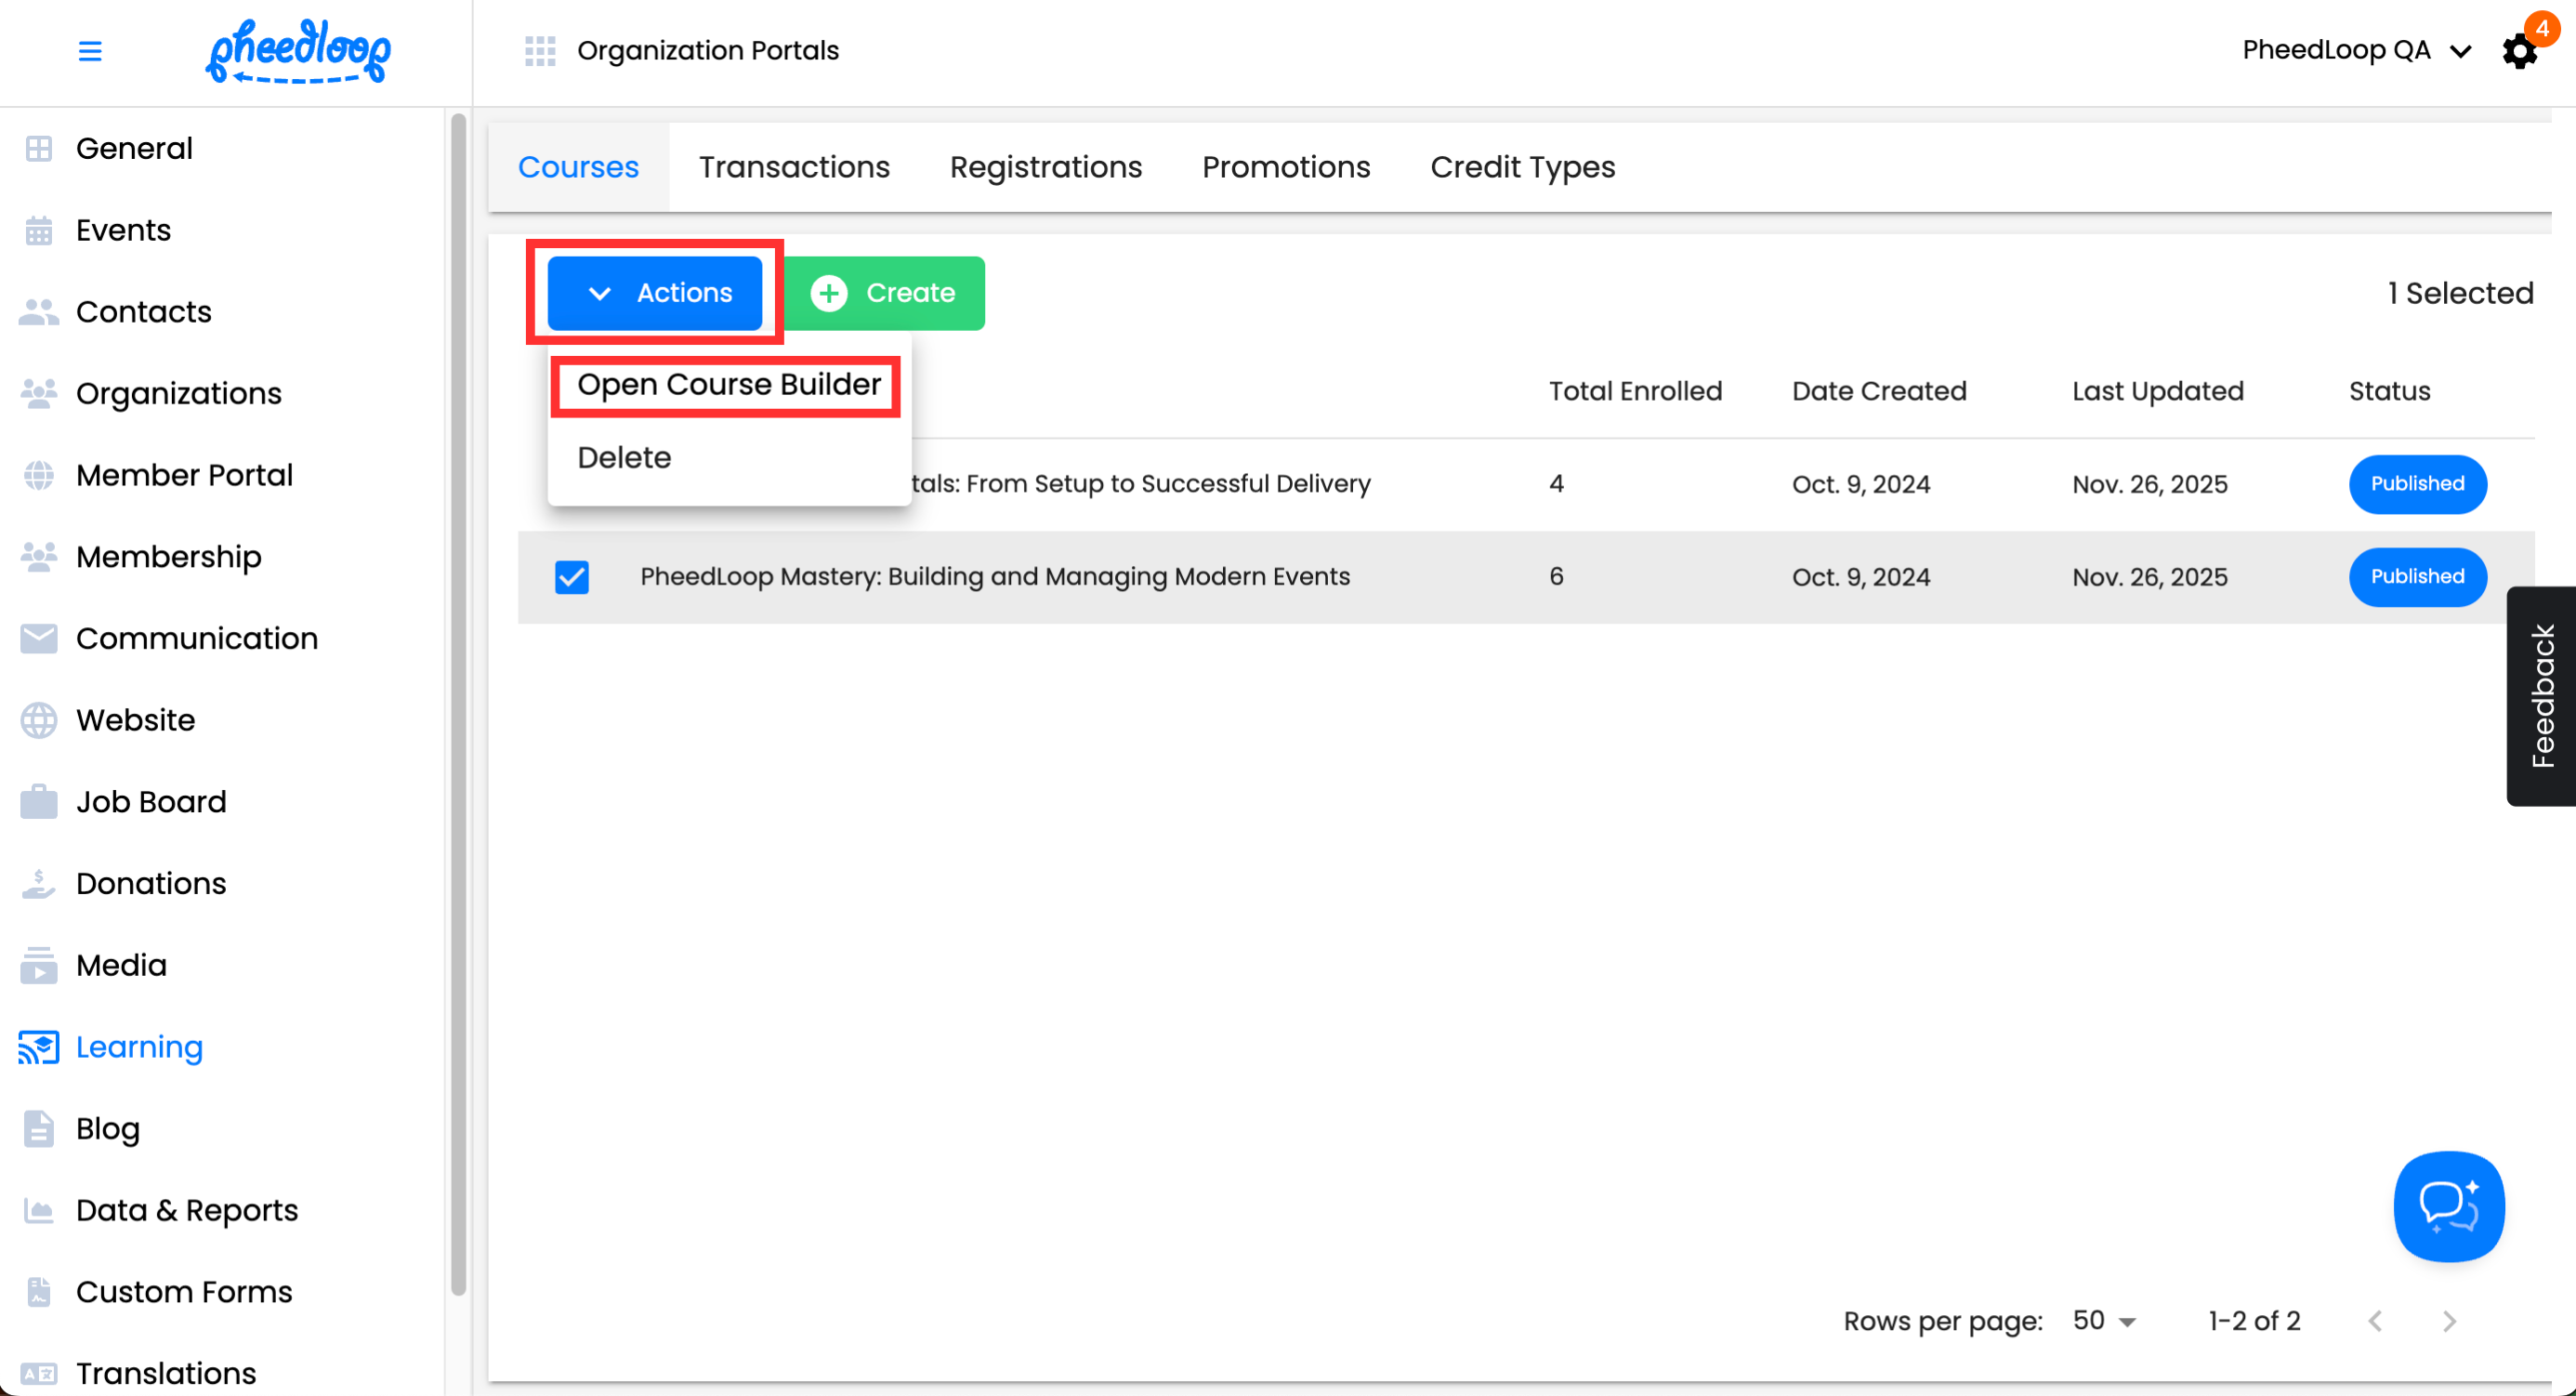
- From the Membership Dashboard, navigate to Lessons > Courses
- Select the checkbox of the course you wish to edit
Above the Courses table, select Actions > Open Course Builder
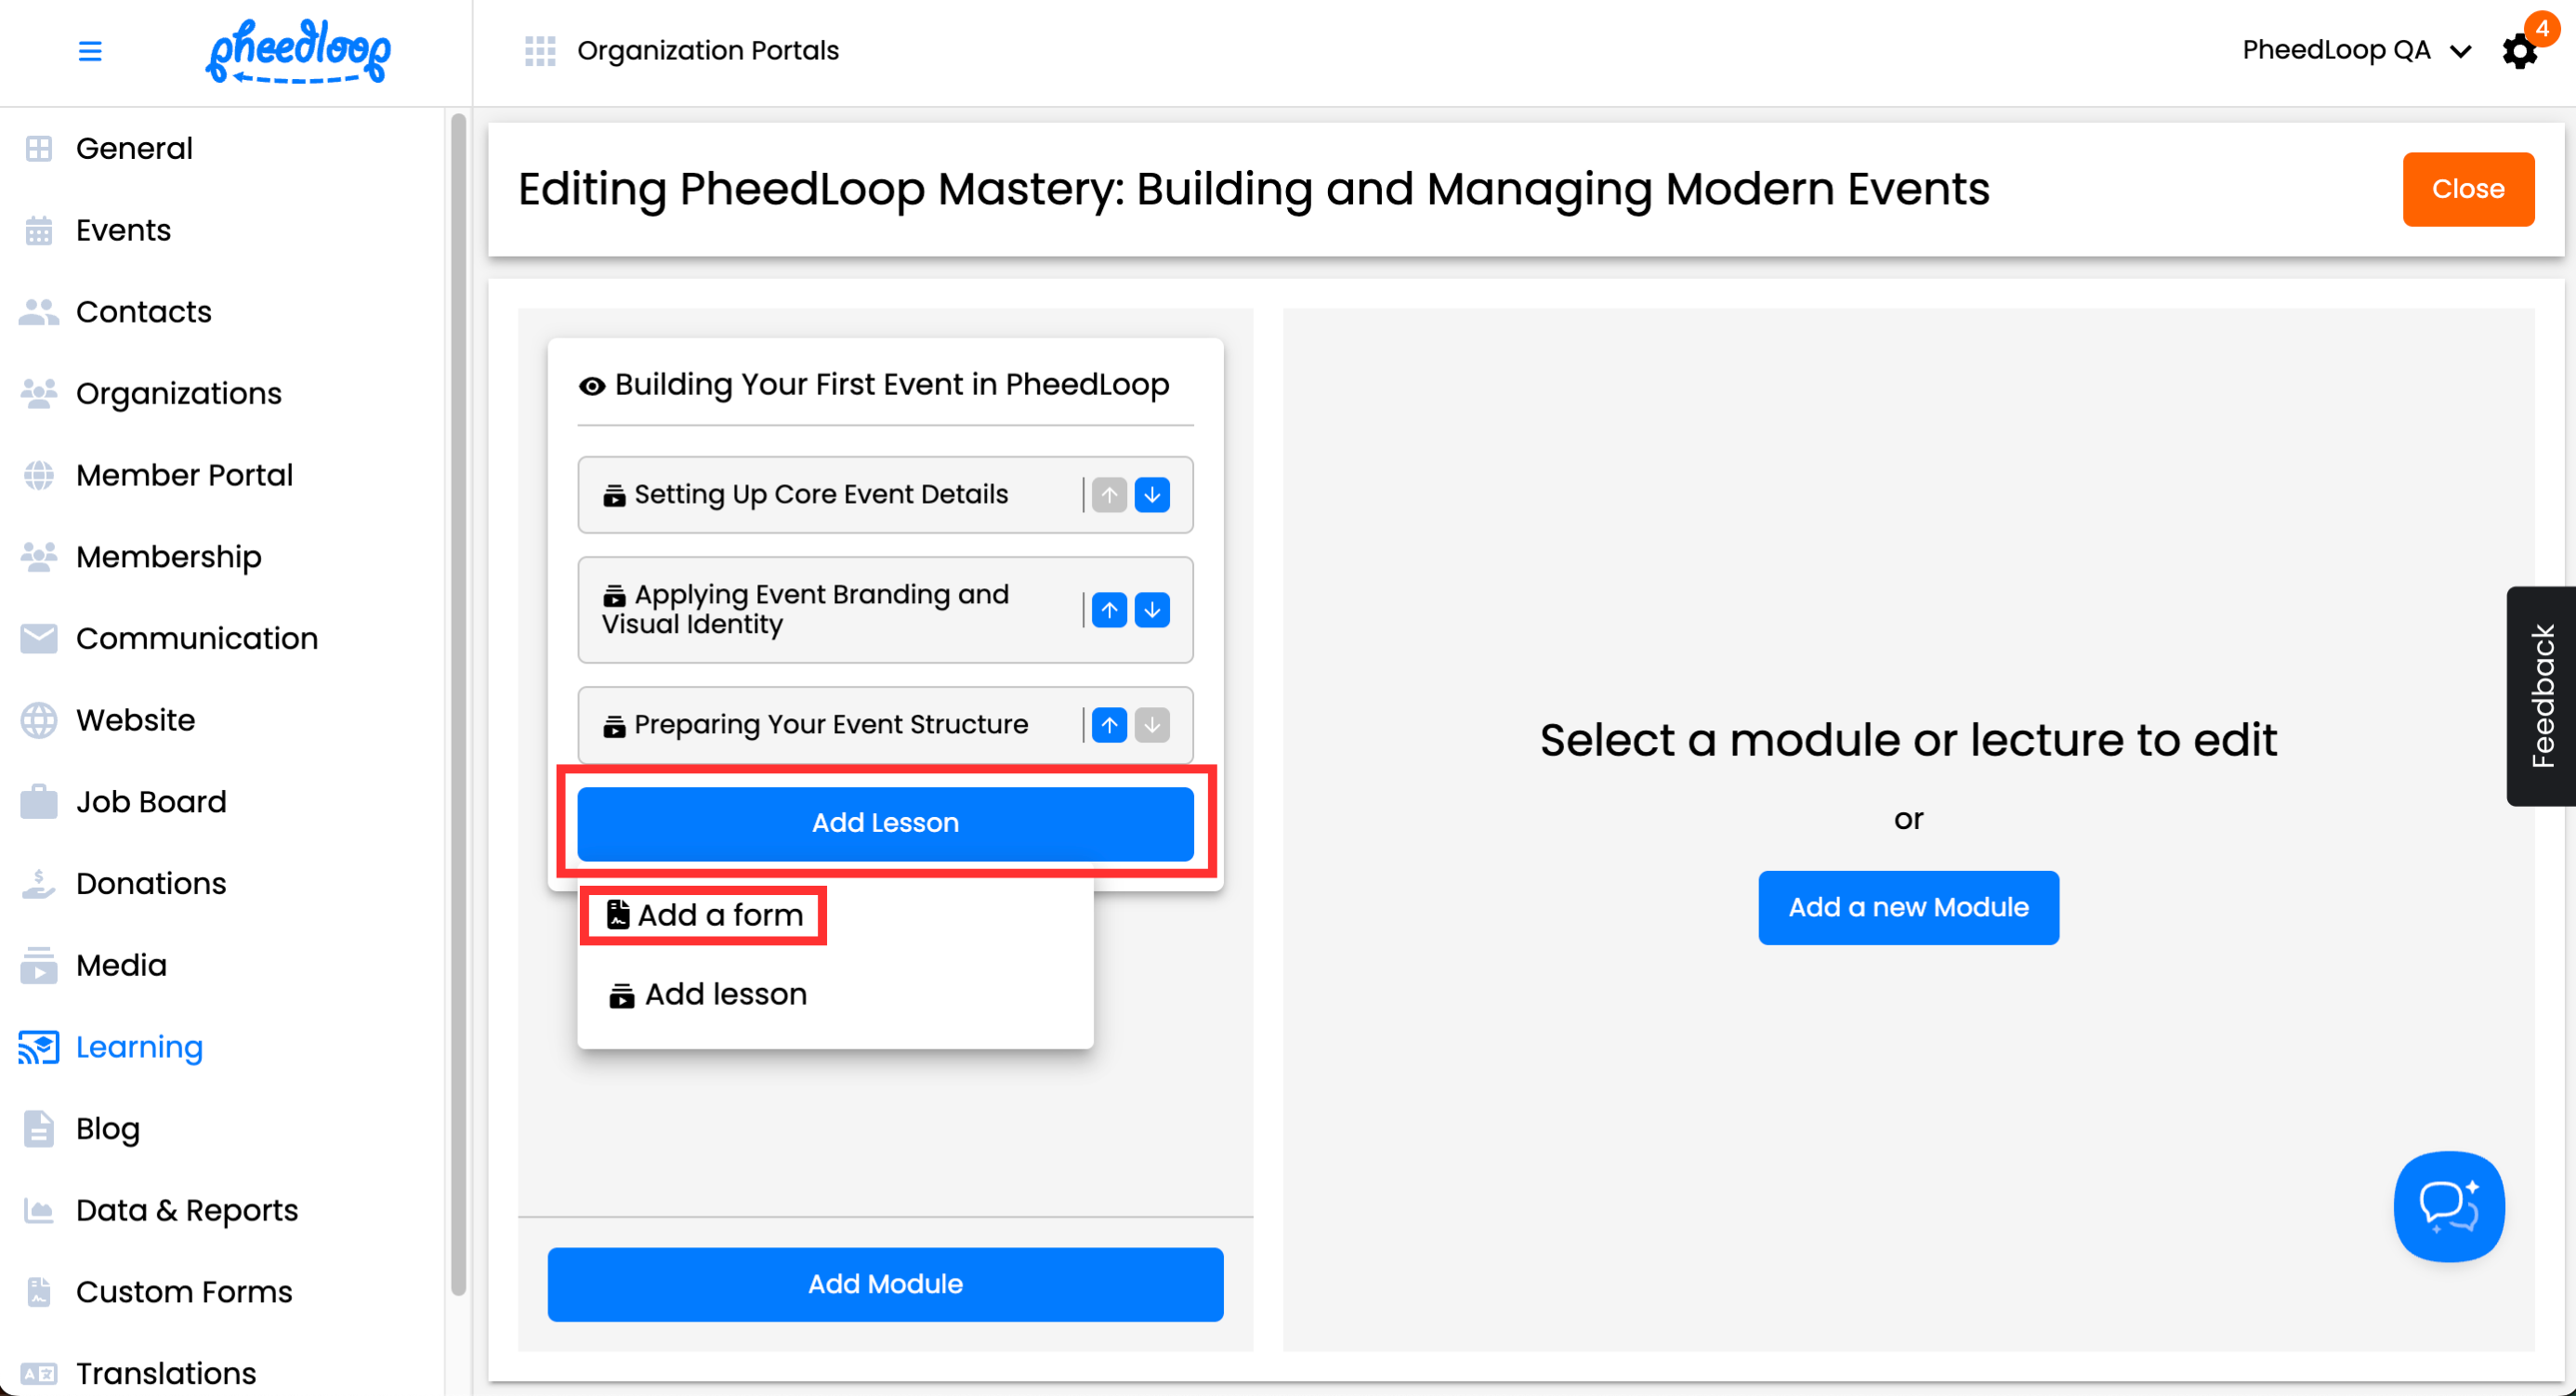
From the Course Builder, select Add Lesson > Add a Form

The Lesson Editor Form will now open, allowing organizers to add the custom form.
- Under the Title field, enter a name for the lesson
Under the Description field, enter a description for the lesson
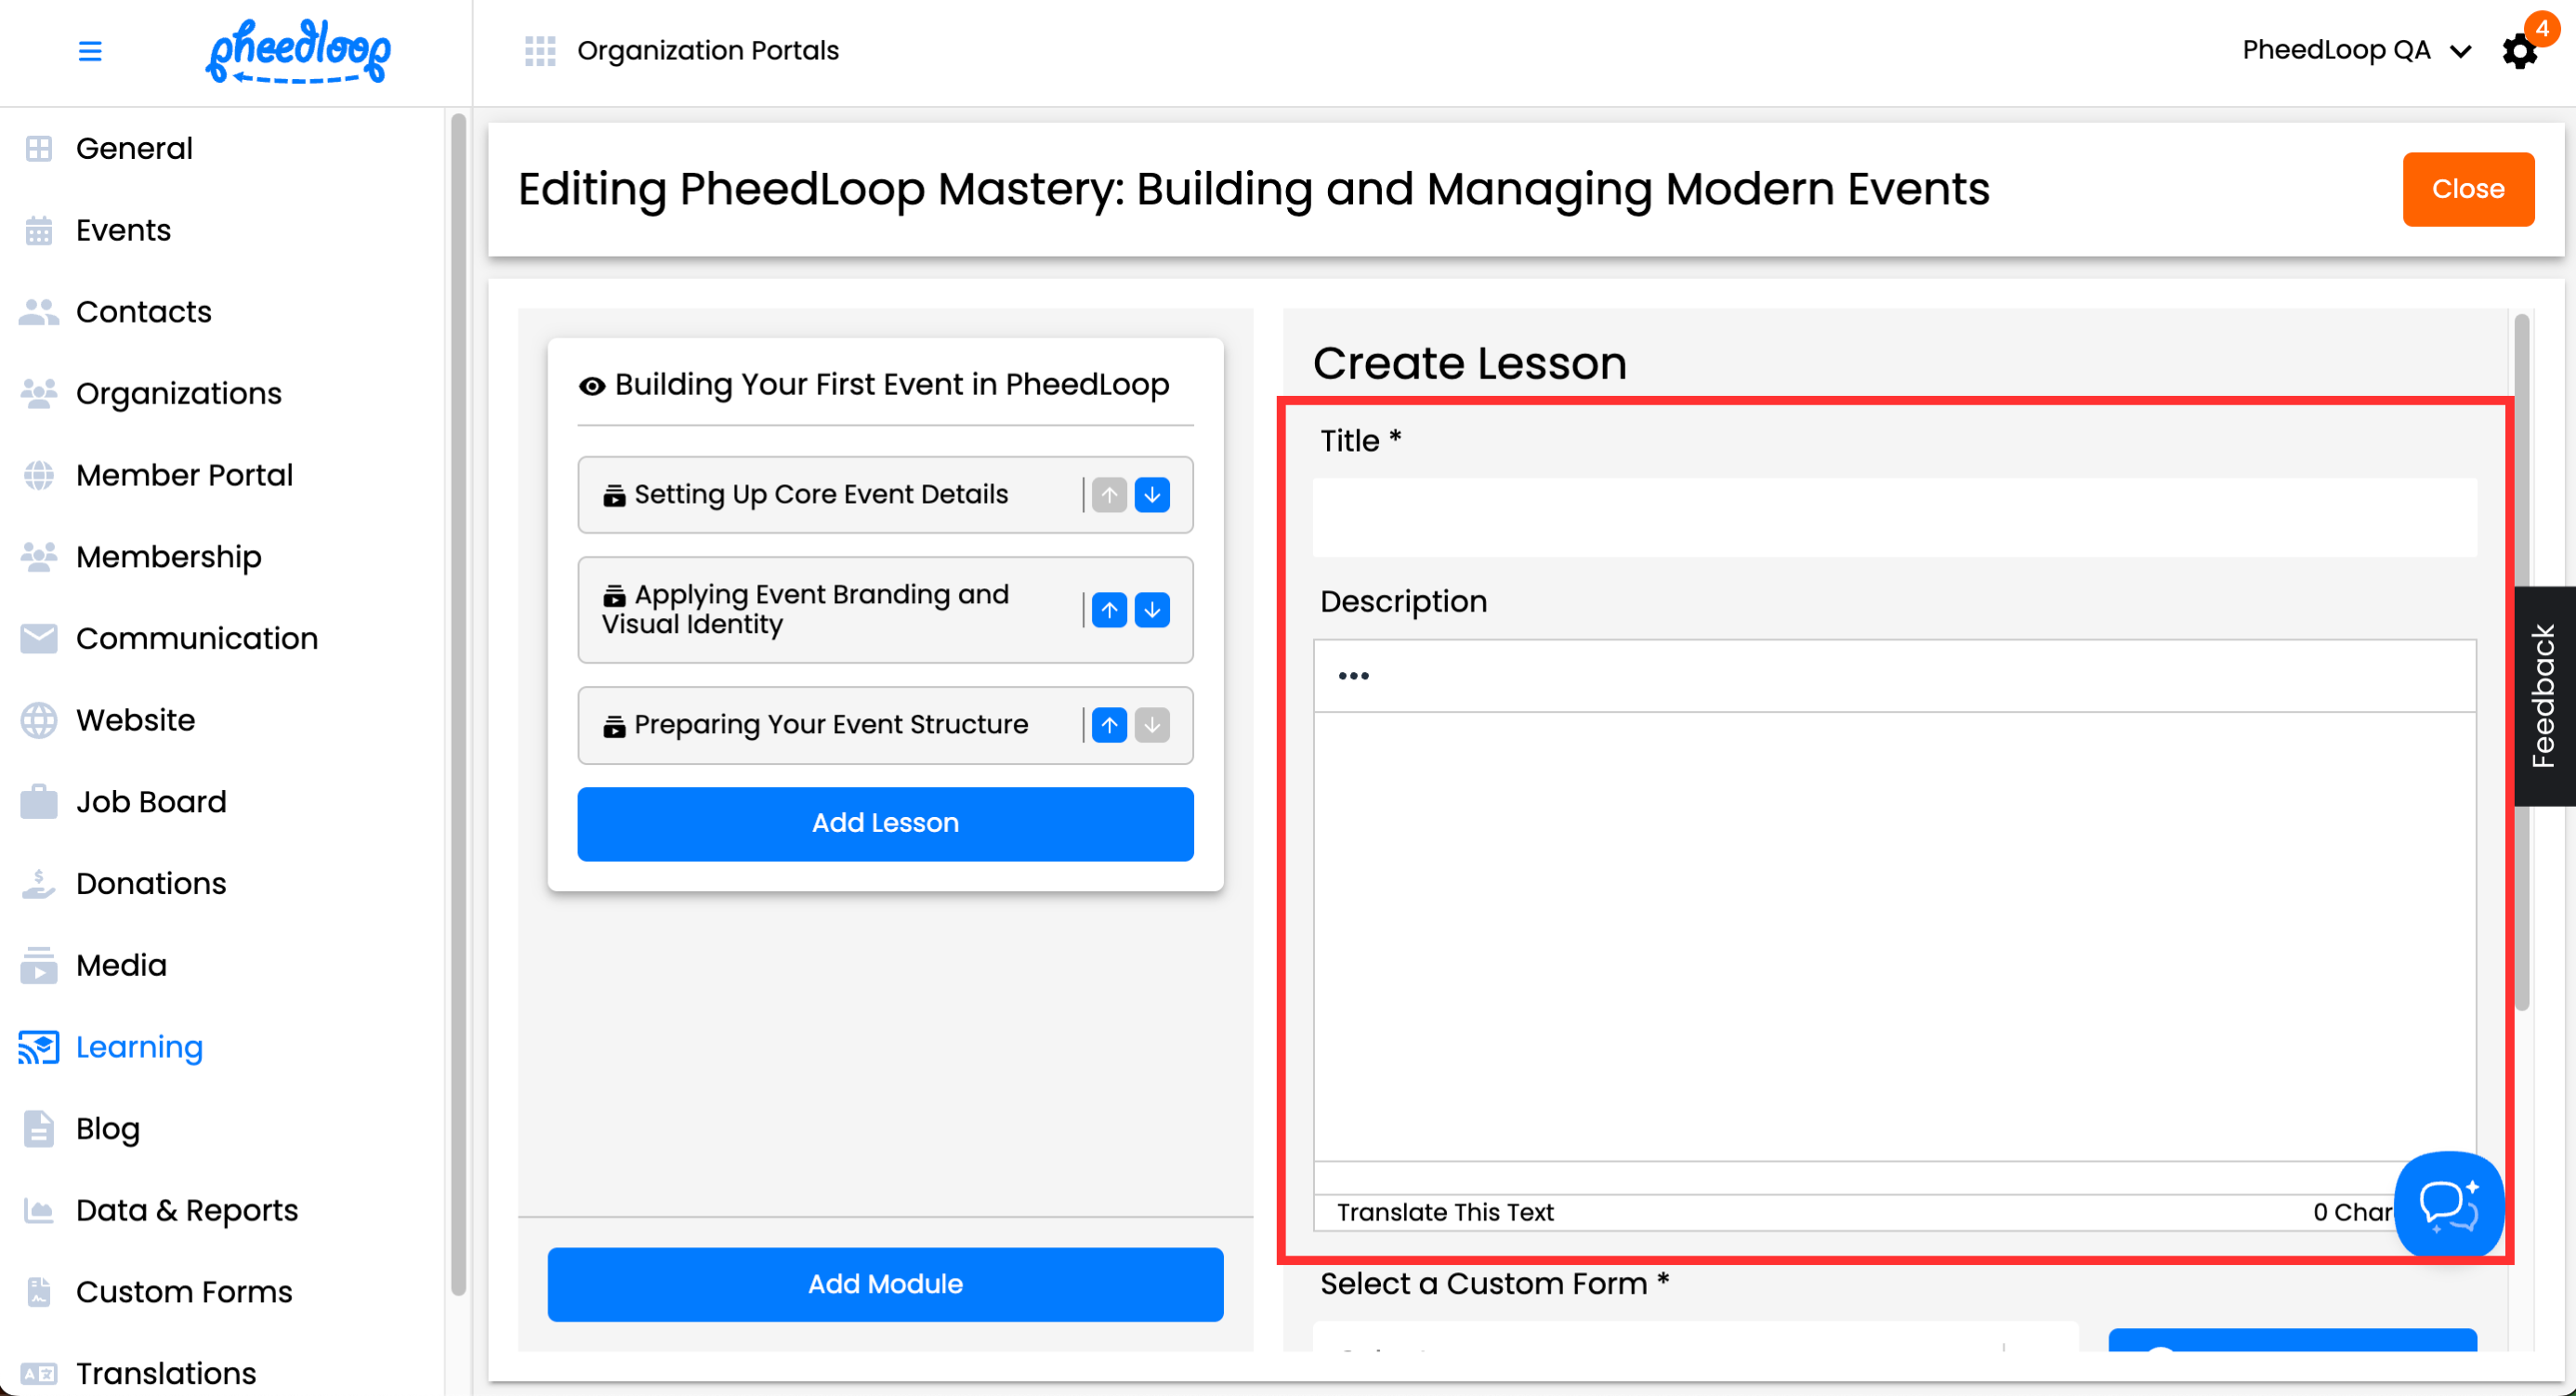
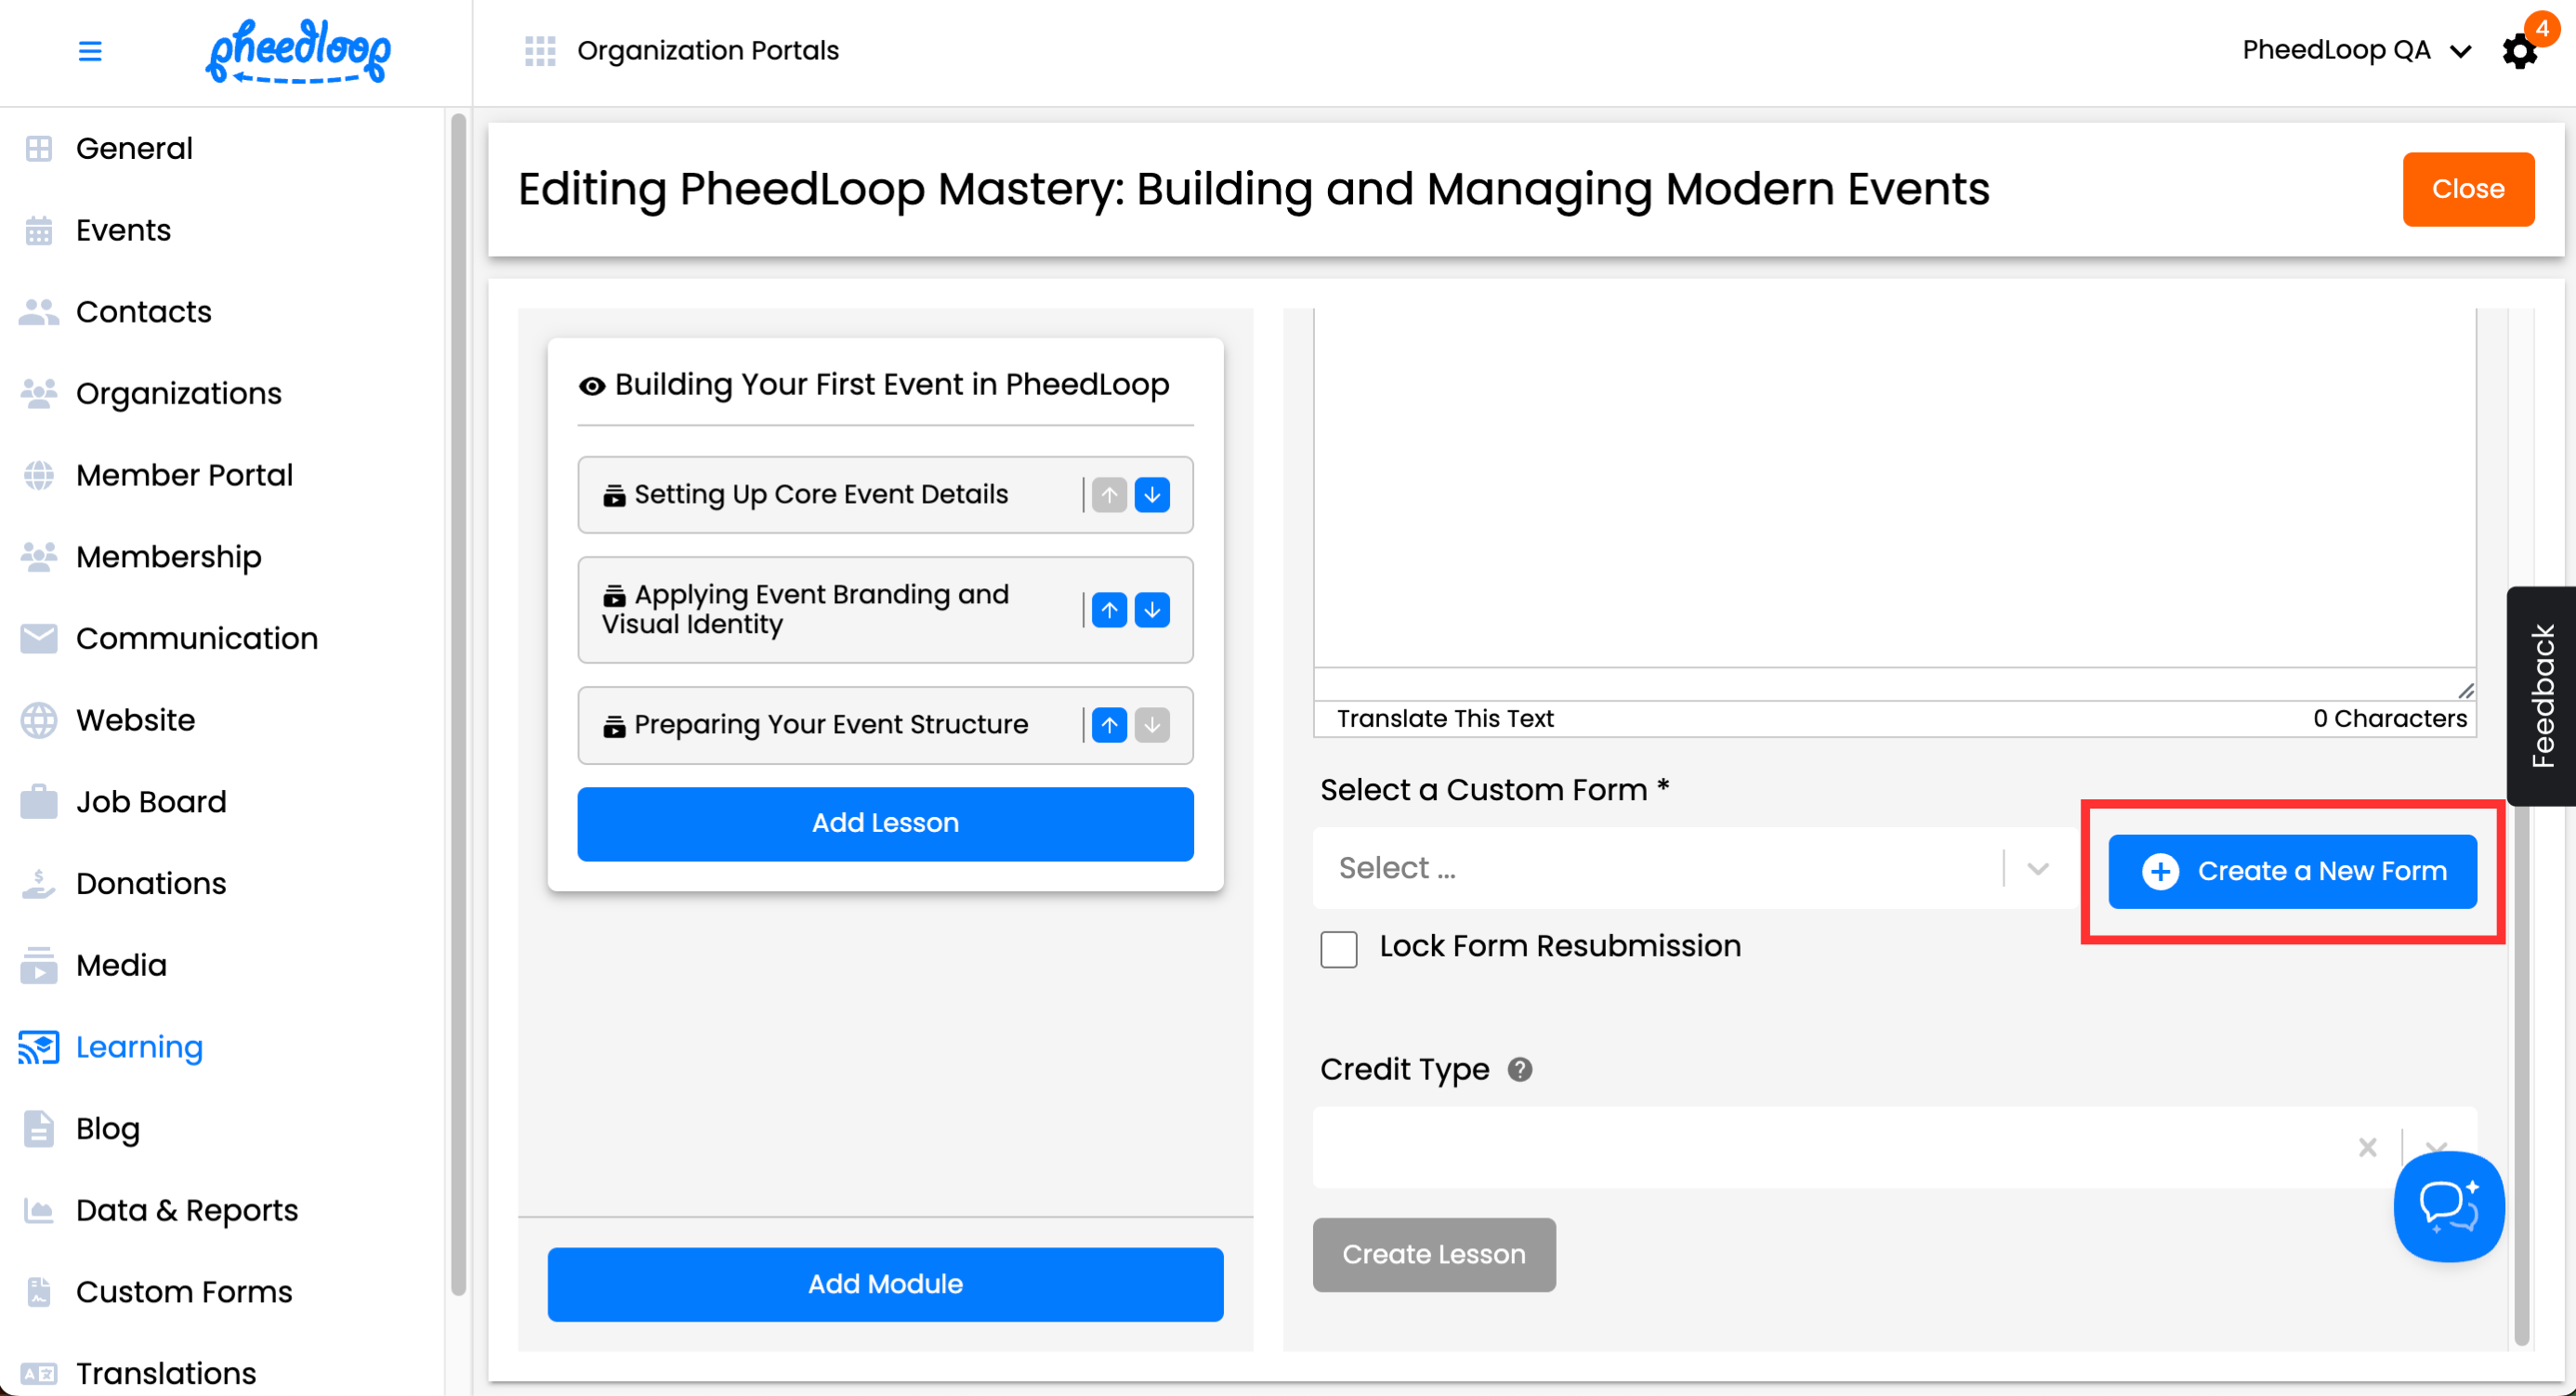
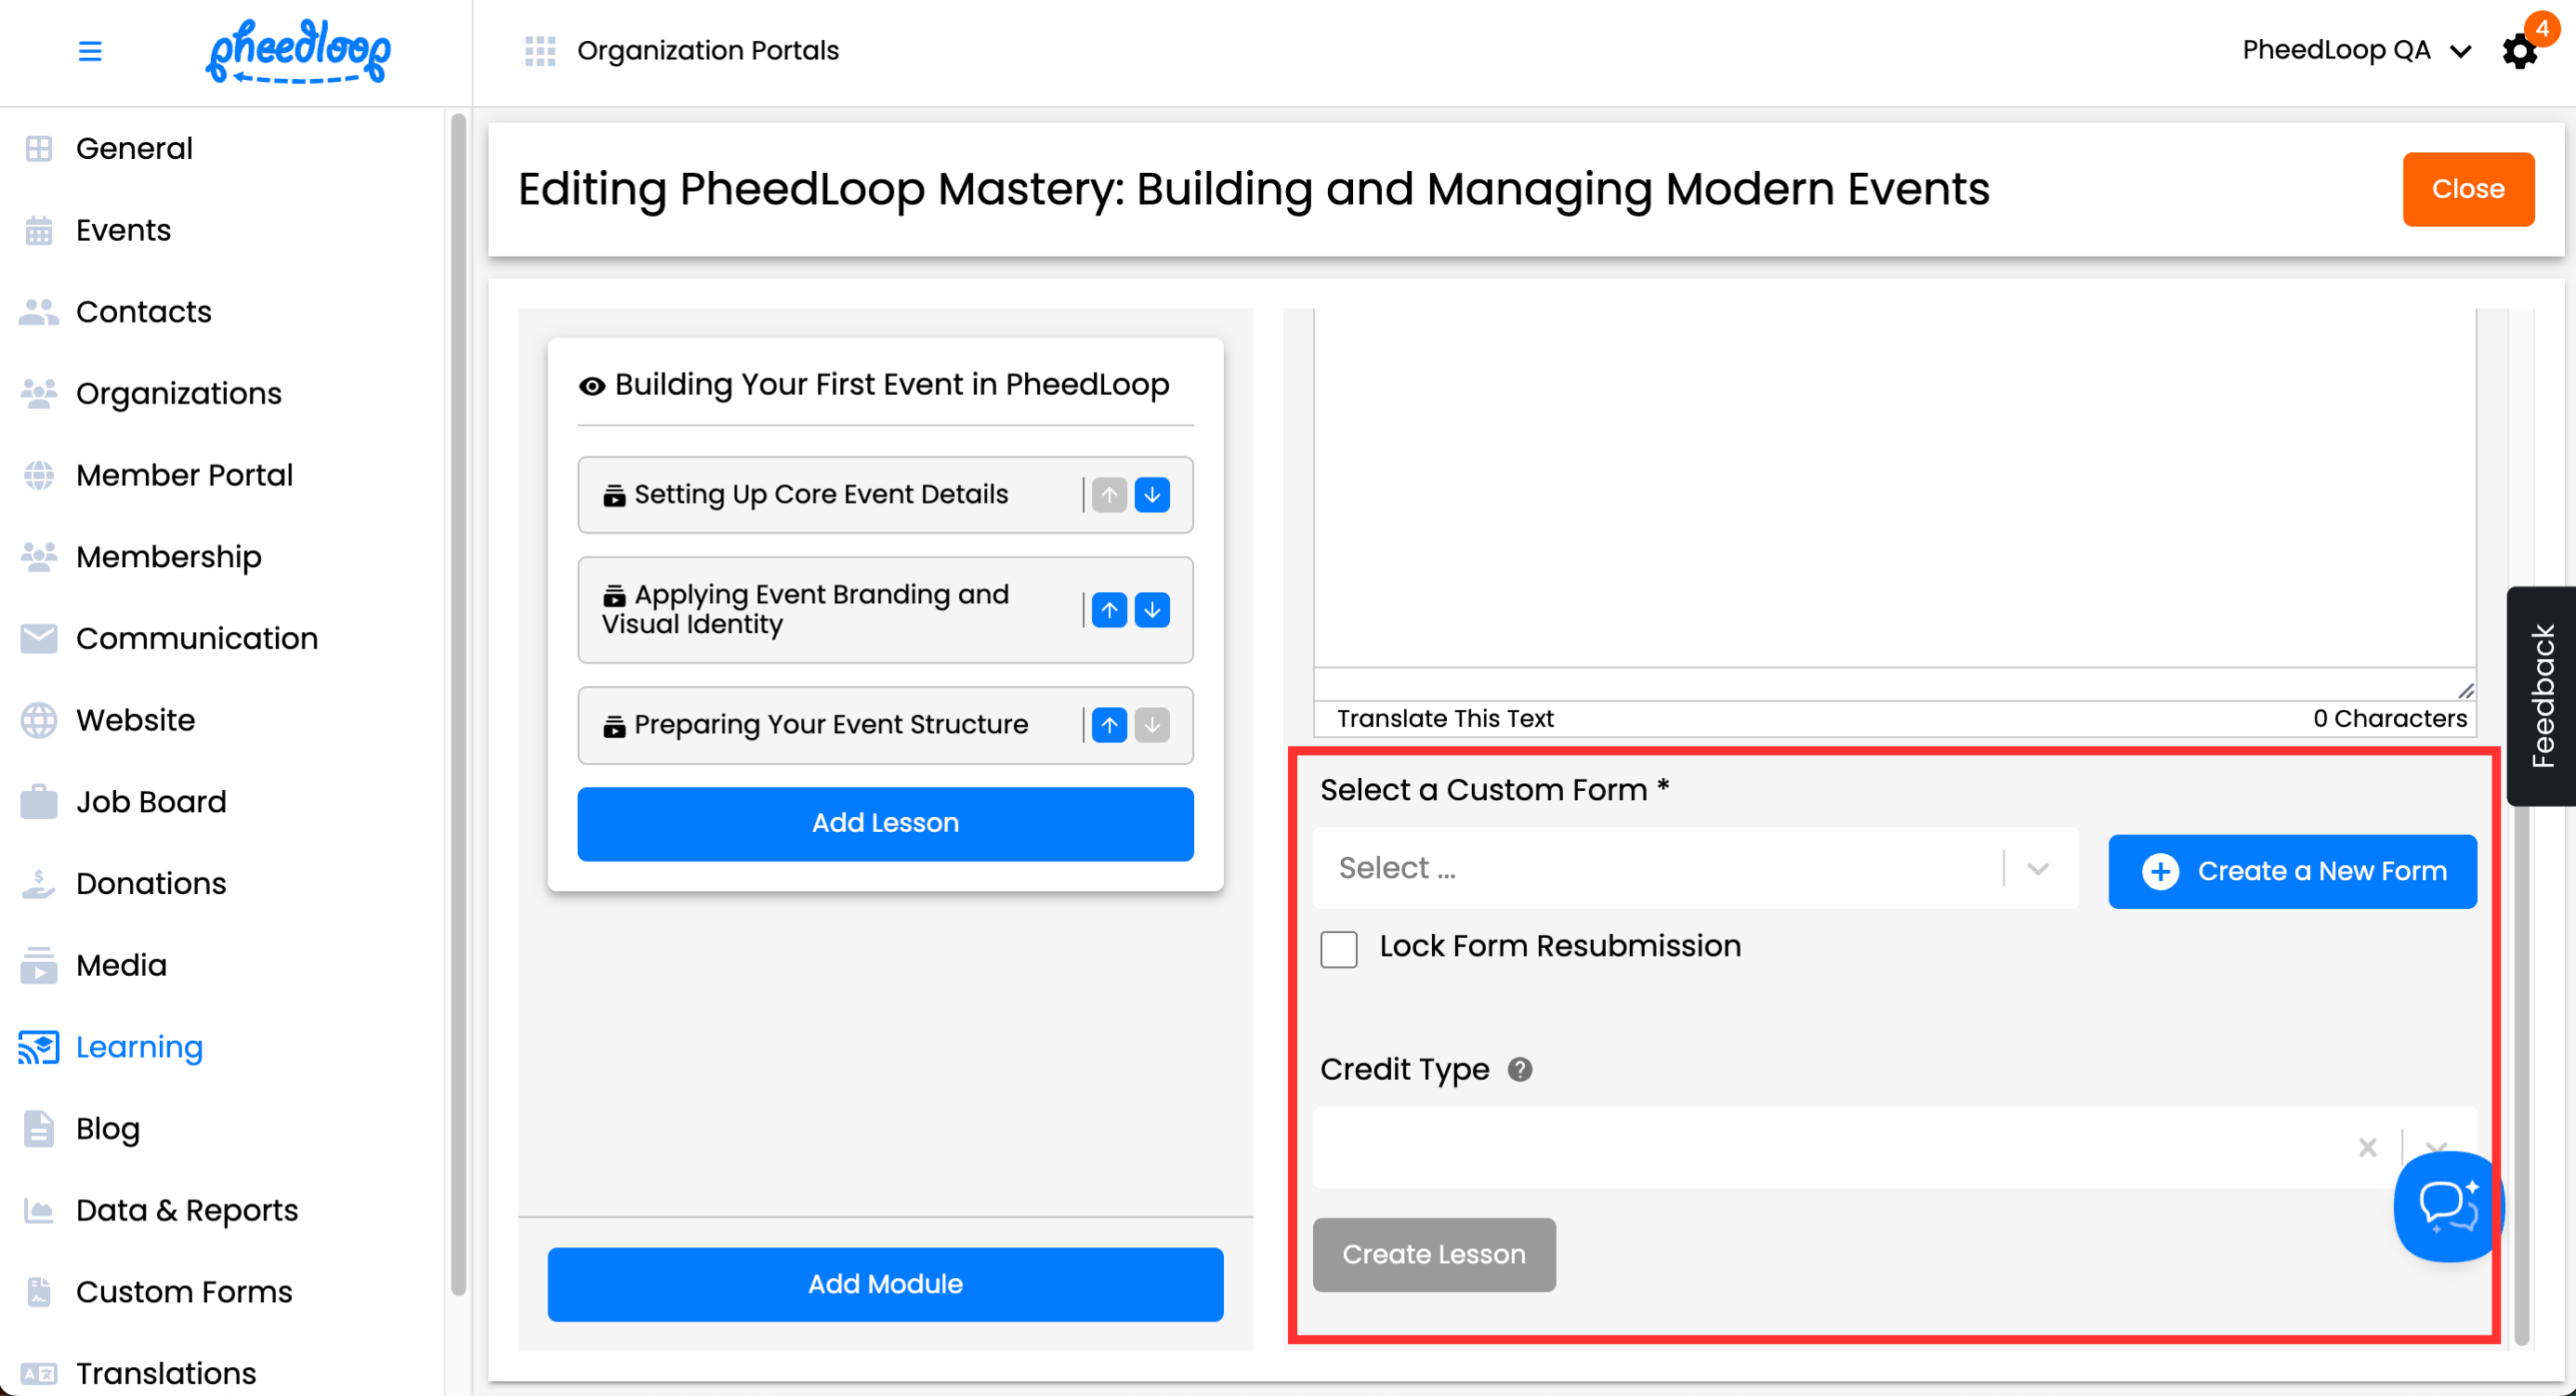
Under the Select a Custom Form field, select a custom form created by your organization
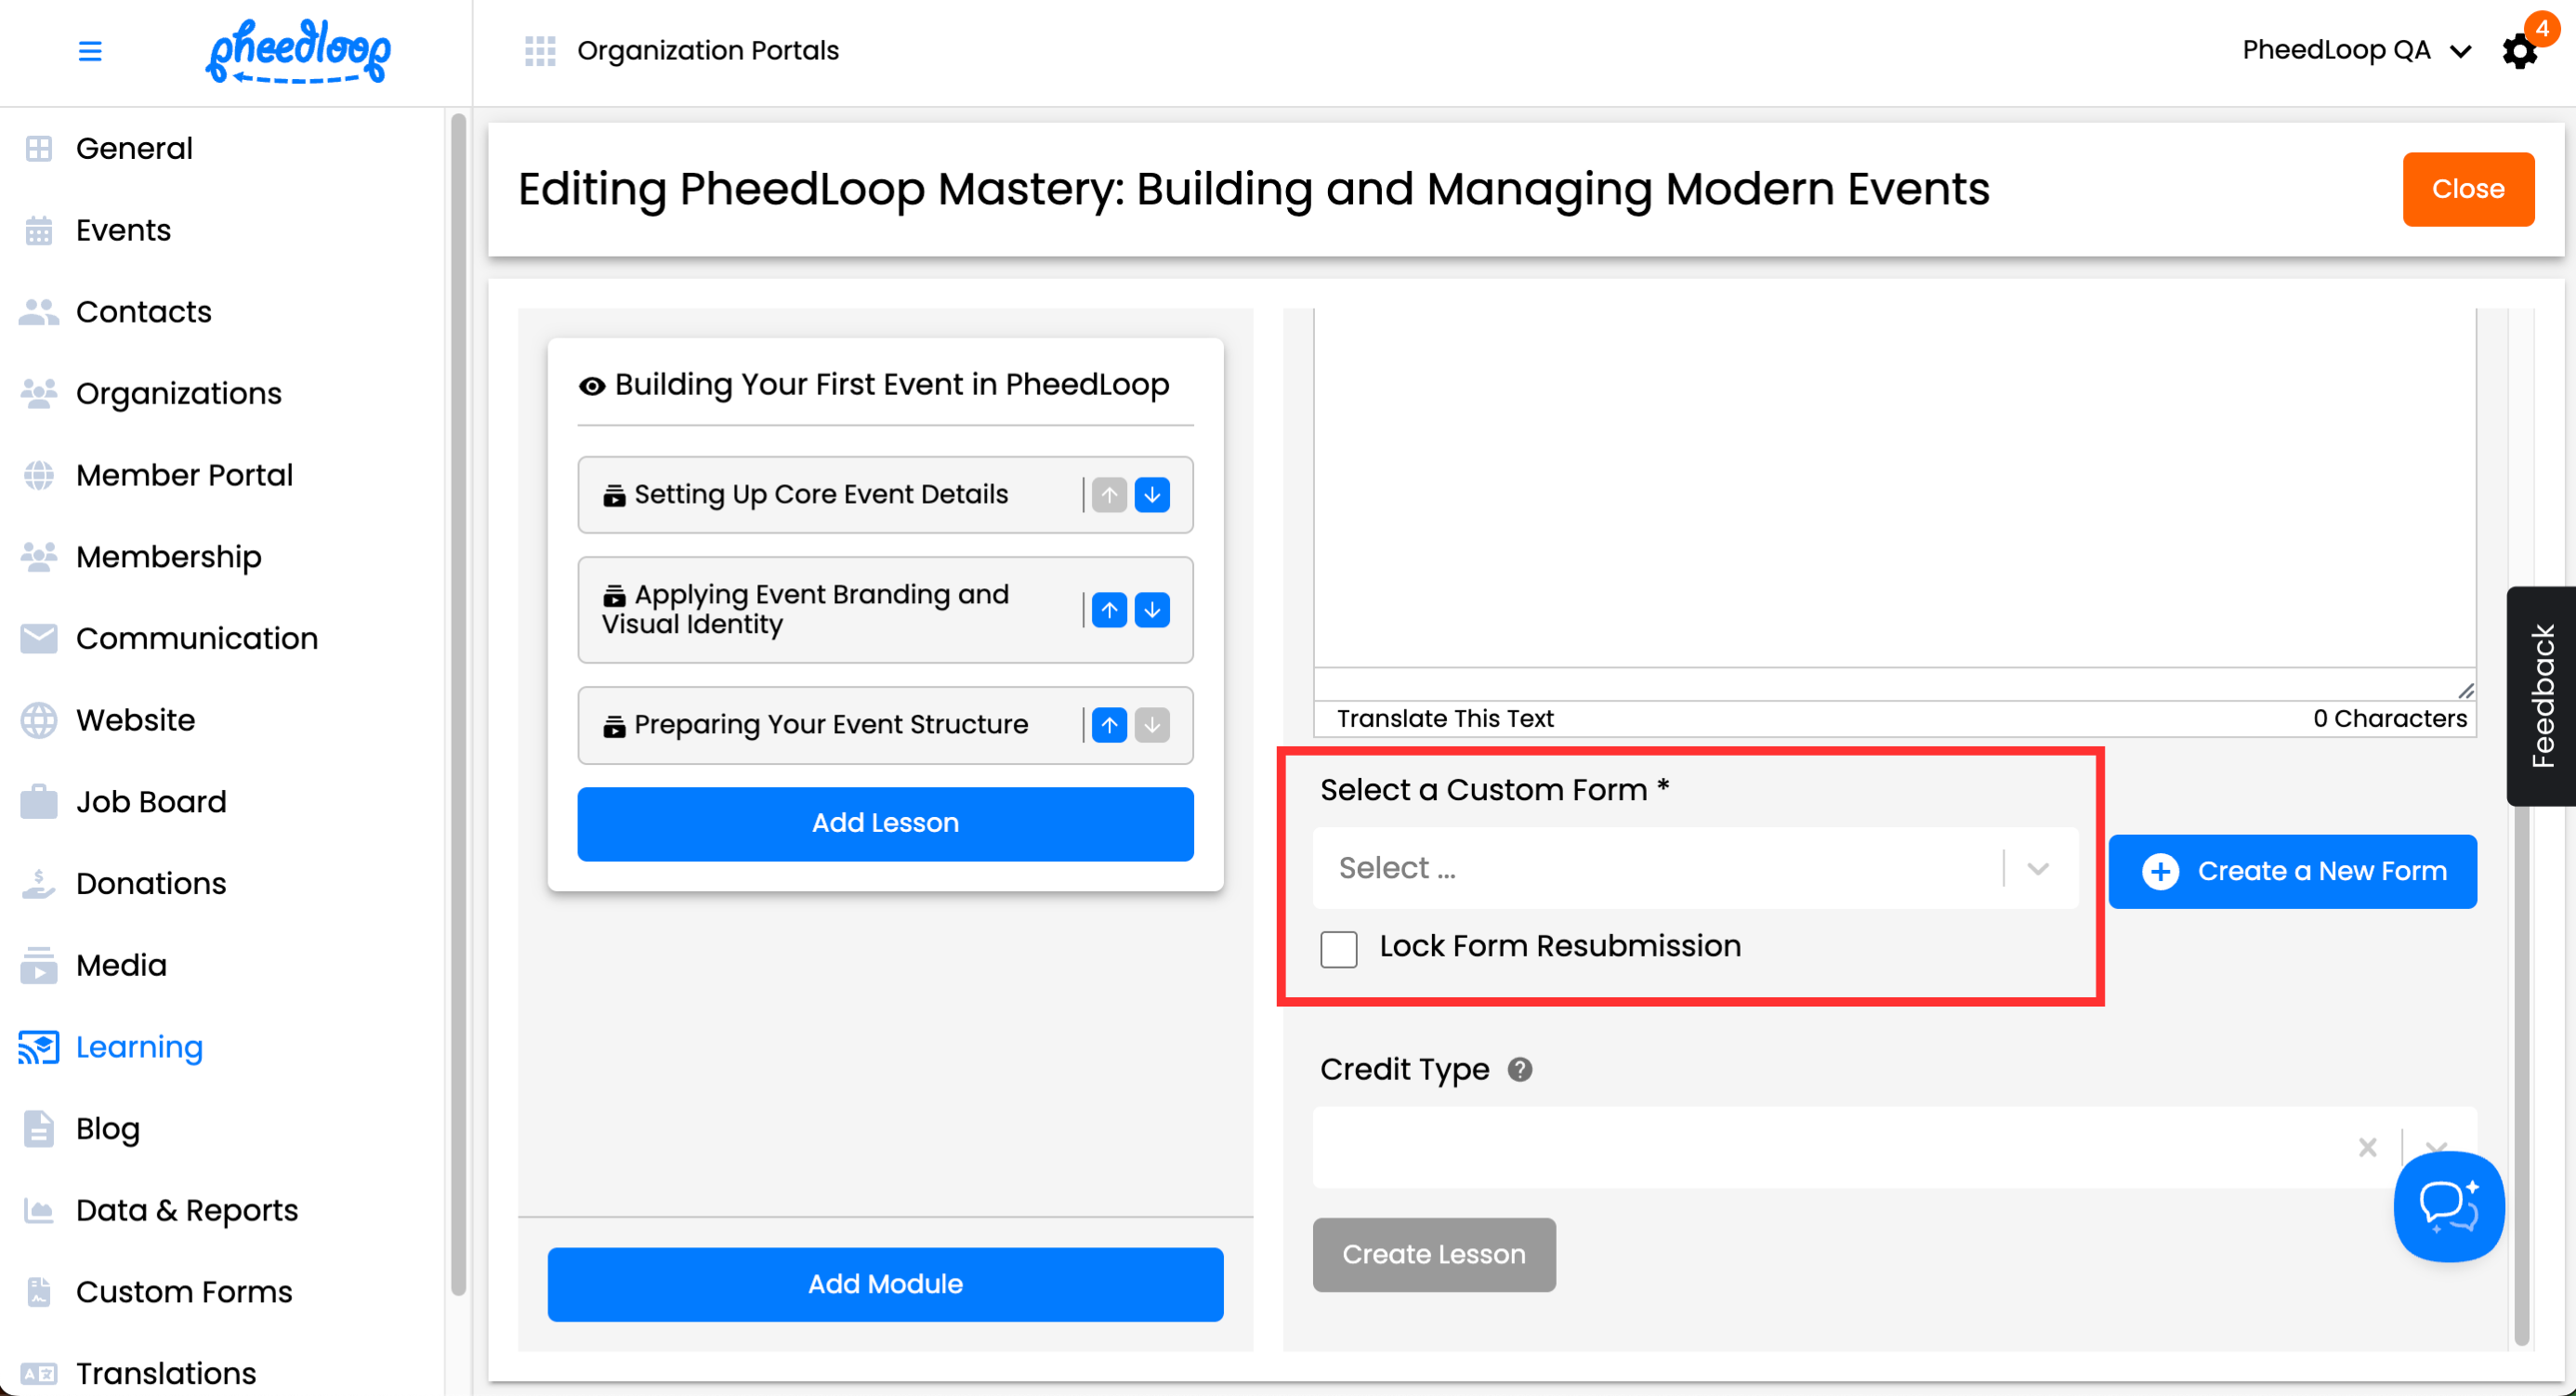
Alternatively, select Create a New Form to make your own
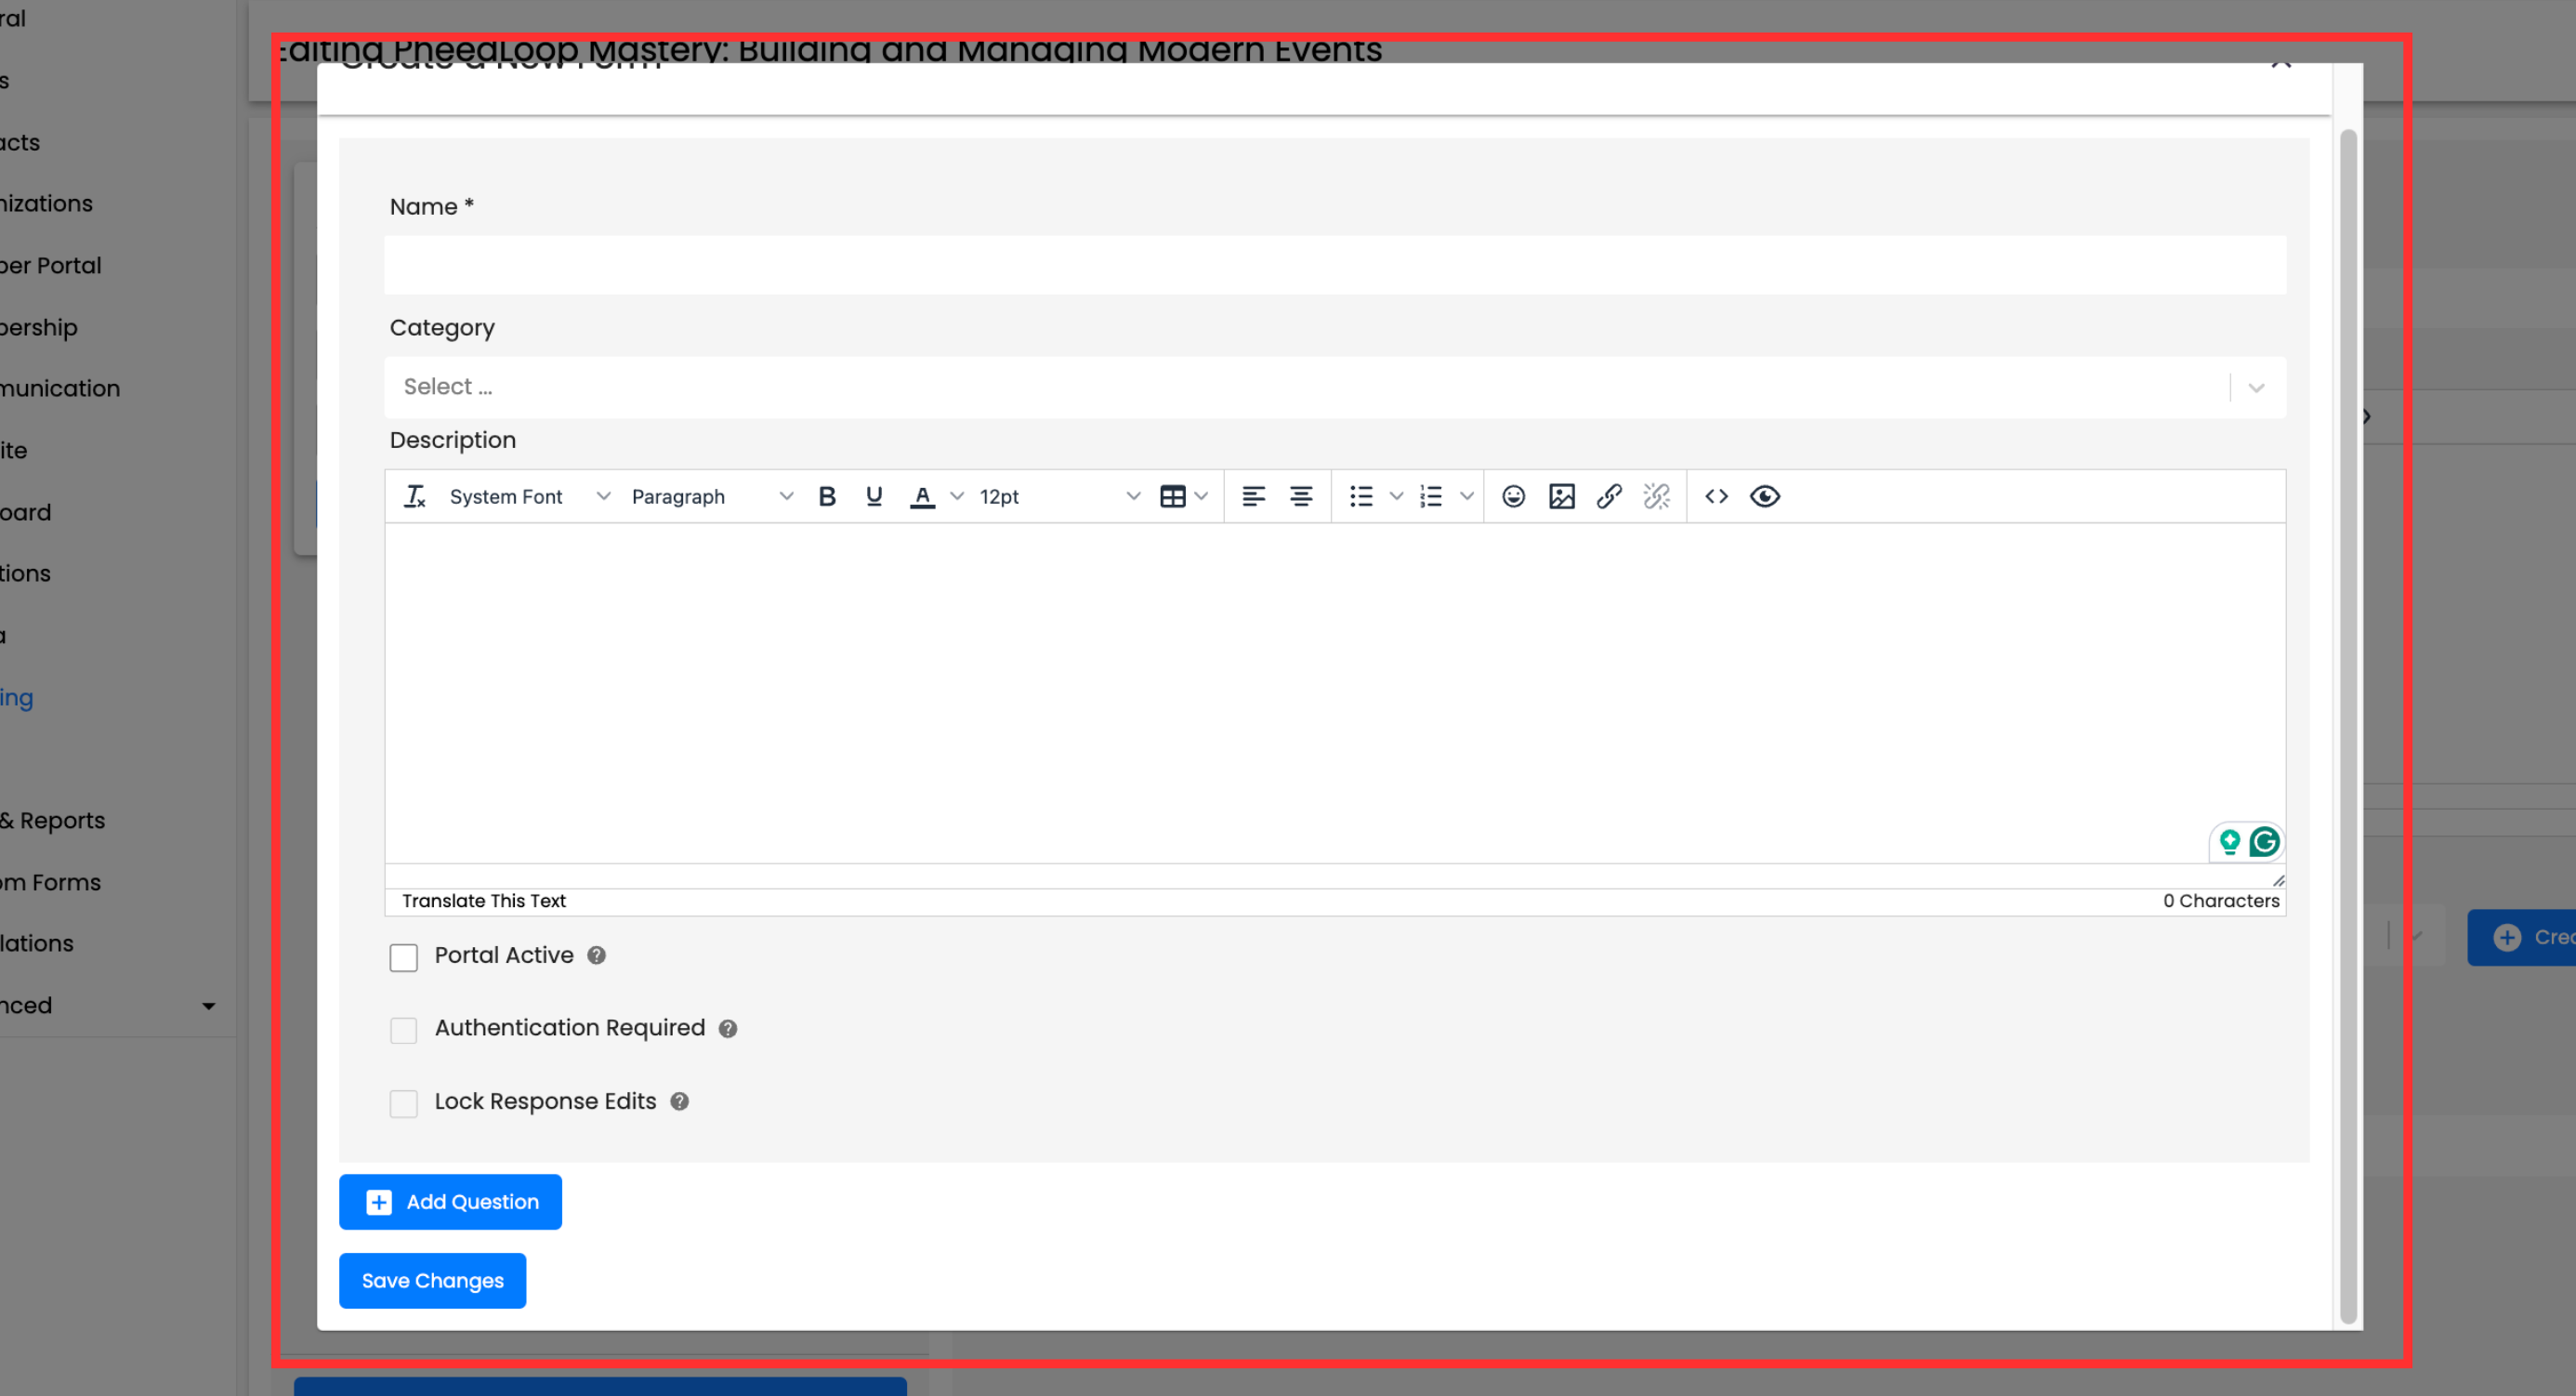
- Under the Name field, enter a name for the form you wish to create.
- Under the Category field, select Membership.
- Under the Description field, enter any additional information you wish to pass off to Members
- Select Add Question to begin creating your questions.
Select Save Changes to create your form
- Toggle on the Lock Form Resubmission checkbox to prevent resubmissions
- Under the Credit Type field, select the credit type to award the Member for completing the form
- Select Create Lesson or Save Changes if editing an existing lesson


The form will now be added to the course, and members will be able to complete it at their discretion.
Assigning the Quiz to a Course
For quizzes, the process is similar to assigning a custom form to the course. As an organizer, you have the option to include the quiz as a custom form or attach it directly to a lesson for Members to complete.
From the Course Builder, select Add Lesson > Add Form
- Under the Select a Custom Form field, select your quiz
- Alternatively, select Create a New Form to make your own
- Toggle on the Lock Form Resubmission checkbox to prevent resubmissions
- Under the Credit Type field, select the credit type to award the Member for completing the form
Select Create Lesson or Save Changes if editing an existing lesson


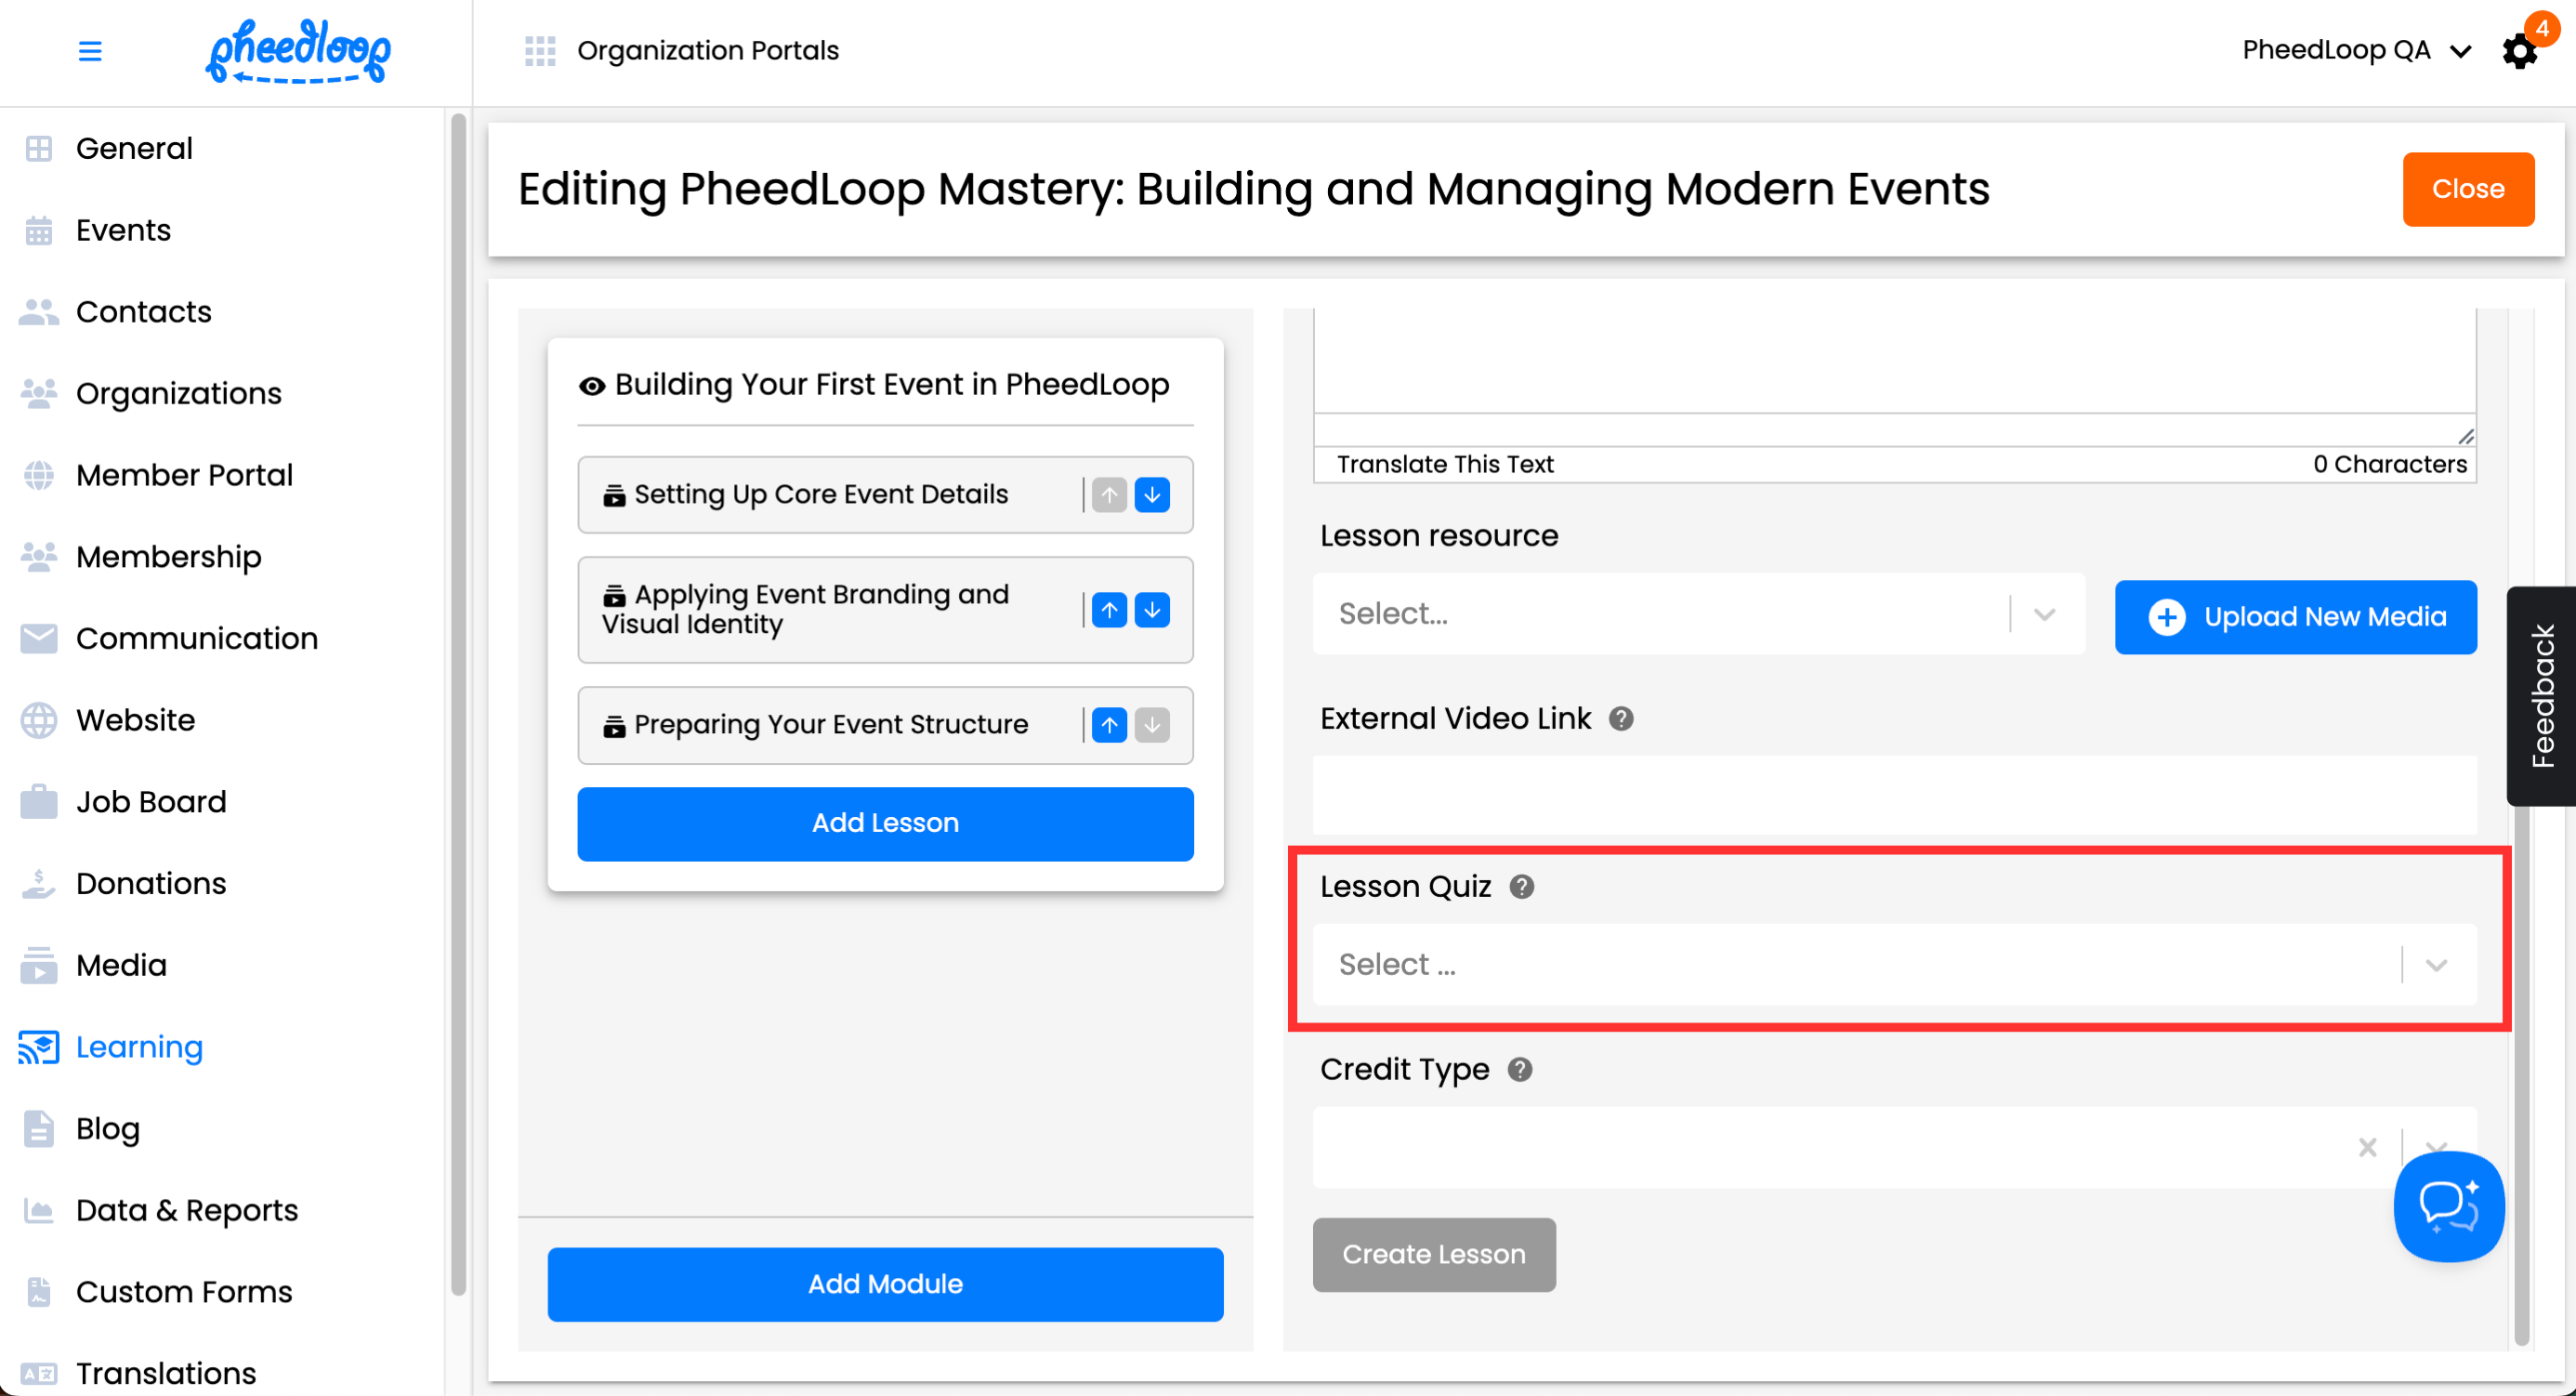
Alternatively, quizzes can be attached to the lesson itself instead of it’s own separate form. This method is ideal for planners wishing to include quizzes at the end of a lesson. Please note, that users will need to review the lesson in full before accessing the quiz.
From the Course Builder, select Add Lesson > Add Lesson

- Under the Lesson Quiz field, select your quiz
Select Create Lesson or Save Changes if editing an existing lesson