Managing Purchases in the Learning Management System
Please note, the organization account must be connected to a financial integration such as Stripe in order for Members to pay for courses with a credit card.
All unpaid courses can be handled in the Learning Portal or through an administrator in the Membership Dashboard.
Managing Purchases from the Learning Portal
From the Member Portal, select Learning
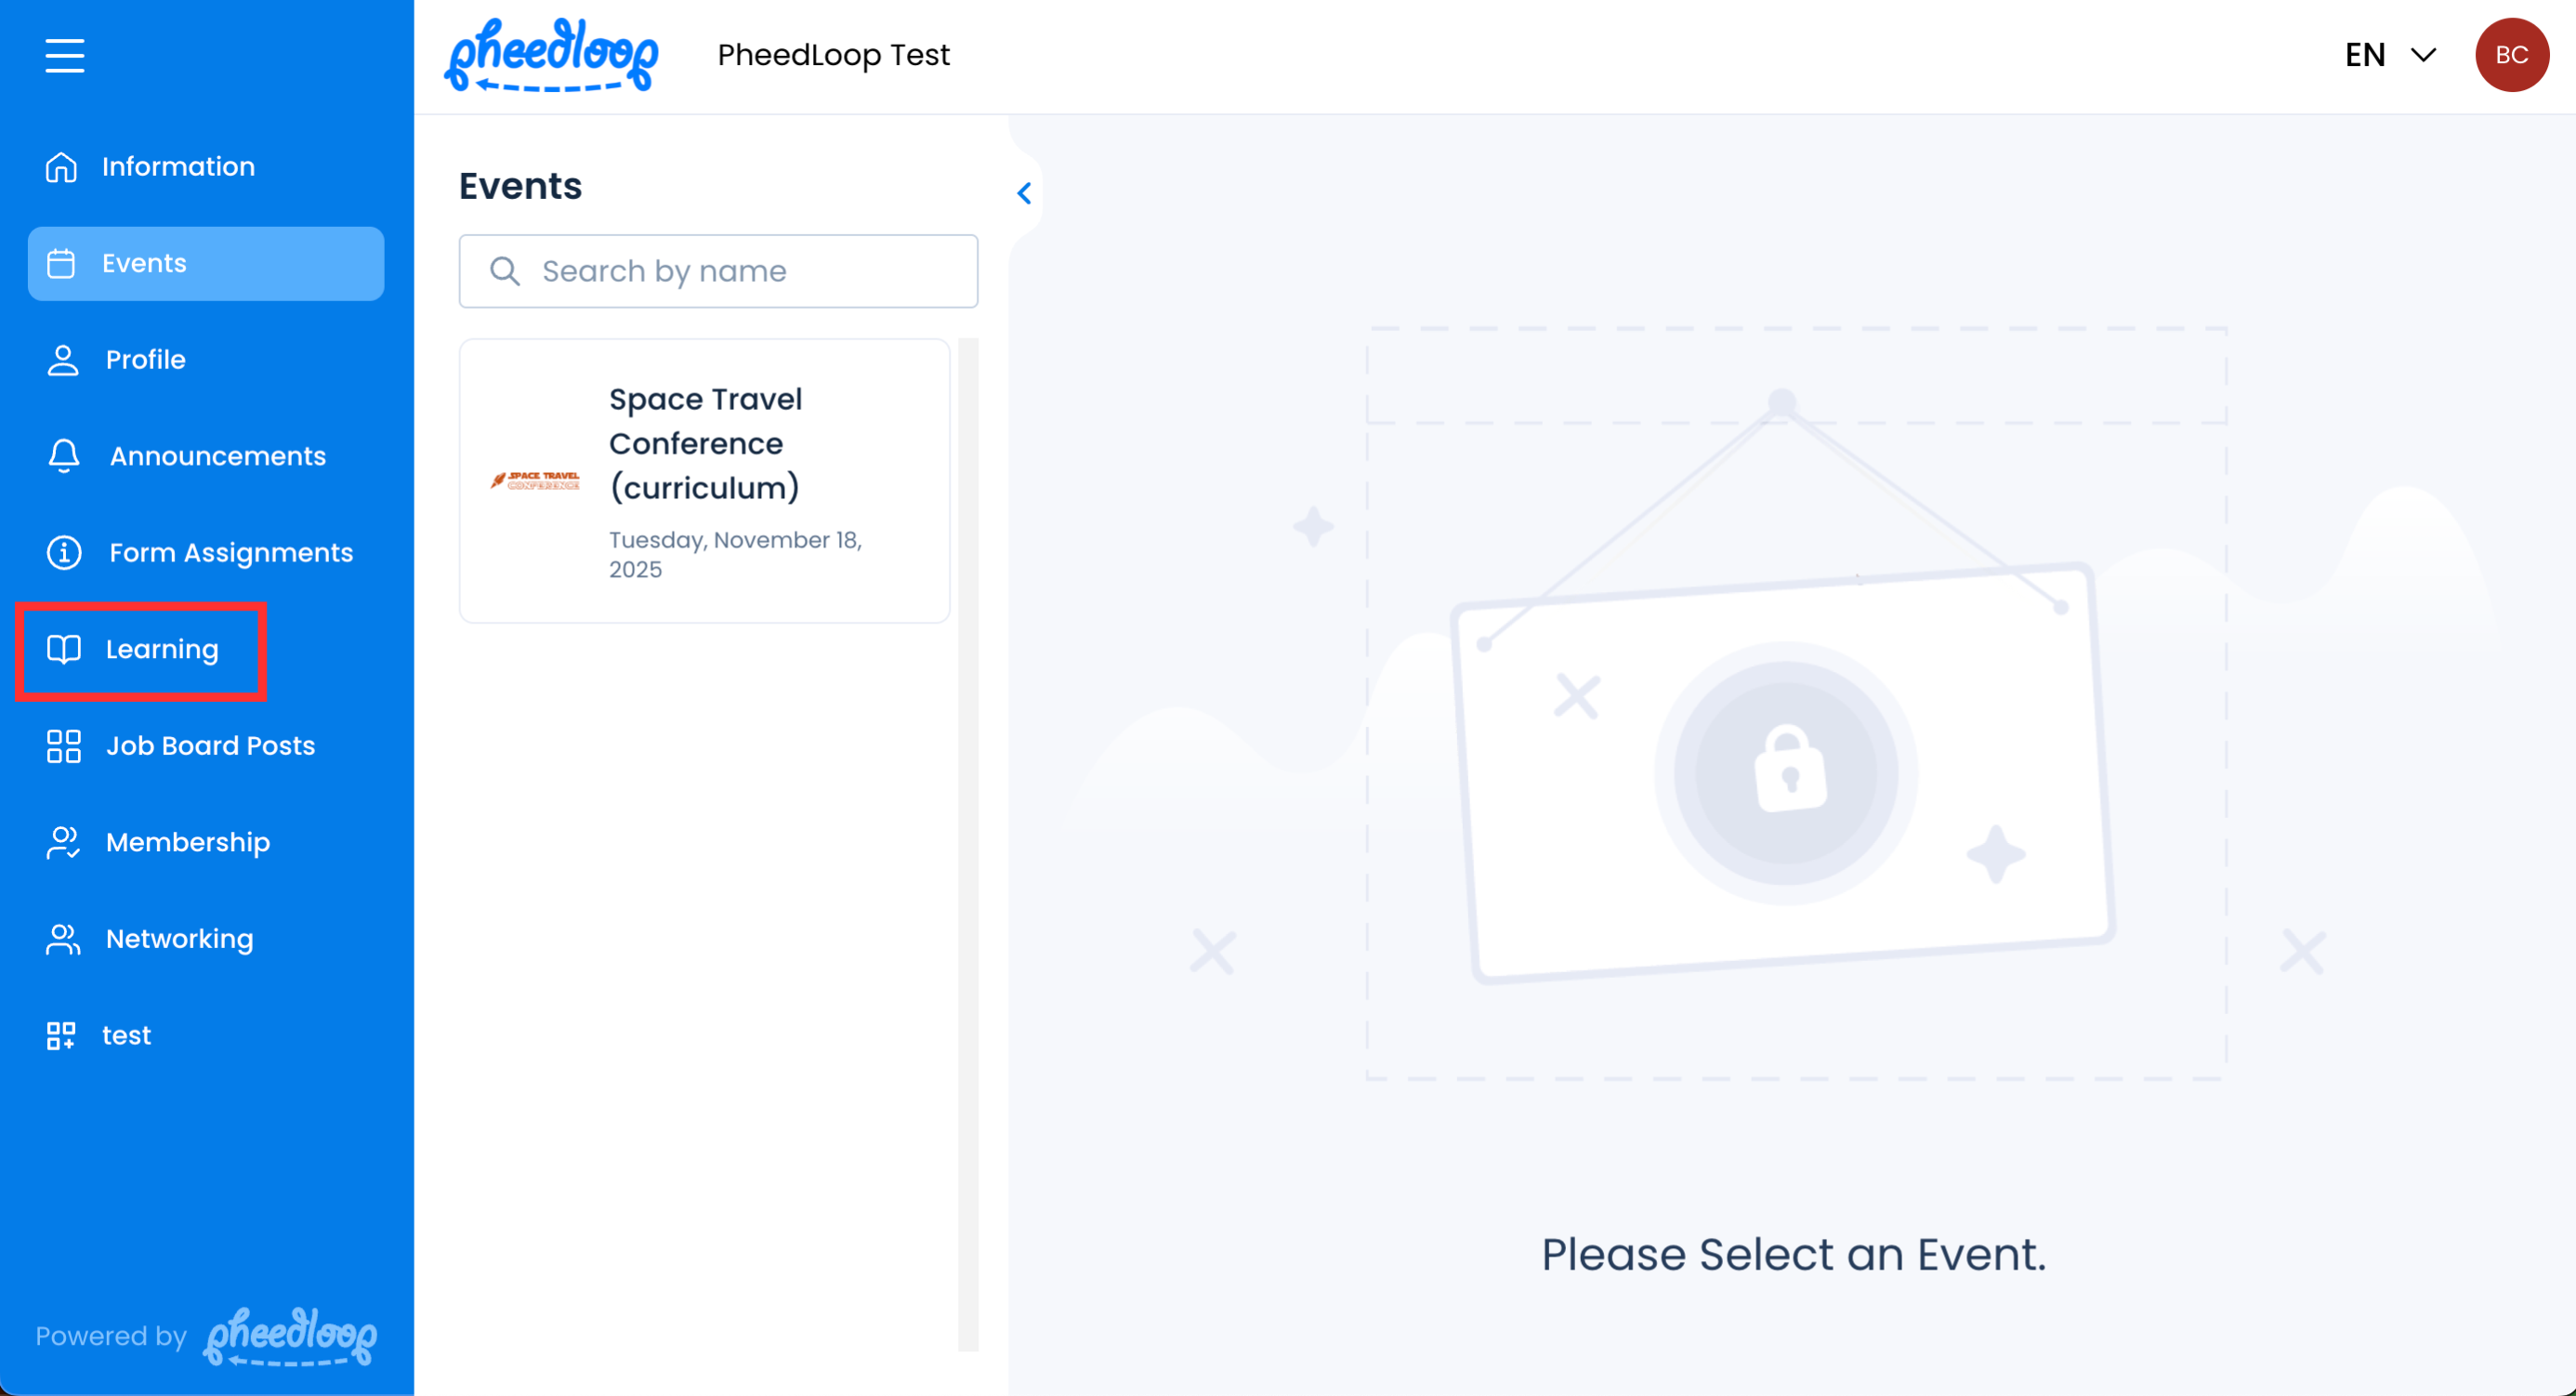
- From the Learning Portal, navigate to Purchases
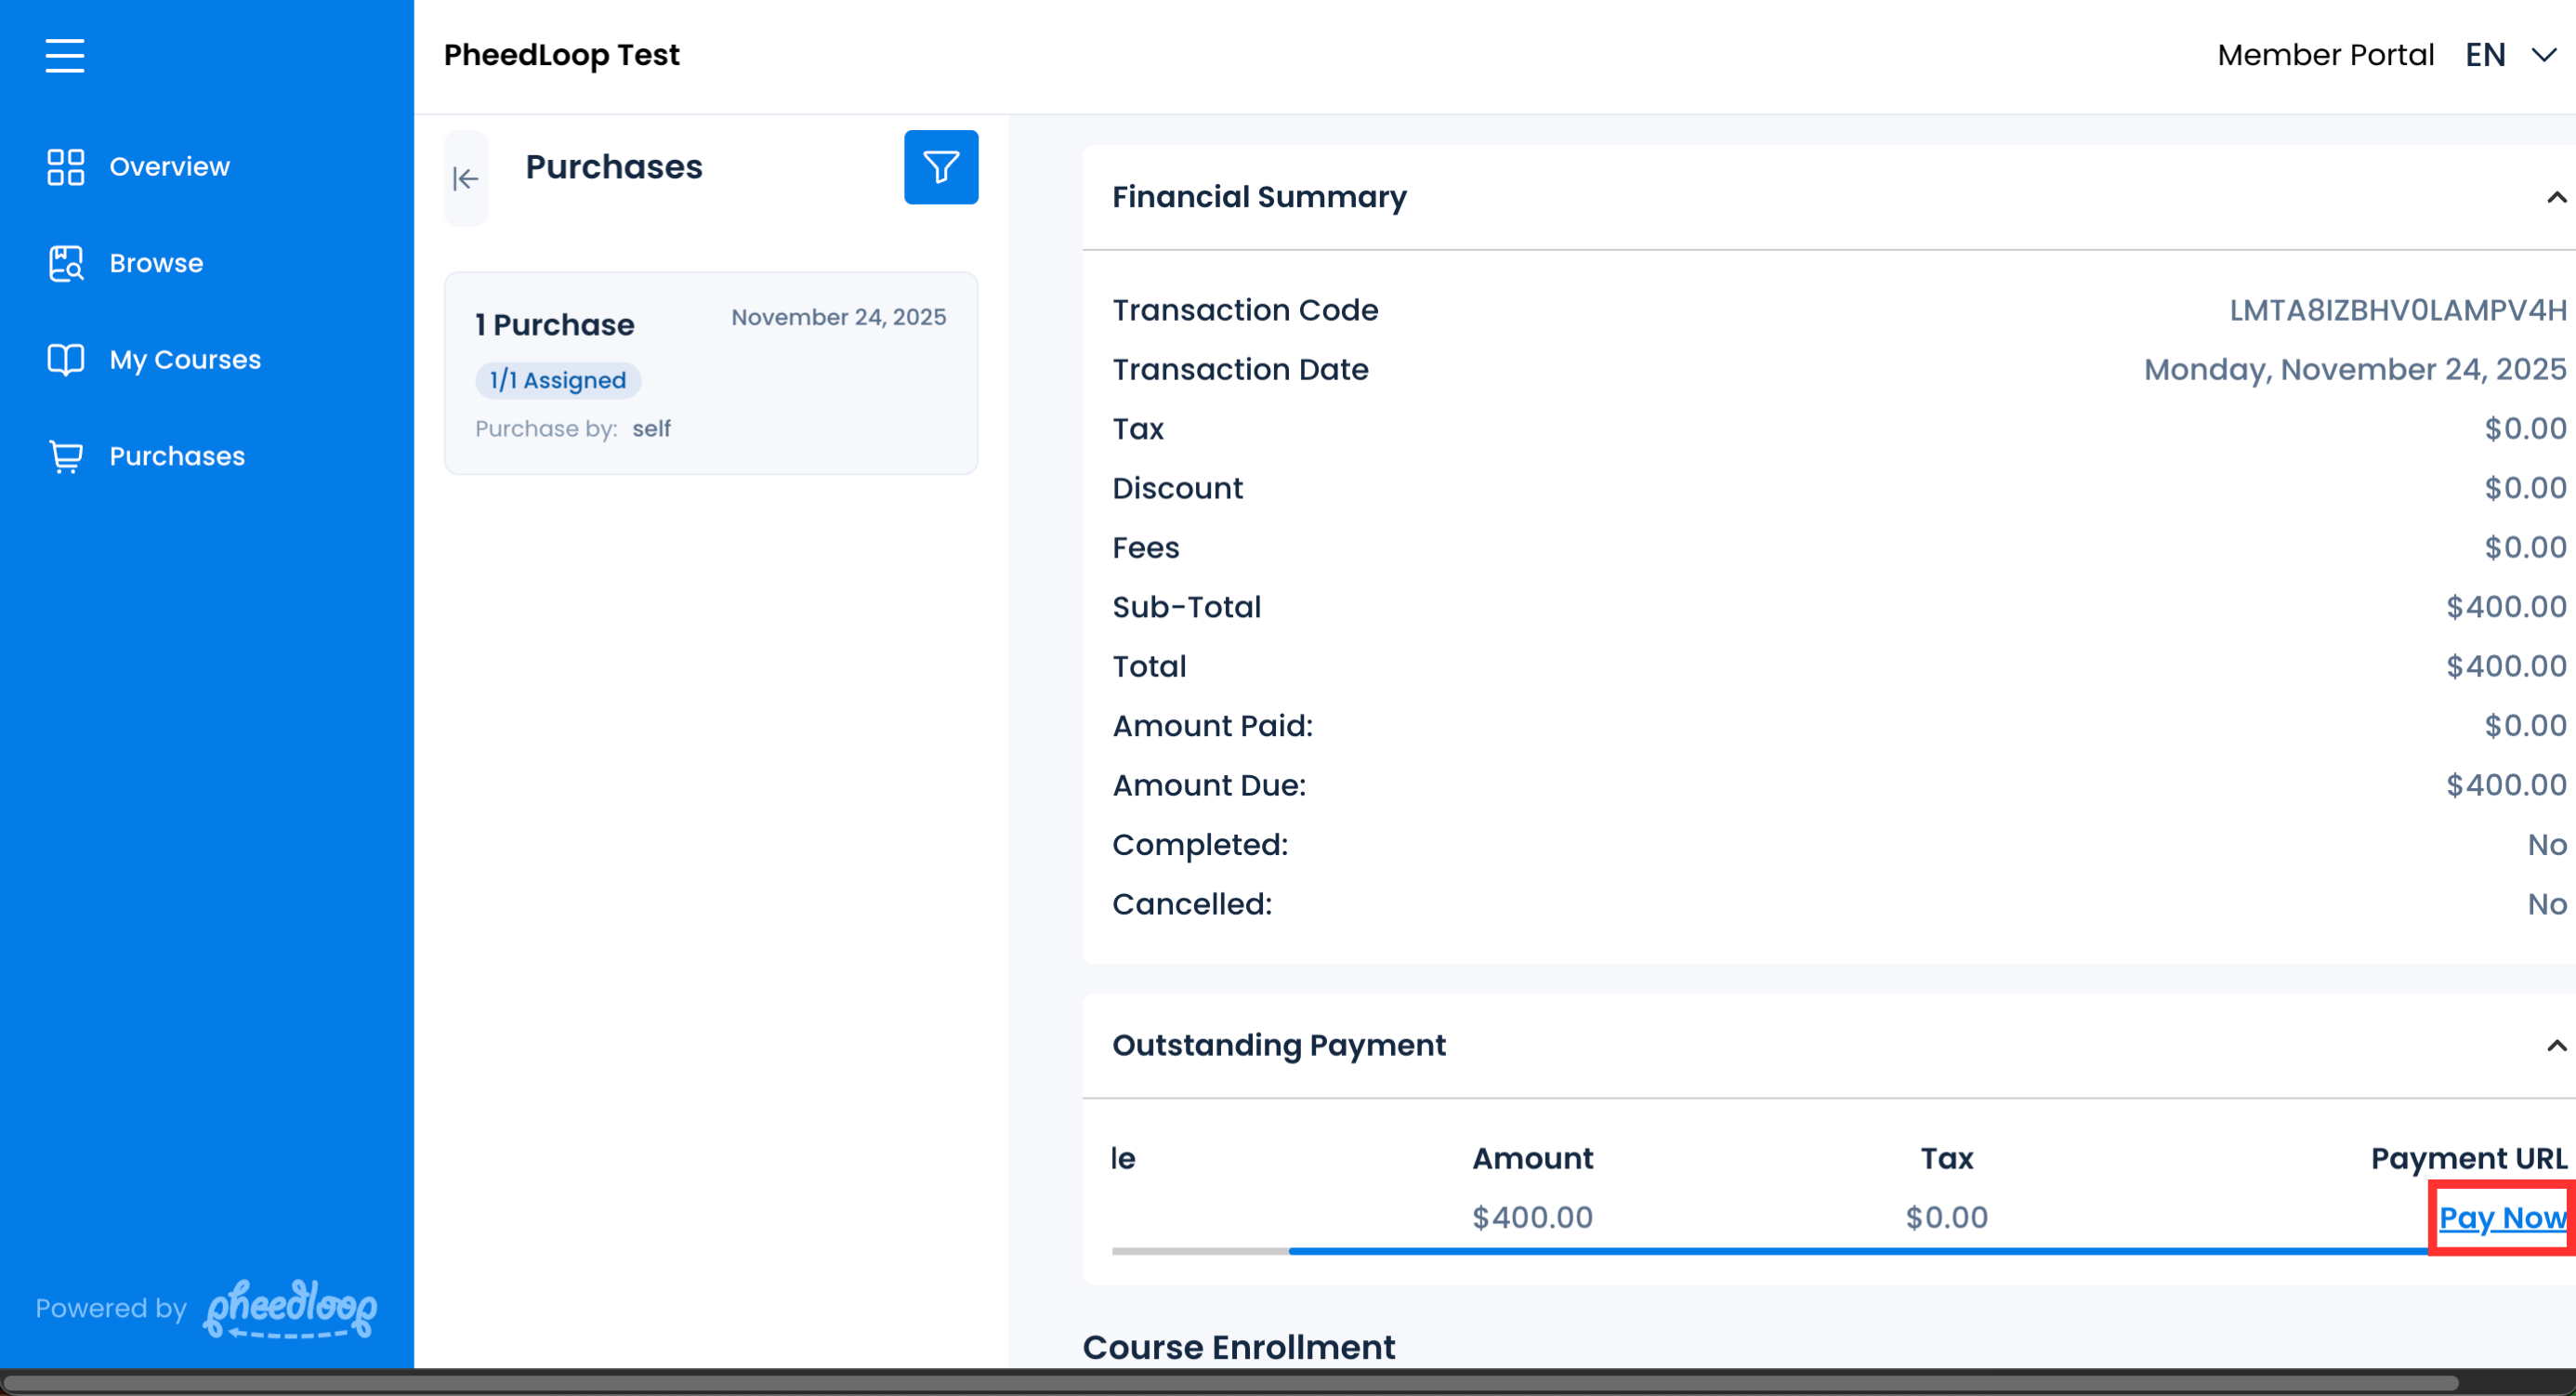
- Select the outstanding payment from the list
- Under the Payment URL column, select Pay Now
In the new window, select Pay Now
- Enter your credit card information
- Select Confirm


Managing Purchases from the Membership Dashboard
Purchases can also be recorded and edited in the Membership Dashboard.
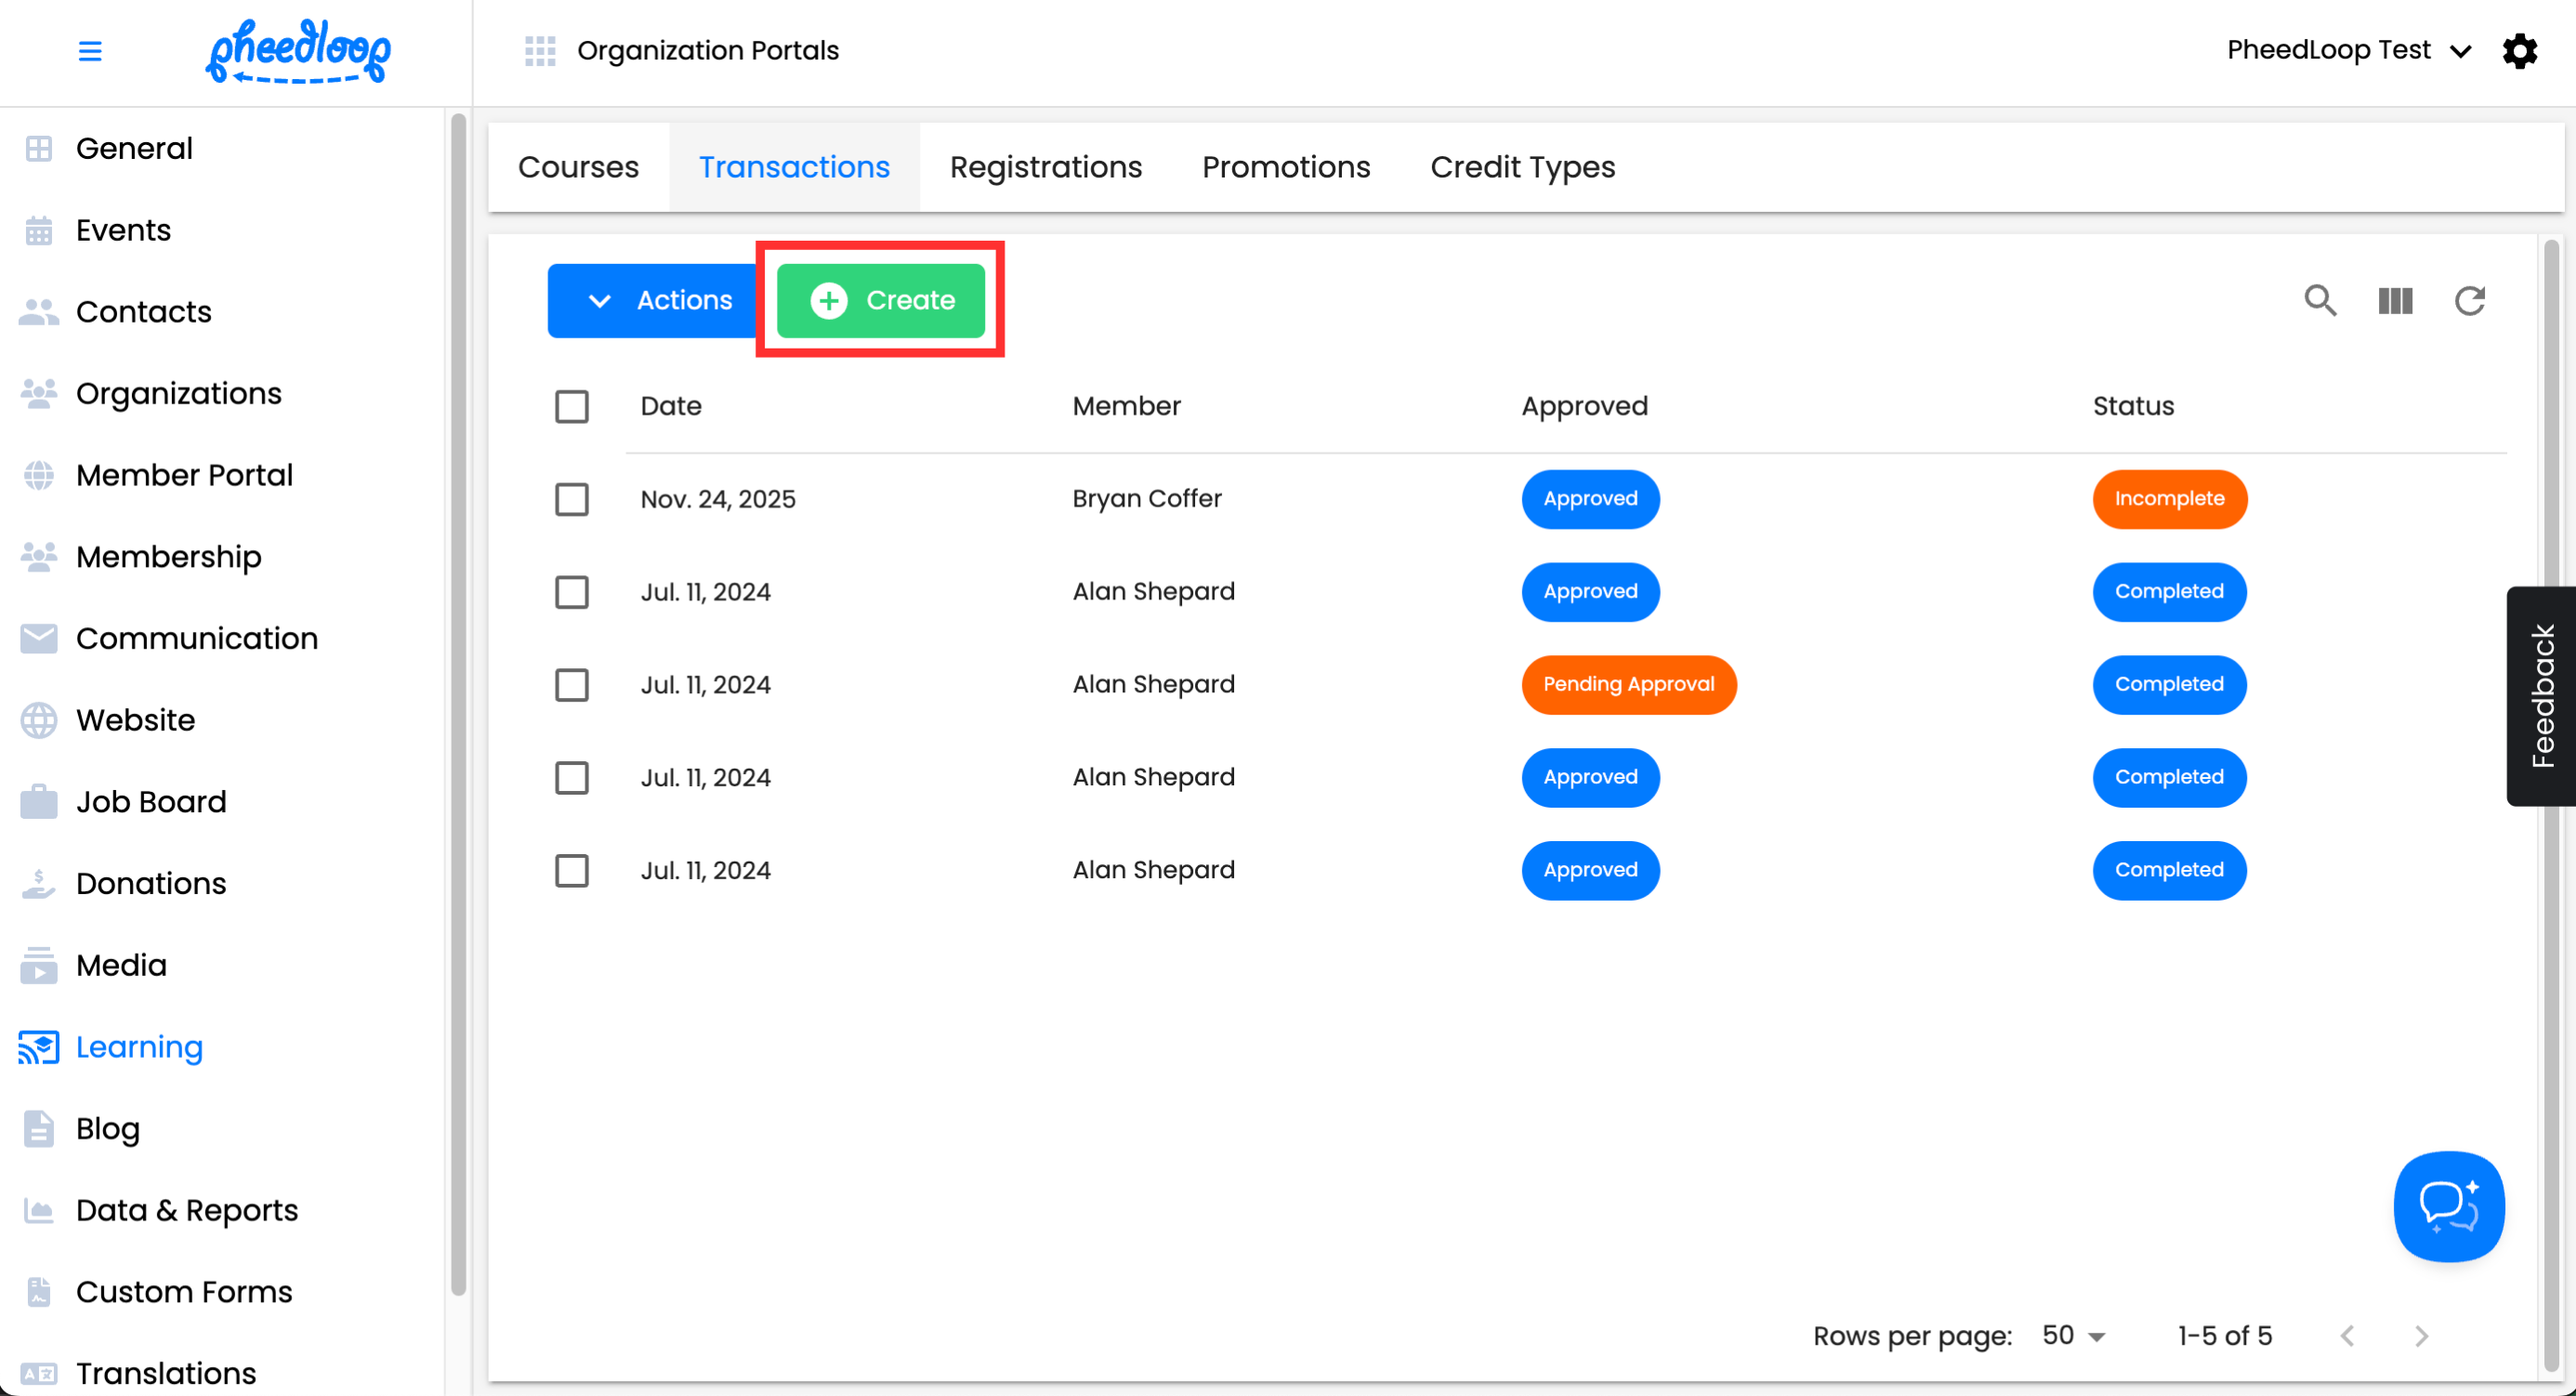
- From the Membership Dashboard, navigate to Learning > Transactions
Above the Transactions table, select Create
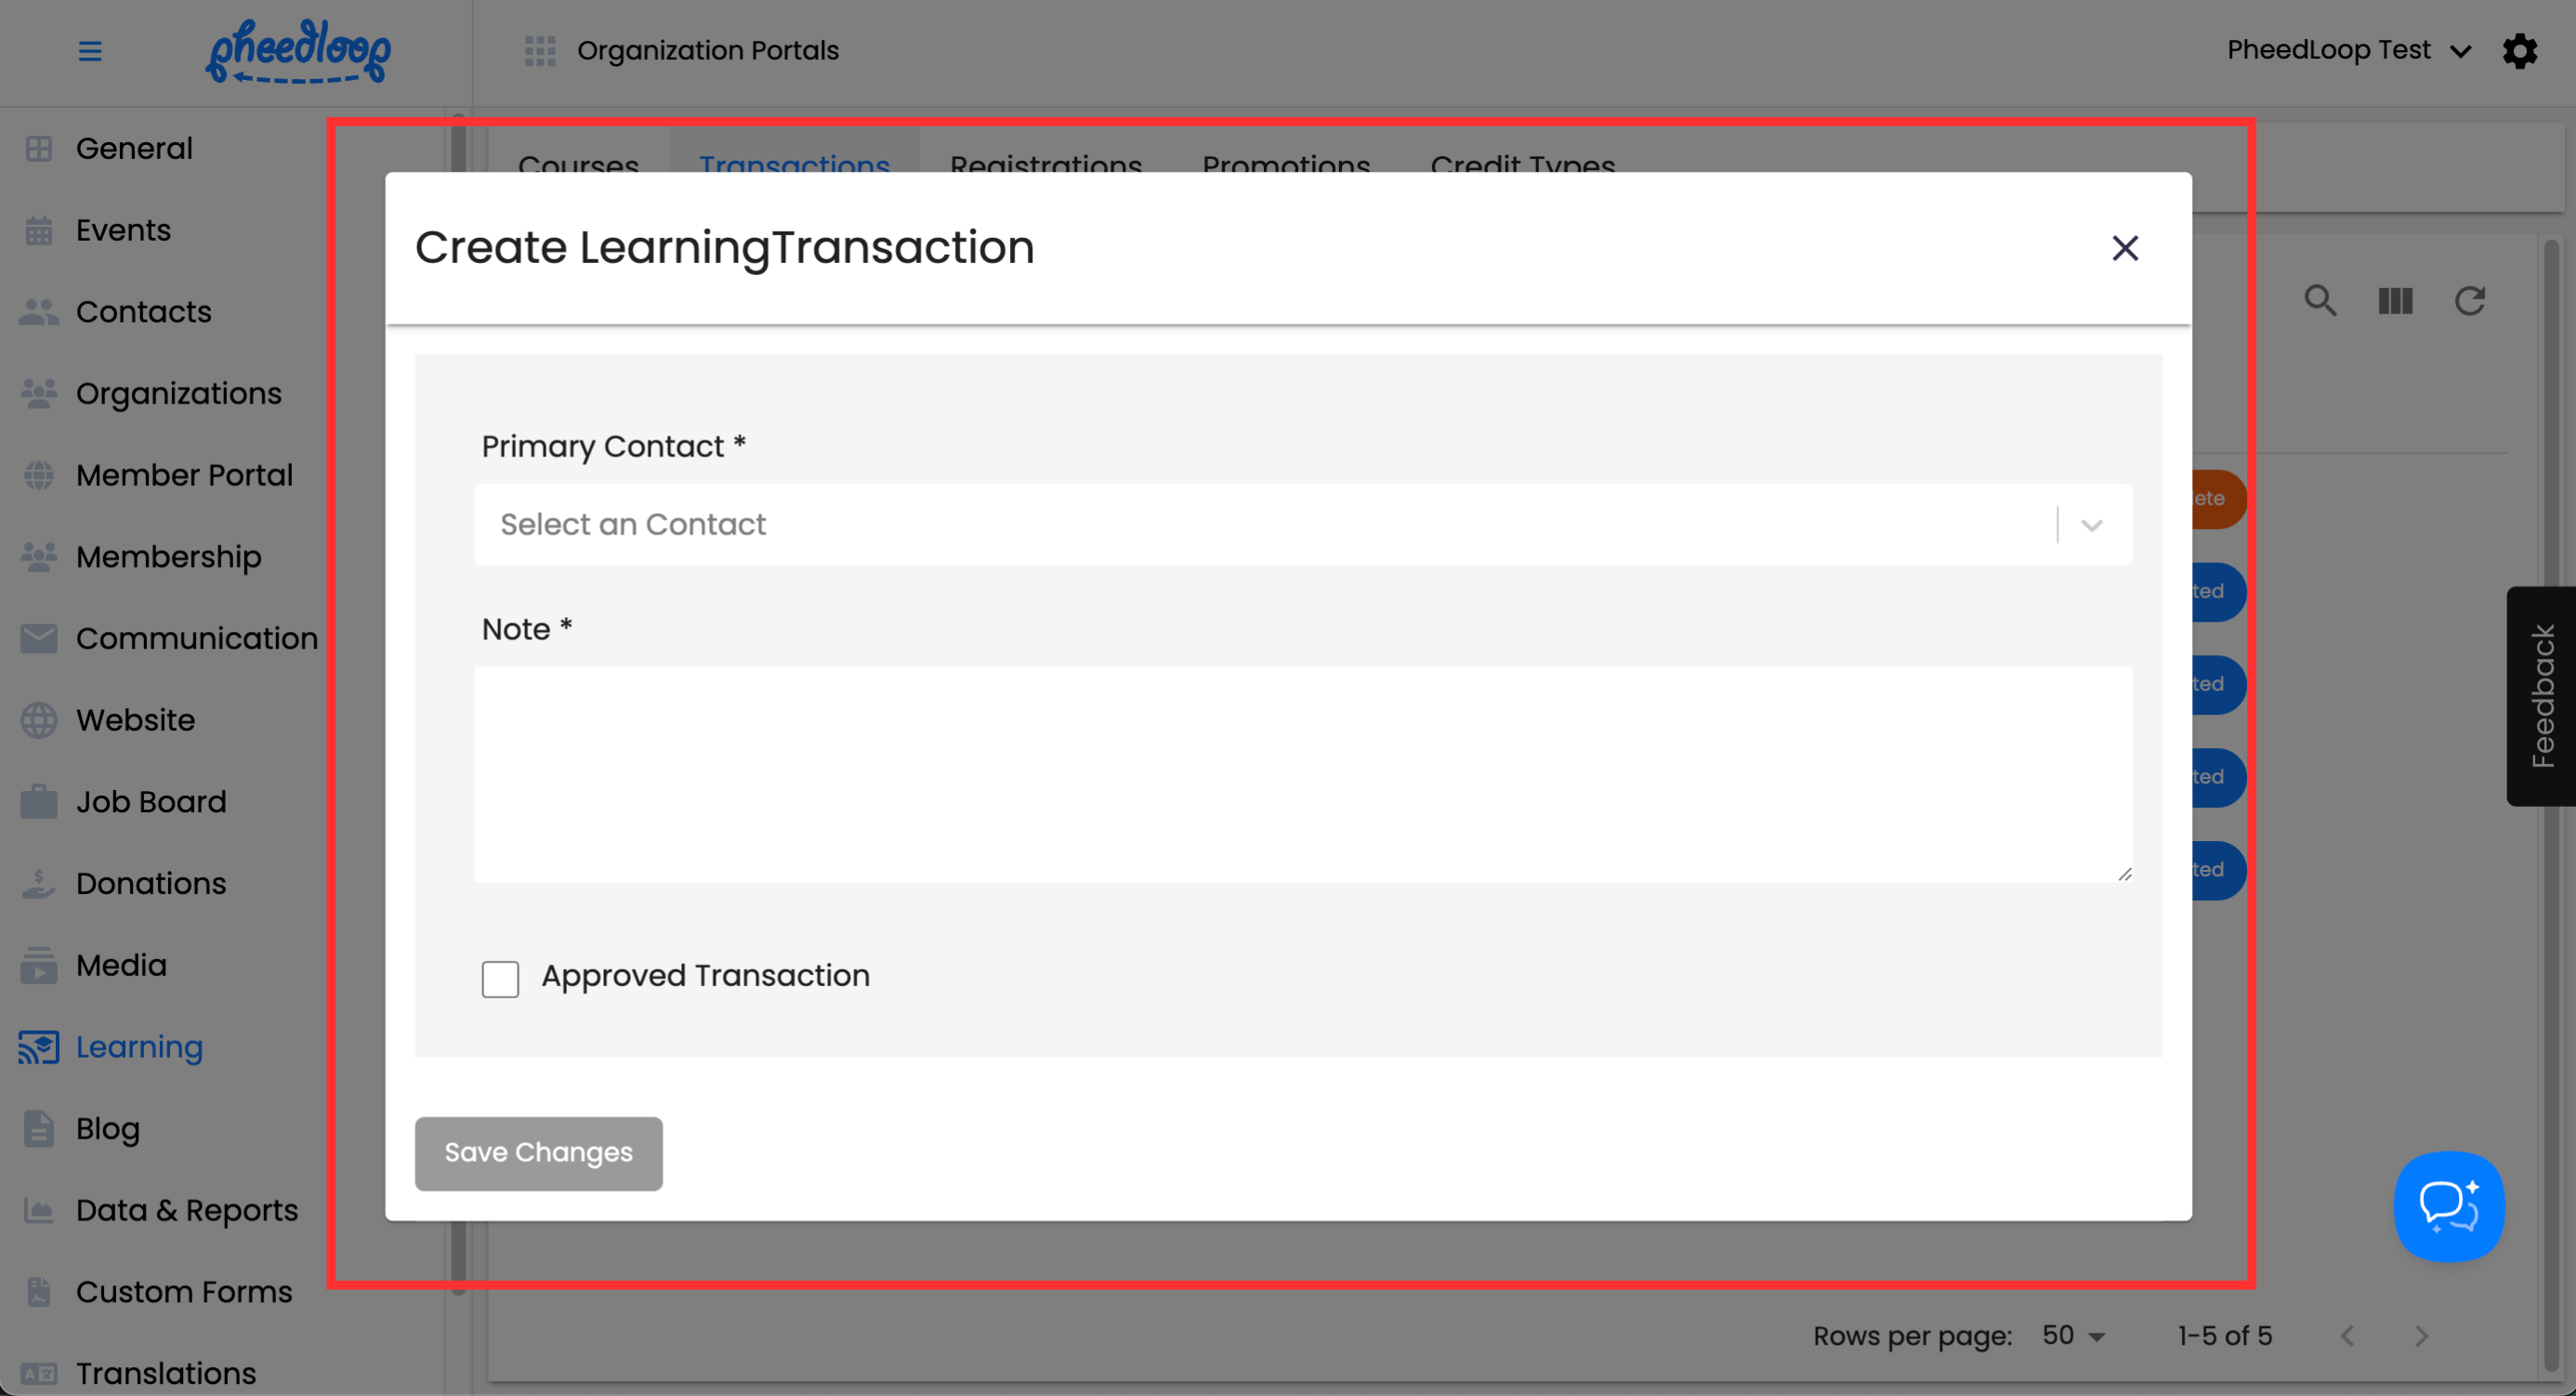
- Under the Primary Contact field, select the member to assign the transaction to
- Under the Note field, enter any internal notes you wish to add as part of the transaction
- Toggle on the Approved Transaction checkbox to authorize the transaction
- Please note, this setting does not verify the payment.
Select Save Changes


Please note that the transactions page here is unique to the Learning Management System and will not reflect transactions for things beyond the purchases made in the Learning Portal.
If the transaction is already in the Membership Dashboard, it can be edited directly.
- From the Membership Dashboard, navigate to Learning > Transactions
Select the Transaction you wish to edit
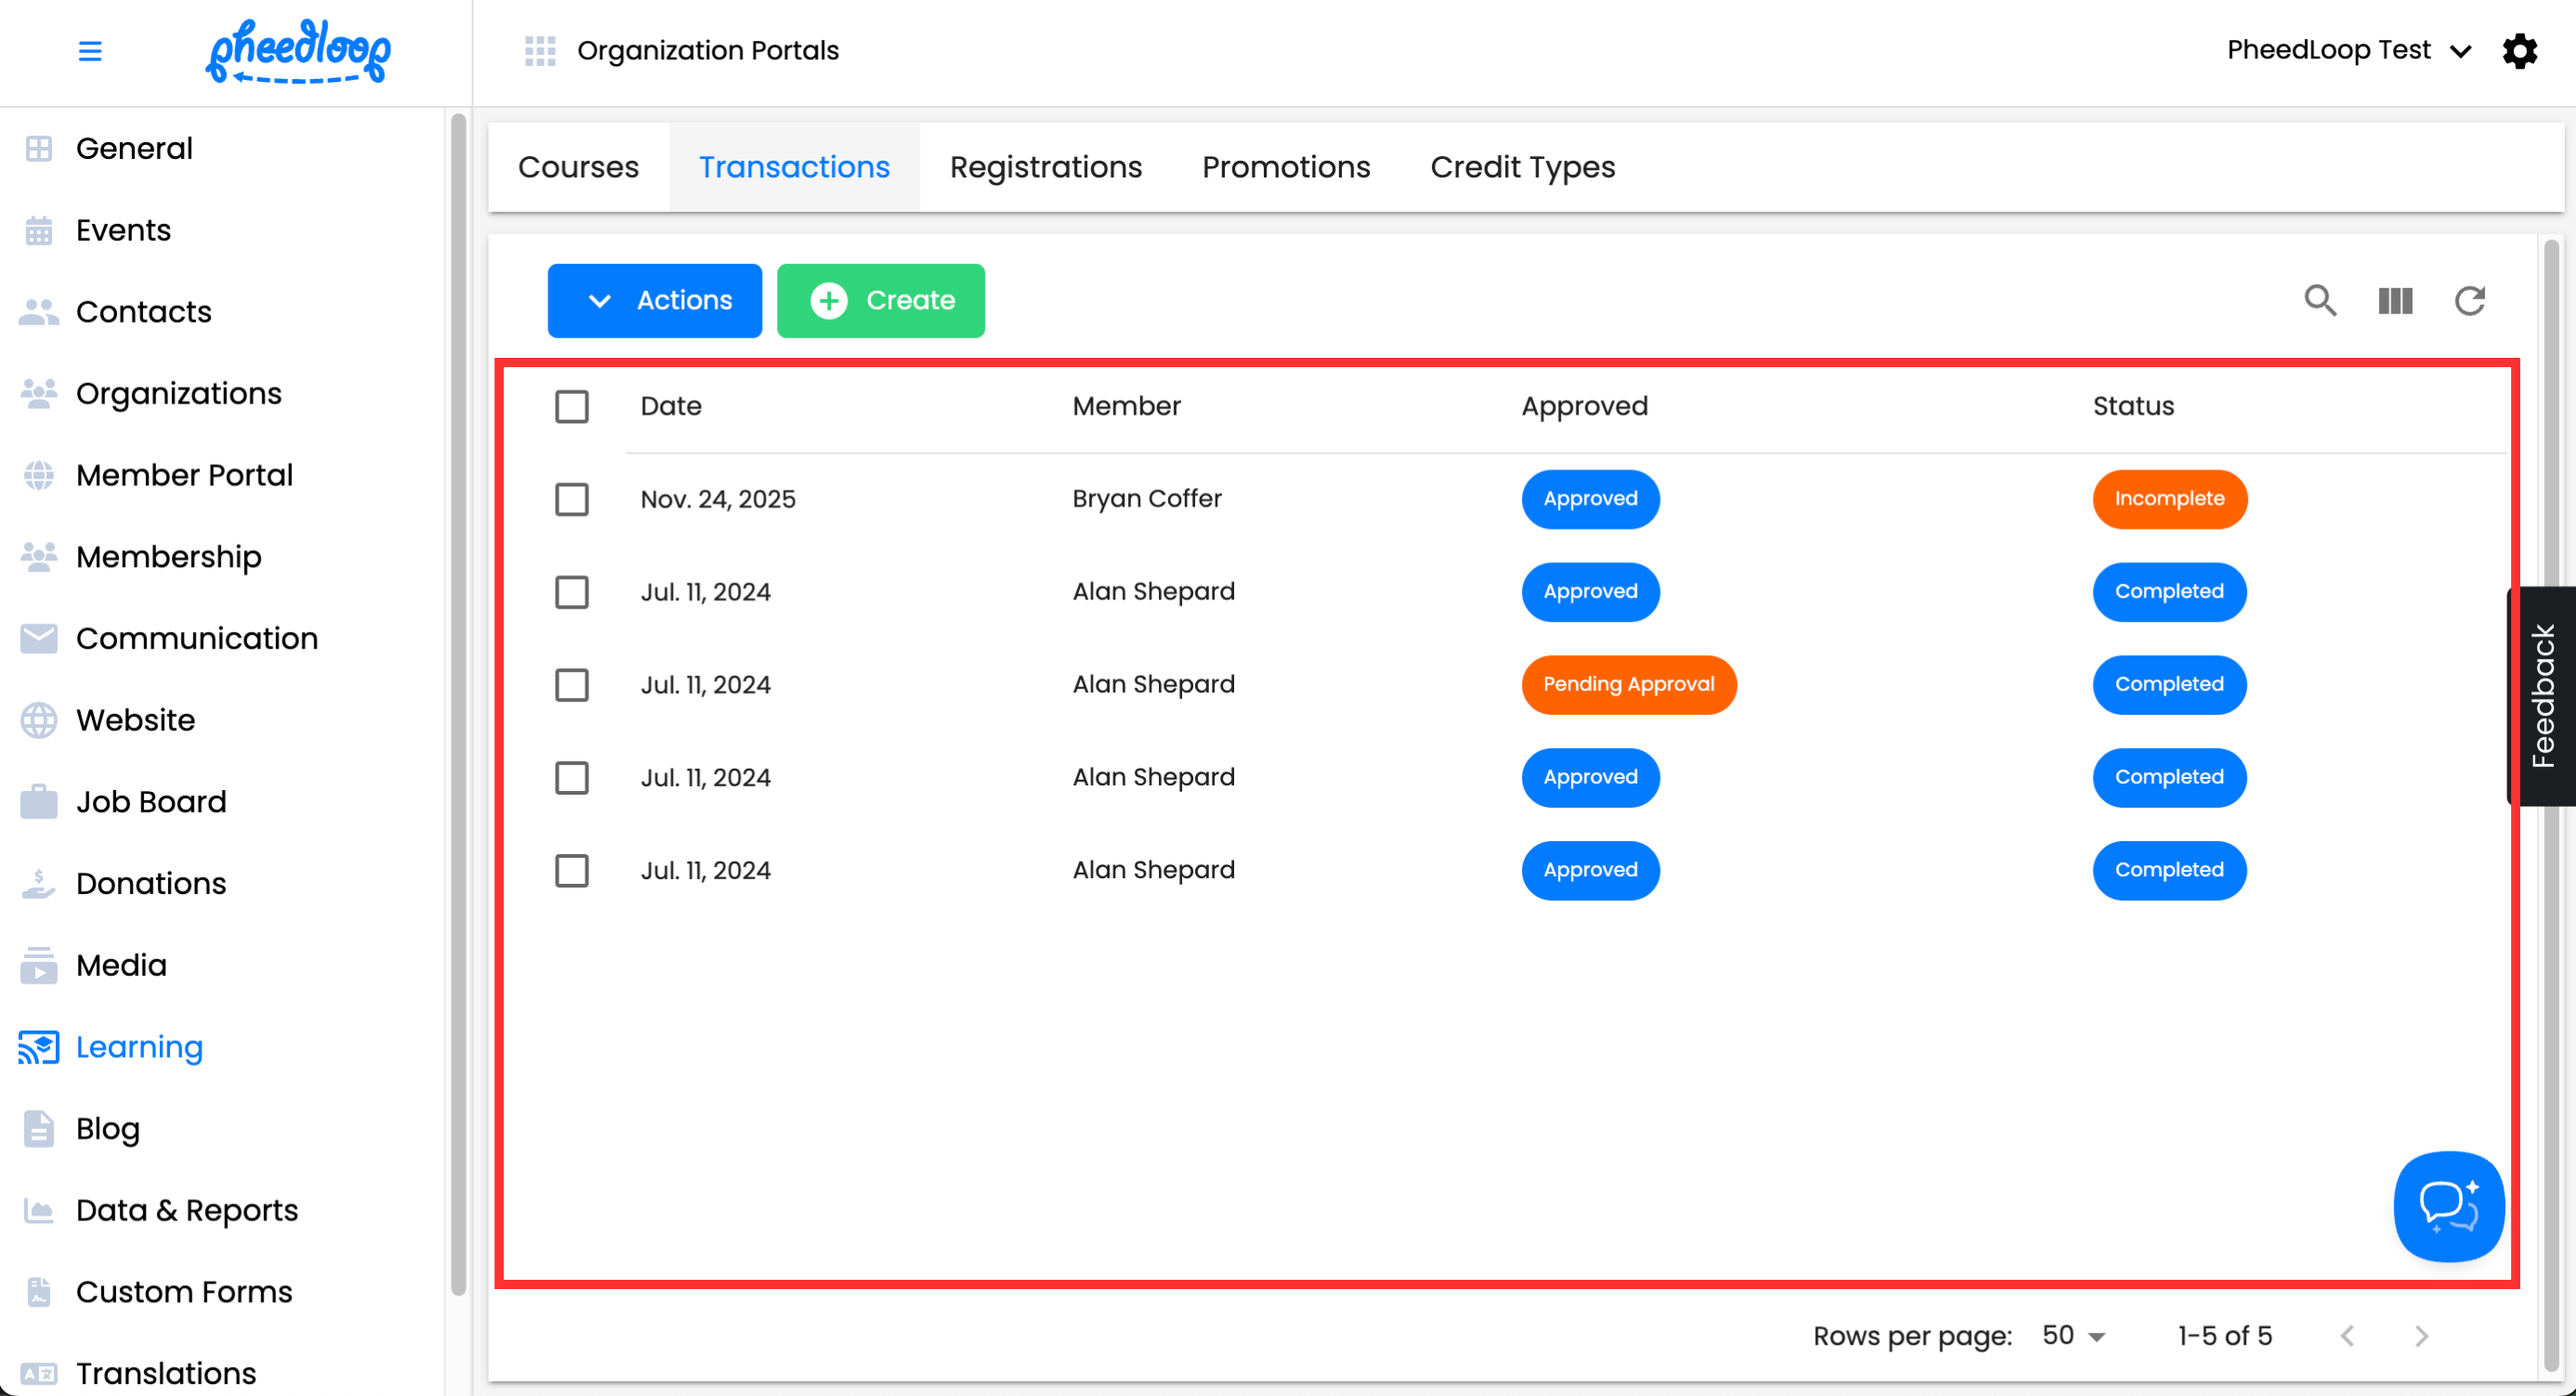

The transaction editor form will now open. Along with personal details of the transaction such as the date and member information, there are many configurable settings.
Finance Summary
The Finance Summary contains the payment details for the transaction. There are no configurable settings in this section.
Courses
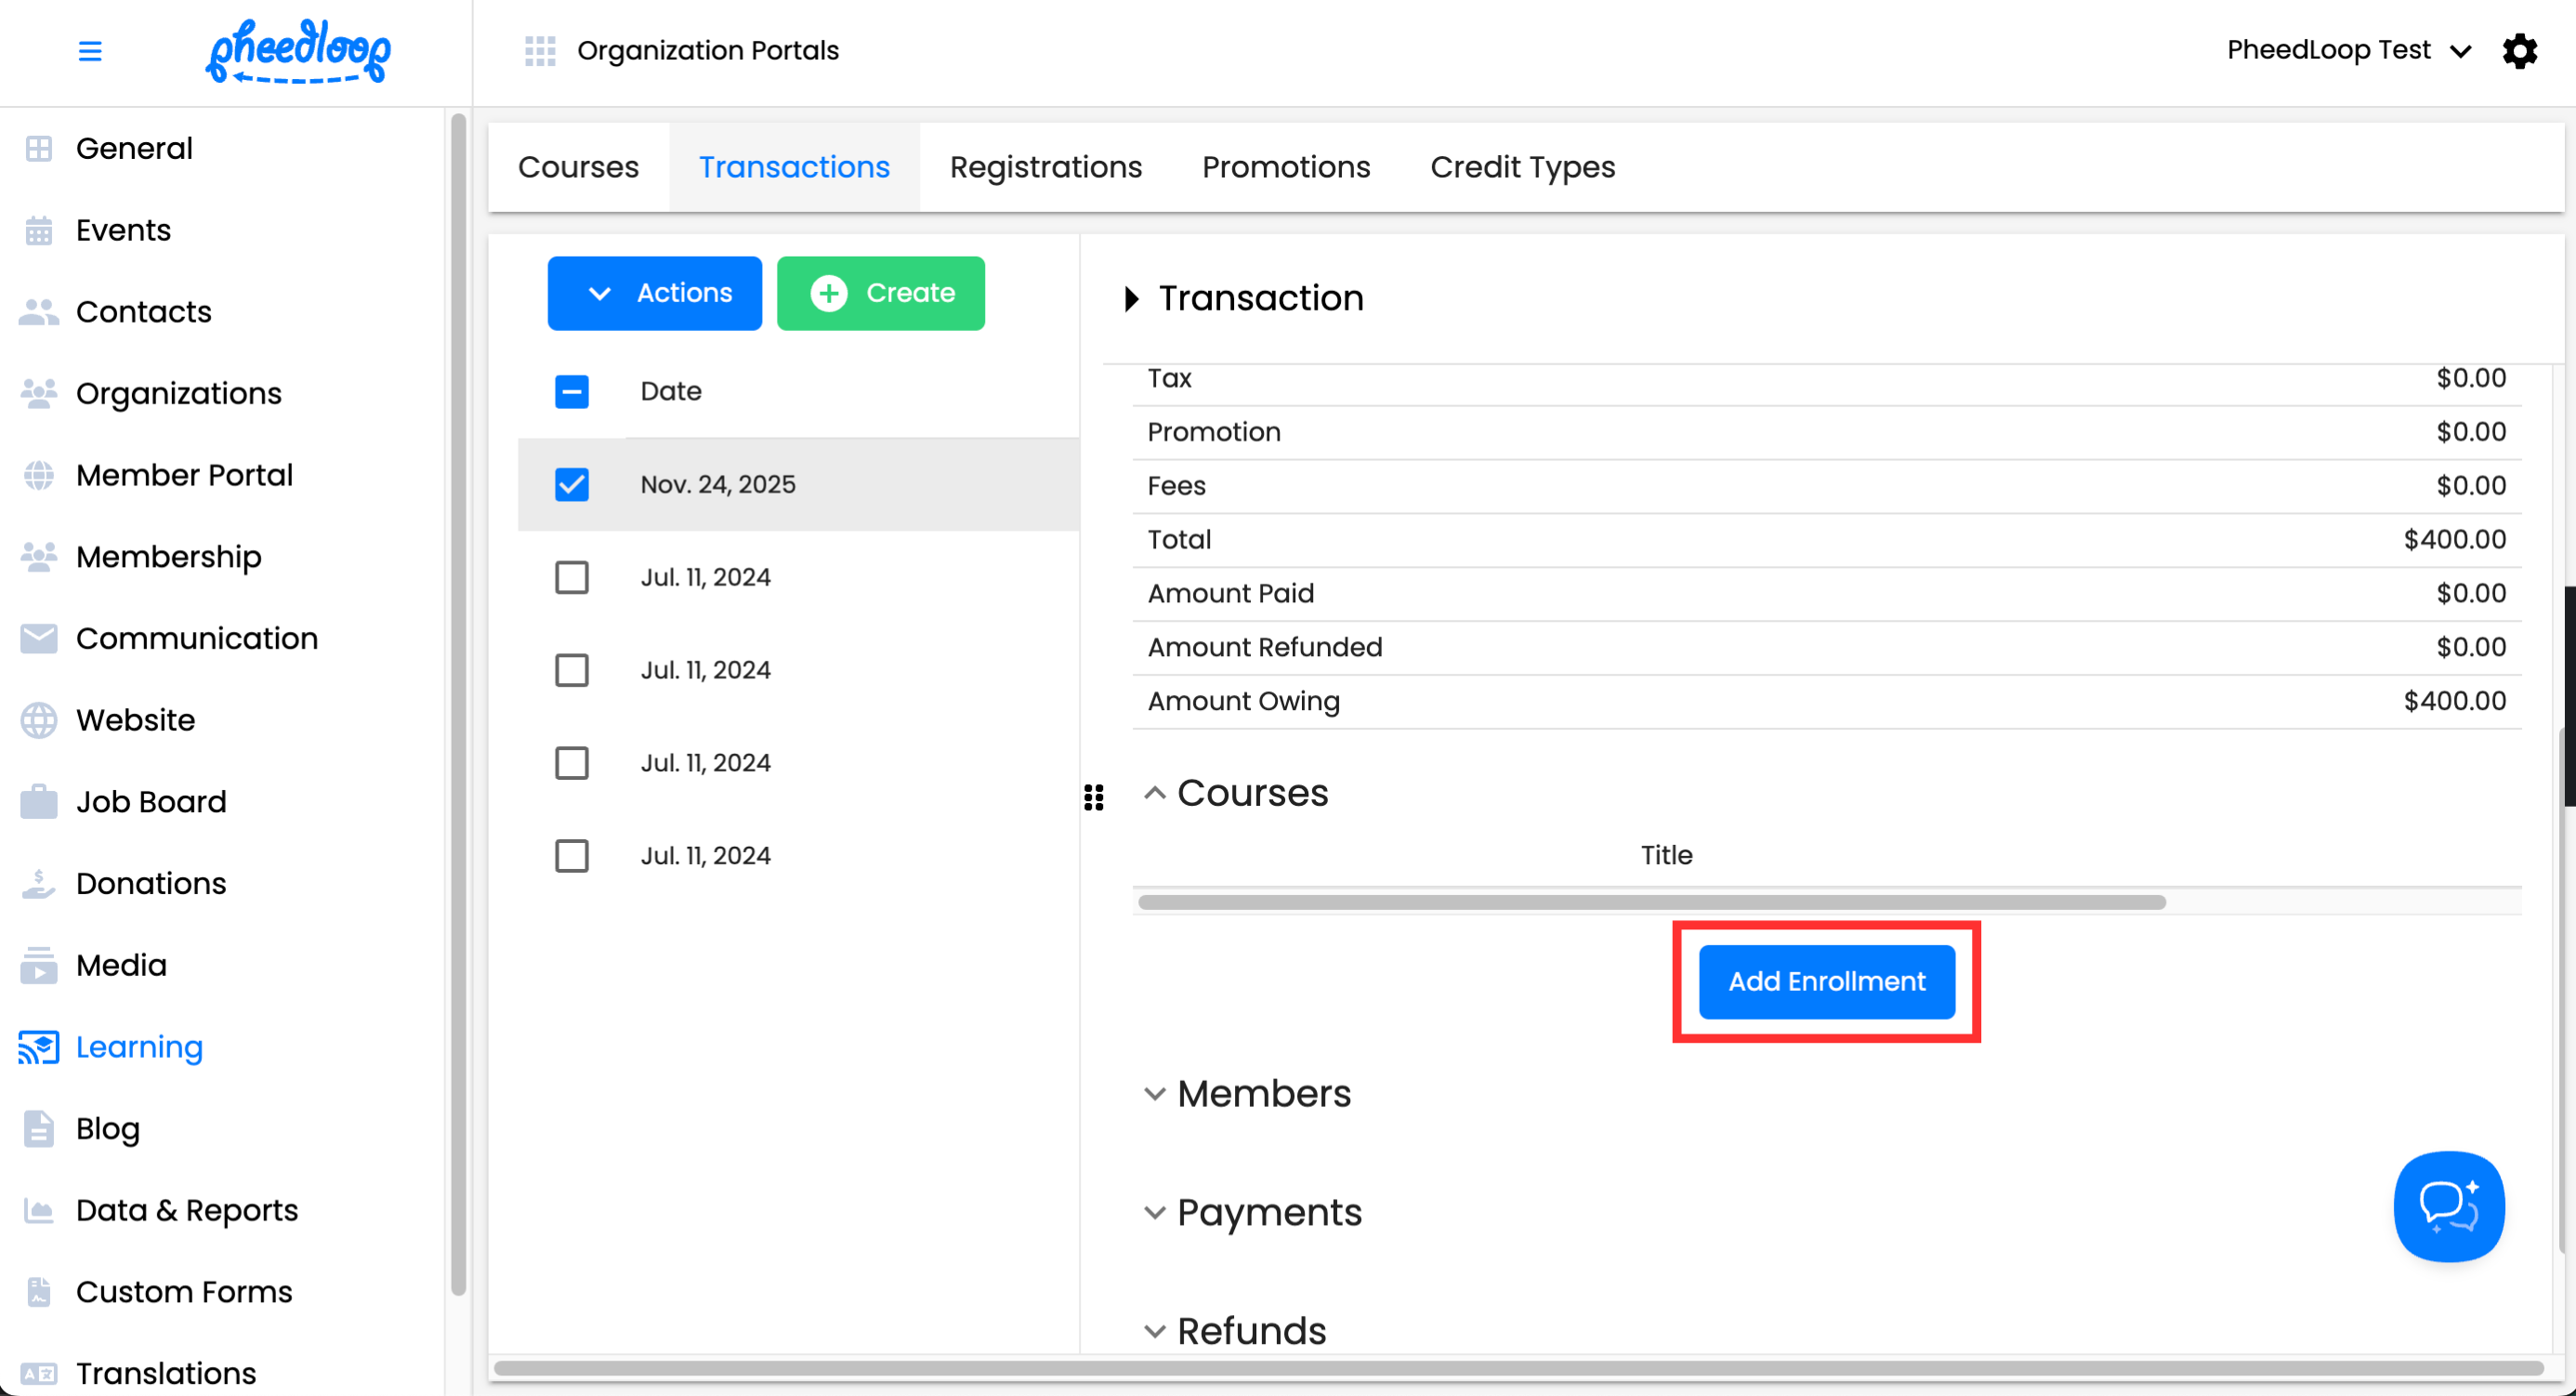
The Courses section contains information on what courses the Member is enrolled in.
Courses may also be added manually:
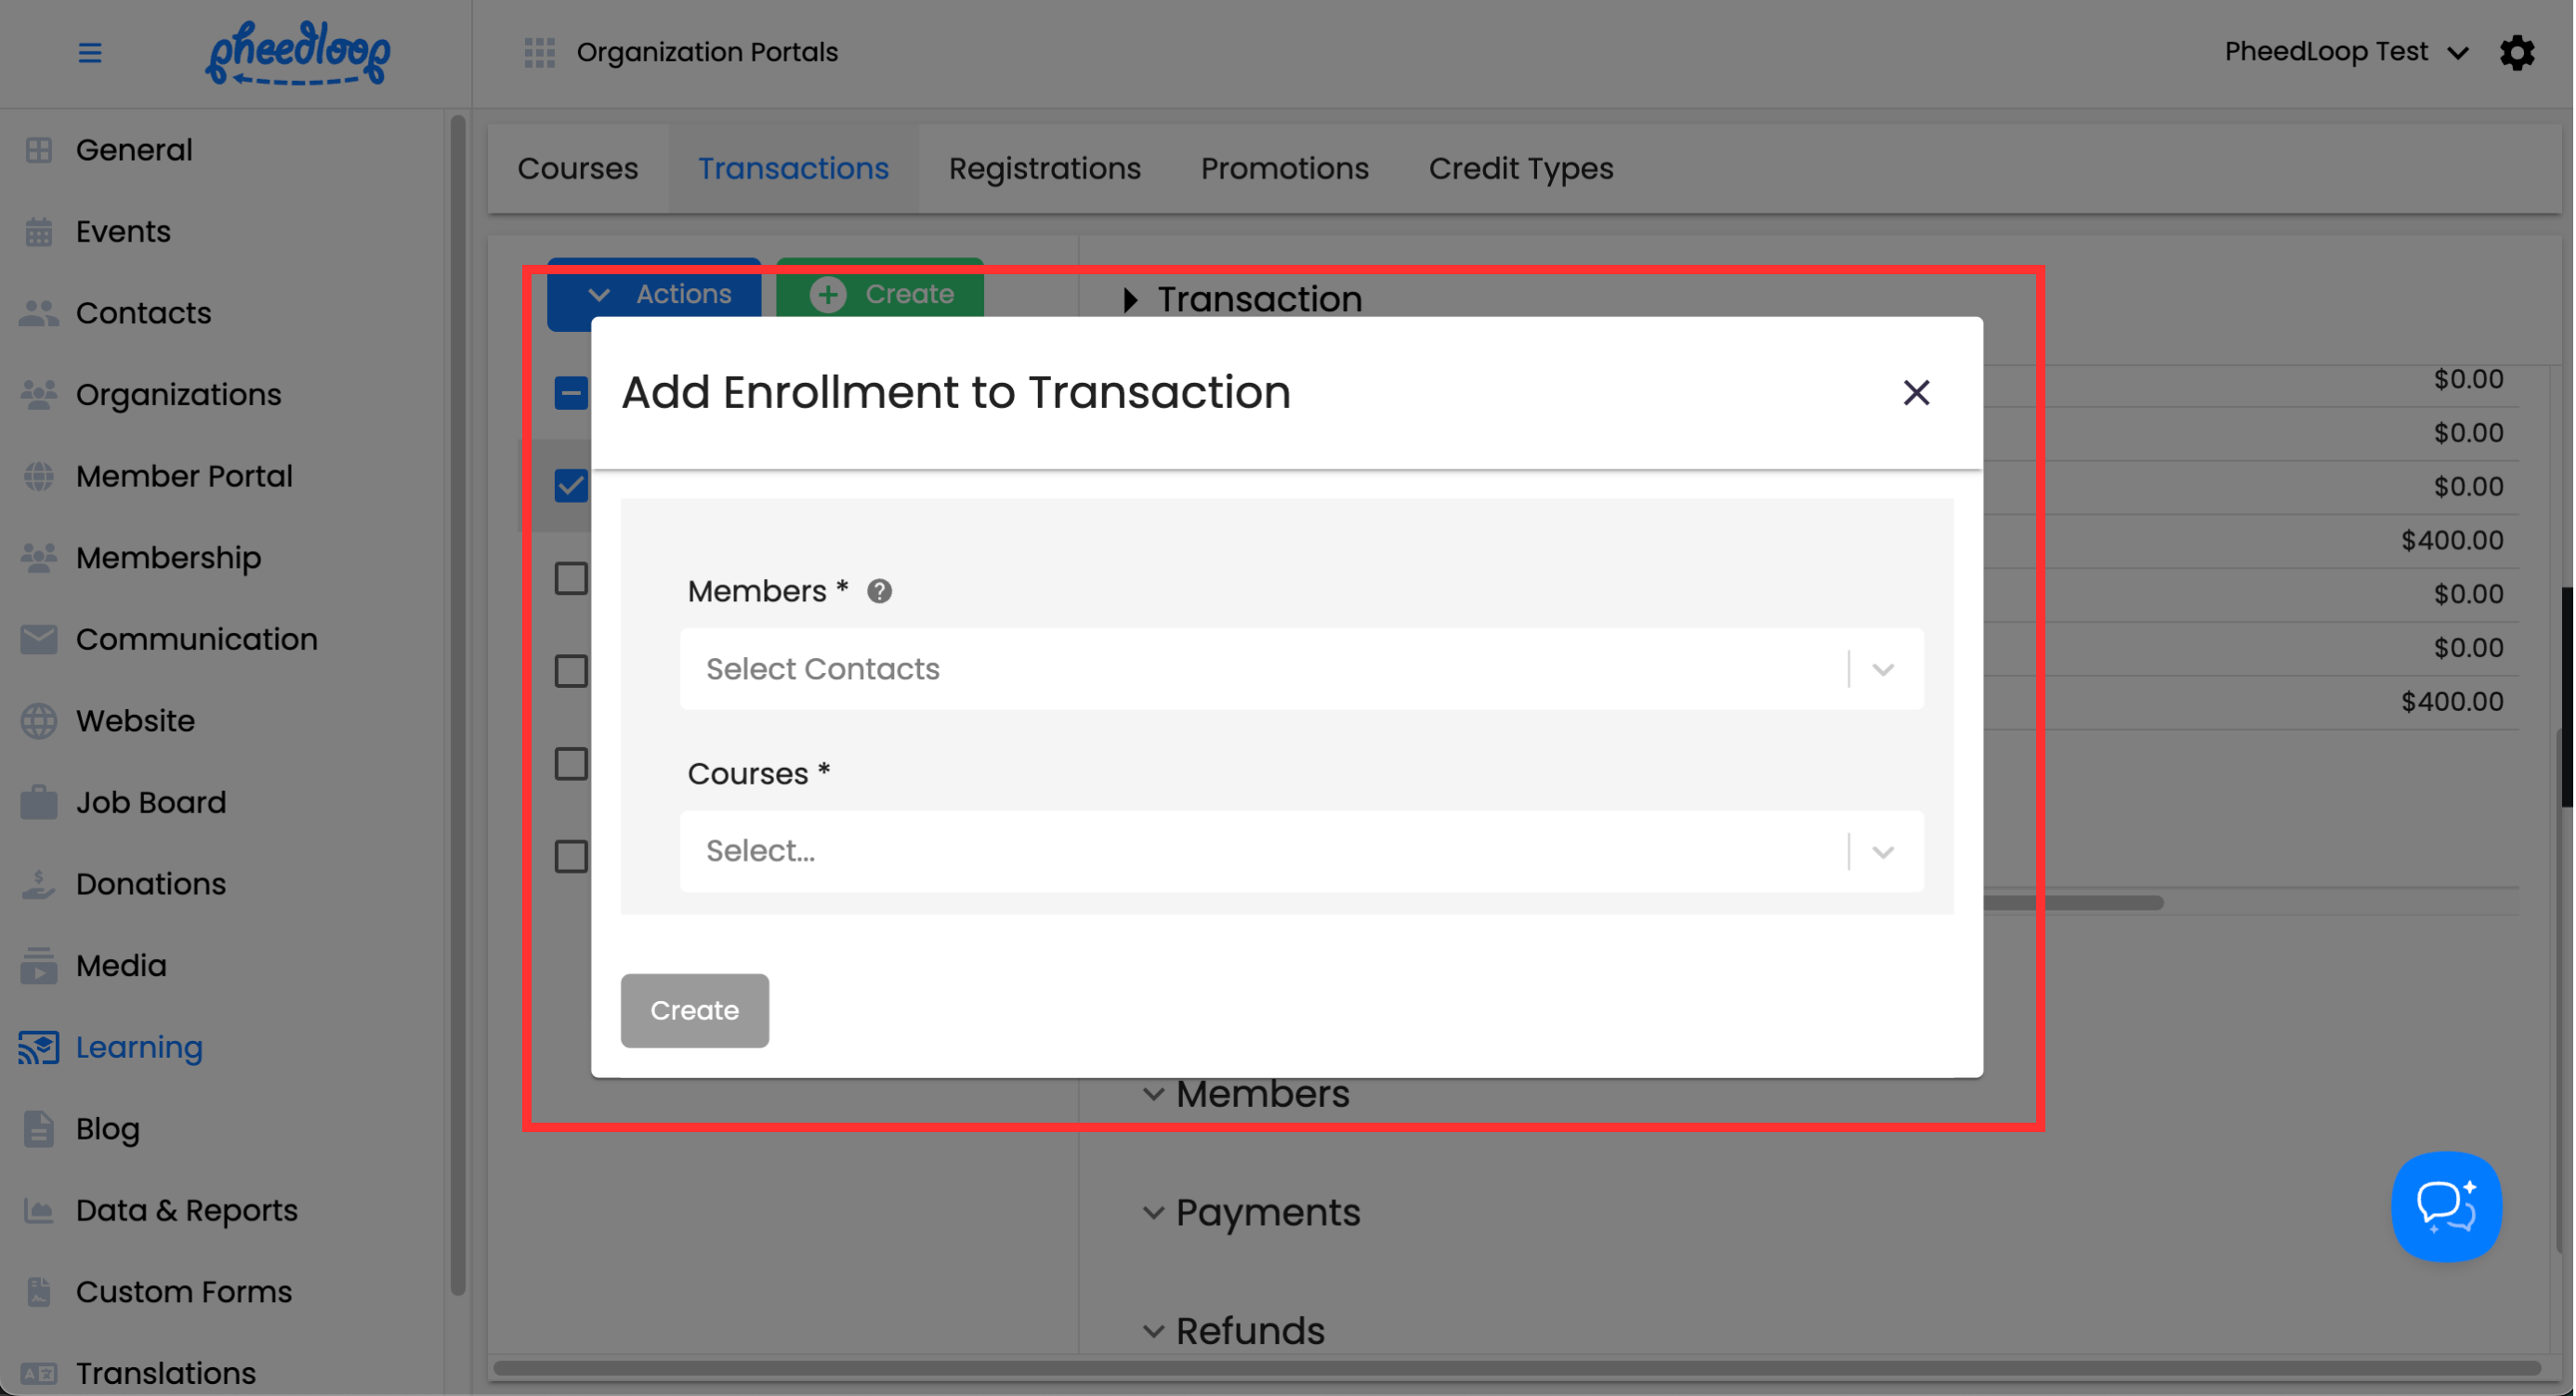
From the Editor Form, scroll down to Courses and select Add Enrollment
- Under the Members field, select one or more members to add the course to.
- Under the Courses field, select one or more courses for the members to enroll into.
Select Create


Courses can be removed from the transaction by selecting Actions > Delete.

Courses can also be managed in the Registration page in the Membership Dashboard.
- From the Membership Dashboard, navigate to Learning > Registration
- Select the checkbox of the transaction you wish to edit
- Above the Registrations table, select Actions
- Select Send Confirmation Email to send a confirmation email of the purchase to the member
- Select Assign Enrollment to assign a member to this course. A new pop-up will appear where the course can be assigned to the member under the Member field. Select Assign to save your progress.
- Select Activate Registration to active enrollment in the course. Select Confirm to verify your decision.
- Select Deactivate Registration to disable enrollment in this course. Select Confirm to verify your decision.
- Select Delete to remove the course from the transaction. Select Confirm to verify your decision.

Members
The Members section contains information on the Members associated with the transaction. There are no configurable settings in this section.

Payments
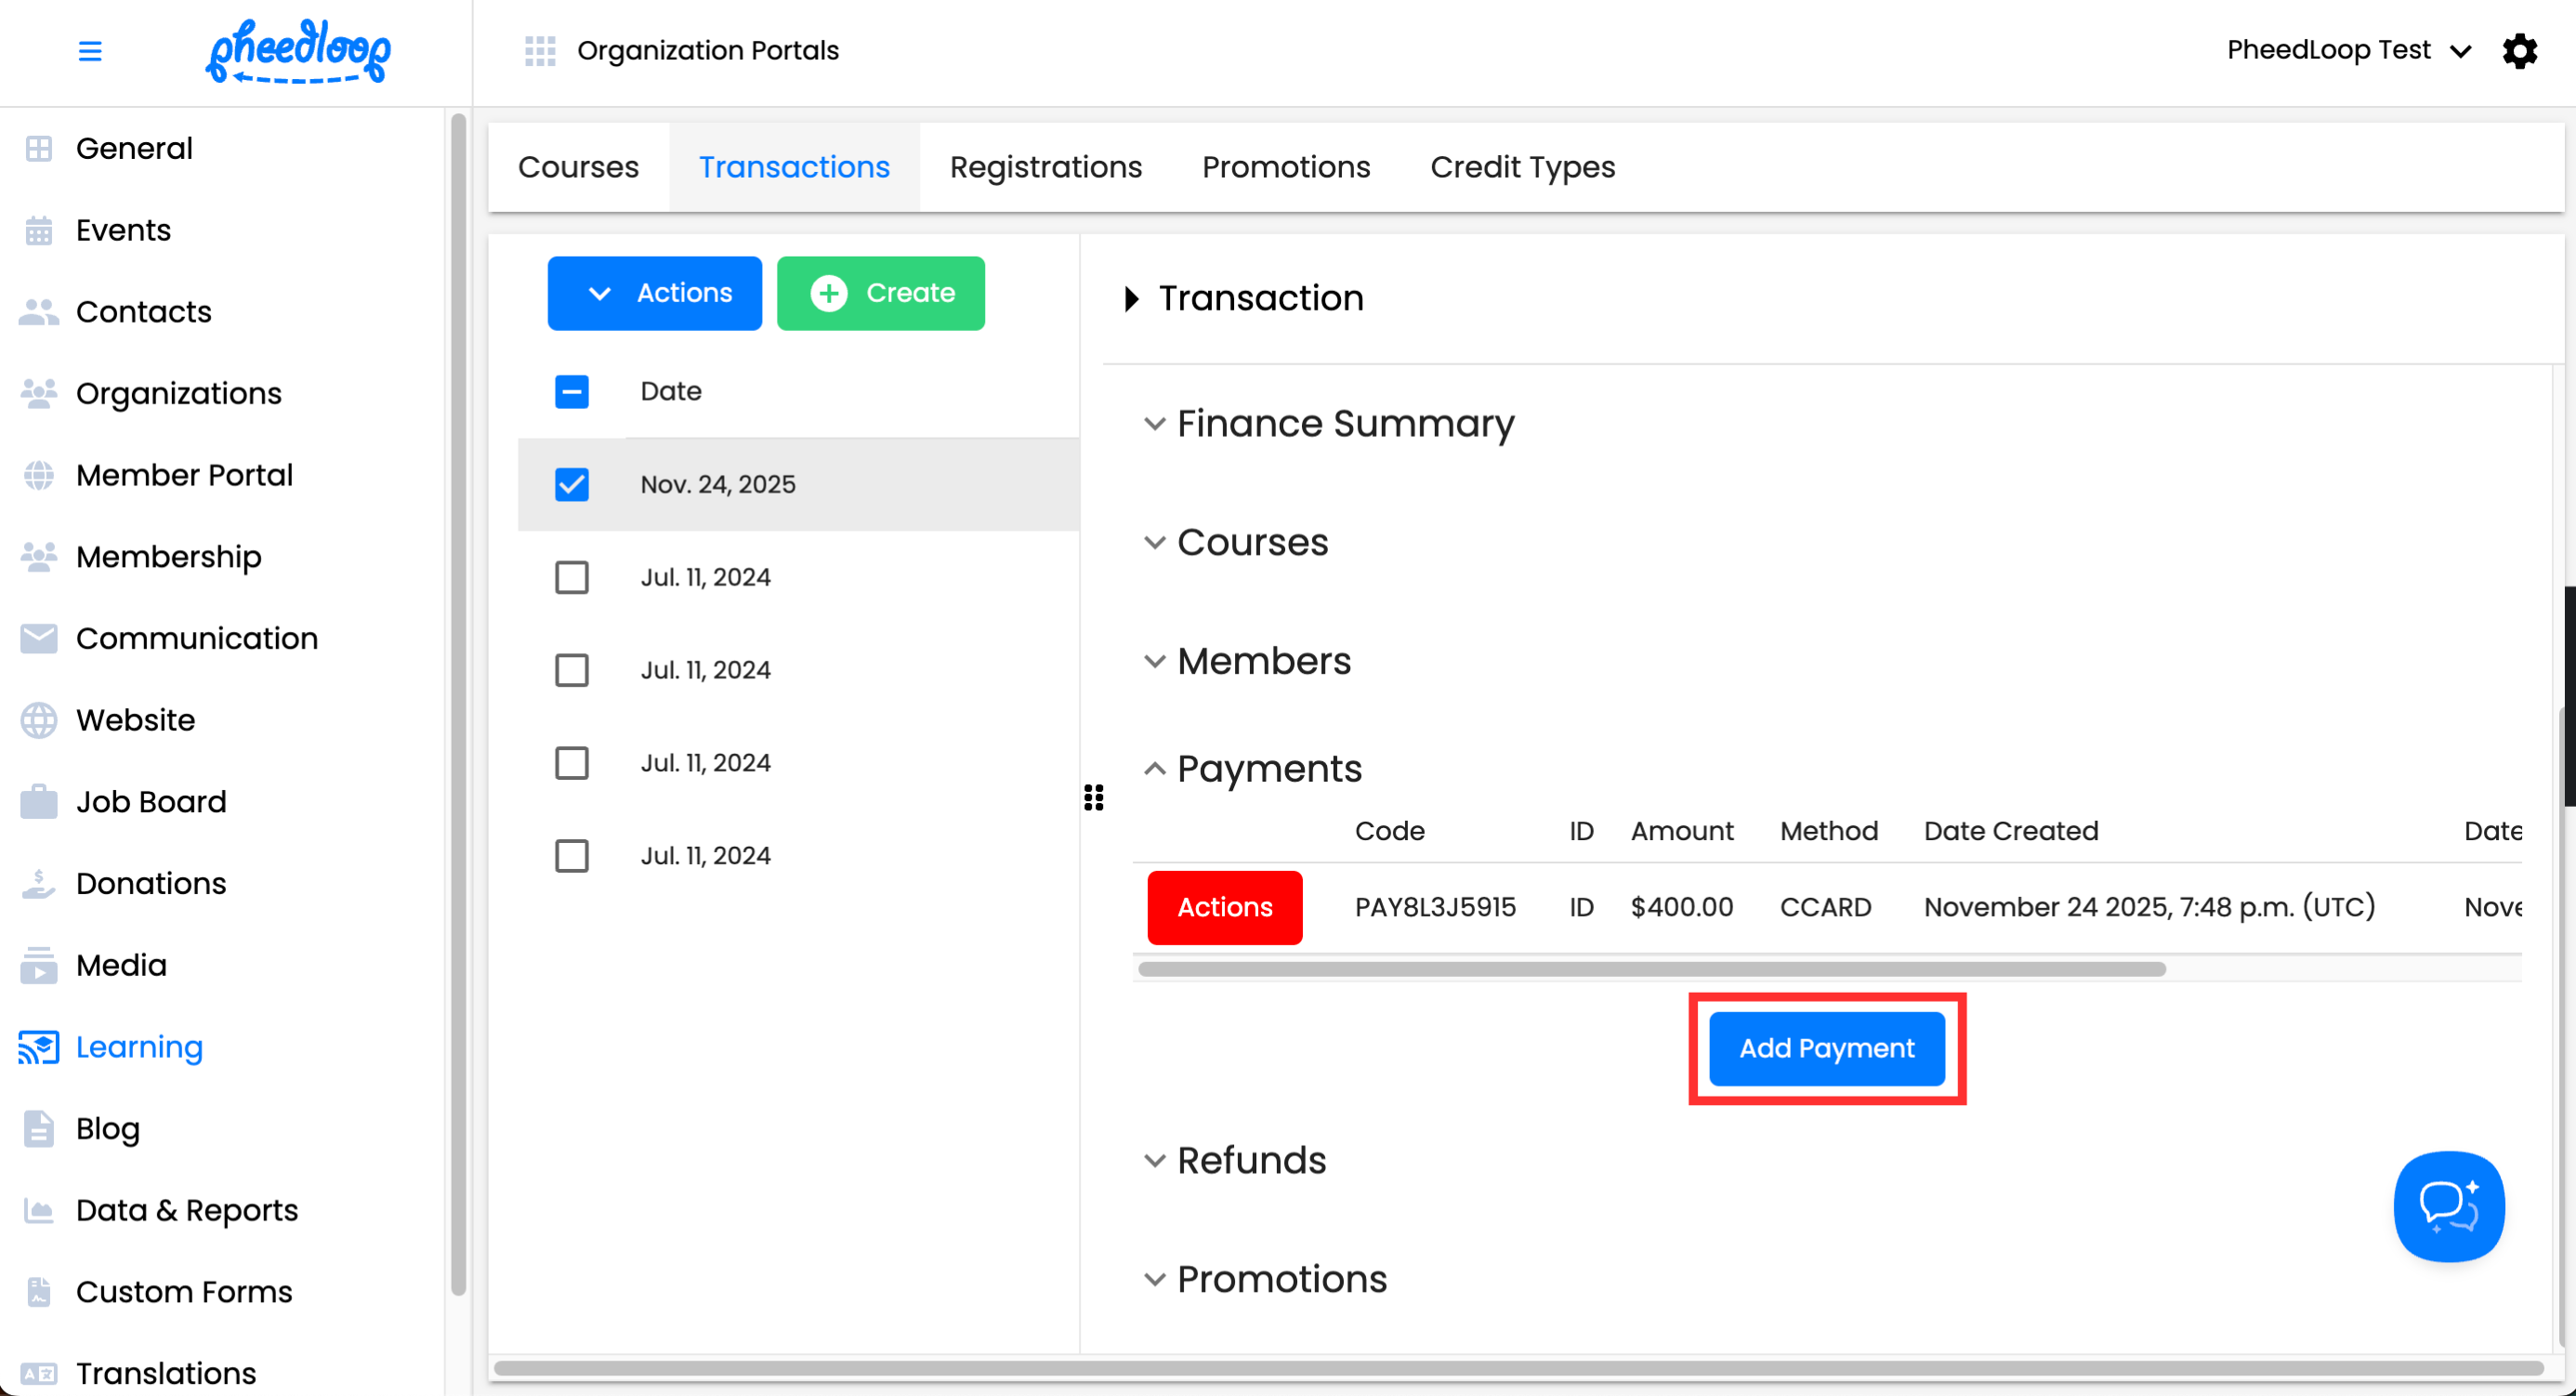
Payments provide an overview of the payment type and amount made by the Member. Administrators can use this section to add payments from other means, such as a cheque.
To Add a Payment
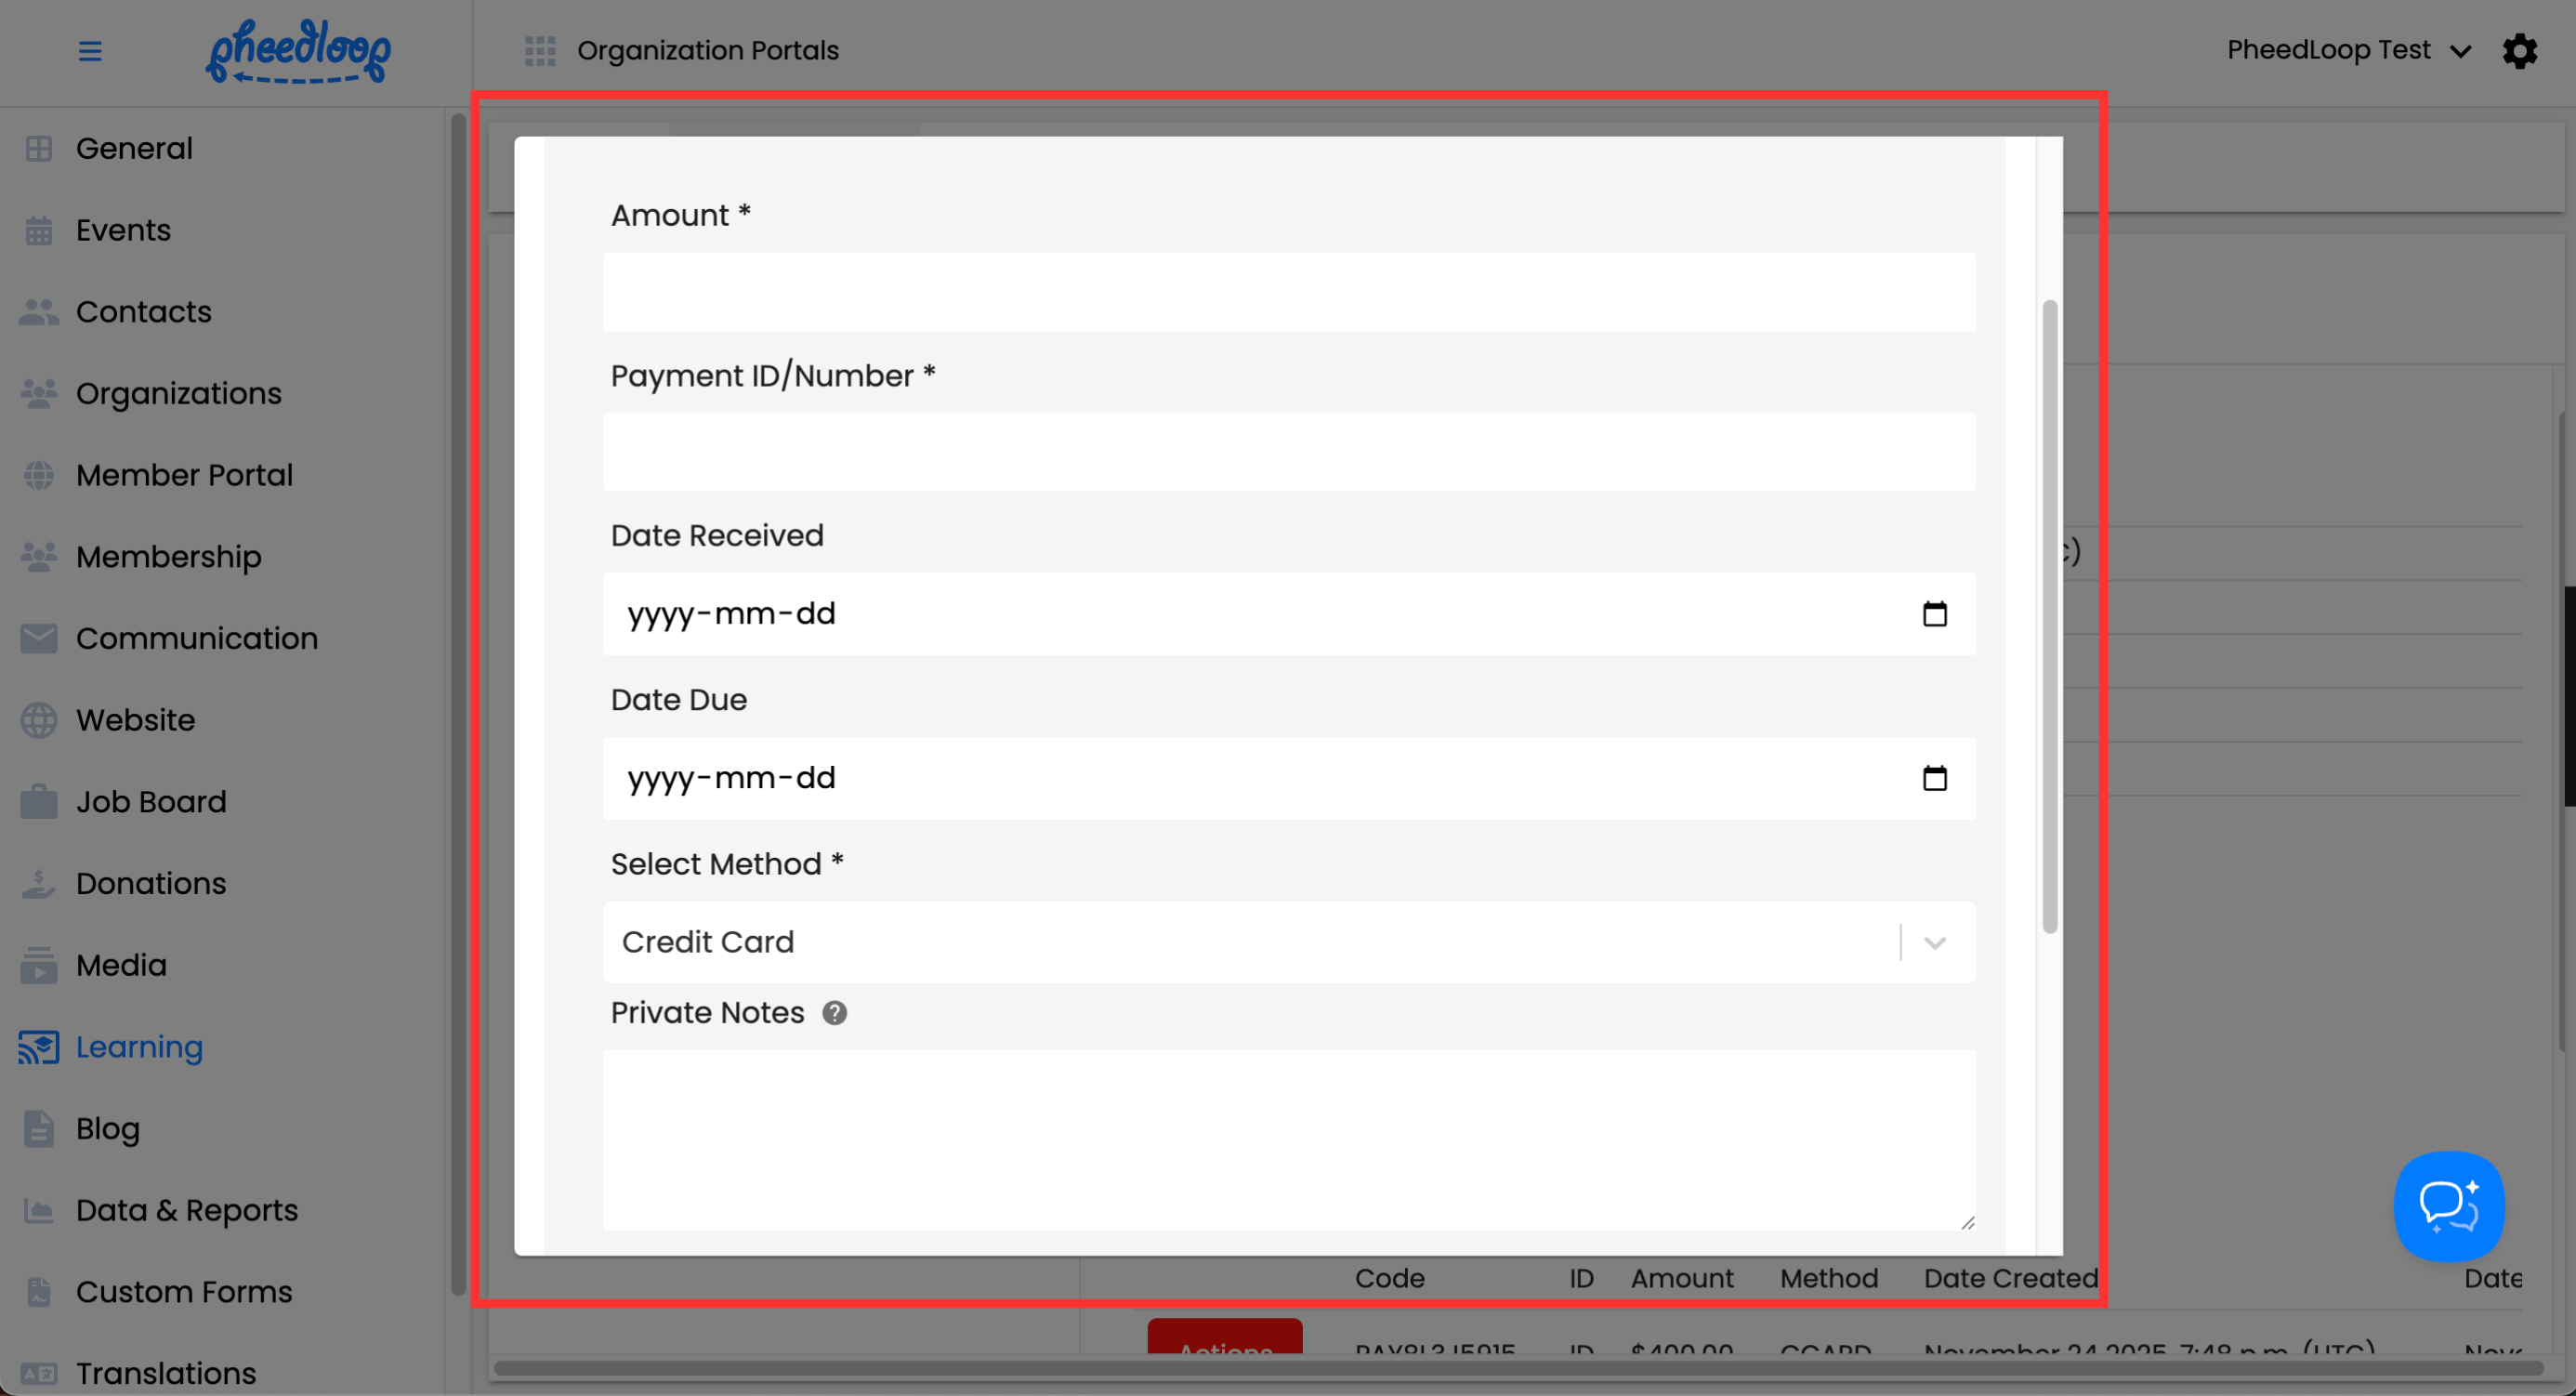
From the Transaction Editor Form, select Add Payment
- Under the Amount field, enter the amount being paid
- Under the Payment ID/Number field, enter an unique identifier for the payment
- This is for internal use and does not impact the payment itself beyond giving the payment a name.
- Under the Date Received field, enter the date the payment was received
- Under the Date Due field, if the payment was not completed yet, enter the date that payment will be due
- Under the Select Method field, select Credit Card, Check, Wire Transfer, Complimentary, or Other, depending on how the Member paid
- Under the Private Notes field, enter any internal notes for the transaction
- Under the Public Notes field, enter any notes for the member to see as part of the transaction
- Public notes will appear on the Payment Summary PDF file when the Payment Link is sent to the member's email.
- Toggle on the Payment Verified checkbox if your organization has received payment
- Toggle this off if payment has not been delivered yet.
Select Save Changes


To manage payments
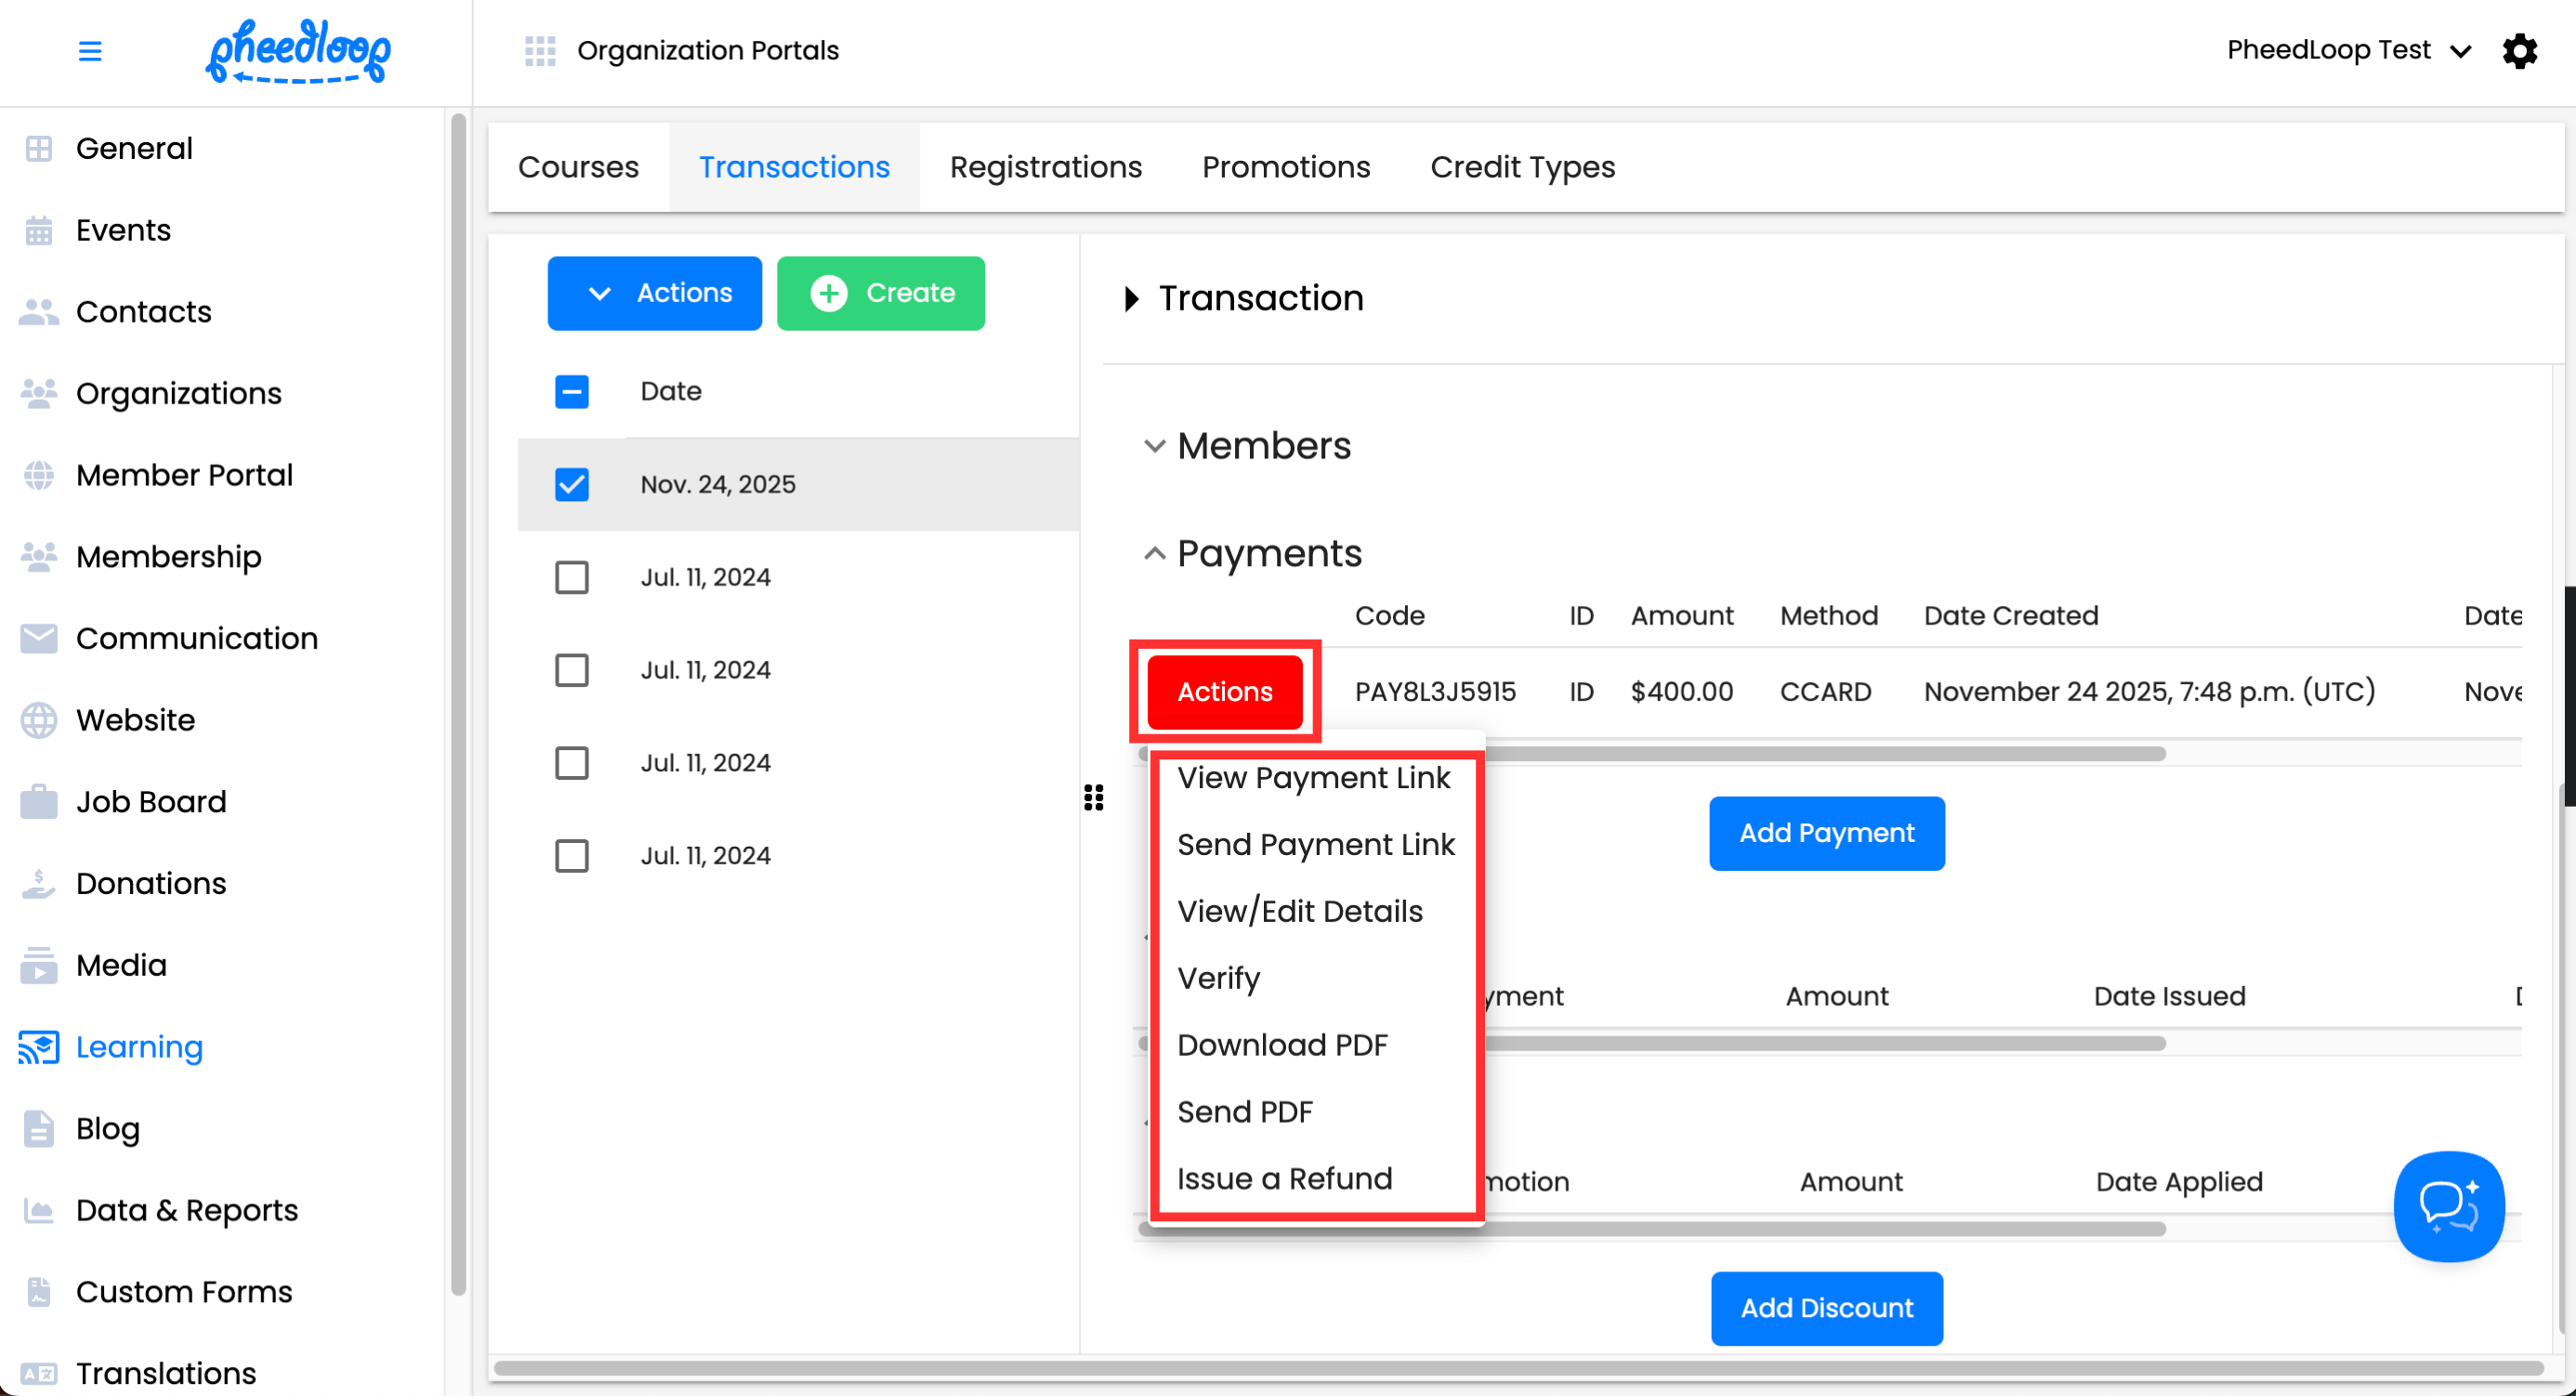
- From the Transaction Editor Form, select Actions next to the payment you wish to edit
- Select View Payment Link to view the payment portal of the transaction
- Select Send Payment Link to send an email containing the payment link to the member
- Select View/Edit Details to edit the details of the payment
- Select Verify to confirm the payment has been edited
- Select Download PDF to generate a pdf file of the receipt
- Select Send PDF to email a PDF file of the receipt to the member
Select Issue a Refund to refund a portion or the full amount of the payment

Refunds
Any refunds processed for this transaction will appear in this section.
Refunds can be canceled by selecting Actions > Delete and select Confirm to verify your decision.

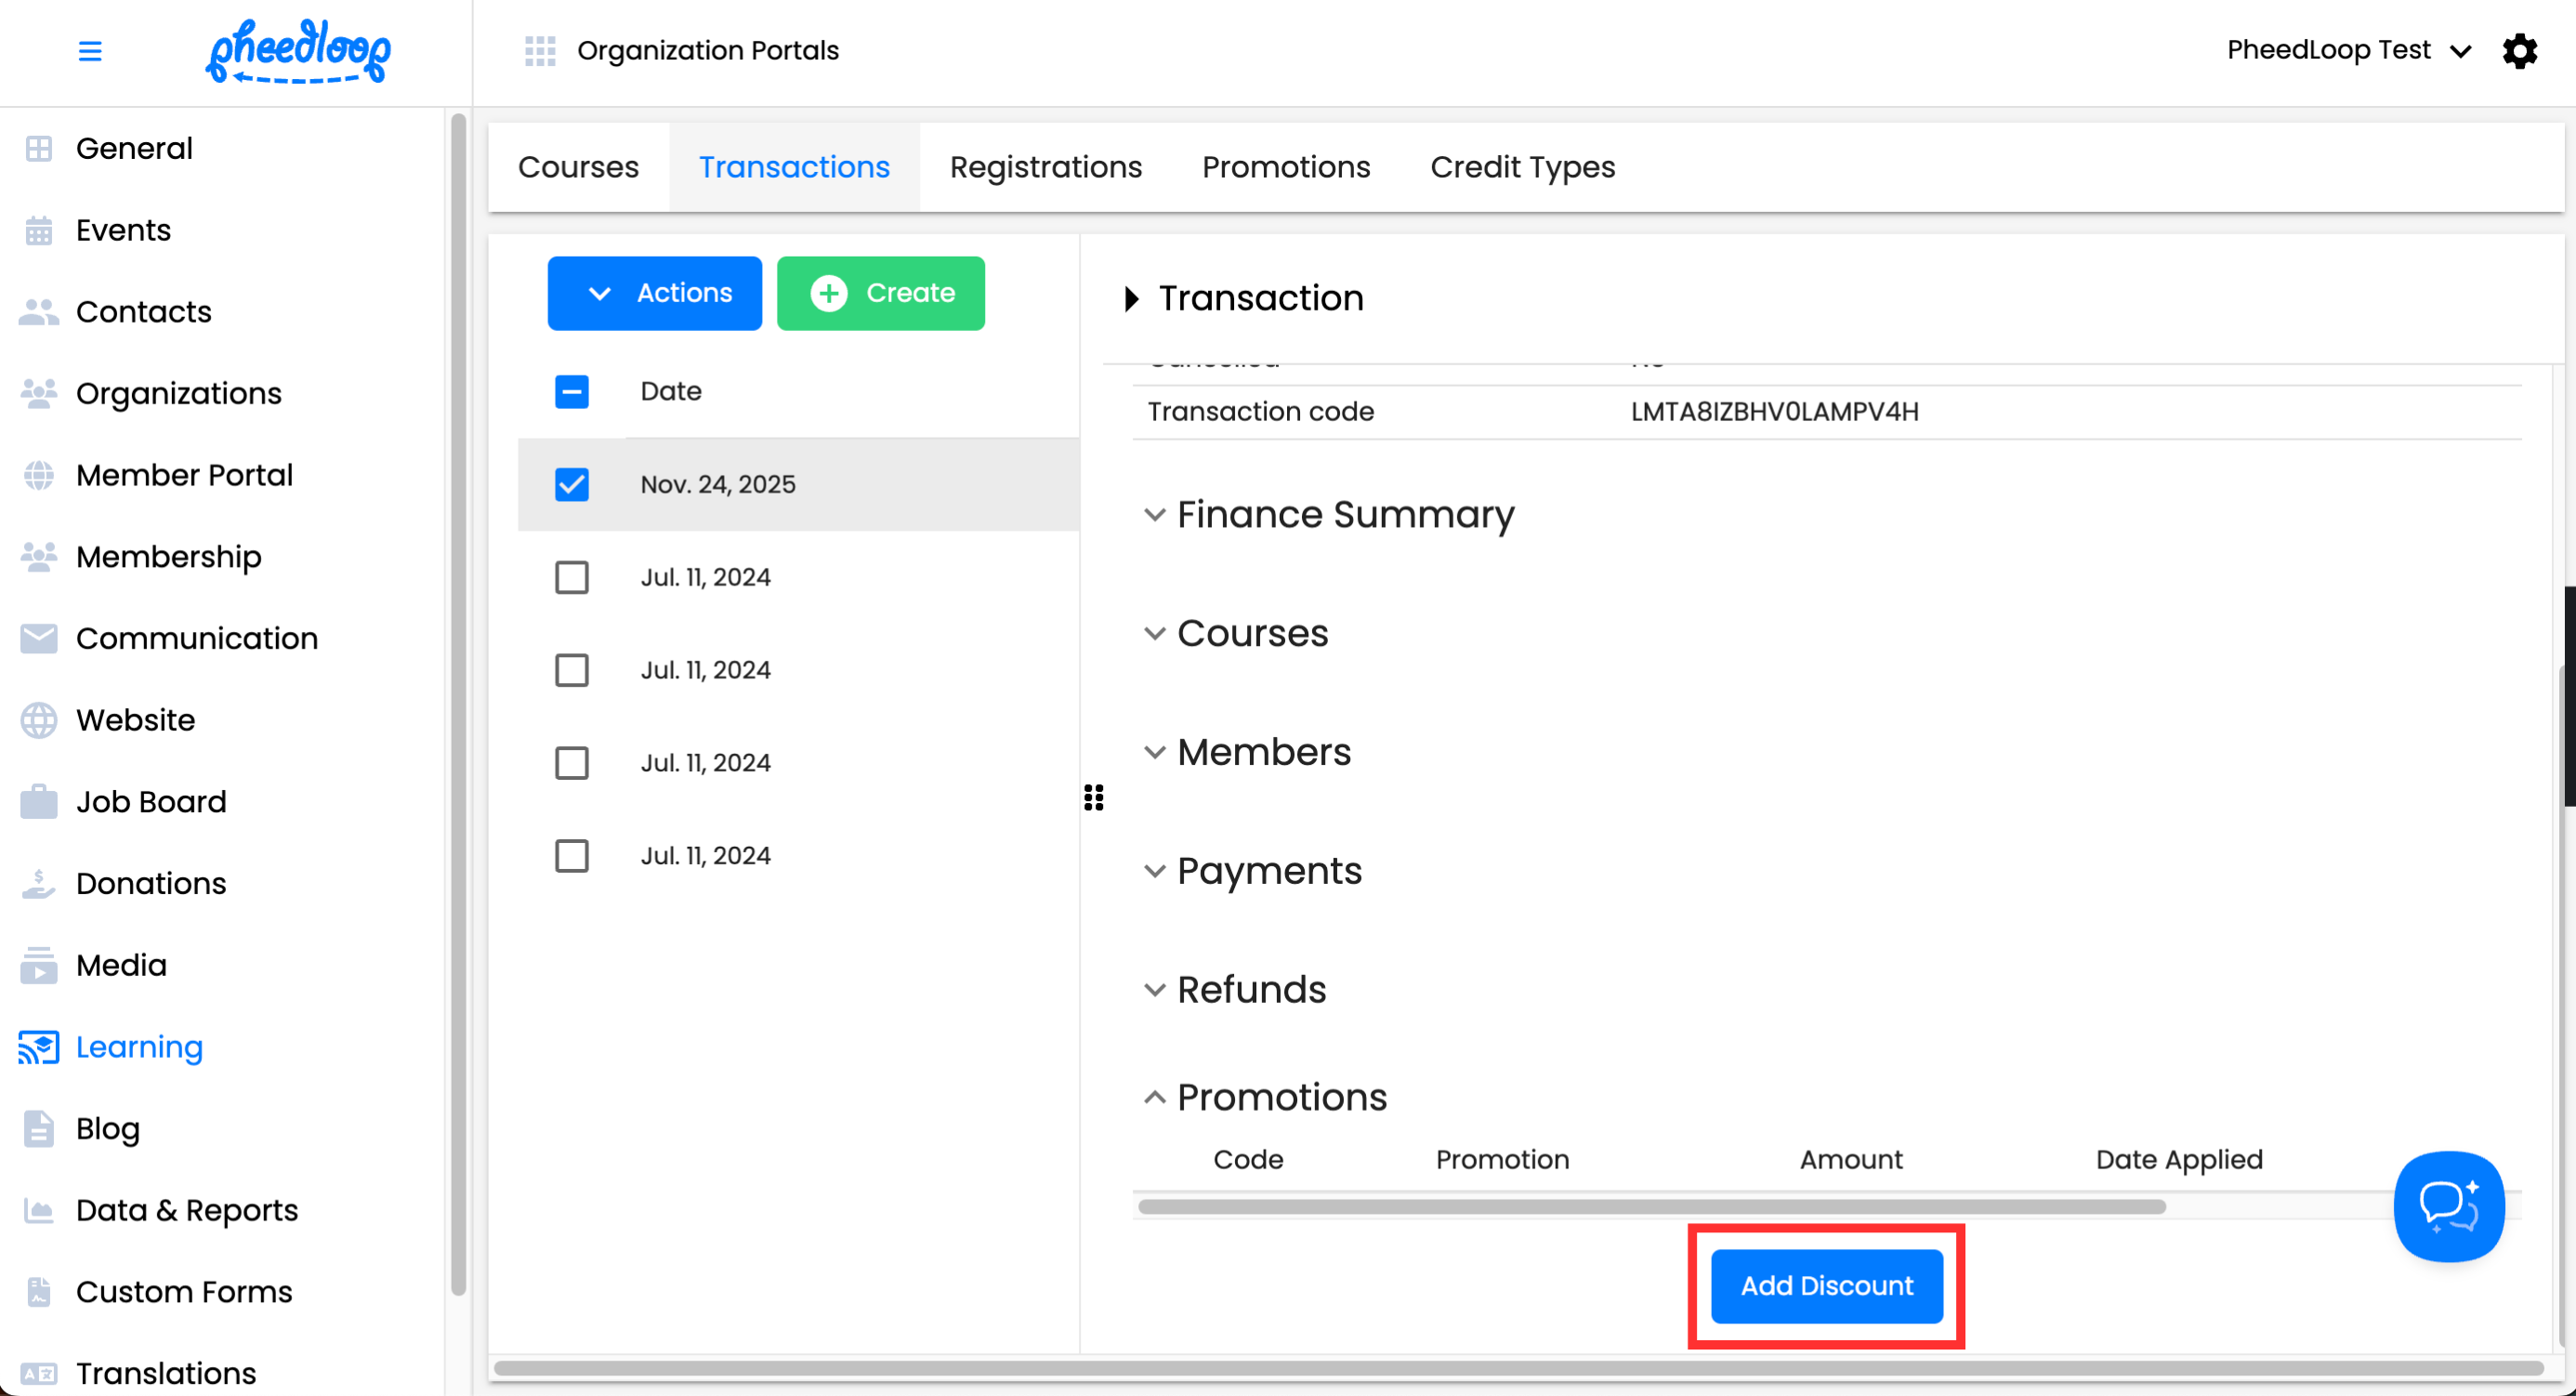
Promotions
The Promotions section contains information on promotions used by the Member during checkout.
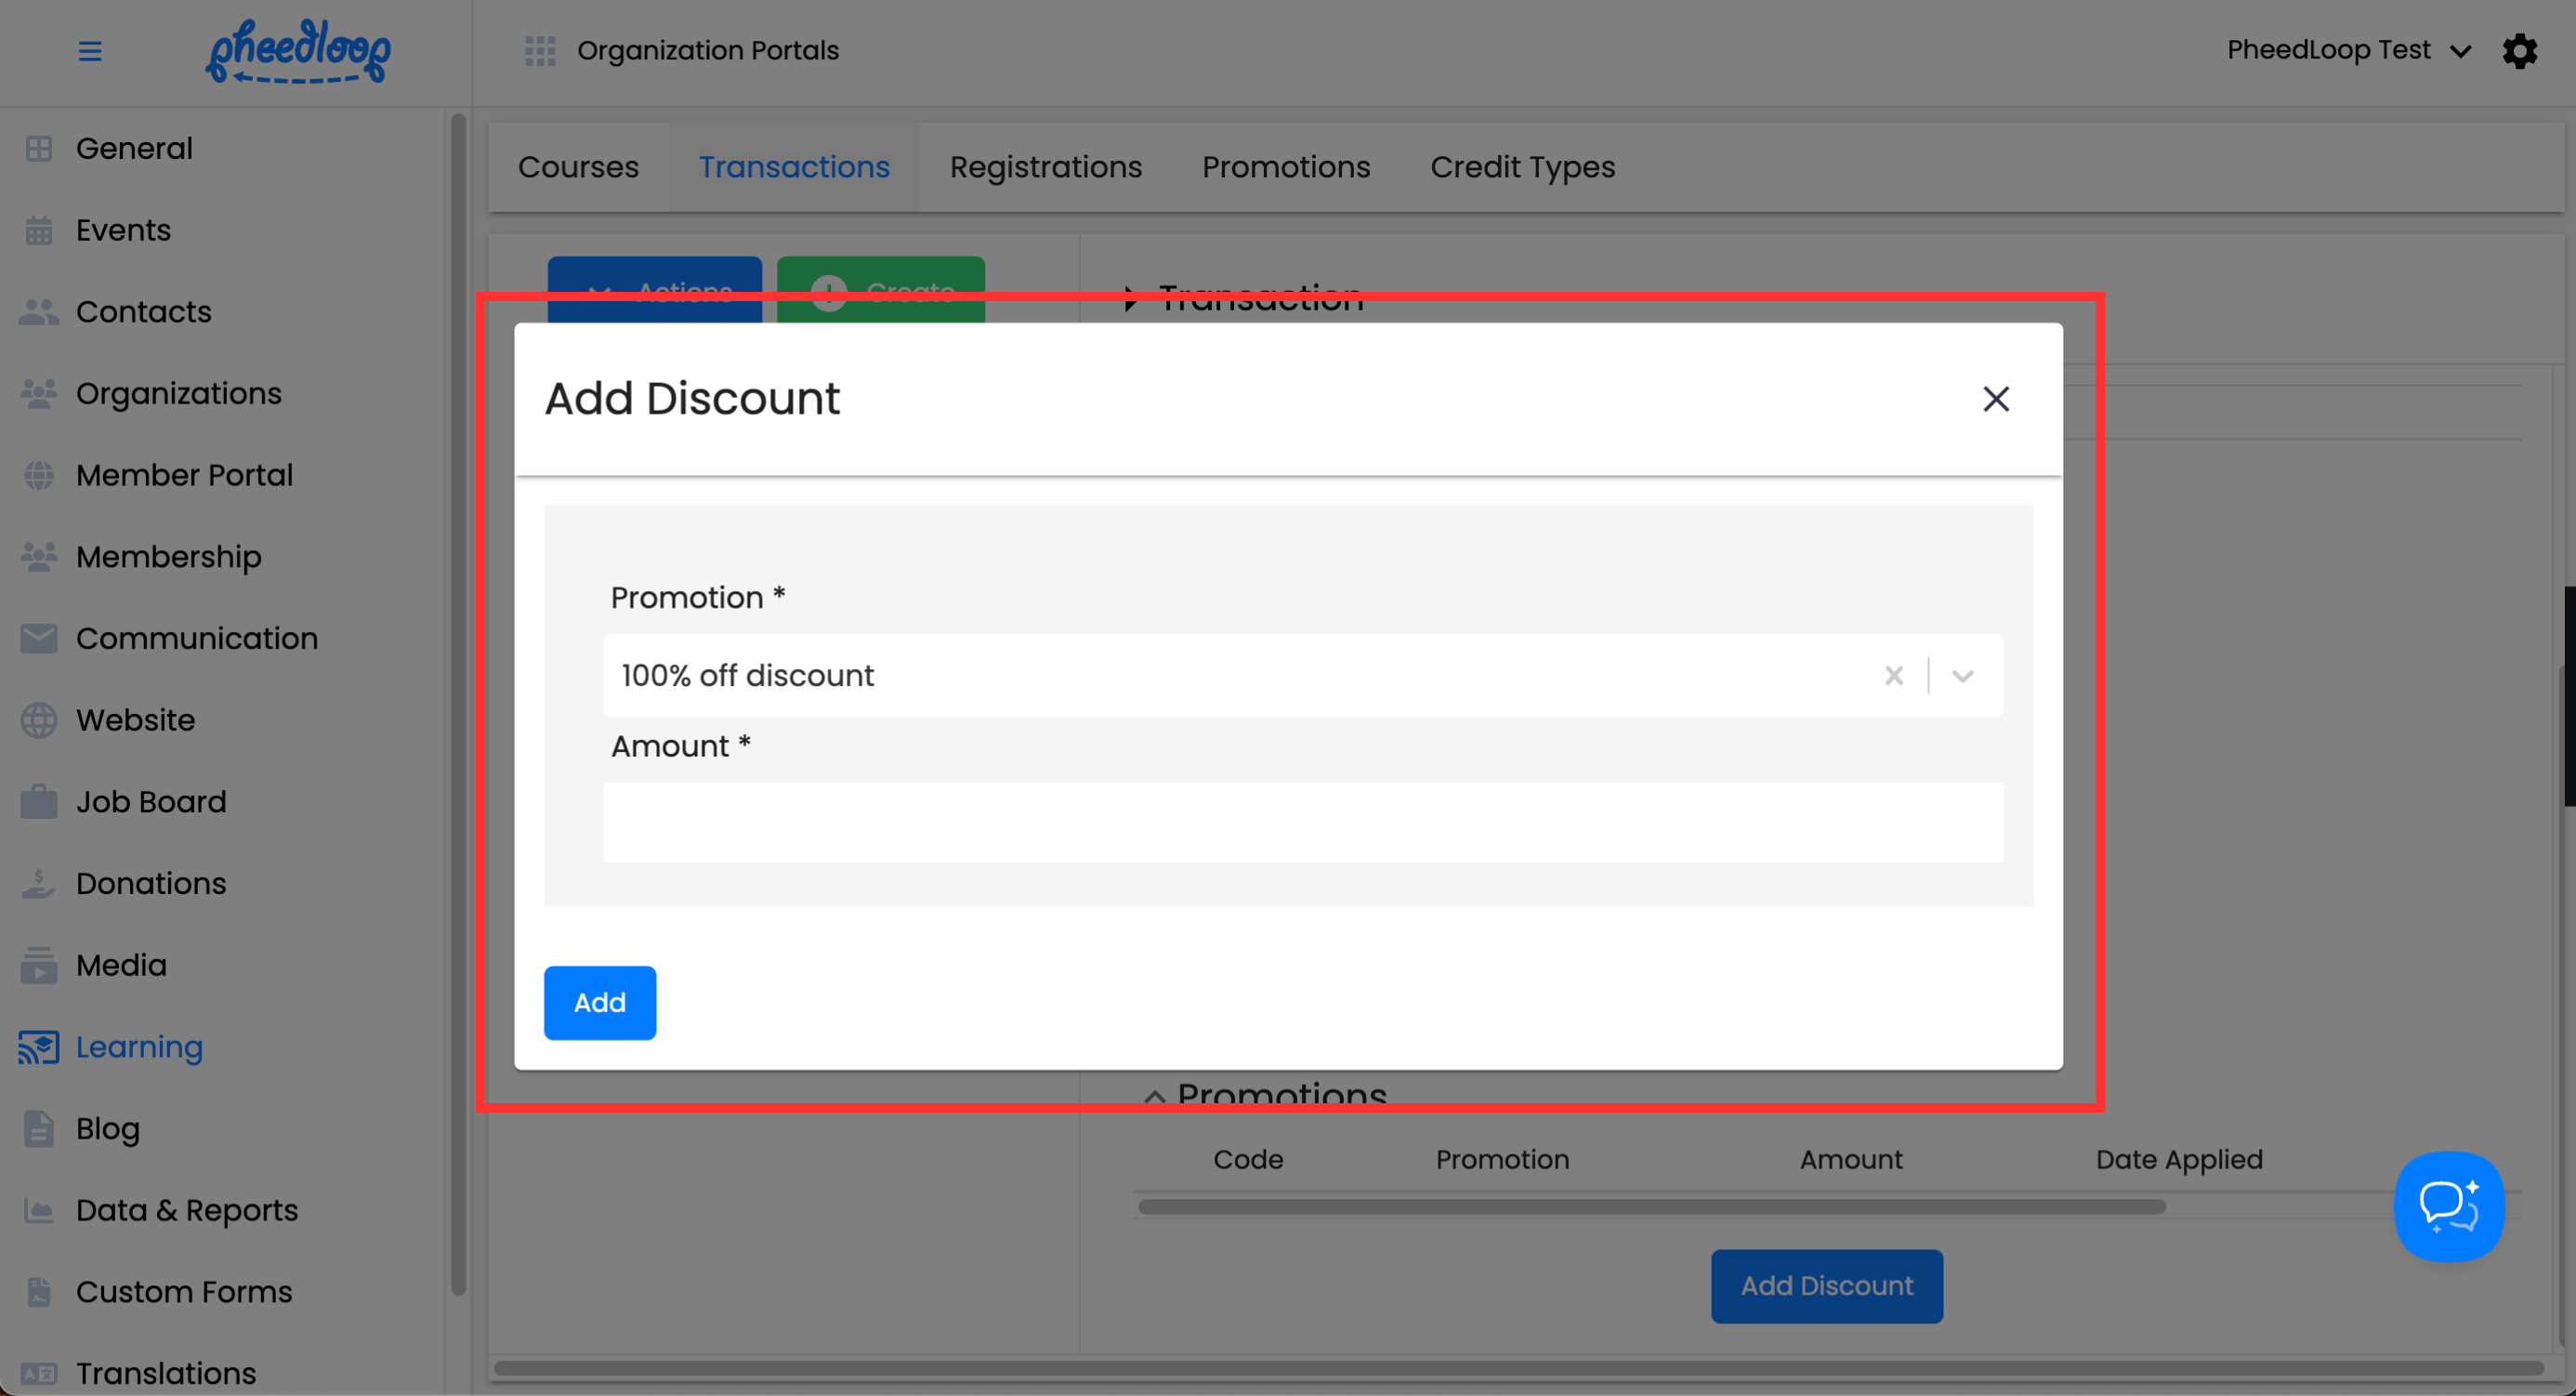
From the Transaction Editor Form, select Add Discount
- Under the Promotion field, select the promotion you wish to use
- Please note, only promotions created under Learning > Promotions will be included among the list.
- Under the Amount field, enter the dollar amount to be discounted
Select Add


The discount will now apply to the transaction. Promotions can be deleted by selecting Actions > Delete next to the promotion in the transaction details. Select Confirm to verify your decision.

For more information on promotions for the Learning Management System, please review the Promotions section of our Getting Started with the Learning Management System article.