Getting Started with the Learning Management System
The learning management system is PheedLoop’s primary means for organizations to provide credits and other valid proofs of completion within your organization. With this system, tracking attendance and creating multi lesson modules is a quick and simple process.
If you are part of an association and would like to track attendance and award certificates of completion to your members, the Learning Management System is perfect for you.
The Learning Portal can be accessed from the Learning page in the Member Portal. To manage the Learning Management System, open the Membership Dashboard and navigate to Learning. Here, you will see all the configurable settings for the Learning Management System.
Courses
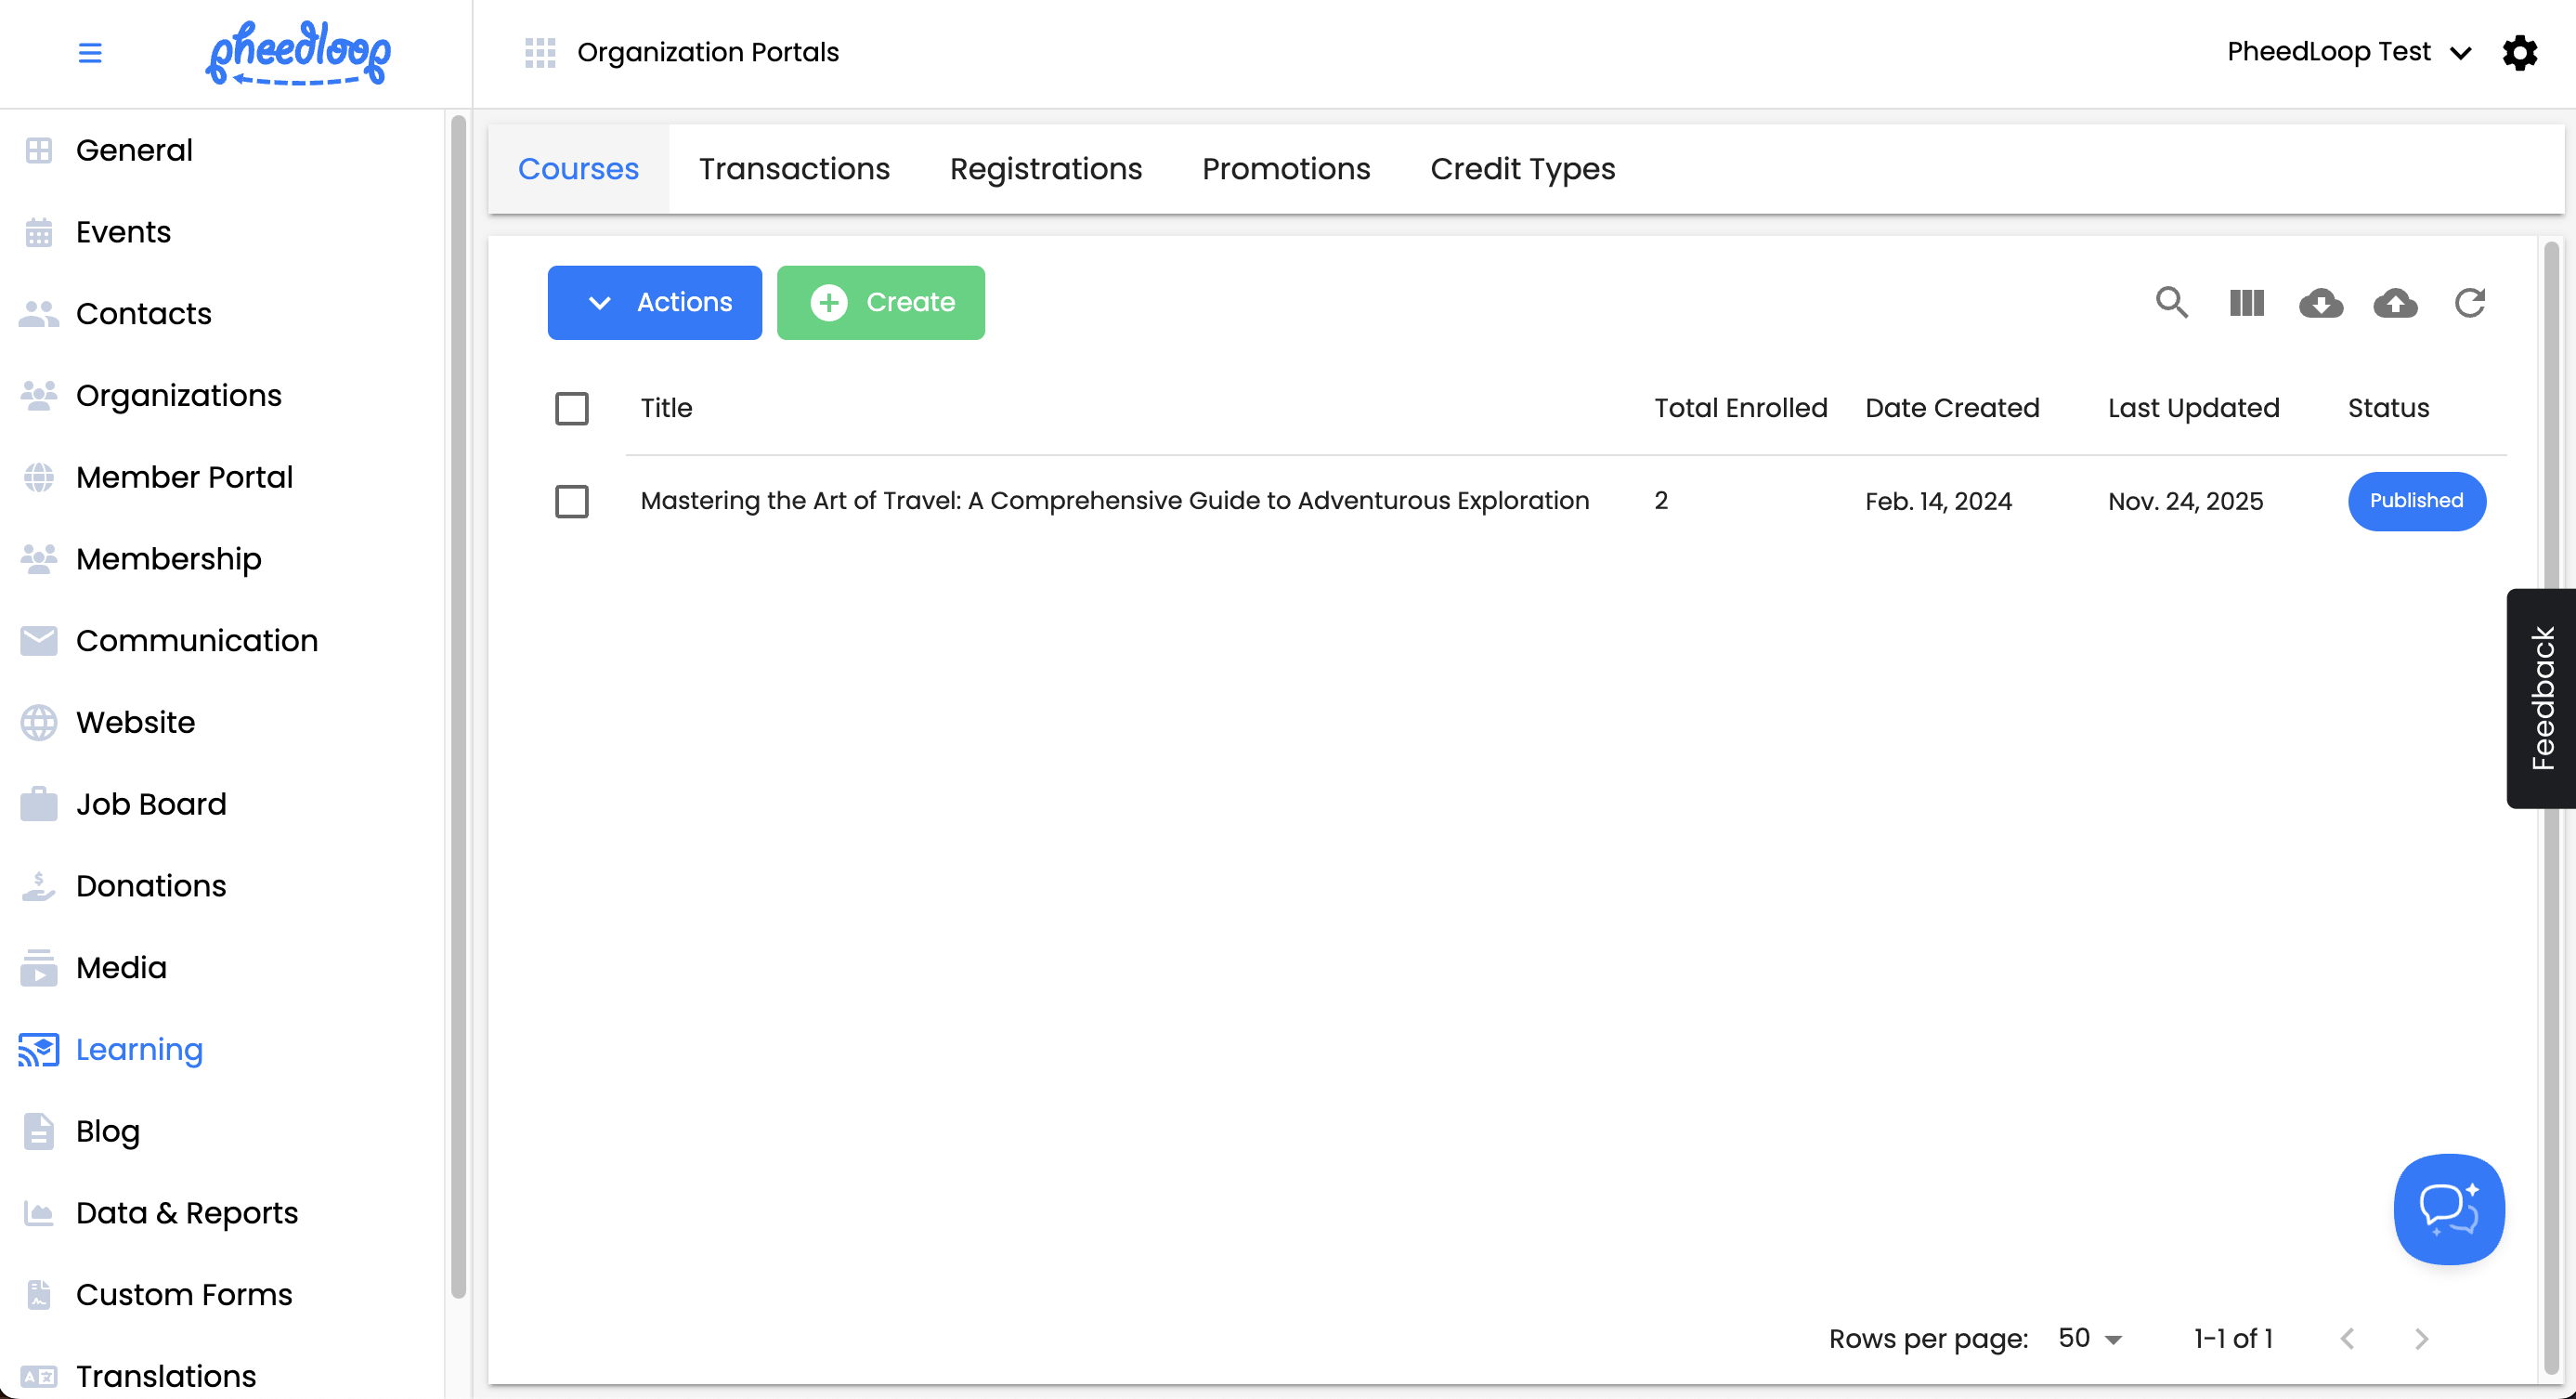
The My Courses page is where you can create and manage courses in the Learning Portal. For more information on this topic, please review our How Courses Work article.
Instructions for quizzes can also be found in our How Quizzes Work article.

Transactions
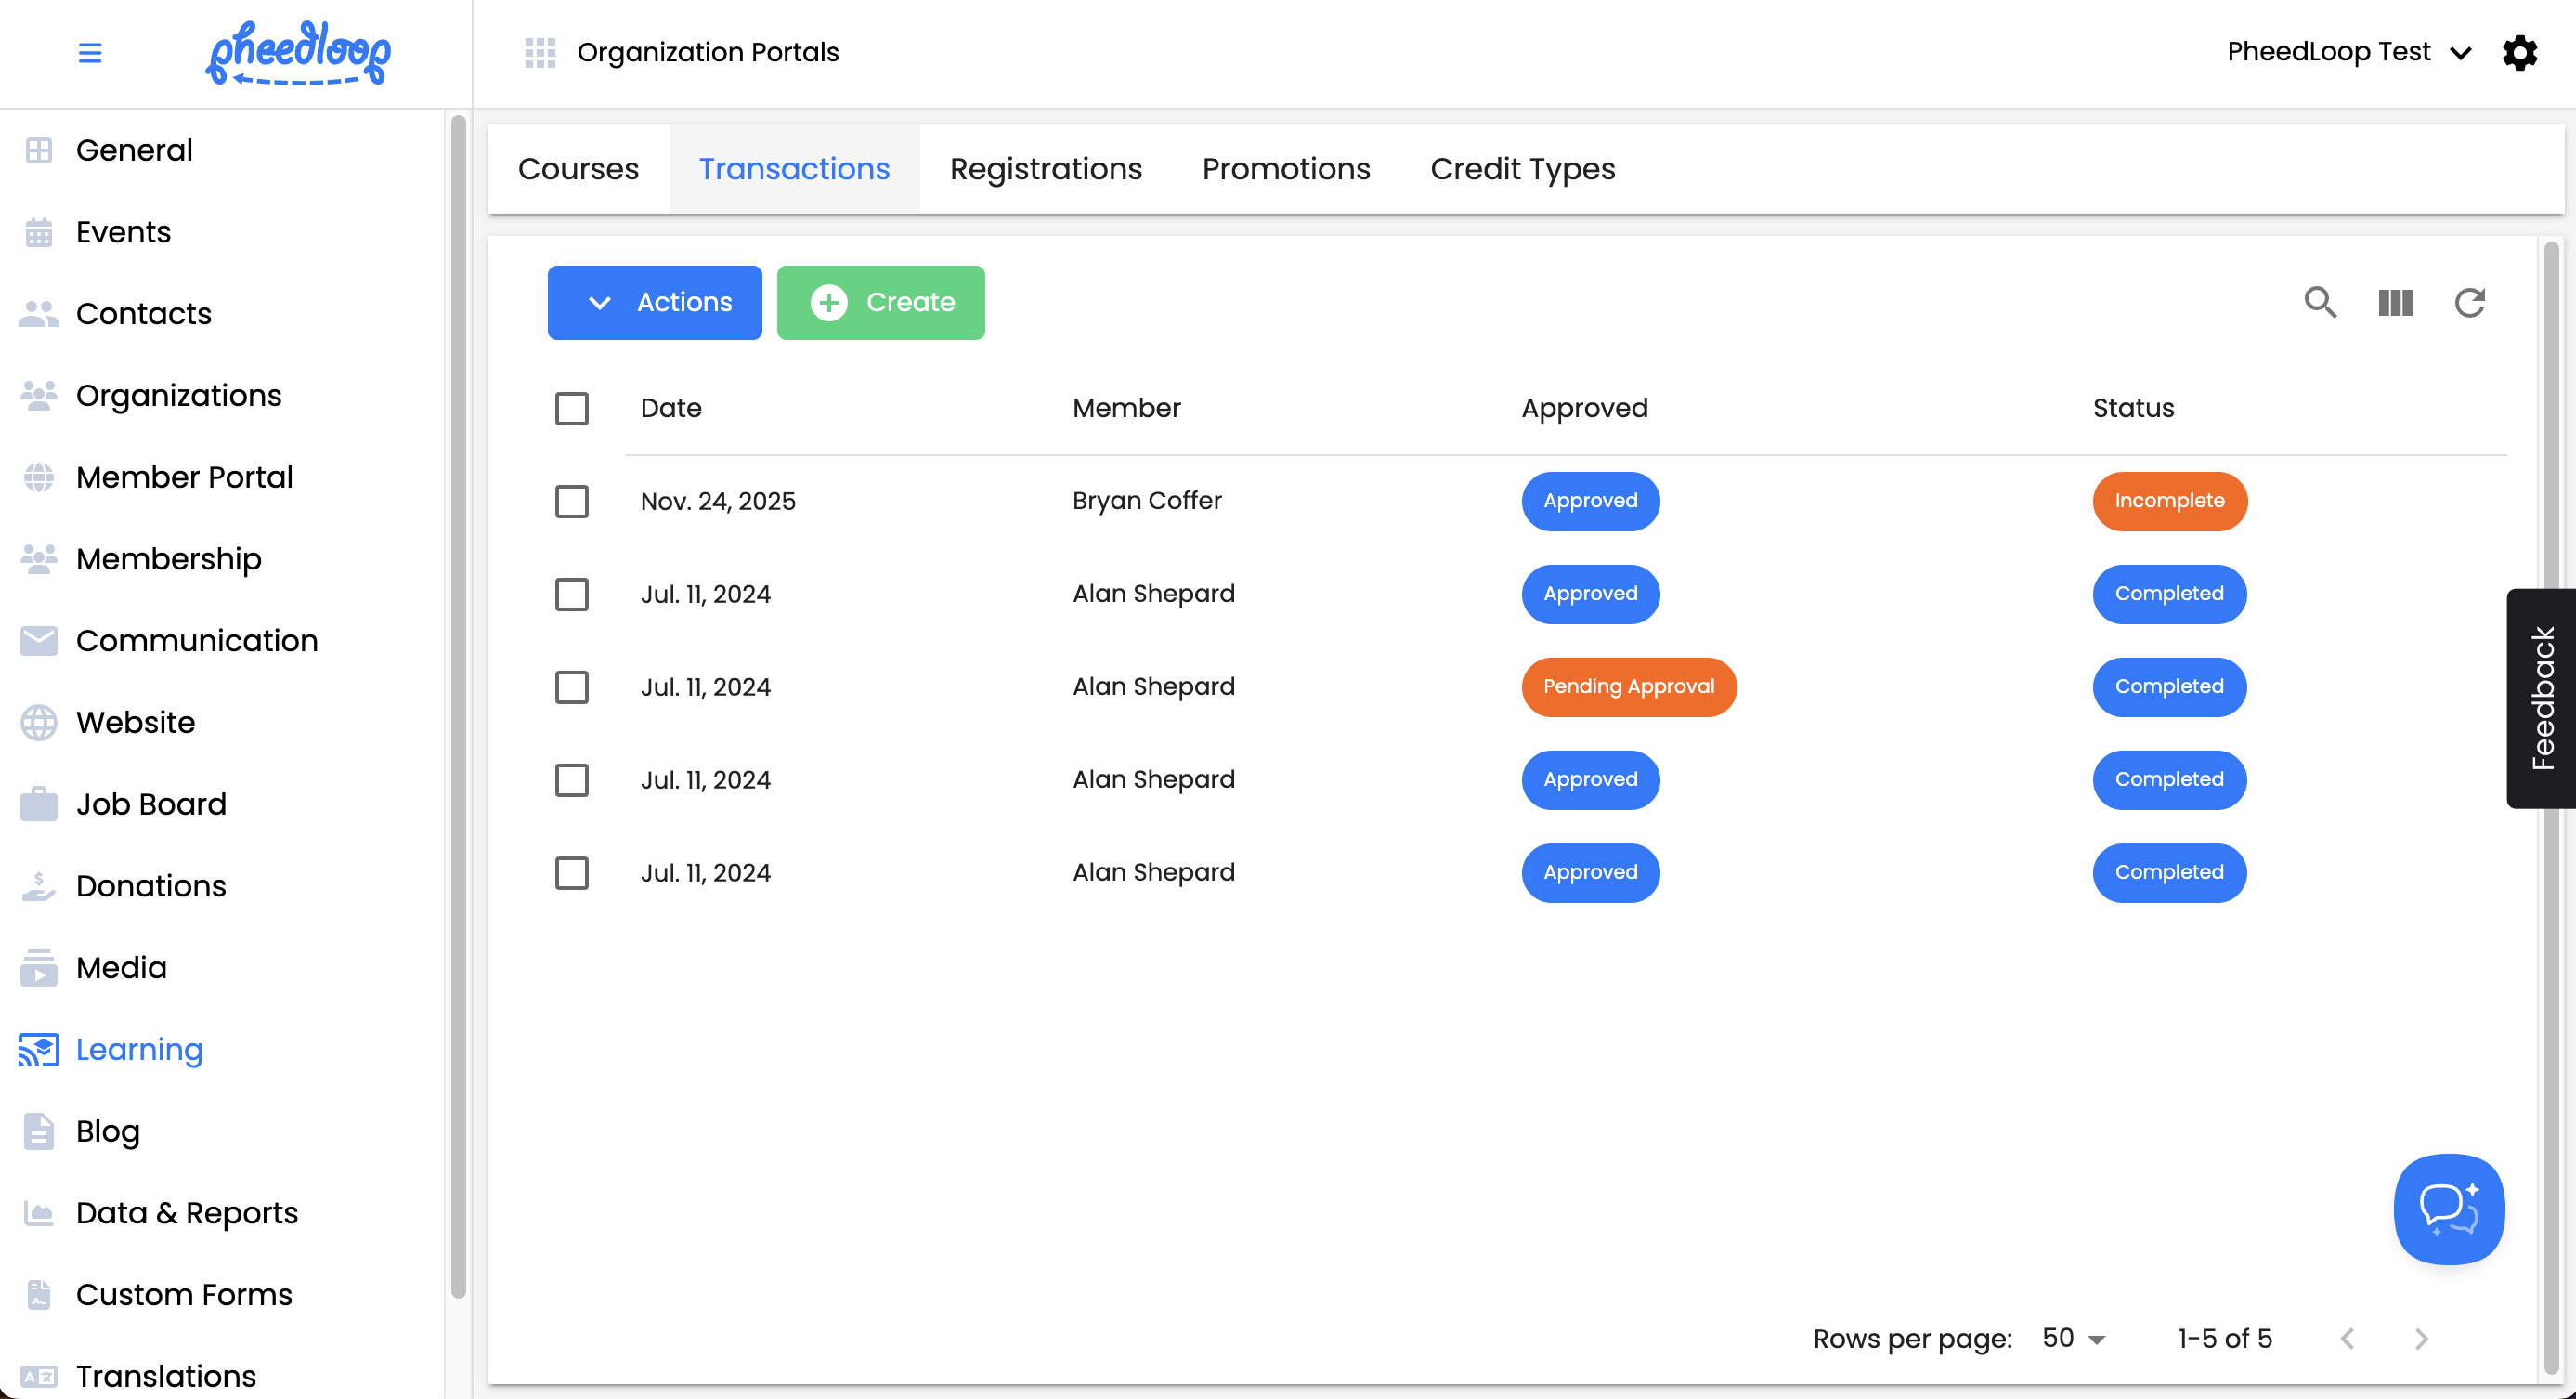
The Transactions page will display information on all existing transactions created by your members as they purchase courses. Please note that the transactions page here is unique to the Learning Management System and will not reflect transactions for things beyond the purchases made in the Learning Portal.
For more information on Transactions, please visit our Managing Purchases in the Learning Management System article.

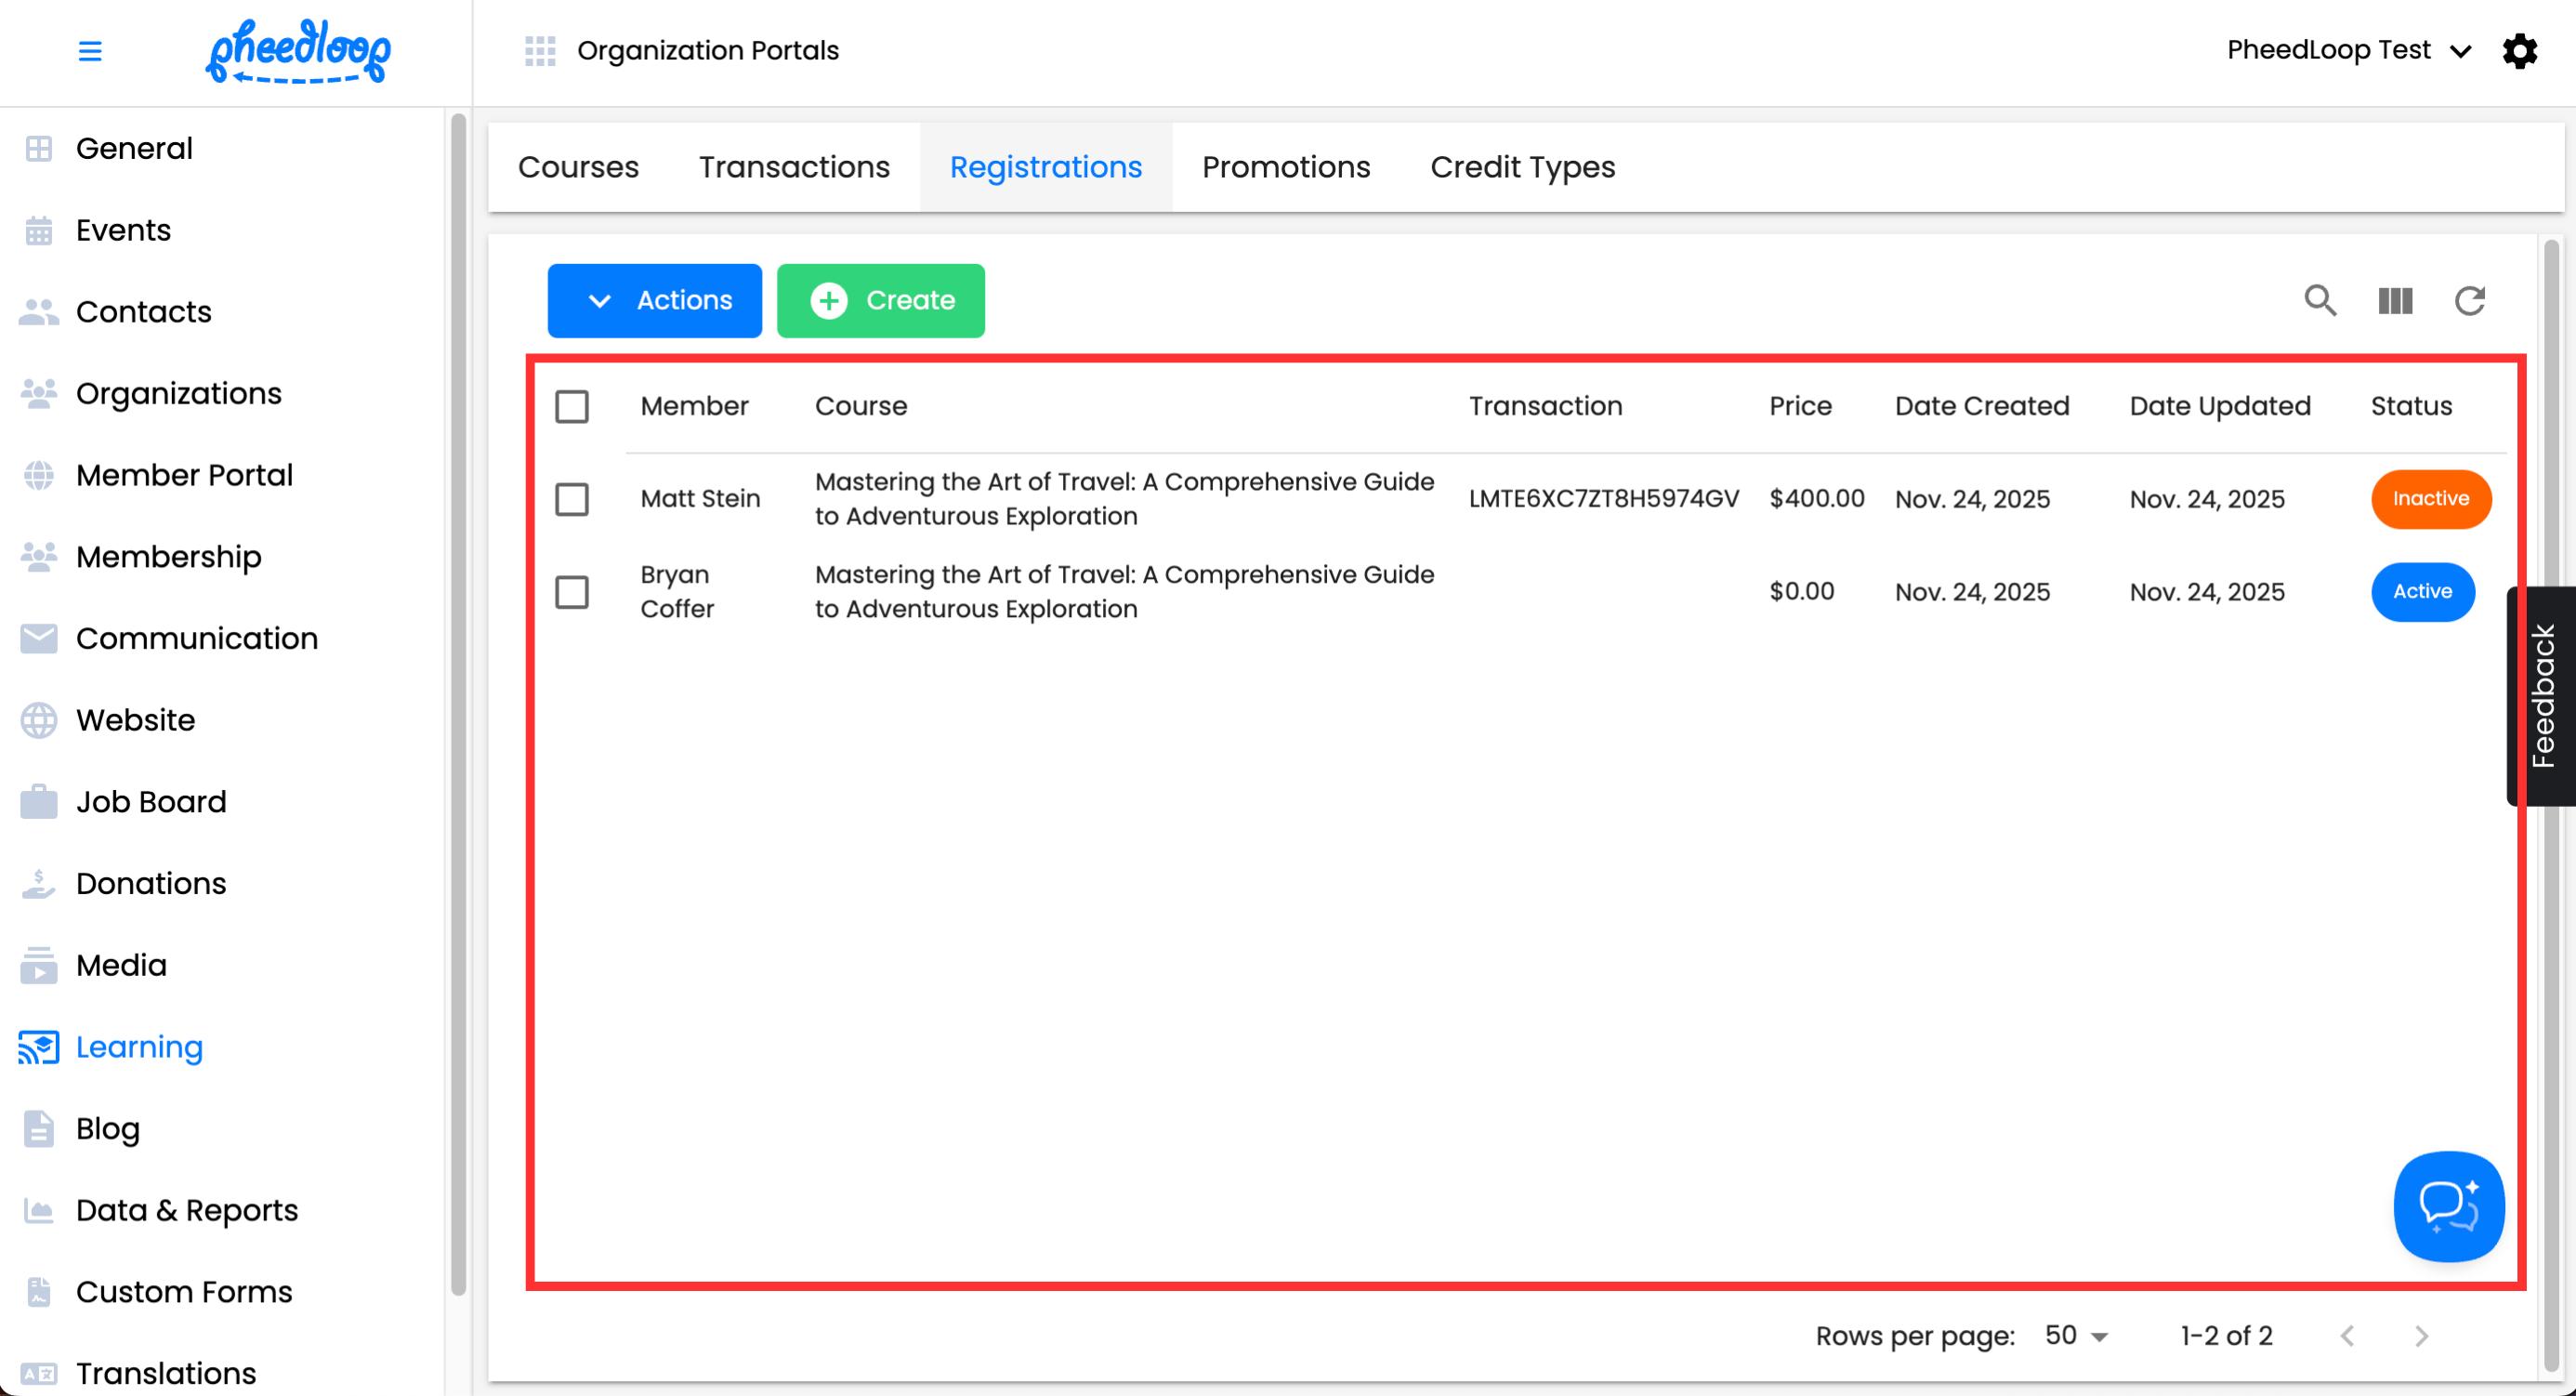
Registrations
The Registrations page covers all course enrollments made from Members.
- From the Membership Dashboard, navigate to Learning > Registrations
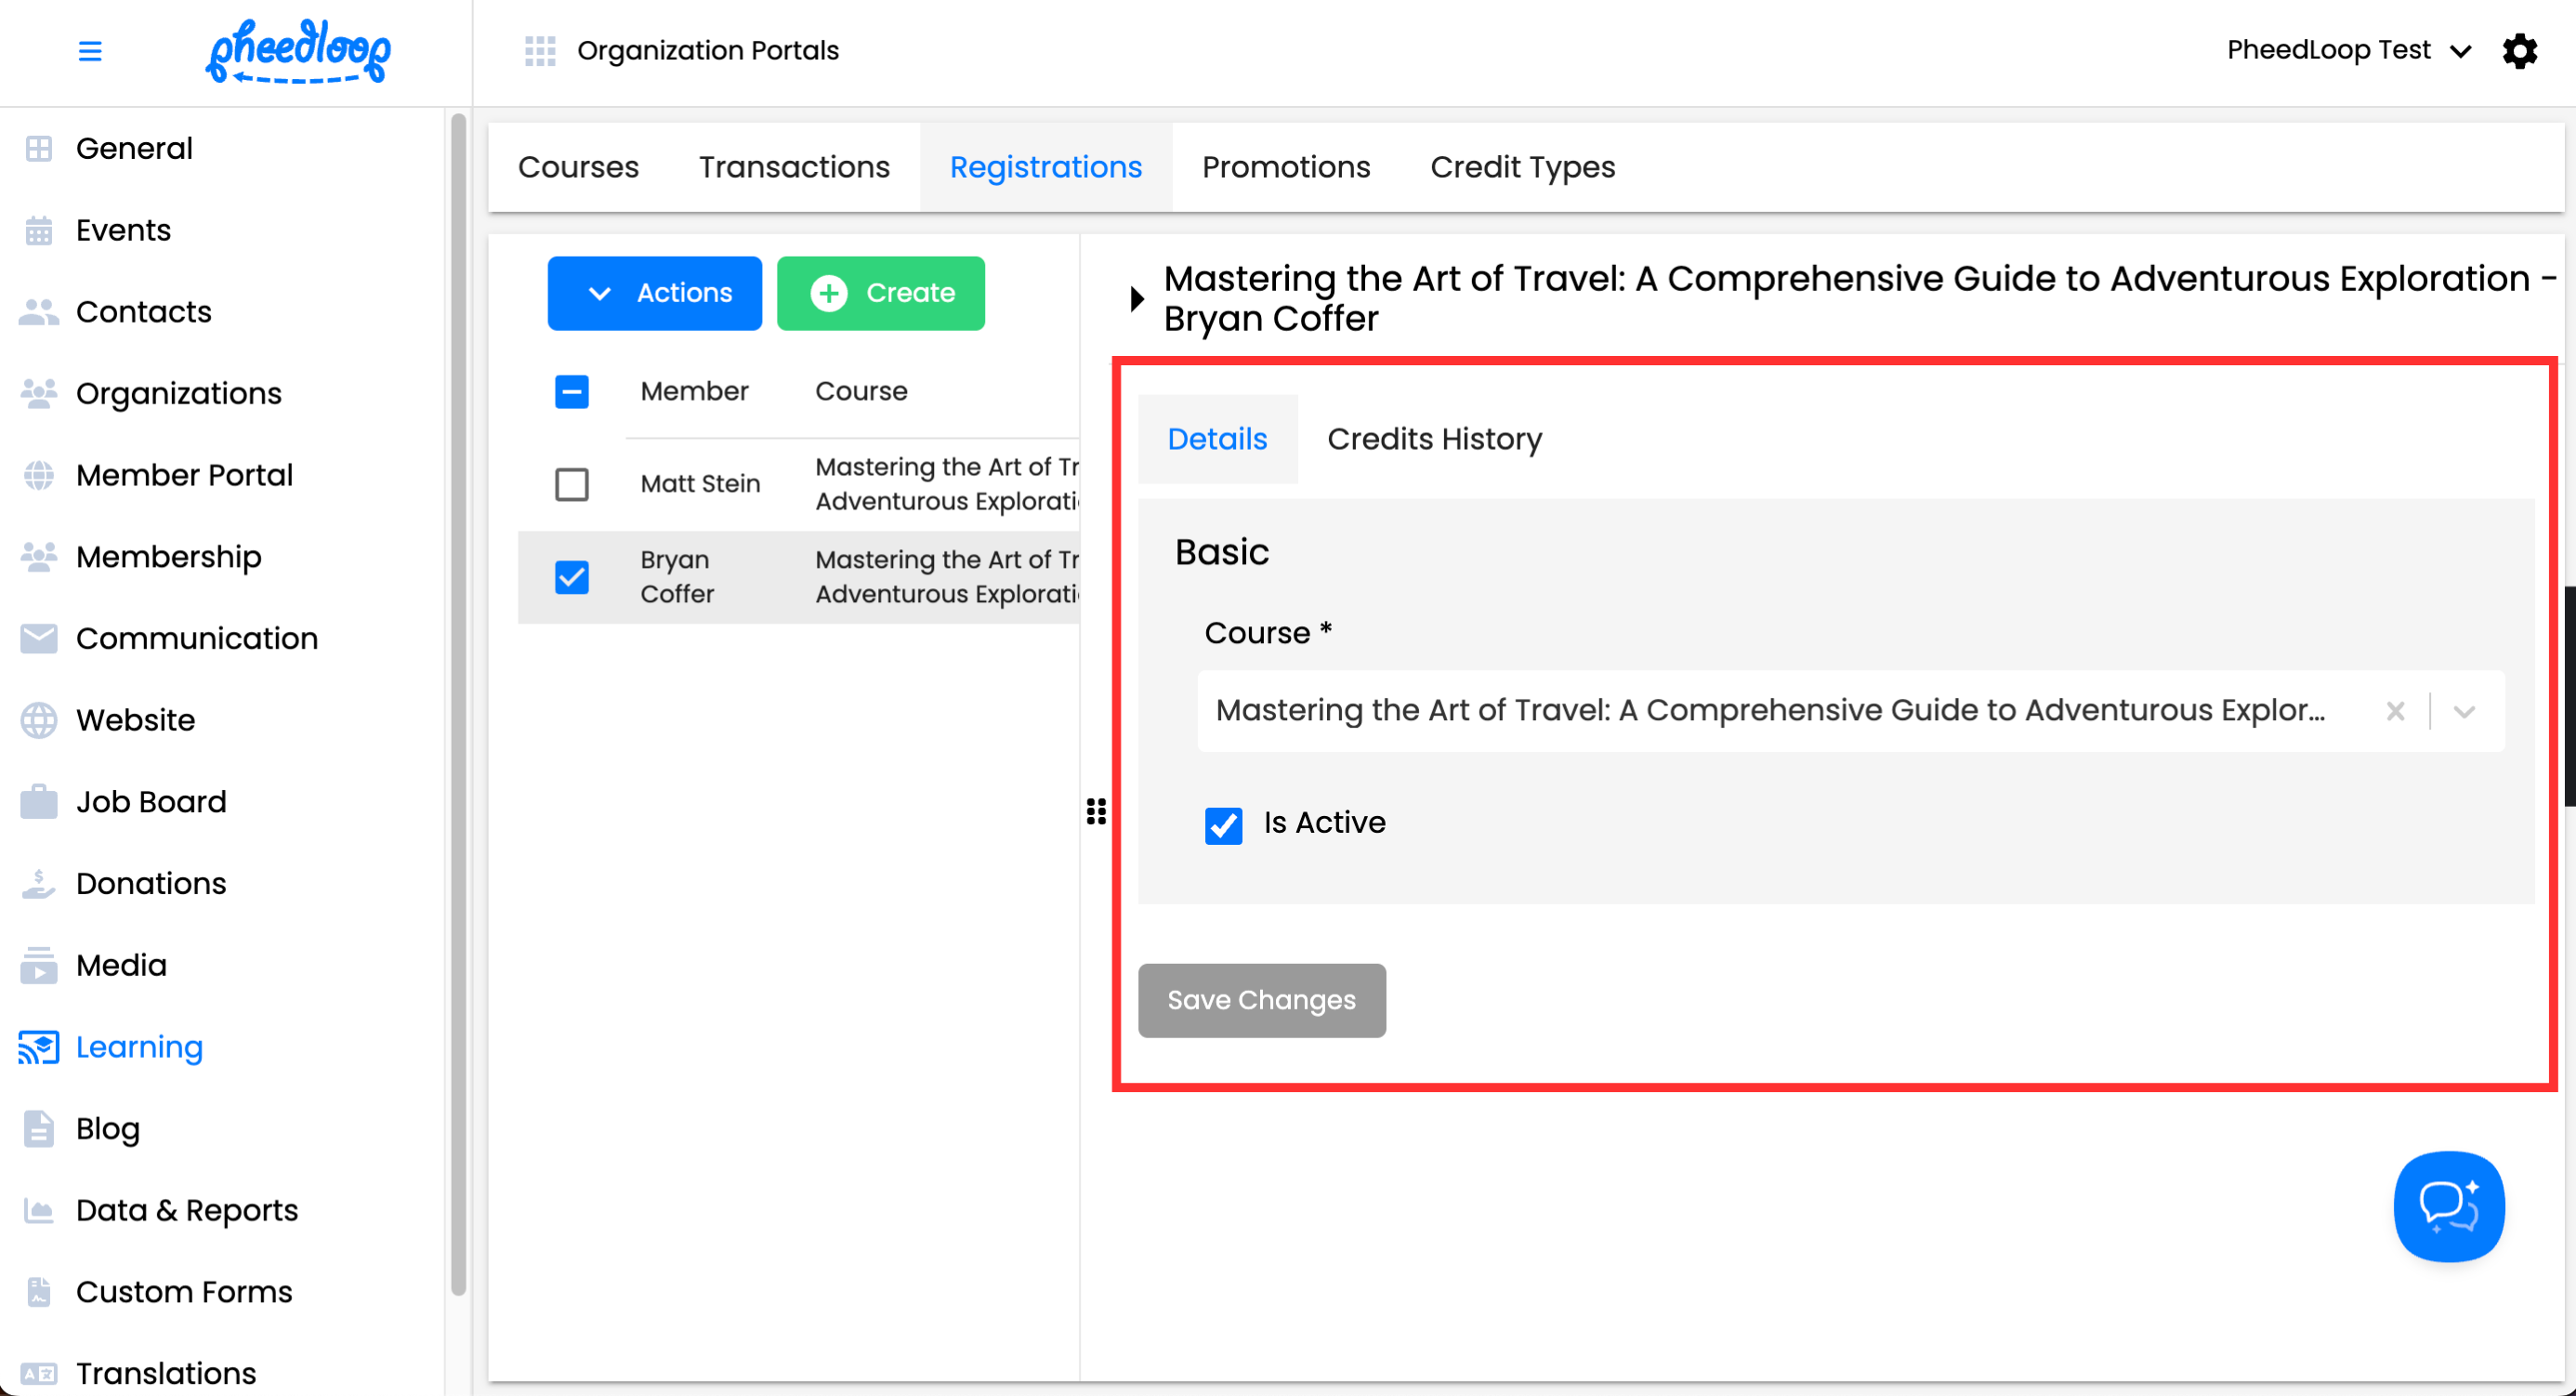
Select the Registration you wish to edit

The Registration Editor Form will now be opened. Here, you can configure the registration as necessary.
Details
- Select Go to Transaction to be redirected to the transaction
- Under the Course field, select a course to change the enrollment
- Toggle off the Is Active checkbox to deactivate the registration
Select Save Changes to save your progress

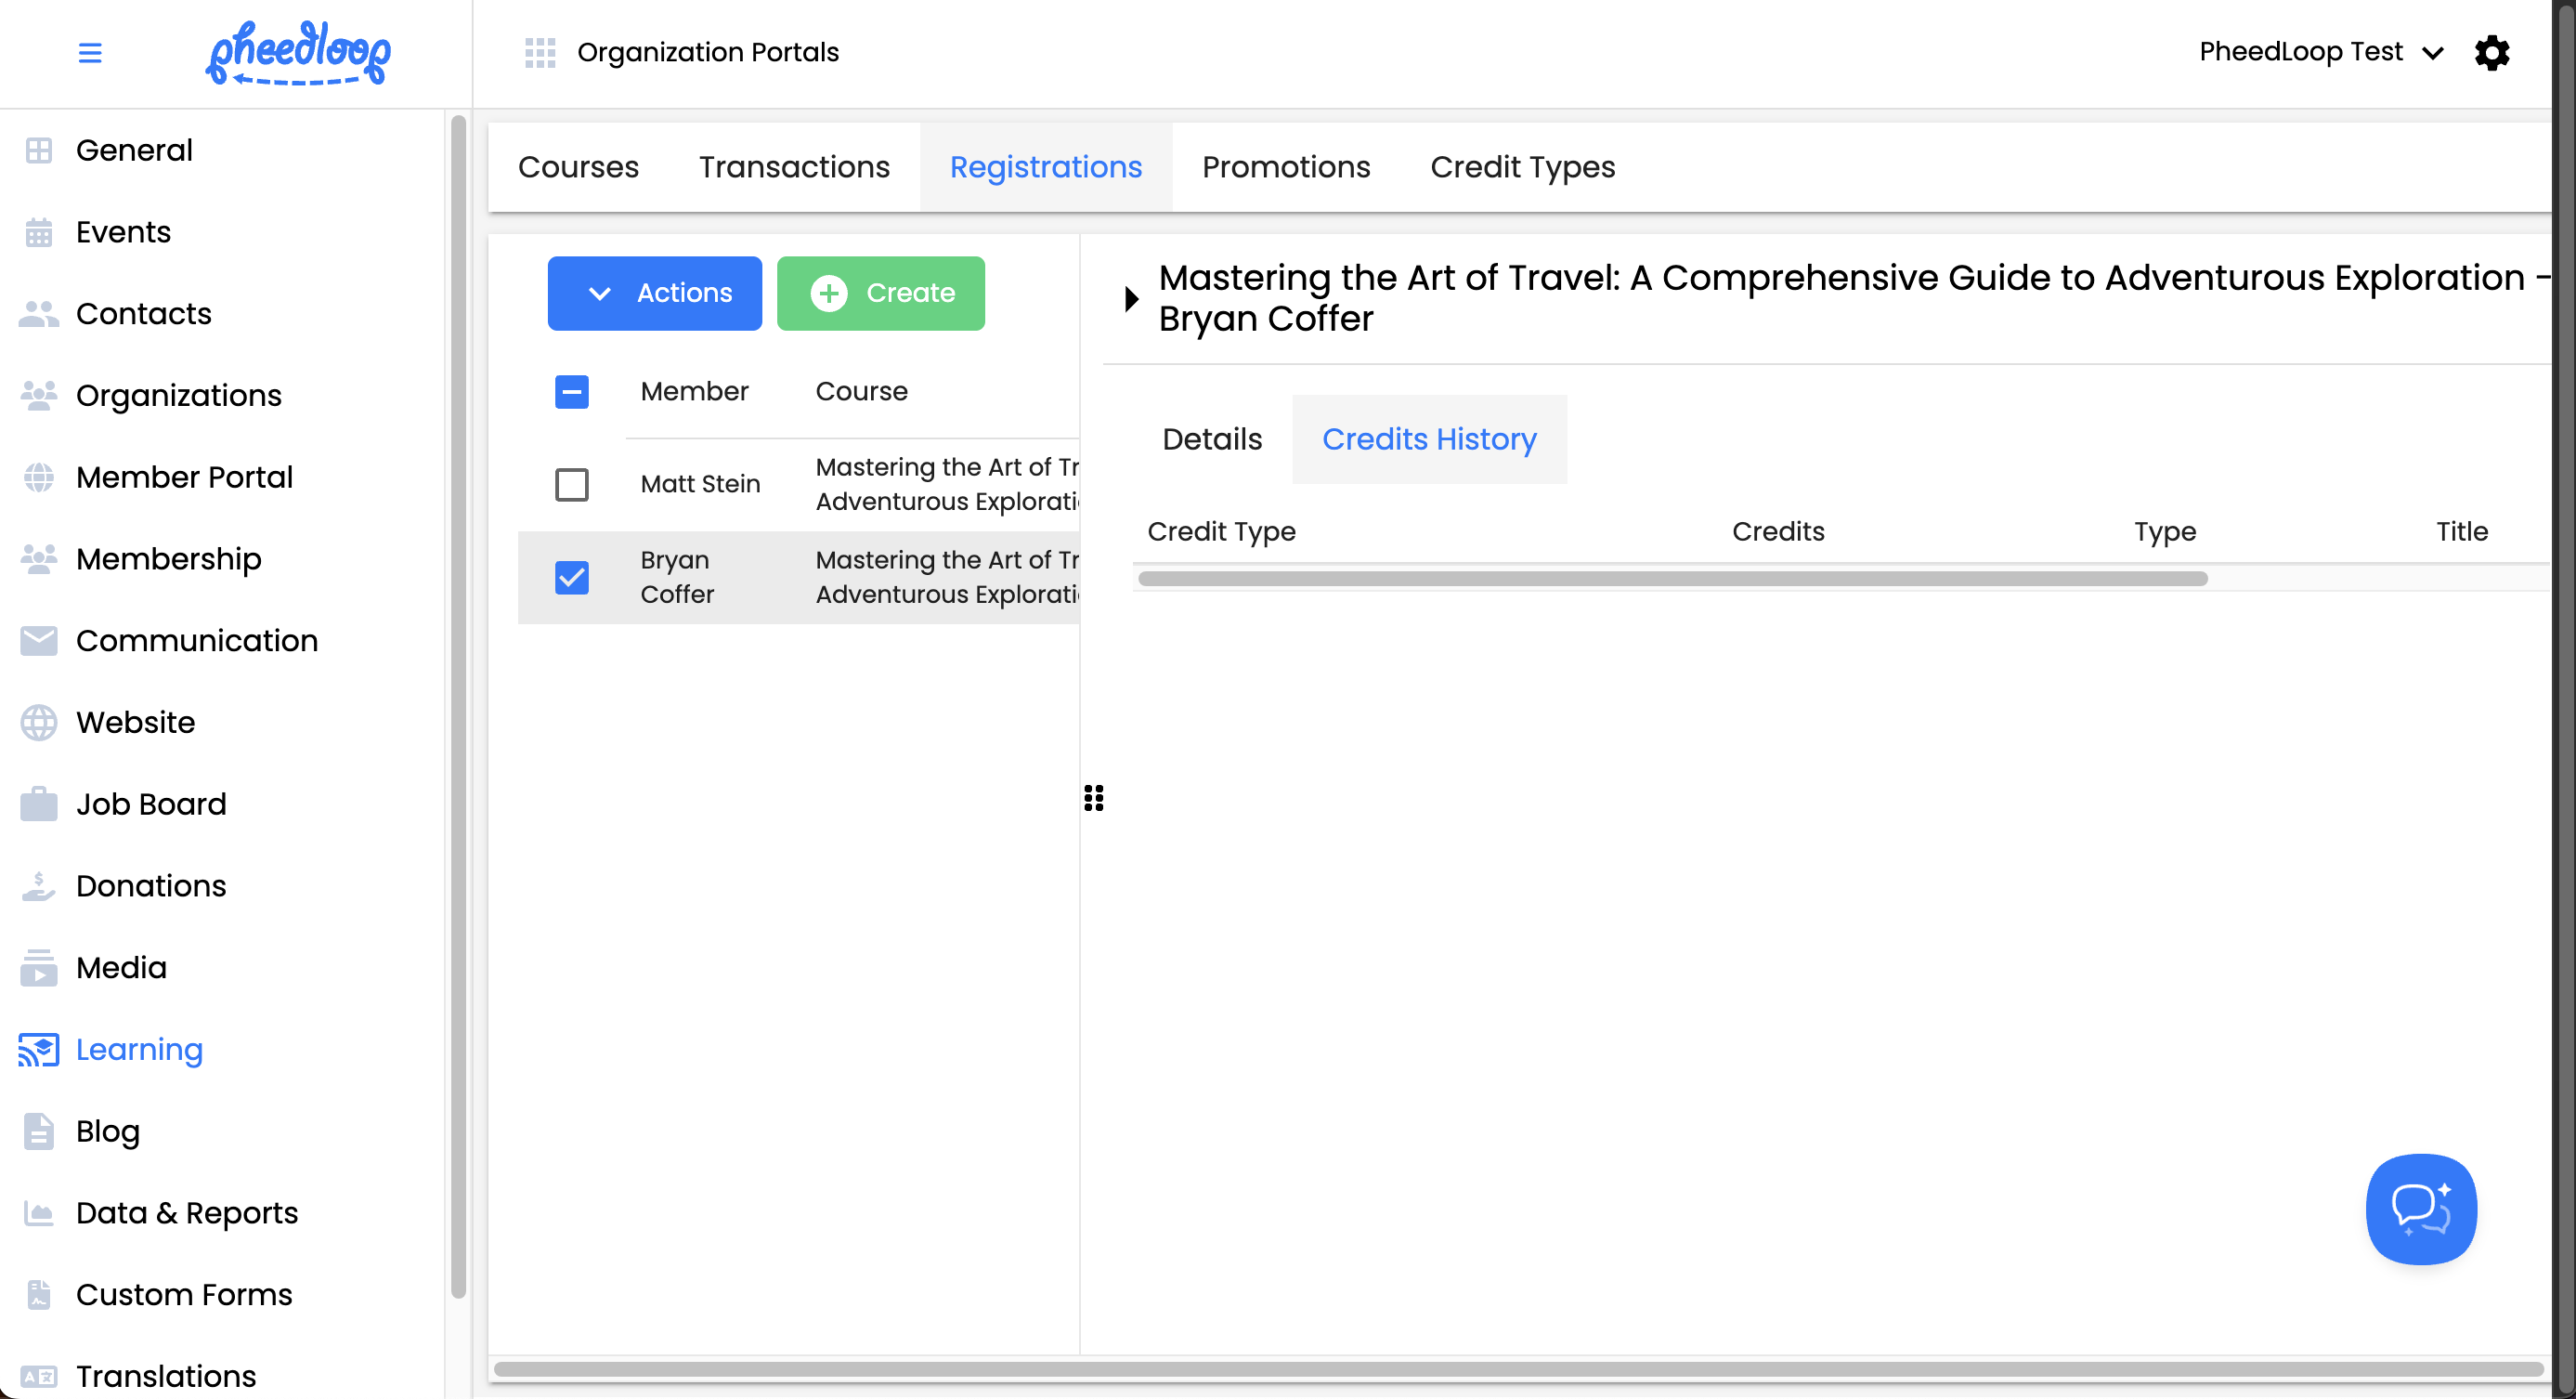
Credit History
The Credit History page shows what credit types the member earned as they go through the course. There are no editable sections in this page.
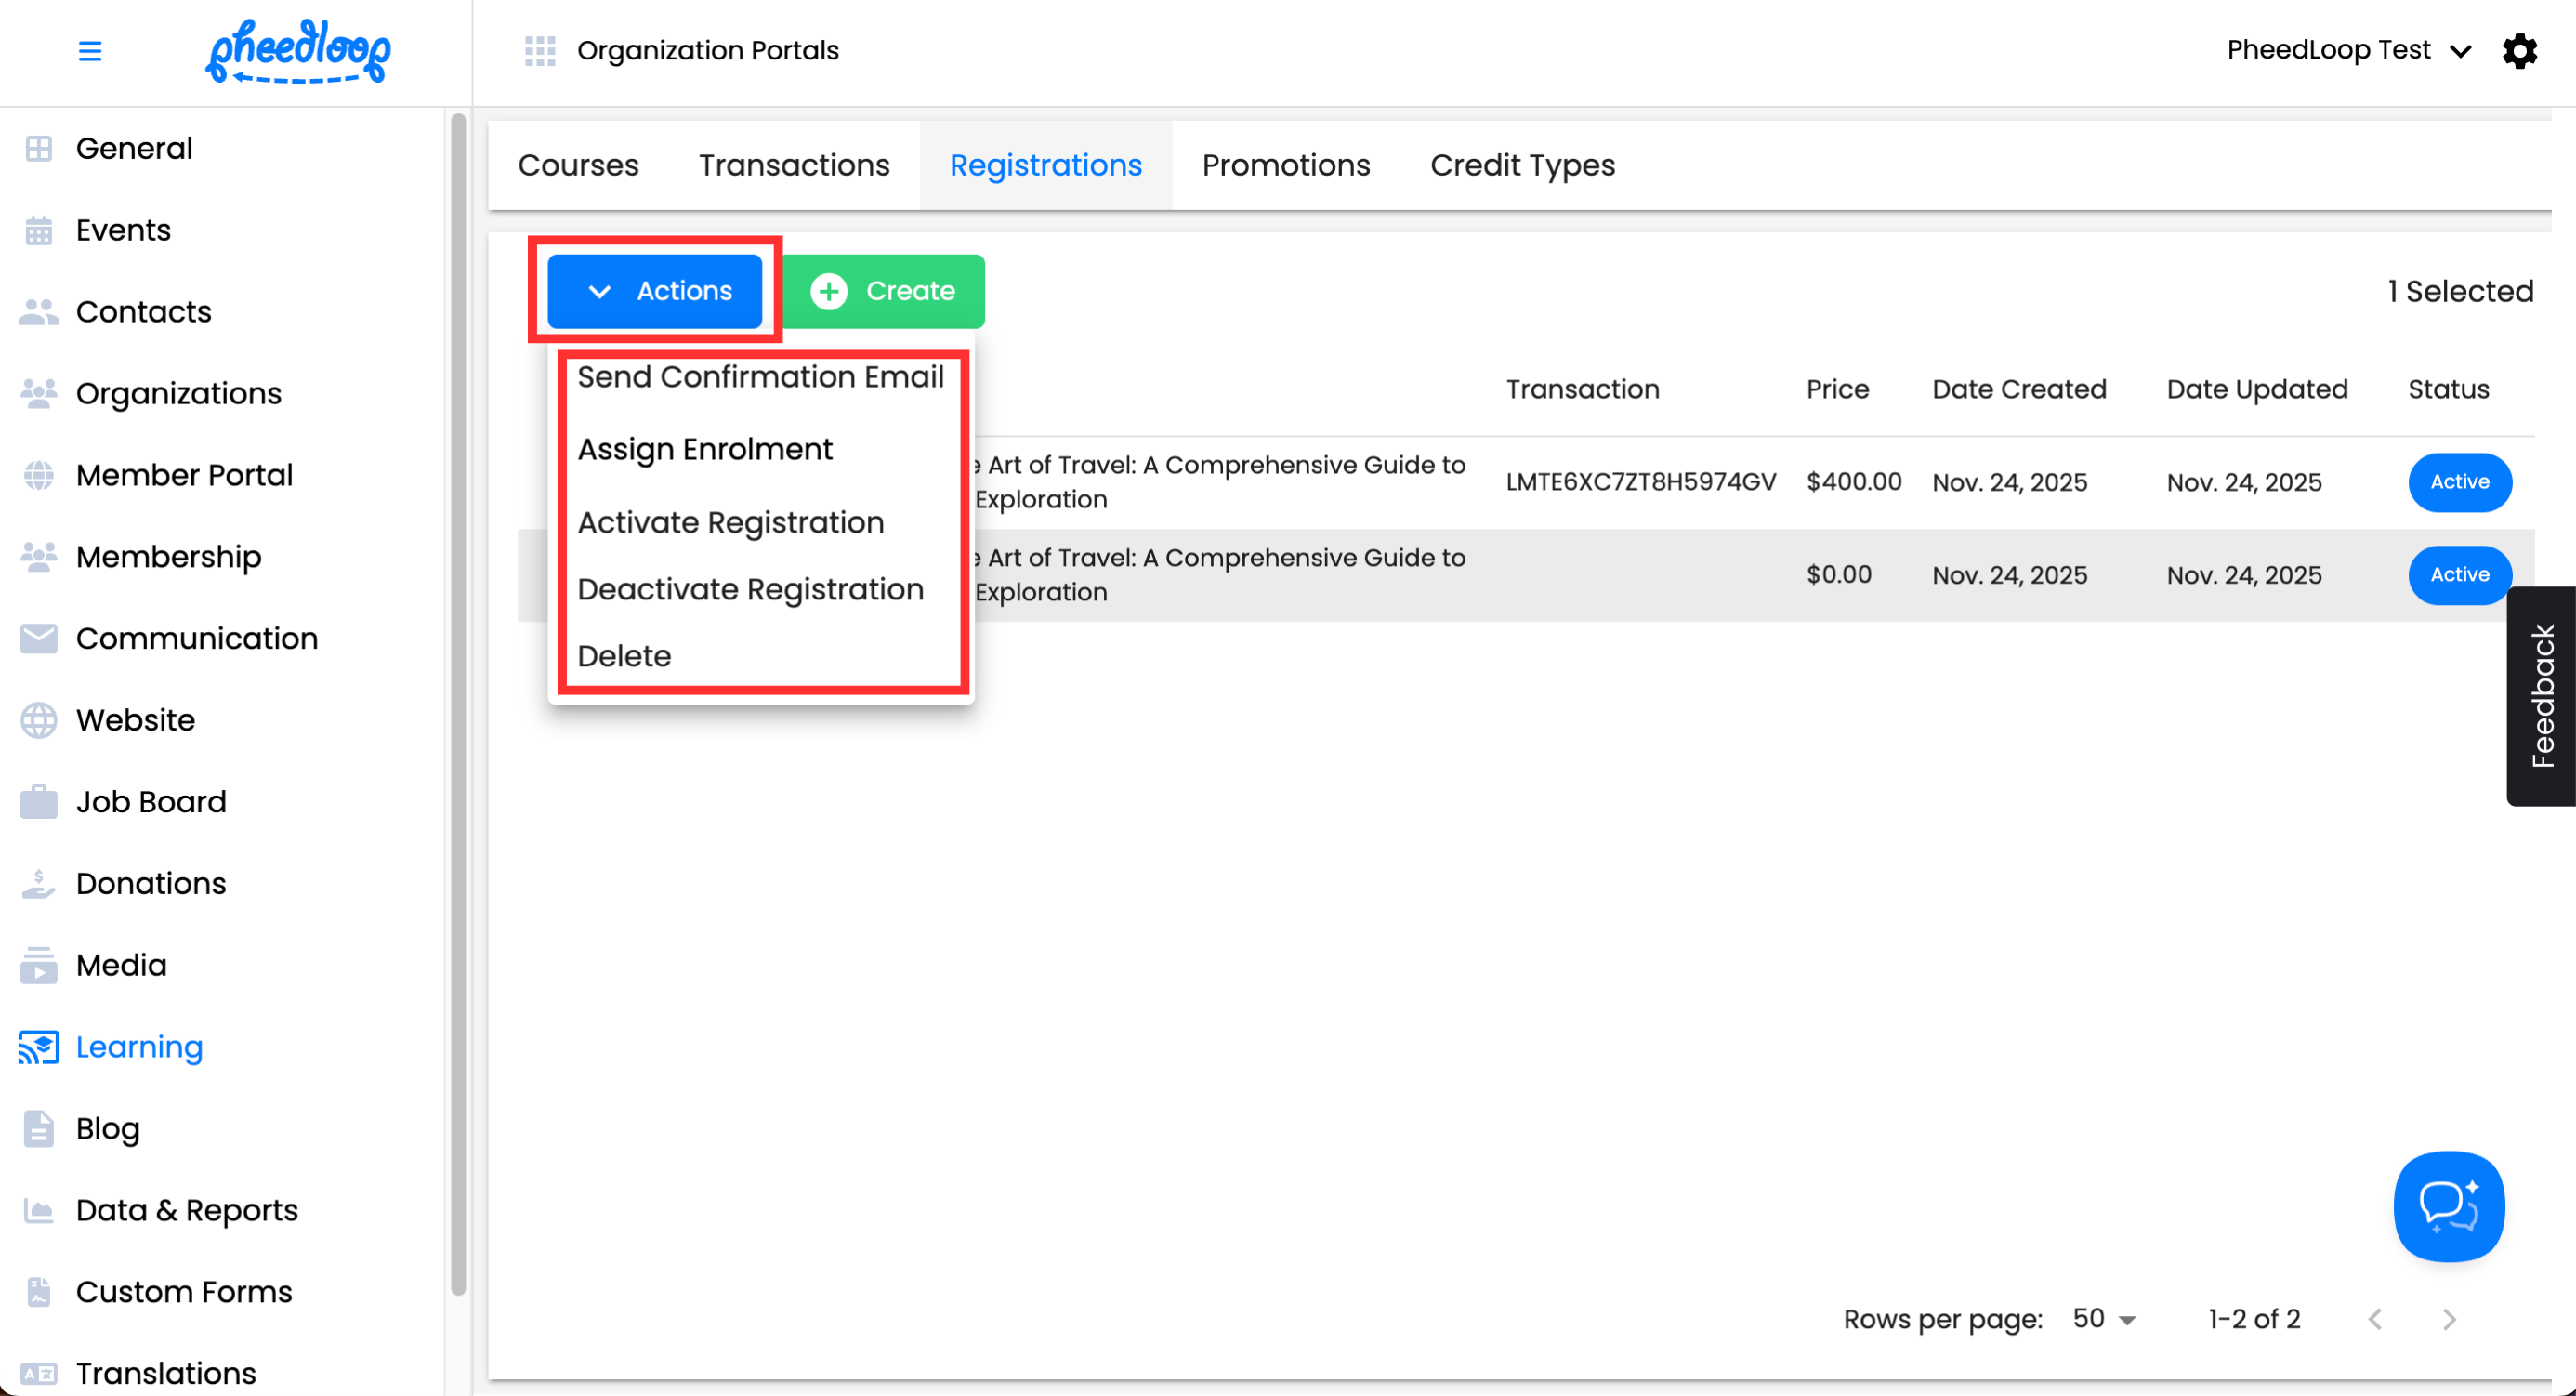
Using Actions
The Actions button has additional capabilities for Registration.
- From the Membership Dashboard, navigate to Learning > Registrations
- Select the checkbox of the Registration you wish to edit
- Above the Registrations table, select Actions
- Send Confirmation Email - Select this option to send an email to the Member confirming they are enrolled in the course.
- Assign Enrollment - Select this option to change the Member of the registration to someone else.
- Activate Registration - Select this option to render the status of the Registration as Active. This will toggle on the Is Active checkbox in the Registration Editor Form.
- Deactivate Registration - Select this option to render the status of the Registration as Inactive. This will toggle off the Is Active checkbox in the Registration Editor Form.
Delete - Select this option to remove the registration. Please note that once a registration has been deleted, it cannot be recovered.

Creating Registrations
In addition to managing registrations, it is also possible to create registrations manually in the Membership Dashboard.
- From the Membership Dashboard, navigate to Learning > Registrations
Above the Registrations table, select Create
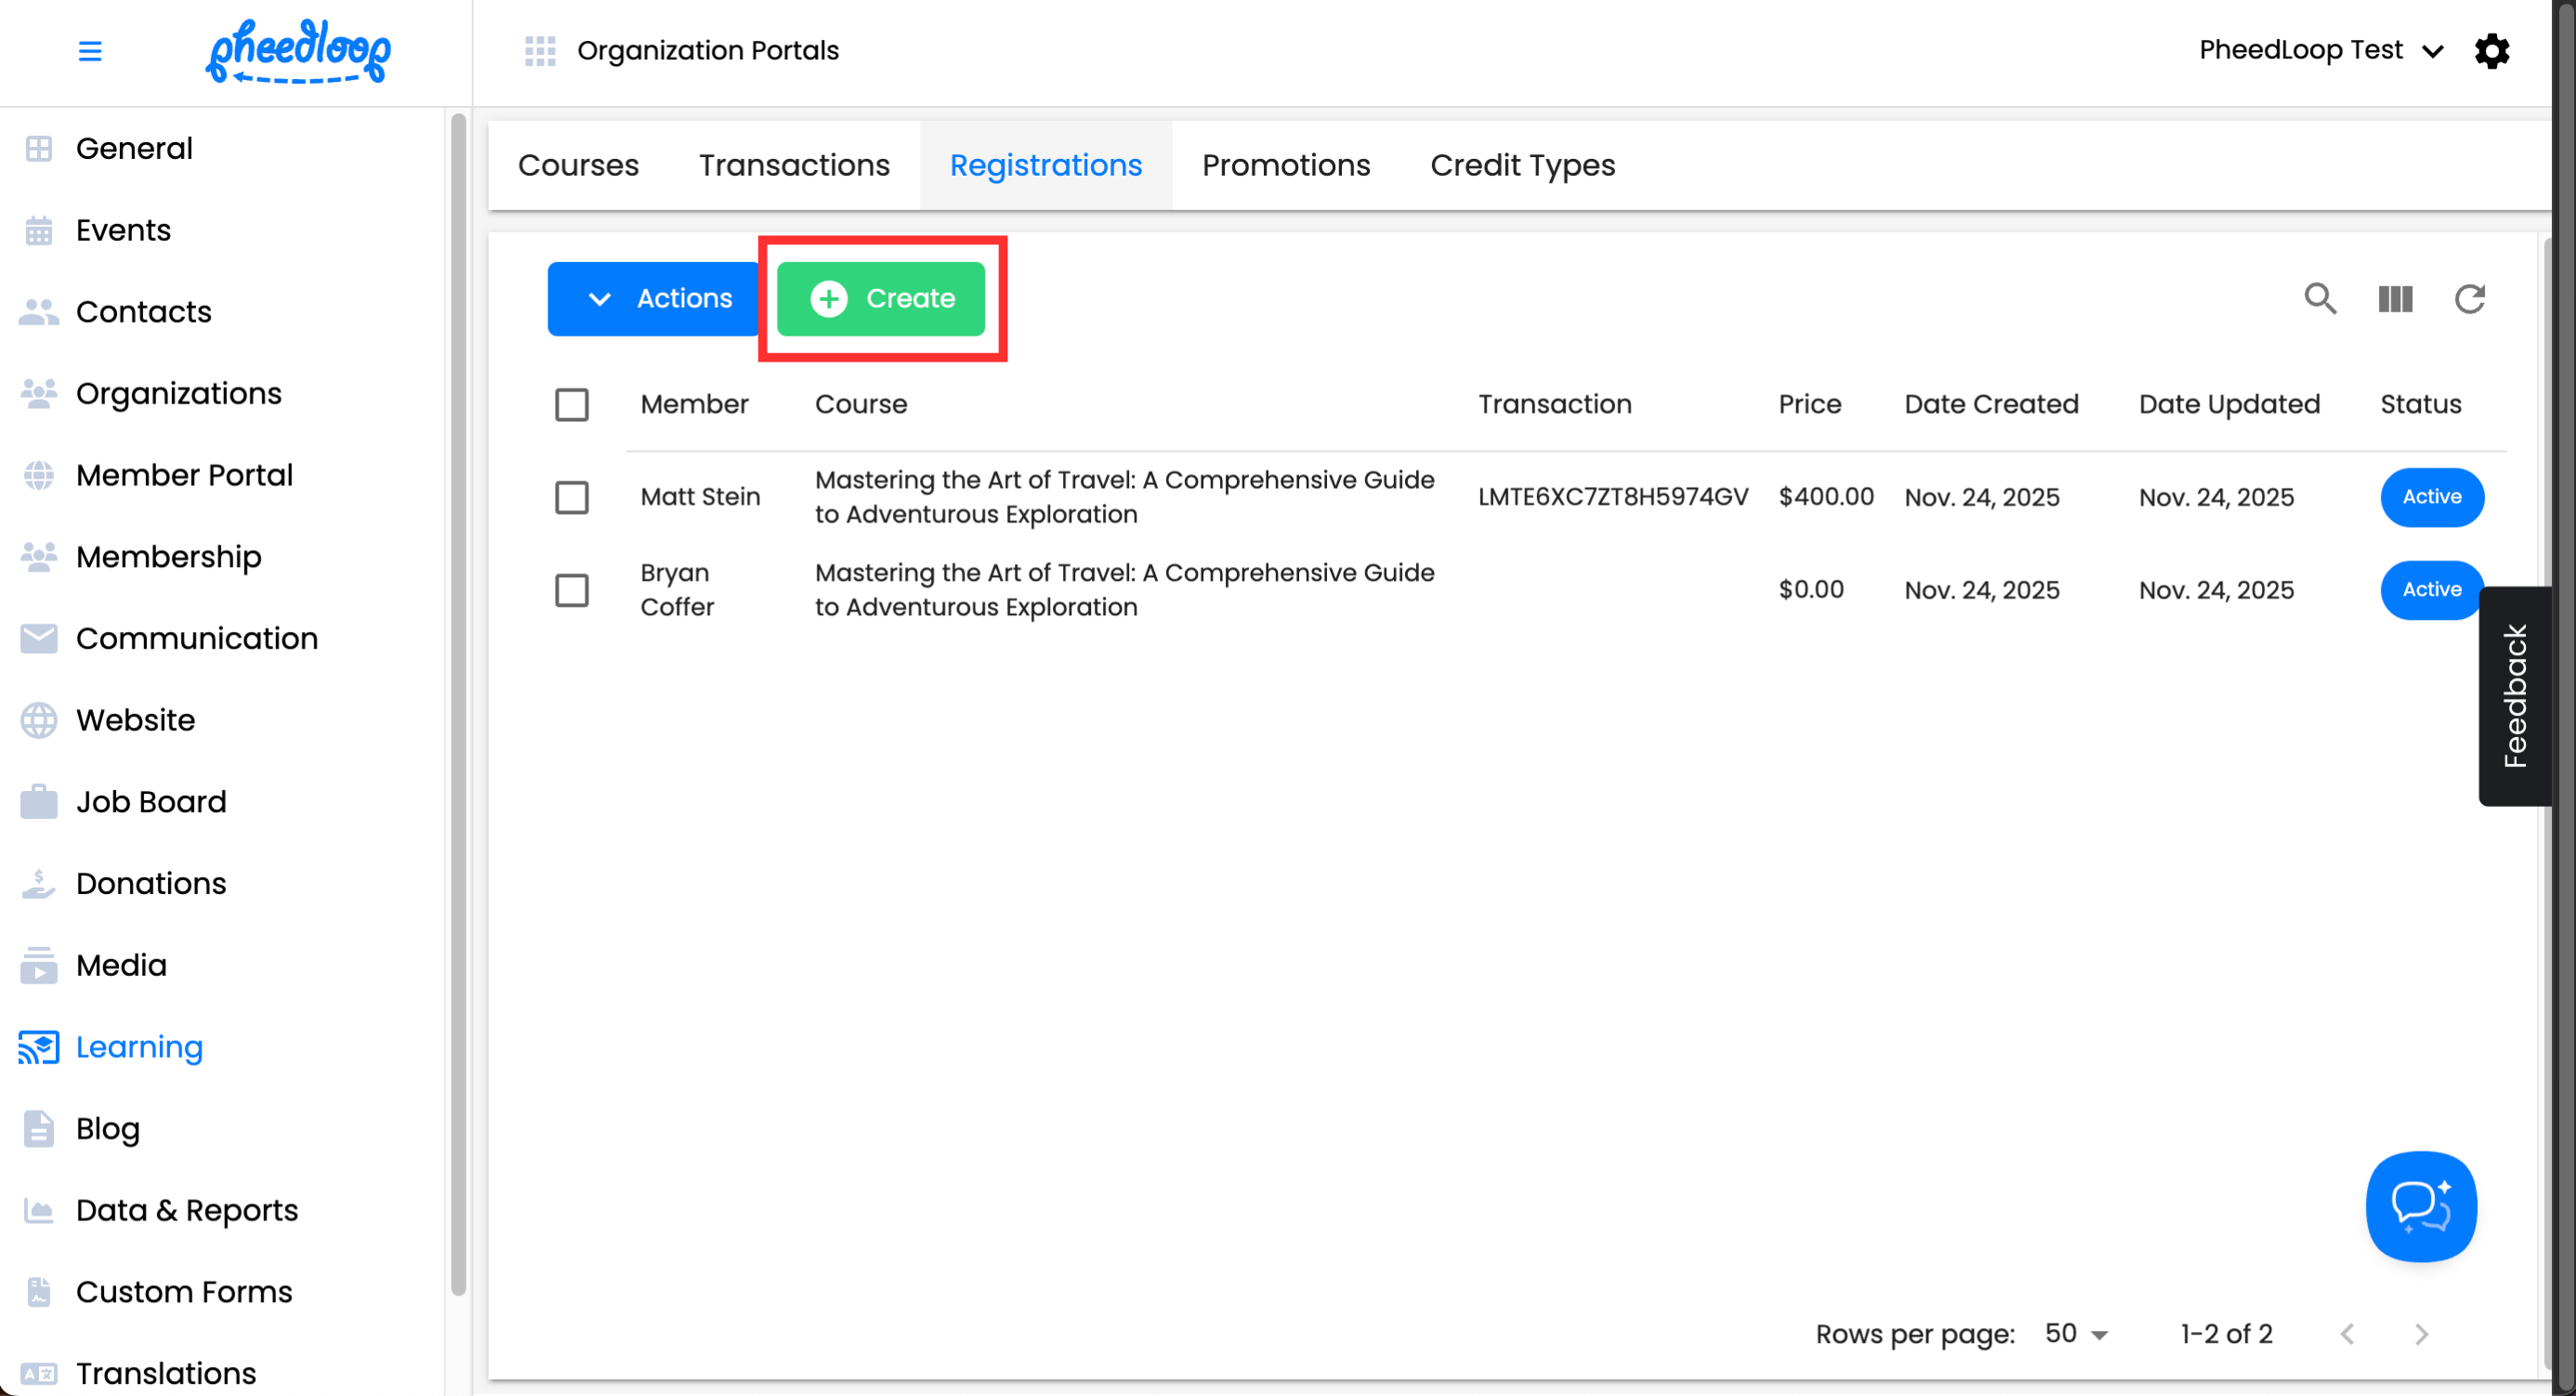

You will now be taken to the Registration Editor Form.
Basic

| Setting | Description |
|---|---|
| Course | Select a course to modify or update the member’s enrollment. |
| Member | Select the member associated with the registration. |
| Is Active | Toggle on to activate the registration or toggle off to deactivate it. |
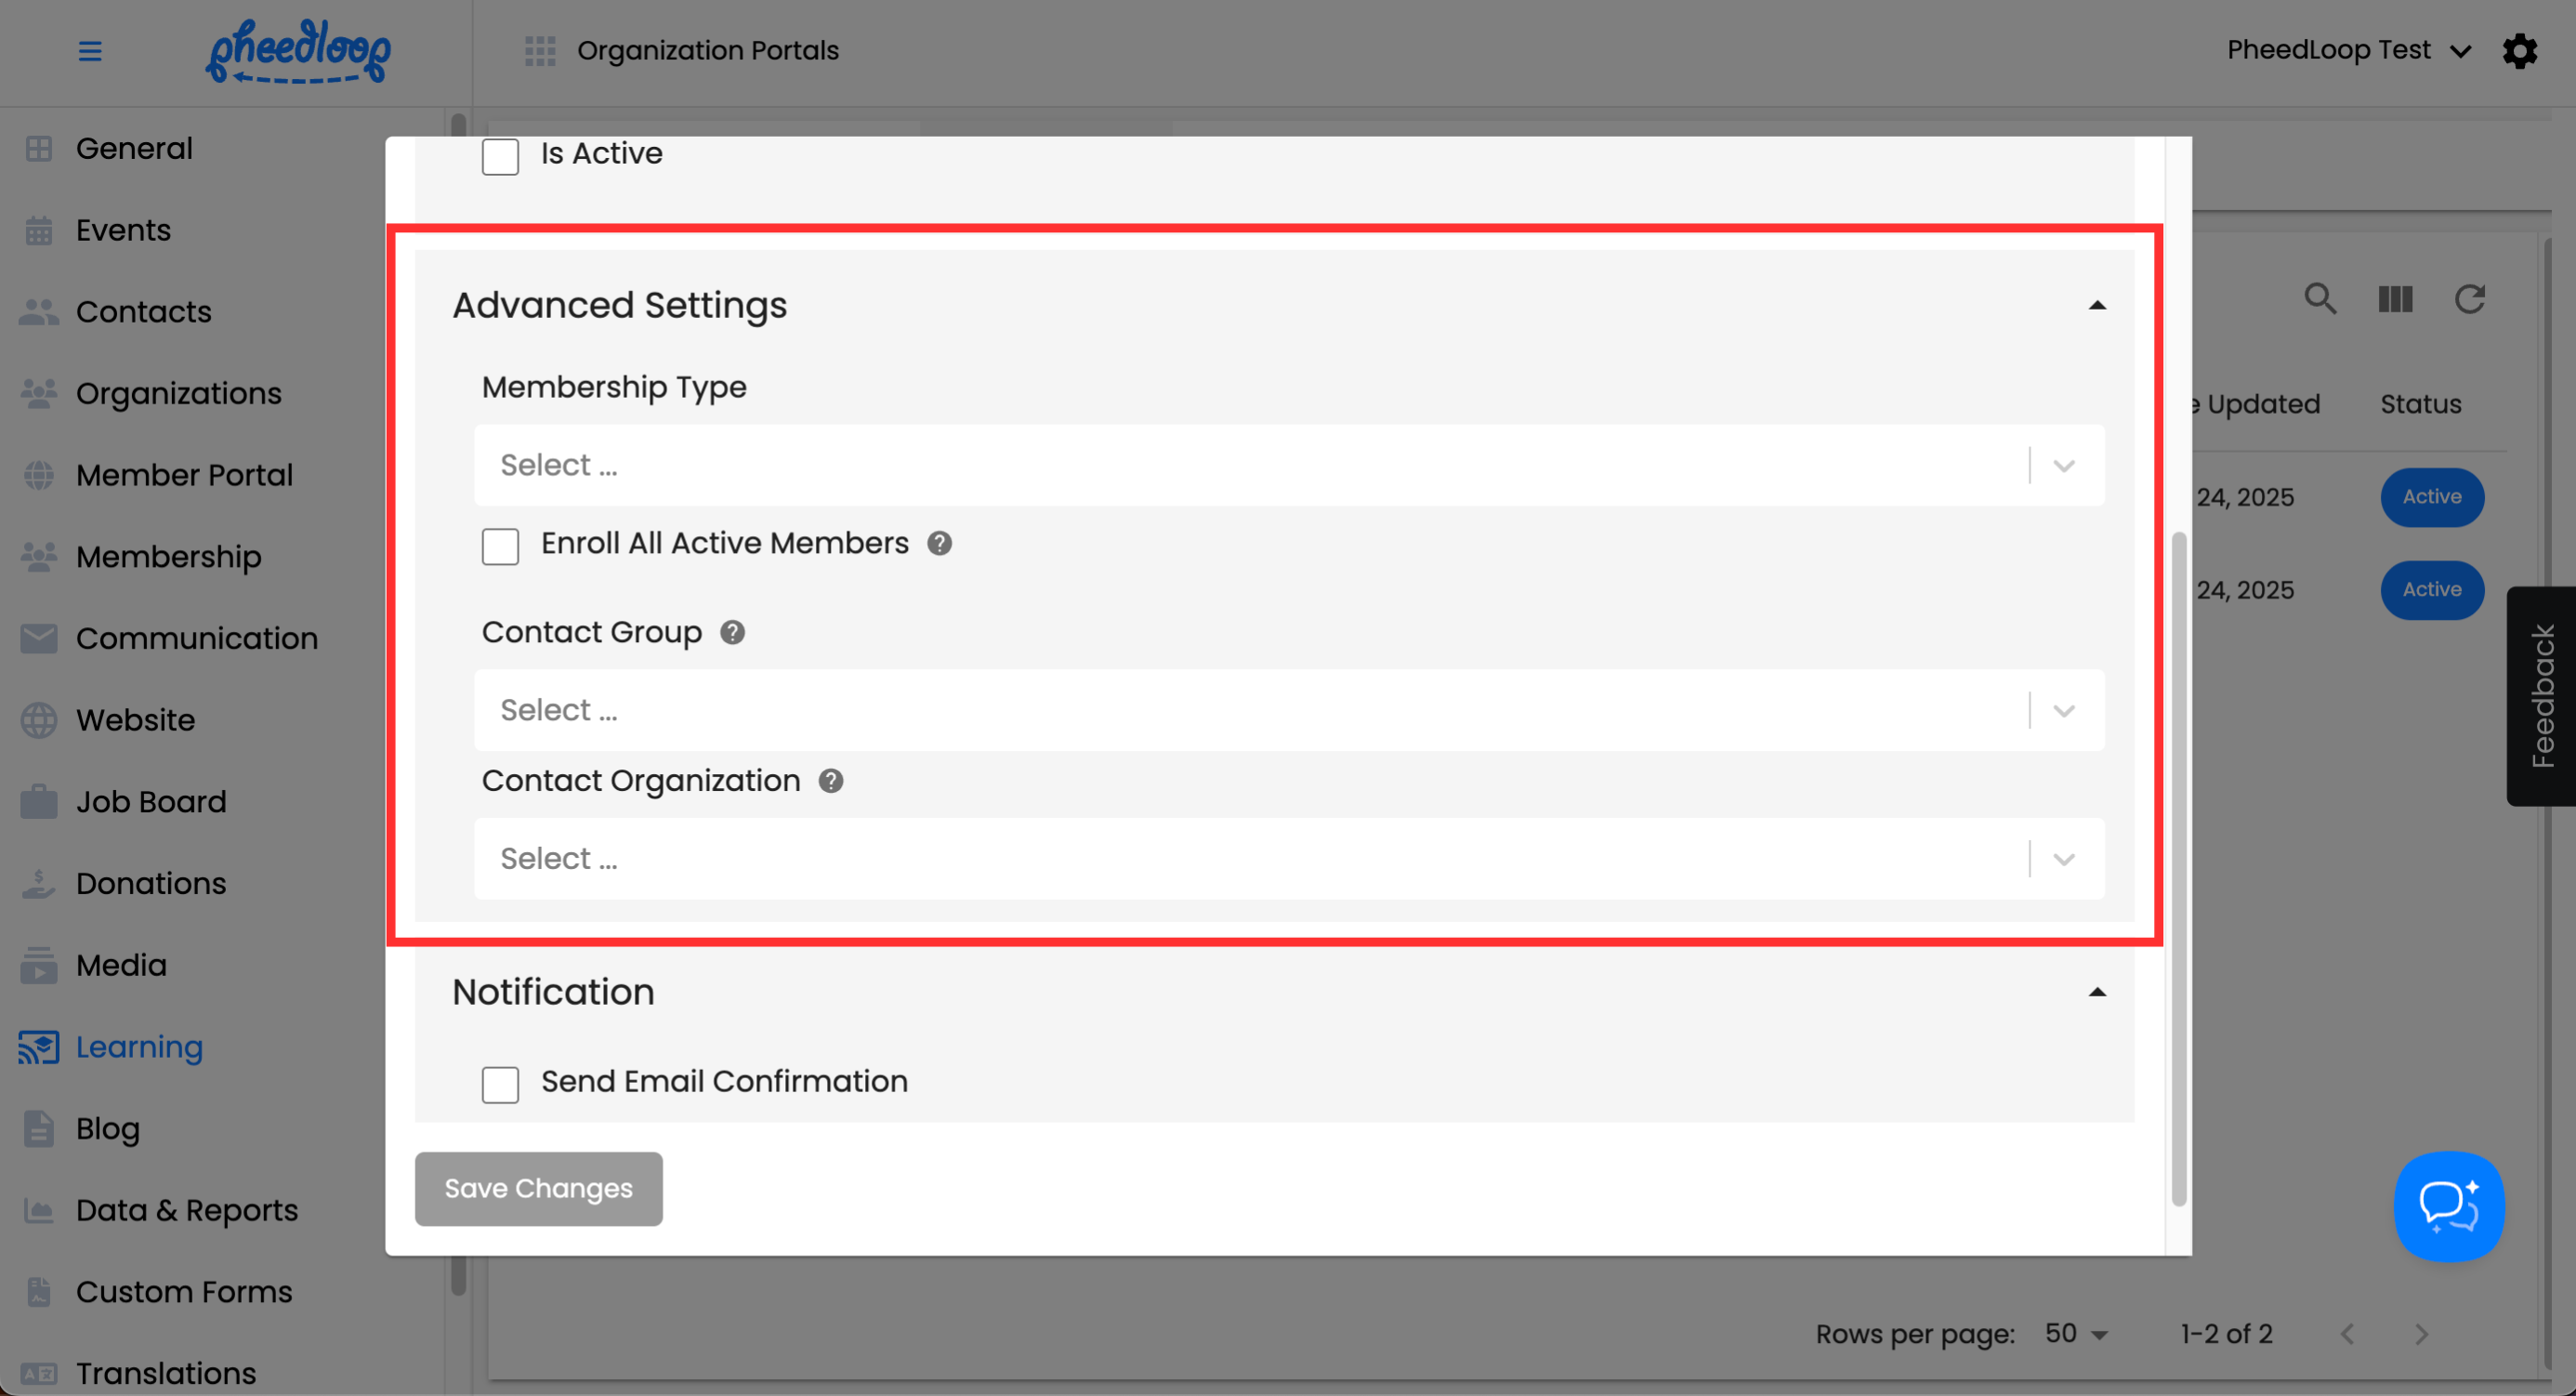
| Membership Type (Advanced Settings) | Select any Membership Types to include as part of the registration. |
| Enroll All Active Members (Advanced Settings) | Toggle on to enroll all active members in your account into the registration. |
| Contact Group (Advanced Settings) | Enter any contact group to include as part of the registration. |
| Contact Organization (Advanced Settings) | Enter any organization to include as part of the registration. |
| Send Email Confirmation (Notification) | Toggle on to send an email to the member confirming their inclusion in the registration. |
Once all settings have been configured, select Save Changes to create your registration.
Advanced Settings
| Setting | Description |
|---|---|
| Membership Type | Select the Membership Type to be assigned to this registration. |
| Enroll All Active Members | Toggle this checkbox on if you would like to enroll all active members to your registration. Active Members can be found under Membership > Membership in the Membership Dashboard. |
| Contact Group | Select a contact group to enroll all members associated with this registration to the contact group. |
| Contact Organization | Select a contact organization to enroll all members attached to the contact organization. |
Notification

| Setting | Description |
|---|---|
| Send Email Confirmation | Toggle this checkbox on to send an email notification to the recipient. |
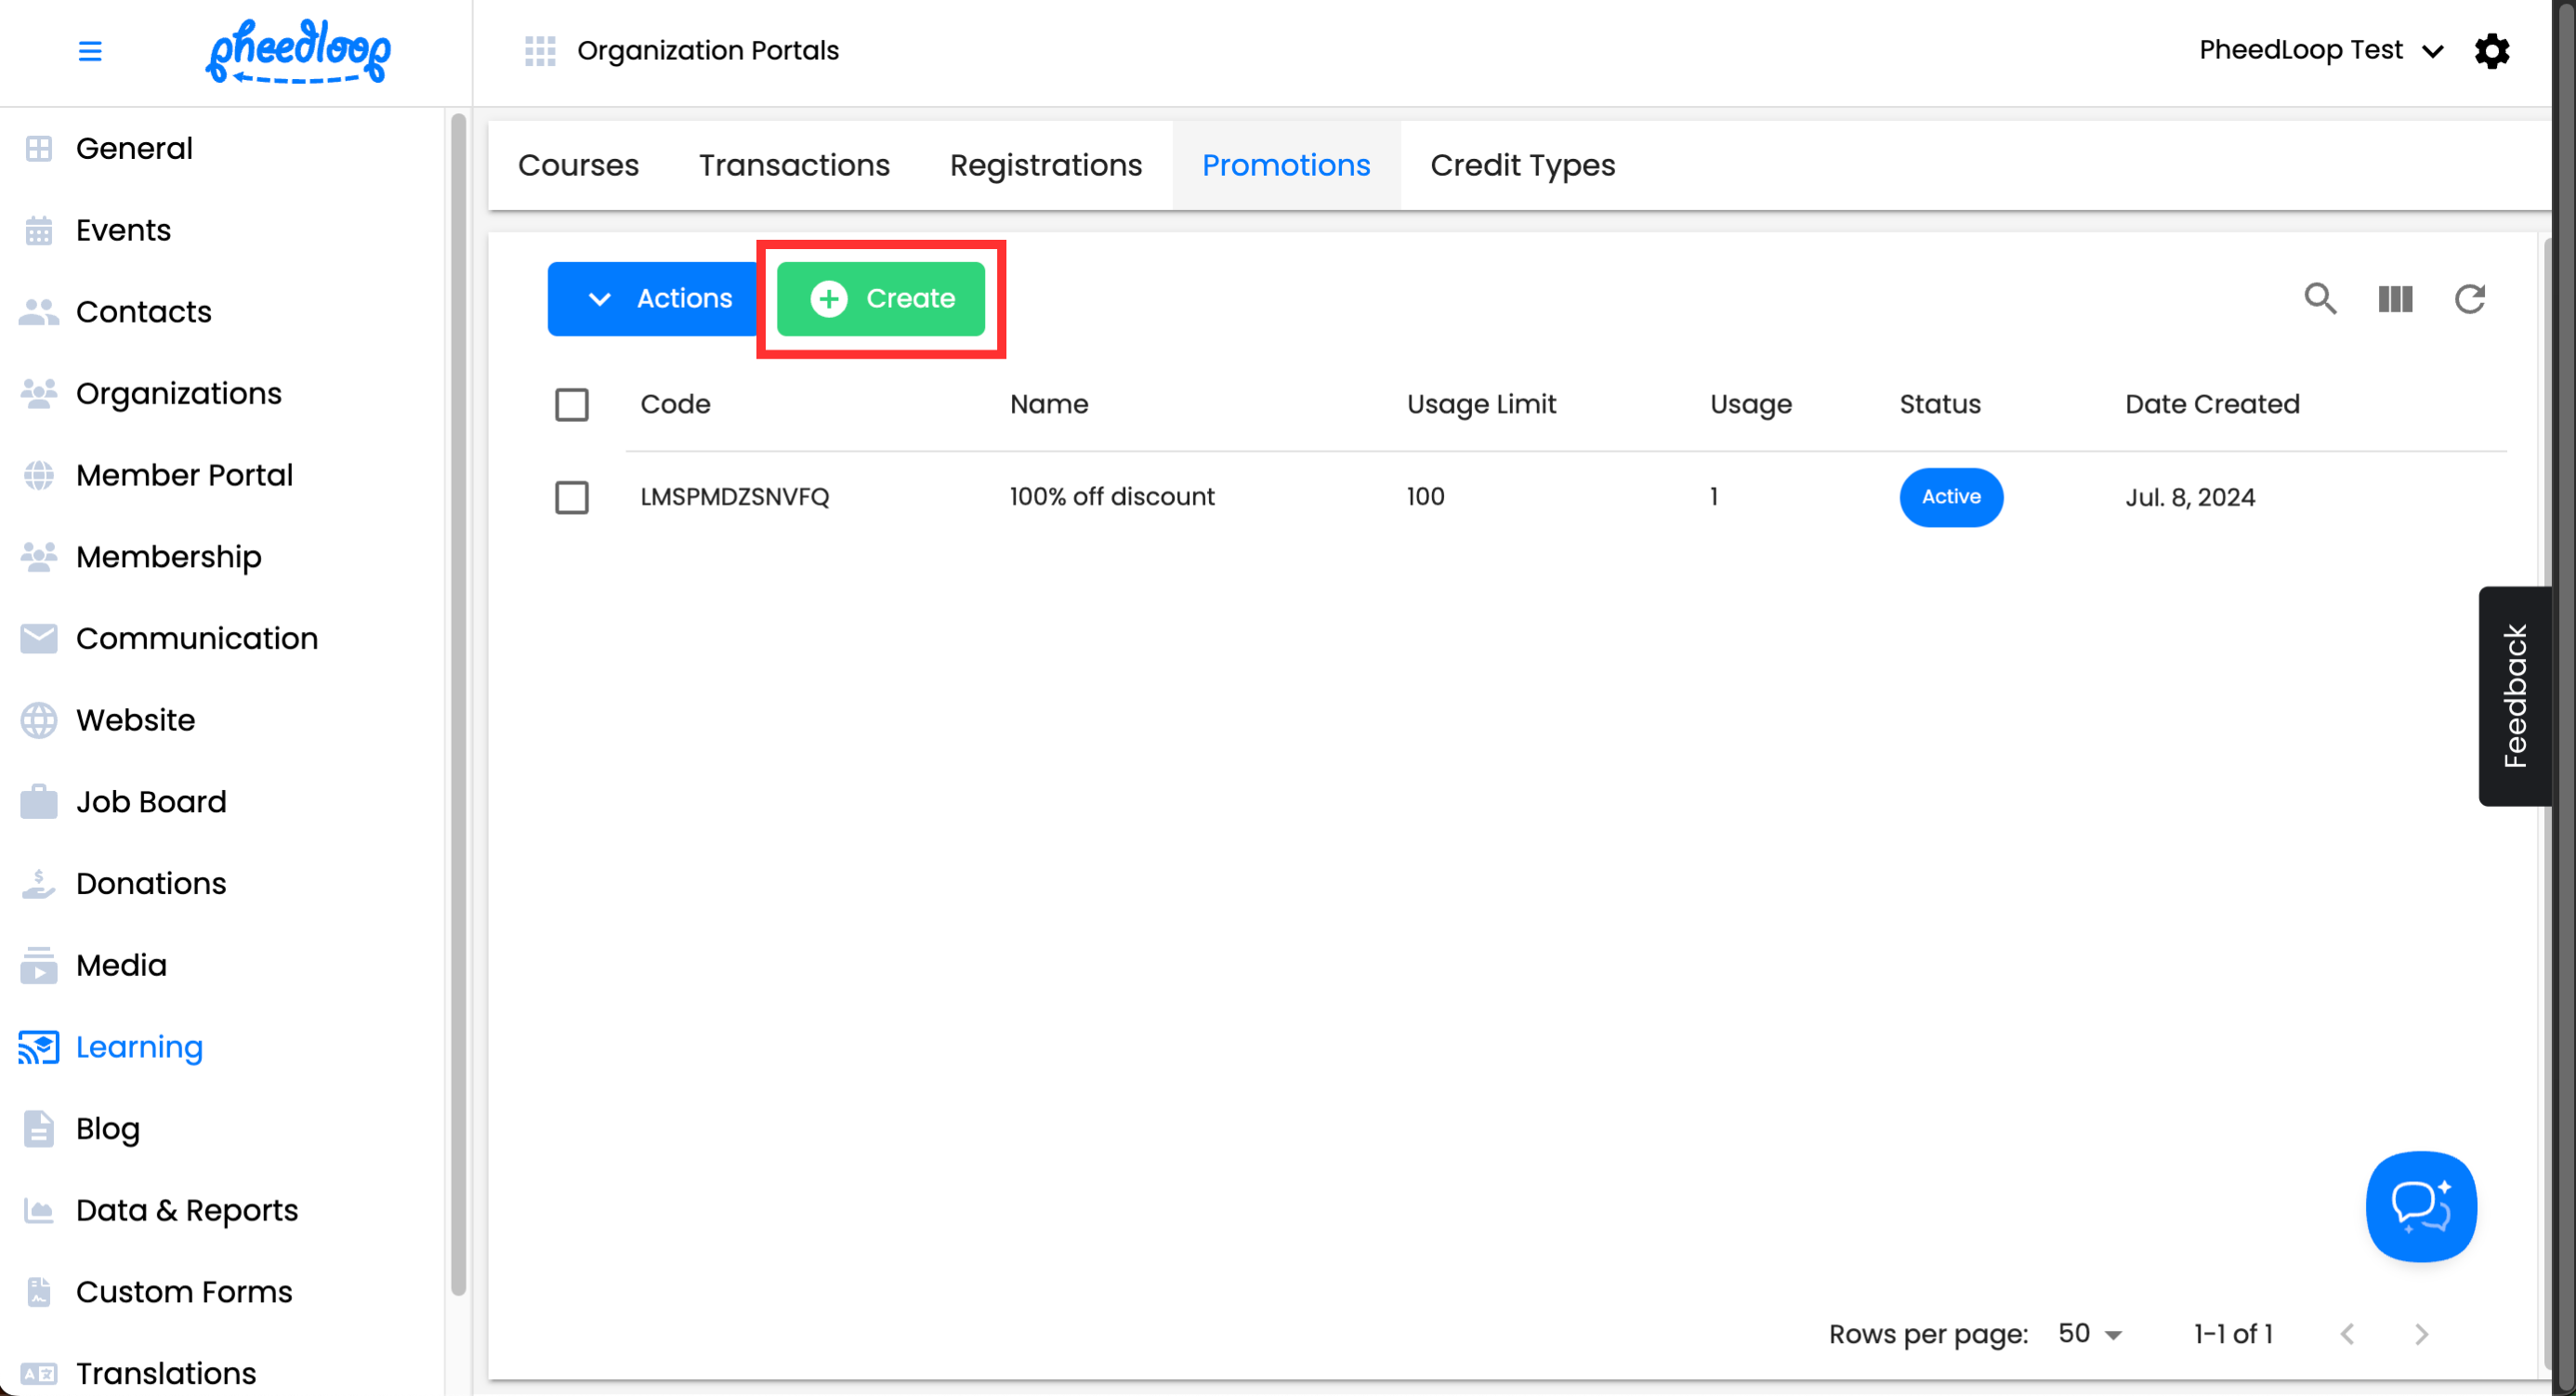
Promotions
Please note, promotions from Membership > Promotions will not apply to the Learning Management System. Promotions for the Learning Management System are created and managed seperately.
The Promotions page is where Administrators can create and manage promotions to be used in the Learning Management System. If a promotion is active, a member can use the code to gain a discount at checkout.
- From the Membership Dashboard, navigate to Learning > Promotions
Above the Promotions table, select Create
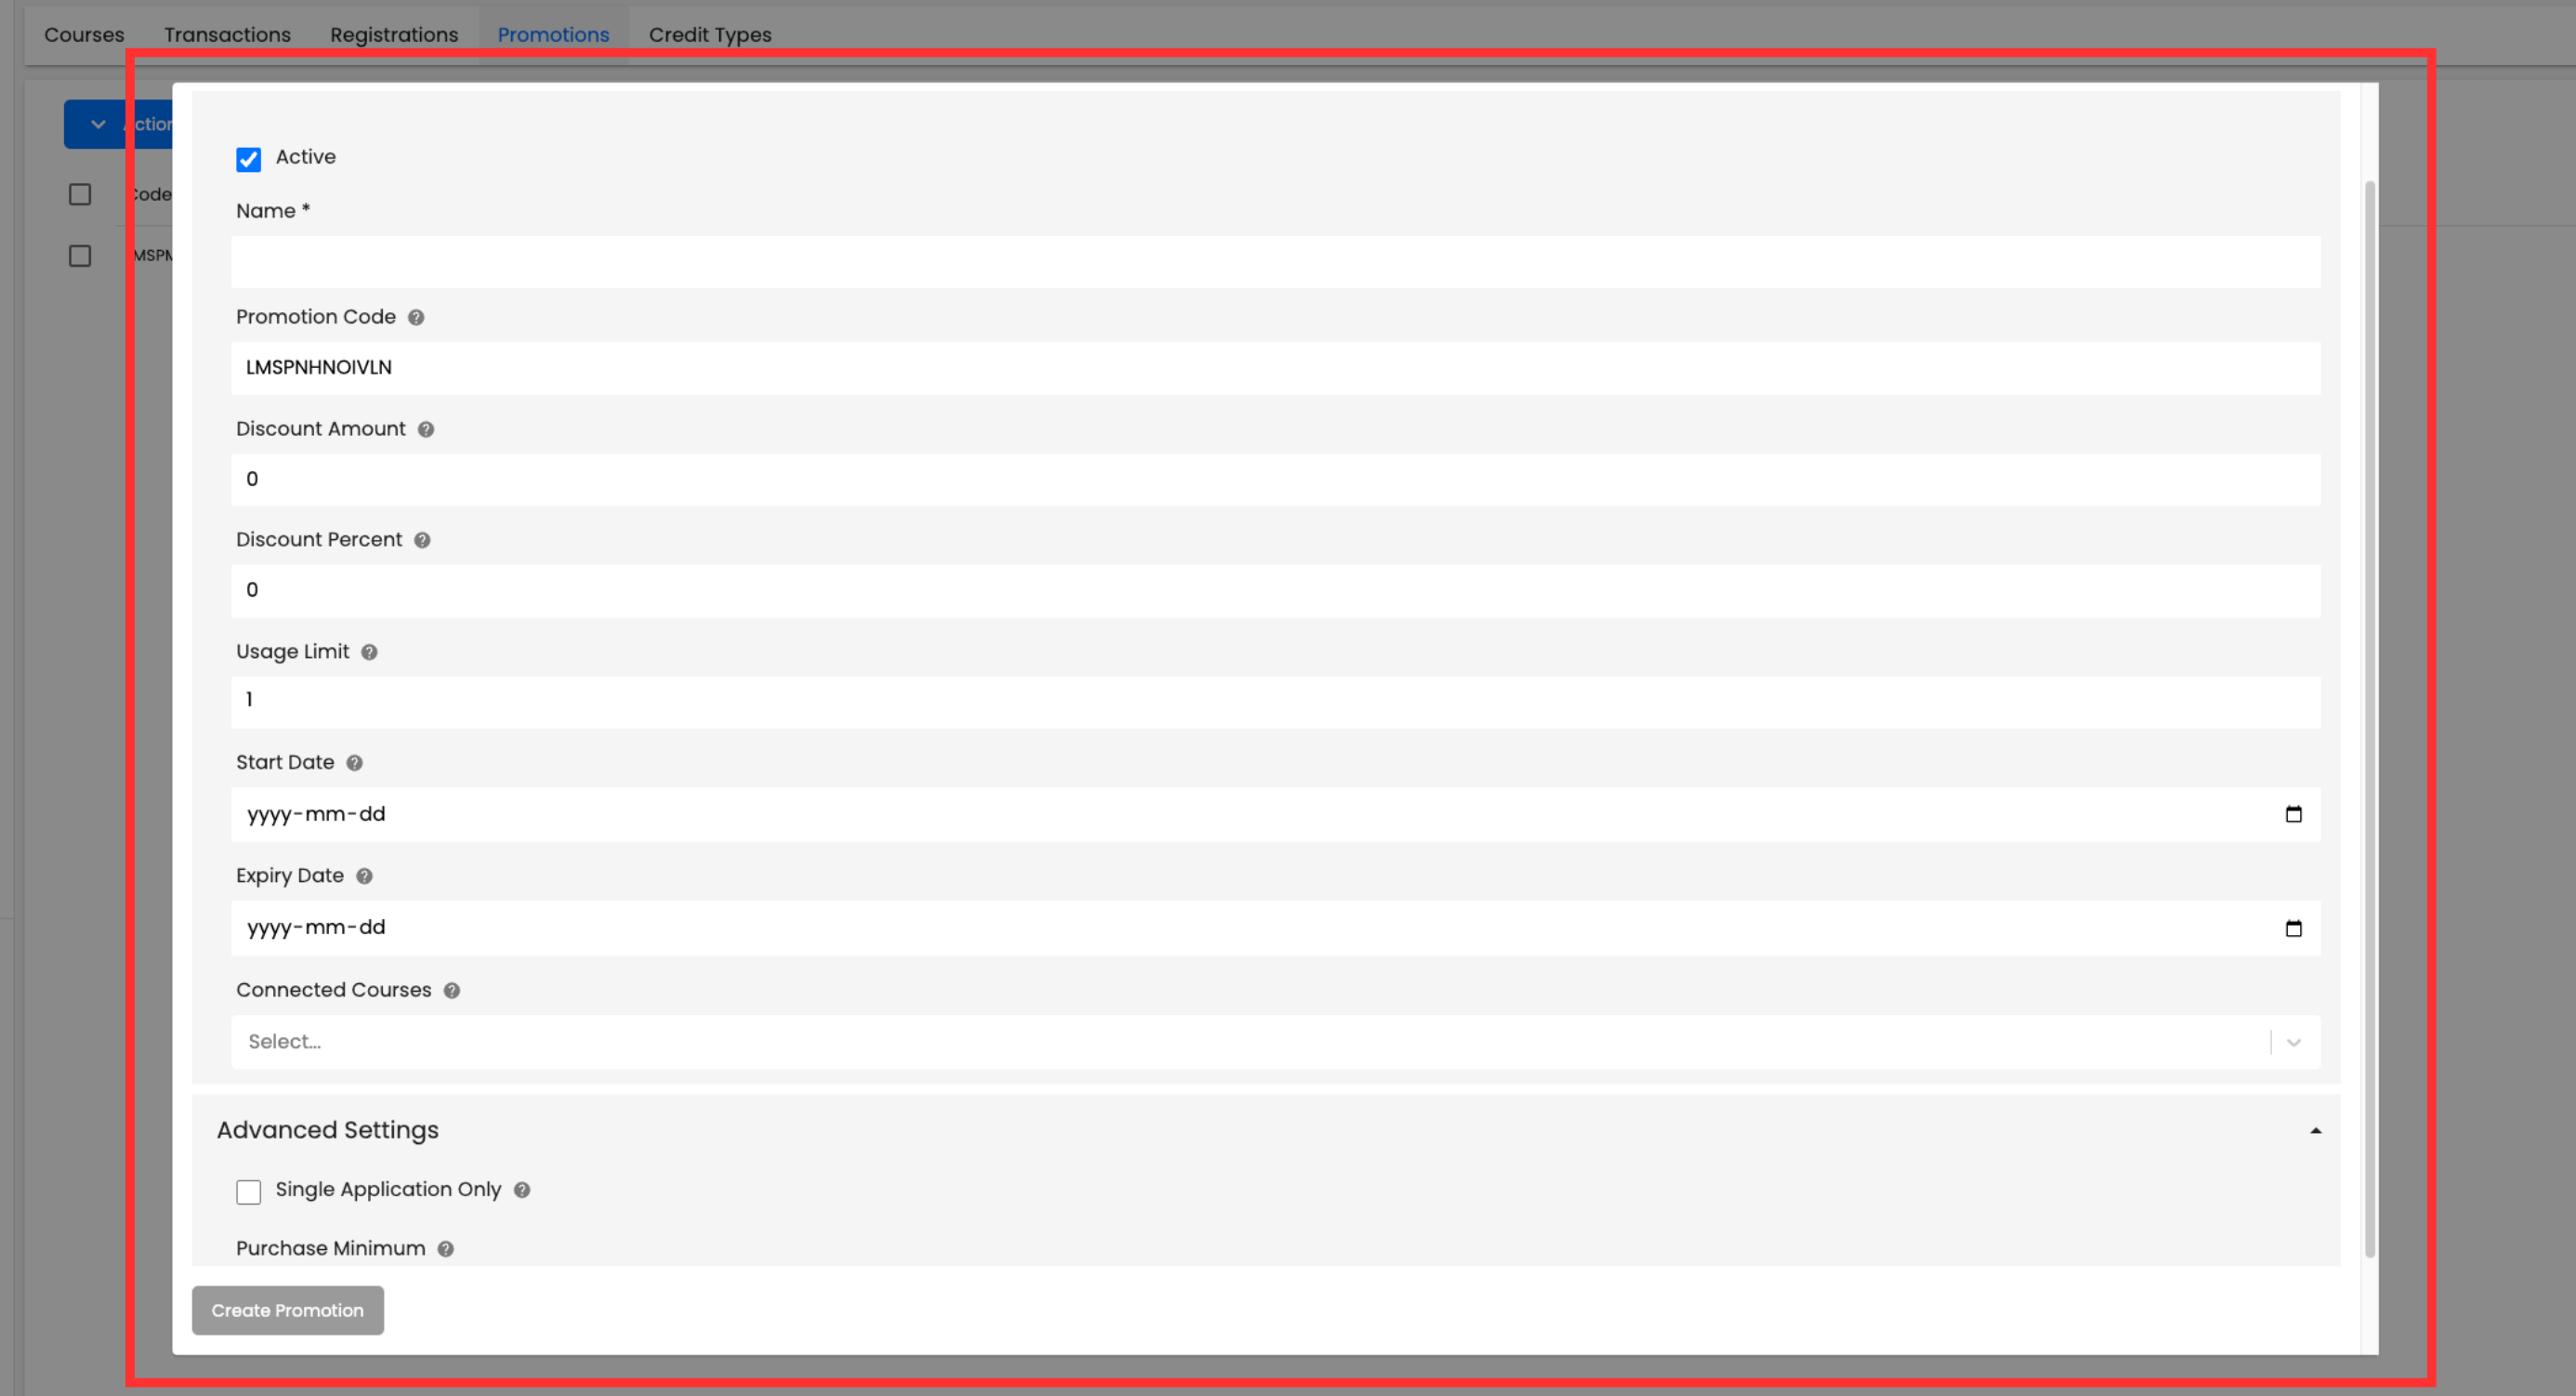
- Toggle on the Active checkbox to make the promotion available for use
- Under the Name field, enter the name of the promotion
- Under the Promotion Code field, enter the code of the promotion
- Under the Discount Amount field, enter the dollar amount that will be discounted at checkout
- Under the Discount Percent field, enter the percentage of the total amount to be discounted at checkout
- Under the Usage Limit field, enter the maximum number of times the discount can be used
- Under the Start Date field, enter the earliest date that the promotion can be used
- Under the Expiry Date field, enter the date where the promotion will no longer be available
- Under the Connected Courses field, select any courses you wish to restrict the promotion to
- Toggle on the Single Application Only checkbox to apply only one instance of the promotion for each connected course included in the cart
- Under the Purchase Minimum field, enter the minimum amount the member needs to spend before the promotion code can be applied
Select Create Promotion


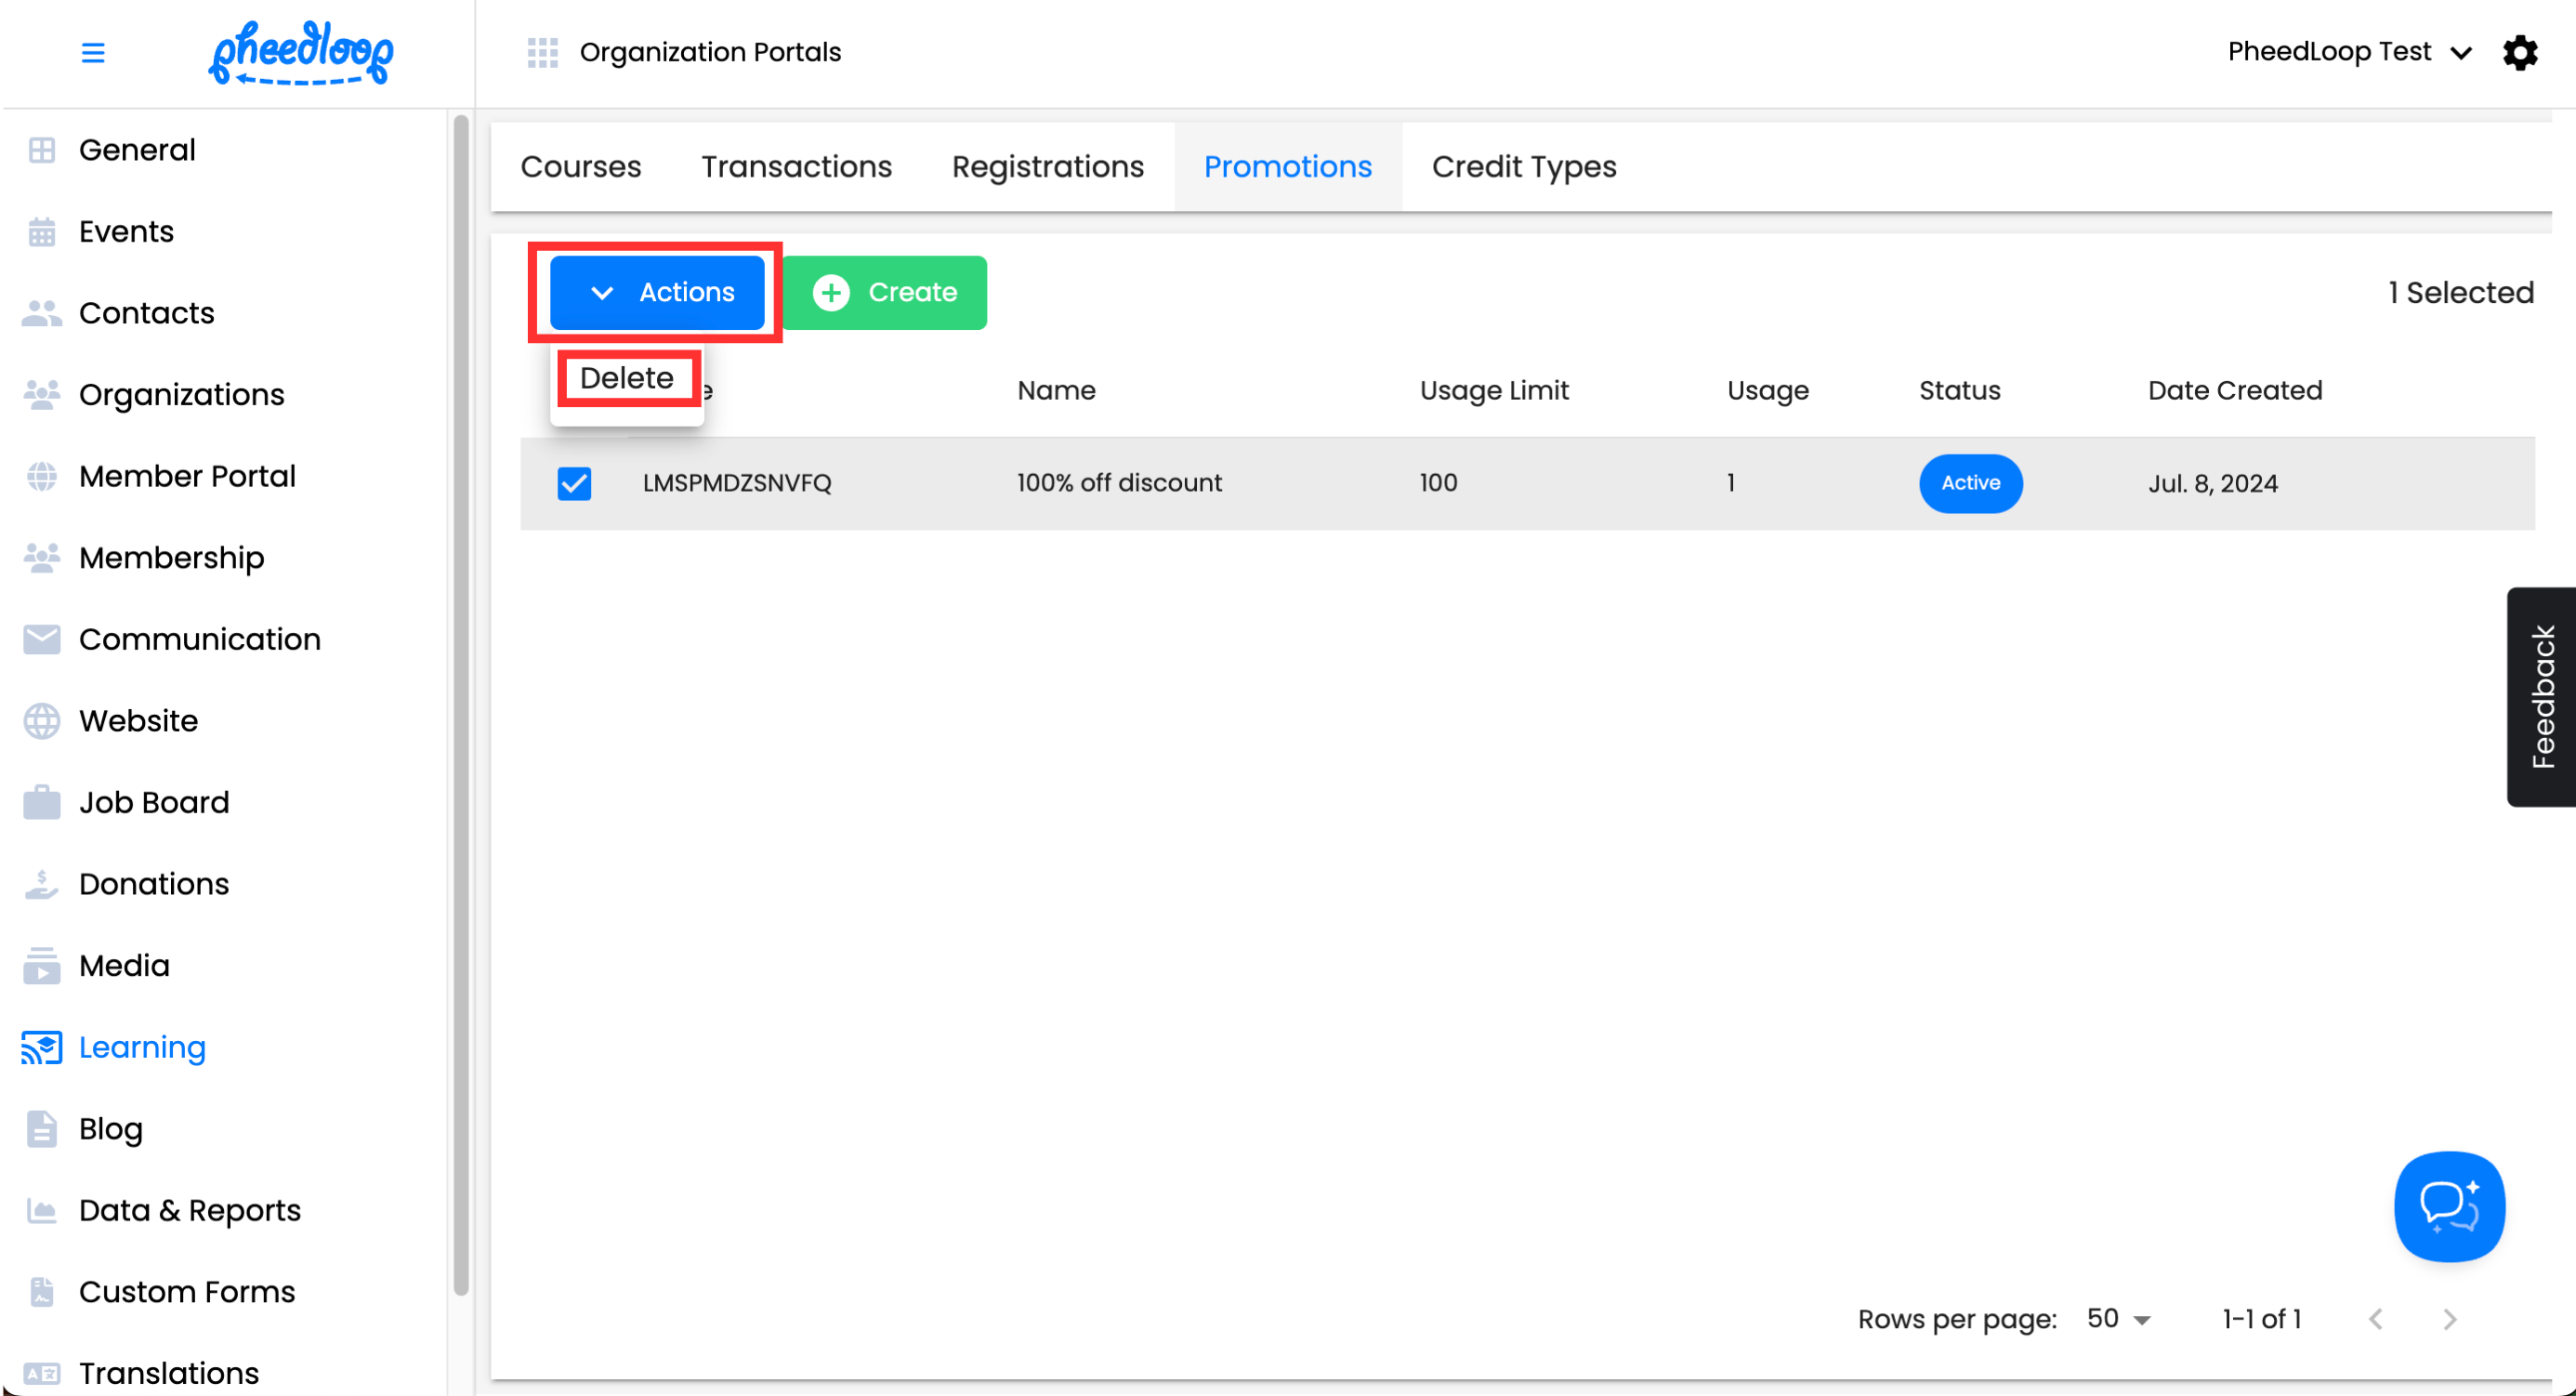
Deleting Promotions
- From the Membership Dashboard, navigate to Learning > Promotions
- Select the checkbox of the promotion you wish to delete
Above the Promotions table, select Actions > Delete
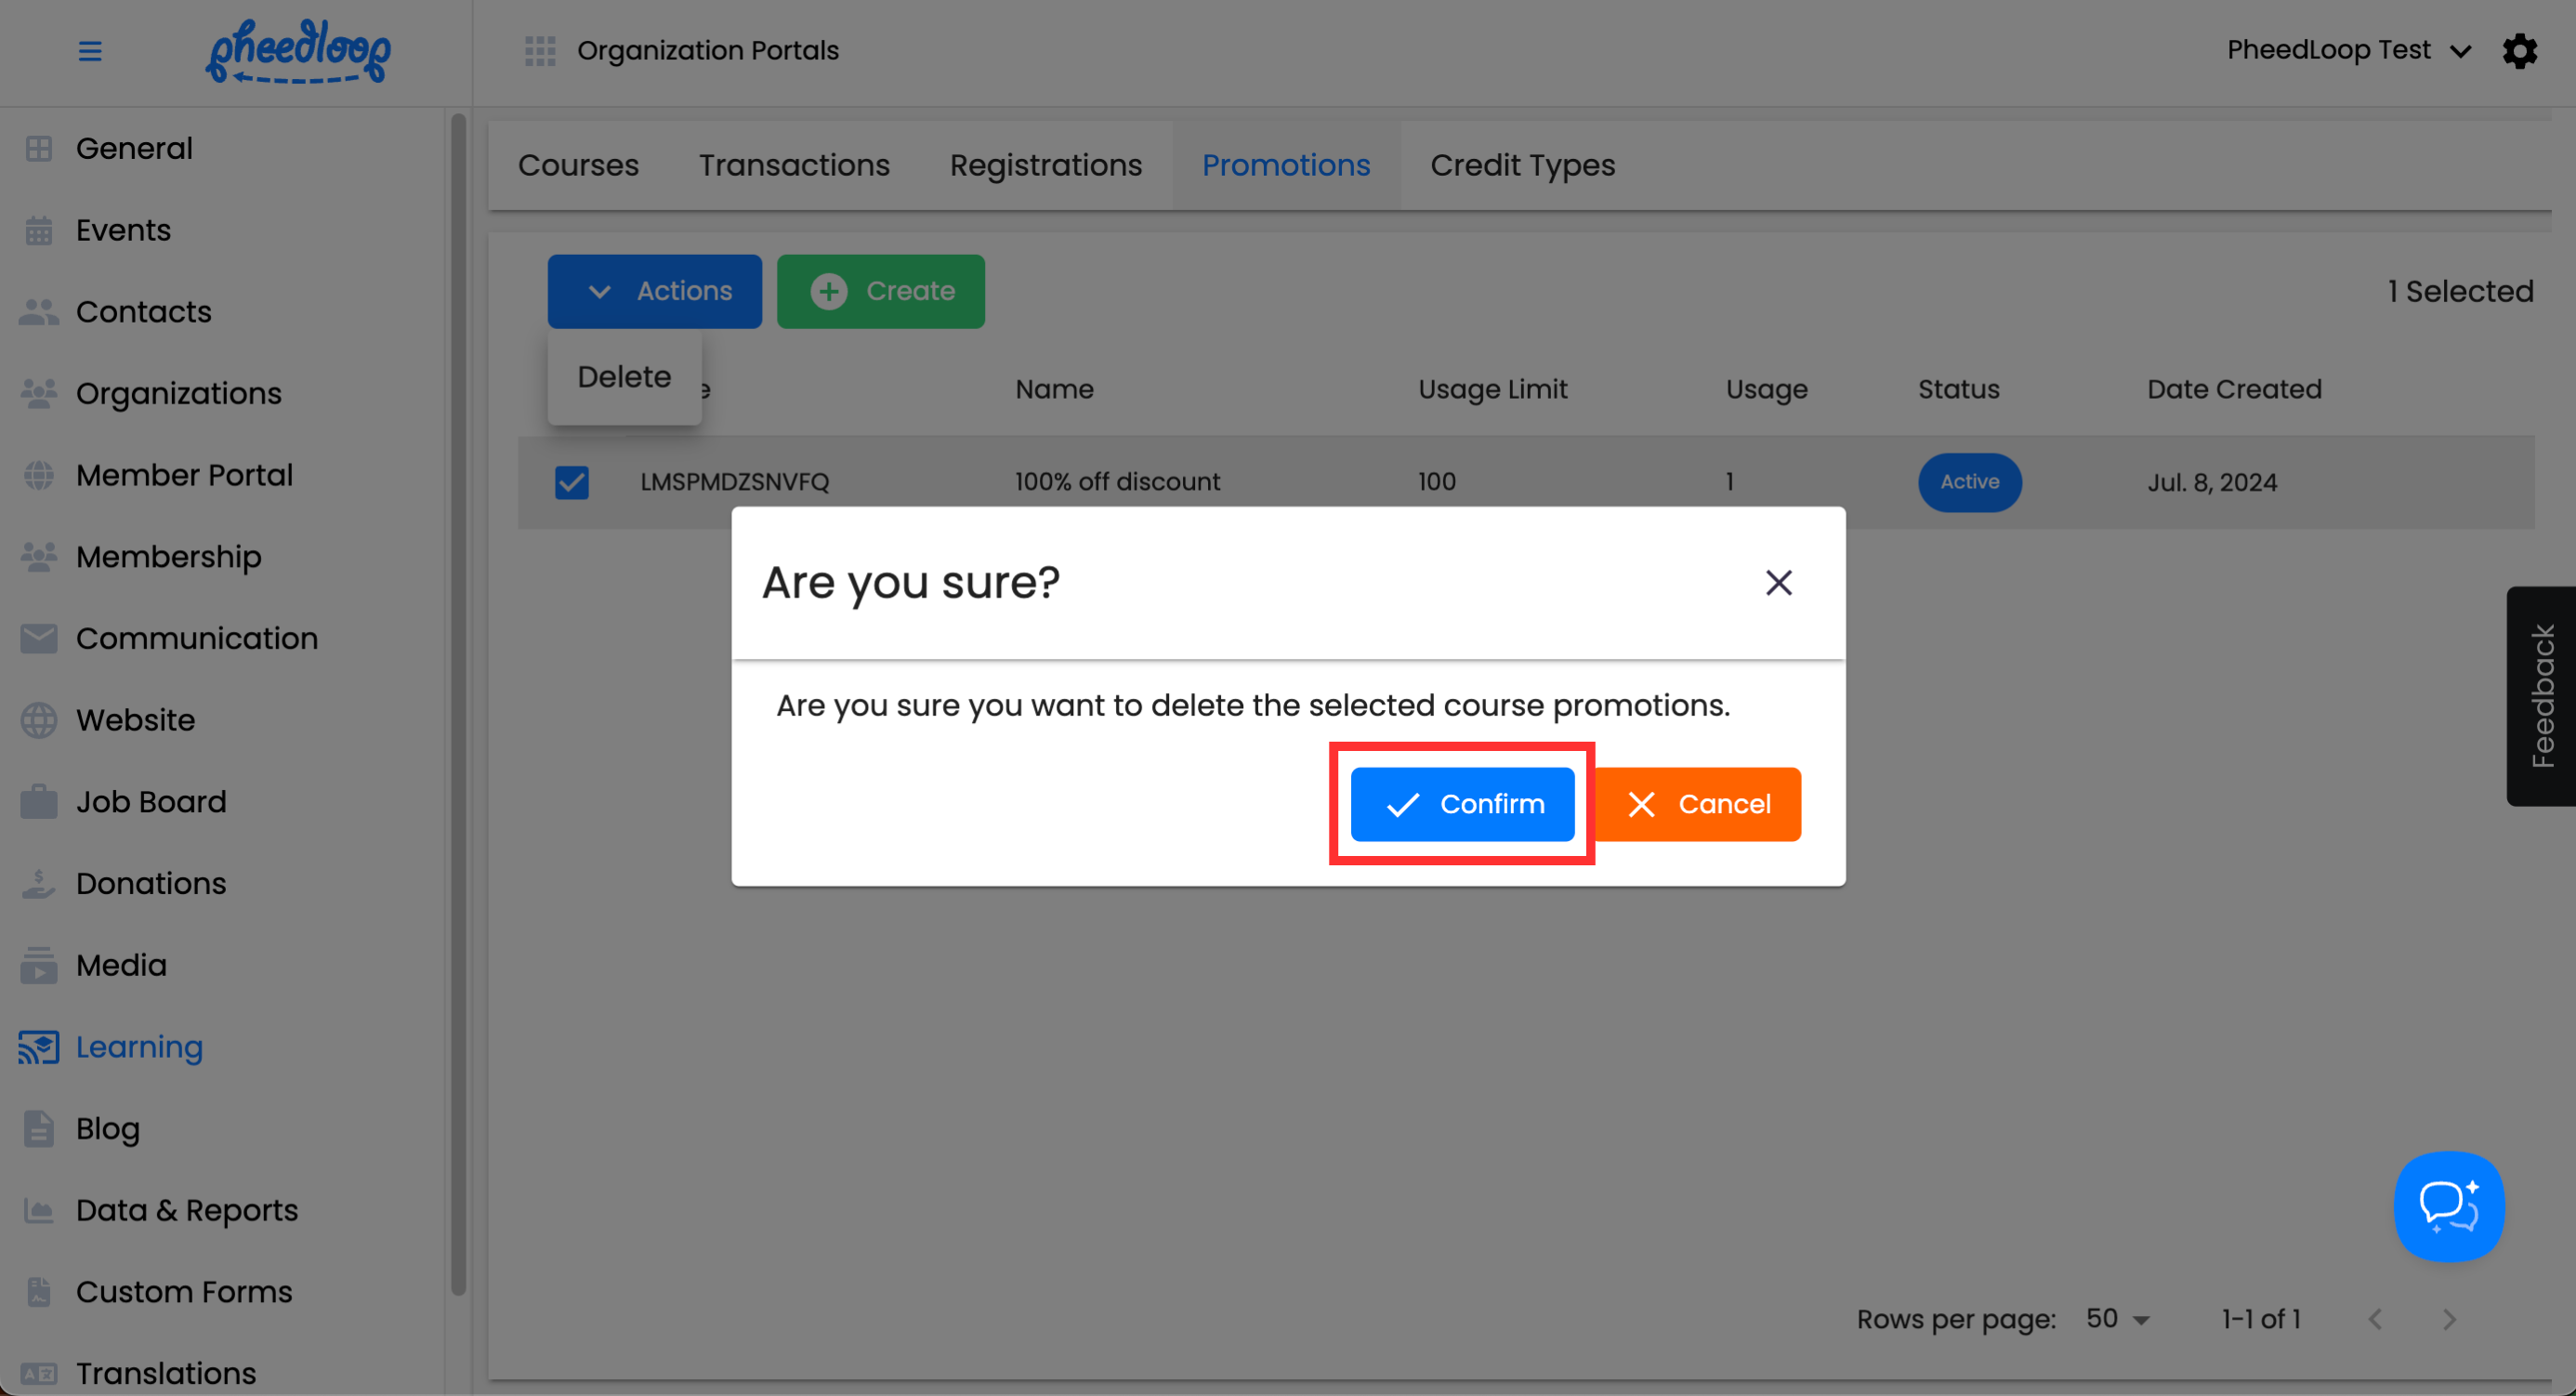
Select Confirm


Credit Types
Credit Types are what Members receive upon completing a course or lesson. Typically, this is used to track Attendance, and Members will need a certain number of credits to complete the course.
- From the Membership Dashboard, navigate to Learning > Credit Types
Above the Credit Types table, select Create
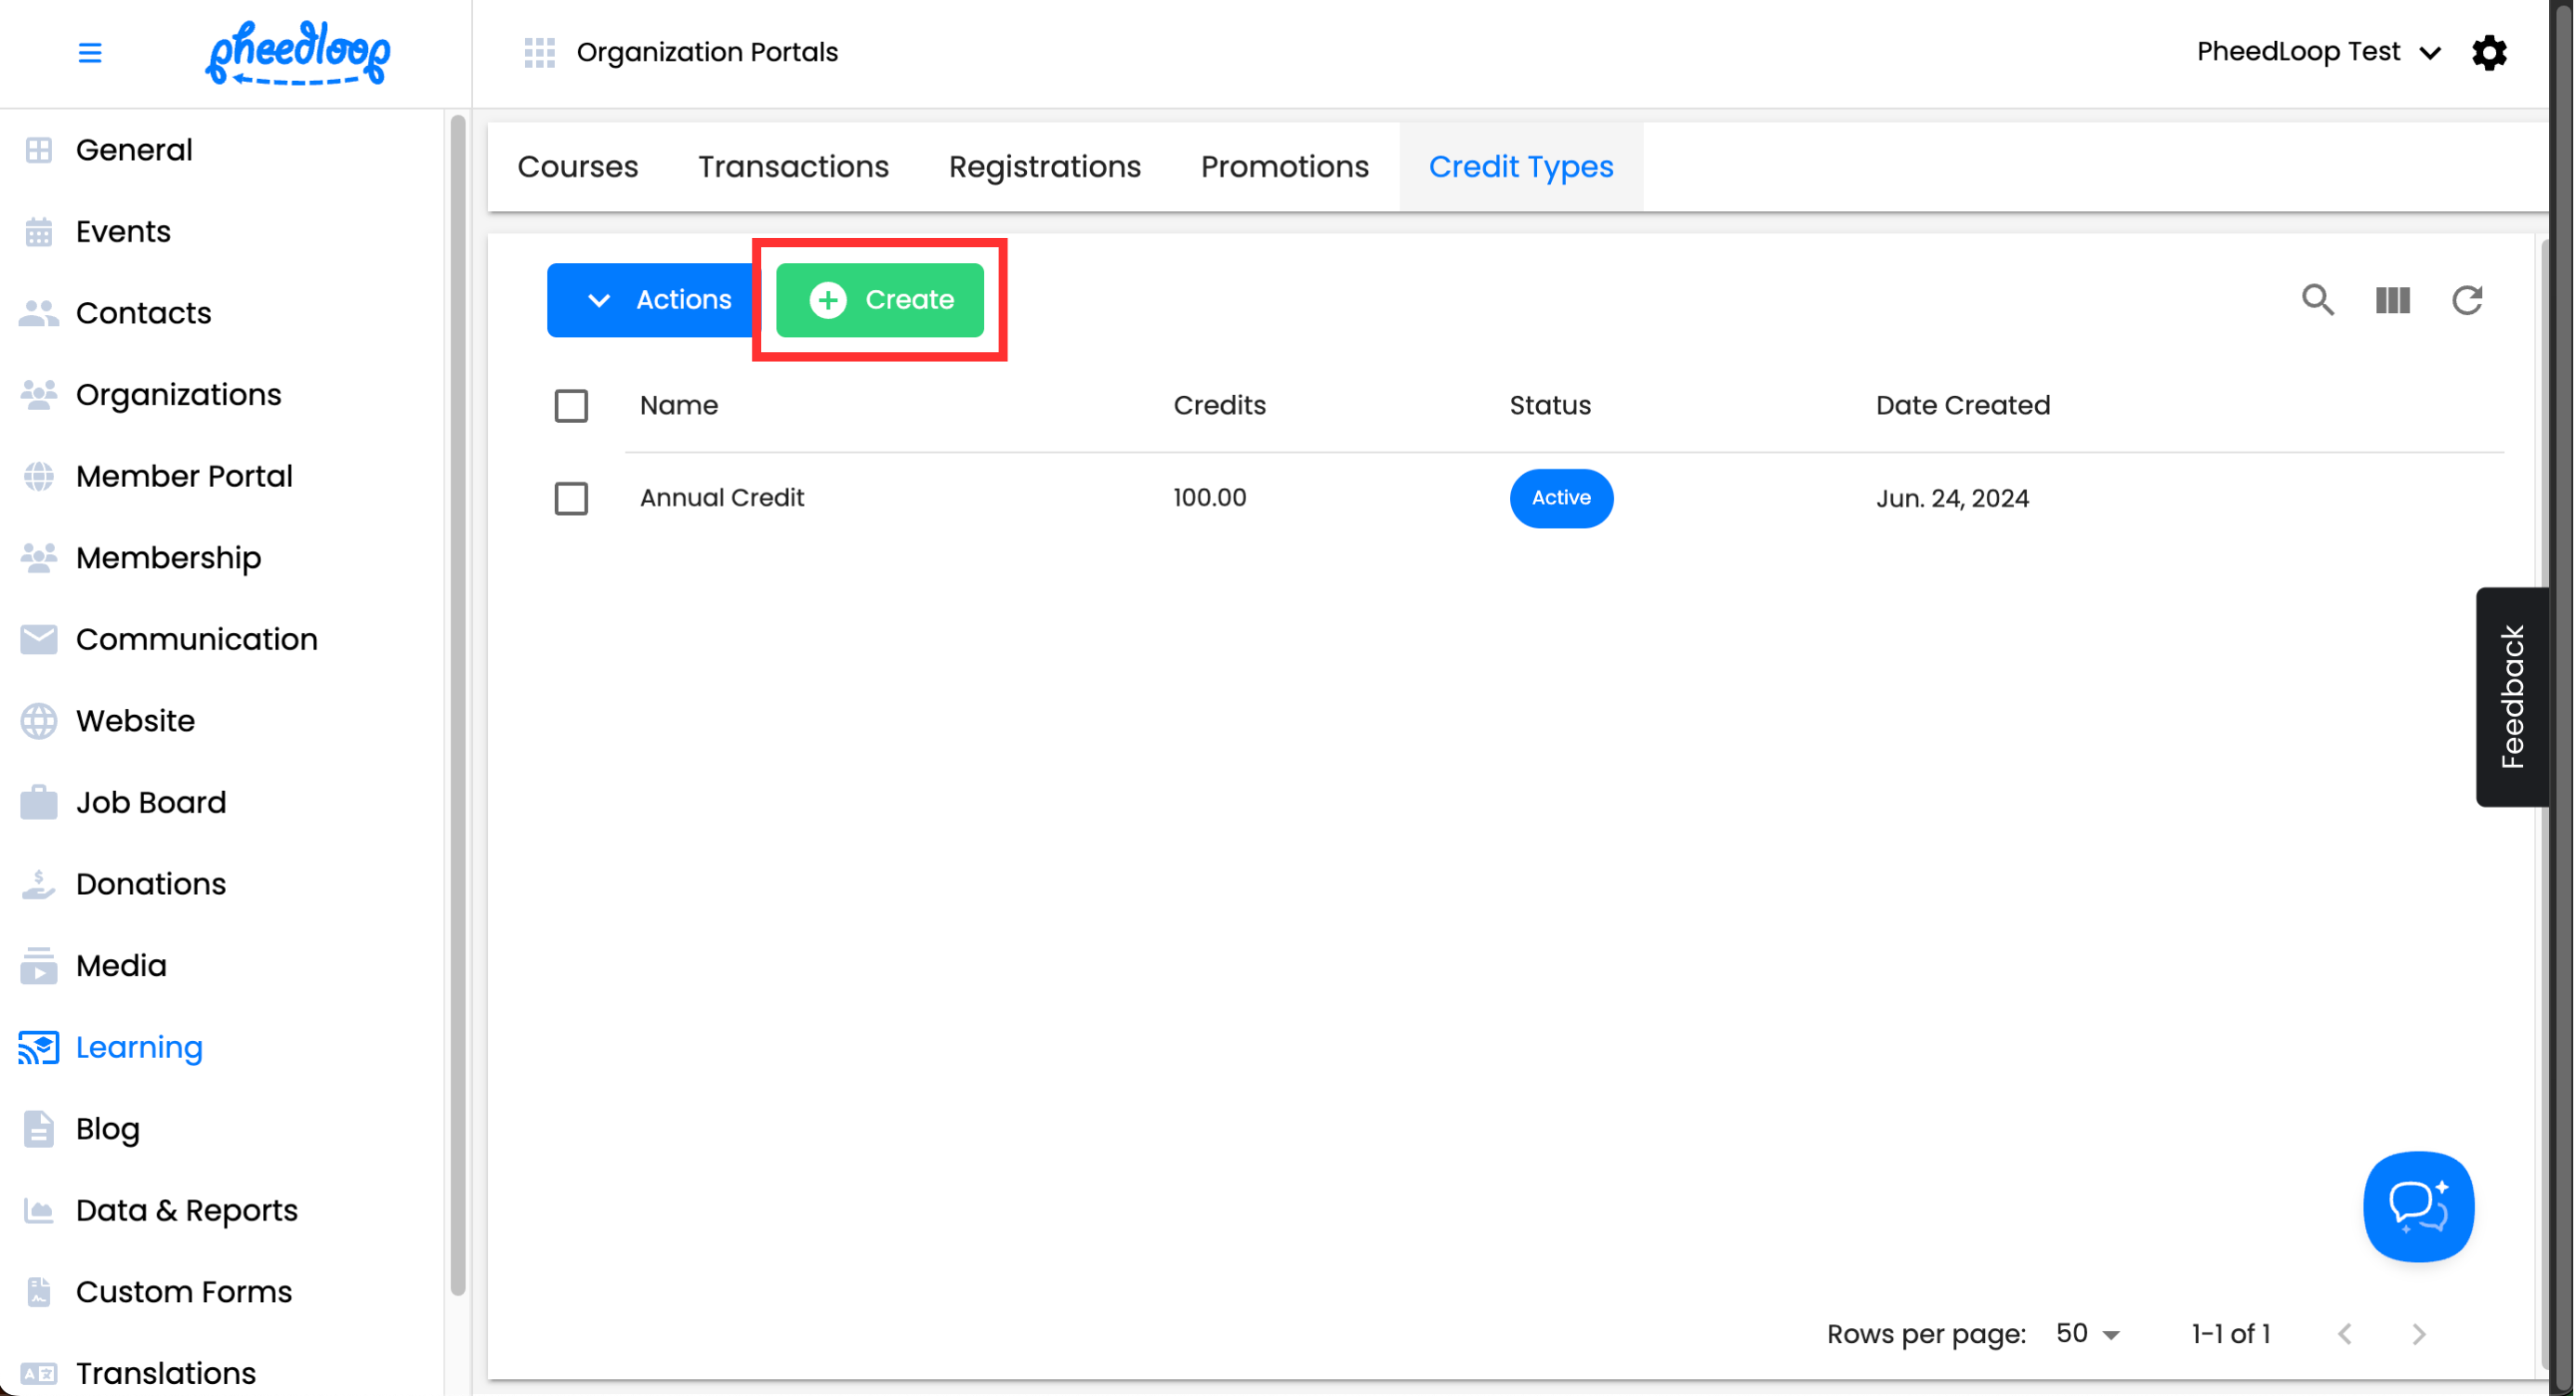

A new pop-up will appear, allowing you to create a new Credit Type.
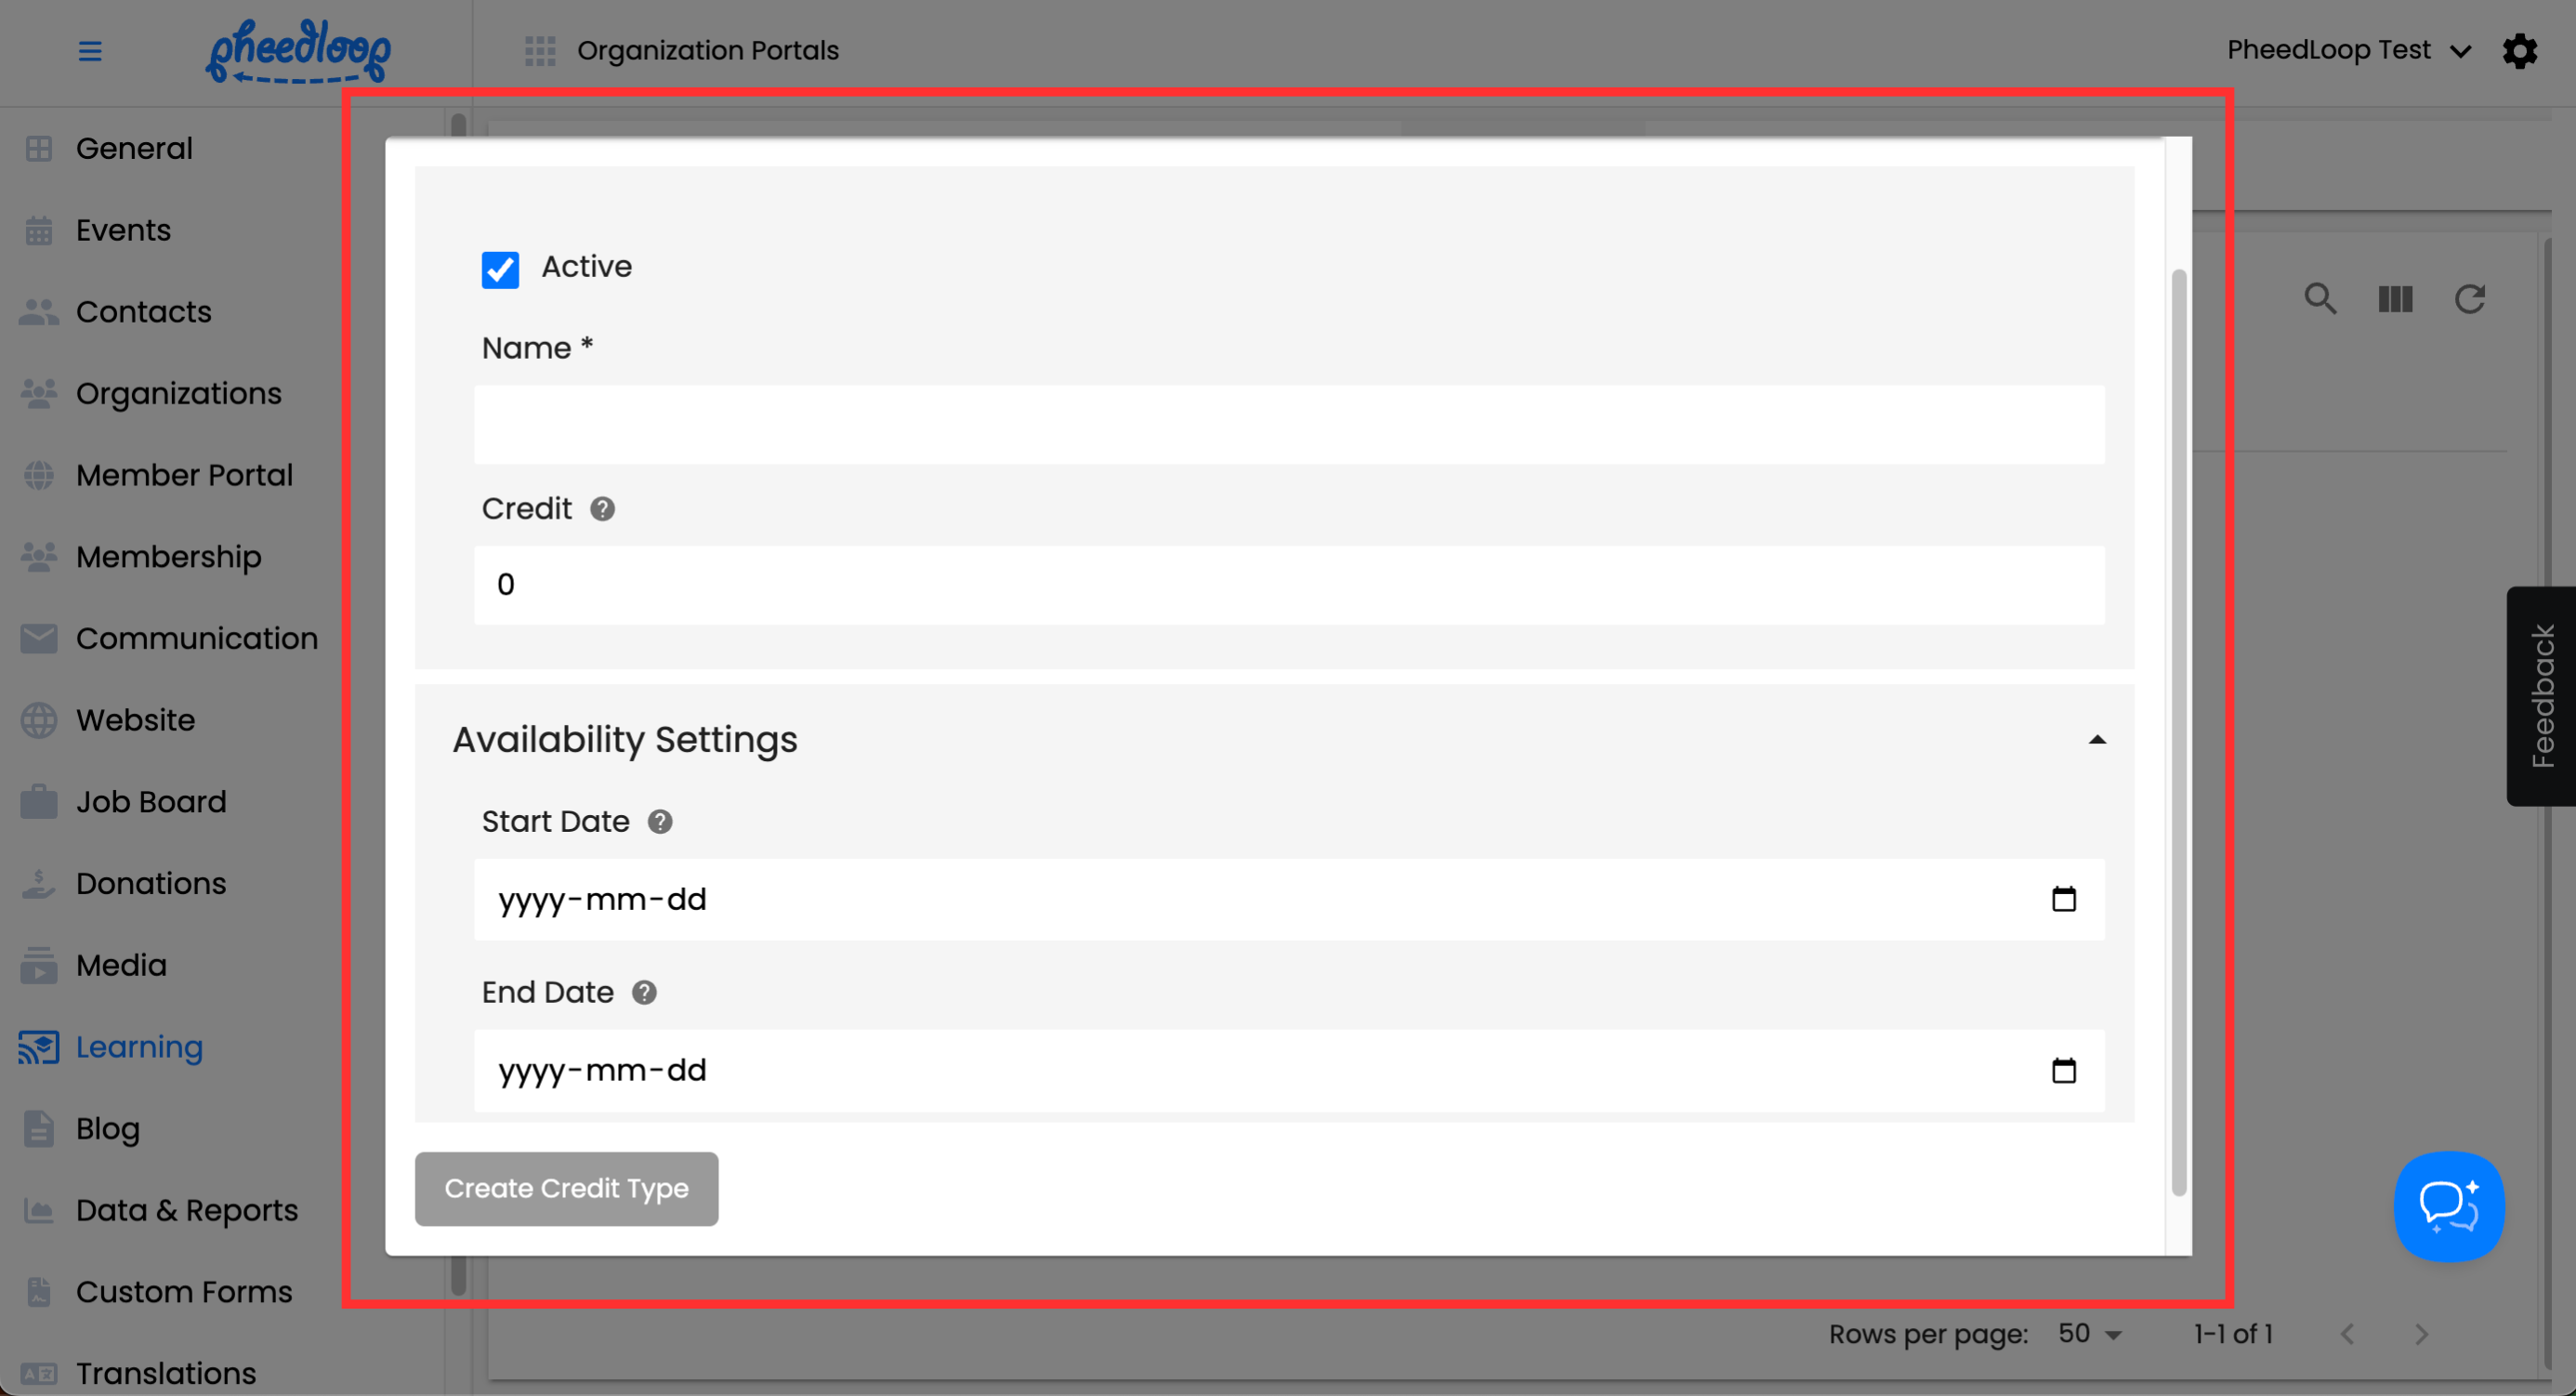
| Setting | Description |
|---|---|
| Active | Toggle on to allow attendees to use this promotion. If toggled off, the promotion will not function. |
| Name | Enter the name for the promotion in this field. |
| Credit | Enter a numerical value to award to a member when they complete a specified task, such as viewing a lesson or completing a course. |
| Start Date (Availability Settings) | Enter a date to make this Credit Type available. It will not work before this date. Leave blank to keep it available at all times. |
| End Date (Availability Settings) | Enter a date to make this Credit Type unavailable. It will not work after this date. Leave blank to keep it available indefinitely. |
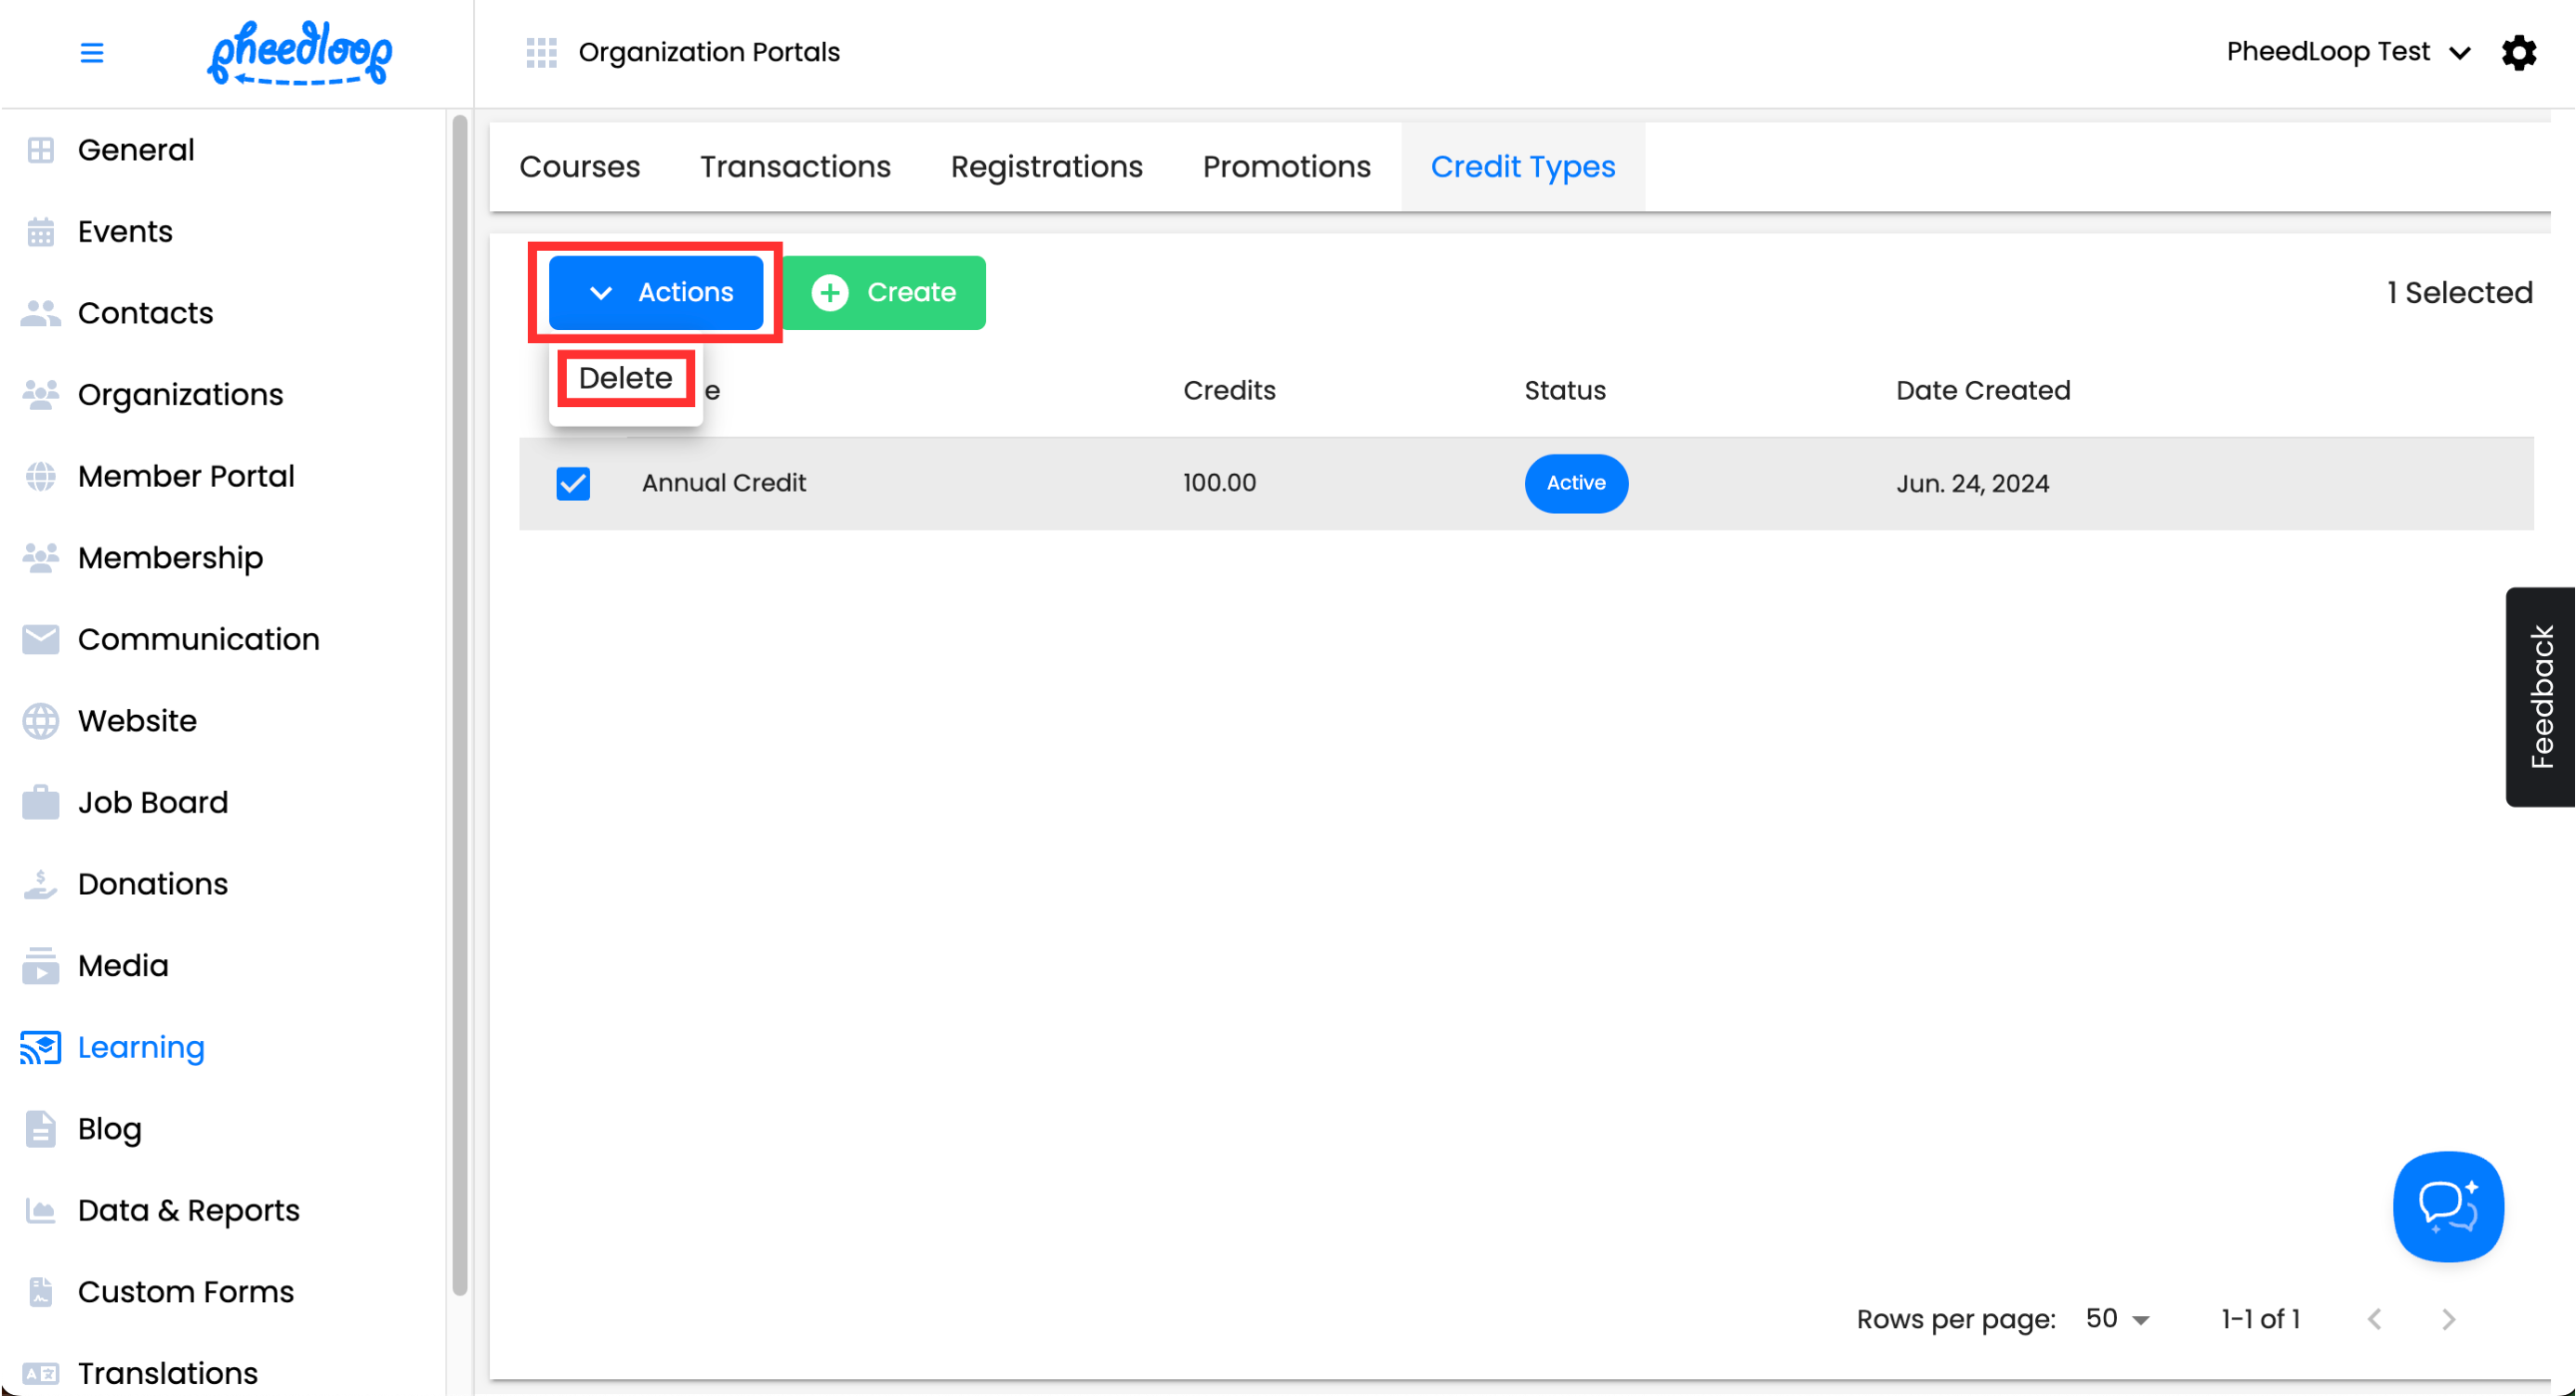
Deleting Credit Types
- From the Membership Dashboard, navigate to Learning > Credit Types
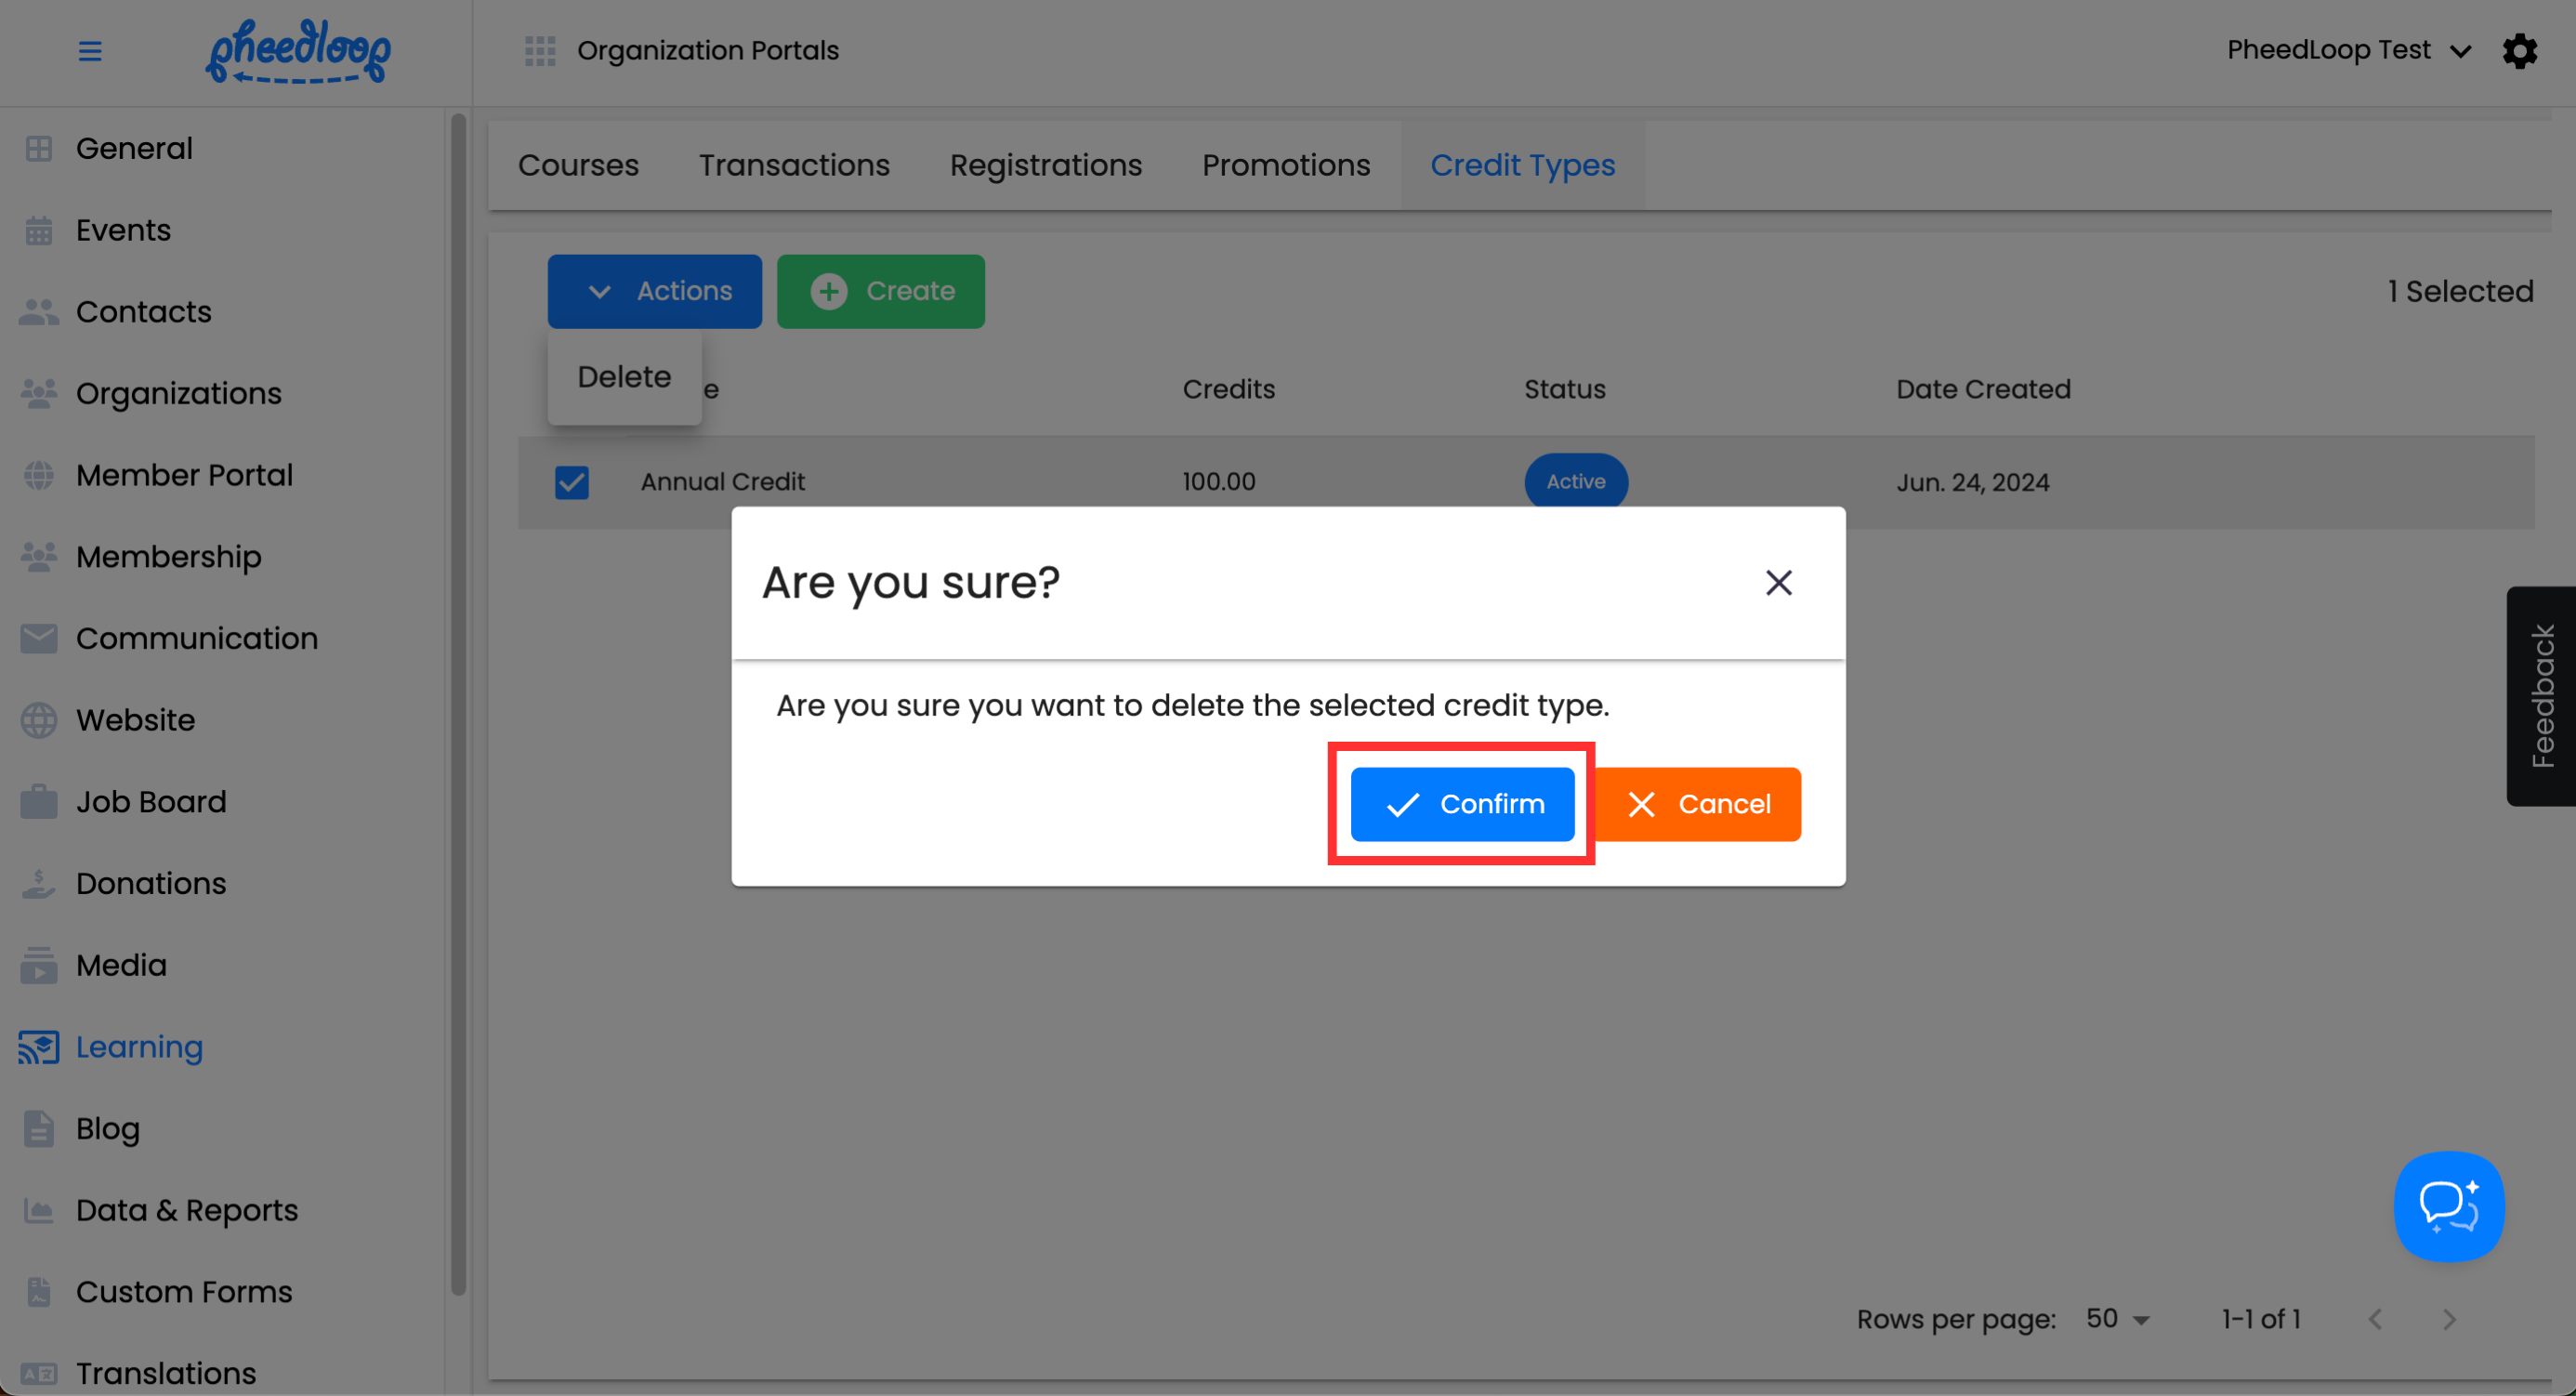
Above the Credit Types table, select Actions > Delete
Select Confirm


Additional Customization Settings in the Learning Portal
Certain aspects of the Learning Portal can be customized through the Membership Dashboard.
- From the Membership Dashboard, navigate to General > Settings
- Scroll down to General Settings
- Under the Color field, select the hex color value to change the layout color within the Learning Portal
- Please note, this setting will change the color scheme for other portals such as the Member Portal.
- Under the Organization Logo field, select Choose File to upload your organization's logo
- The logo will appear in the top left corner of the learning portal.
Select Save Changes


Please note, editing the color or organization logo will also change the Member Portal and Organization Website.