How Can I Set Up Academic Posters for an In-Person or Virtual Event?
Posters are a segment of an event where an event organizer is looking to display the Academic Based content in a separate section of the Virtual Portal or the Event App.
This is a common experience for conferences with an academic focus.
In these scenarios, what is required is having a Sessions Area for people to view Sessions, an Exhibit Hall area for people to see commercial exhibitors, and a dedicated area for people to see Academic Based Posters.
PheedLoop has a way of accommodating this. There are two ways to achieve what you are looking to do. It really depends on the requirements of your event. Please see below:
Using the Exhibitor Showcase Feature in PheedLoop
Please note that the Exhibit Hall Feature is required. Posters must be uploaded as a PDF file if using this method.
As an event organizer, you are able to create a “duplicate” Exhibit Hall that would be present in the Event App and the Virtual Portal.
When used in conjunction with our Translation feature this duplicate can serve as a poster. For more information on Translations, please review our Translating Text, Button, Phrases, and Labels article. If you are using the Virtual Portal, we recommend translating the name of the Exhibitors page into Posters or whichever title you wish. If using the Event App only, the exhibitors page can be simply renamed into the poster title or whatever text desired.
- From the Event Dashboard, navigate to Experiences > Mobile App > Pages
- Select the Exhibitors page
- Under the Title field, enter the desired text
-
Select Save Changes


Once the page is configured, you can now configure the exhibitors serving as your academic poster to appear in the Virtual Portal and Event App.
- From the Event Dashboard, navigate to Exhibitors > Exhibitors
- Select the Exhibitor you wish to edit from the list
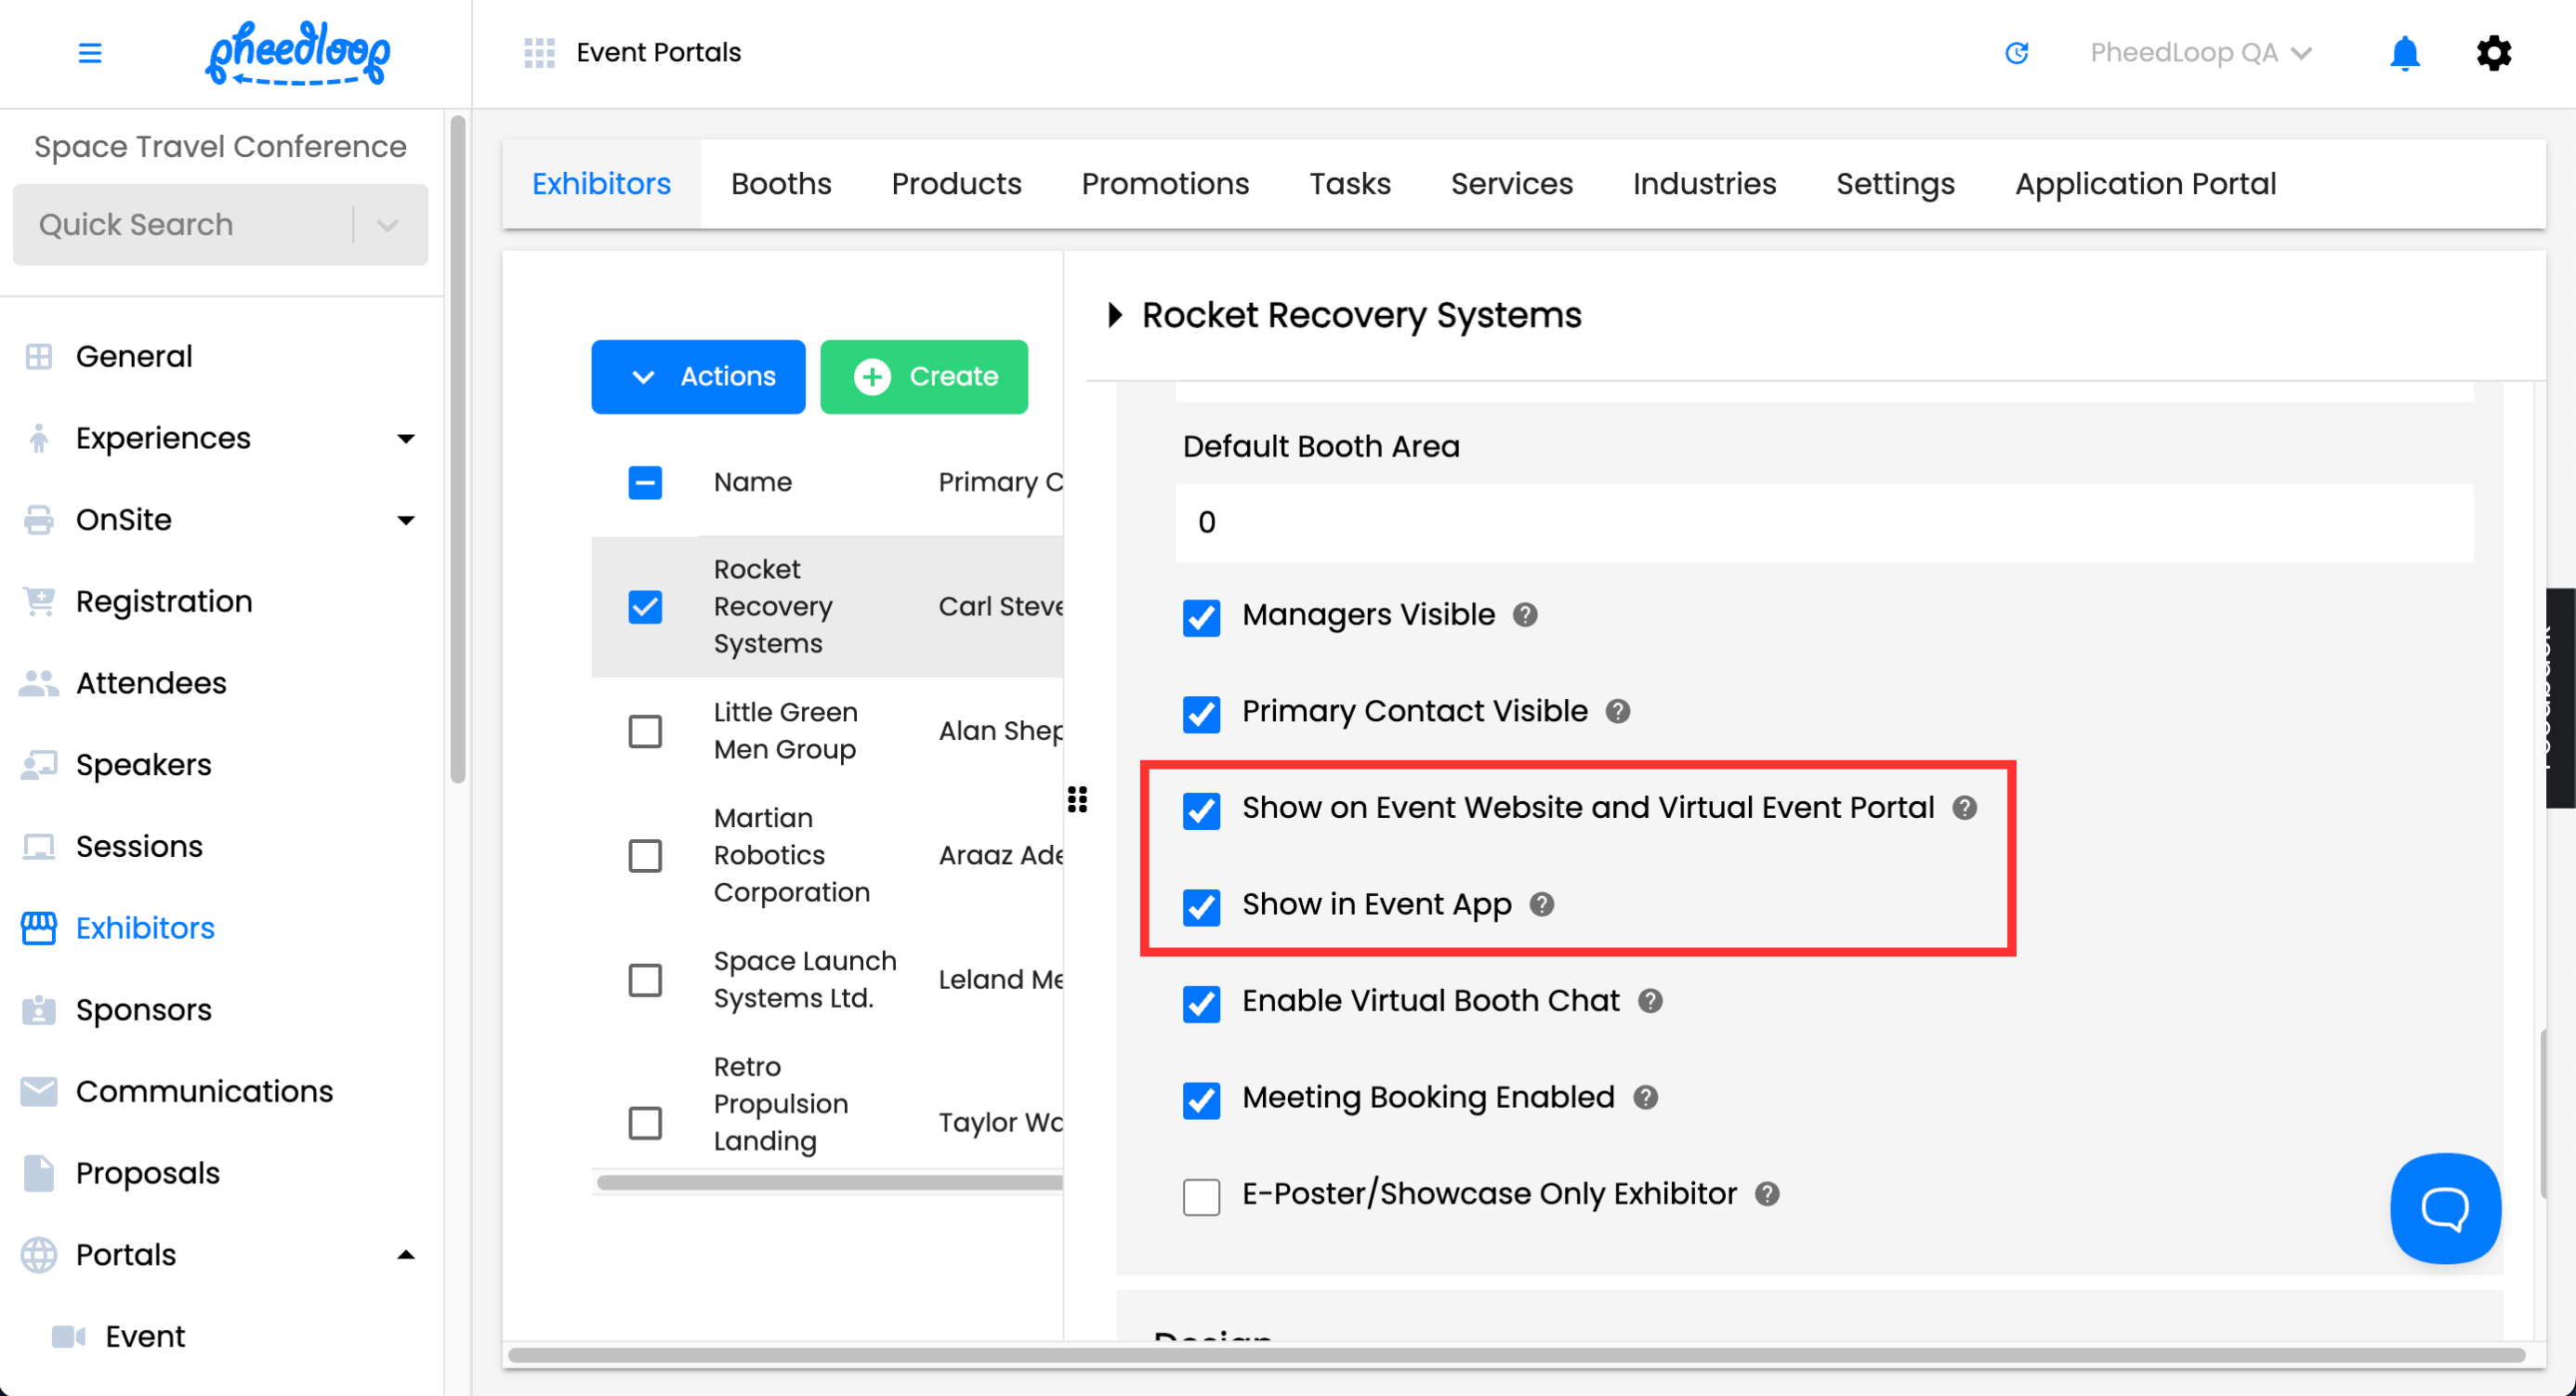
- Scroll down to Basic Details
- Toggle on the Show on Event Website and Virtual Event Portal, and Show in Event App checkboxes
-
Select Save Changes

The main benefit of this is that all of the features that you would normally see with the typical Exhibitor Portal can be leveraged by academic poster presenters.
Please note, a poster cannot be displayed in both the Exhibit Hall and Showcase tab. They may only be shown in one or the other.
To create an exhibitor for an academic poster:
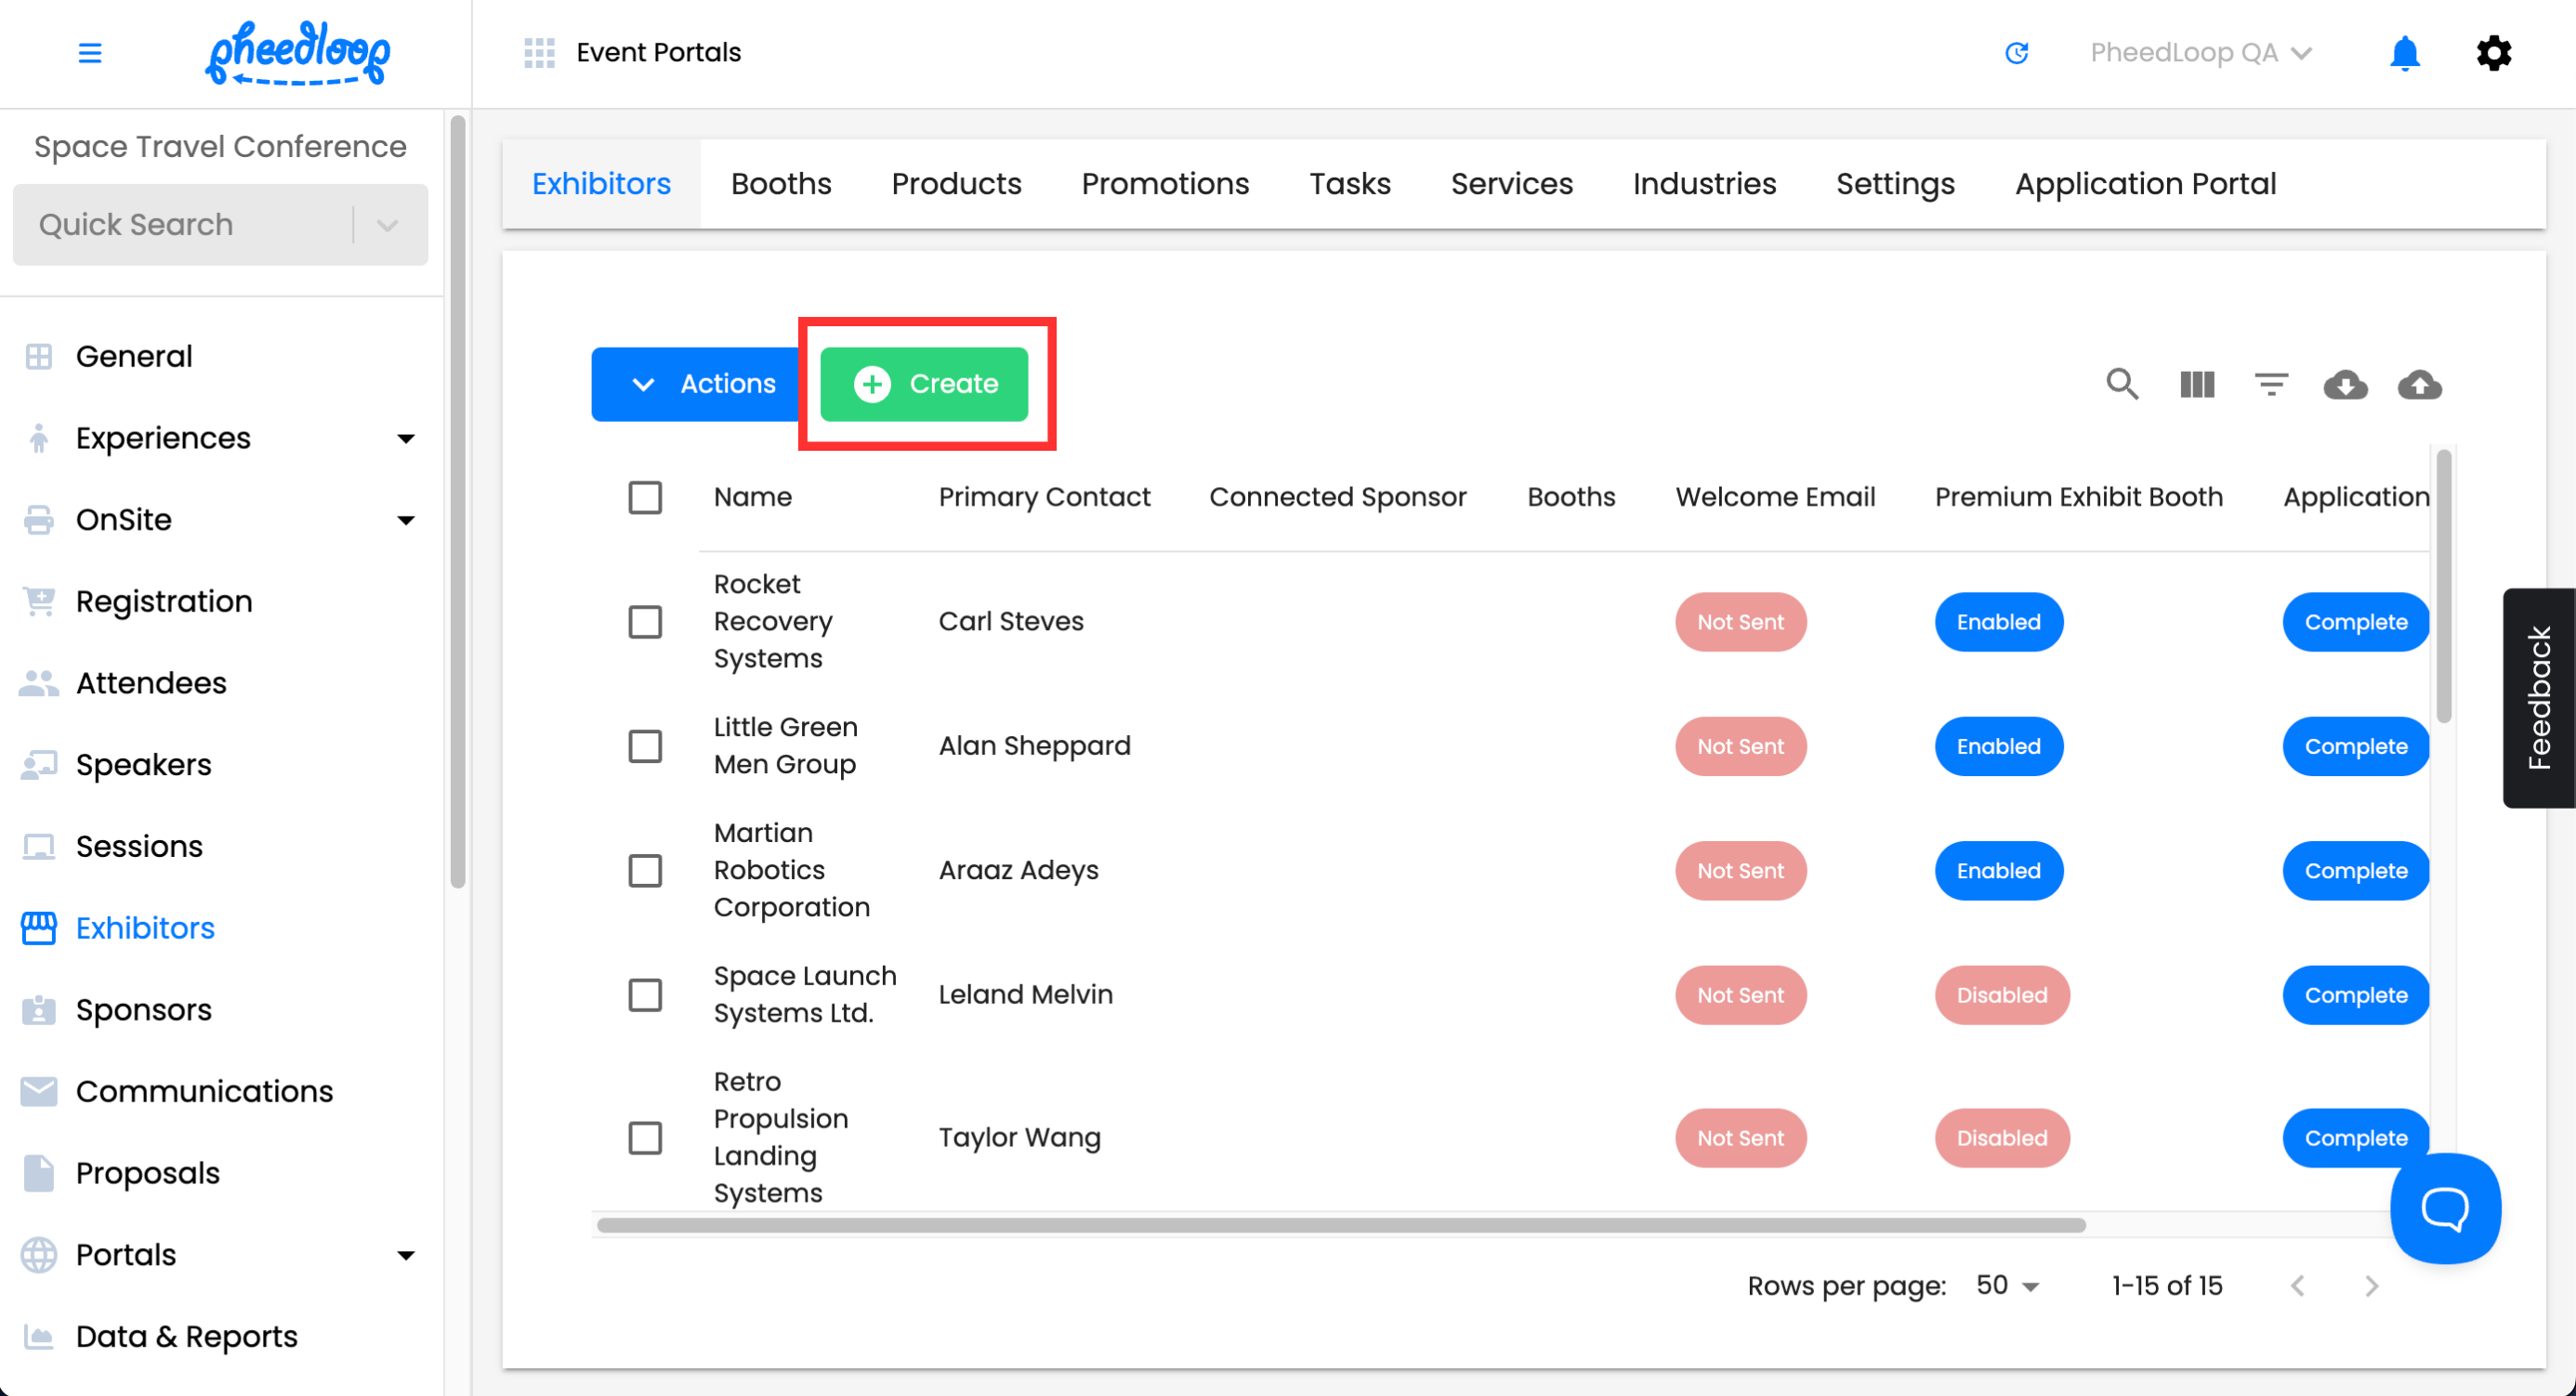
- From the Event Dashboard, navigate to Exhibitors > Exhibitors
-
Above the Exhibitors table, select Create
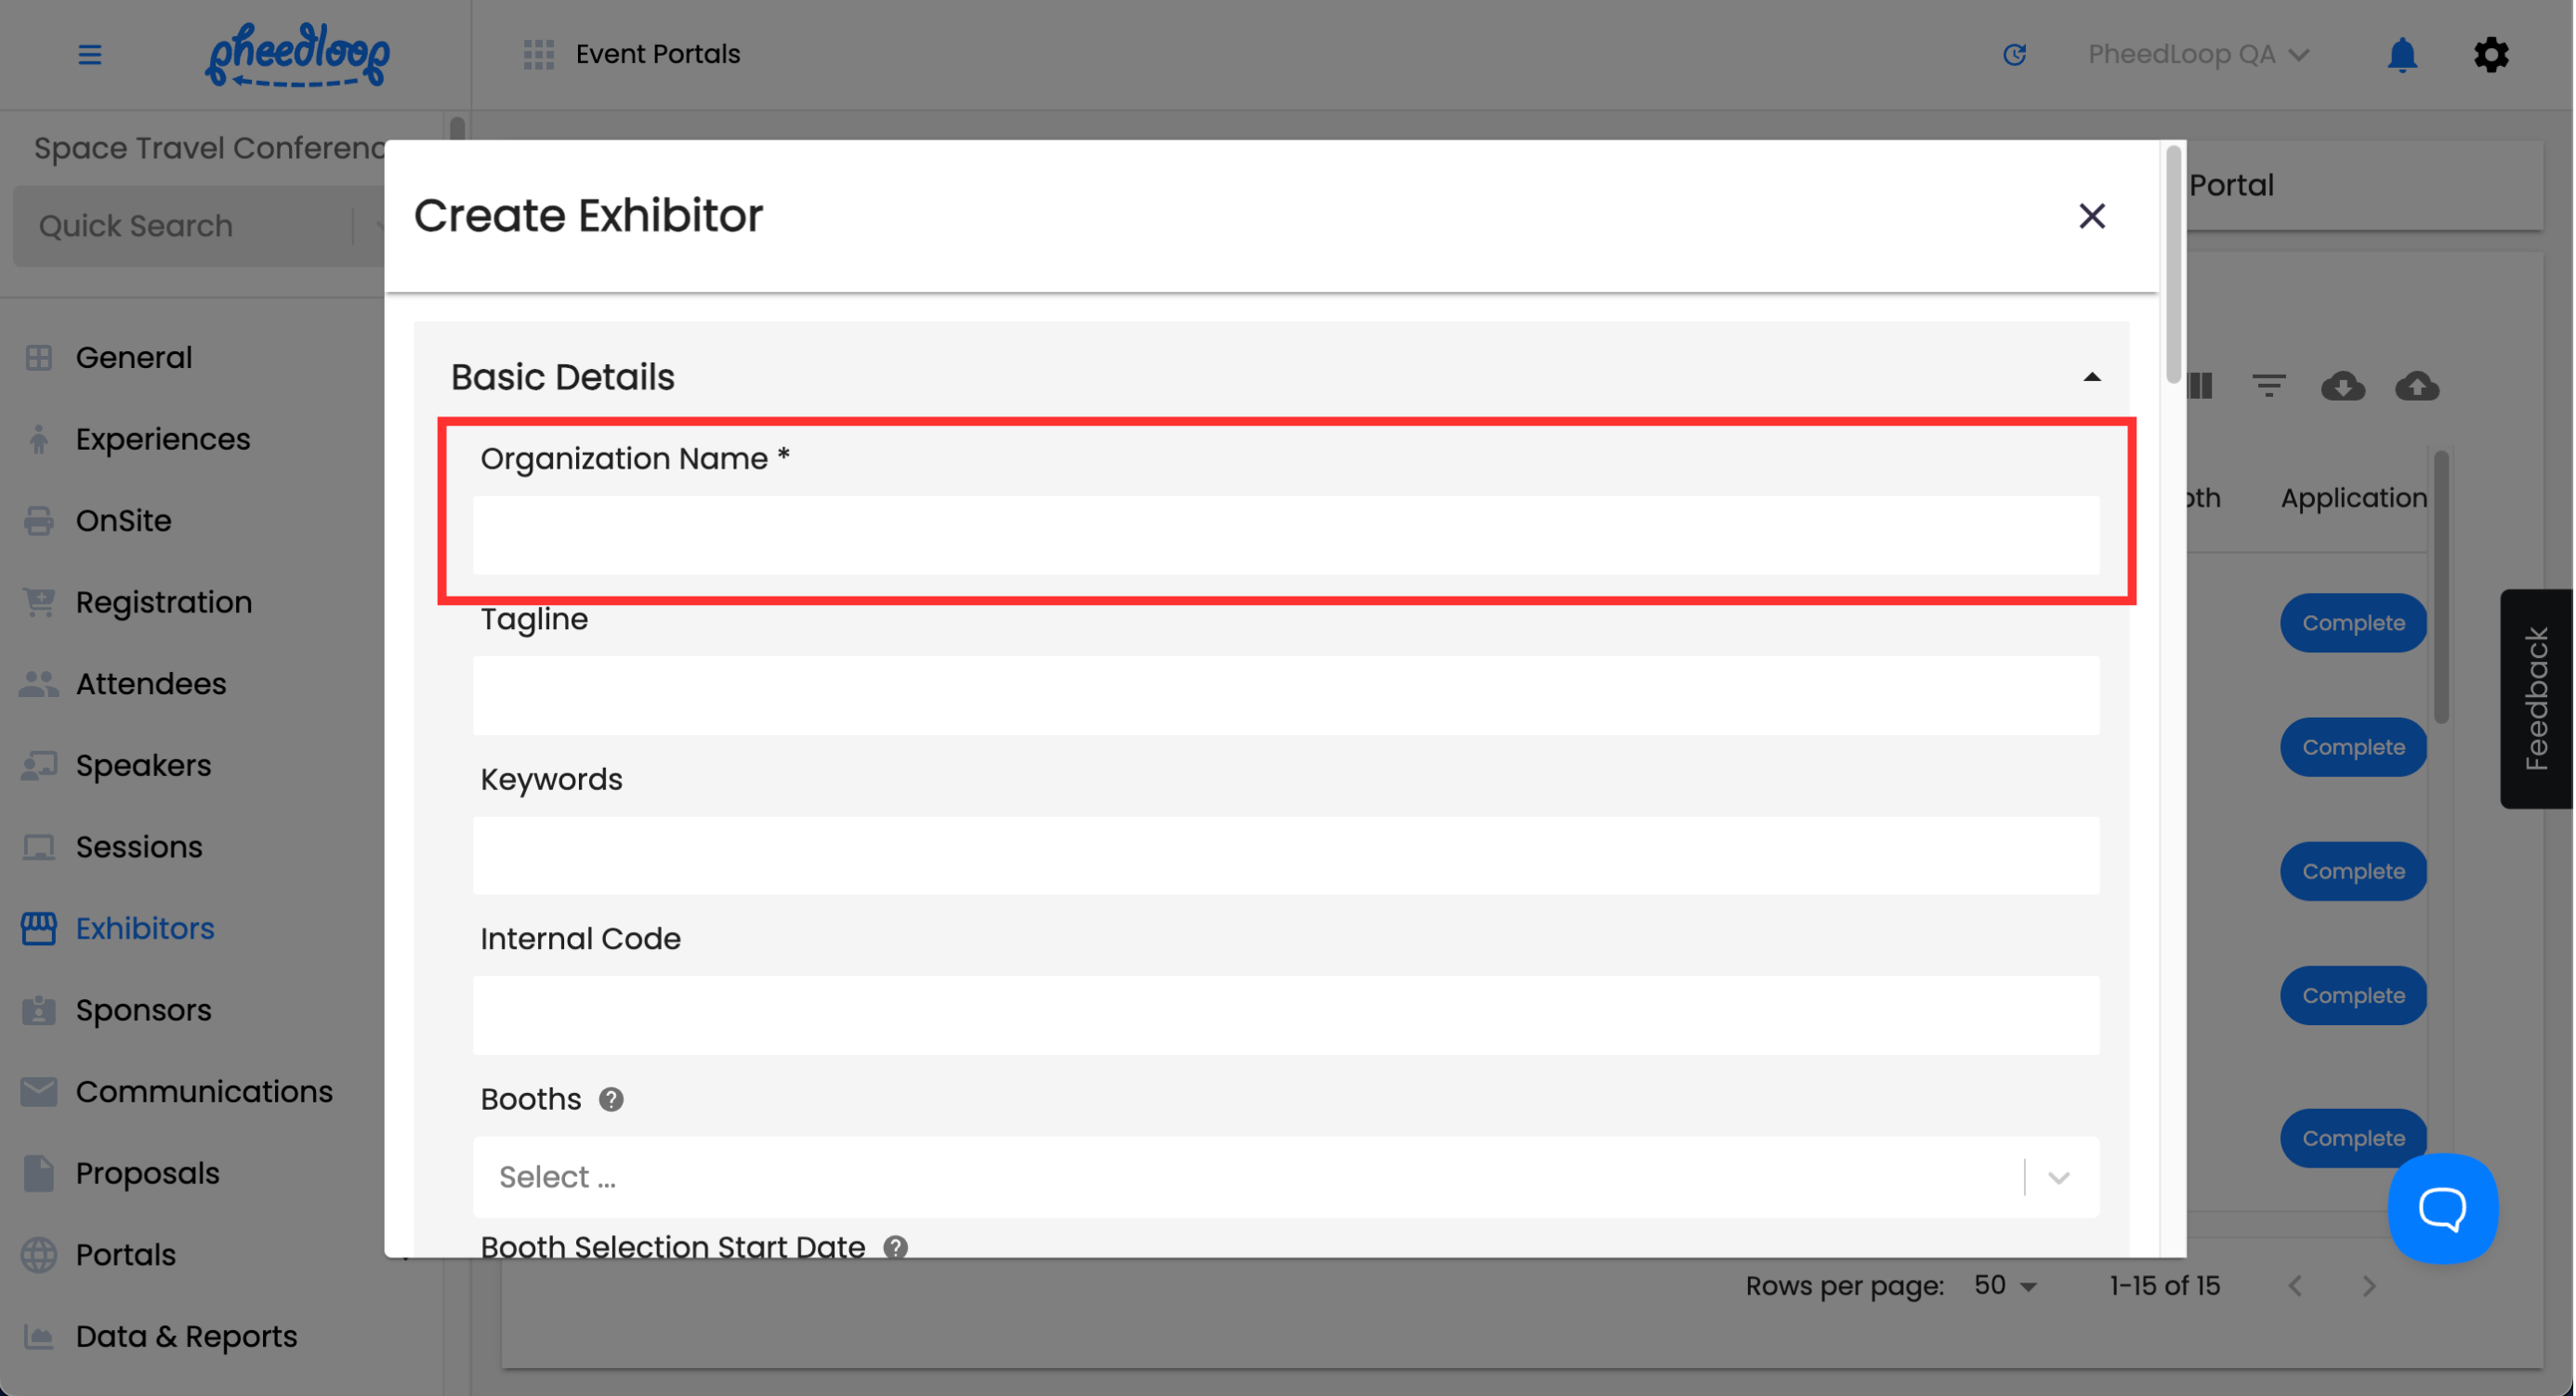
- Under Organization Name, enter the title of your poster
-
Optionally, under Description, enter additional information for your poster
-
-
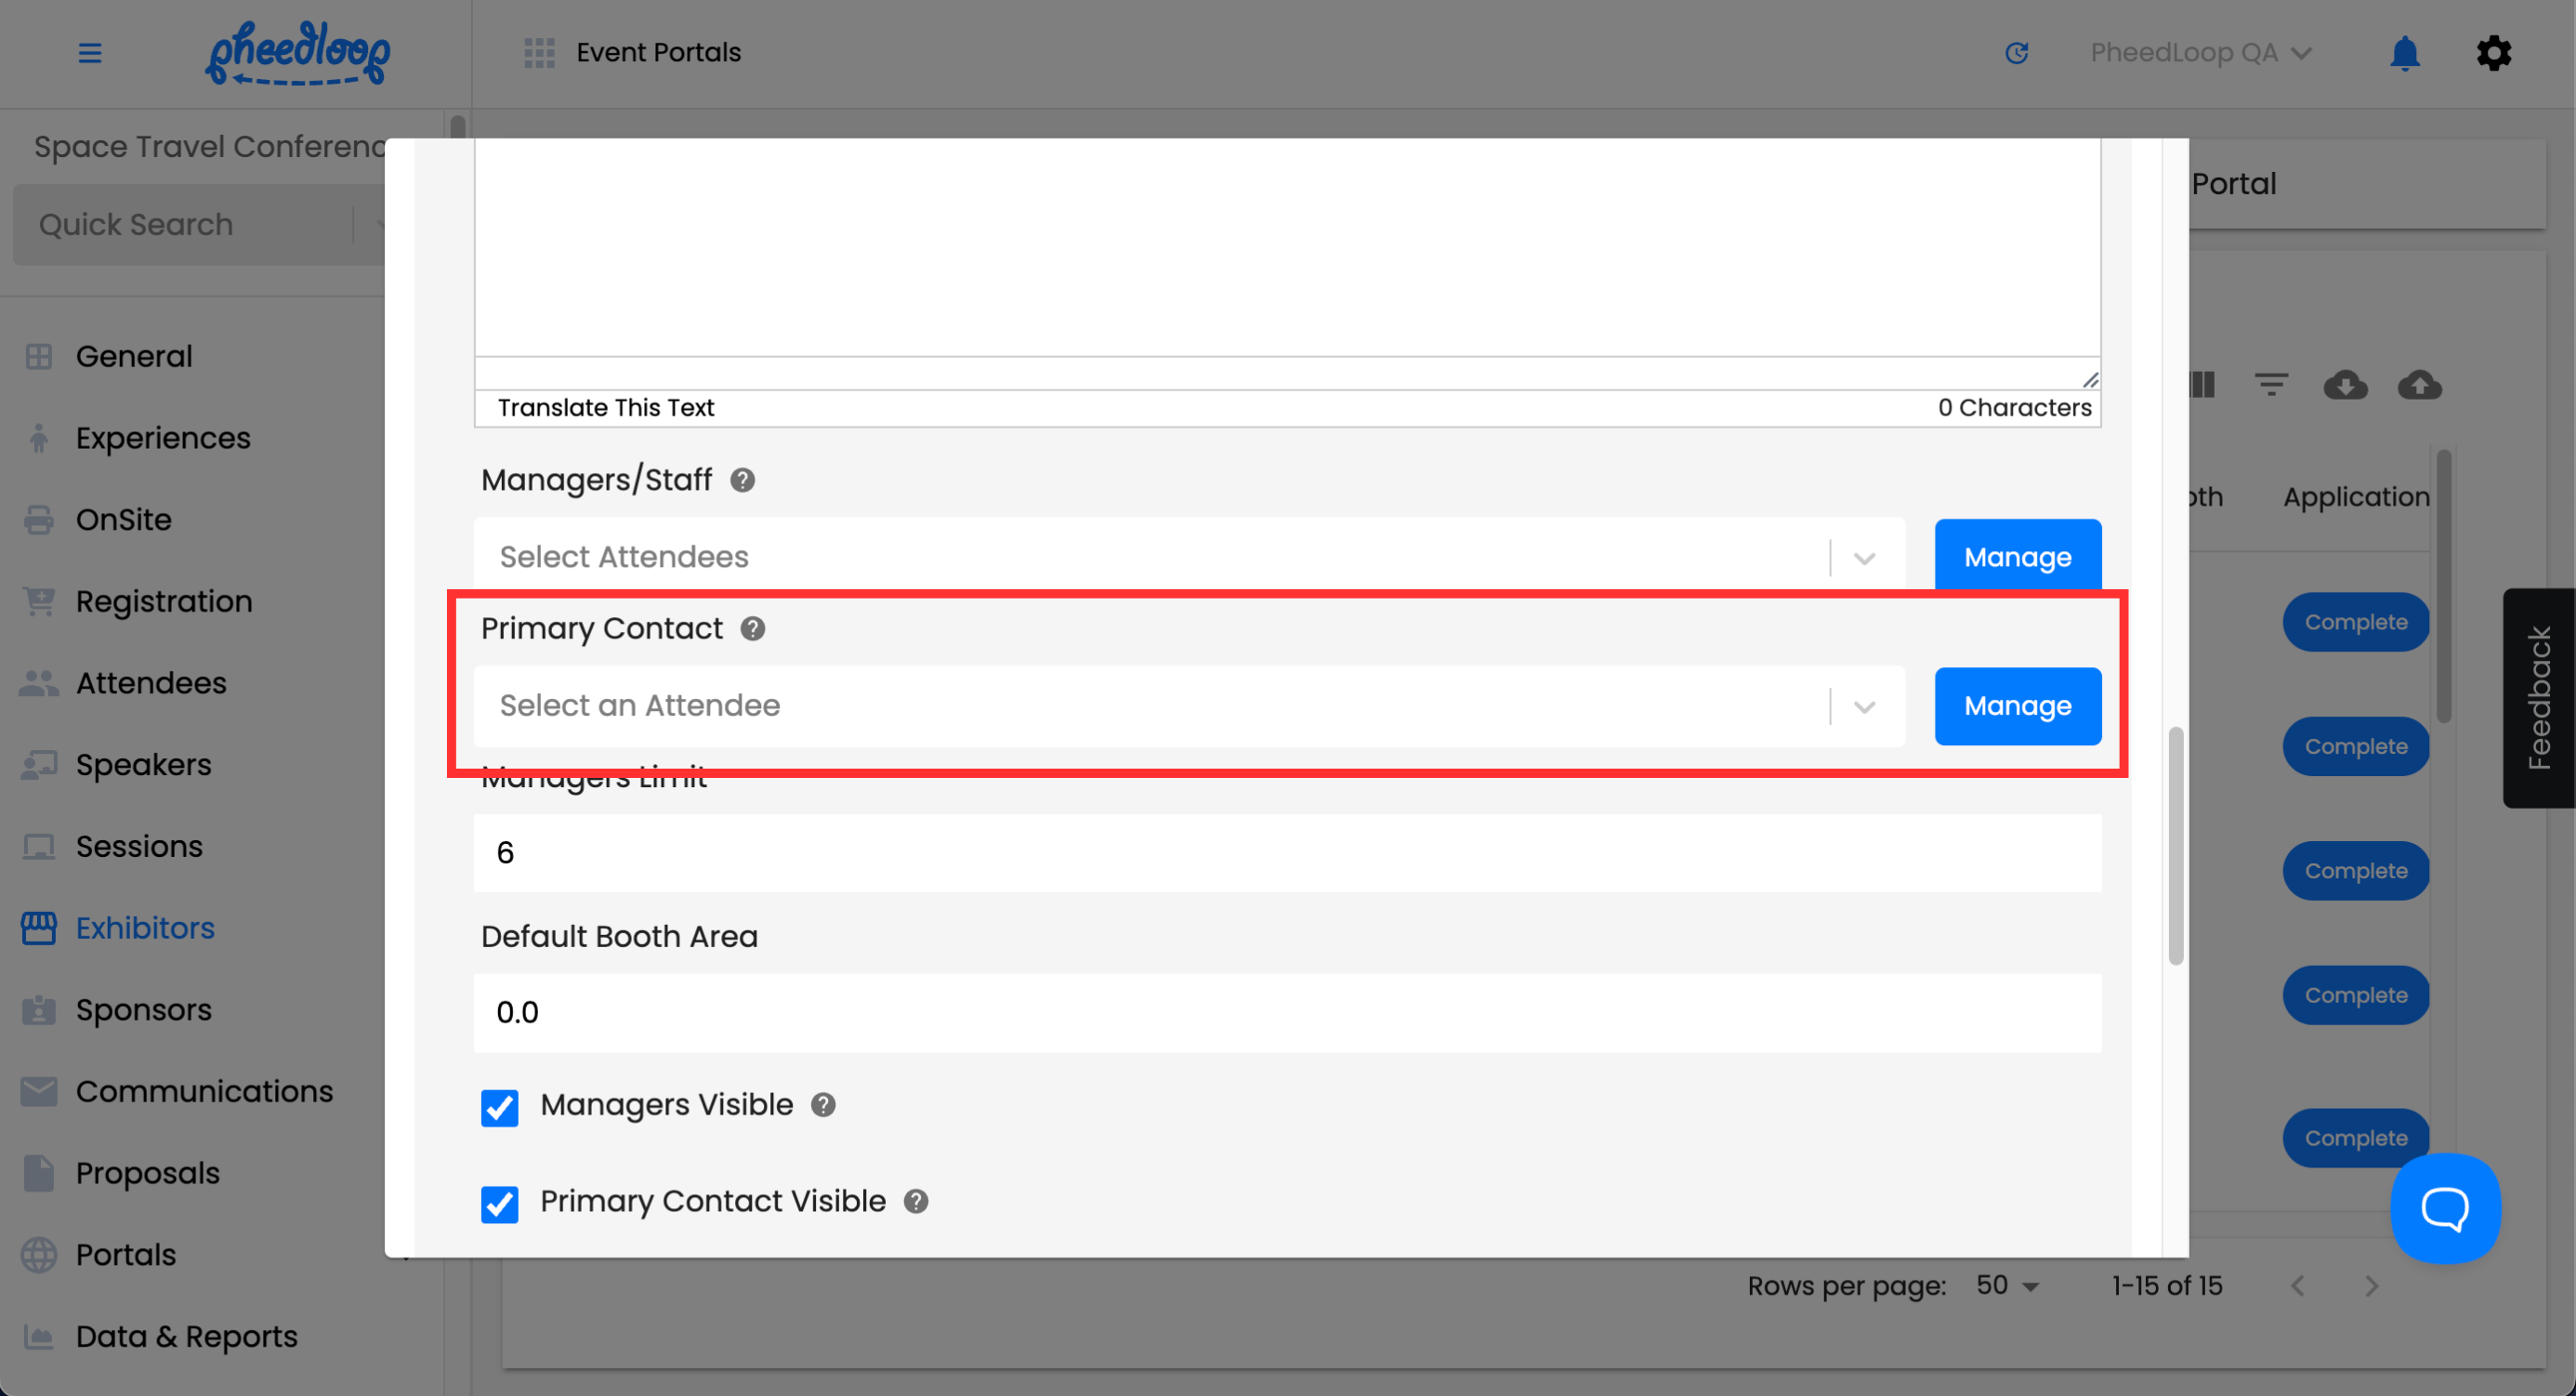
Under Primary Contact, select Manage to add the main point of contact for your poster
-
Toggle on the E-Poster/Showcase Only Exhibitor checkbox
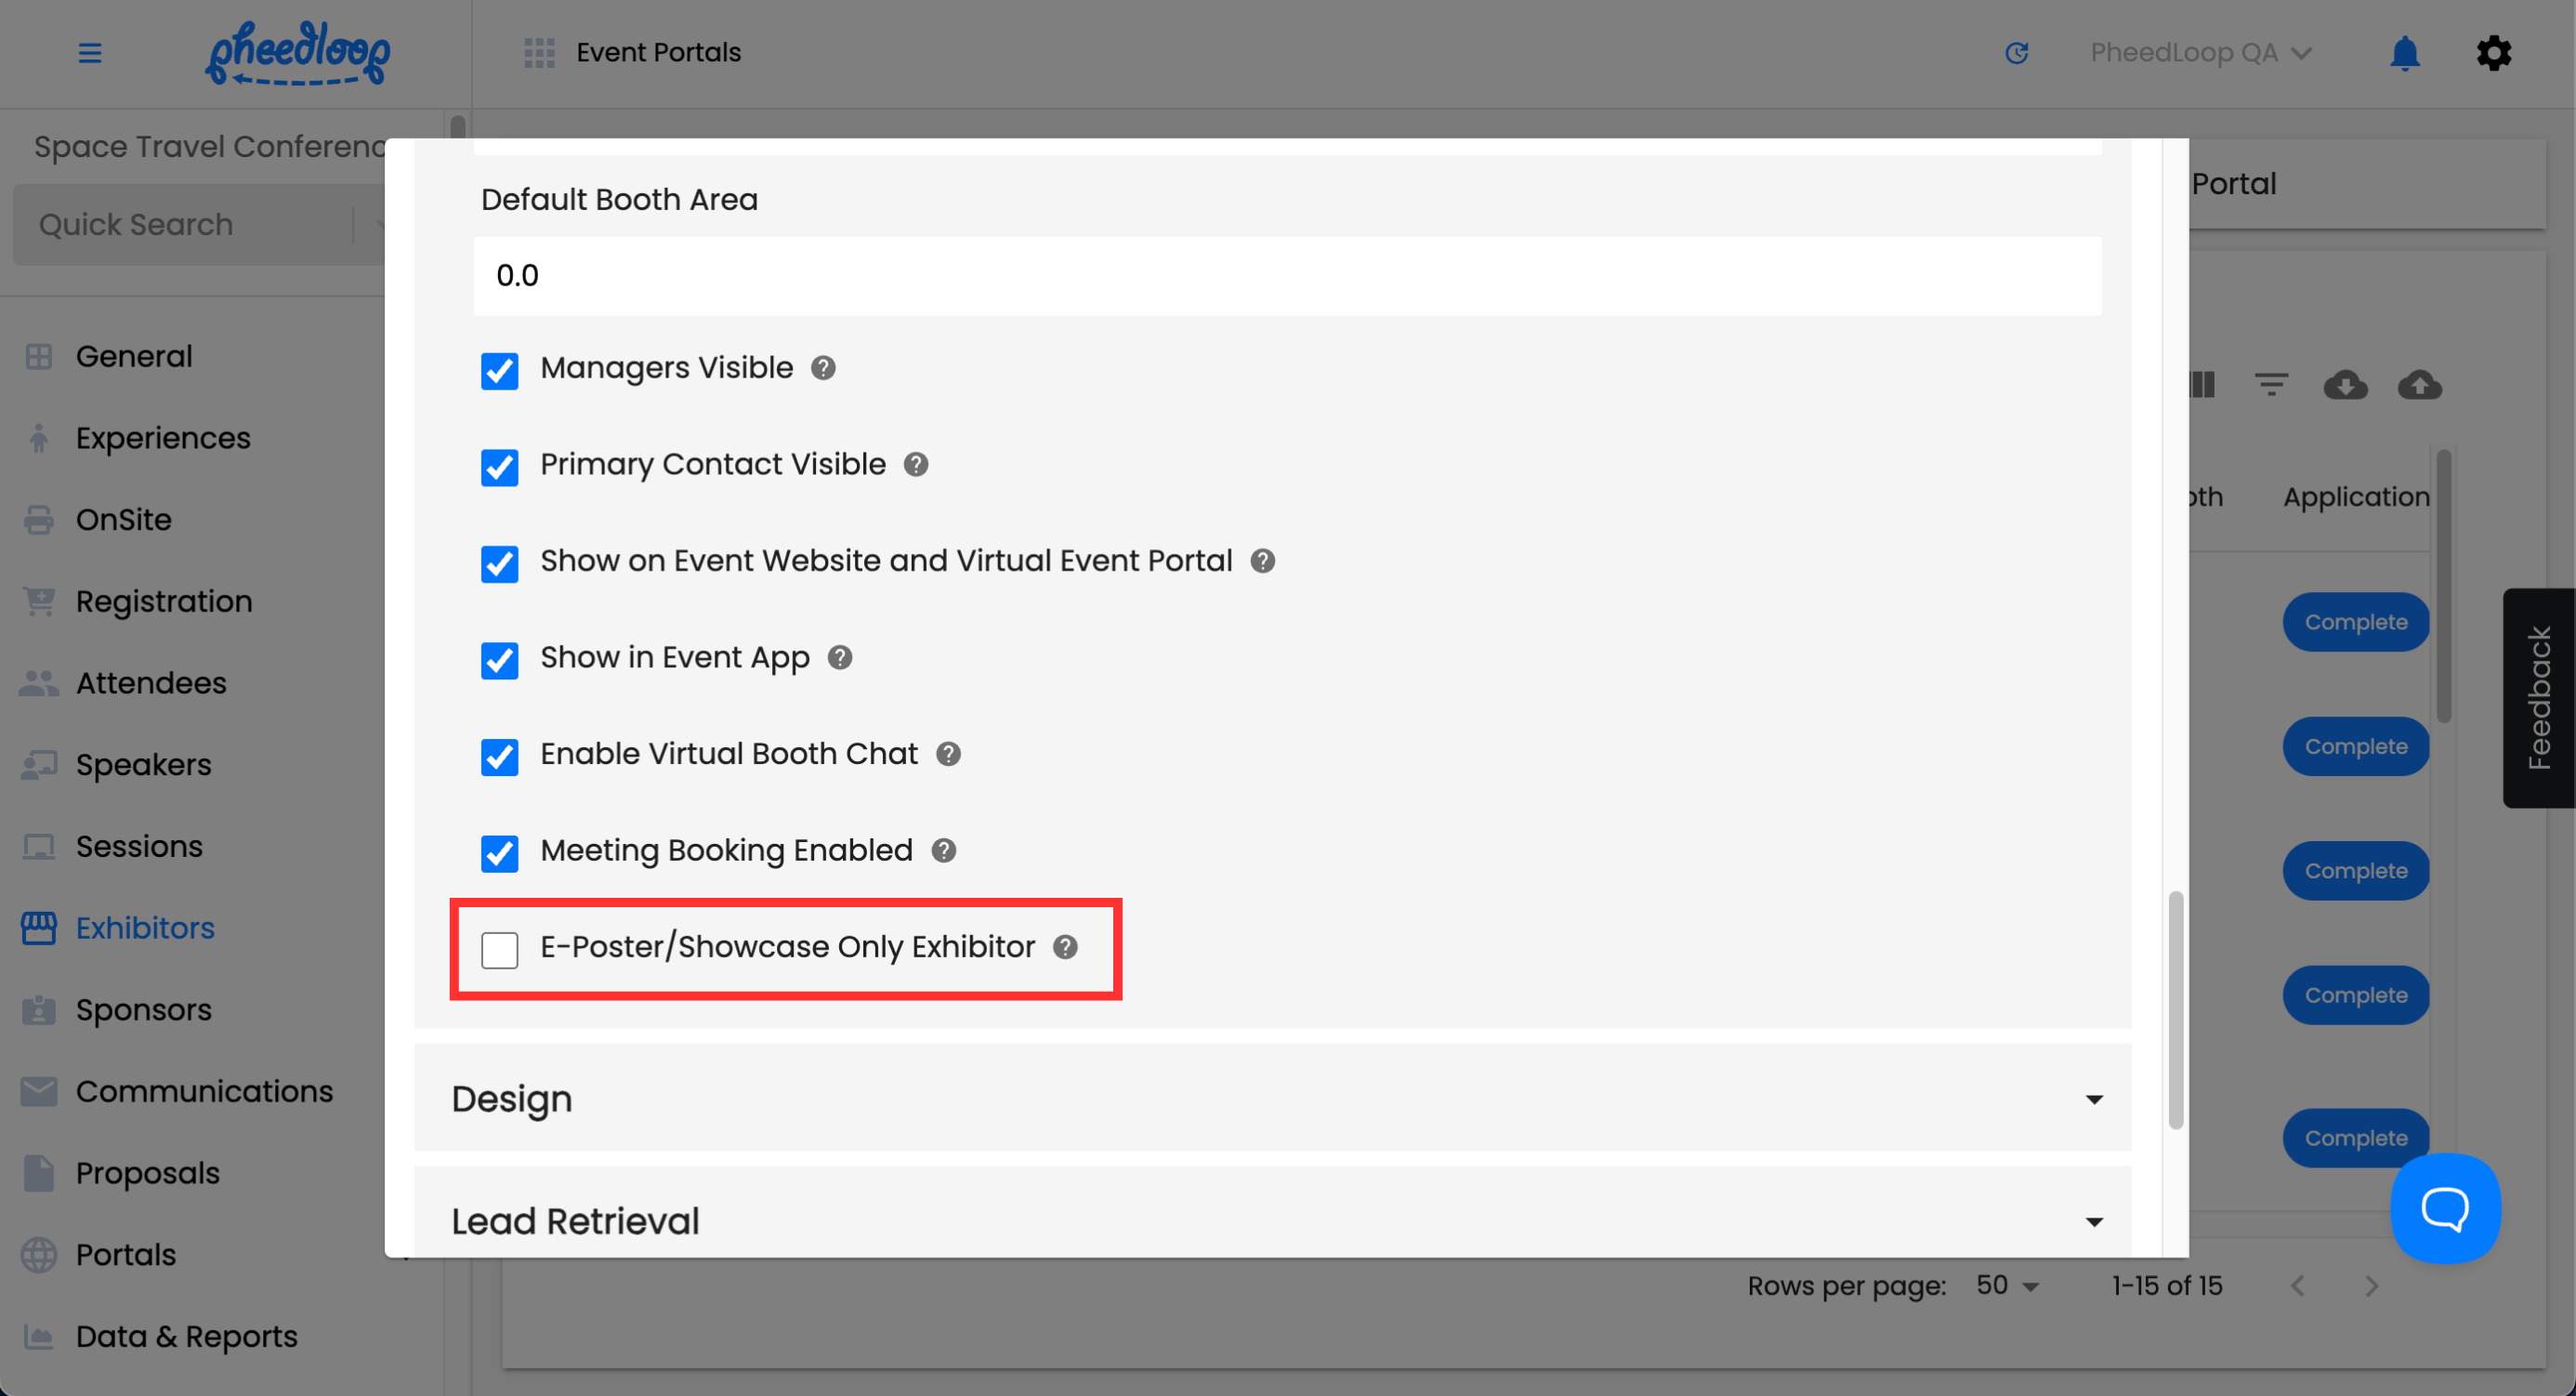
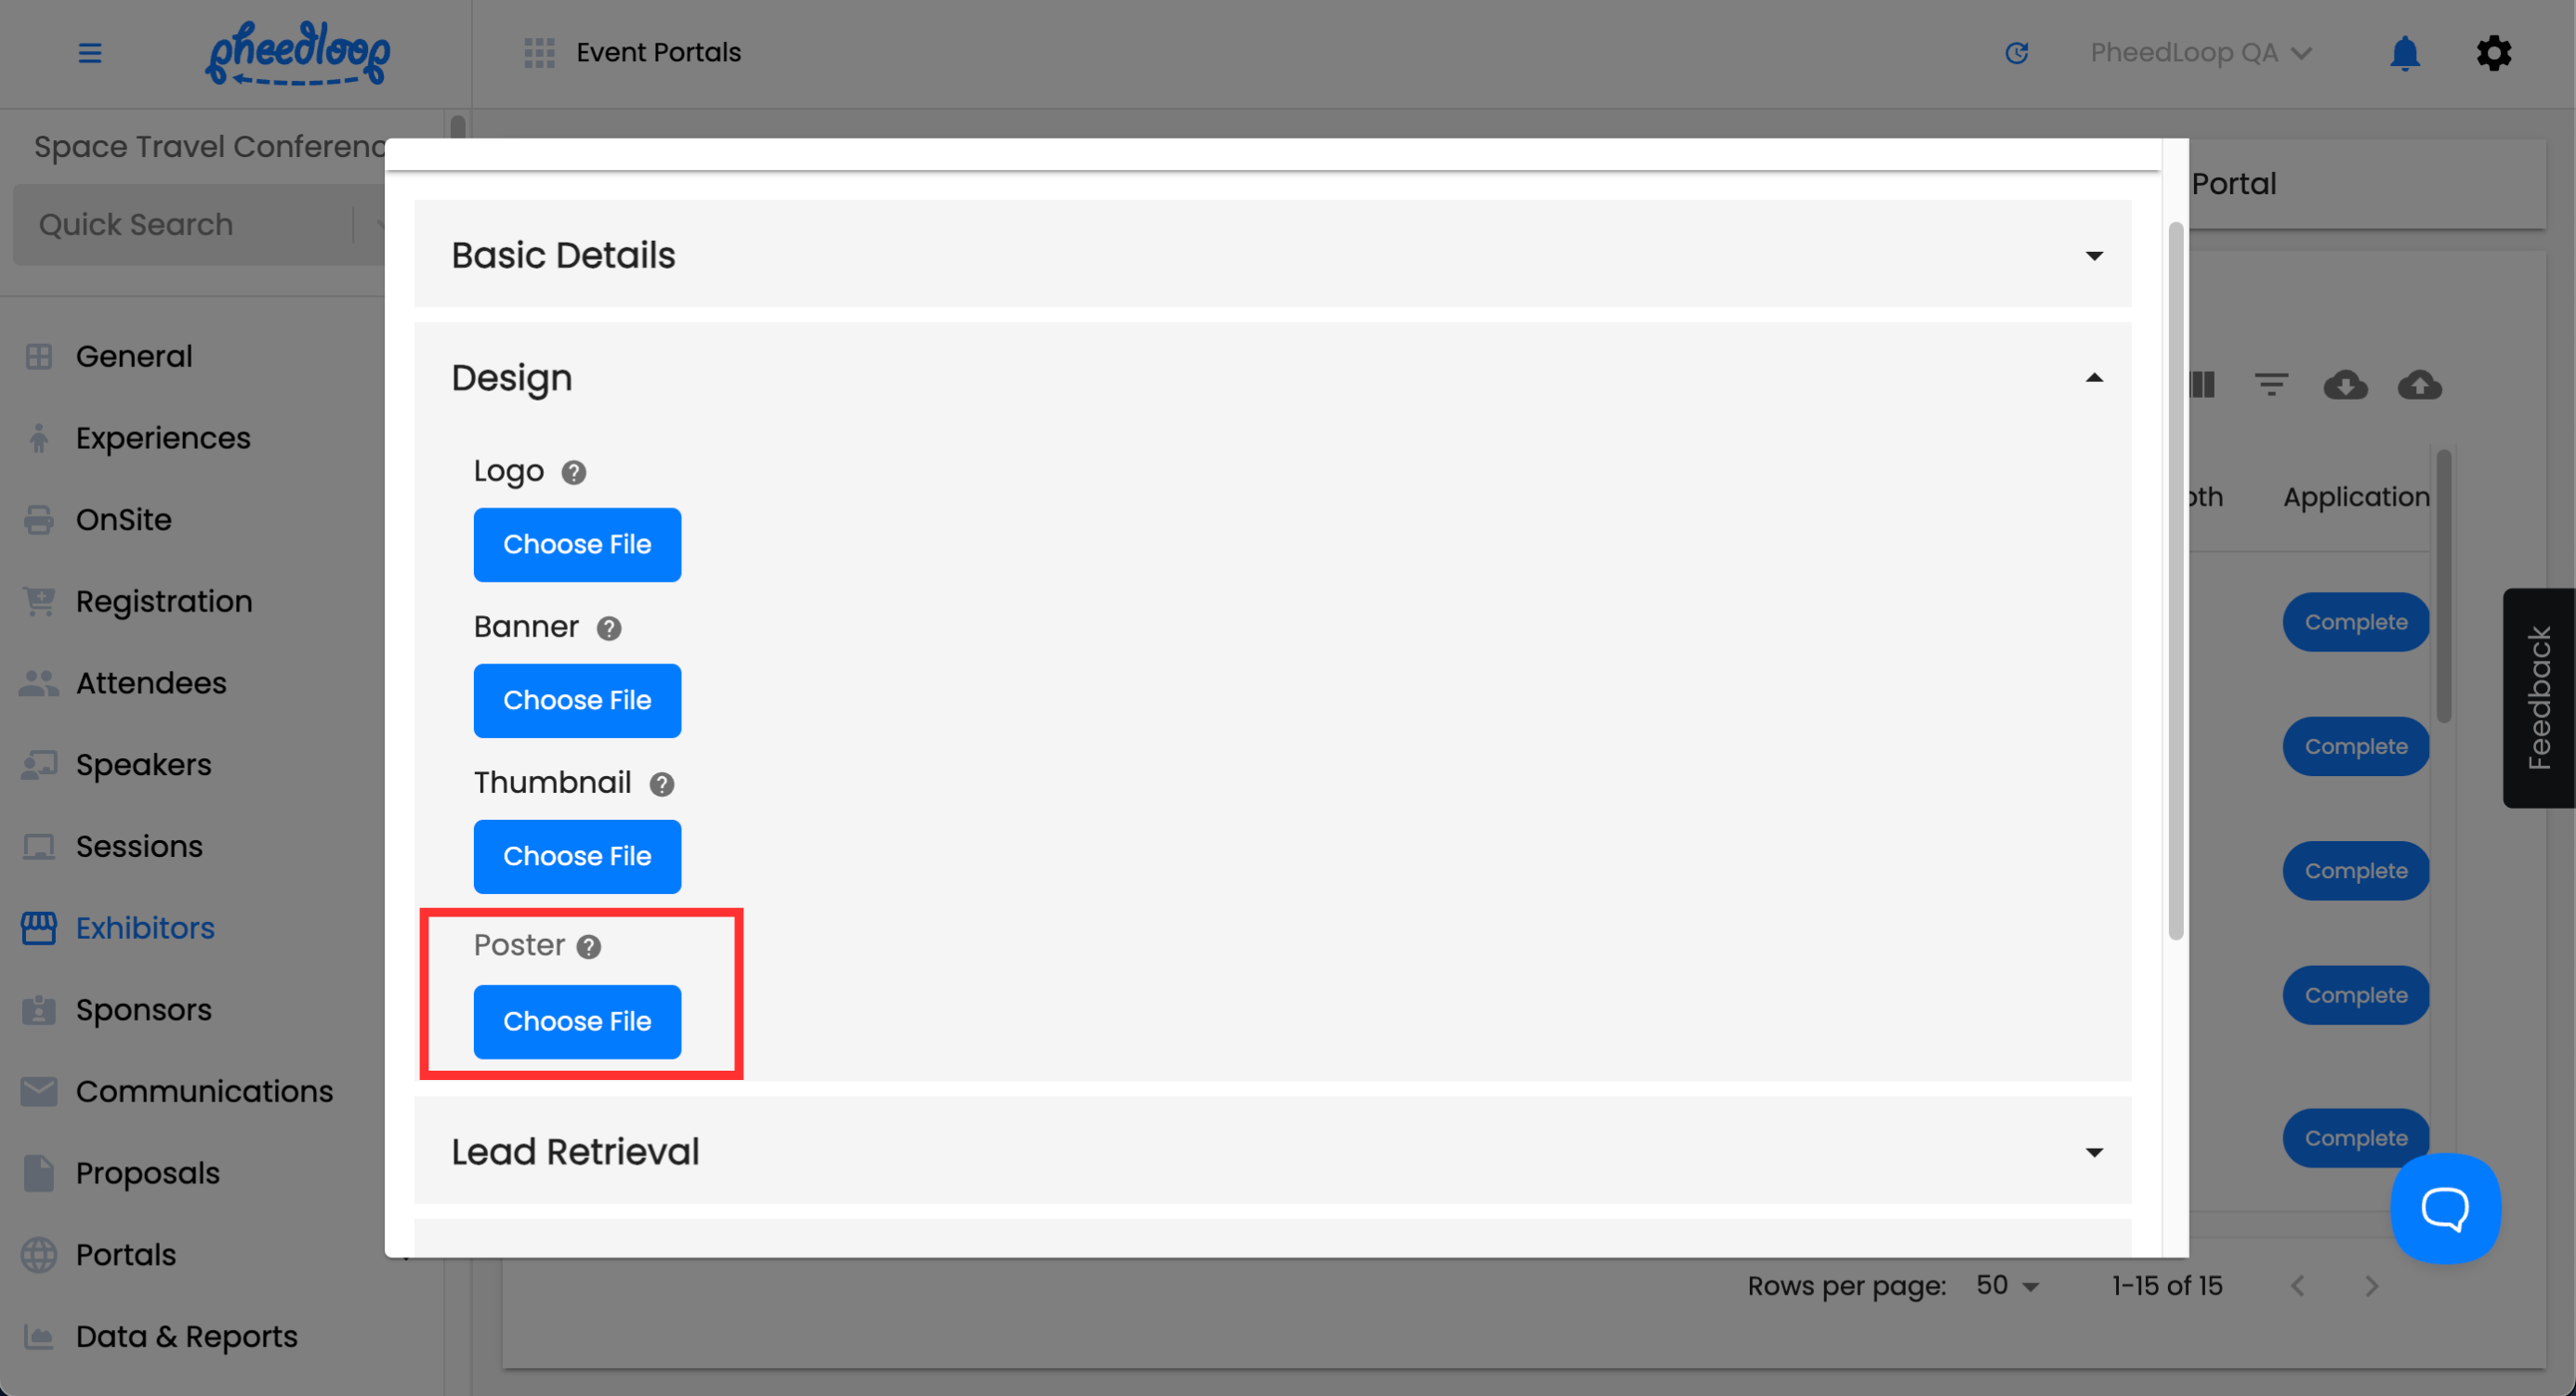
- Scroll down to Design and under Poster, select Choose File to upload your poster
-
Select Save Changes


Afterwards, you can go ahead and send the Exhibitor Welcome Email to your Poster Presenters. They can then log in to their portal and make edits to their poster in their dedicated portal.
- From the Event Dashboard, navigate to Exhibitors > Exhibitors
- Select the Exhibitor you wish to notify
- Above the Exhibitors table, select Actions > Send Welcome Email
-
Select Confirm

Actionable Items for the Primary Contact
The primary contact will have access to many features that can be used to enhance the poster:
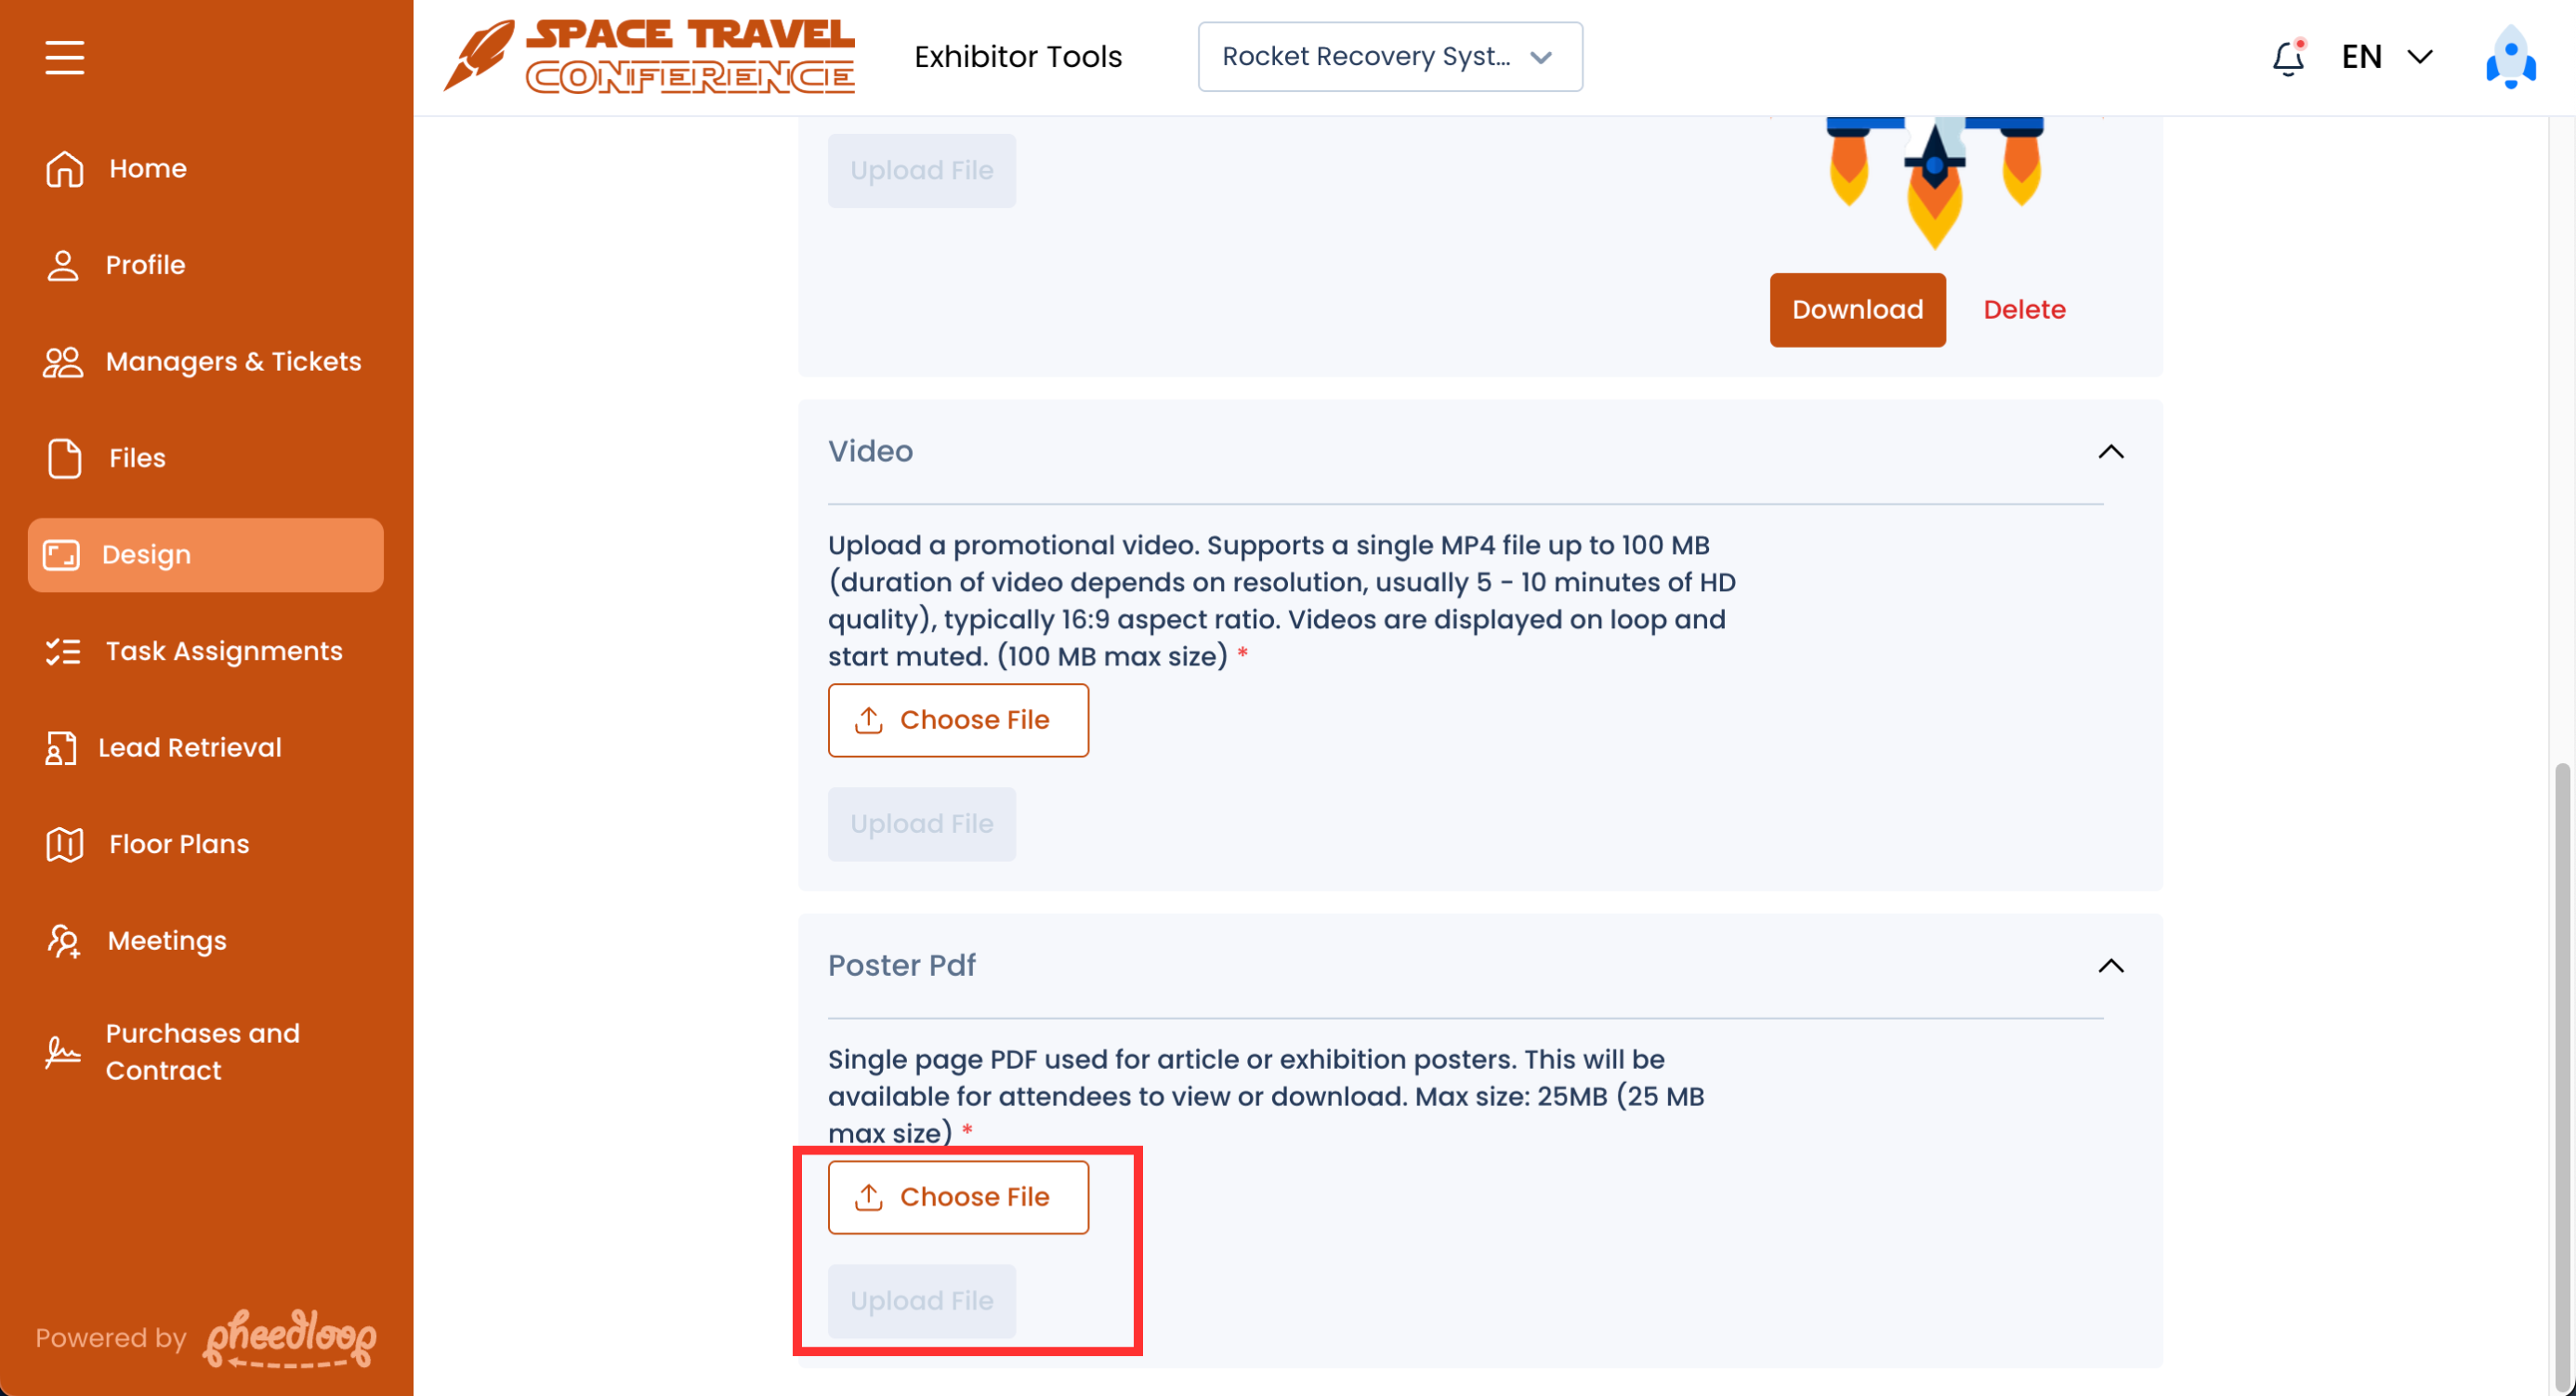
Uploading Images of their Poster in the Design section of the Exhibitor Portal
- From the Exhibitor Portal, navigate to Design
- Under Poster Pdf, select Choose File to upload your poster
-
Select Upload File

Uploading Files in the Files section of the Exhibitor Portal for individuals to download
Presenters may sometimes want to upload files for attendees to download or for internal use. The Exhibitor Portal supports both options.
- From the Exhibitor Portal, navigate to Files
- Under Upload File, select Choose File to upload your file
- Under File Name, enter the name of your file
- Toggle on the Is Private checkbox if you wish to keep the file for internal use and prevent public access from attendees
- Select Add File

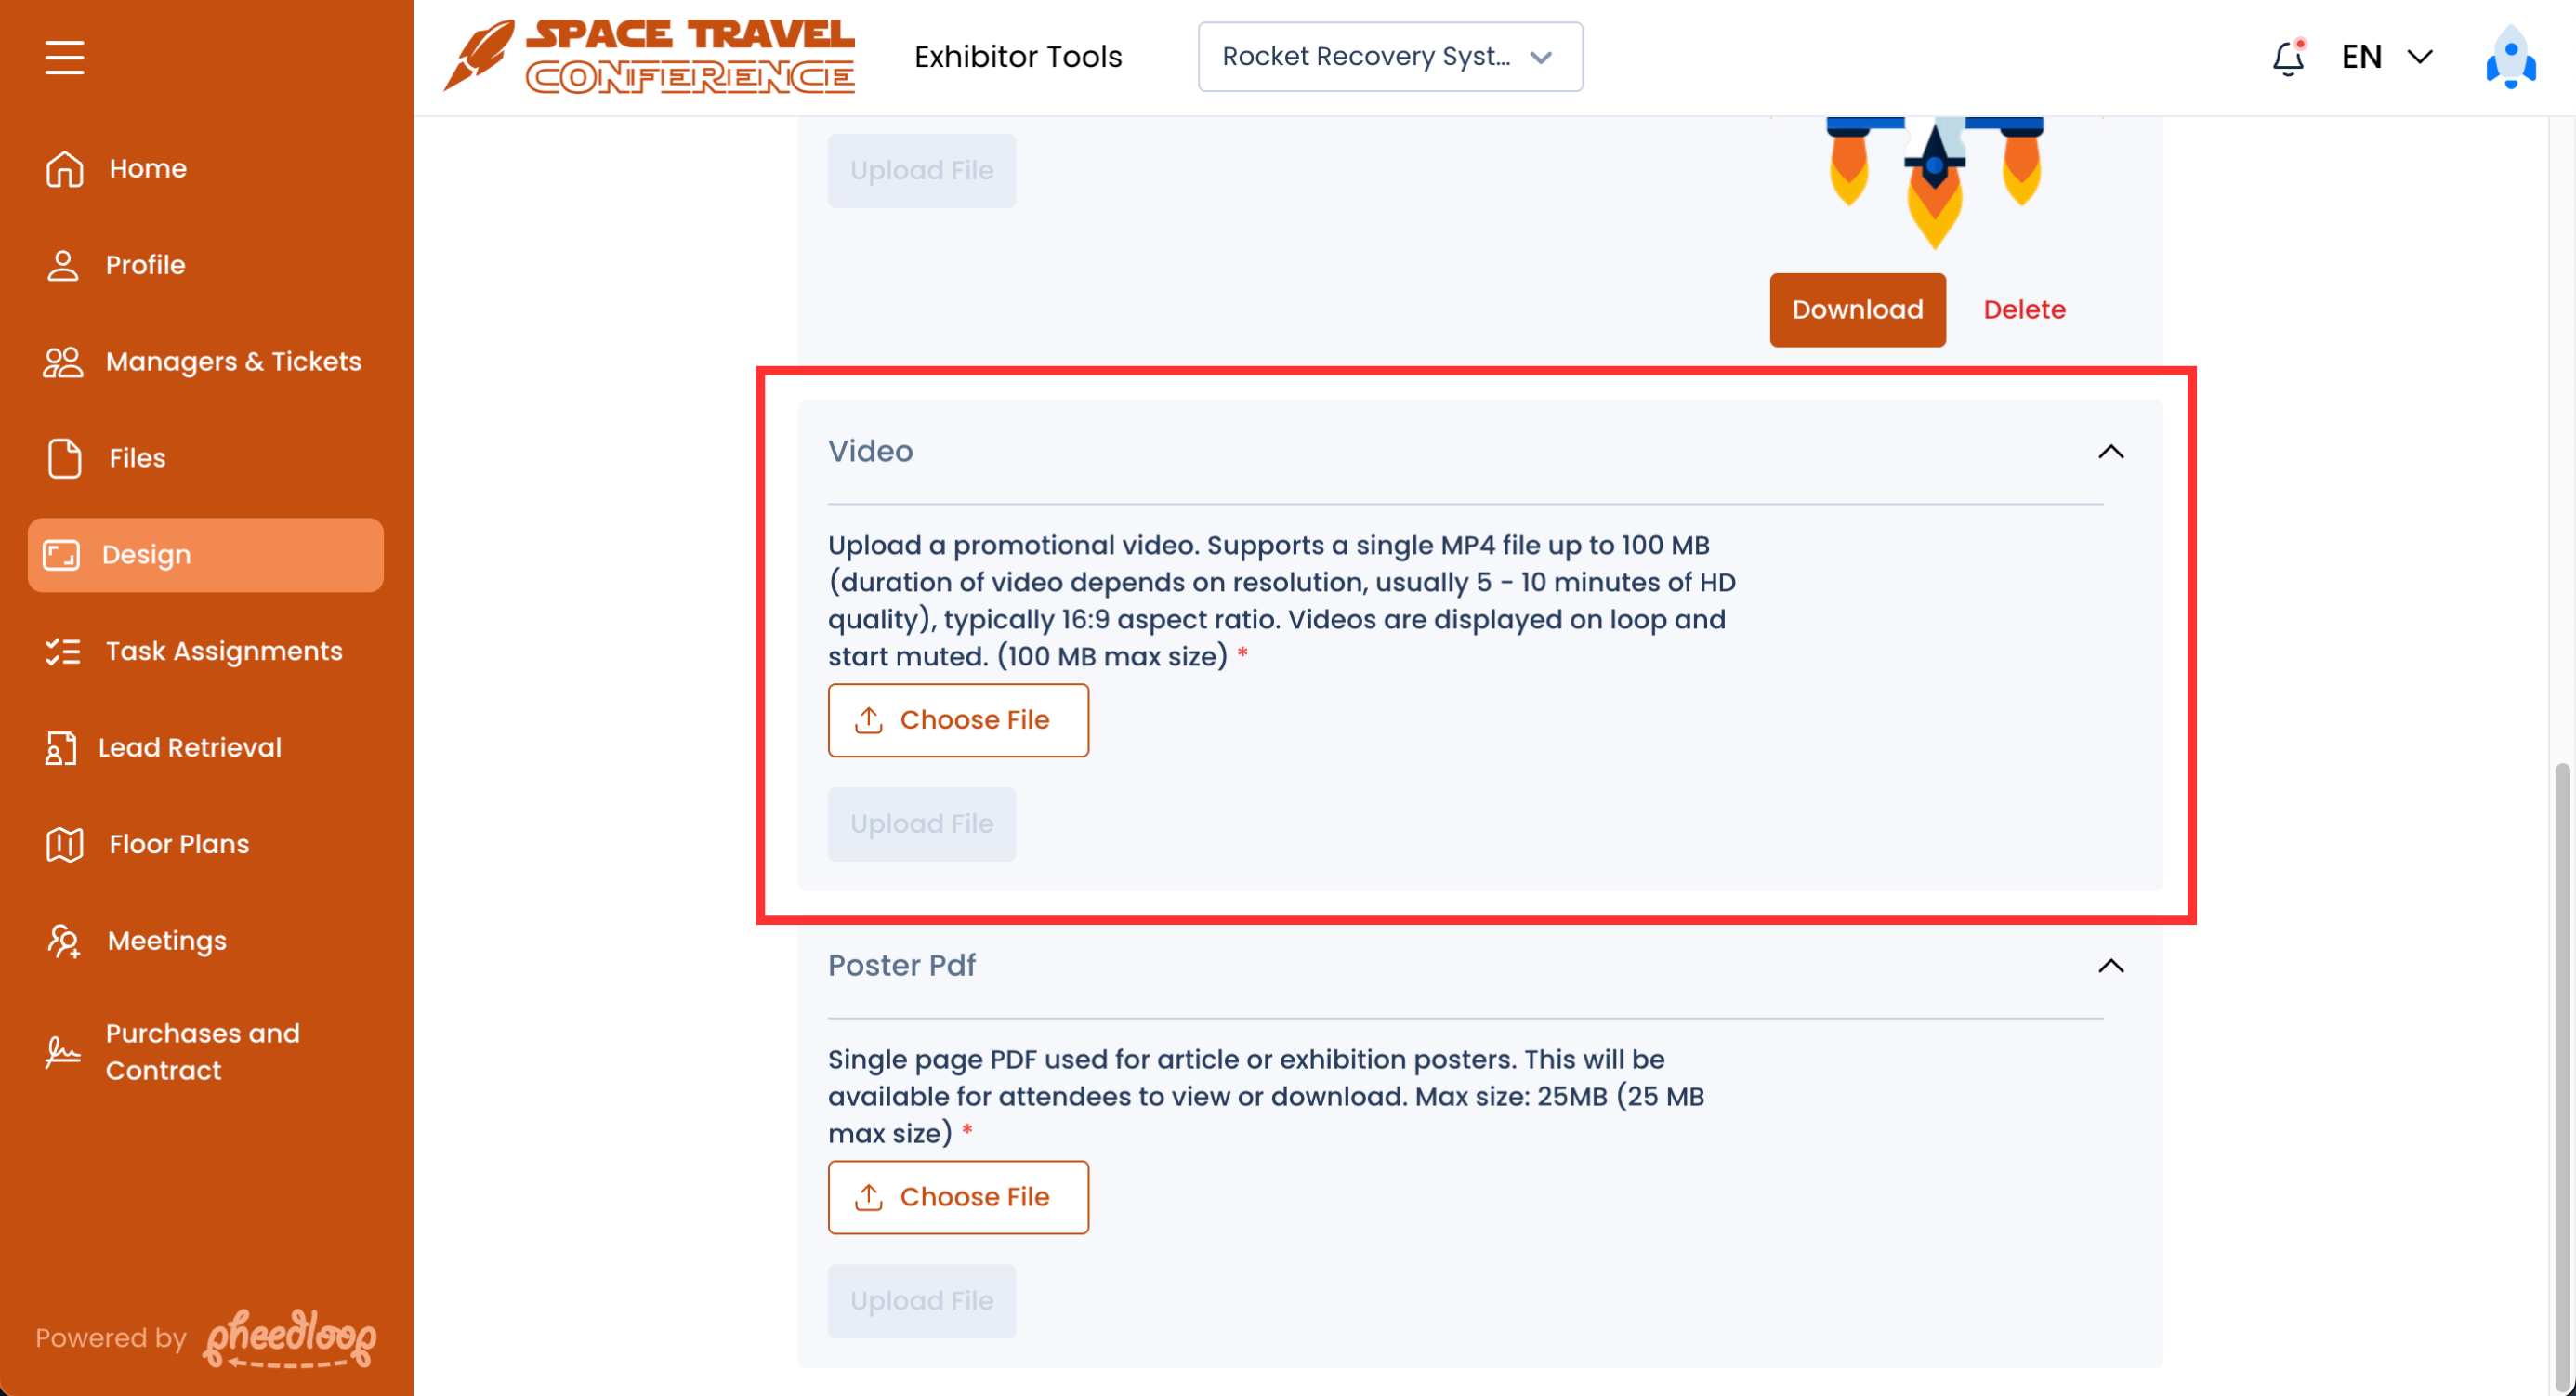
Uploading a Video related to the Poster
- From the Exhibitor Portal, navigate to Design
- Under Video, select Choose File to upload your poster
-
Select Upload File

You could also use the Premium Exhibitor Booth features as part of this setup as well.
Benefits include:
Hosting a Join Live Booth
One common item is using the Join Live Group Video feature which can be used to host a virtual booth where attendees can visit during Virtual Events.
Scheduling Meetings
For a more personalized touch, exhibitors can host one on one meetings with attendees. For instructions on how to set this up, please review our I'm an Exhibitor, how can I manage my meetings from the Exhibitor Portal and PheedLoop Go! article.
Using the Channels Feature
An alternative method to setting up an academic poster is with PheedLoop’s Channels feature. If you would like to learn more about Channels, please consider reviewing our How the Sessions Channels Feature Works with the Virtual Portal and Event App article.
Similar to Showcase, Channels is a feature that lets you duplicate the Session Tab in the Event App and Virtual Portal. All features available in the Sessions tab are available in the Channels tab.
To make use of posters as "sessions," associate your poster’s presenter as a Speaker. For complete instructions on how to add Speakers to your Event Dashboard, please review our Adding Speakers and Inviting Them to the Speaker Portal article.
Once your poster’s main point of contact is added as a Speaker, you can now create the session to serve as a poster from the Event Dashboard.
- From the Event Dashboard, navigate to Sessions > Sessions
- Select the Session you wish to edit
- Scroll down to Basic Details
- Under Title, enter the title of the poster
-
Optionally, under Description, enter additional information for your poster
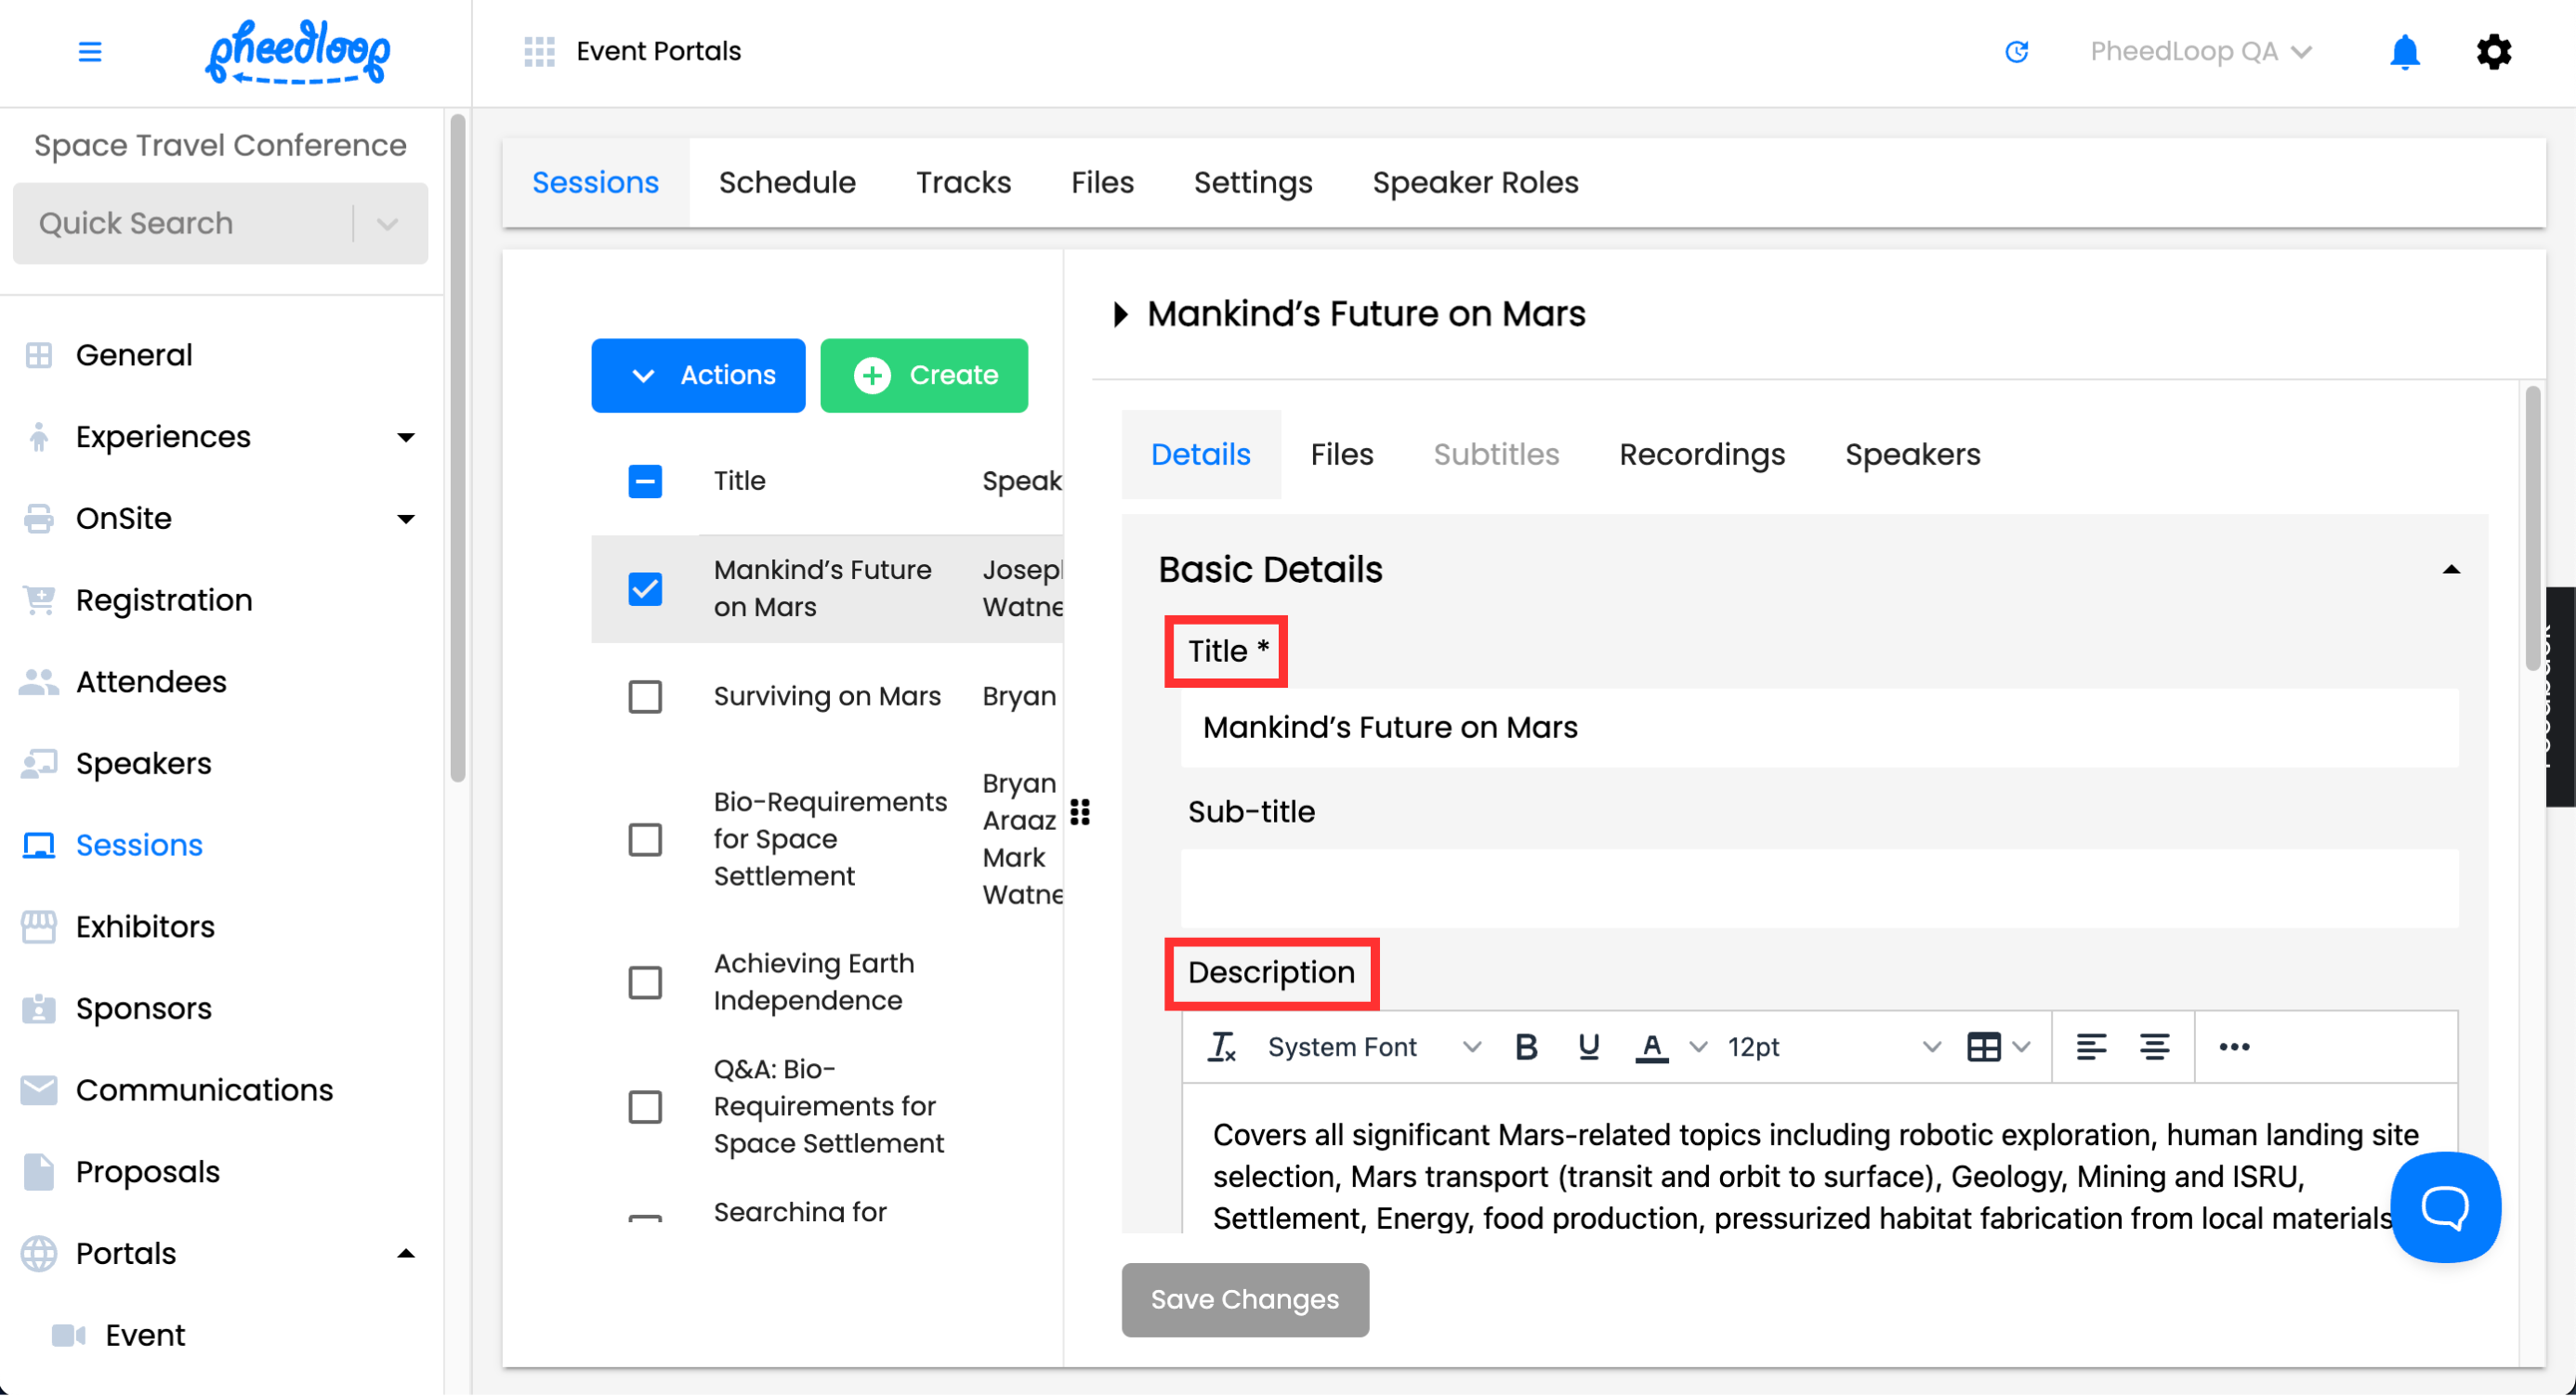
-
-
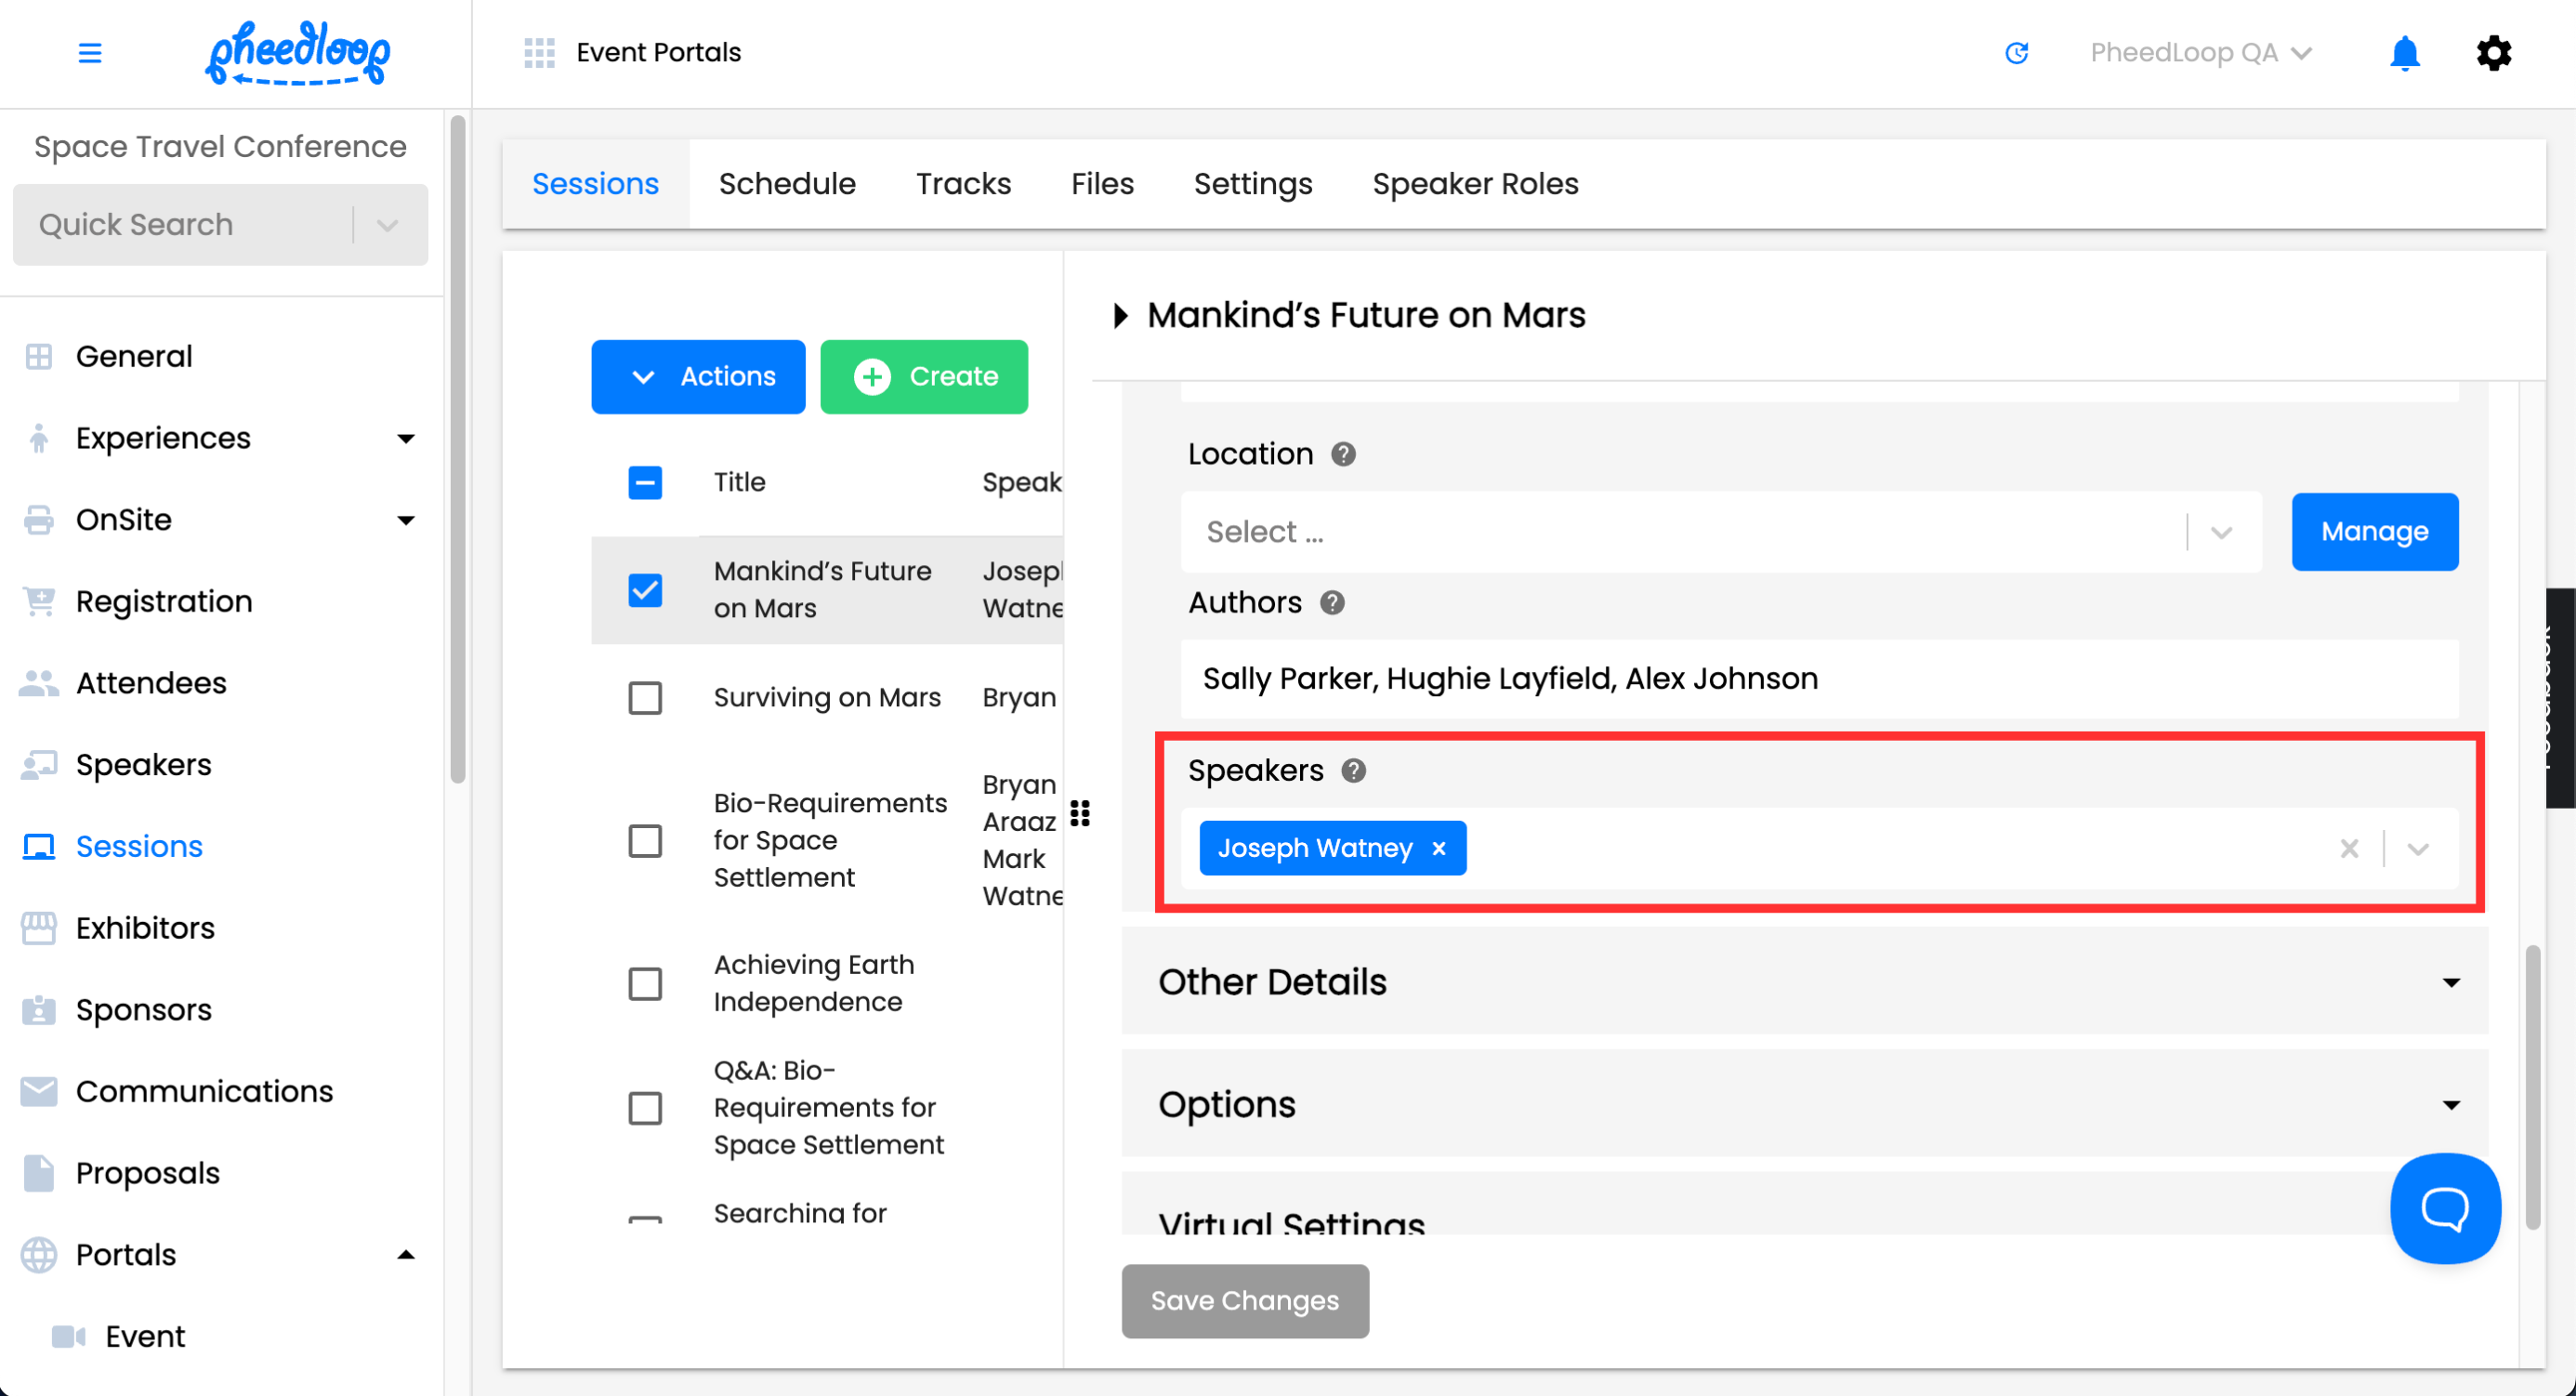
Under the Speakers field, select your main point of contact(s) for the poster as the Speaker
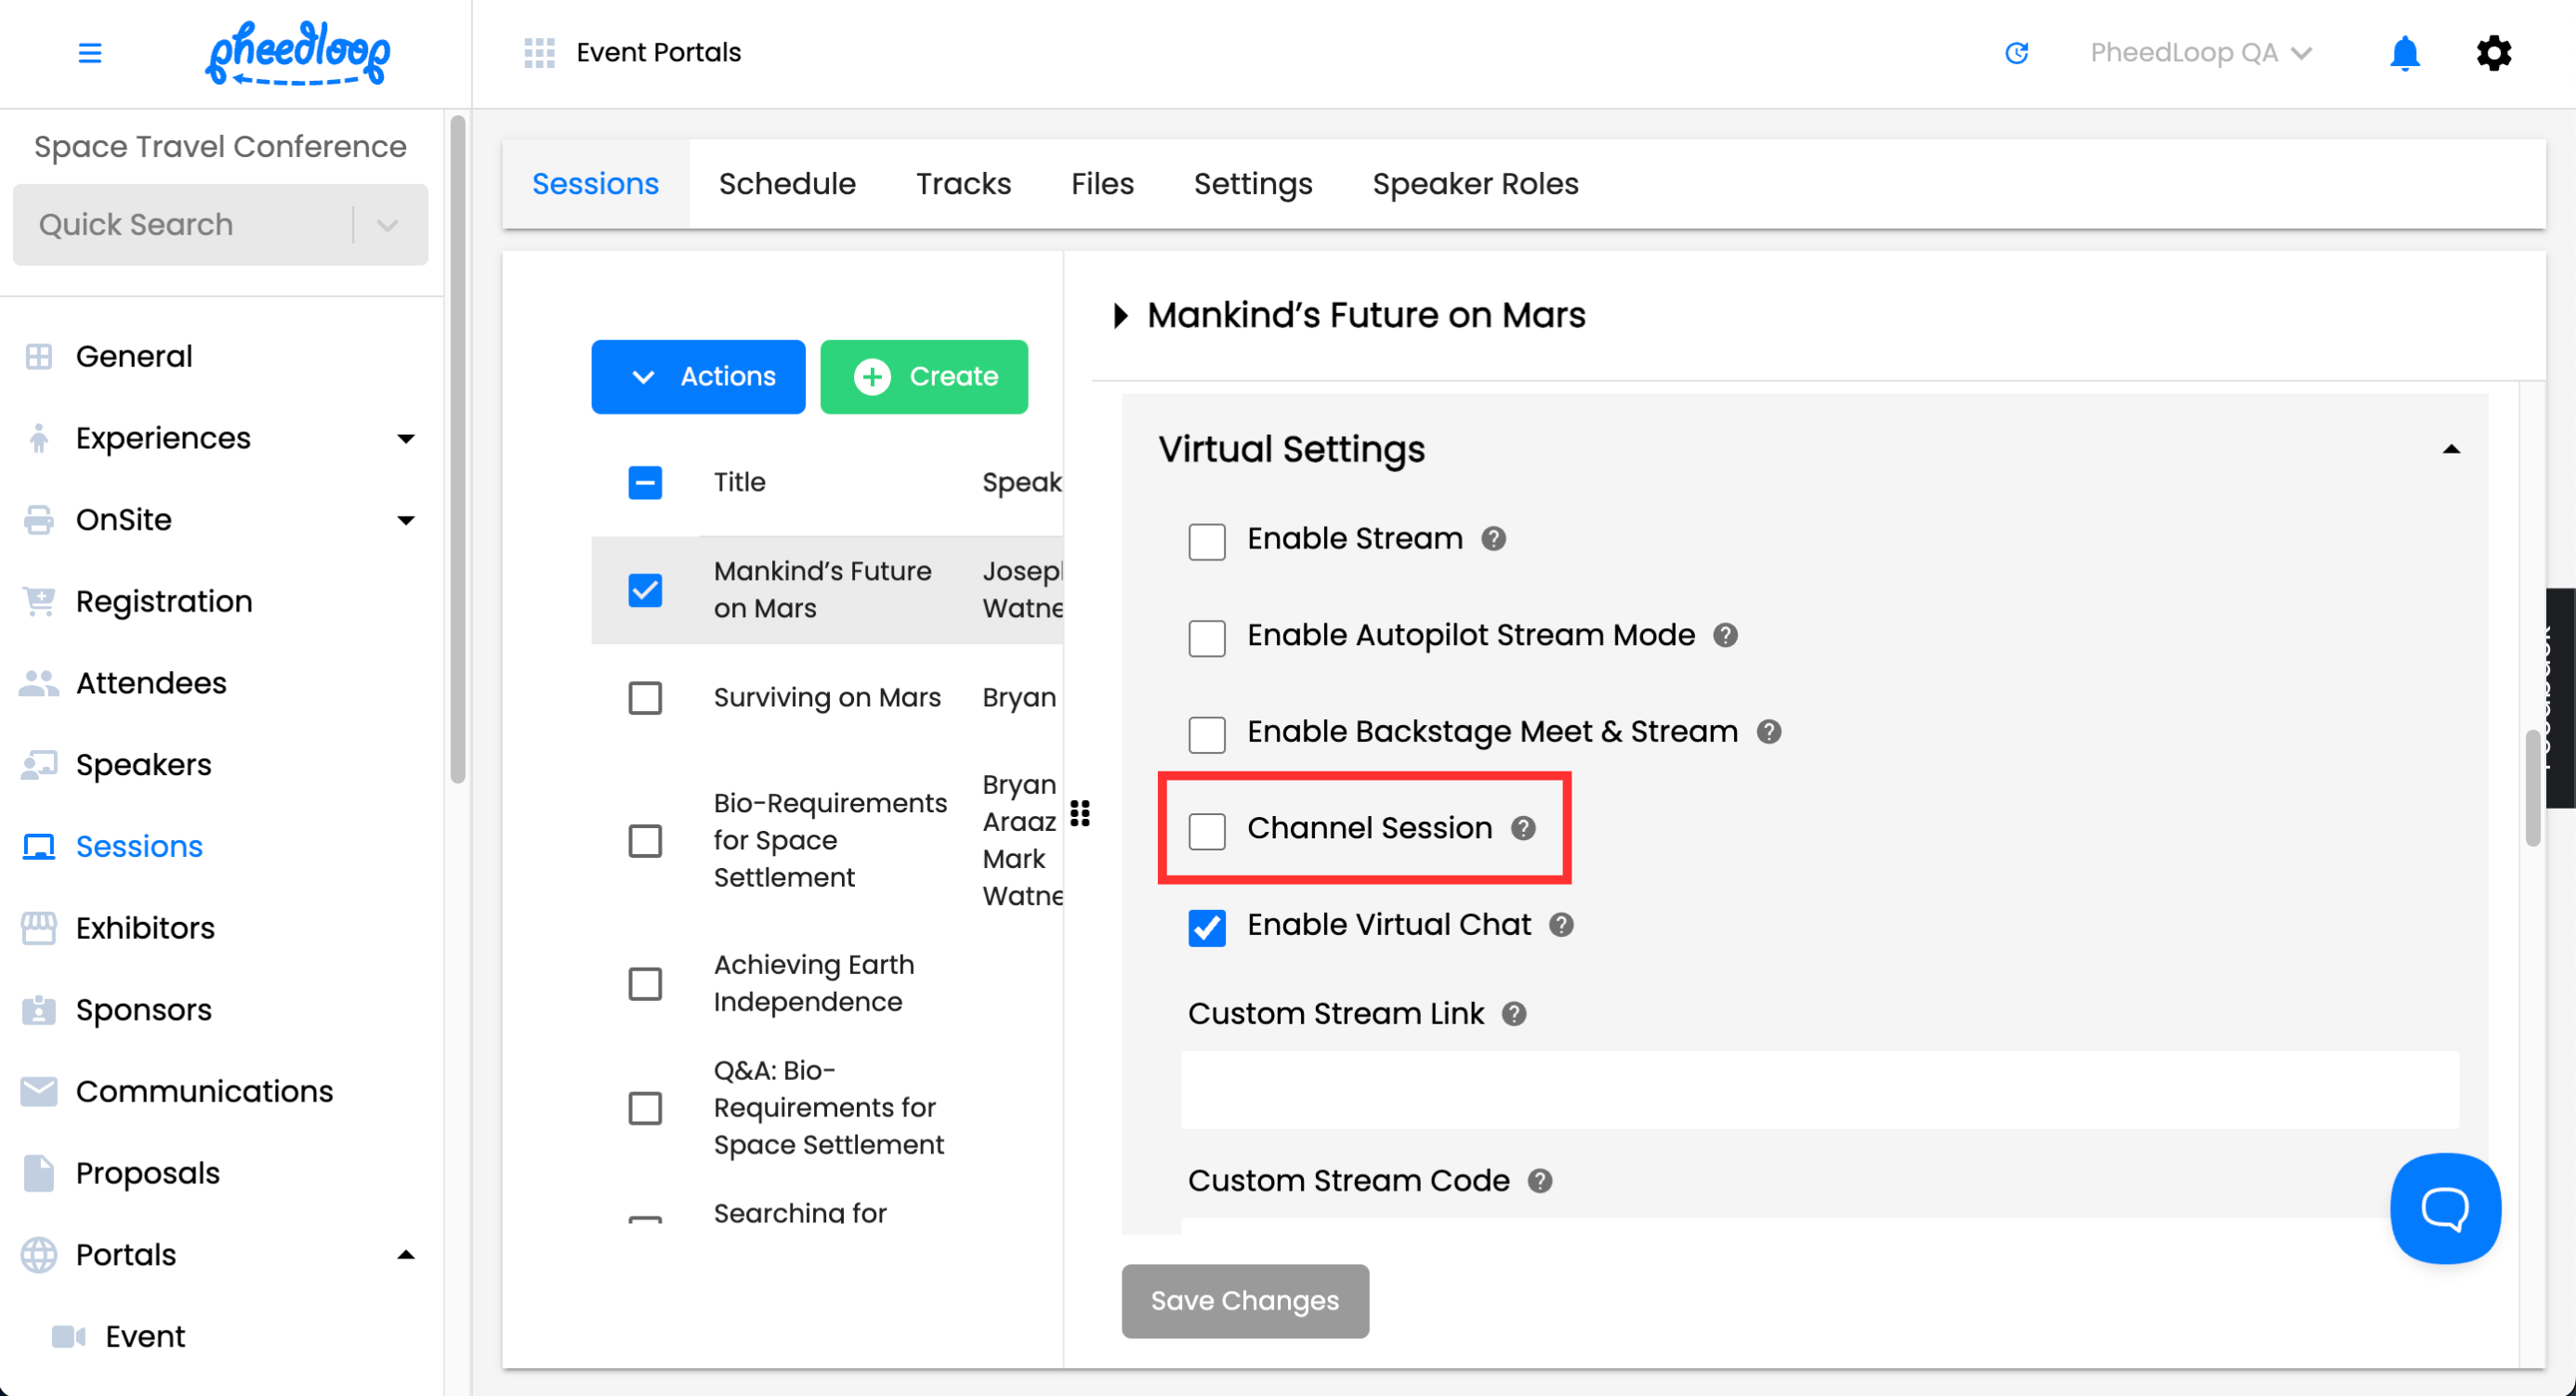
- Scroll down to Virtual Settings
- Toggle on the Channel Session checkbox
-
Select Save Changes


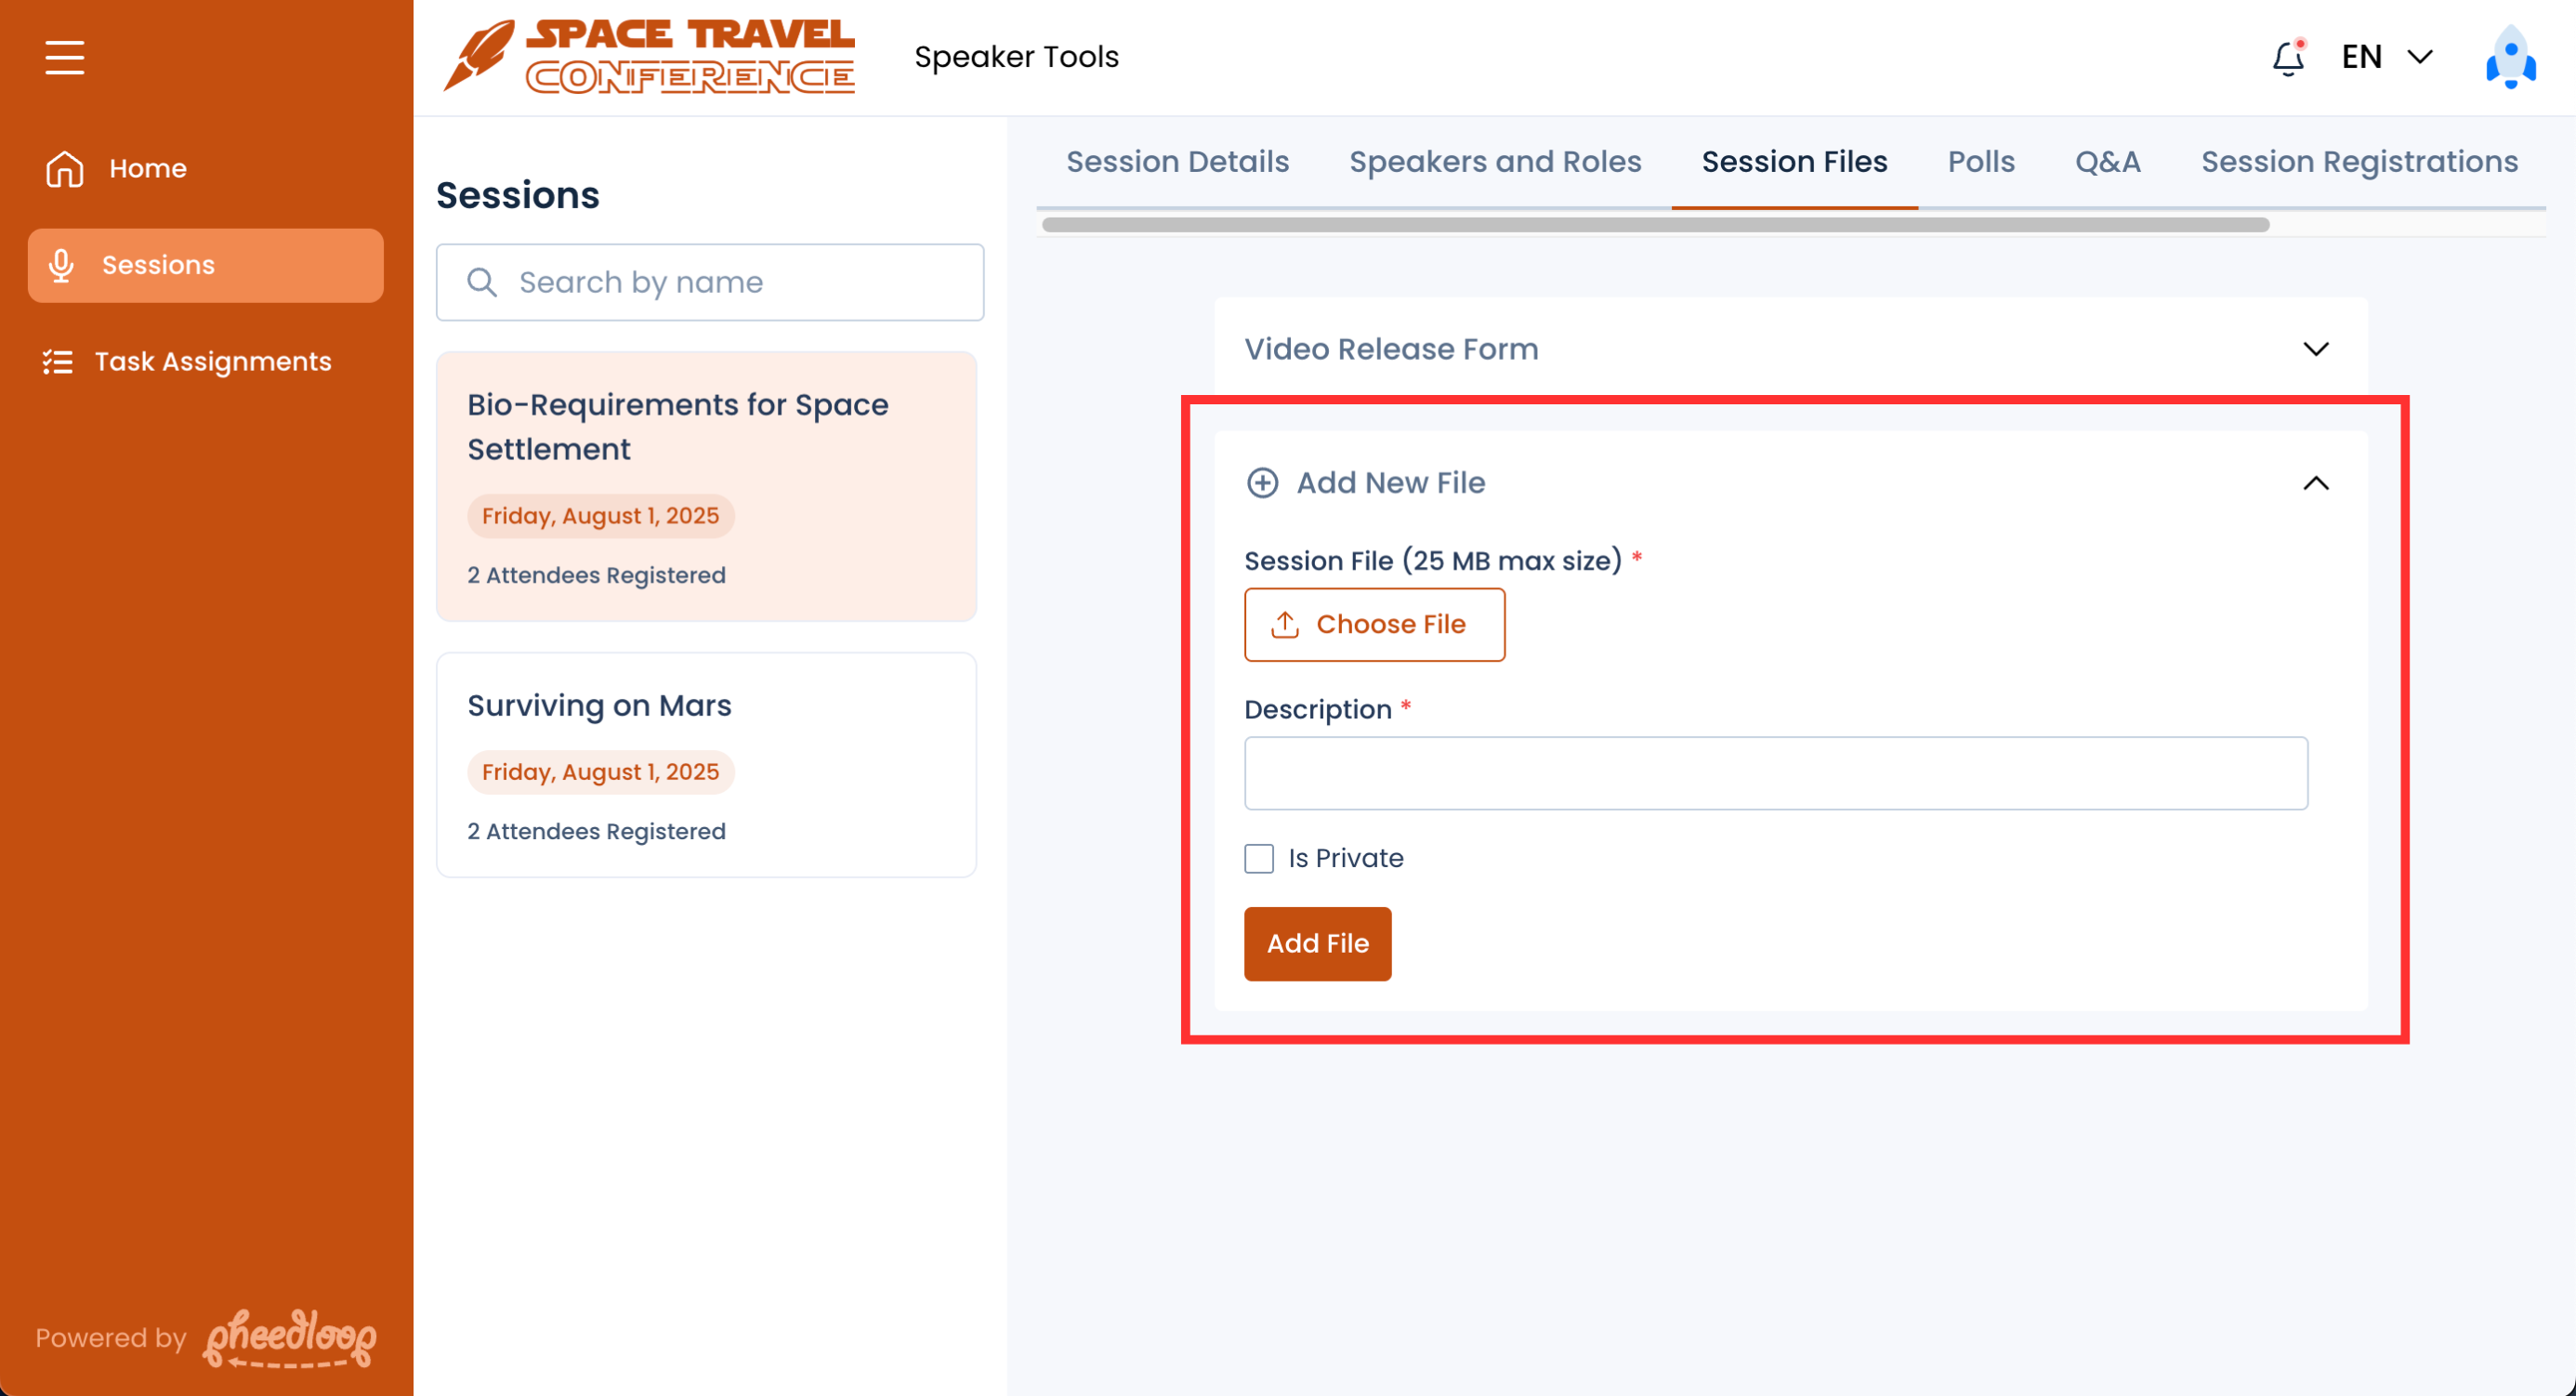
The poster presenter can now upload their post as a file from the Speaker Portal.
- From the Speaker Portal, navigate to Sessions
- Select the Session you wish to edit from the list
- Navigate to the Session Files tab and select Add New File
- Under Session File, select Choose File to upload your file
- Under Description, enter the name of your file
- Toggle on the Is Private checkbox if you wish to keep the file for internal use and prevent public access from attendees
-
Select Add File

The main benefit of using the Channels Tab over the Showcase tab is that you are able to use the prerecorded video feature or the ability to livestream your poster.
The Prerecorded Video Feature lets you upload a max file of 2GB for a single session and can be content that is accessible via the Virtual Portal or Event App. For more information on this, please review our Uploading Pre-Recorded Videos to Sessions On Demand Content, and Simulive article.
Live Streaming Content Live can be used for Speakers who prefer to display their poster in real time instead of a prerecorded video. For more information, please review our Setting Up Zoom Meetings & Webinars for Session Streaming article.