How to Setup Membership Signup
If your organization is using the Membership Dashboard, you can set up registration similar to the Event Dashboard. This article will go over the process of setting up your Organization Website to allow Membership Signups.
Step 1 - Connecting to a Financial Integration
In order for users to pay for a subscription, your organization account must be connected to a Financial Integration such as Stripe. For instructions on how to do this, please review our How to Connect your Account to Stripe for Payment Processing article.
Step 2 - Accessing the Organization Website for Registration
The Organization Website can be easily accessed from the Membership Dashboard.
From the Membership Dashboard, navigate to Organization Portals > Organization Website
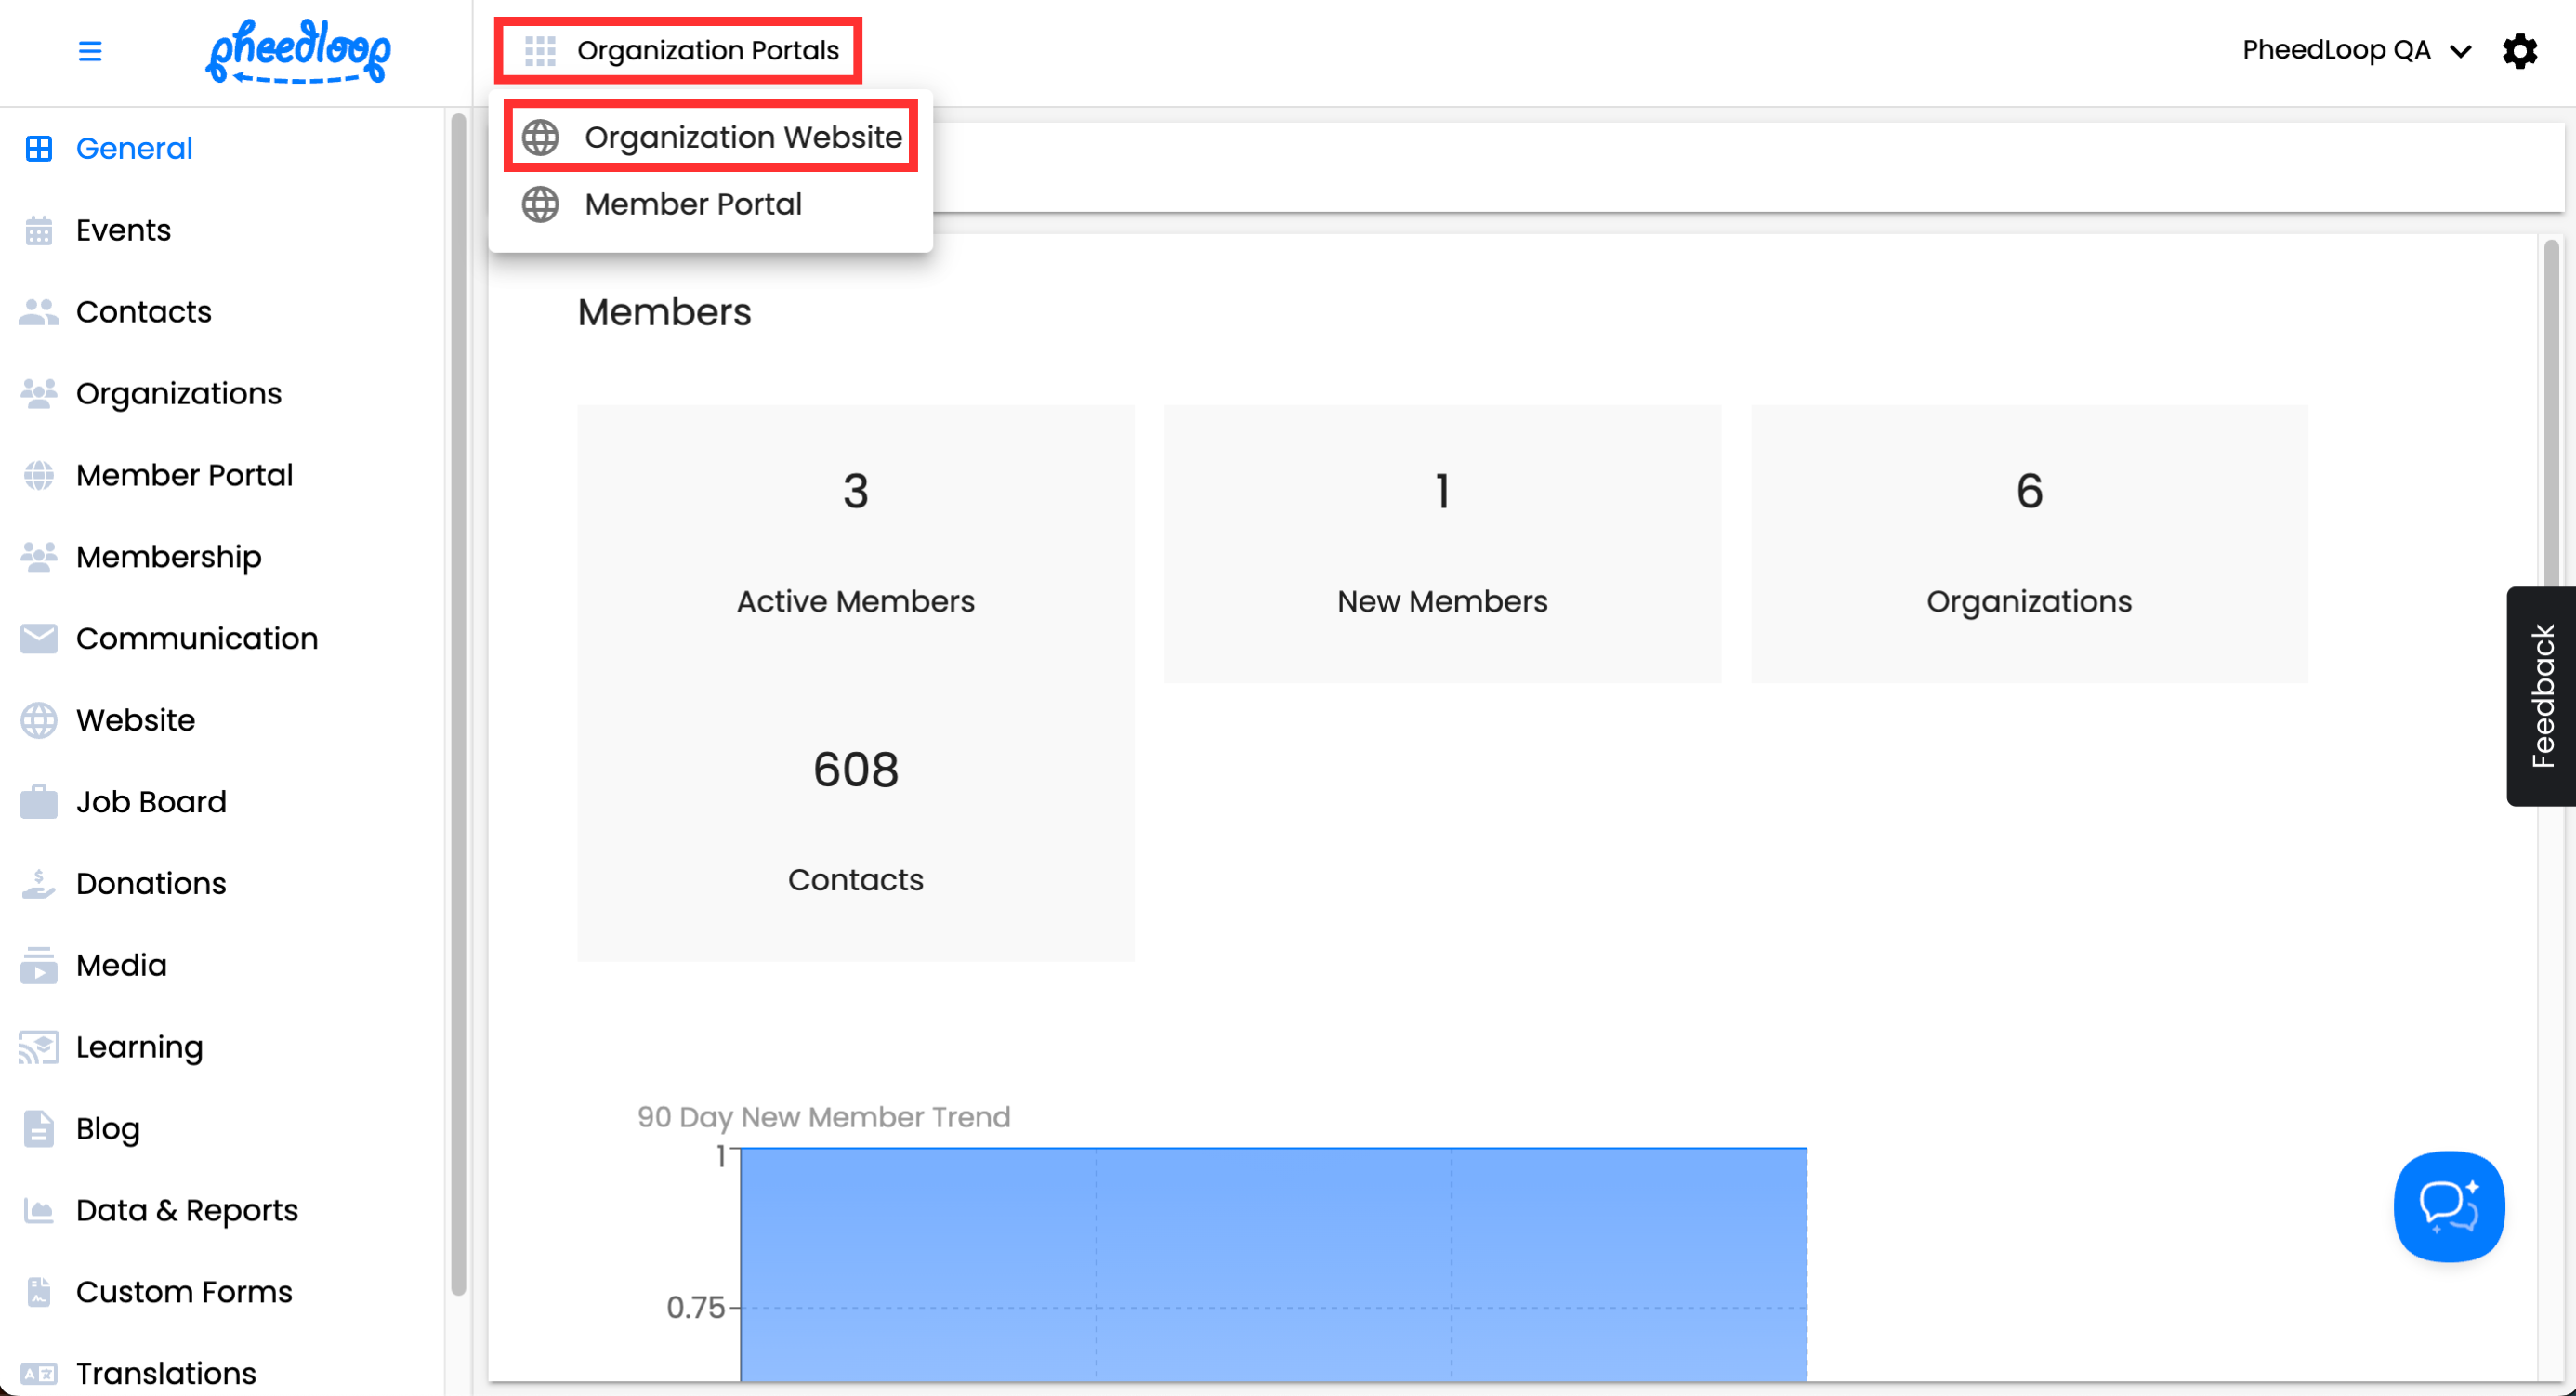
From the Organization Website, select Signup


You will now be taken to the Signup flow where you can purchase membership for your organization. For instructions on how to set up your Organization Website, please review our XYZ article.
Step 3 - Understanding the Membership Signup Flow
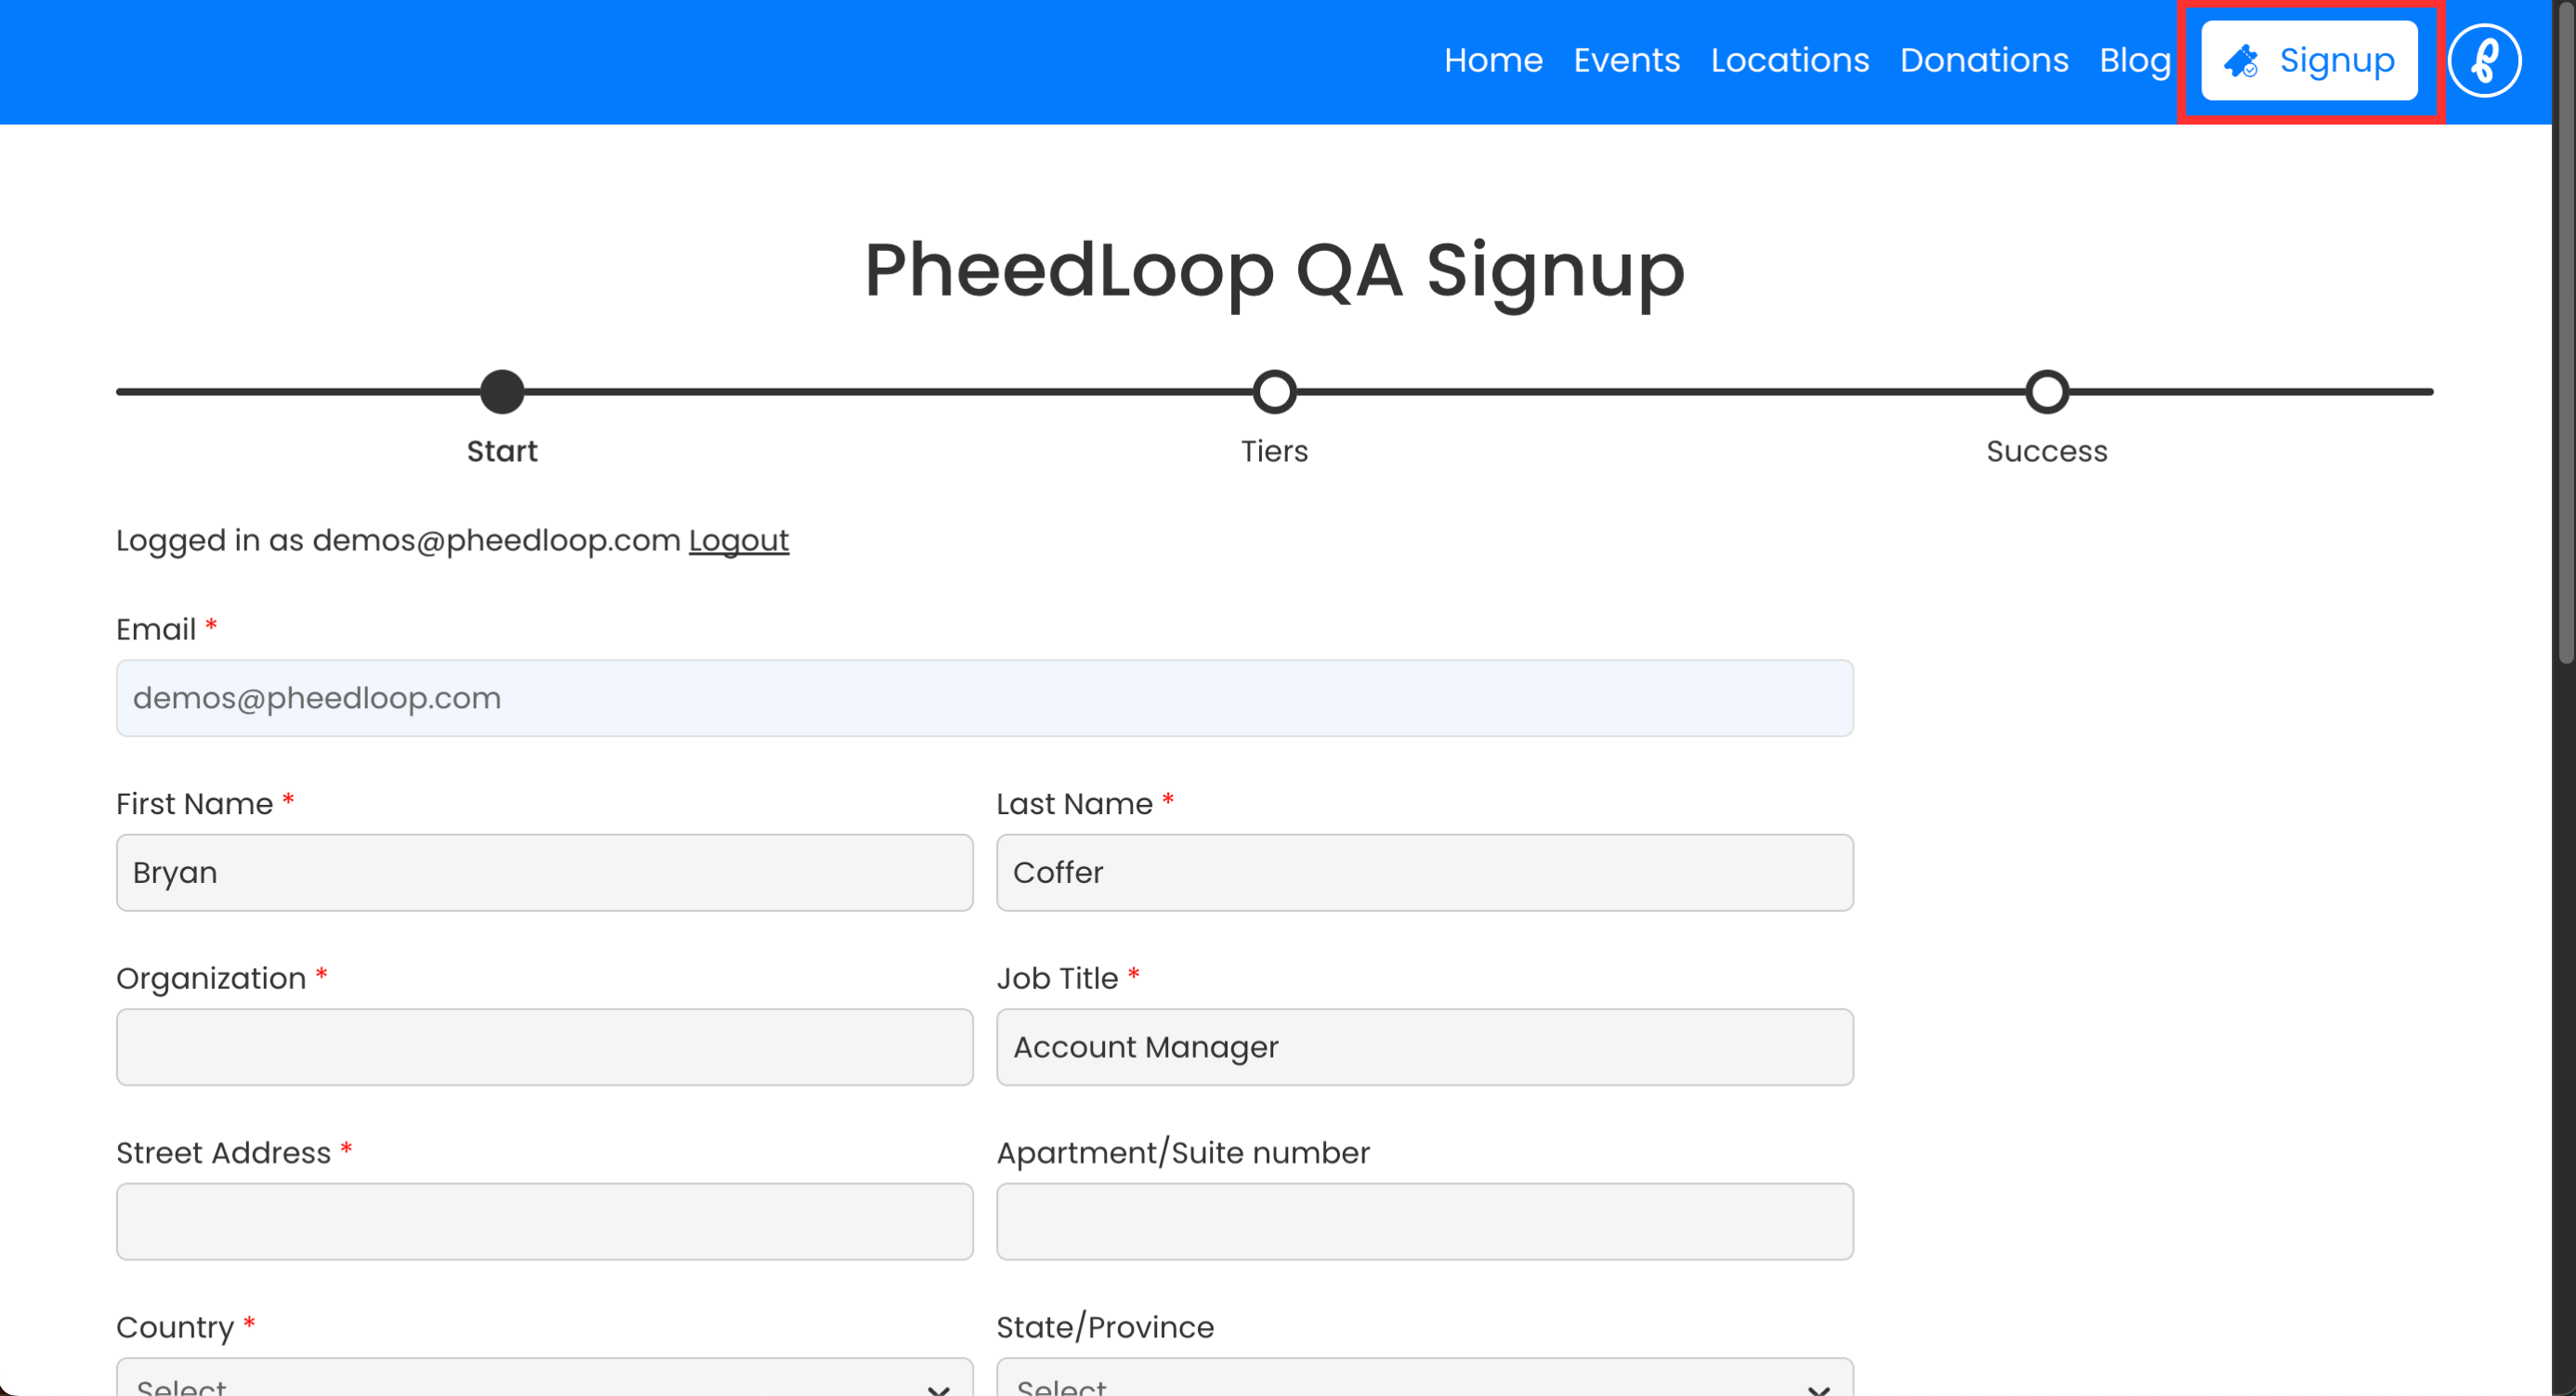
Members can join your organization when they visit the Signup page on the Organization Website.
Please note, the Signup page is the default page for Membership Signups.

Start
The Start page, as the name suggests, is the beginning of the Signup flow. This page is where members fill in their personal information, such as name and email, as well as any other information if configured in the Membership Dashboard.

Details
The Details page will only appear if a custom form is assigned under Membership > Settings.

Members will use this page to fill out the Custom Form before proceeding to the next step.

Tiers
The Tiers page is where Members purchase the Membership Types and Bundles to join your Organization. If you wish to learn more about Membership Types, please review our How to Set Up Membership Types article. If you wish to learn more about Membership Bundles, please review our Setting Up Membership Bundles article.

Success
The success page is the final page of the Signup flow. The Success page confirms the Signup flow is successful. No further action is needed for the Member and they can select Download Invoice to acquire a PDF copy of their invoice. Please note, the invoice is also attached in the confirmation email of the purchaser’s account.

Step 4 - Utilizing Settings in the Signup Flow
There are several settings in the Membership Dashboard that can be utilized to customize the Signup Flow. This includes text and designating fields as mandatory or optional to fill out by members.
All settings can be found by navigating to Membership > Settings in the Membership Dashboard.

Success Page
Success Message - Enter a custom message under this field to be displayed in the Success page of the Signup flow. Members who complete a signup will see this message on the page.

Payment

| Setting | Description |
|---|---|
| Allow Other Payments | Allows members to pay using alternative methods such as cheque or wire transfer. These payments will appear as unpaid in the Membership Dashboard. PheedLoop does not enforce alternative payment methods; enforcement is the organization’s responsibility. |
| Allow Card Payments | Allows members to pay by credit card. Requires a connected payment processor such as Stripe. Recommended to leave enabled. |
| PheedLoop Transaction Fee | PheedLoop charges a 1.9% transaction fee for each credit card purchase. This default setting cannot be changed. |
| Pass Transaction Fees to Members | Charges members the 1.9% PheedLoop Transaction Fee. Alternatively, organizations may increase membership prices by 1.9% to absorb the fee. Useful if you want to avoid displaying the fee on member invoices or receipts. |
| Connect to Stripe | Opens the integrations page where Stripe can be connected. For setup details, refer to the How to Connect your Account to Stripe for Payment Processing article. |
Options

| Setting | Description |
|---|---|
| Custom Form | Assign a custom form for members to complete during the signup flow. Selecting a form adds a Details page to the signup process. |
| Hide Promotion Code Field at Checkout | Hides the promotion code field on the membership type selection page during signup. |
| Collect Member's Address Information | Collects address-related information during signup, including phone number. |
| Require Member's Address Information | Makes address information mandatory during signup. |
| Collect Member's Designations | Collects member designations during signup. For group signups, each membership holder will also be asked for their designations. |
| Require Member's Title | Requires members to enter their title during signup. |
| Require Member's Organization | Requires members to enter their organization during signup. |
| Disable Group Checkout | Prevents users from purchasing multiple memberships for themselves or others in a single checkout. Multiple tiers and bundles can still be purchased, but all items will belong only to the account holder. |
| Allow Unassigned Members | Allows membership information to be left blank during checkout. Memberships can be assigned later through the owner’s member portal. |
| Require Approvals | When enabled, memberships must be approved by you before they are created in the system. |
Invoice Settings

| Setting | Description |
|---|---|
| Invoice Header Content | Optional text appended to the top of every invoice generated for registrations. Financial information is summarized below the header. Basic HTML styling is supported. |
| Invoice Footer Content | Optional text appended to the bottom of every invoice generated for registrations. Financial information is summarized above the footer. Basic HTML styling is supported. |
| Invoice Email Content | Replaces the default invoice email content. Basic HTML styling is supported. |
| Receipt Email Content | Replaces the default receipt email content. Basic HTML styling is supported. |
Advanced Options

| Setting | Description |
|---|---|
| Welcome Text | Text entered here will appear on your signup landing page and the first step of the signup flow. Typically used for short informational text, instructions, or graphics. |
| Footer Text | Text entered here will appear at the bottom of the signup flow. Typically used for short-form text such as key signup terms, contact information, or other details. |
| Terms and Conditions | Enter your terms and conditions here. They will appear in checkout under the cart widget. By completing checkout, members agree to your organization’s Terms and Conditions. |
| Signup Notifications List | Enter a comma-separated list of emails to receive a notification each time a signup is successfully created. |
| Use Pre-Filled Organization List | Check this to allow members to select from a pre-filled organization list. Organizations must be added in the Organizations page of the Membership Dashboard. It is not recommended to enable this without first creating organizations. |
Step 5 - Testing the Signup Flow as an Organization Administrator
Once all your settings have been configured, we recommend doing a test signup to ensure everything is working properly. As part of this process, we recommend setting up a promotion code with a 100% discount to remove any costs. For instructions on how to set up promotions, please review our Setting up Membership Promotions article.